A high ponytail bun has a bad habit of looking perfect for half a day and then drifting lower, looser, and a little sad by midafternoon. The fix is rarely “more hair.” It’s usually better tension, a cleaner base, and a shape that doesn’t fight your own head shape.
I’ve always liked high ponytail buns because they can read polished, sporty, or a little undone without asking for a full salon appointment. But the styles that stay put are built with intention: the elastic sits where it should, the bun is anchored close to the crown, and the weight is spread out instead of hanging from one weak point.
Clean roots can be slippery. So can freshly conditioned hair. That’s where a little grit helps — dry shampoo, texture spray, a second elastic, maybe a few crossed bobby pins if your hair has a mind of its own. Not glamorous. Very effective.
And yes, some of these look sleek enough for a dressy dinner, while others lean messy or casual on purpose. All 27 are built around the same promise: a high ponytail bun that keeps its shape, keeps its height, and doesn’t fall apart the second you bend to tie your shoe.
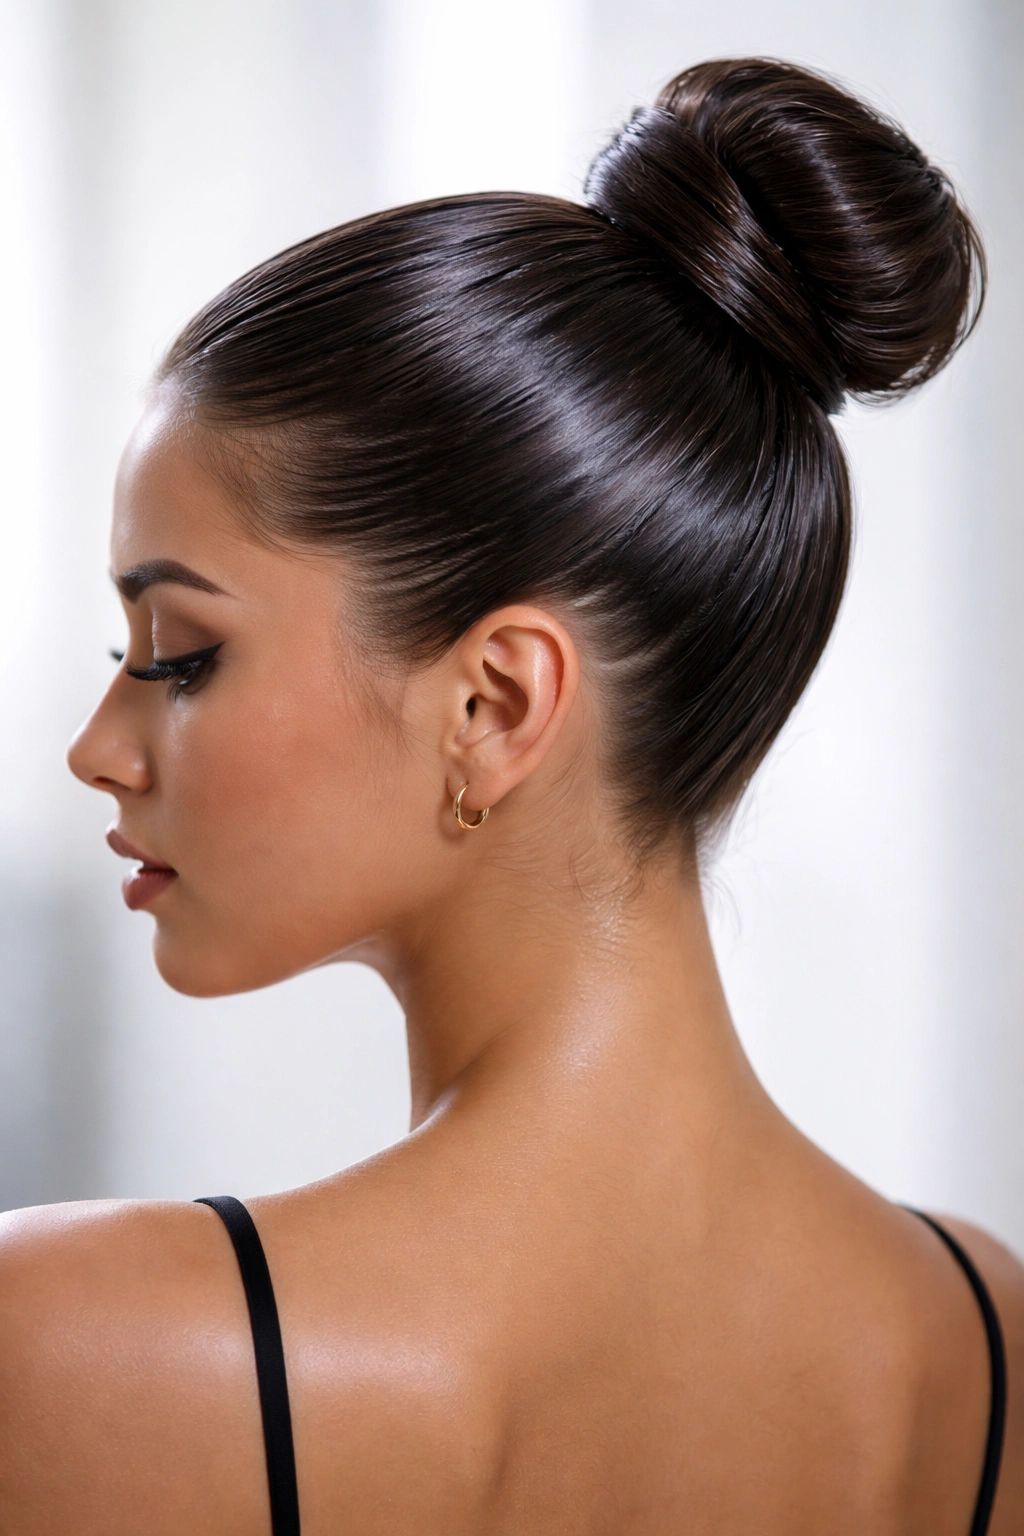
1. The Sleek Wrapped Knot
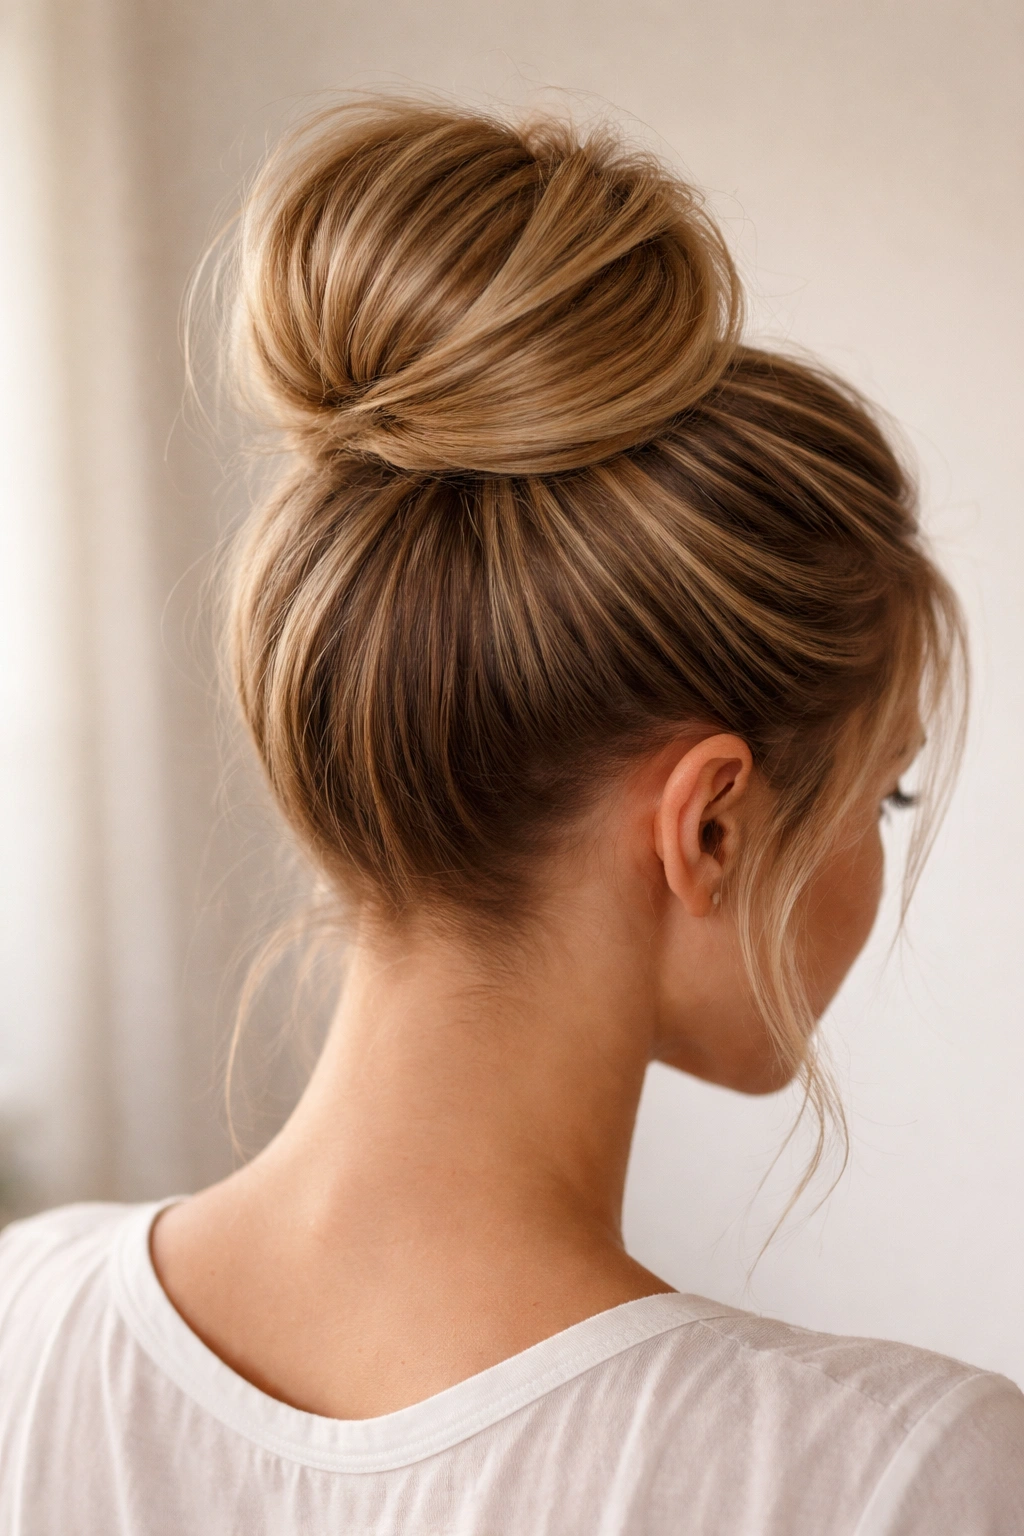
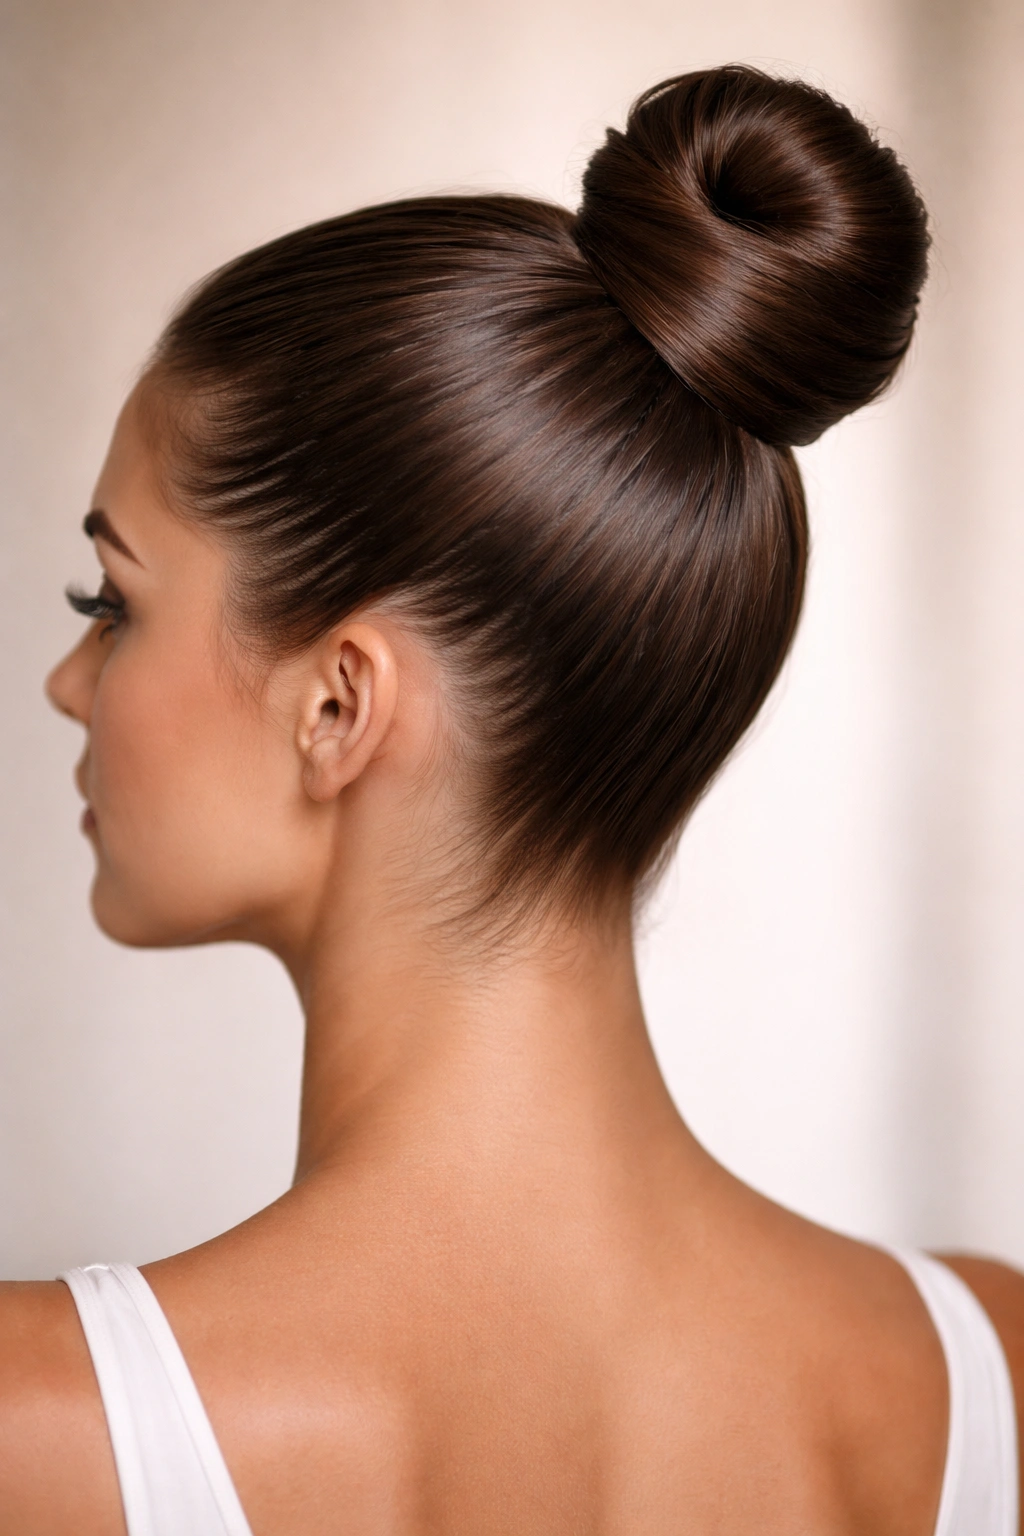
A sleek wrapped knot is the high ponytail bun I reach for when I want the cleanest possible finish. It starts with a tight ponytail placed high on the crown, then the length gets wrapped around the base until the whole thing reads as one compact shape.
Why It Holds
The trick is in the base. Smooth the roots with a light gel or cream, brush the hair up in sections, and secure it with a strong elastic before you even think about the bun. If the ponytail is loose, the bun will sag. Period.
Quick Build Notes
- Use a small, firm elastic so the ponytail doesn’t slip.
- Wrap a 1- to 2-inch section of hair around the base to hide the band.
- Cross two bobby pins under the bun for extra grip.
- Finish with a mist of strong-hold hairspray aimed at the roots, not the whole head.
Best detail: keep the bun compact. A sleek shape looks strongest when it sits close to the scalp, not perched on top like it’s about to roll off.
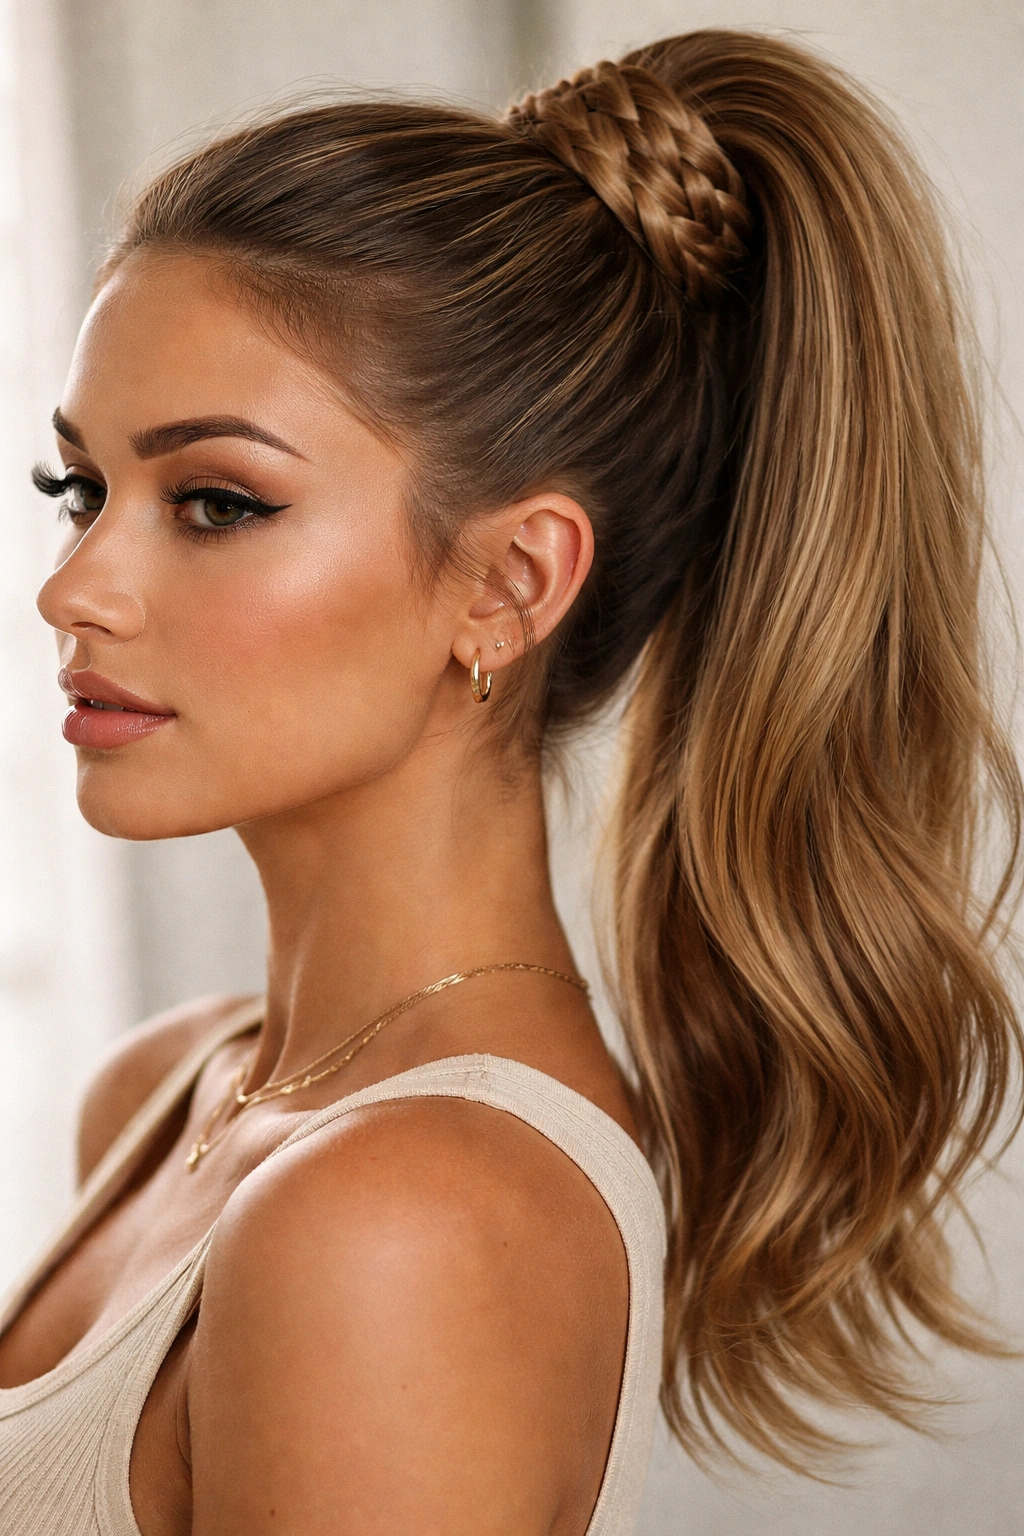
2. The Braid-Into-Bun Ponytail
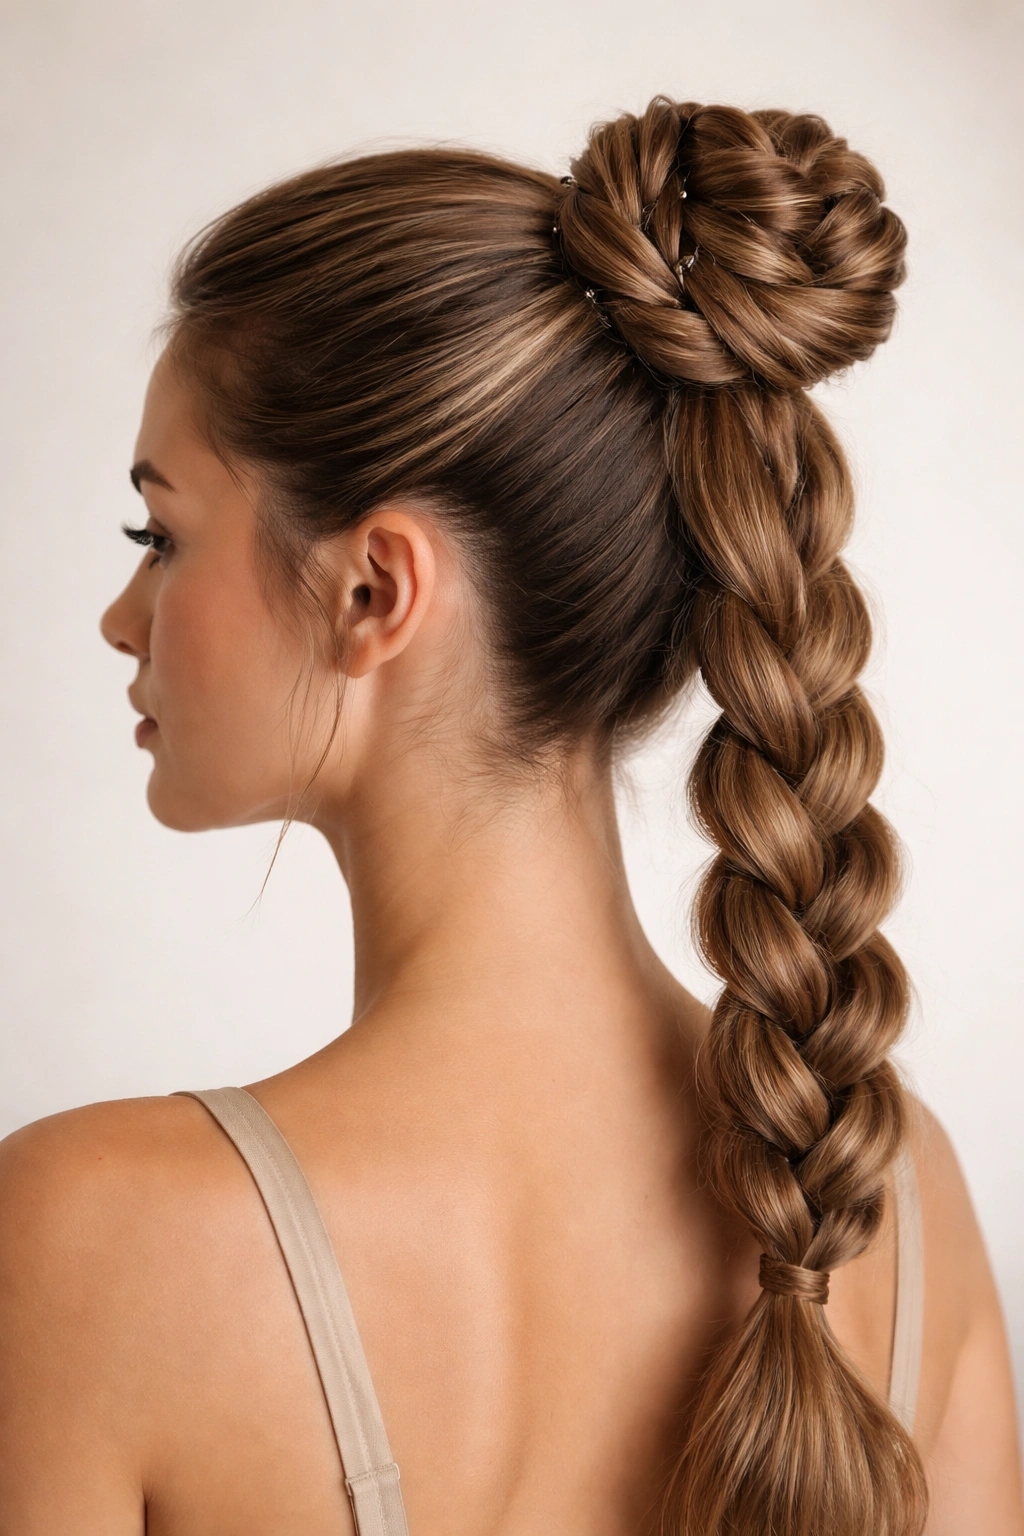
Braiding the tail first gives you a bun with teeth. That’s the part people miss. A smooth ponytail can slip; a braided ponytail gives the pins something to grab, which is why this style tends to survive long days without much drama.
Start with a high ponytail, braid the length all the way down, then coil the braid around its own base. If your hair is thick, make the braid a little looser so it bends instead of fighting you. If it’s fine, keep the braid snug and pin through the braid’s ridges, not just the outer layer.
This is one of those styles that looks more complicated than it is. It’s also forgiving. A braid that isn’t perfectly even still turns into a good-looking bun once it’s wrapped and pinned, which is more than I can say for some sleeker styles.
3. The Soft Messy Bun With Grip
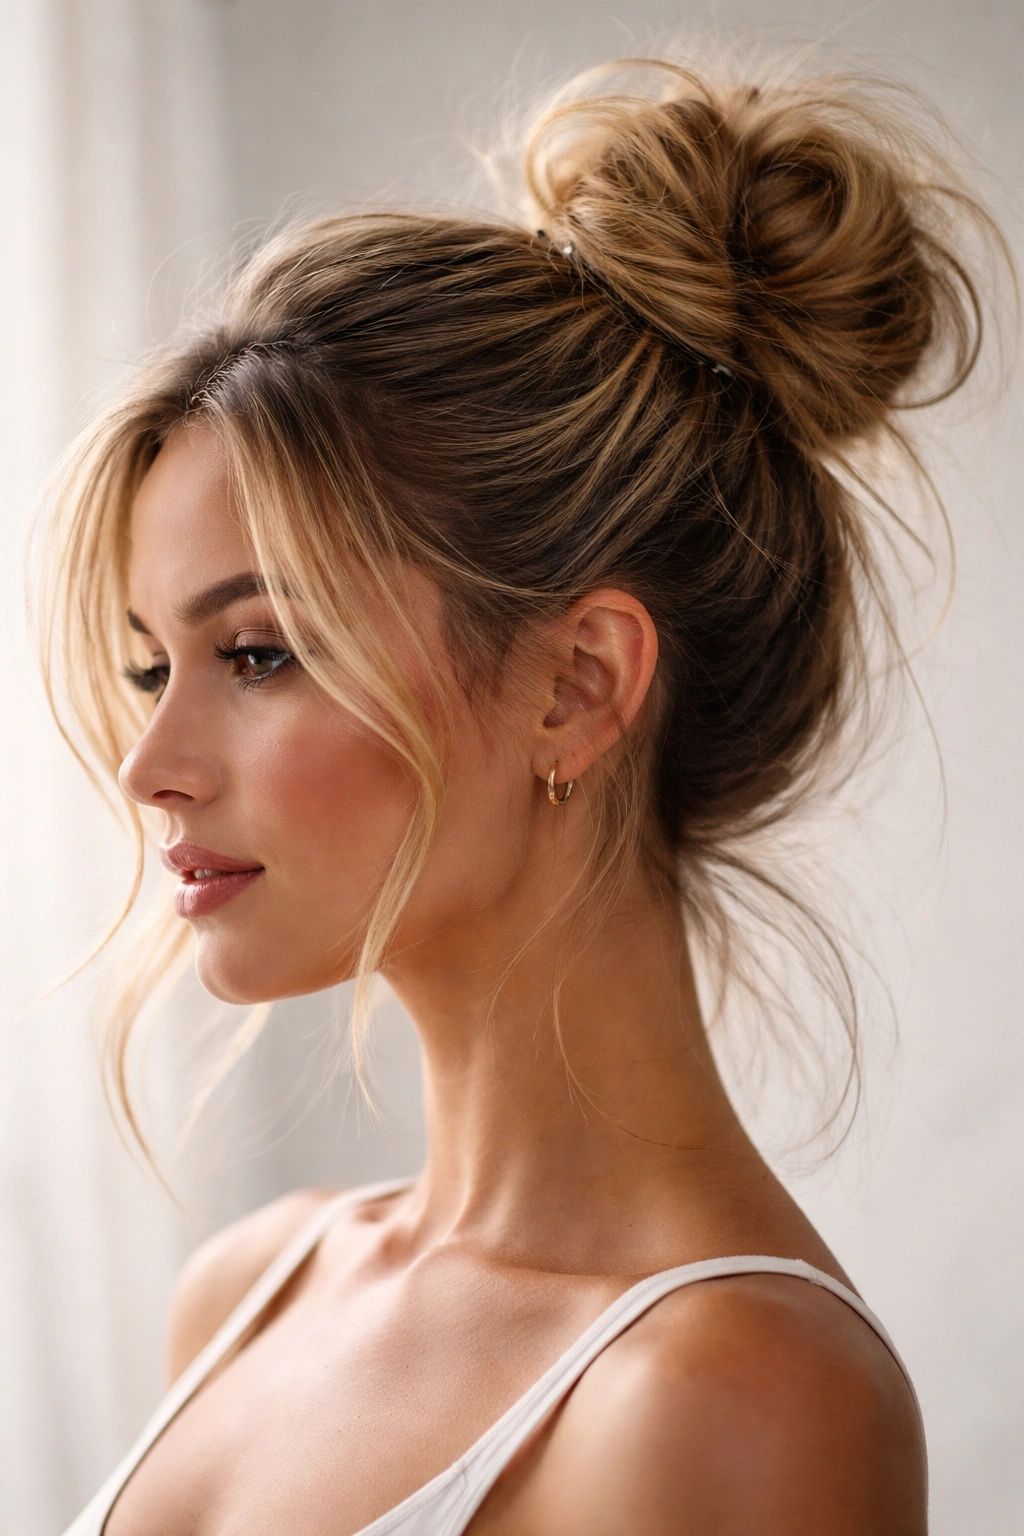
Why does a messy high ponytail bun sometimes stay up longer than a polished one? Because a bit of texture can help the hair lock into itself instead of sliding around. Clean, slippery strands are the enemy here.
How to Get the Grip
Mist the roots with texturizing spray or dry shampoo, then rough up the ponytail with your fingers before twisting it into a bun. Don’t brush it to death after the ponytail is secured. That’s where the softness comes from, and softness here does not mean weakness.
If you like a few pieces out around the face, leave them on purpose and curl them lightly. Keep the bun itself pinned in two directions so it doesn’t flatten. One pin will not do the job. Usually it never does.
A messy bun that stays up all day needs a little structure hidden underneath the loose look. That balance is the whole point.
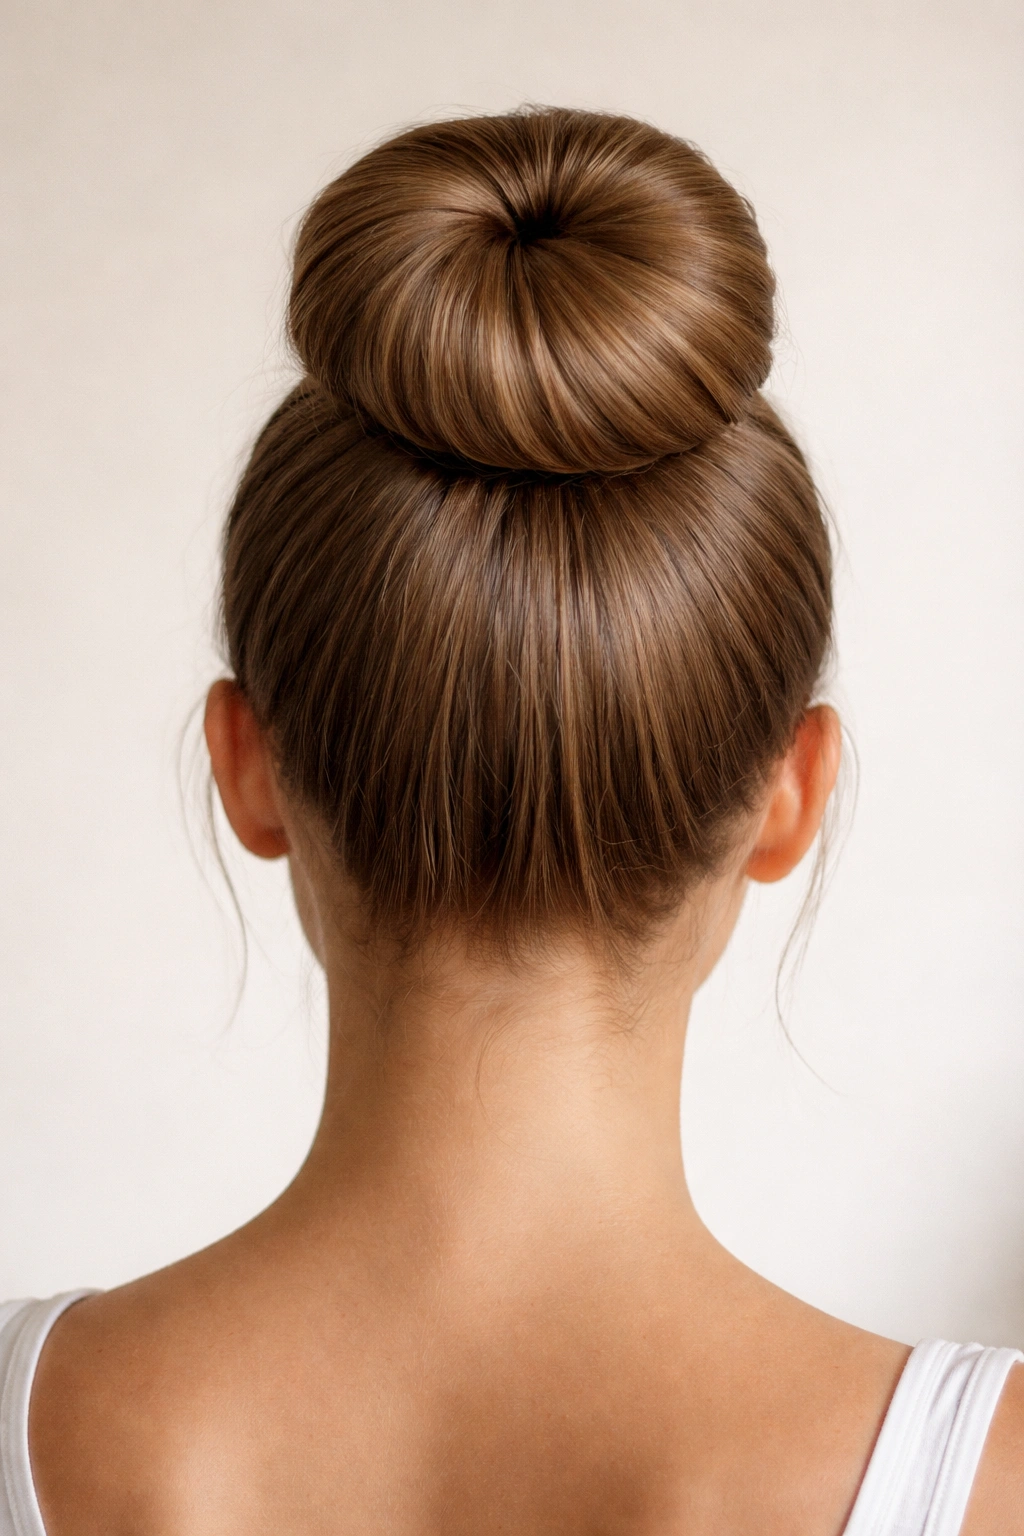
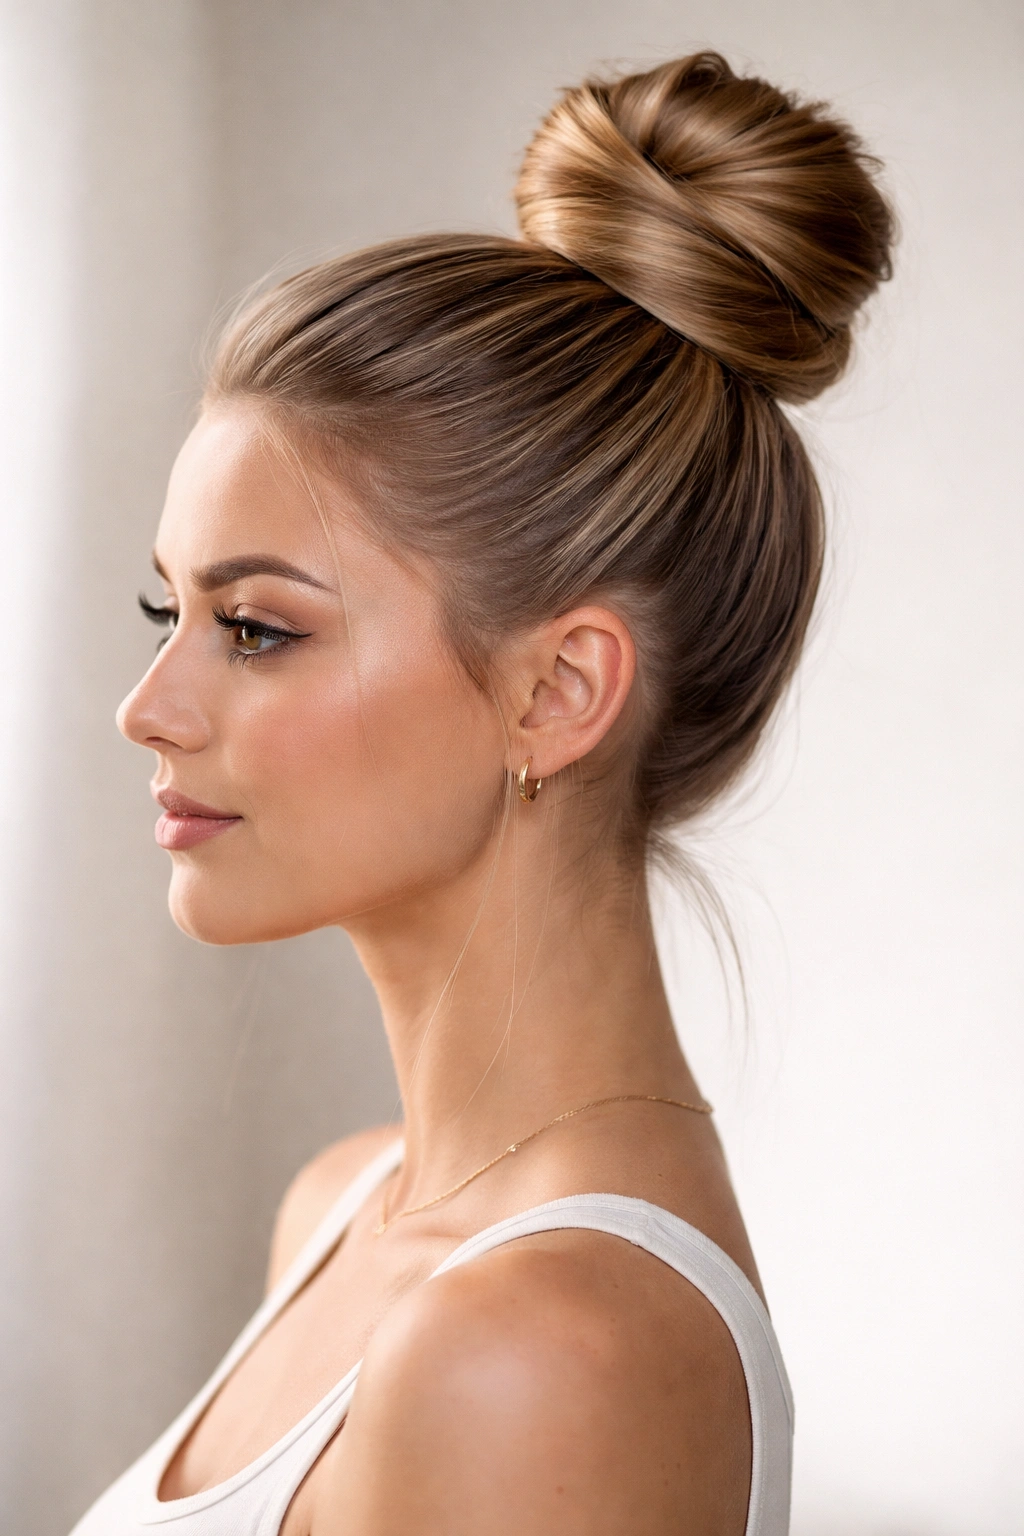
4. The Donut-Base Volume Bun
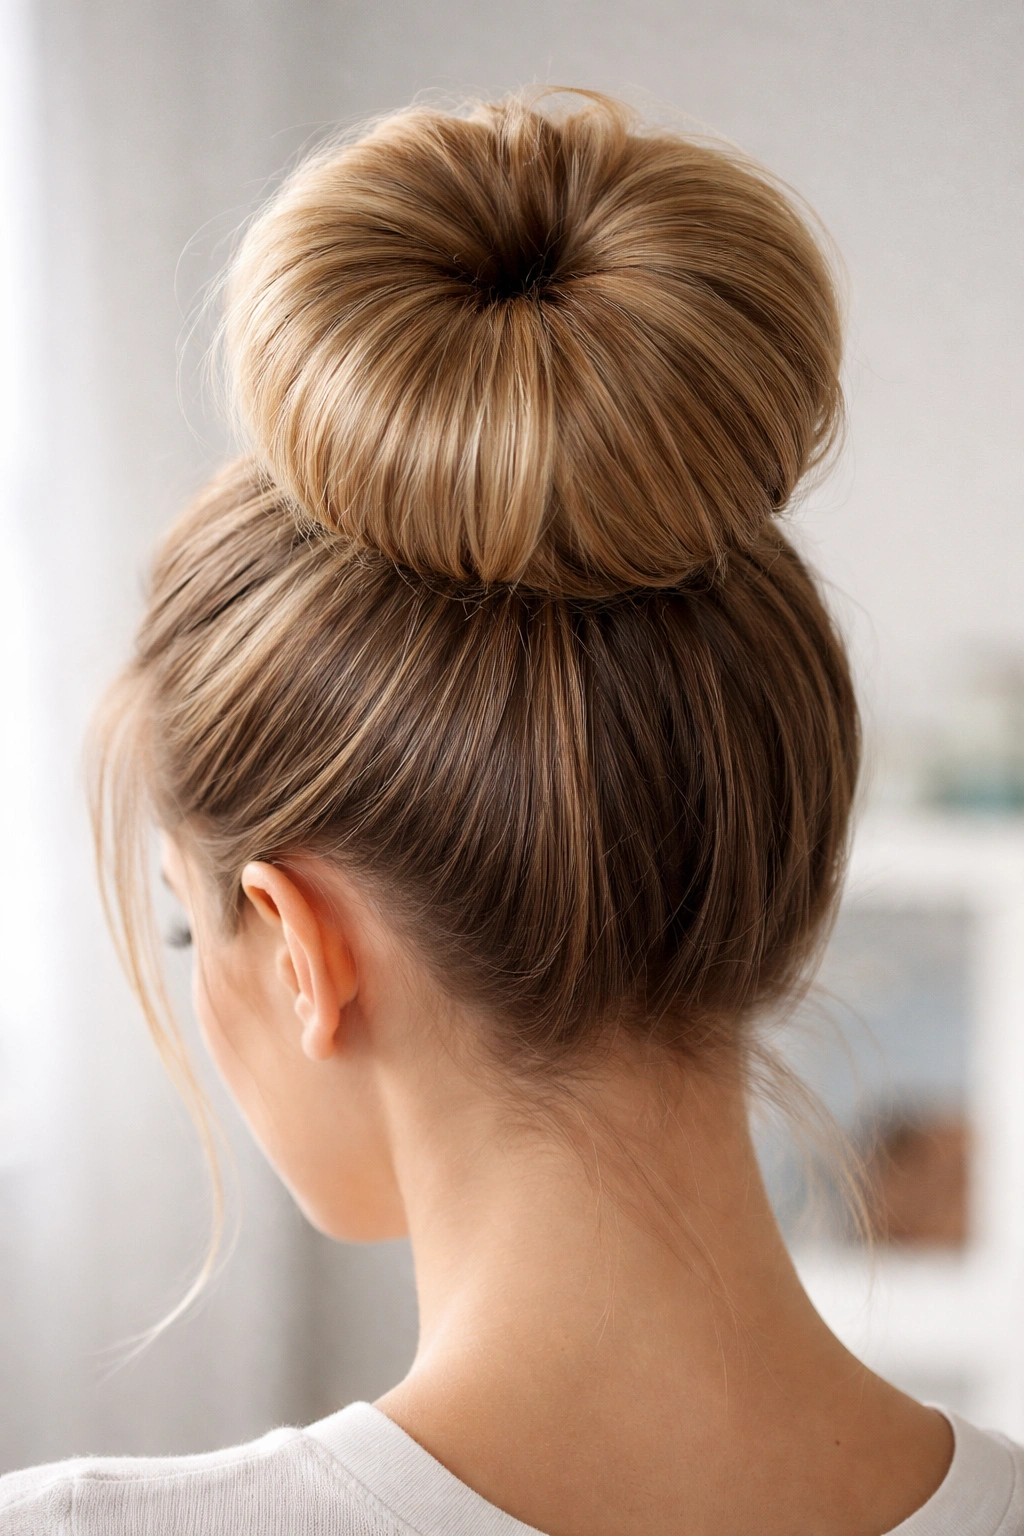
The first time I used a bun donut on a high ponytail, I understood why people keep one in a drawer. The shape gives you lift without forcing you to wrap all your length into a tiny knot, which is especially nice if your hair is medium length or layered.
Slide the donut over the ponytail, fan the hair around it, and tuck the ends underneath. Then pin the perimeter in small sections. That perimeter matters. If you only pin the top, the lower edge can sag and leave the donut peeking through.
What Helps Most
- Choose a donut that matches your hair color if you want it hidden.
- Use short U-pins around the outer edge for a cleaner hold.
- Spray the fanned-out hair lightly before shaping it.
- Keep the ponytail at the top third of the head for the strongest lift.
This style looks fuller than a plain wrap bun, and it tends to stay more stable because the weight is spread across the donut instead of hanging from one twist.
5. The Rope-Twist High Bun
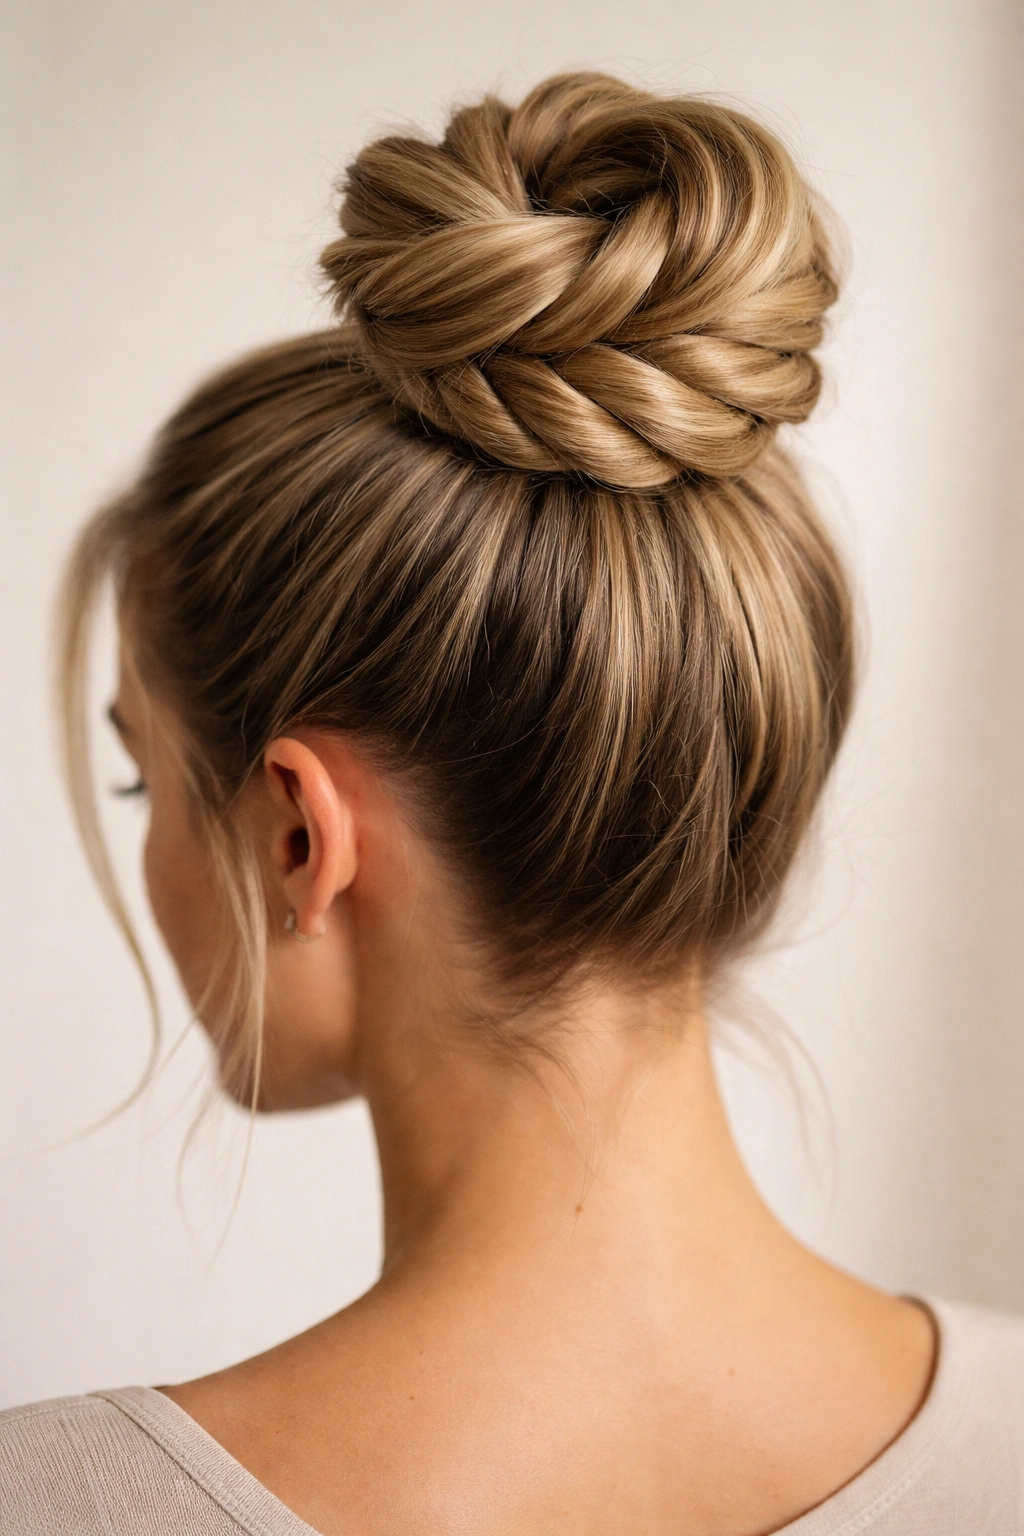
A rope twist is one of those old-school tricks that still works because the math is simple: twist two sections together, and they lock more tightly than one loose strand ever will. That tighter structure makes a high bun feel firmer from the start.
Split the ponytail into two sections, twist each one in the same direction, then wrap them around each other in the opposite direction. It should feel slightly springy in your hands. If it feels floppy, the twist is too loose.
Once the rope twist is coiled into a bun, pin the ends under the base and check the sides with your fingertips. You want the bun to feel anchored, not just sitting there. That little distinction matters when you’re wearing it for hours, because the rope texture holds its shape even after a few hours of movement.
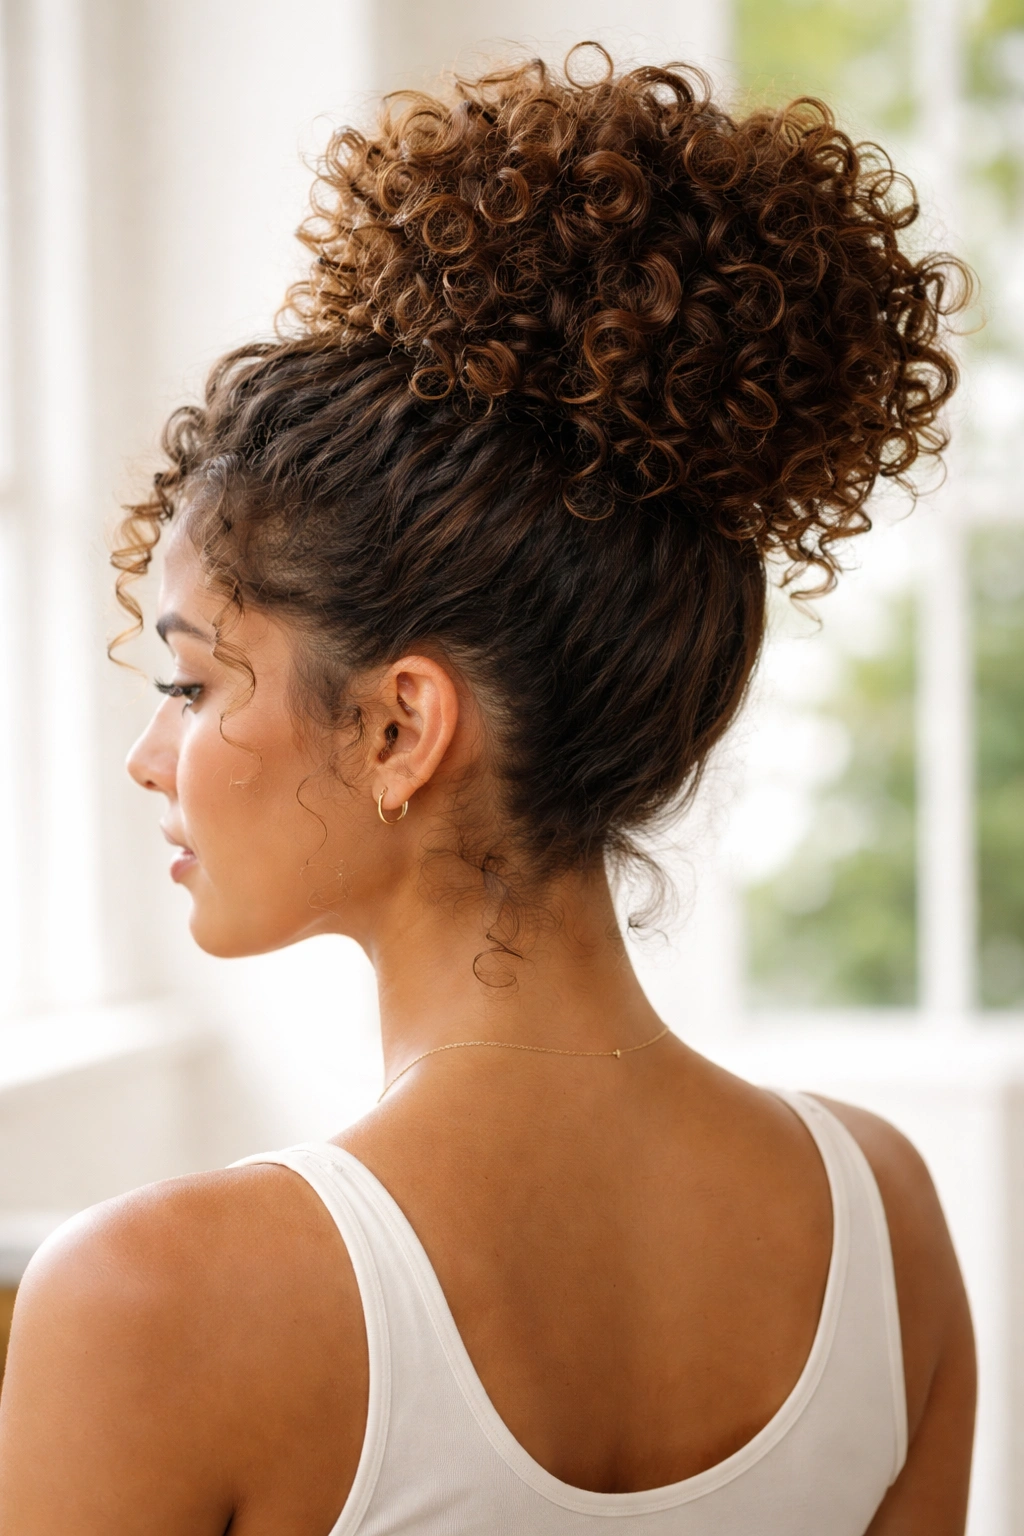
6. The Curly Puff Bun
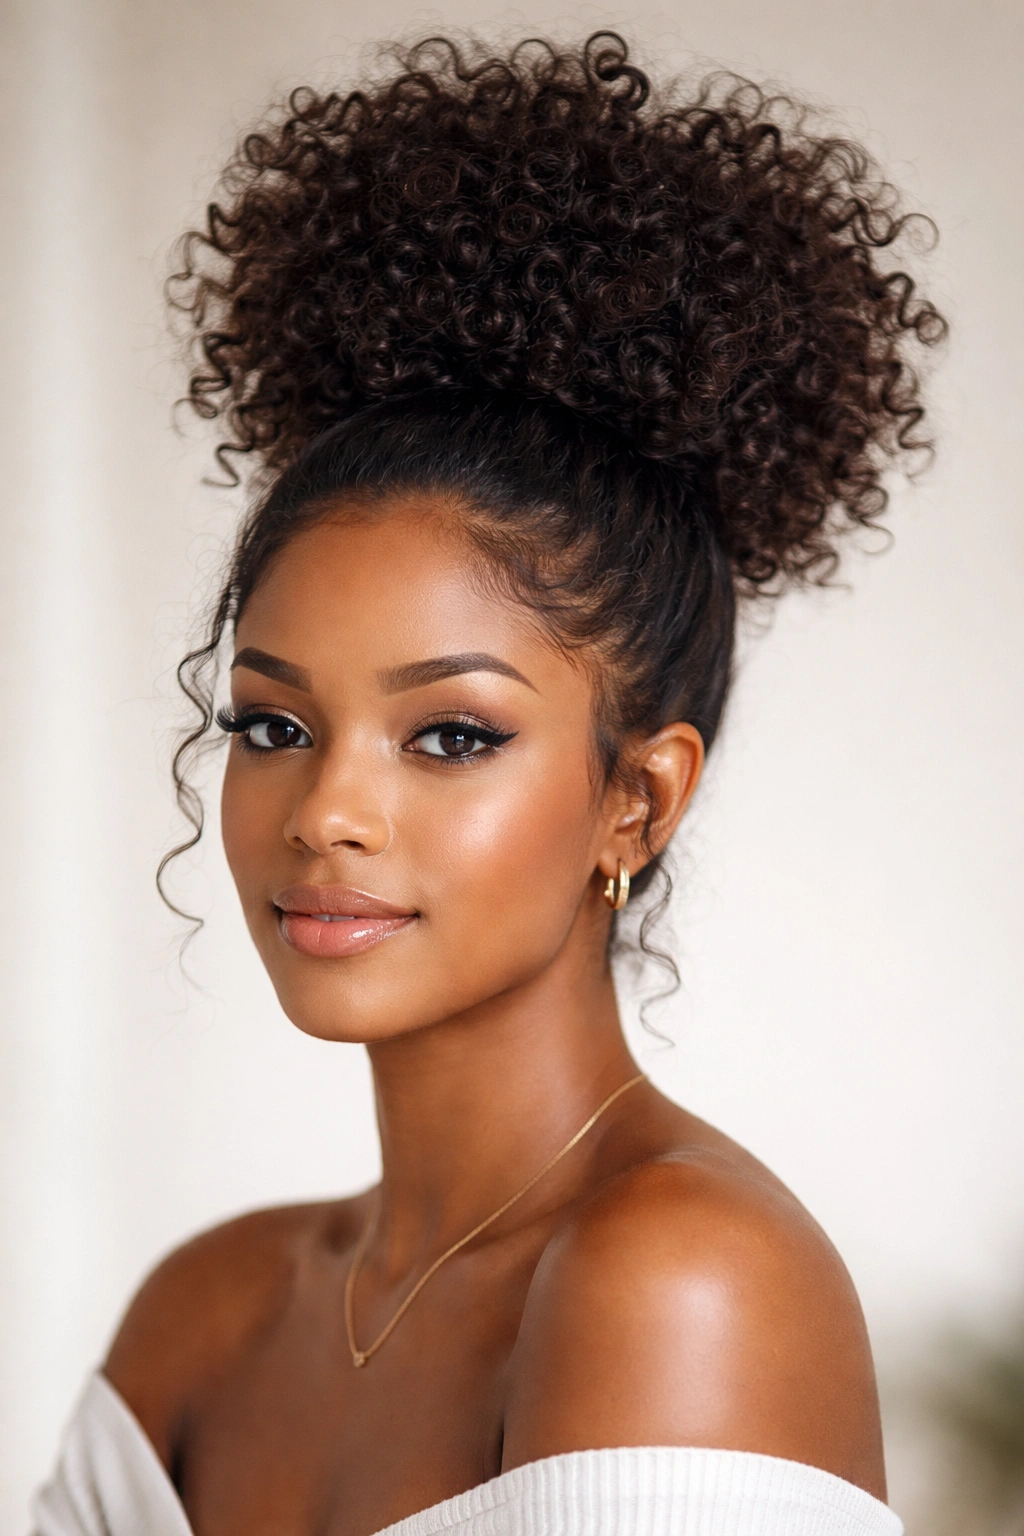
Unlike a sleek bun, this style lets your curls do the heavy lifting. That’s the charm. You gather the hair high, stretch it just enough to keep the base secure, then build a soft puff or bun that keeps the curl pattern visible.
This works especially well on curly and coily hair because the texture itself adds grip. You do not need to press the curls flat to make this look stable. In fact, flattening them often makes the bun harder to pin neatly.
The key is section control. Smooth the roots only where the ponytail starts, then leave the length with its natural bounce. If the bun feels bulky, split it into two wrapped sections instead of forcing one giant loop. That gives you a cleaner shape and less stress at the base.
7. The Bubble-Section High Bun
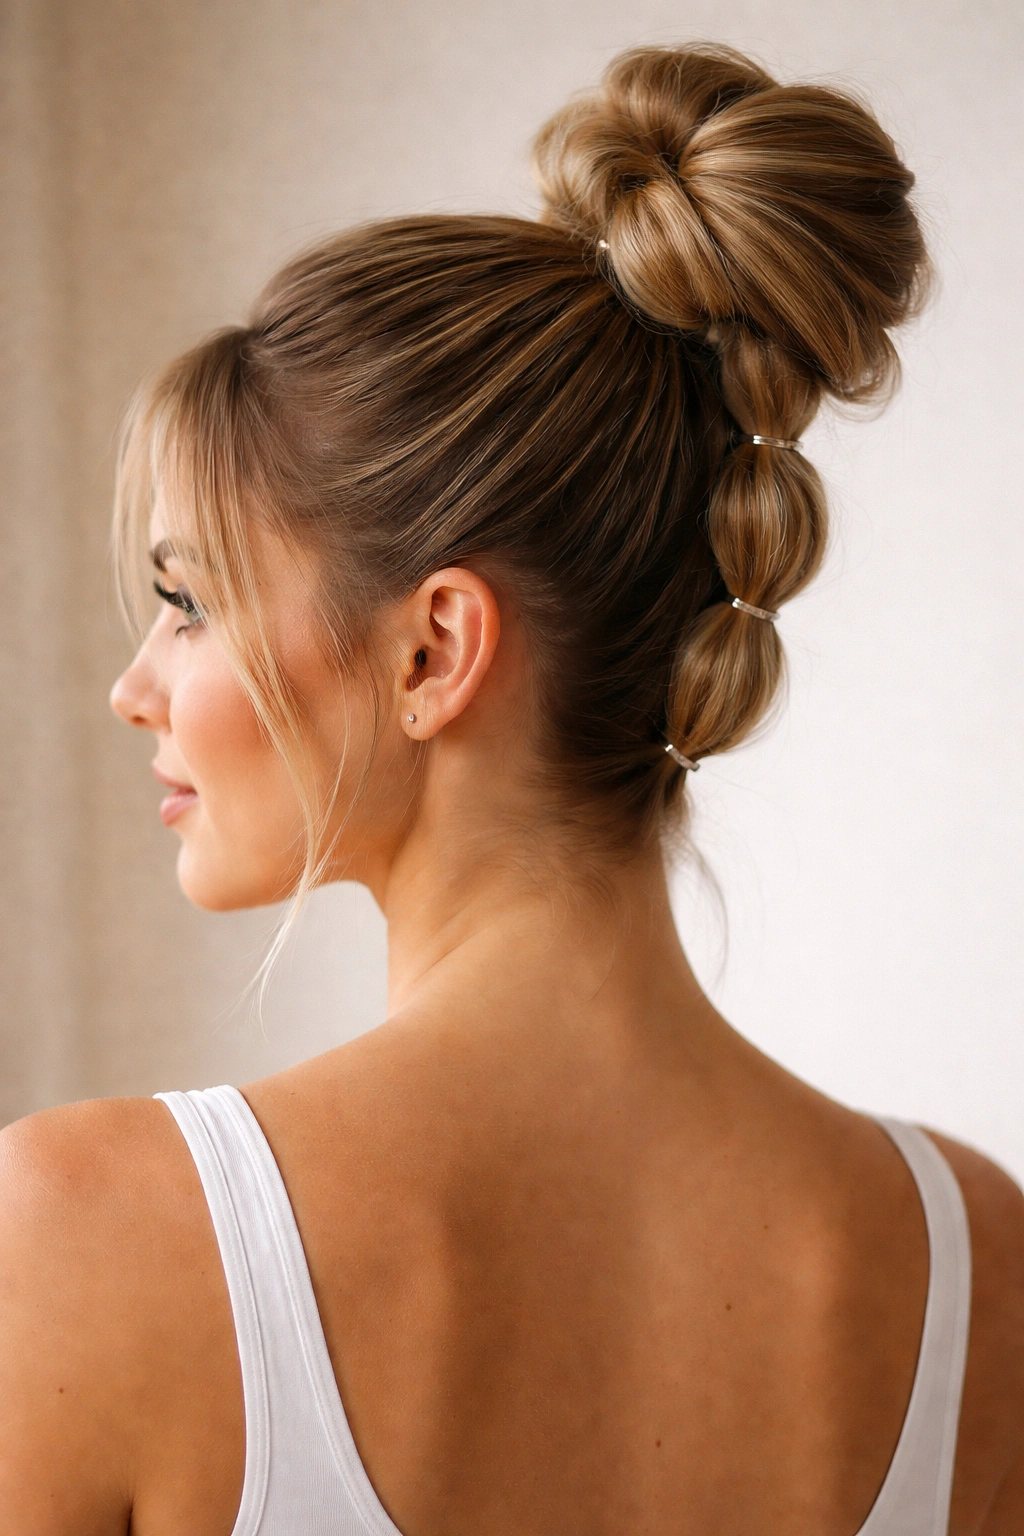
Bubble sections sound playful, and they are, but they also create little anchor points that help the hair stay together. It’s the same reason a rope doesn’t unravel easily. Each small elastic gives the style a bit more structure.
Bubble It, Then Wrap It
After you make the high ponytail, place tiny clear elastics every 1½ to 2 inches down the tail. Gently puff each section outward with your fingers, then wrap the whole “bubble” tail into a bun. The bubbles give the bun shape without making it too flat or too tight.
If you want extra hold, pin the tail ends under the base before you smooth the outside. That keeps the style from fraying at the edges. It also looks more interesting than a plain wrapped bun, which is nice when you want the style to read a little more styled without going formal.
A bubble bun works well on medium to long hair, especially if your layers normally escape from everything.
8. The Double-Knot Top Bun

Two knots beat one when your hair is slippery. Simple. You make one half-knot, then another, and those crossing motions help the style lock before you even reach for pins.
Start with a high ponytail, split the length into two parts, and tie them in a loose knot over the base. Do it again if the hair is long enough. Then tuck the ends around the knot instead of wrapping them in a smooth circle. The result looks slightly sculptural, but the real benefit is that the knot structure keeps the bun from unwinding.
This one is especially good for hair that tends to slide out of elastic bands. If your strands are fine or freshly washed, mist them first with texture spray. Not a ton. Just enough to remove that slick, glassy feel.
9. The Scarf-Wrapped Bun
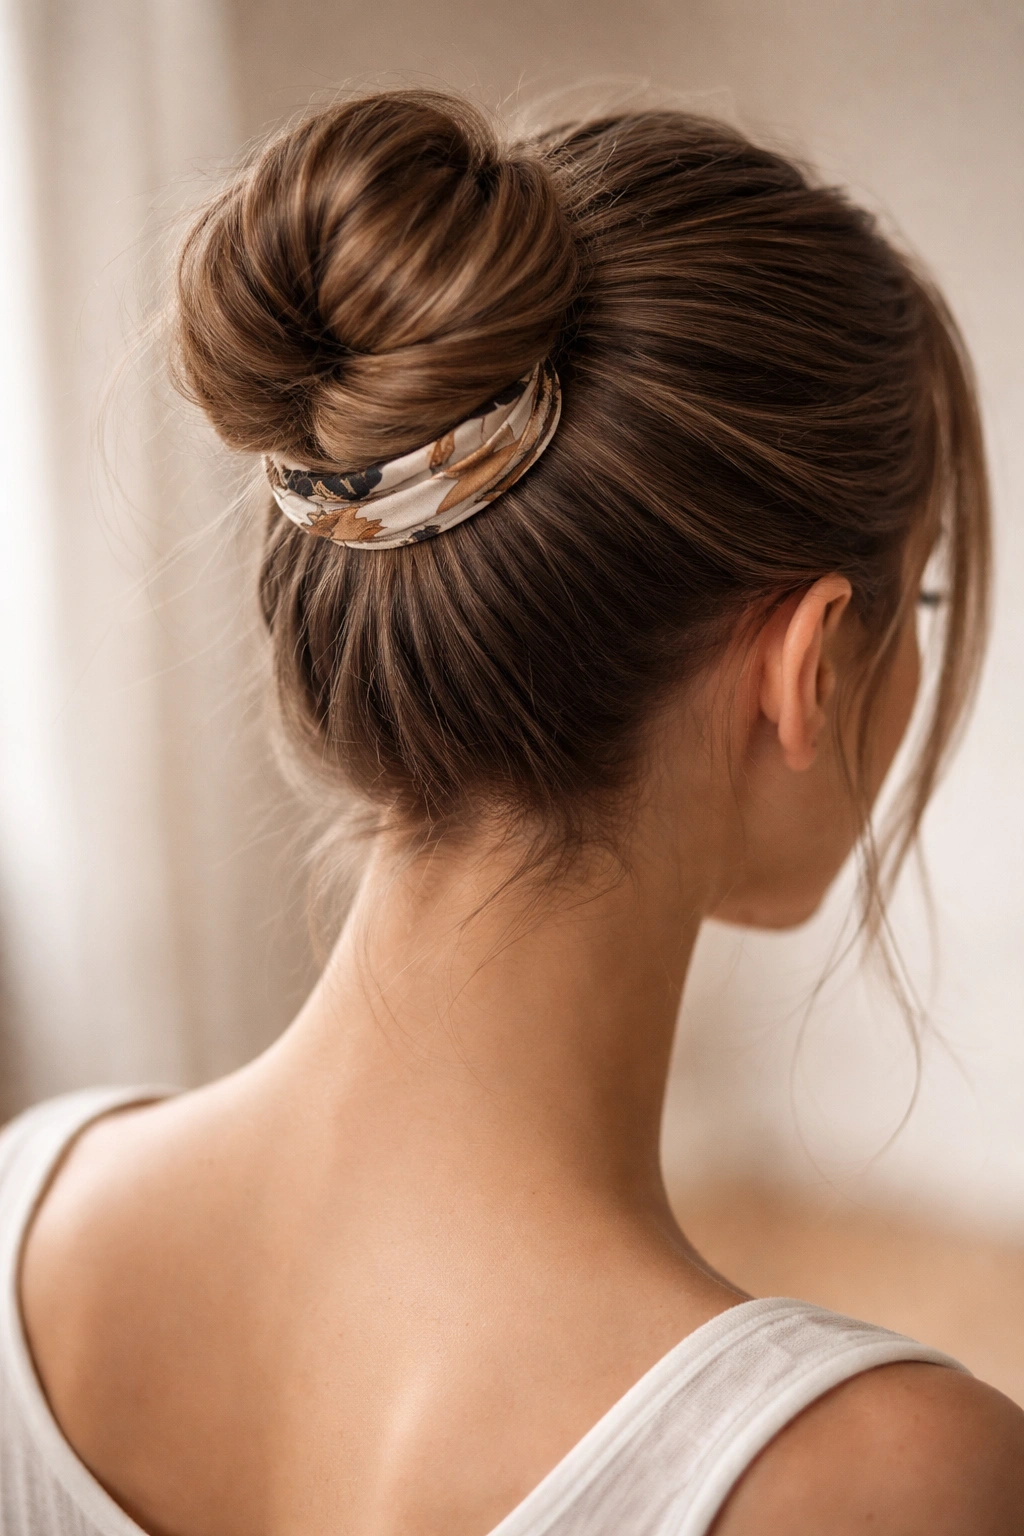
A scarf can do more than decorate a bun. It can help hold one together, especially if your hair needs a little extra security around the base. That’s why this style is both pretty and practical.
Tie the high ponytail first, twist the hair into a compact bun, and then wrap a narrow scarf around the base before knotting it underneath. Silk scarves look polished, but a cotton or jersey scarf can give a bit more grip if the bun keeps shifting. The fabric also hides pins, which is a small mercy on busy days.
I like this style for second-day hair. The slight texture from yesterday gives the scarf something to hold onto, and the whole thing sits more comfortably than a bun that’s pulled painfully tight. That matters more than people admit.
10. The Hidden-Clip Reinforced Bun
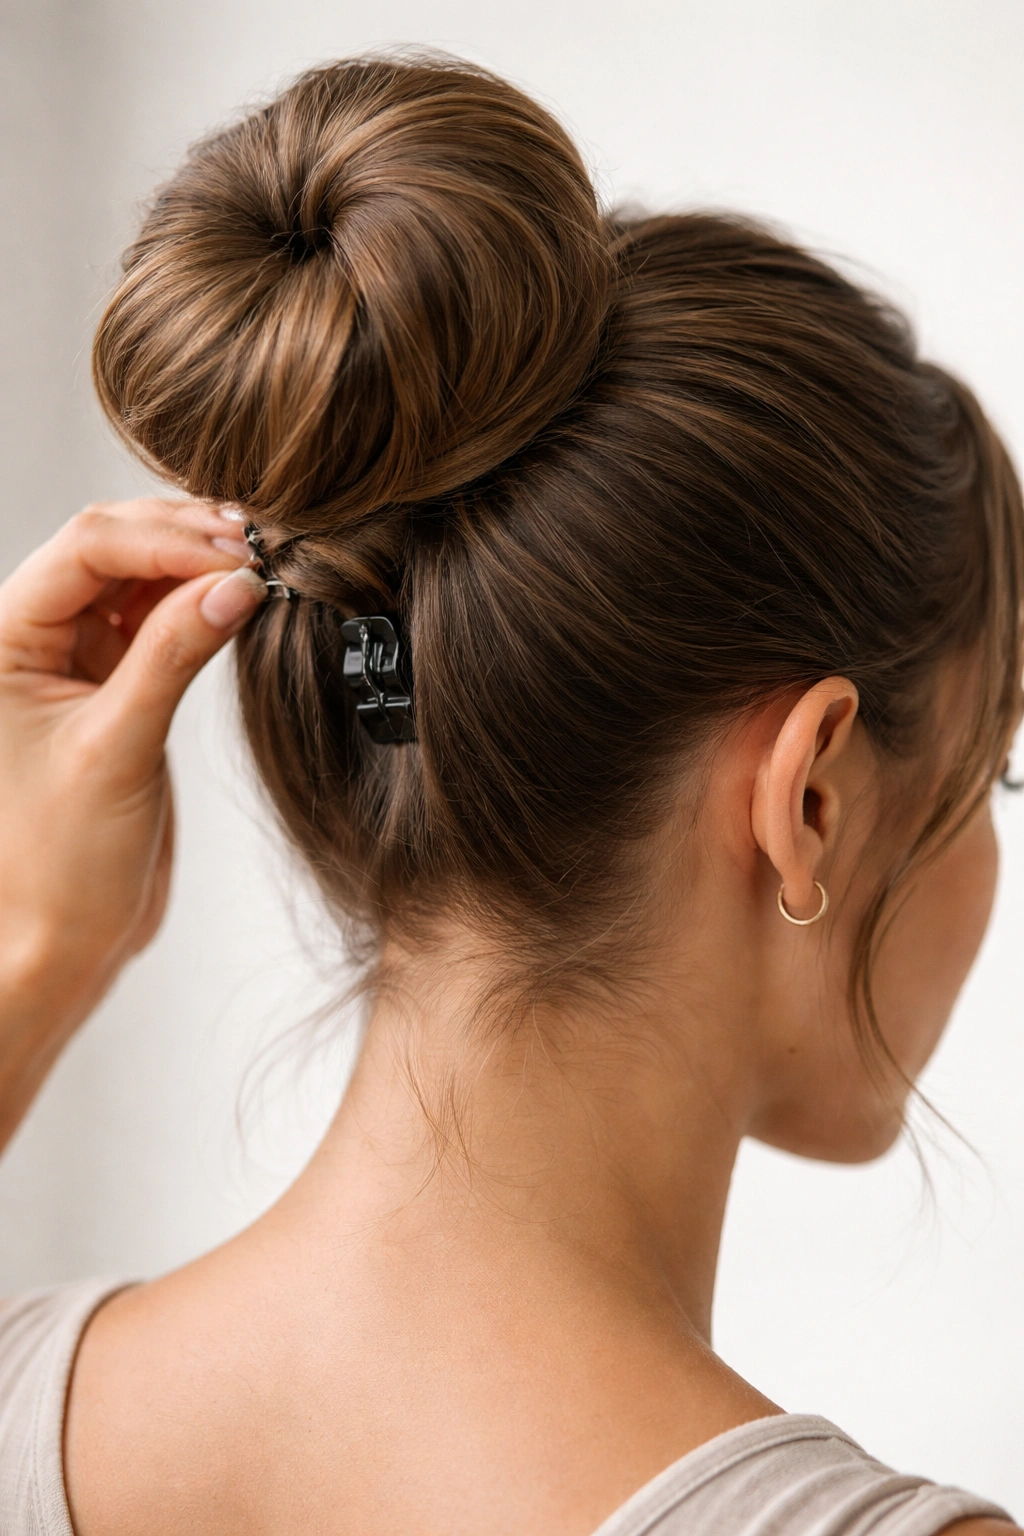
A hidden clip feels almost too simple, which is why I trust it. Slide a small claw clip or flat banana-style clip underneath the bun, then pin the hair over the top so the clip disappears. You get a secret brace under the weight of the style.
This is especially useful for thick hair or layered cuts that refuse to stay in one neat coil. The clip gives the bun a spine. The pins finish the job.
What to Watch For
- Keep the clip small enough to vanish under the bun.
- Place it parallel to the crown, not sideways.
- Use 2 to 4 bobby pins to disguise the edges.
- Press the bun gently after clipping so it feels snug, not bulky.
A lot of people skip this because it sounds fussy. It isn’t. It’s one of the easiest ways to get a high ponytail bun that survives the commute, the errands, and whatever else the day throws at your head.
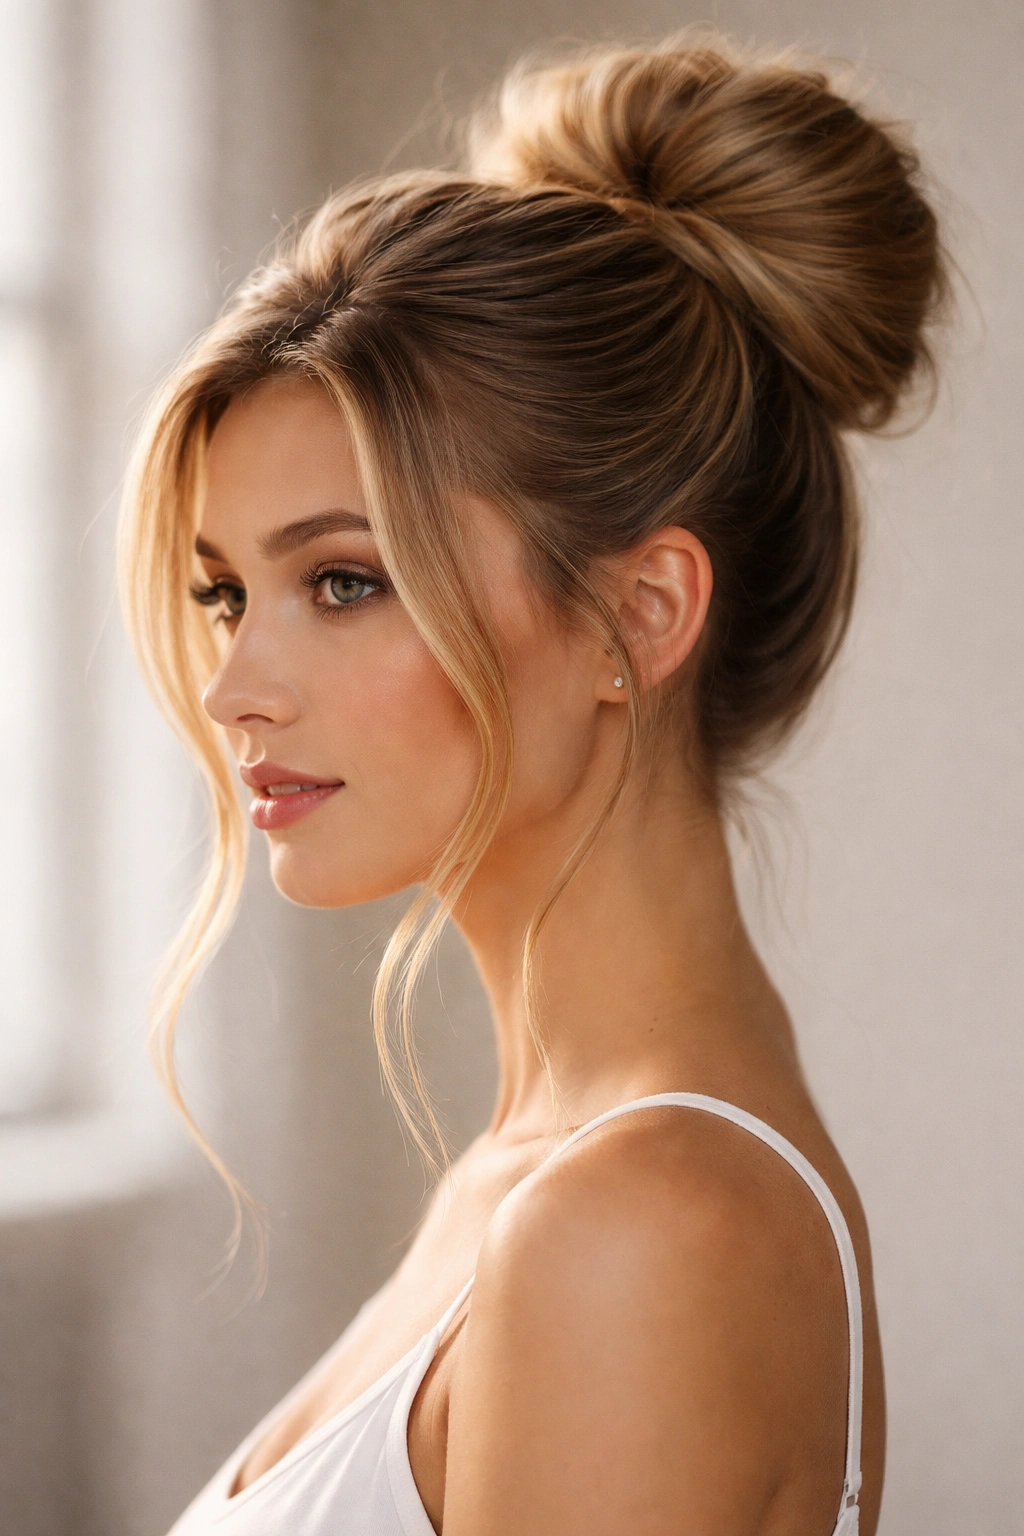
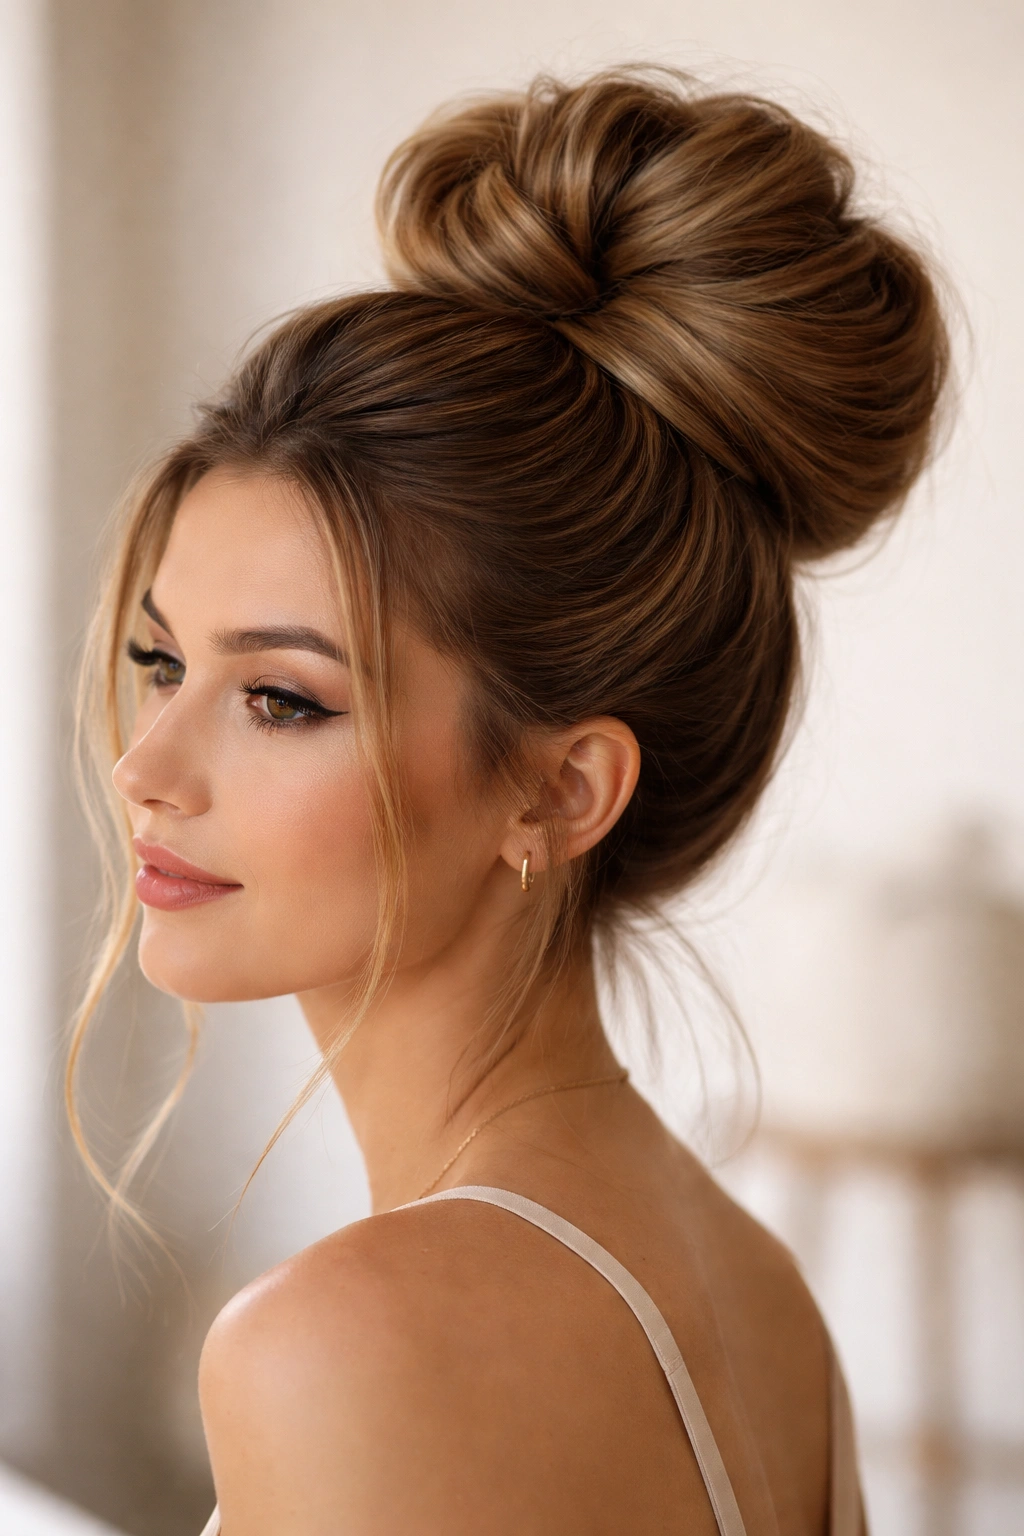
11. The Teased Crown Bun
A teased crown bun gives you height without forcing the whole bun to grow bigger. That’s the smart part. Teasing just the crown area adds lift where the style needs it most, so the bun sits high and proud instead of flat and pulled down.
Take a small section at the crown, backcomb it lightly with a fine-tooth comb, and smooth only the top layer over the tease. Then secure the ponytail just behind that lifted area. The bun itself can be sleek or soft; the crown does the visual work.
I like this style when hair is fine or medium density and needs a little boost. It also helps if your head shape naturally sends buns lower than you want. A modest tease can fix the whole silhouette.
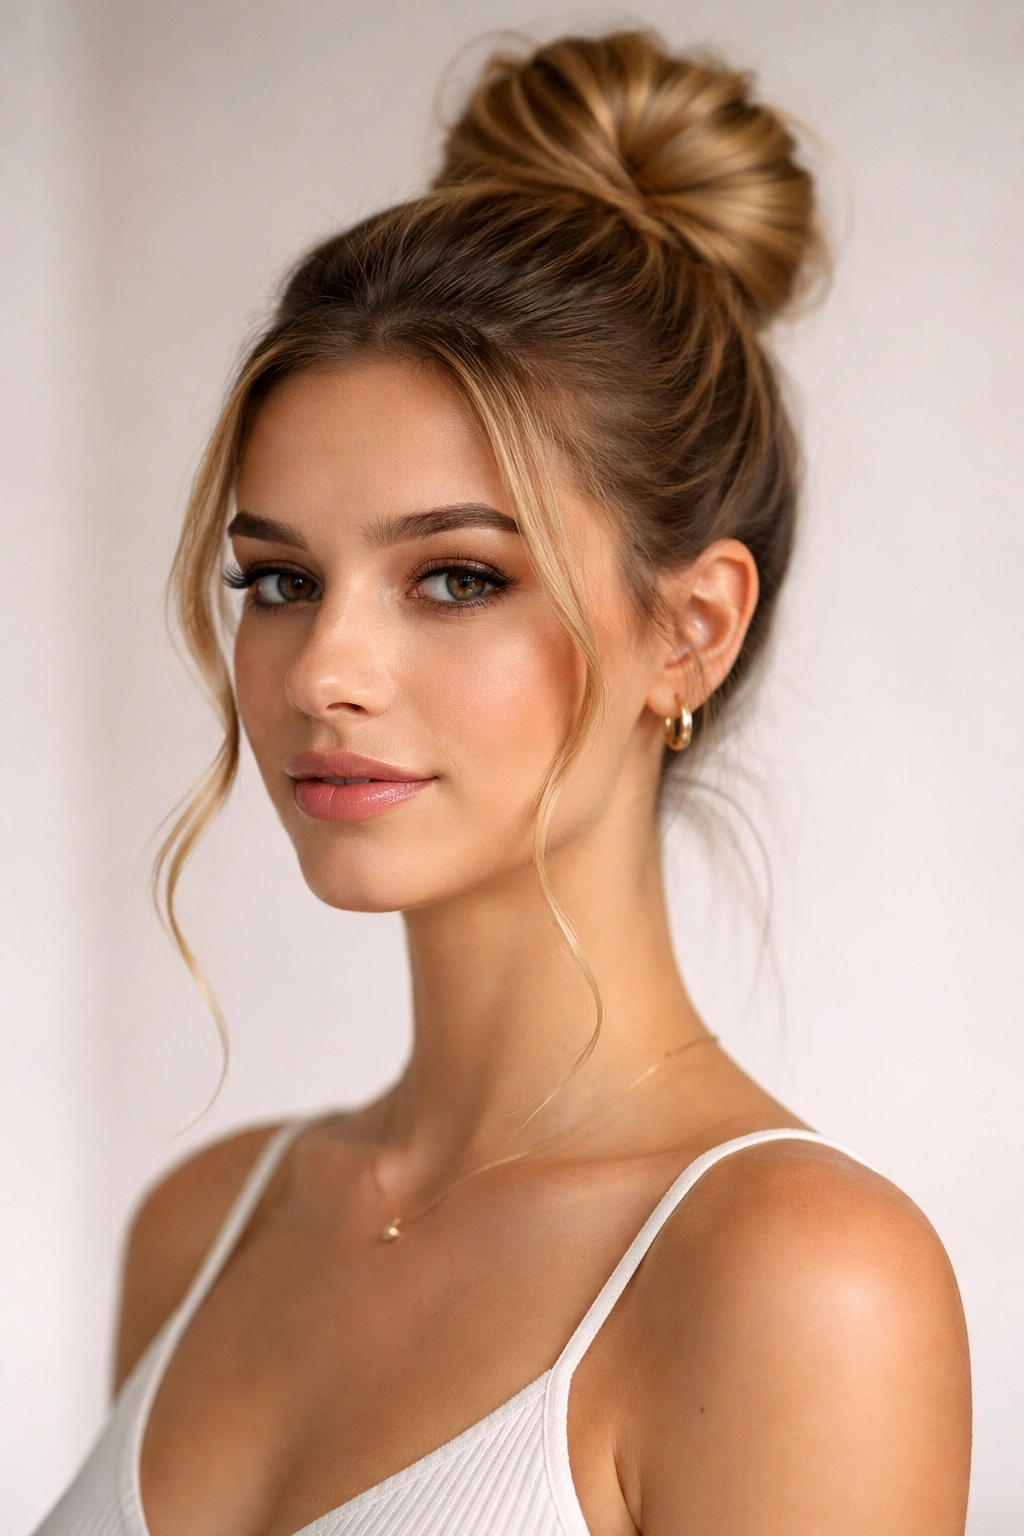
12. The Side-Part Bun With Face-Framing Pieces
A side part changes the whole mood of a high bun. It softens the pull-back and keeps the style from looking too severe, which makes this one easy to wear for work, dinner, or a day when you want polish but not stiffness.
Create a side part first, then smooth the rest of the hair into a high ponytail while letting two slim face-framing pieces stay free. Build the bun as usual, but keep the front pieces loose enough to curve around the cheekbones. If they’re too short, don’t force them. Let them be wispy. That’s better than flattening them into submission.
This style works well on straight hair, waves, and looser curls. It gives you height at the crown and softness around the face, which is a nice combination when a plain slick bun feels too bare.
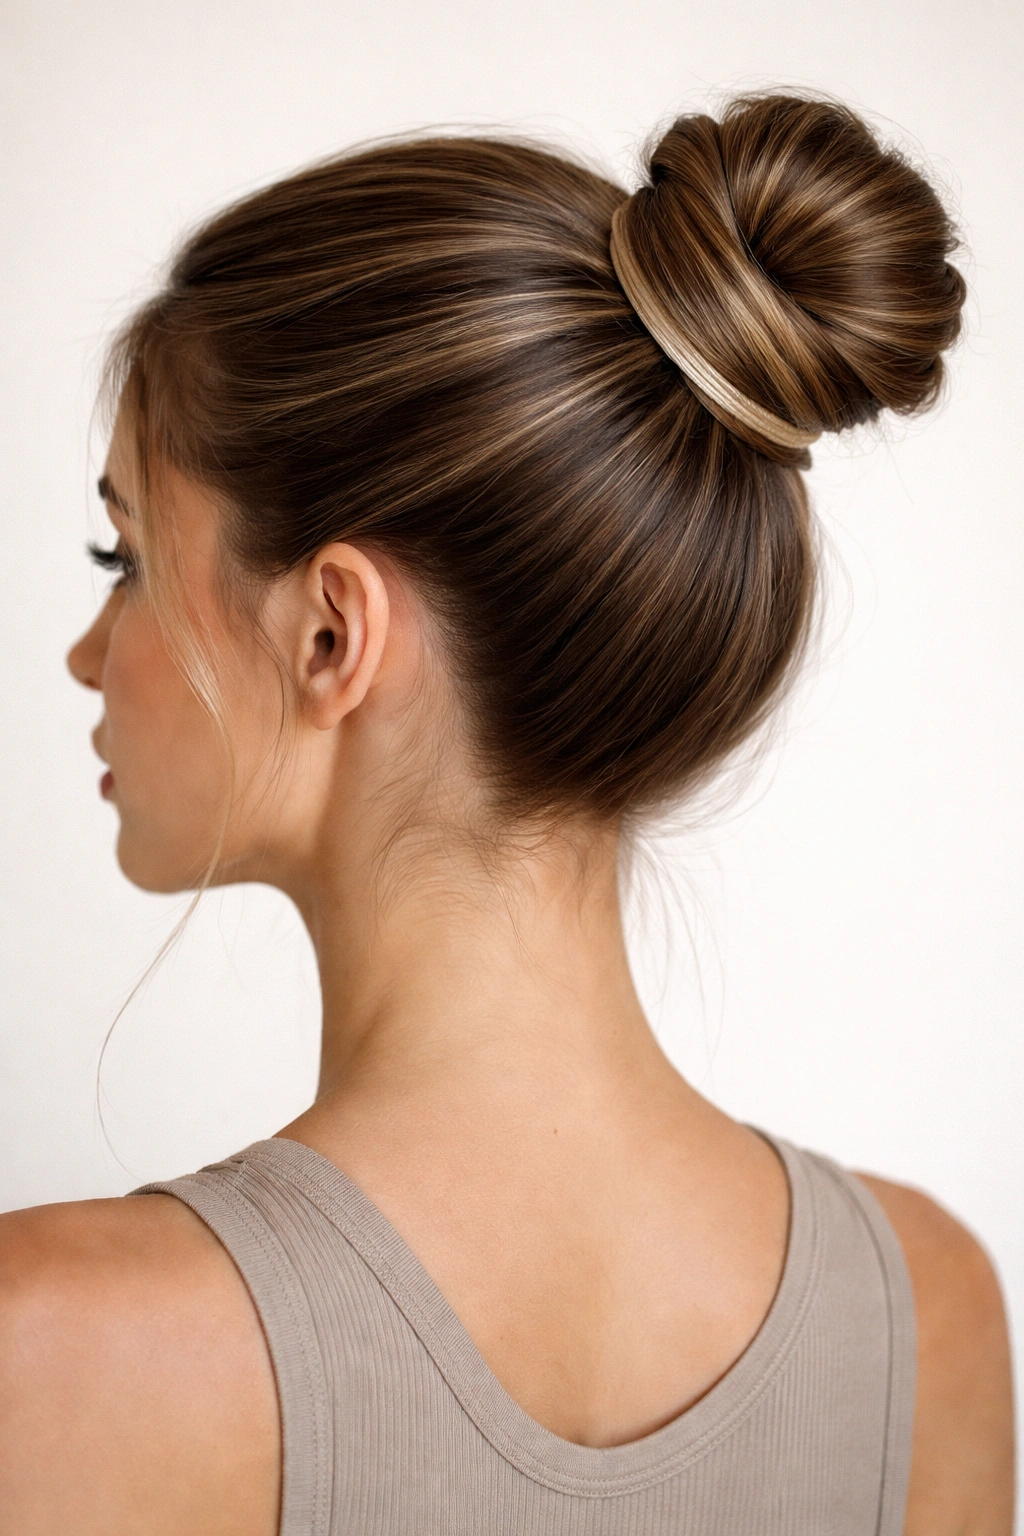
13. The Ballerina Bun
A ballerina bun is the clean, centered version of a high ponytail bun, and it lives or dies by symmetry. The ponytail should sit right at the crown, the wrap should be even, and the finished bun should look balanced from every angle.
Build It in Small Moves
- Brush the hair upward in sections.
- Secure the ponytail with a firm elastic.
- Twist the length tightly before wrapping.
- Pin the bun at three points minimum: top, side, and bottom.
That sounds meticulous, but it’s faster than redoing a lopsided bun three times. If one side feels heavier, tug a little hair from the opposite side before you pin. Tiny adjustments matter here.
This is one of the few buns that can look almost architectural without feeling severe. It suits straight, wavy, and relaxed hair especially well, because the smooth finish makes the high placement feel crisp.
14. The Fanned-Out Fan Bun
The fanned-out bun is what happens when you stop trying to hide every strand and start working with the natural spread of the hair. Instead of wrapping the length tightly around itself, you fan the ends outward, then pin them in a rounded arc.
It gives the style a little drama. Not too much. Just enough to make the bun look fuller from the front and sides. I like it on medium to thick hair, where the spread helps keep the bun from turning into a tiny knot that disappears against the head.
Use a strong elastic, twist the ponytail once, then spread the length around the base in sections. Pin the sections as you go. If the fan starts to droop, tuck the lower edge under with one extra pin. That small hidden fix usually saves the whole shape.
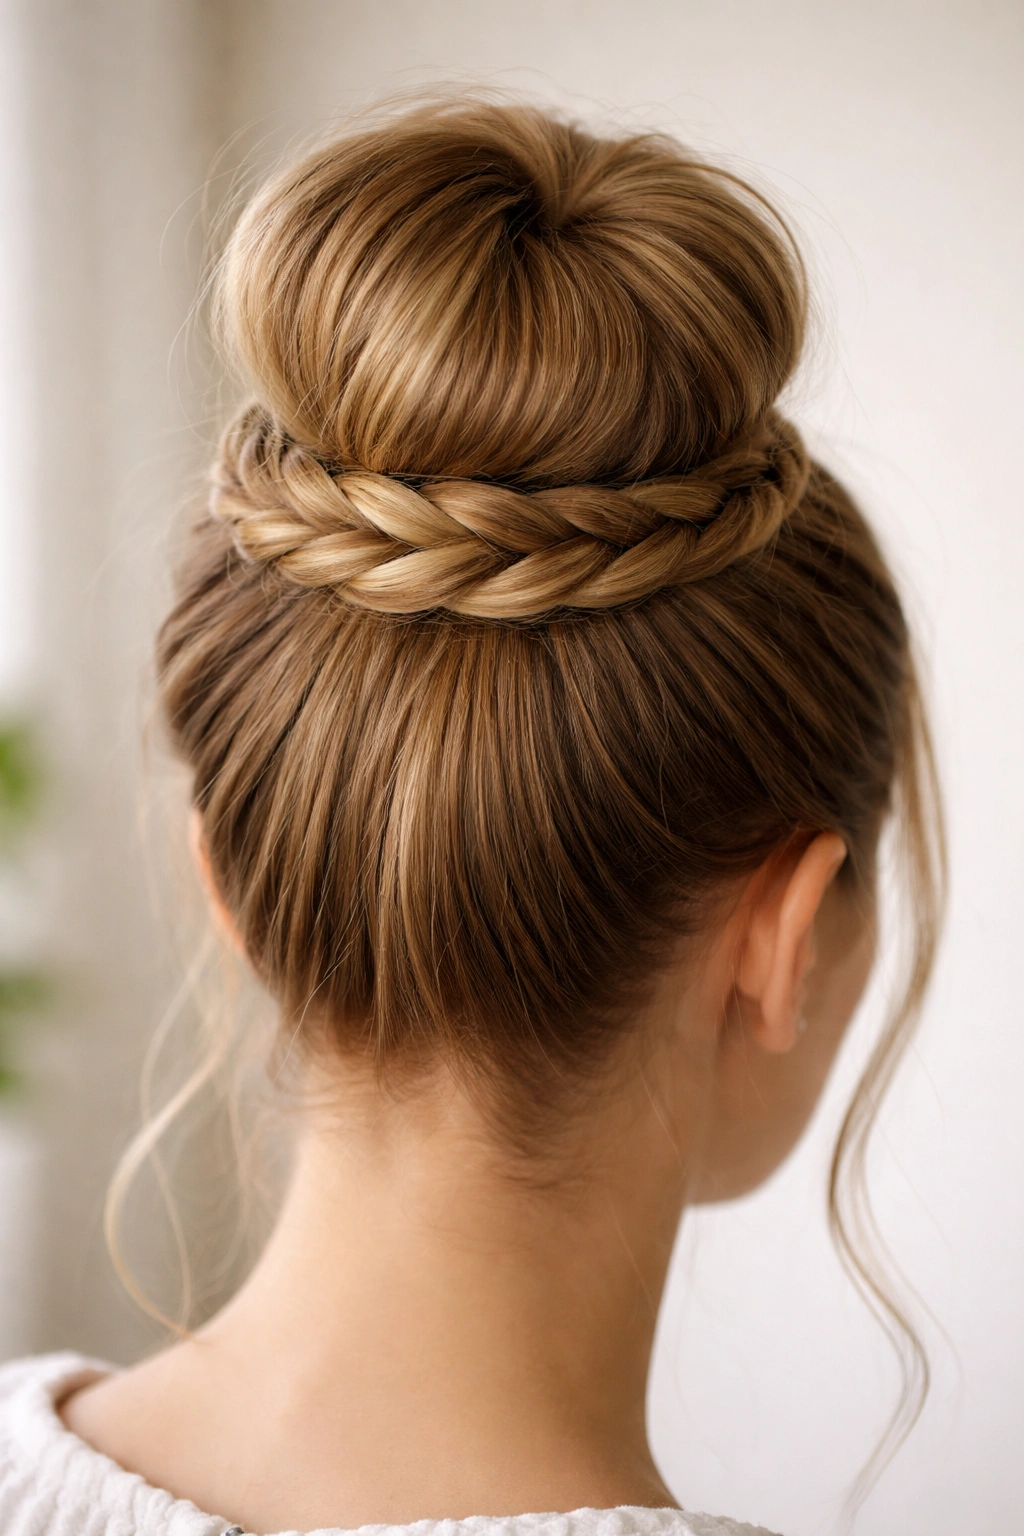
15. The Braided Wrap-Around Bun
A braided wrap-around bun has a clean finish with built-in texture, and the braid acts like a decorative rope around the bun’s edge. It’s tidy, but not boring. That’s the whole appeal.
Make a high ponytail, braid the tail, and wrap that braid around the base like a coil. If you want the braid to look fuller, pancake it slightly before wrapping by pulling the edges outward with your fingertips. Do that gently. Too much tugging and the braid loses the grip that keeps the bun in place.
This style is especially nice for layered hair because the braid hides awkward lengths. It also works when you want a bun that feels a little dressed up without going full formal. The braid does the styling for you.
16. The Stretch-and-Twist Bun
If your hair has a lot of shrinkage, stretch it first. That one move changes the whole bun. A stretched base gives you more visible length, more control, and less puff around the edges.
You can stretch hair with a blow-dryer on low heat, a banding method, or a twist-out left to dry. Once the hair has some length to it, twist the ponytail into a bun and pin the ends under. The shape will sit more evenly and won’t fight you as hard when you try to tuck the last section.
This is a good choice for natural textures that don’t want to stay smooth when pulled straight back. It respects the texture while still giving you a high, clean silhouette. And yes, it holds better because the stretched strands are easier to wrap tightly.
17. The Mini Bun for Fine Hair
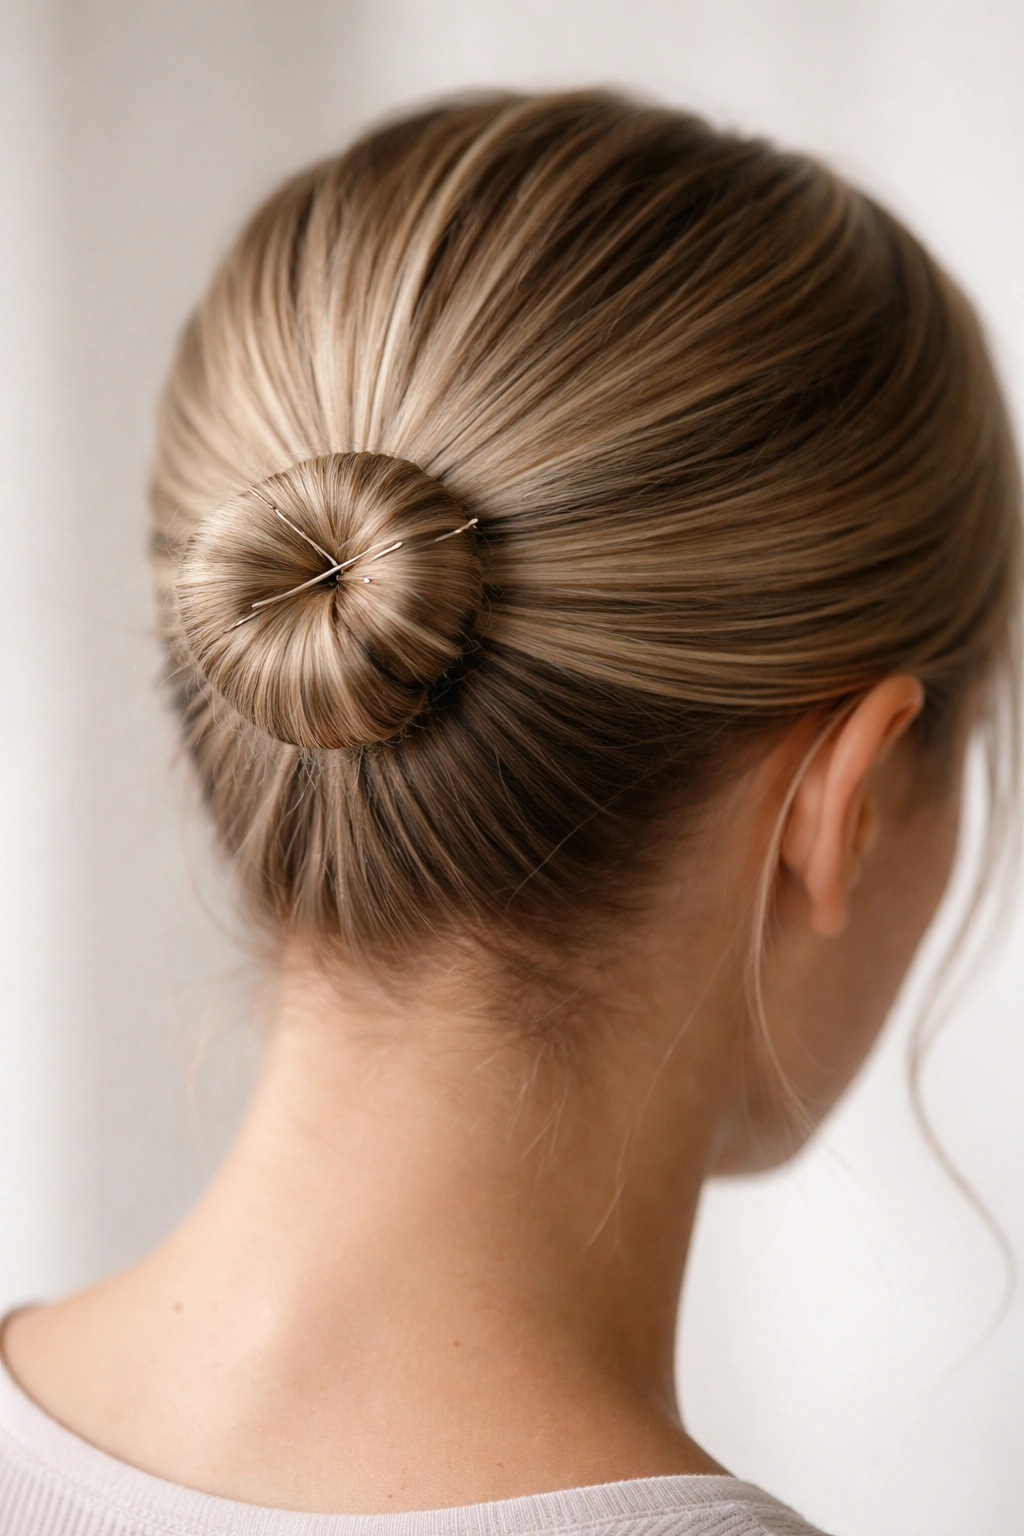
Fine hair can absolutely wear a high ponytail bun that stays put. It just needs a smaller shape and a little strategy. Big buns on fine hair often collapse because there isn’t enough mass to support the size.
Keep the ponytail tight, use a light texturizing spray, and build a compact mini bun close to the base. Don’t try to force volume that isn’t there. That leads to loose loops and sagging pins. A smaller bun looks deliberate; a too-large bun looks tired.
If the hair is extra silky, roughen the ponytail with your fingers before wrapping. One or two crossed pins through the center will usually do more than a spray-heavy finish. Fine hair likes clean structure, not a cloud of product.
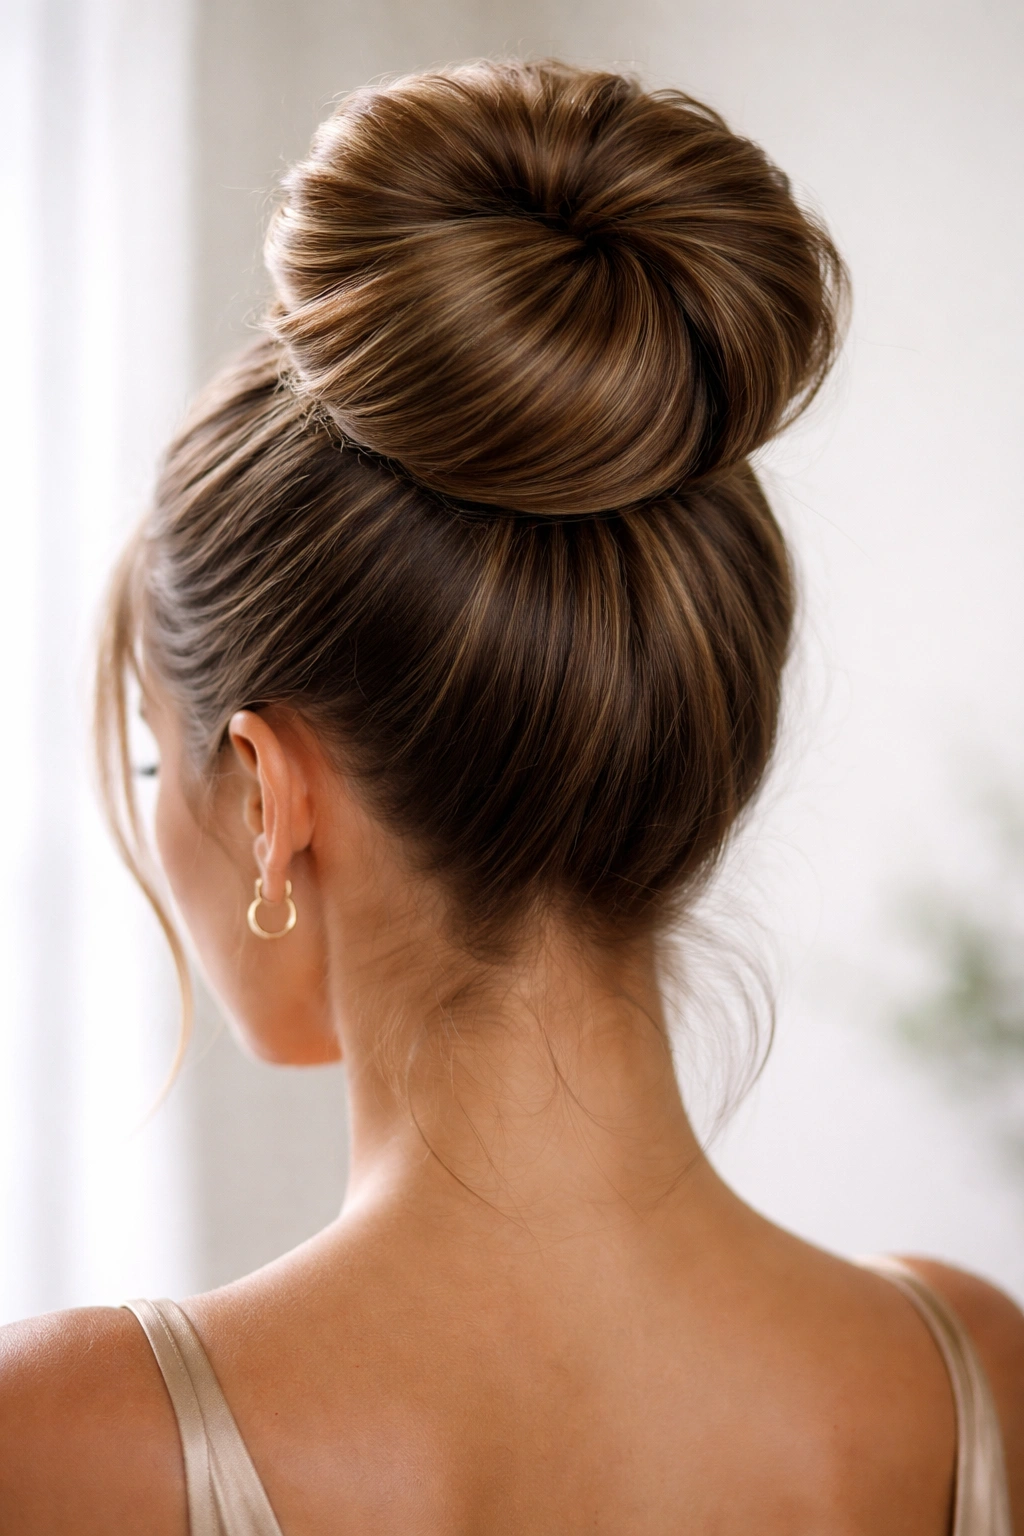
18. The Oversized Bun for Long Hair
Long hair gives you room to make a bun with presence, but it also gives you more weight to manage. That weight is the problem. If you pile it up carelessly, the bun slides. If you distribute it well, the style looks full and stays surprisingly secure.
Split the length into two sections, wrap each one around the base in opposite directions, and pin as you go. That spreads the mass instead of making one thick knot trying to hold itself together. If the ends stick out, tuck them under the lower edge where the pins can catch them.
This style suits long layers, especially when the ends are a little dry and less slippery. I’d avoid over-spraying the whole bun. Too much product can make the outside heavy and flatten the nice rounded shape you worked for.
19. The Gym-Proof Cinched Bun
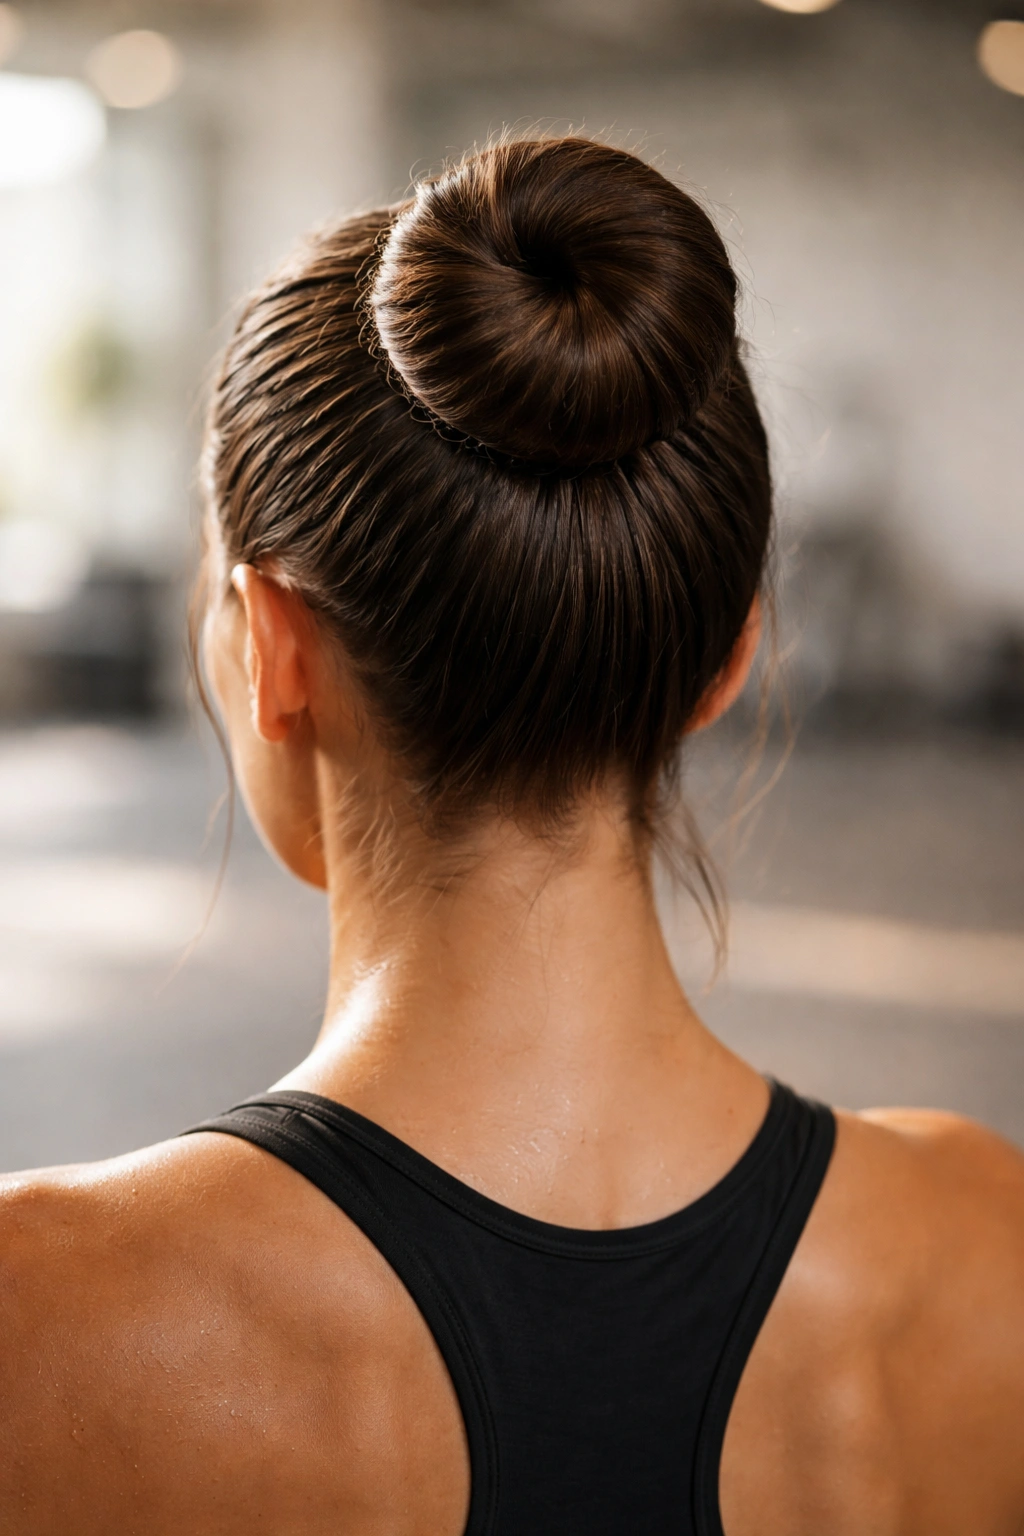
A gym-proof bun isn’t about beauty first. It’s about not thinking about your hair while you move. That means the base needs to be snug, the bun needs to be centered, and the pins need to be hidden so they don’t poke you halfway through a workout.
Use a firm elastic, wrap the ponytail into a tight coil, and cinch the bun with a second elastic or a few well-placed pins. If your hair is slippery, start with dry shampoo at the roots. If it’s curly or coily, let the texture do some of the work and only smooth the front.
Tiny Details That Matter
- Keep the bun close to the crown so it doesn’t bounce.
- Avoid a loose loop; choose a tight coil instead.
- Use two pins crossed in an X if the bun keeps loosening.
- Test it by shaking your head once. If it moves, fix it before you leave.
No fancy finish needed here. It just has to stay where you put it.
20. The Office-Polished Bun
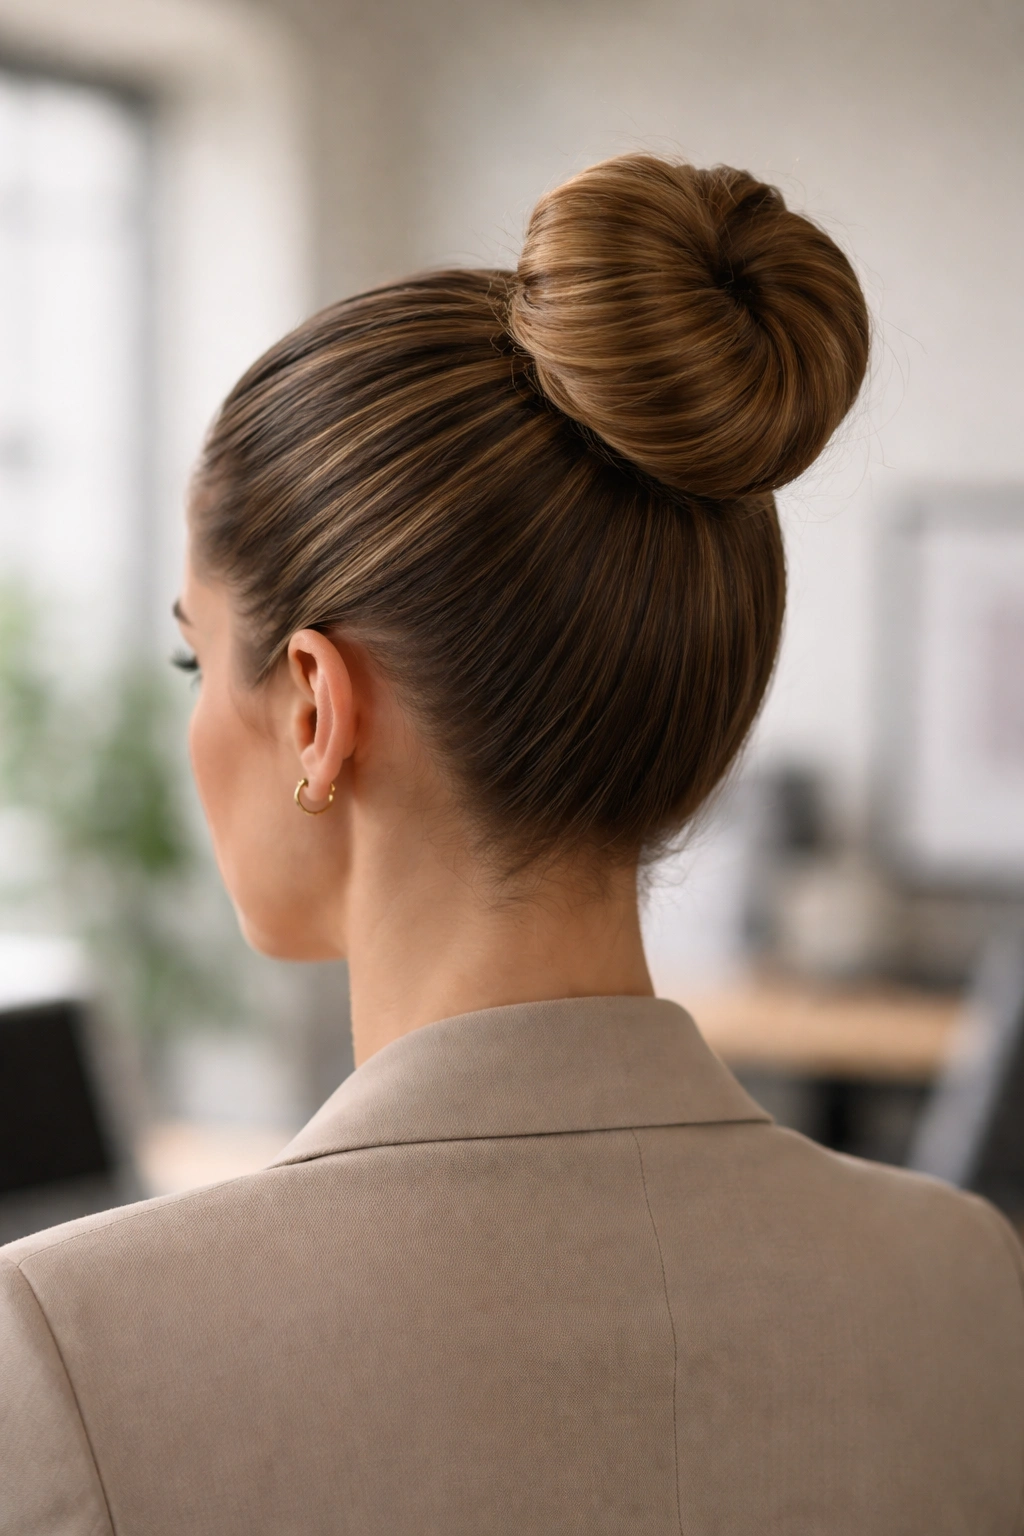
A polished bun can still feel relaxed enough for a full day at a desk. The difference is in the edges. You want smooth roots, a clean bun shape, and no stray ends sticking up like they’re trying to escape.
Start with a side or center part, whichever suits your face, and brush the hair high with a soft bristle brush. Secure the ponytail, twist the length into a neat bun, and smooth flyaways with a pea-sized amount of cream or gel on your fingertips. Then pin the bun so the pins disappear into the base.
This is the style I’d wear when I want to look composed without making it obvious I spent forever on my hair. It reads neat from the front and holds that clean line pretty well, even if you take the bun down and redo it later.
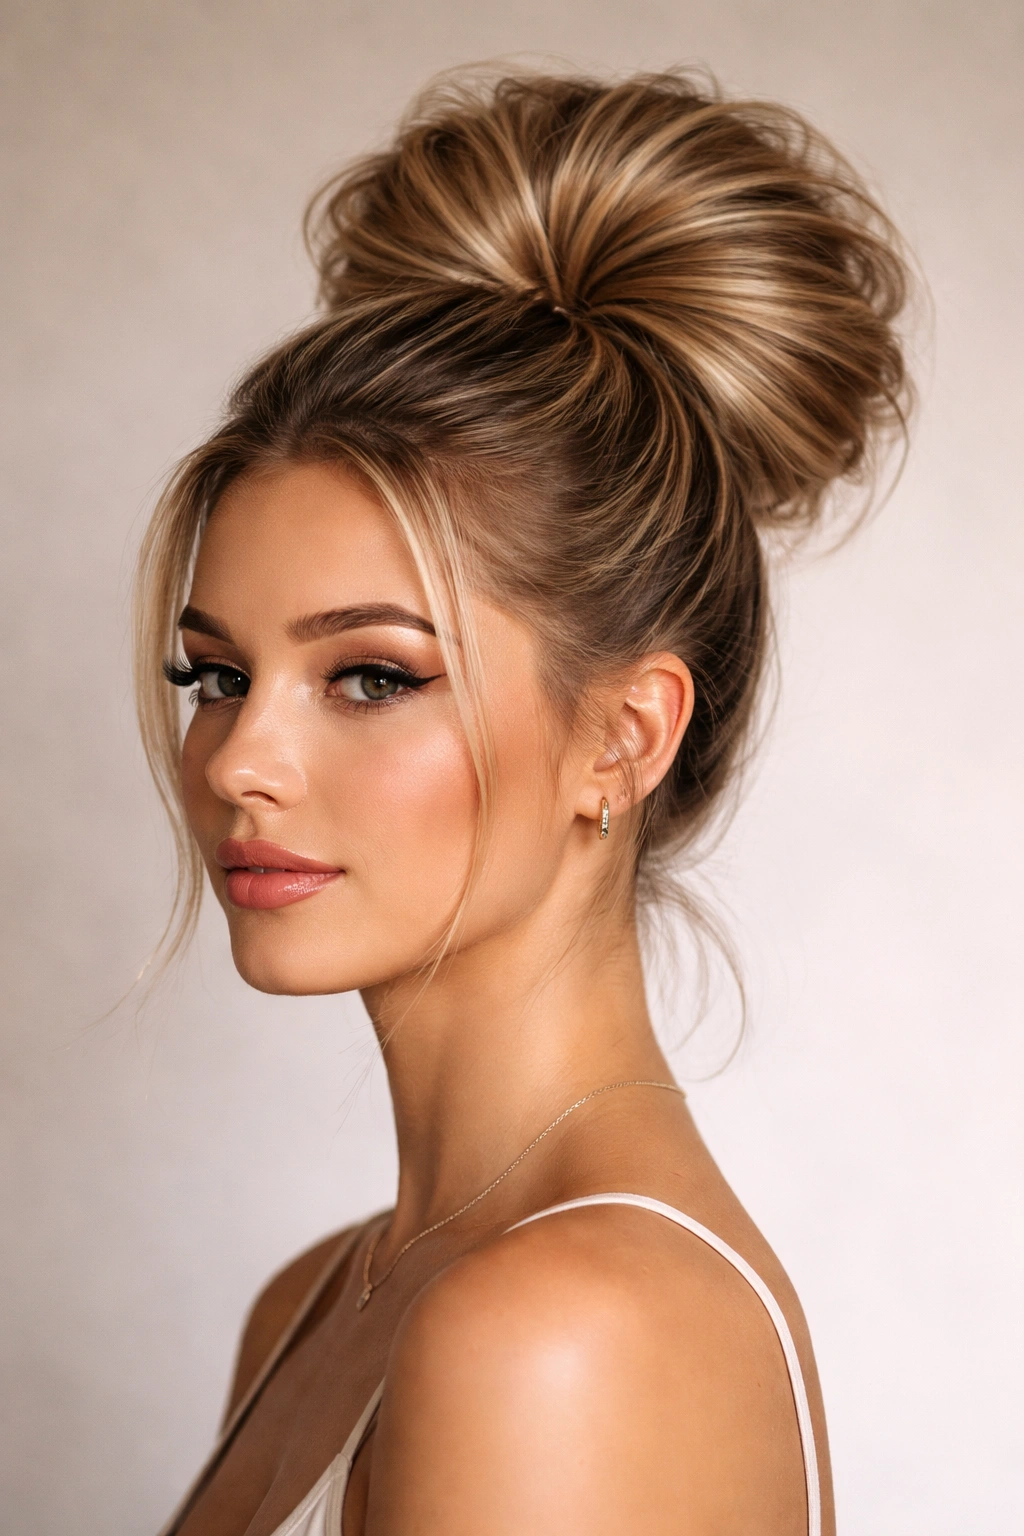
21. The Sculpted Event Bun
Why does a sculpted high bun look so different from a plain wrapped one? Because the hair is arranged in visible sections, almost like folded ribbons, instead of being wrapped into one simple coil.
Divide the ponytail into two or three sections, shape each one into a smooth arc, and pin them around the base one at a time. This creates a fuller silhouette that feels more deliberate than a standard bun. It’s also useful if you want the bun to look formal without relying on a ton of accessories.
Use a strong-hold spray sparingly between sections, not all over the hair. That keeps the surface clean and lets the shape stay crisp. If you’re working with thick hair, this style has enough structure to support the weight. If the hair is finer, make the arcs smaller and the pins tighter.
22. The Halo-Wrap Bun
A halo-wrap bun circles the crown in a way that gives the whole style a softer frame. It starts high, then the wrapped hair or braid traces around the bun like a ring. That little halo effect helps the bun feel finished from every angle.
This works especially well when you want the bun to look like more than a quick pull-back. Braid the ponytail or twist it into a rope first, then wrap it around the base in a wider loop. The outer edge should feel smooth; the inner edge can be tucked with pins.
The style is strong because the wrap crosses its own path. That crossing creates grip. If you notice one side drooping, pin that section before touching the rest. Fixing one weak point early is easier than trying to salvage the whole thing later.
23. The Wet-Look Sleek Bun
A wet-look bun is for the people who like shine and clean lines. The hair stays visually controlled, and the high placement gives it some bite. The finish can look dramatic, but the construction is still practical if you build it right.
Use gel or styling cream on damp hair, comb it upward, and secure the ponytail as close to the crown as possible. Twist the length into a neat bun and pin the base from underneath. The key is not to flood the hair with product. You want shine, not a sticky shell that flakes later.
This style works well on straight and wavy textures, and it can look especially sharp when the rest of the outfit is simple. One caution: if the hair is too damp, the bun can loosen as it dries. Let the roots set for a few minutes before you head out.
24. The Pineapple Bun for Curls
Curly hair does not need to be flattened to stay up. A pineapple-style bun keeps the curl pattern lifted on top while preserving as much bounce as possible.
Gather the curls high, secure them loosely at first, then let the curls wrap upward in a soft mound. You can pin a few curls at the base if they keep slipping, but the shape should stay airy. The goal is height, not compression.
I like this style because it respects the curl pattern and still gives a clear high silhouette. It also works beautifully when the curls are a little second-day, since they have more grip than freshly washed hair. If the crown looks too flat, lift it slightly with your fingertips rather than adding more product.
25. The Relaxed Tendril Bun
A few face-framing tendrils can soften a high bun without making it fall apart. The trick is to leave out just enough hair to shape the face, not enough to weaken the base.
Pull the main section into a high ponytail, leave two slim pieces near the temples, and twist the rest into a bun. Curl the tendrils lightly so they bend instead of hanging straight. That small curl makes the style look intentional.
Keep the Balance Right
- Leave out small sections only.
- Secure the bun first, then style the tendrils.
- If the face-framing pieces are too short, let them stay wispy.
- Keep the bun itself tight so the softness stays in the front, not the whole head.
This one is a favorite when you want a little movement around the face. It feels easier, less rigid, and still stays put if the base is properly anchored.
26. The Elastic-Lock Bun
A lot of people rely on one elastic and hope for the best. That’s optimistic, and not in a useful way. A second elastic can lock the bun in place before the pins even go in.
Make the high ponytail, twist or braid the length, and then secure the bun with a small elastic at the end of the wrap. If you have enough hair, you can loop the bun through itself once more and add a second tie around the base. The hair should feel snug, not strangled.
This style is good when your hair tends to loosen as the day wears on. The second elastic catches that slow slip before it starts. Just make sure the elastic isn’t too thick or visible unless you want it to show. Thin, strong bands usually work better than bulky ones here.
27. The Five-Pin Fail-Safe Bun
If I had to hand one style to someone who wants a high ponytail bun that holds up through a long day, this would be it. Nothing fancy. Just smart placement and enough pins.
Build a high ponytail, twist the length into a bun, and pin it in five spots: top, bottom, left, right, and one hidden pin through the center of the wrap. That five-point anchor keeps the bun from shifting when you turn your head or lean back in a chair. It also helps if your hair is layered and likes to pop out in random directions.
The hold comes from redundancy. One pin fails, the others keep the shape. That’s the whole point. Keep the finish clean, give the bun a firm squeeze after pinning, and check the sides with your fingertips before you walk away. A style that feels secure at the mirror usually stays secure for the rest of the day.