



Wavy updos for weddings work because they keep the hair soft while still giving it shape. That balance matters more than people admit. A style that’s too polished can look stiff in photos, and a style that’s too loose can unravel somewhere between the ceremony and the cake table.
I’ve always liked wedding hair that still looks like hair. Not helmet hair. Not a sprayed shell. The best versions usually start with second-day texture, a few deliberate bends from a 1-inch iron, and pins placed where they disappear instead of sitting on top like little silver warnings.
The trick is knowing when to leave the wave alone and when to tuck it in. Too much smoothing kills the movement, but too much movement makes the updo look unfinished. Somewhere between those two extremes is where the good stuff lives.
These 30 styles lean soft, romantic, and practical, with options for long hair, medium hair, fine hair, thick hair, veils, pearls, braids, and the kind of dancing that ruins anything flimsy.
1. Soft Low Knot, a Classic Among Wavy Updos for Weddings
This is the one I’d hand to someone who wants a wedding style that feels gentle instead of fussy. A soft low knot sits at the nape, leaves a few waved pieces around the face, and keeps the overall shape easy to wear for hours. It also tends to flatter almost every neckline because it doesn’t crowd the shoulders.
The detail that makes it sing is restraint. Keep the crown smooth enough to look intentional, then let the knot break apart slightly at the edges so it doesn’t read as too tight. If your hair is layered, tuck the shorter pieces under the knot first and let the longer waves fall loosely at the temples.
2. Textured Chignon with Loose Ends
A textured chignon is not the same thing as a messy bun. A chignon sits lower, looks more tailored, and gives the waves a place to curve without losing their shape. The loose ends matter here; they soften the back view and keep the style from looking buttoned up.
I like this one for dresses with a clean back or a higher neckline. It gives you polish without stealing attention from the dress. If your hair slips easily, mist the lengths with a dry texture spray before pinning. That one step makes a bigger difference than most people expect.
3. Braided Crown Bun with Soft Volume
Why does a braided crown bun look so put-together even when it’s easy to do? The braid gives the style structure, and the bun keeps the whole thing from feeling too sweet. Add wave to the loose sections first, and the braid stops looking stiff or too uniform.
What Makes It Hold
The braid acts like a built-in frame. That means you can pin less aggressively and still keep the shape stable, which is helpful if you don’t want a head full of bobby pins by the end of the night.
- Start the braid at one temple and keep it loose.
- Pancake the braid a little after braiding so it looks fuller.
- Tuck the bun low and slightly off-center for a softer finish.
- Leave two thin face-framing pieces, not four or five.
Pro tip: braid on hair that has a little grit in it. Freshly washed hair tends to slide.
4. Side-Swept Bun with a Deep Part
Picture one shoulder bare, a deep side part, and waves swept over just enough to show the cheekbone. That’s the appeal here. A side-swept bun gives you drama without needing height, and the asymmetry is flattering in photos because it creates a clean line across the face.
This is a smart option for anyone wearing statement earrings. It leaves space around the ear and keeps the neckline open. If the dress has beading or lace on one side, let the bun sit on the opposite side so the whole look feels balanced instead of crowded.
5. Half-Up Twist with Floating Waves
Unlike a full updo, this style keeps the ends moving. That’s the whole point. A half-up twist gathers enough hair to feel wedding-ready, but the lower waves still show off length, color, and texture.
It’s especially good for hair that’s naturally wavy and doesn’t want to stay pinned flat. Twist back two sections from the temples, secure them at the crown, then hide the elastic under a small loop of hair. The rest should fall in smooth, soft bends. If you want it calmer, curl only the lower half; if you want it looser, leave the ends alone and let the natural wave do the work.
6. Loose French Twist for Long Hair
The French twist scares people for no reason. The loose version is easier than it looks, and it has a lovely shape for wedding hair because it keeps the back clean while still leaving room for texture. I like it most when the hair has a little bend through the mid-lengths.
Don’t pull it tight. That’s the mistake that makes it feel severe. Keep the roll soft, let a few wisps escape near the nape, and pin vertically so the shape stays narrow. If your hair is very thick, divide it into two sections first and twist them together. It makes the roll easier to control.
7. Bubble Ponytail Rolled Into an Updo
A bubble ponytail can look playful in the wrong setting, but when you tuck it into an updo, it gets a grown-up edge. The trick is making the bubbles subtle, not cartoonish. Use small clear elastics, puff each section just a little, then wrap the tail into a low knot or coil.
How to Keep the Bubbles Soft
The sections should look rounded, not stuffed. If the hair is too sleek, the bubbles shrink and the style loses its shape. If the hair is too dry, it turns frizzy fast.
- Use 3 to 4 elastics down the tail, spaced evenly.
- Gently pull each bubble from the sides, not the center.
- Finish with pins at the base so the tail sits close to the head.
- Leave a few waved strands around the ears for softness.
This one suits modern dresses, square necklines, and brides who want something a little different without going full fashion-editor.
8. Messy Ballet Bun with a Wrapped Base
A messy ballet bun gets a bad reputation because people think it means “I forgot to finish my hair.” That’s not what’s happening here. Done well, it’s one of the neatest wavy updos for weddings because the bun sits centered, the waves soften the edges, and the wrapped base keeps the look controlled.
It’s a good choice when you want your hair off your neck but still want movement. Leave the crown smooth, twist the lengths into a round bun, then wrap one waved section around the base so the pins disappear. A little volume at the crown keeps it from looking flat from the front.
9. Boho Braided Low Bun
This is the style for someone who wants the hair to feel relaxed, but not sloppy. Start with a loose braid on one side, then gather the rest into a low bun and let the braid fold into it. The braid gives the bun texture, and the waves stop the whole thing from looking too rigid.
For a cleaner finish, keep the braid thin and the bun compact. For a softer one, pancake the braid and let the bun break apart a little at the edges. This style holds up nicely with a veil pinned underneath, since the bun sits low and leaves room for the comb.
10. Pearl-Pin Twist at the Nape
Pearls can go wrong fast. A row of them can feel busy, but a few pearl pins tucked into a twist at the nape look calm and deliberate. That’s what makes this style useful for weddings where you want one pretty detail instead of three.
The twist itself should stay narrow and slightly curved, almost like a soft shell. Leave the waves around the face a touch undone so the pearls don’t take over. If your dress already has beadwork, use fewer pins. If the gown is plain, you can place a small cluster where the twist meets the bun and let the hair do the rest.
11. Waterfall Braid into a Tucked Chignon
A waterfall braid is one of those details that sounds fancier than it is. Once the braid is set, the rest of the hair is pulled into a tucked chignon, which keeps the style neat while the braided line gives it movement from the side. It’s a strong choice for medium to long hair with a soft wave pattern.
What I like here is the angle. The braid gives the eye something to follow, and the tucked chignon keeps the back from feeling heavy. If your hair is layered, spray the lengths lightly before braiding so the dropped pieces don’t slip too soon. The braid should look airy, not pinched.
12. Gibson Tuck with Wavy Ends
The Gibson tuck has a lovely old-fashioned shape, but the wavy version feels much less formal. It’s built by rolling the hair inward at the nape, then tucking the lengths through and letting the ends disappear into the roll. A few soft pieces can stay out near the ears if you want more softness around the face.
Why It Sits So Nicely
A Gibson tuck hugs the head closely, which makes it a smart pick for windy ceremonies or outdoor vows. It also plays nicely with veils because the shape stays low and clean.
- Best on shoulder-length to long hair.
- Works well with a middle part or a slight off-center part.
- Holds better with a small amount of texture spray.
- Looks especially good with satin, crepe, or simple lace dresses.
This is one of the more polished looks on the list, but it still has movement if you leave the wave pattern visible at the ends.
13. Low Pony Wrapped Into a Knot
Can a ponytail count as a wedding updo? Yes, if you hide the elastic and fold the tail into a knot instead of leaving it hanging. This style is fast, practical, and prettier than most people expect. It also works well when you want a stable base for a veil or hairpiece.
Keep the pony low and secure it with a small clear elastic. Then wrap the tail around itself and pin it flat against the head. If your hair is wavy, don’t smooth the lengths too much before pinning; the texture gives the knot a fuller shape. A soft side part makes the whole thing feel more relaxed.
14. Double Twisted Bun for Thick Hair
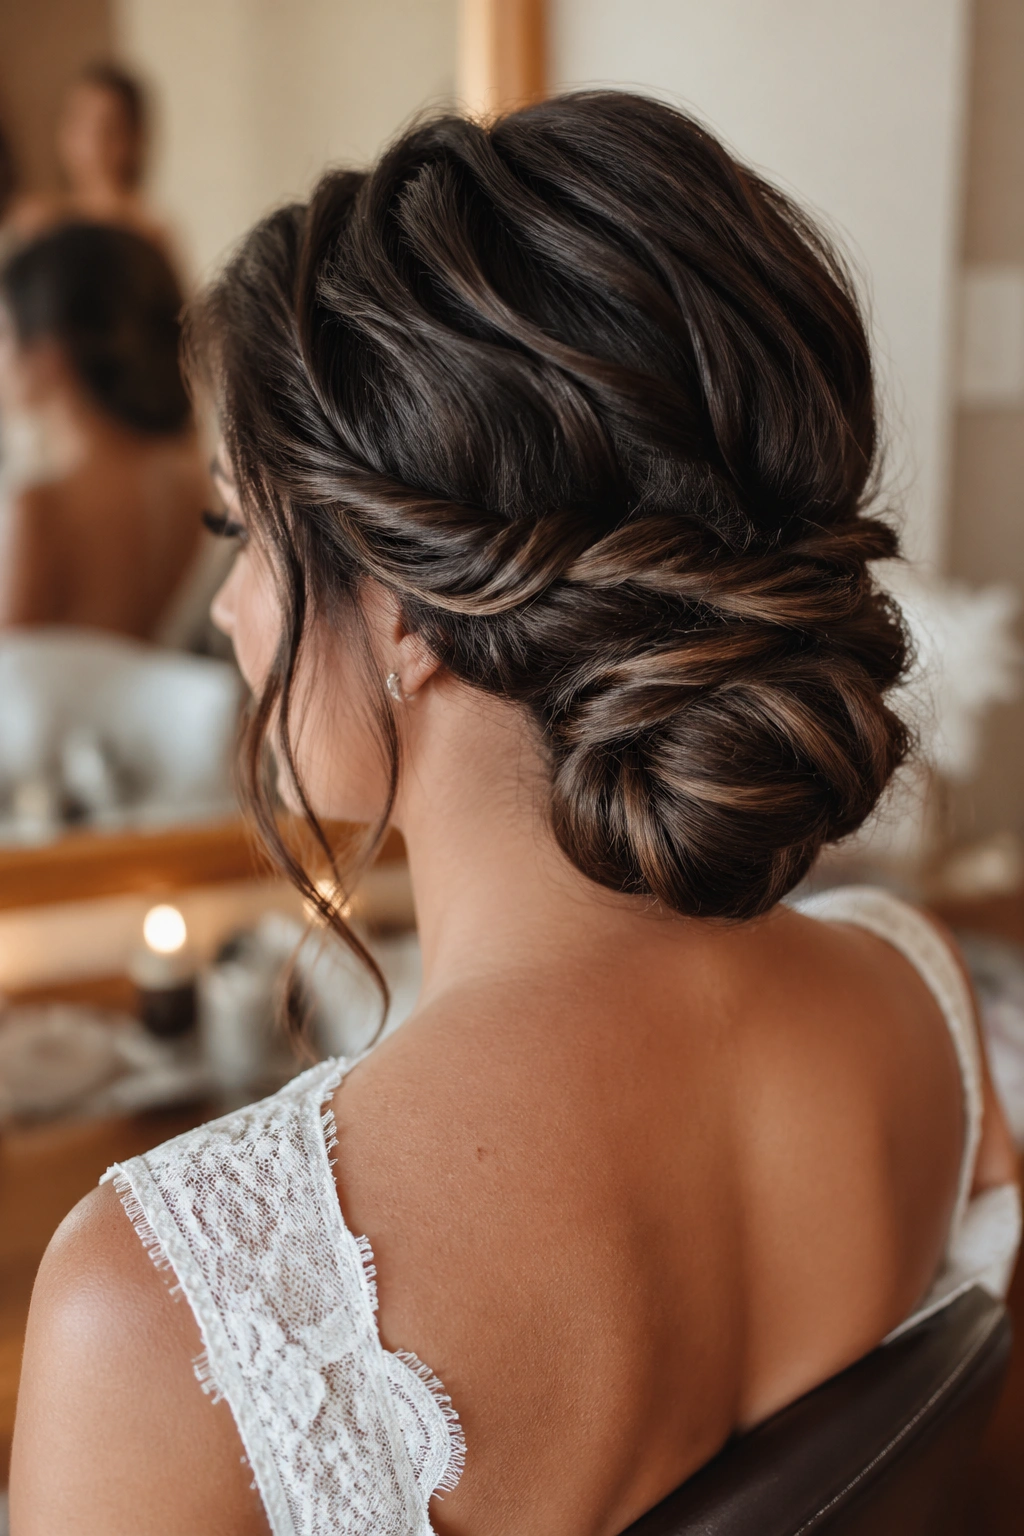
Thick hair can be a blessing and a headache. This style handles both. Split the hair into two sections, twist each one loosely, then coil them together into a bun at the nape. The double twist keeps the weight distributed, so the bun doesn’t collapse halfway through the night.
A few useful details:
- Use two medium elastics, not one large one.
- Pin through the twists, not just the outer surface.
- Leave the bun low if the hair is very dense.
- Let the waves stay visible at the top so the style doesn’t feel too packed.
It’s one of the easiest ways to make thick, wavy hair behave without fighting it into a tiny shape.
15. Side Bun with a Decorative Comb
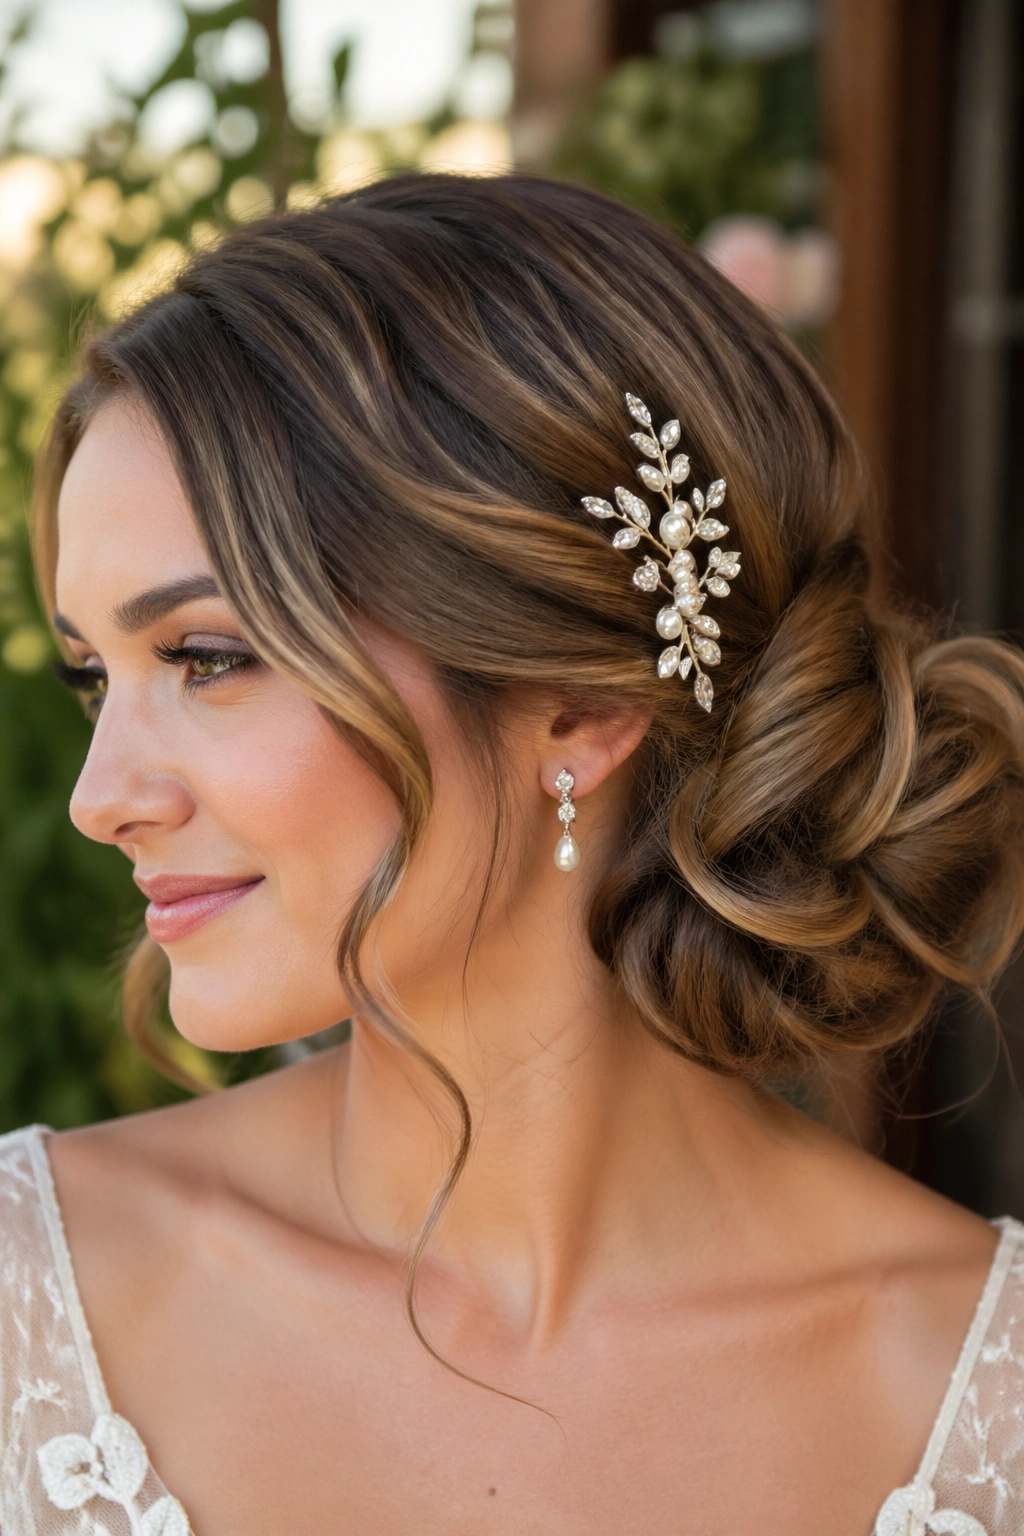
A side bun gives you a little movement without needing a lot of extra styling. The bun sits just behind one ear, which creates a nice line for a decorative comb, especially if the comb has pearls, crystals, or a small floral detail. Keep the bun soft enough that the accessory still stands out.
This style is especially nice with off-the-shoulder dresses. The exposed shoulder balances the bun, and the side placement keeps the profile interesting from every angle. If your hair is naturally wavy, skip heavy brushing after curling. A bit of visible texture makes the whole thing feel lighter and more human.
16. Braided Mohawk Updo
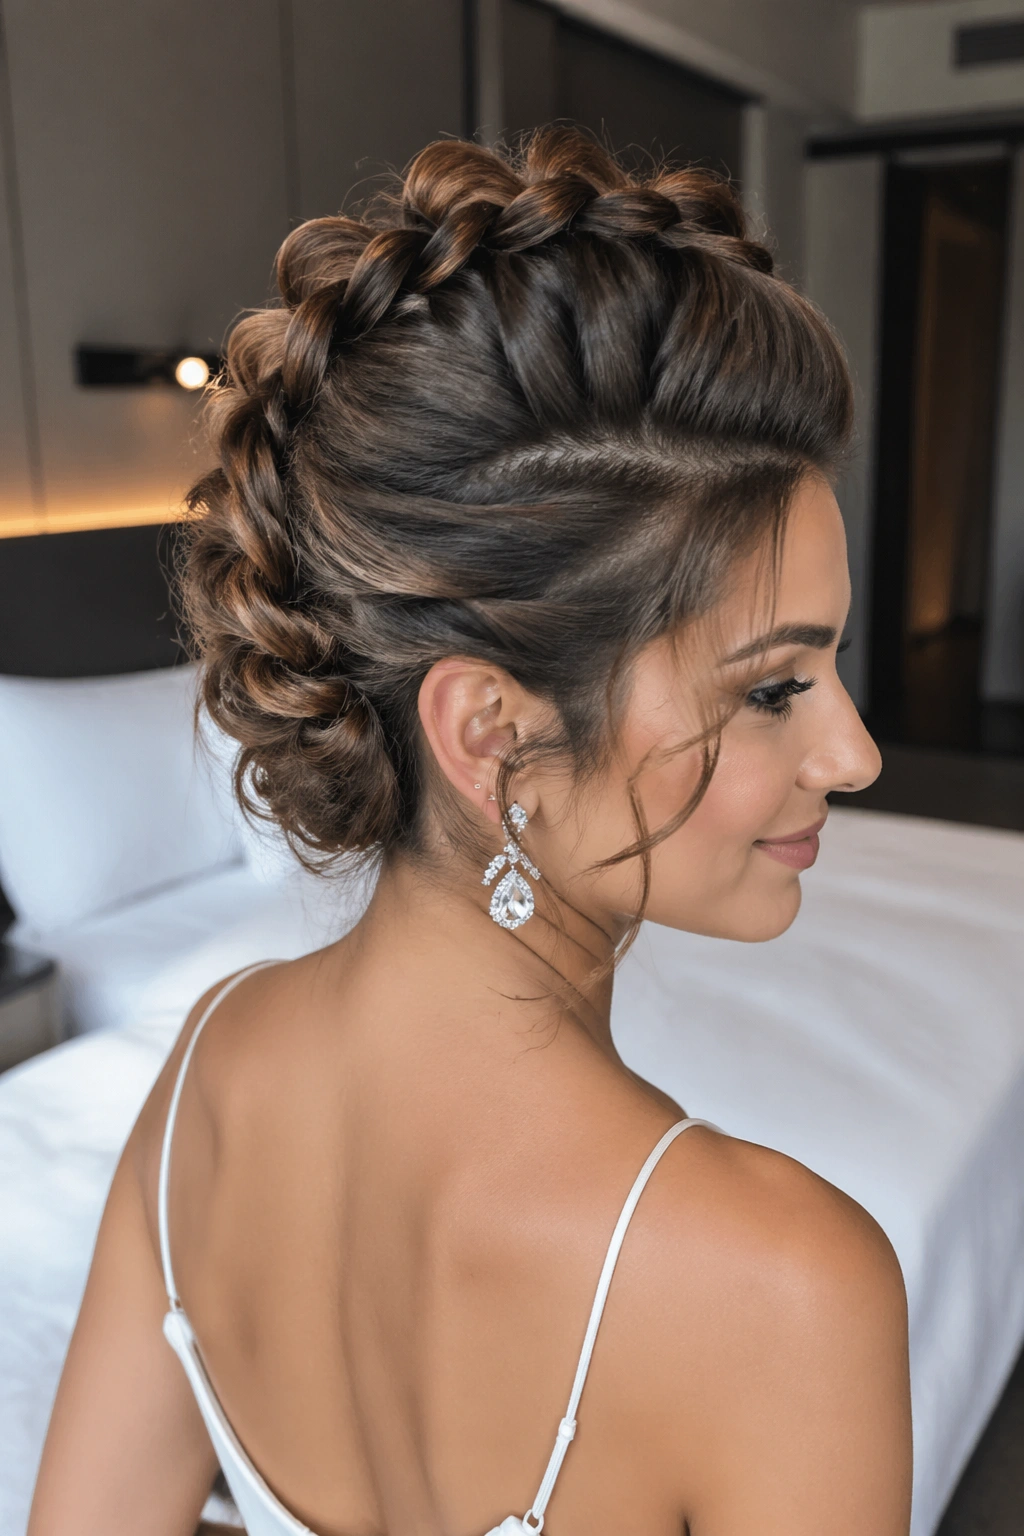
A braided mohawk updo sounds bold, and it is, but it does not have to feel hard. The braid runs down the center, while the sides are pinned back into soft waves. That gives you height at the top without a tower of teasing.
This is one of my favorites for guests who want something with edge. It also works nicely for brides who like a sharper dress shape or a stronger neckline. Keep the braid loose and slightly rounded instead of tight and flat. The contrast between the center braid and the softer sides is what gives it its charm.
17. Rolled Chignon with a Center Part
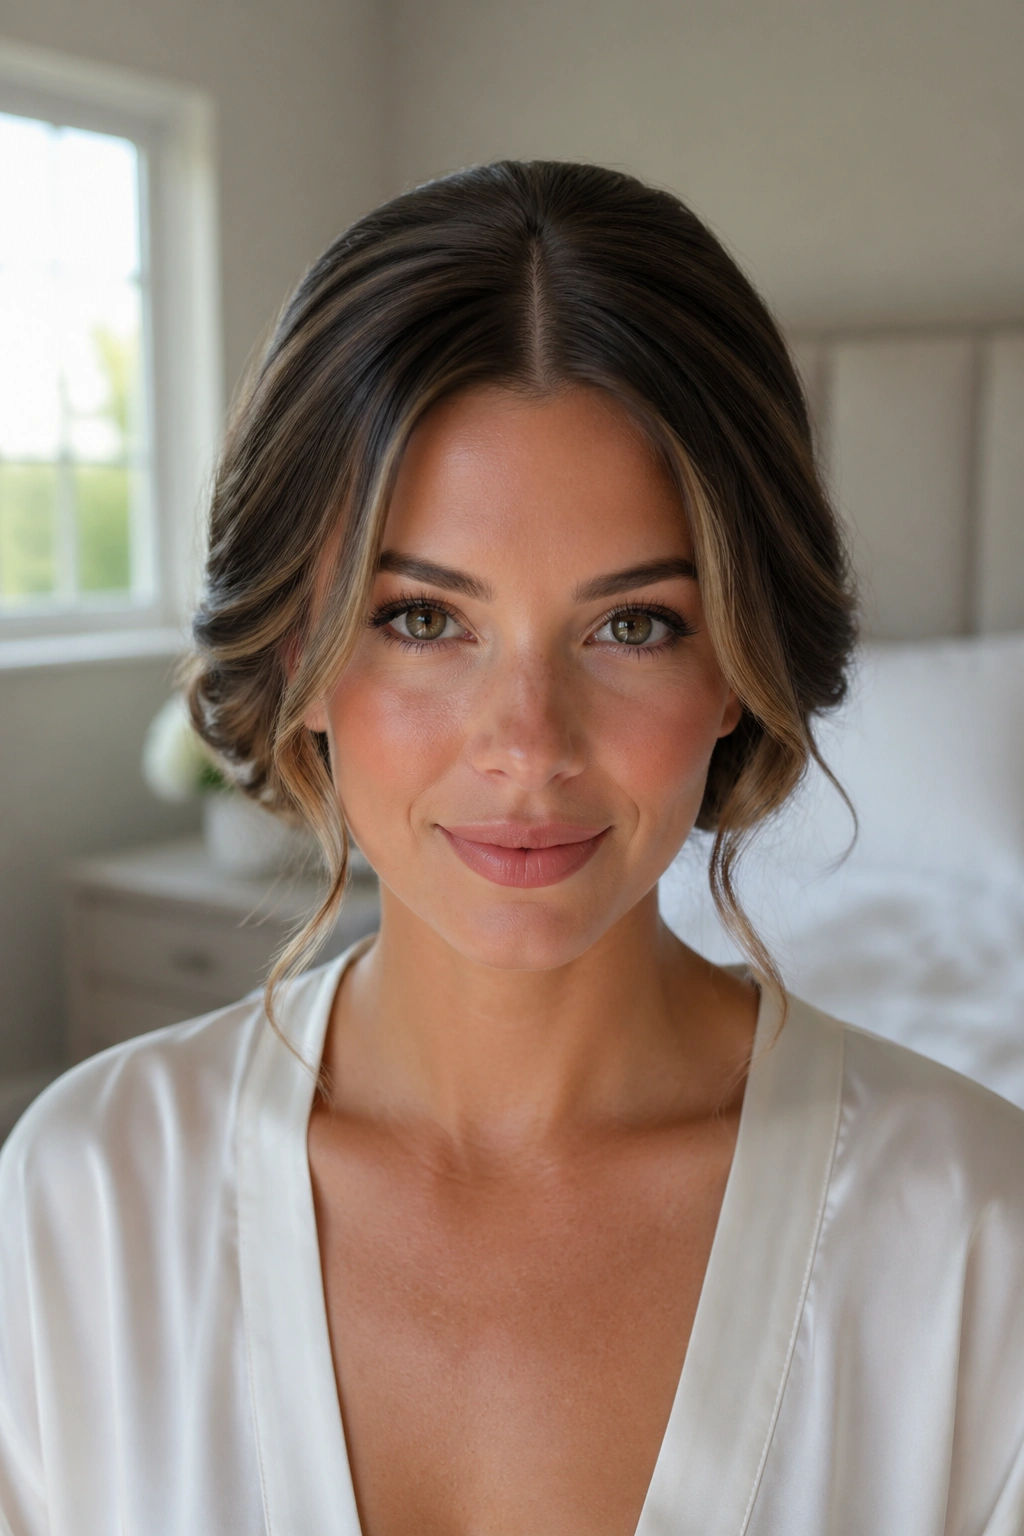
A center part can make a wedding updo look calm and modern. Instead of hiding the part, this style keeps it visible, then rolls the hair inward on both sides into a low chignon. The symmetry is clean, but the waves keep it from feeling severe.
It’s especially useful if you like a little face framing but don’t want loose pieces hanging everywhere. The front stays neat, the back stays low, and the finished shape looks balanced in photos. If your hair is fine, add a tiny bit of padding inside the roll. Not much. Just enough to keep the chignon from collapsing.
18. Faux Bob Updo with Soft Waves
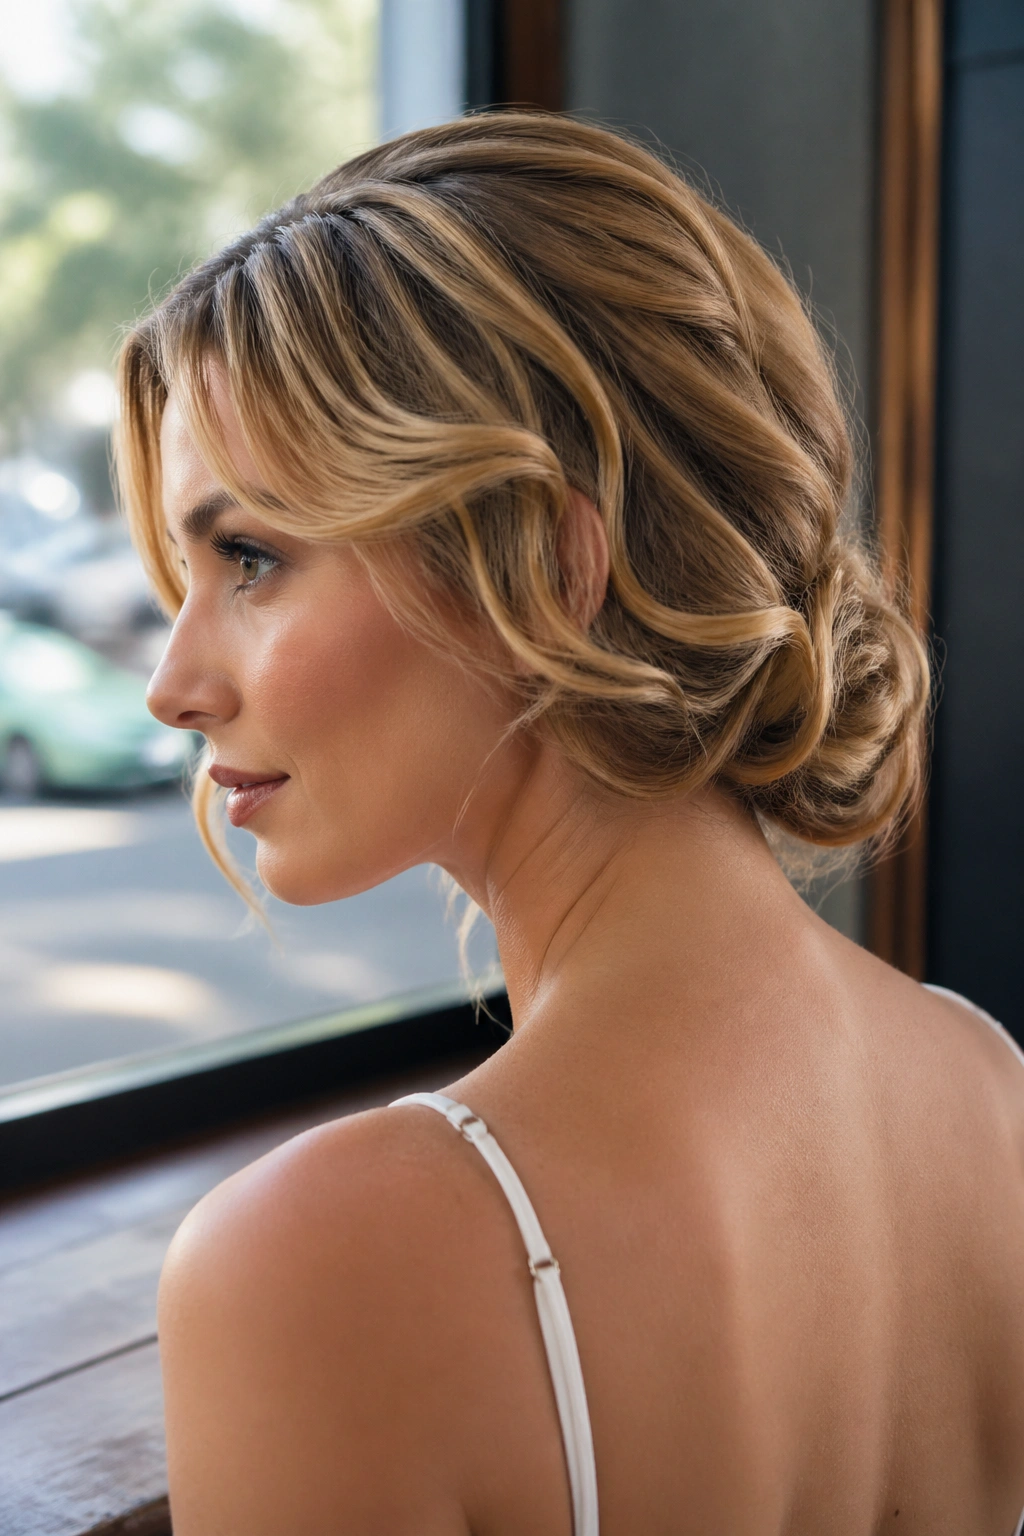
What if you want short-hair energy without cutting anything? The faux bob is the answer. Tuck the ends under at the nape, pin them in place, and let the top lengths sit just above the collar or jawline. When the waves are soft, the style looks romantic instead of theatrical.
Who Should Try It
This works well for medium-length hair, especially if the dress has a detailed back and you want the hair off it. It also flatters guests or bridesmaids who want a polished shape without spending forever in the chair.
The ends should fold under in a gentle curve. If they look too blunt, the illusion breaks. A few bent pieces at the front help the style read as intentional, not accidental.
19. Rope-Braid Bun for Medium Hair
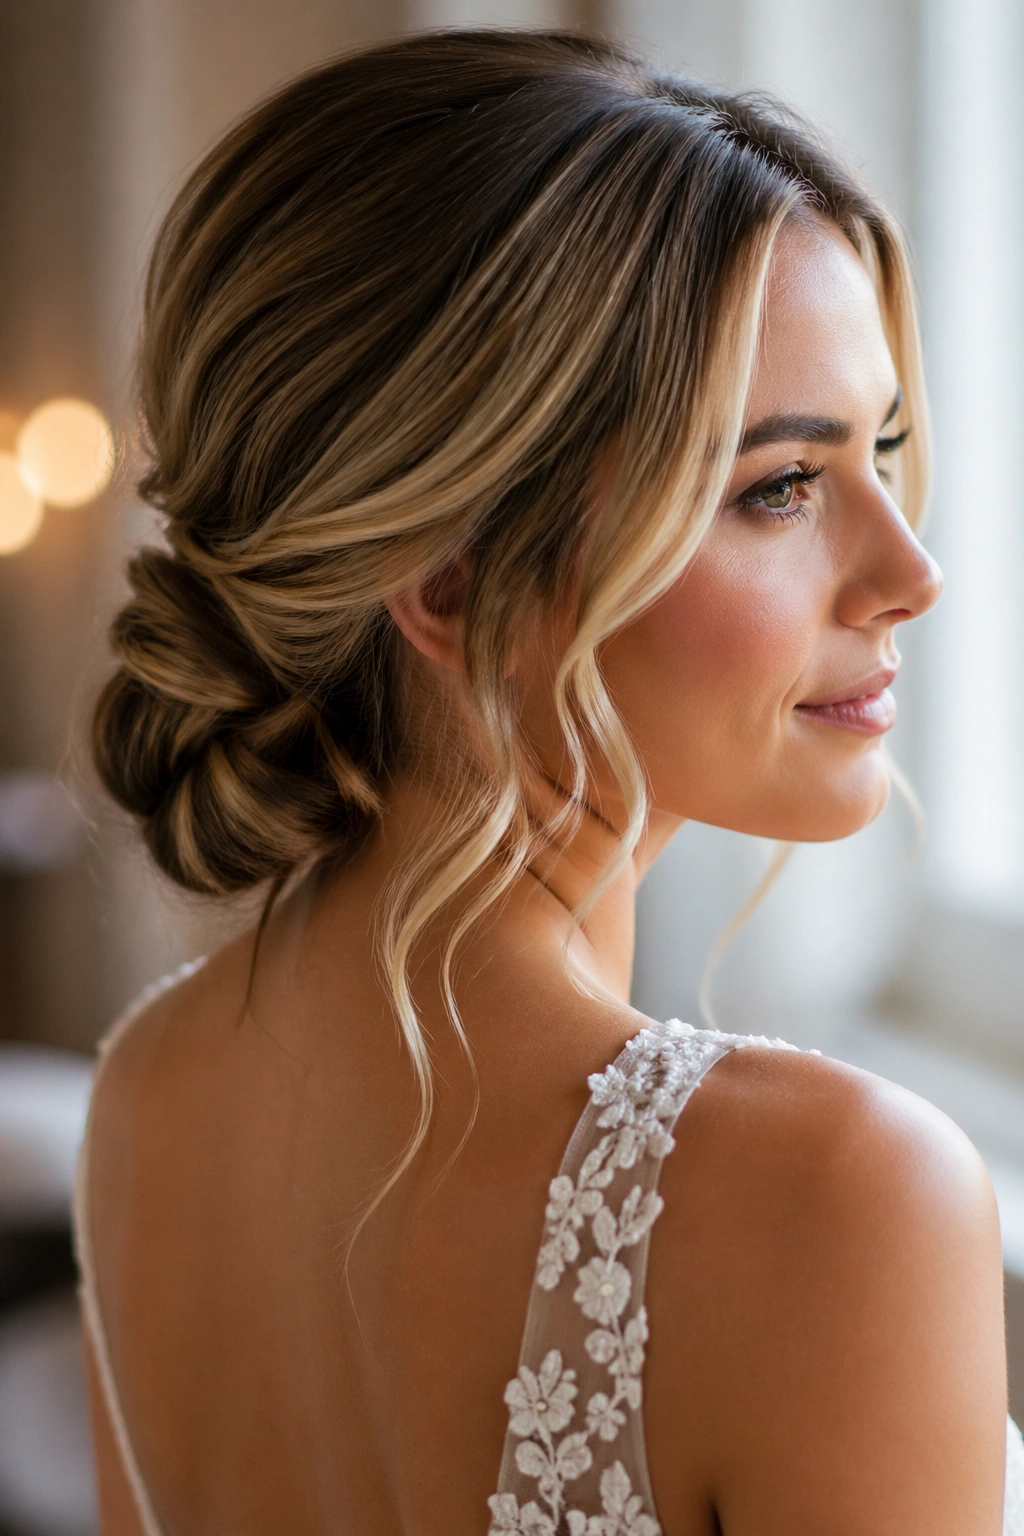
A rope braid uses two twisted sections instead of three woven ones, and that tiny difference changes the feel of the whole style. It looks a little sleeker than a regular braid, which makes it useful when the hair is layered or not especially long. Wrap the rope braid into a bun, and you get texture without a lot of bulk.
Unlike a traditional braided bun, this one tends to stay neater at the edges. That matters if the wedding is warm or the hair is fine and prone to puffing up. Keep the twists even, and don’t over-pull them after wrapping. The braid should look clean, not stretched to the point of breaking apart.
20. Floral-Pinned Low Bun
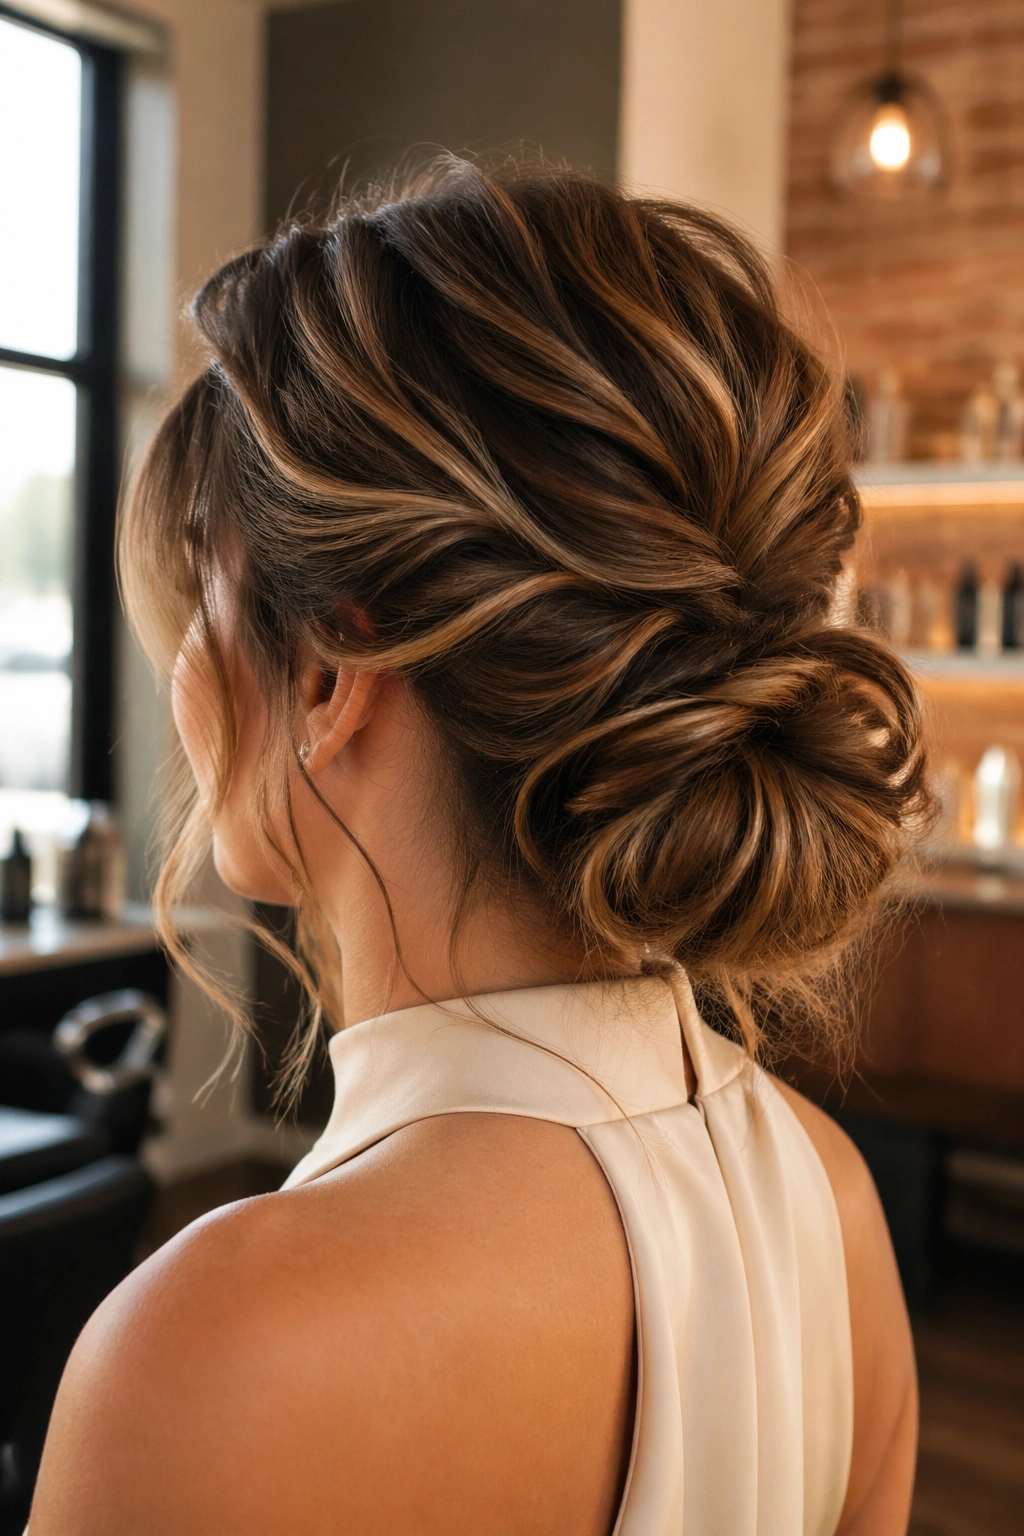
Fresh flowers can look beautiful in hair, but the placement matters more than the bloom type. A low bun with a few floral pins or tiny buds tucked into one side feels soft and natural, especially when the waves around the face are left loose. Too many flowers, and the style turns crowded fast.
I like this one for outdoor ceremonies or garden settings because the bun sits low and the flowers read as part of the hairstyle, not an afterthought. Use small stems or pins with short inserts so the bun doesn’t get heavy. The hair should still be the main shape, with the flowers acting like a finishing line.
21. Asymmetrical Knot for Shorter Hair
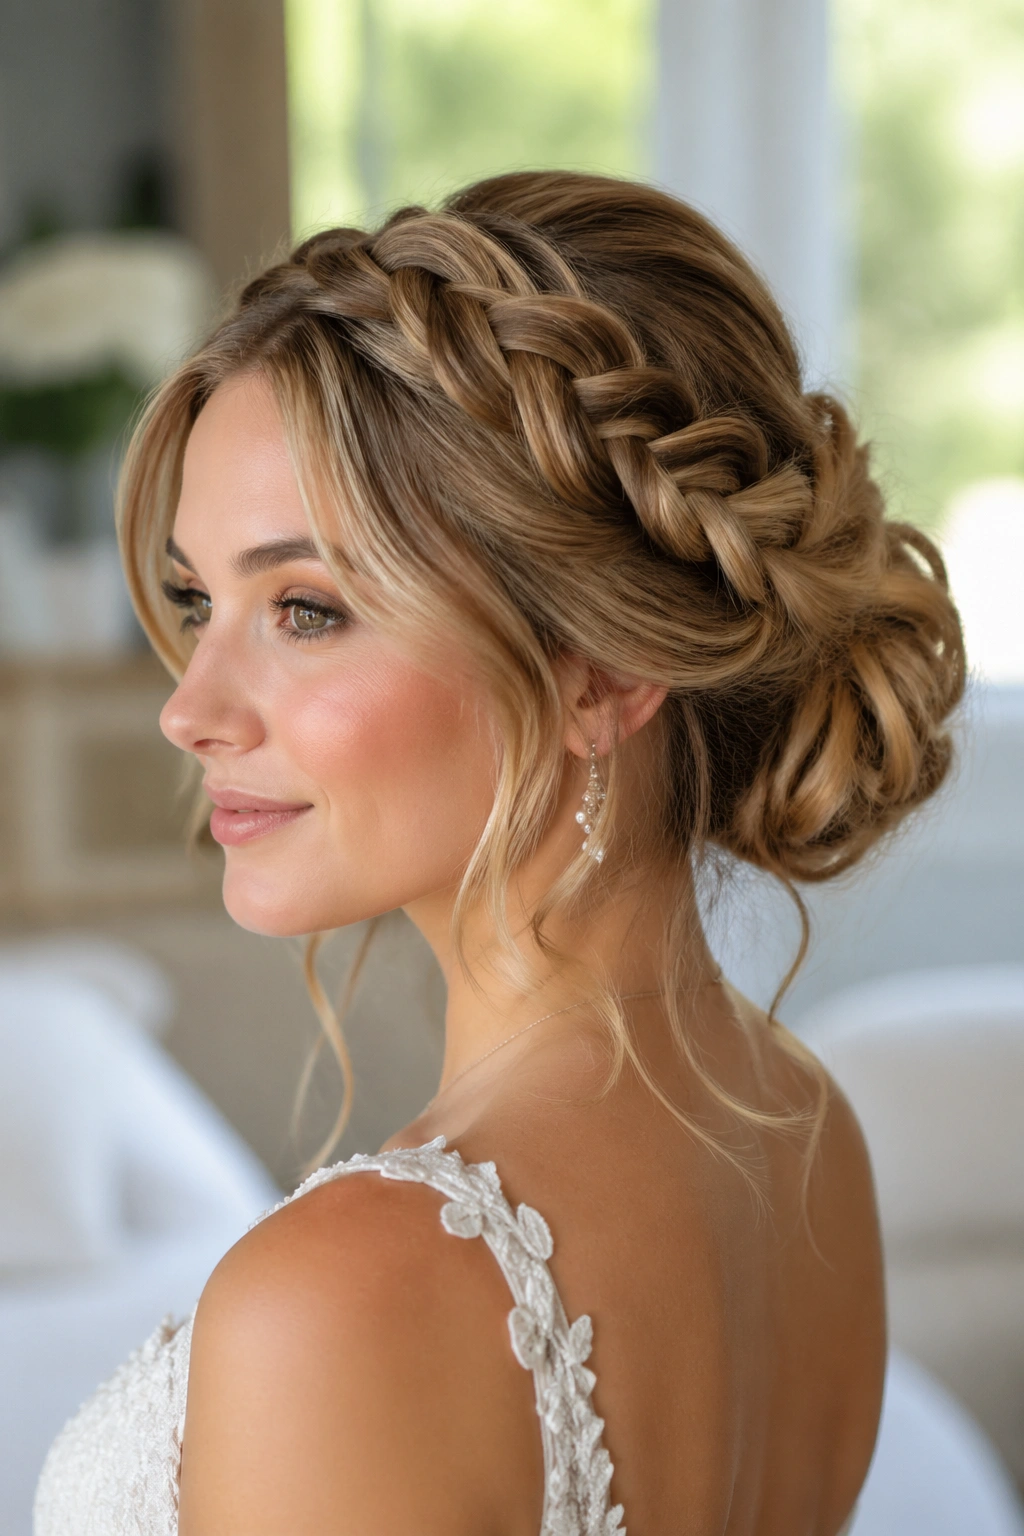
Shorter hair does not need to be left out of wedding updos. An asymmetrical knot can be built from chin-length or shoulder-length hair by twisting one side tighter than the other and letting the wavy ends tuck in at different points. The result feels modern and a little unexpected.
The key is not to fight the length you have. Use the shorter pieces around the face as part of the shape instead of trying to hide them. A slight side part helps the knot sit better, and small pins work better than large ones because they disappear more easily. If you have a layered cut, this style gives the layers a job.
22. Crown Braid with a Hidden Bun
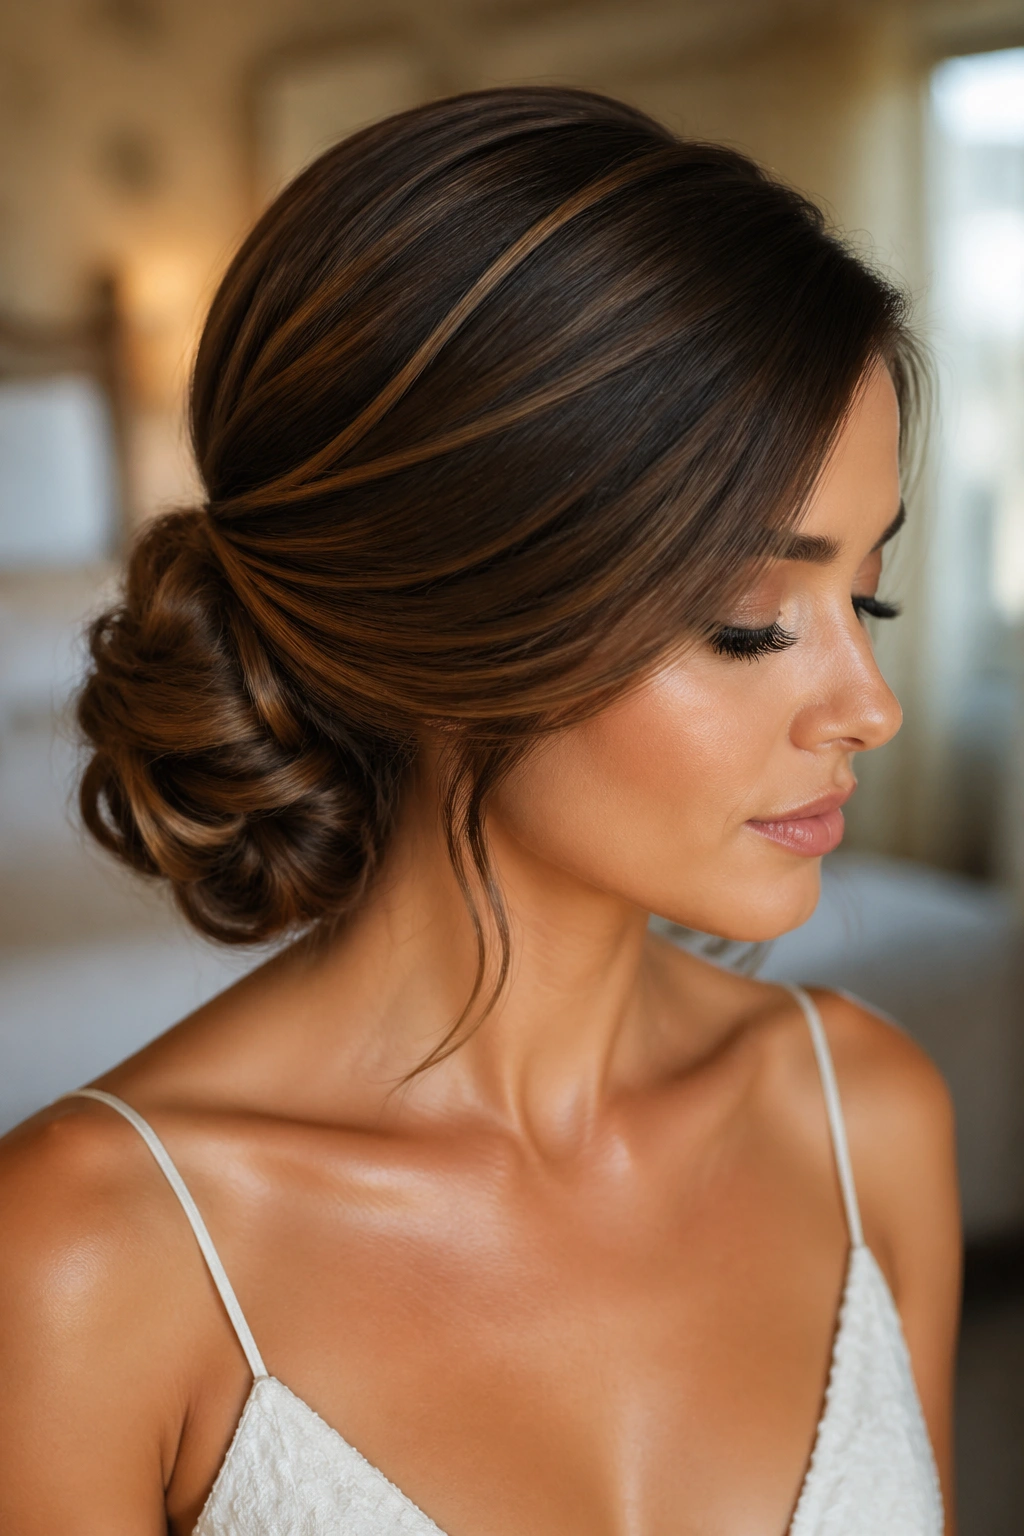
Does the braid need to be the star? Not always. In this style, the crown braid is only there to guide the eye into a hidden bun at the back. The braid frames the hairline, then disappears into the bun so the finished look feels soft and secure.
How to Keep the Braid From Puffing Up
If your hair is thick or very wavy, the braid can expand more than you want. Pinning it as you go helps keep the shape calm.
- Braid loosely, then pin every few inches.
- Keep the bun low and tucked under the braid.
- Use a light mist of spray before braiding, not after.
- Leave one thin wave near the temple if you want a softer front.
This one is lovely with lace veils because the braid creates a pretty line without covering the whole head.
23. Wavy Top Knot with Loose Ends
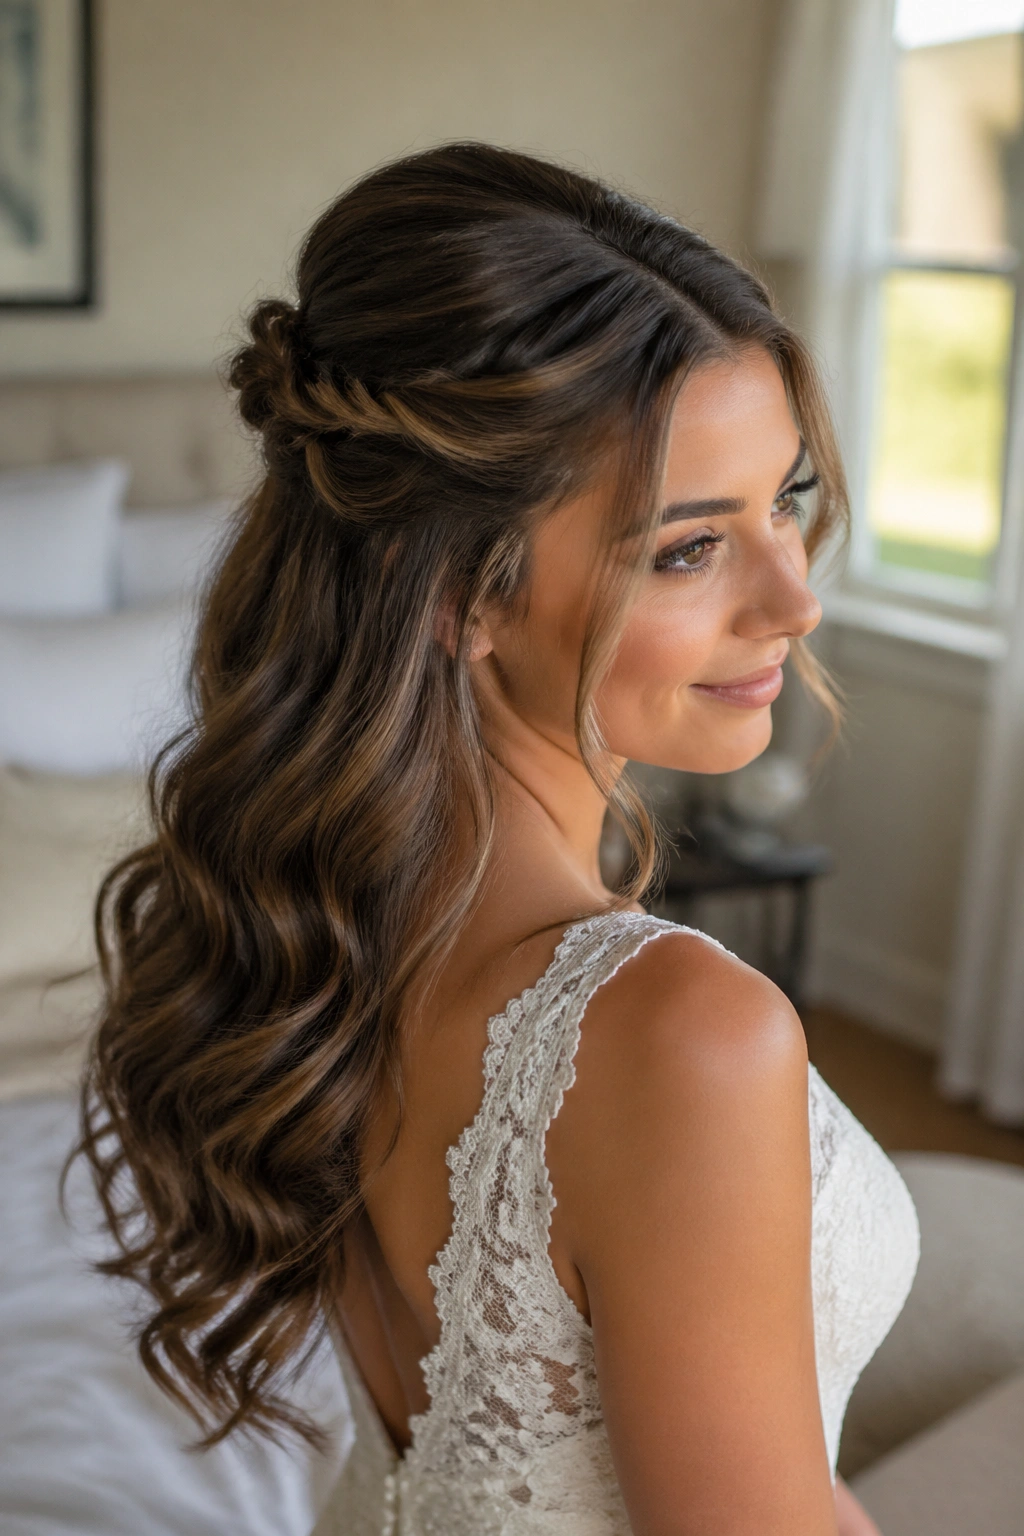
A top knot at a wedding sounds risky until you soften it. Keep the bun high, but leave a few waved ends out so it doesn’t feel gym-class casual. The lift at the crown is helpful if you want height in photos or if the dress has a very simple silhouette that needs a bit of structure on top.
The trick is to keep the knot round and controlled. A lopsided top knot can read careless fast. Wrap the hair once, then pin the ends underneath instead of stuffing them into the center. The loose side pieces should stay soft and gently curved, not curled into tight ringlets.
24. Half-Up Low Bun Hybrid
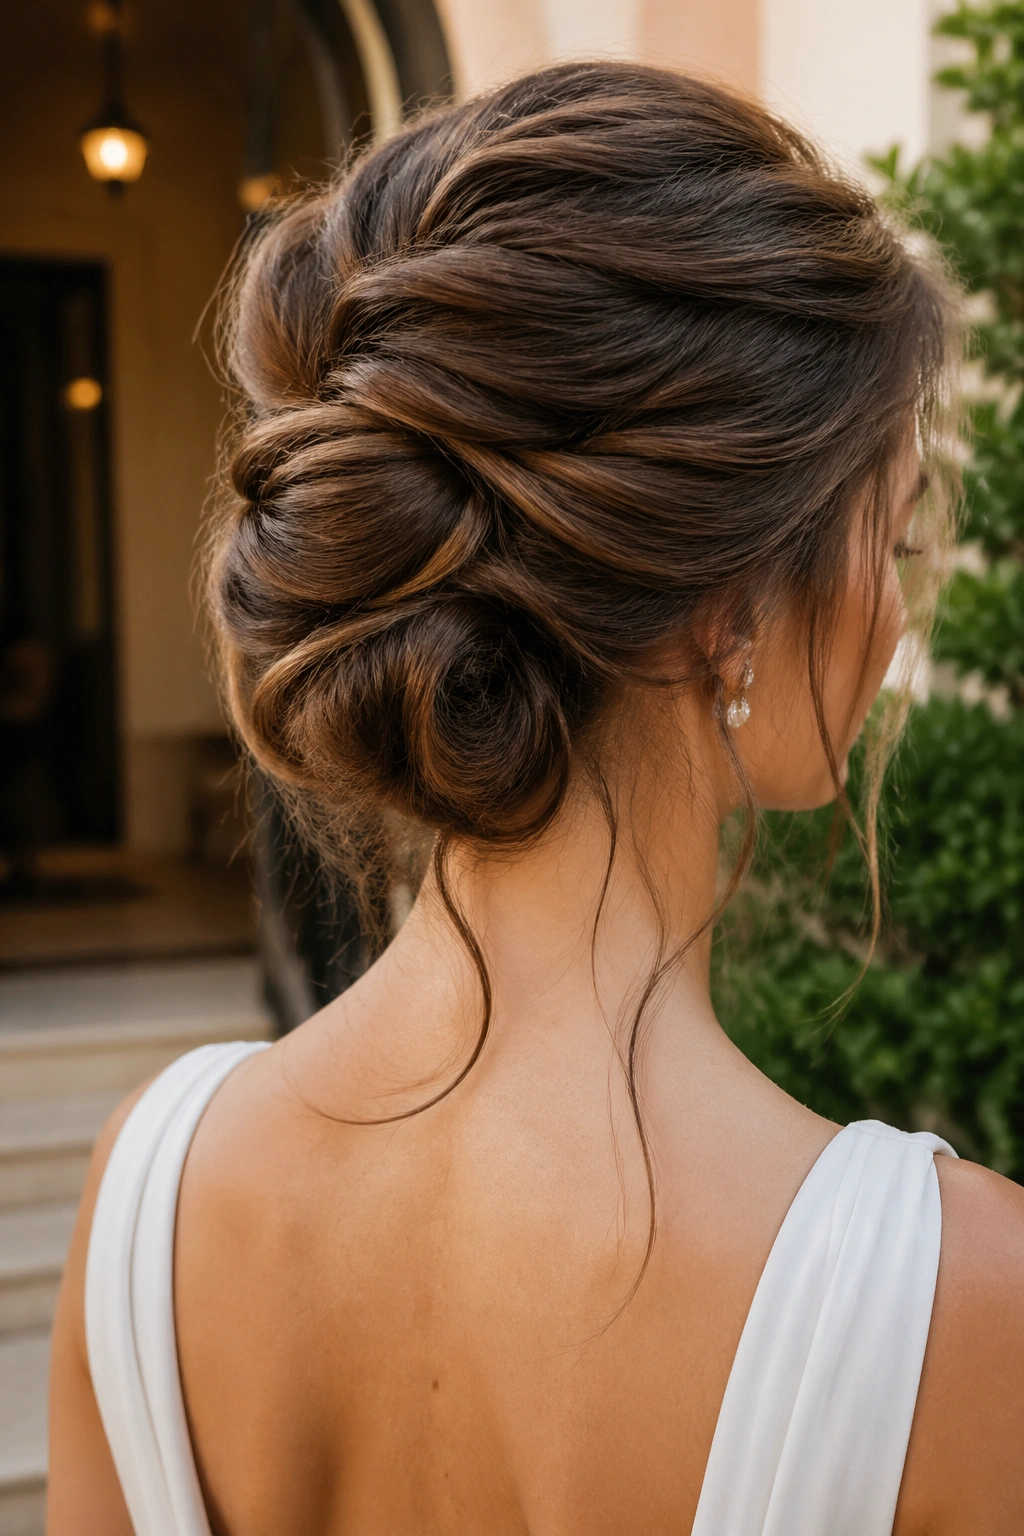
This one sits between a half-up style and a full updo, which is exactly why it works. Gather the top half, twist it back, and let it feed into a small low bun while the rest of the waves stay down. It gives you the security of pinned hair without losing the length completely.
I like it for bridesmaids, rehearsal dinners, and anyone who wants to keep the style simple but still wedding-ready. It also photographs well from the side because you can see both the bun shape and the wavy lengths. If your hair is very straight, curl only the lower section and the face-framing pieces; the style reads softer that way.
25. Ribbon-Tied Low Bun
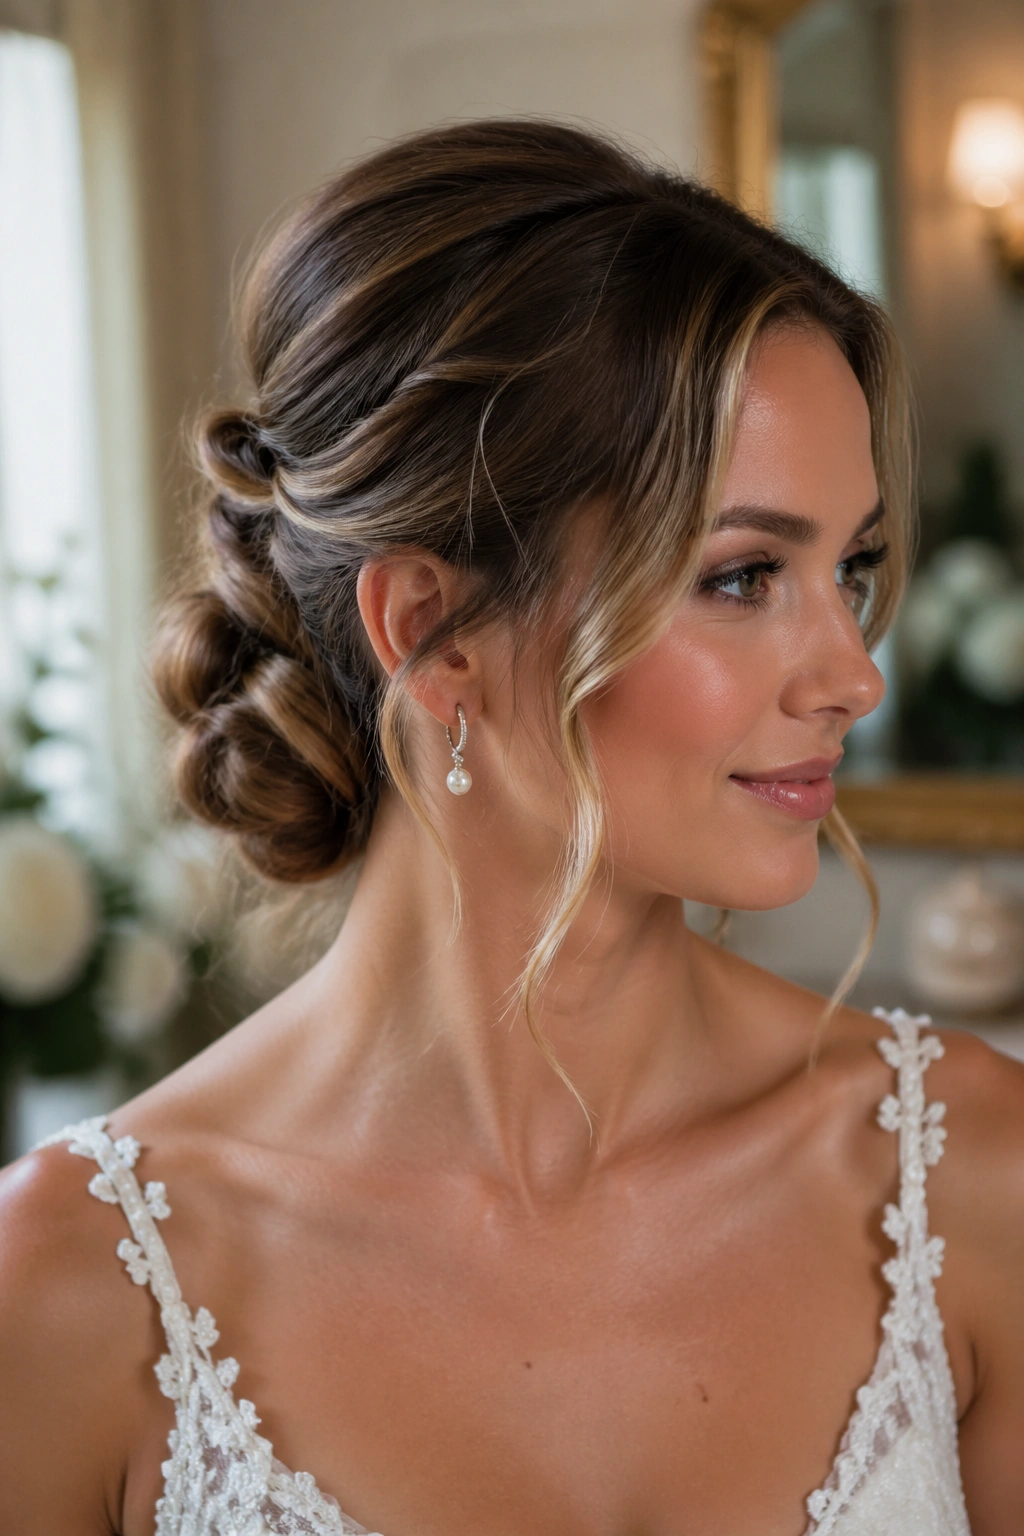
A ribbon can be a nice fix when you want the hairstyle to feel finished without adding too many pins or accessories. Tie a satin ribbon around the base of a low bun, then let the tails drape a few inches down the back. The ribbon should look like part of the outfit, not a craft project.
Compared with a plain bun, this version gives you a little movement at the back and a softer line around the nape. Choose a ribbon that matches the dress or shoes, but don’t force an exact match. Slight contrast usually looks more natural. If the hair is wavy, let a few pieces stay loose near the ears so the ribbon doesn’t do all the work.
26. Twisted Halo Bun
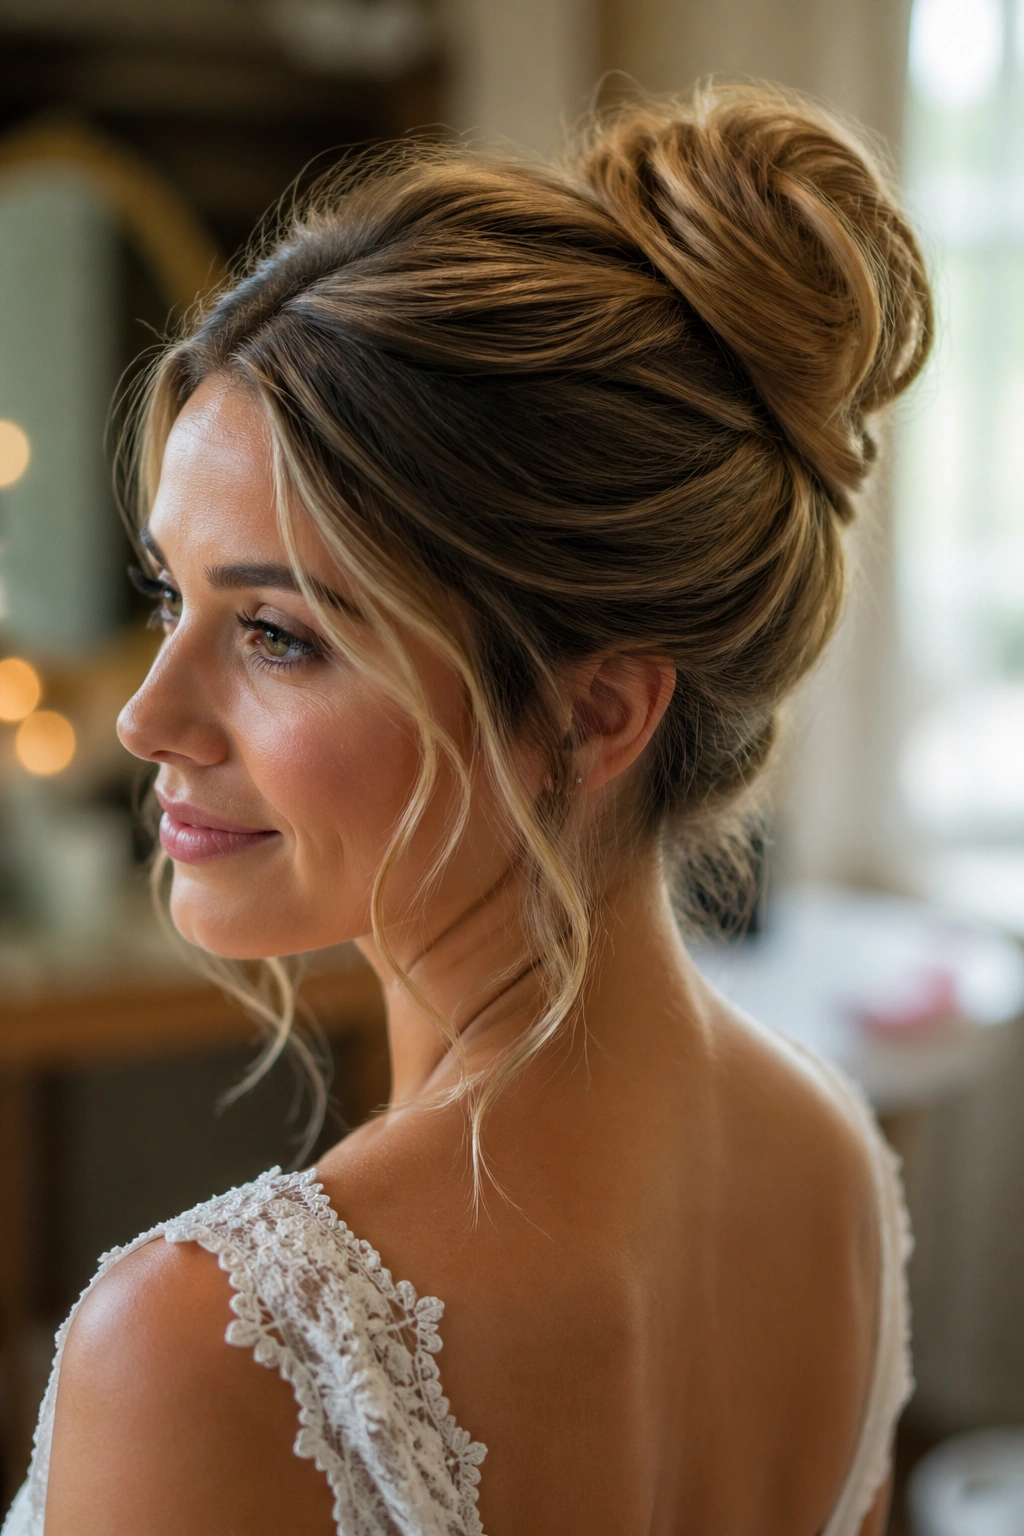
A twisted halo bun wraps hair around the head in a soft loop before tucking it into a bun at the back. It sounds complicated. It isn’t, once you separate the hair into sections and twist each one loosely before pinning. The result looks graceful and keeps the hairline interesting.
This style is especially nice when you want the front to stay controlled and the back to stay low. It’s also a good answer for hair that grows puffy around the crown, because the twists help hold everything in place. Leave the twists slightly uneven so they don’t look pasted on. The shape should feel soft enough to breathe.
27. Curved Nape Roll
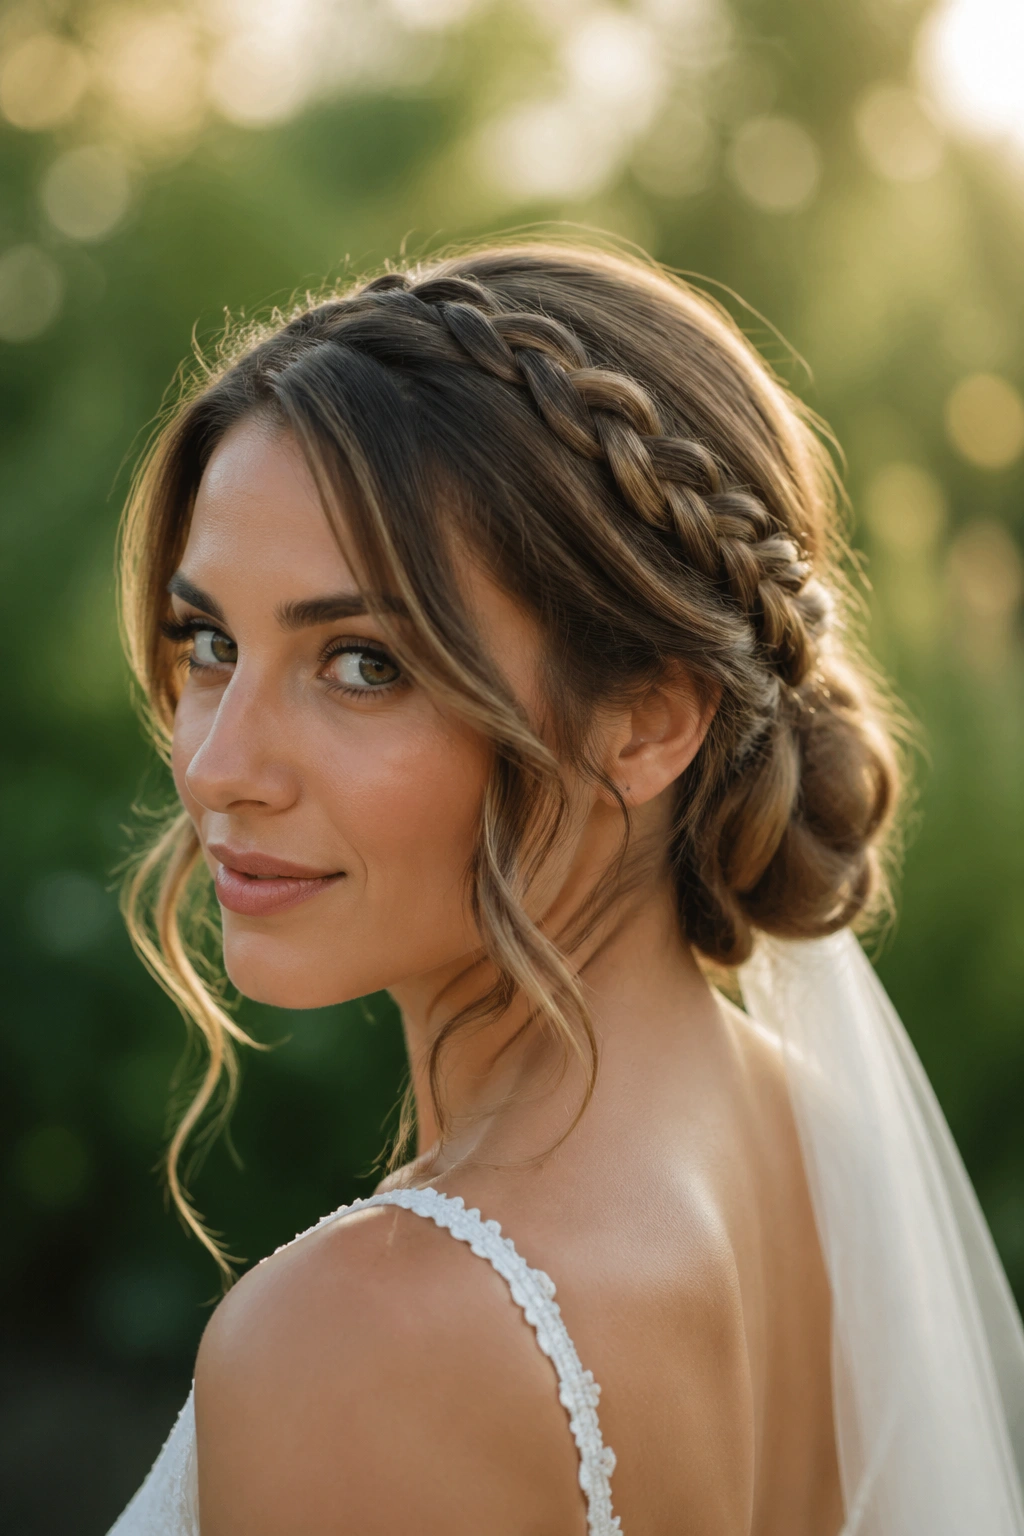
A curved nape roll is one of those styles that looks almost deceptively simple. Hair is smoothed at the crown, then rolled inward along the nape in a gentle arc instead of a tight cylinder. Because the curve follows the shape of the head, it feels elegant without seeming stiff.
This is a strong choice for minimalist dresses and lower necklines. The hair stays off the shoulders, but the wave pattern still shows through the roll if you don’t brush it flat before pinning. I’d call this a quiet style, not a dull one. There’s a difference, and it matters.
28. Pinned-Up Waves for Fine Hair
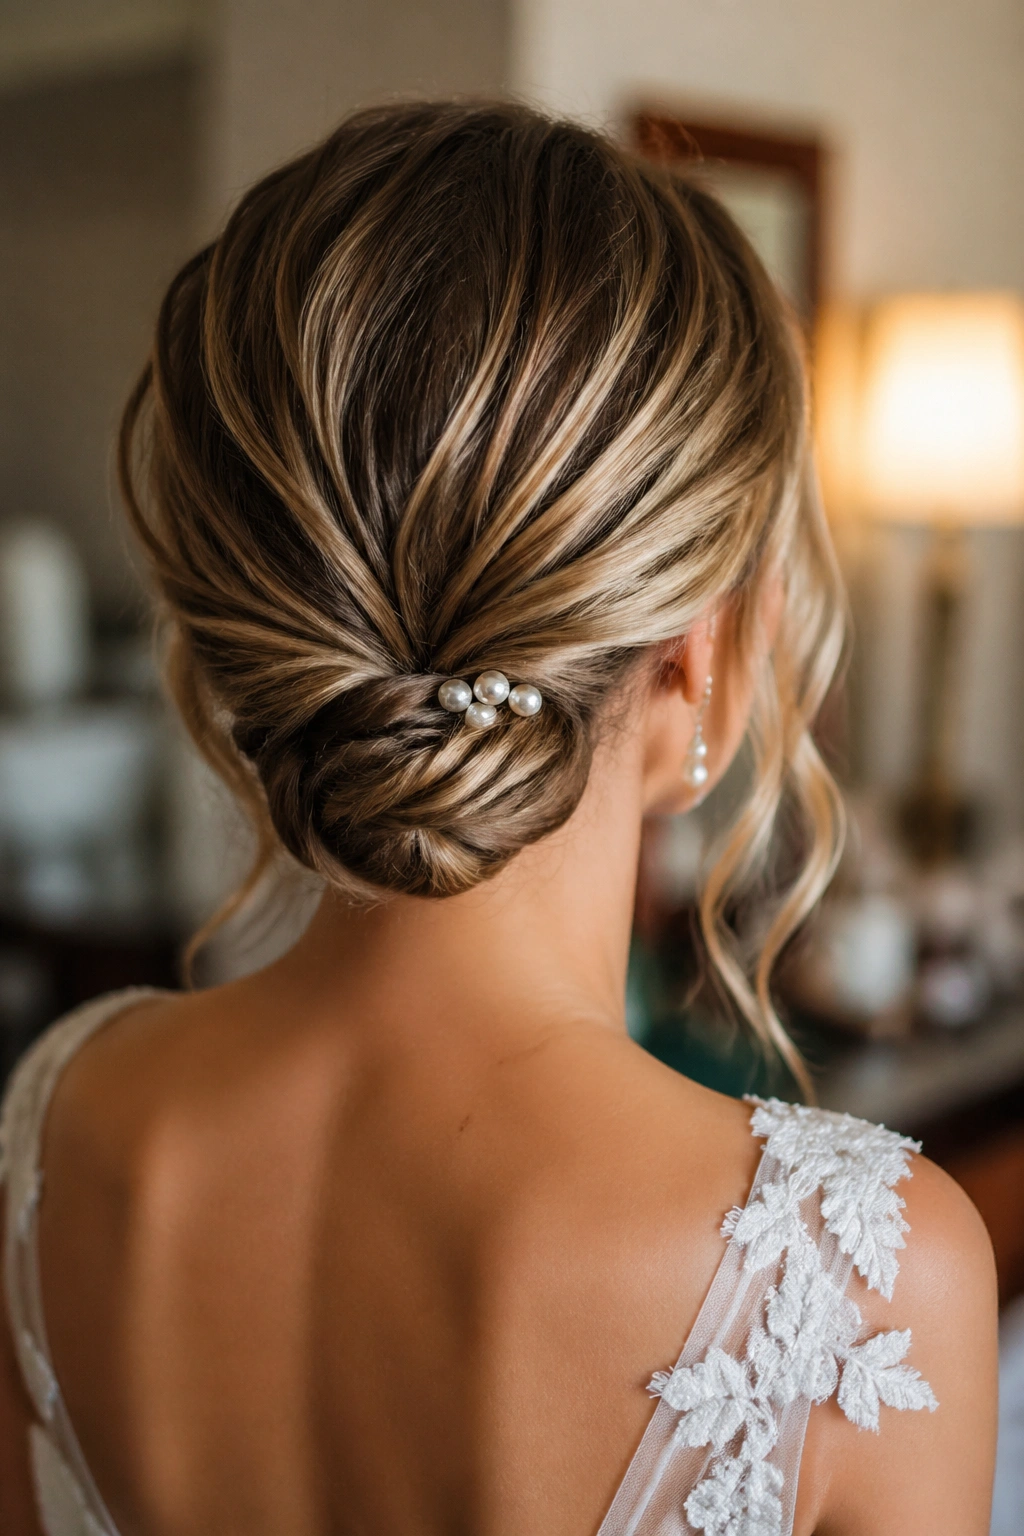
Can fine hair hold a wedding updo? Yes, if you stop asking it to do too much at once. Pinned-up waves work because they use the hair’s own movement instead of fighting for a dense bun. Curl in small sections, pin them in overlapping loops, and let the style look airy on purpose.
The Trick
Backcombing just at the roots can help, but don’t overdo it. Fine hair turns limp if you crush it with too much product, and then the style loses the airy look that makes it appealing.
- Use 1-inch sections when curling.
- Let each curl cool fully before pinning.
- Pin in a crisscross pattern for more hold.
- Finish with a flexible spray, not a hard shell.
This one is especially nice for short-to-medium lengths and brides who want volume without a lot of weight.
29. High Knot with Soft Side Pieces
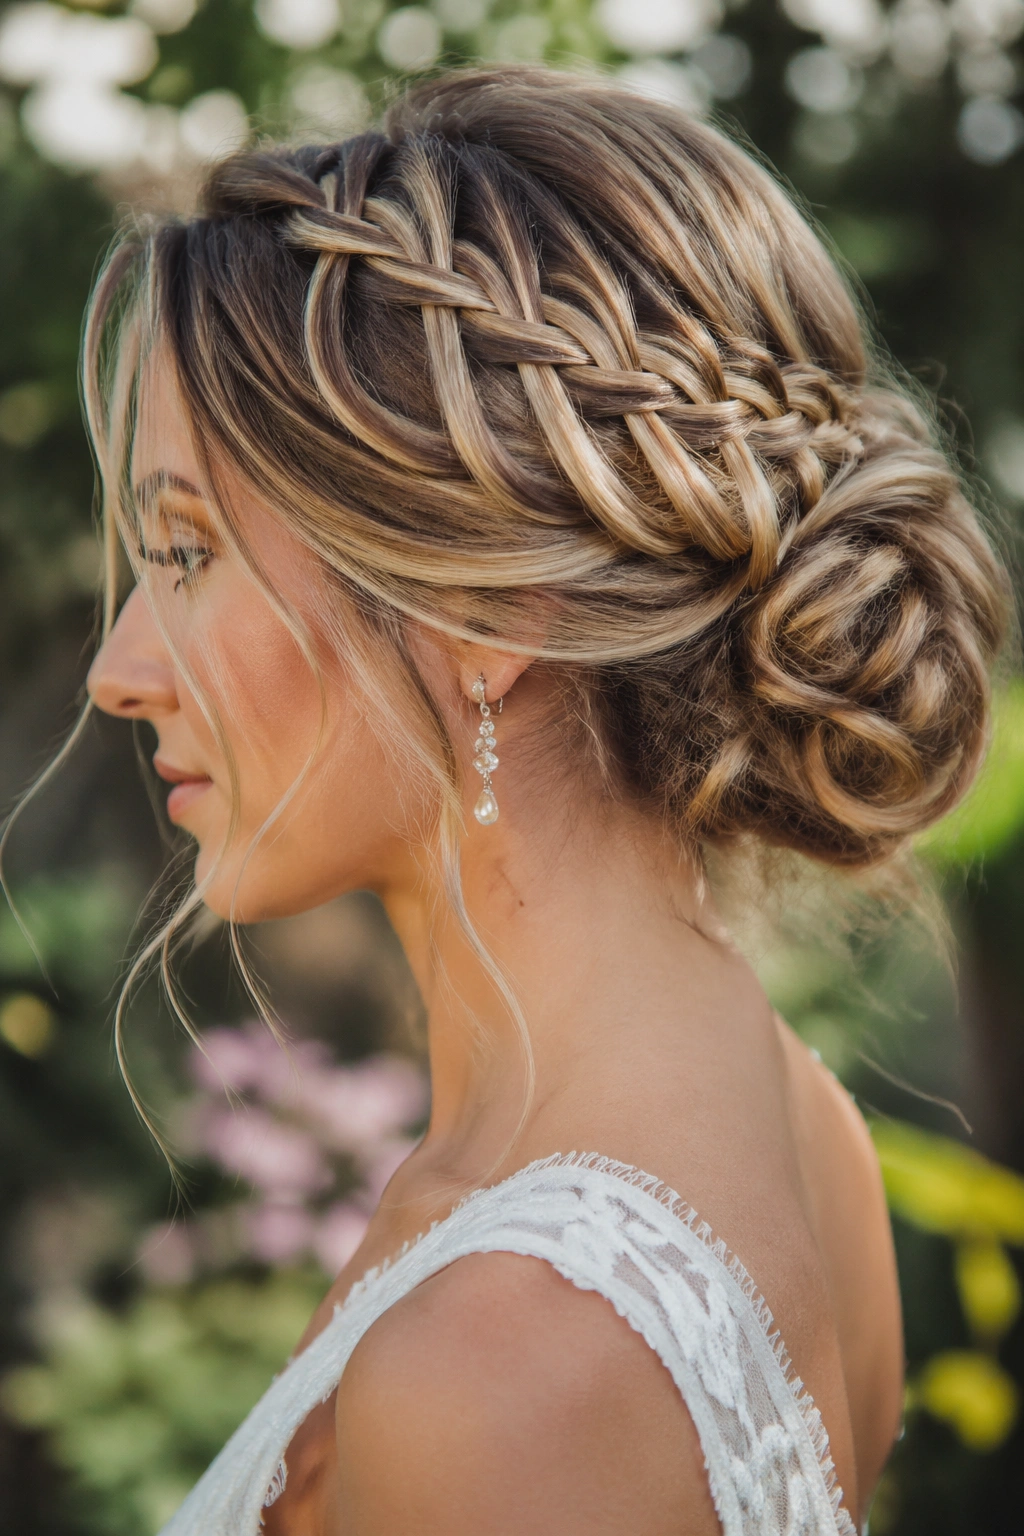
A high knot gives you lift and a long neck line, which can be a good thing when the dress is simple and the earrings are doing some of the visual work. The difference between a wedding knot and an everyday bun is in the edges. Leave the side pieces soft and slightly waved, and the style feels intentional rather than rushed.
It’s also a practical pick for dancing because the knot stays out of the way. Keep the base secure with pins placed under the bun, not across the surface. If your hair is thick, split the knot into two smaller loops and stack them. That keeps the shape from bulging in the wrong place.
30. Sleek Rooted Bun with Airy Waves
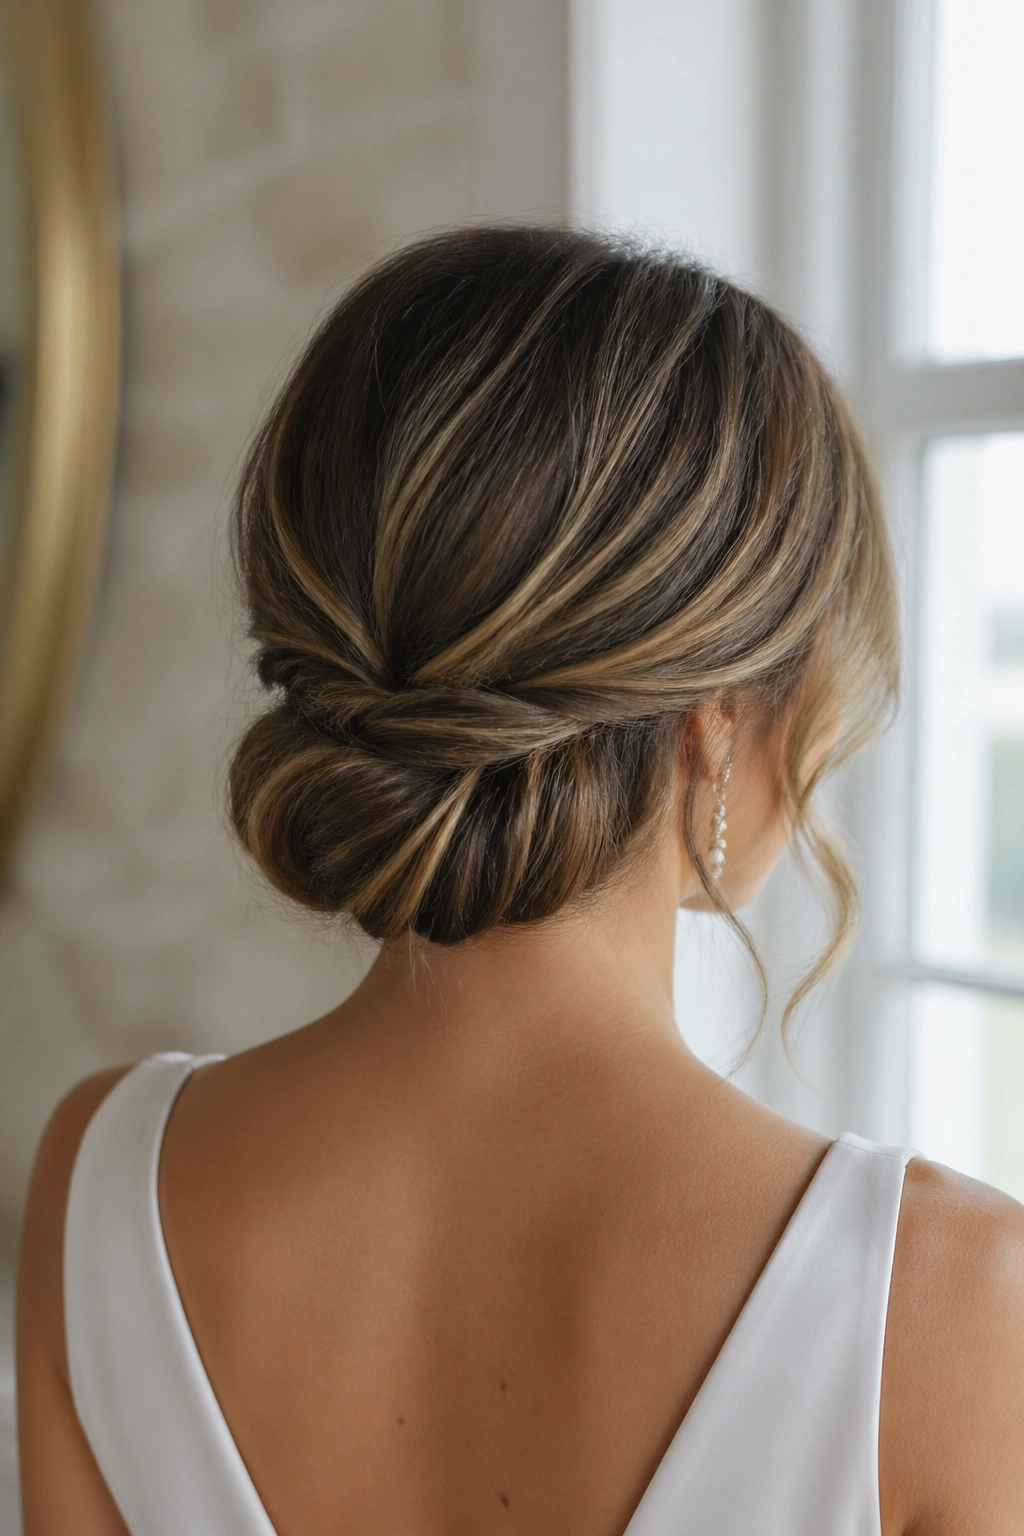
This is the style for someone who likes contrast. Keep the roots smooth and close to the head, then let the bun itself stay airy with a little wave showing through the wrapped sections. The crown looks tidy, which gives the whole style a cleaner line, while the bun keeps enough texture to feel soft.
I’d use this for a dress with a strong shape — square neck, corset top, clean satin, that kind of thing. The hair doesn’t compete with the outfit, but it still has movement. If you want the look to last, pin the bun in layers: base pins first, then decorative pins second. That keeps the airy finish from sagging by the end of the night.
Final Thoughts
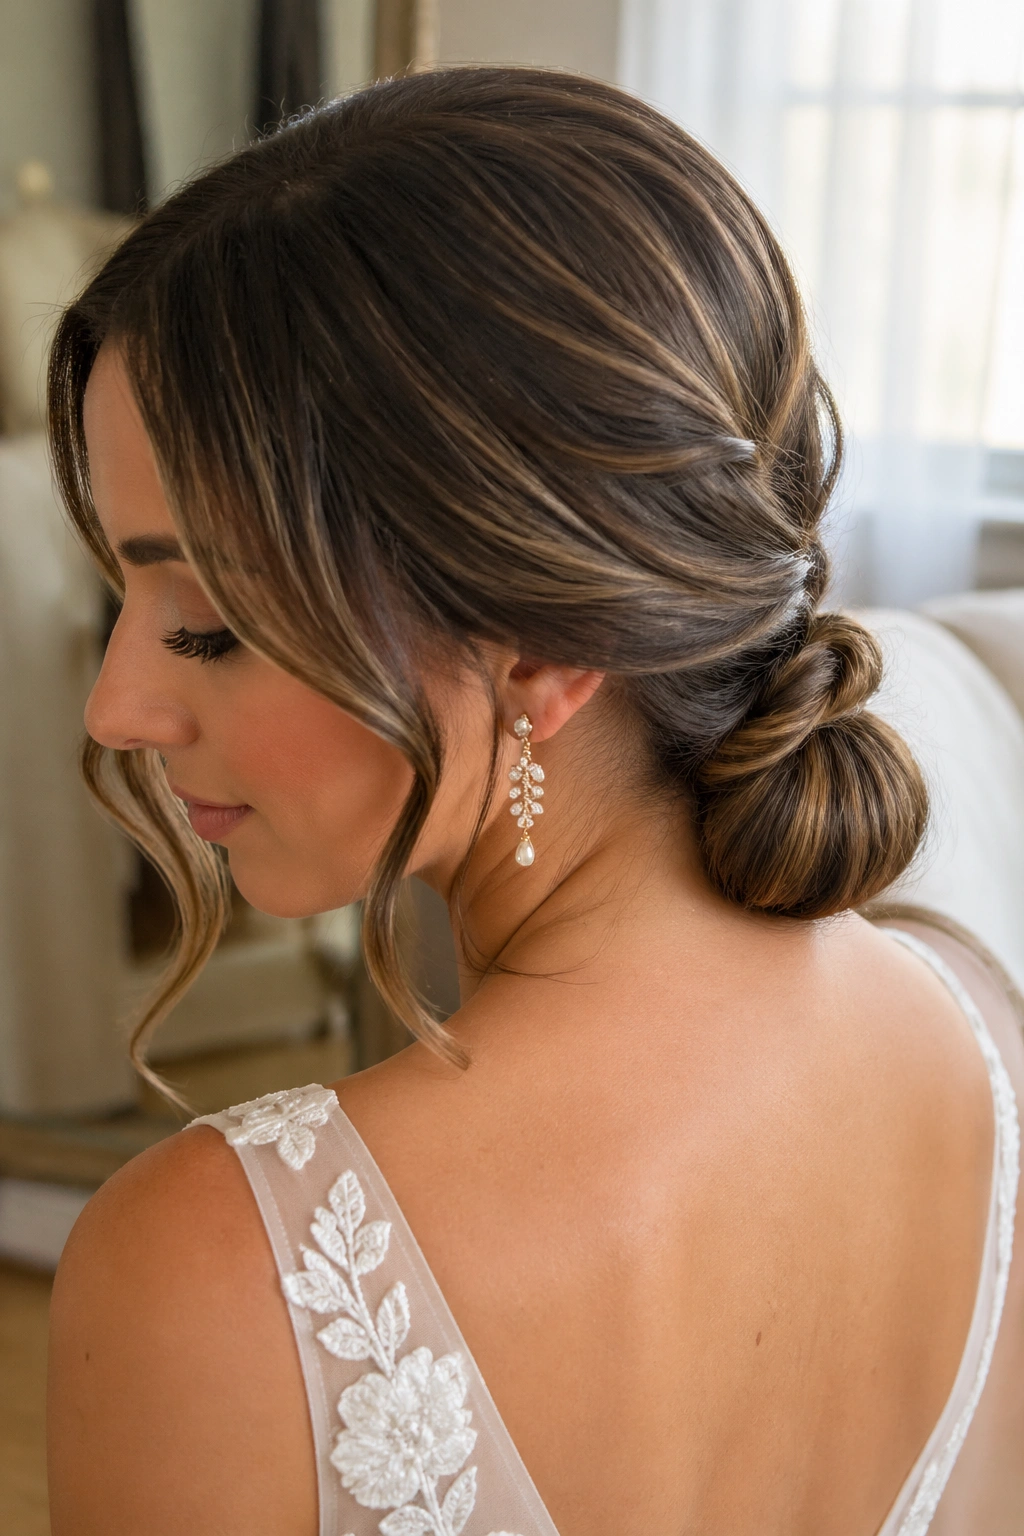
The best wavy wedding updos usually do two things at once: they hold, and they move. If a style gives you one without the other, it tends to feel off in person, even if it looks nice in a still photo. That’s why texture matters so much here.
A trial run is worth the time. So is checking the style from the back, the side, and under indoor lighting, because wedding hair can look different once the room changes and the pins start doing their job.
Bring extra pins. Bring a small spray. And if your hair already has a natural wave, let some of it stay visible. That’s often the part people end up liking most.
