



Oval faces can wear a shocking number of long wave styles, but that freedom can backfire if the shape isn’t doing any real work. A center part with soft bends reads calm and balanced. A heavy side sweep changes the mood fast. A blunt curtain of waves can make the whole look feel denser than it needs to be.
The sweet spot is usually pretty clear: keep movement around the cheekbones, jaw, and collarbone, then decide how much lift you want at the crown. Too much height on top can stretch an already balanced face. Too little movement near the front can make long hair hang like a curtain with no shape at all. That’s the part a lot of generic hairstyle lists skip, and it matters.
With long wavy hairstyles for oval faces, the cut and the wave pattern work together. A 1.25-inch curling iron gives a different result than a 1.5-inch barrel. Face-framing layers starting at the chin do a different job than layers that start below the collarbone. Even the direction of the bend — away from the face, toward the face, mixed, brushed out, left piecey — changes how the face reads.
Some of the styles below are polished enough for a formal event. Some are easy enough for second-day hair and a good mist of texturizing spray. A few are more about the shape of the cut than the styling itself, which is where the real payoff lives anyway.
1. Center-Parted Curtain Waves for Oval Faces
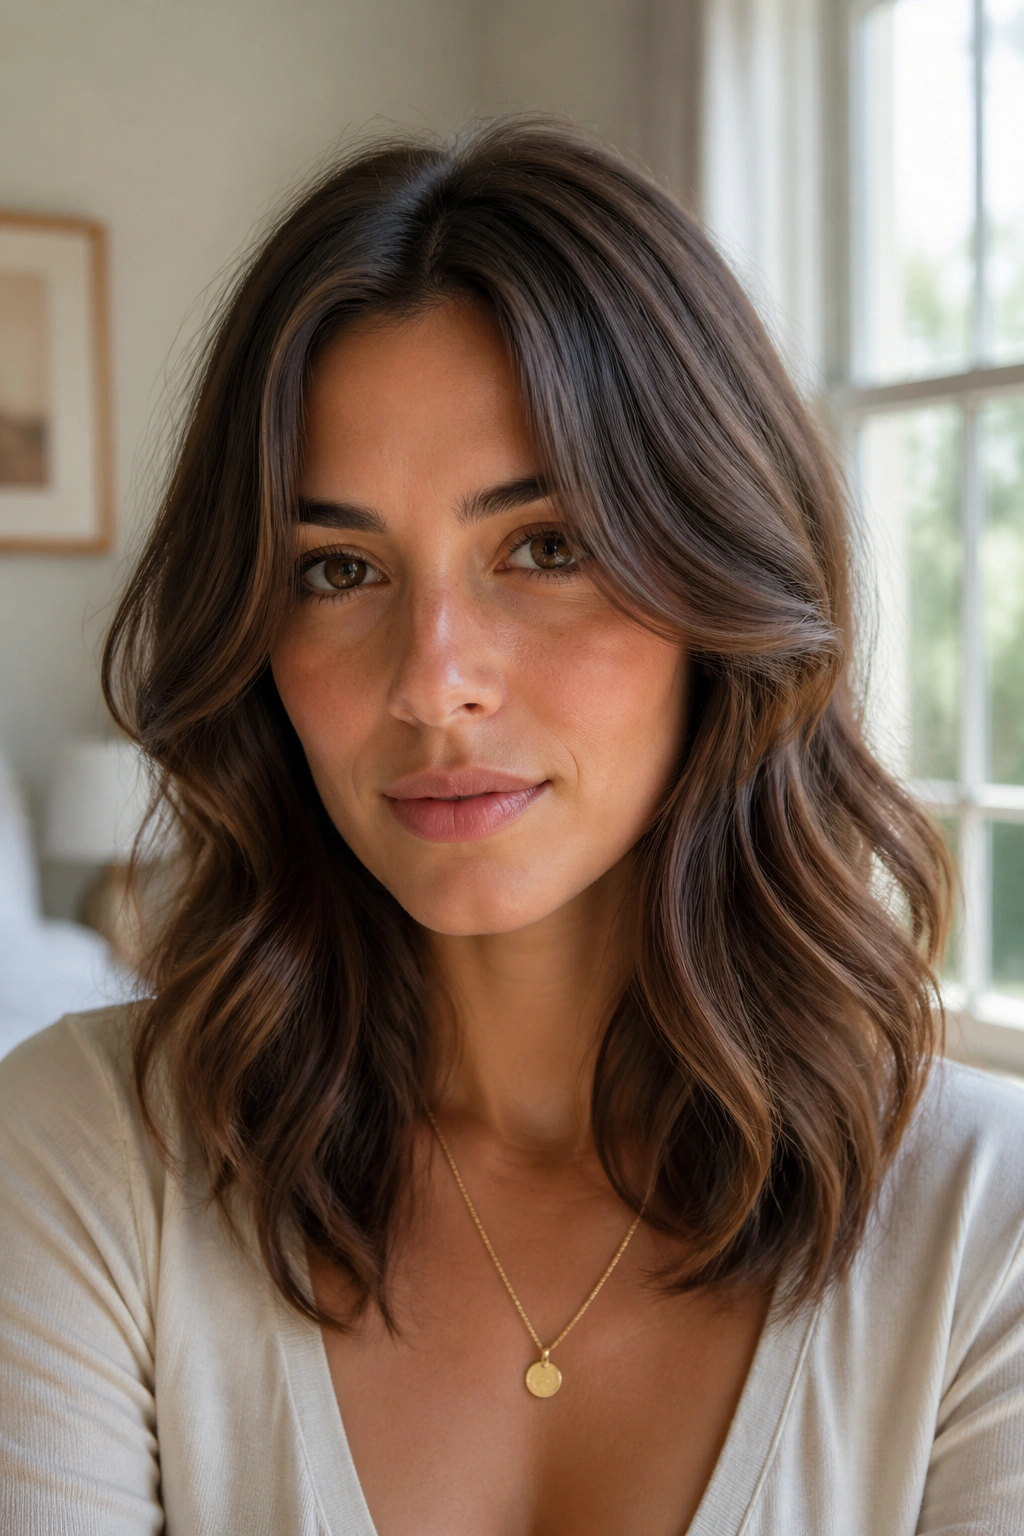
A center part is the cleanest place to start, and on an oval face it usually looks calm rather than severe. The trick is keeping the waves loose enough to frame the face instead of hanging straight down like two heavy panels.
Why It Flatteres the Shape
Curtain waves work because they split the visual weight evenly. That matters when your face already has balanced proportions. If the bend starts around the cheekbones and opens slightly at the jaw, the face stays soft without losing structure.
Keep the roots flat for the first 1 to 1.5 inches, then wrap mid-lengths around a 1.25-inch curling iron away from the face. When the hair cools, brush it out with a boar-bristle brush or wide paddle brush. The result should feel airy, not puffy.
- Ask for face-framing layers that start around the chin or lower lip.
- Leave the ends slightly straighter if your hair is fine.
- Use a light-hold hairspray, not a sticky one.
Pro tip: clip the front sections up while they cool. That tiny pause keeps the wave from dropping flat before you even leave the mirror.
2. Deep Side-Part Waves
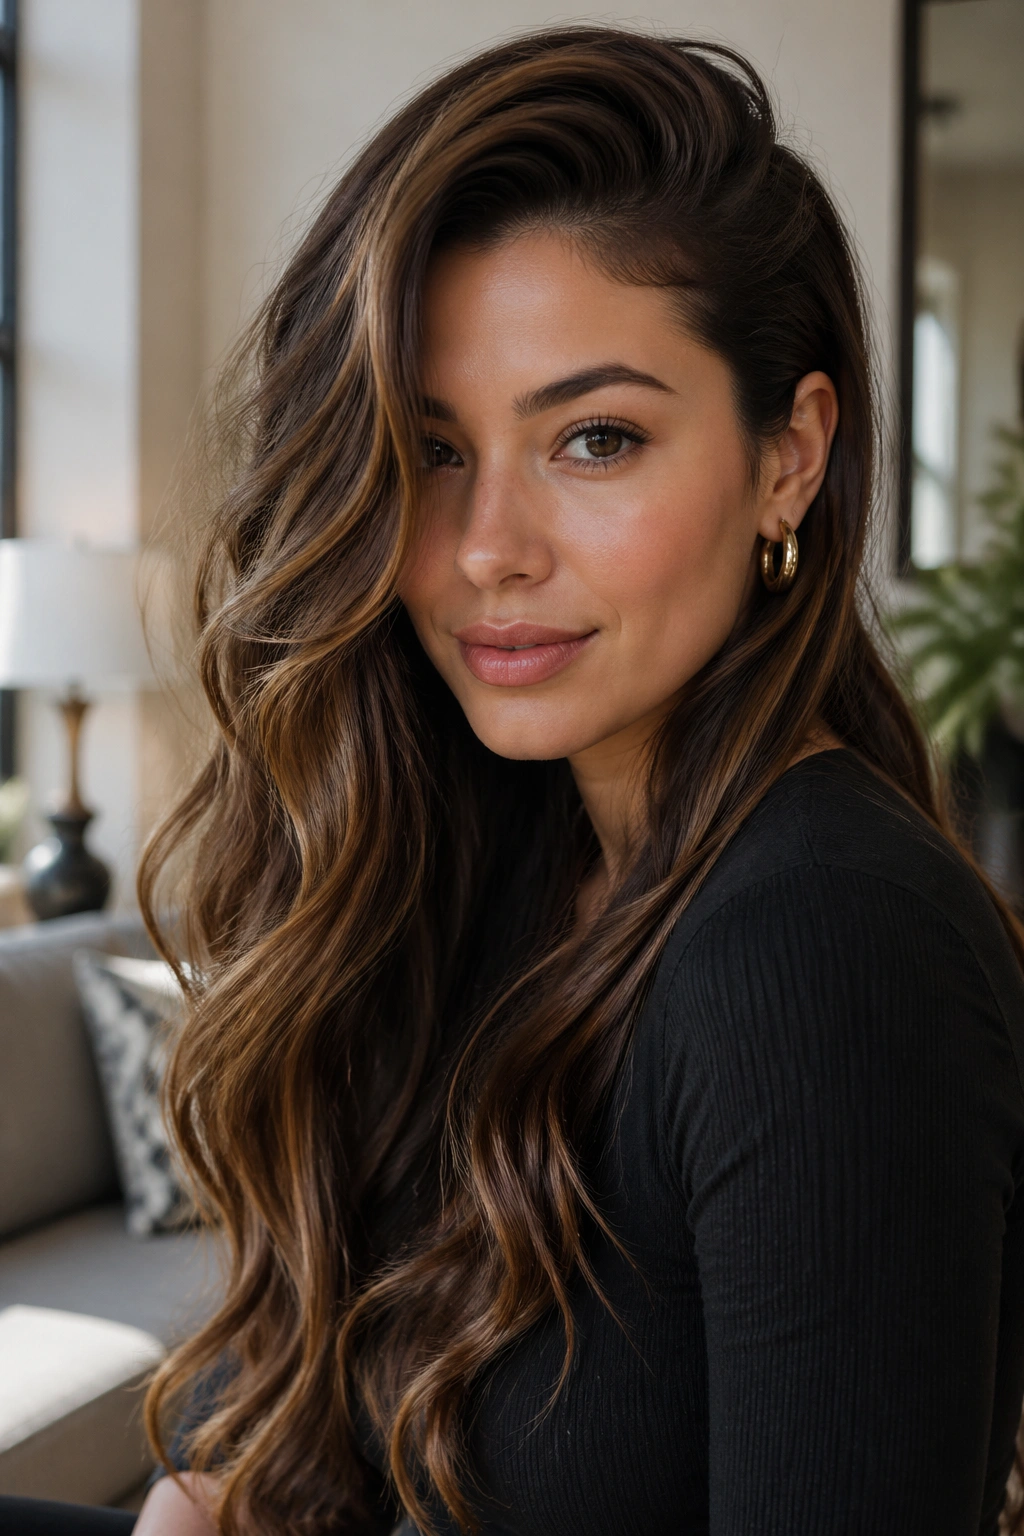
Want instant drama without losing length? Push the part over by about two inches and the whole style changes. The face gets a diagonal line, and diagonals are flattering because they break up all that symmetry in a good way.
A deep side part gives oval faces a little more attitude at the forehead and cheek line. It also helps if your hair falls flat at the roots, since the extra lift on one side creates shape without needing a lot of teasing. Keep the heavier side glossy and the lighter side tucked slightly behind the ear.
This is one of those styles that looks expensive even when it’s not. A 1.5-inch iron, a quick bend at eye level, and a drop of serum on the ends are enough. If you want the side part to stay put, place a small clip at the root for five minutes while the hair cools. The difference is annoying until you try it, then it feels obvious.
3. Long Face-Framing Layers for Oval Faces
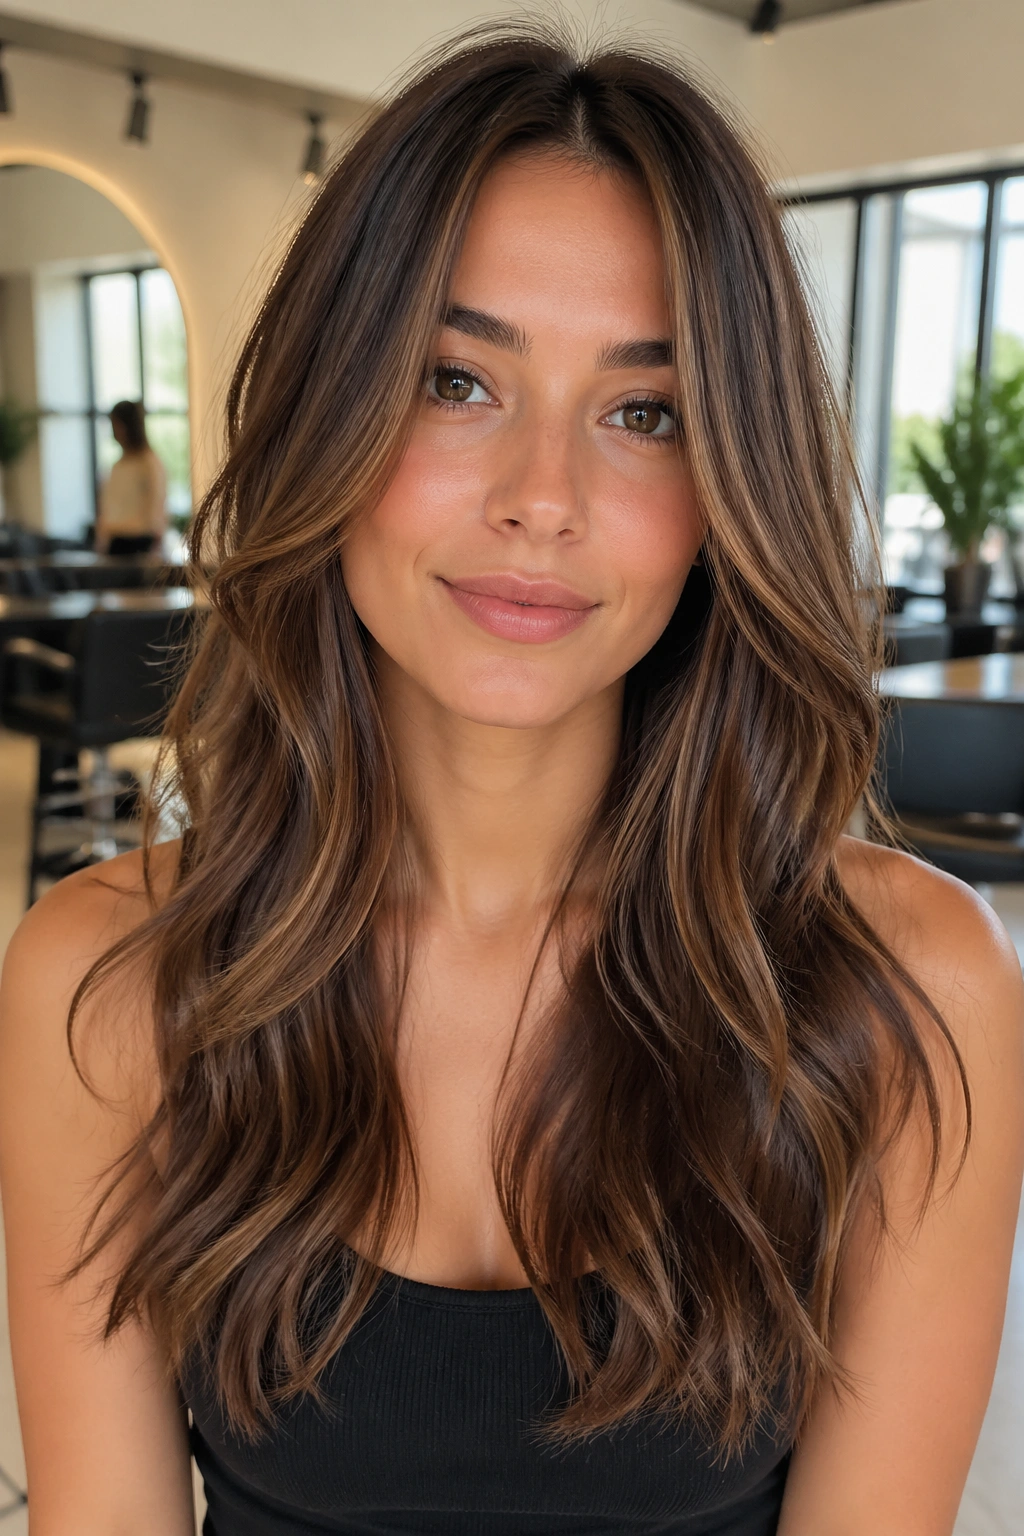
When hair hangs in one uninterrupted sheet, the face can disappear a little. Long face-framing layers fix that without sacrificing length, and they’re one of the smartest choices for long wavy hairstyles for oval faces.
Where the First Layer Should Start
I like layers that begin between the chin and collarbone. That range keeps the front pieces useful. Too short, and the look turns feathered in a way that can feel dated. Too long, and you lose the point entirely.
The best part is how the layers move once you wave the hair. They catch around the cheekbones first, then taper down toward the ends. That creates width where you want it and keeps the lower half of the hair from looking heavy.
- Fine hair: keep the layers subtle and use mousse at the roots.
- Thick hair: ask for internal layers so the bulk doesn’t puff out.
- Wavy hair that frizzes: finish with a cream, not a dry spray.
One thing worth skipping: blunt, face-framing chunks that stop at the chin. They can fight the natural balance of an oval face instead of helping it.
4. Brushed-Out Hollywood Waves
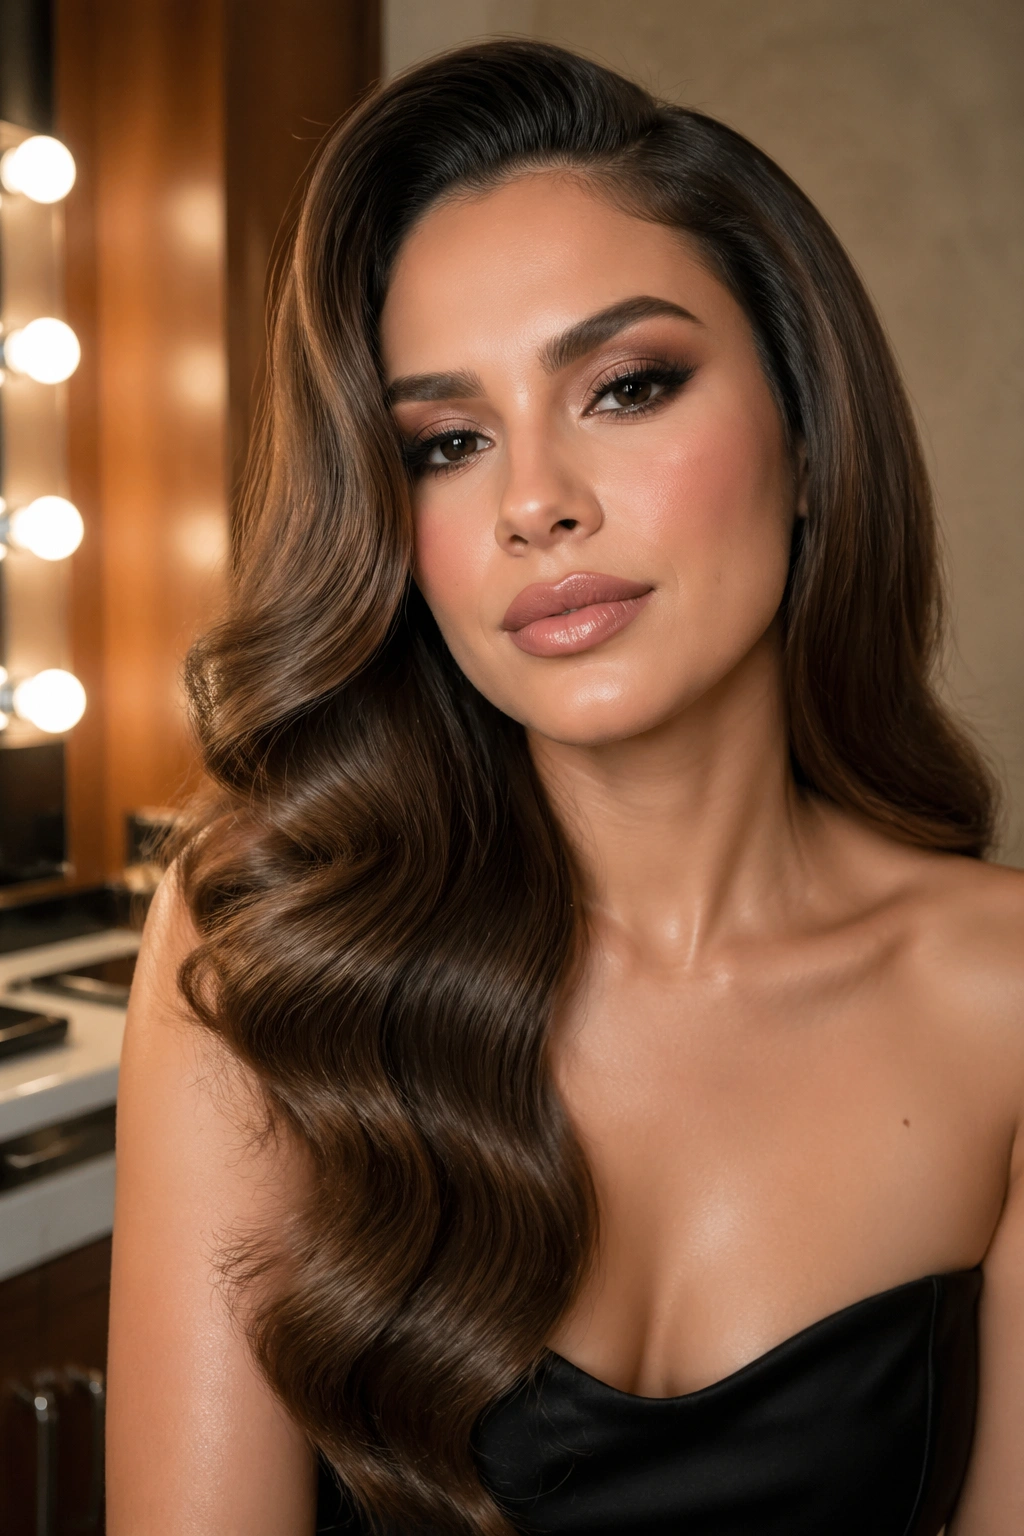
Sharp, set waves have a different mood from beachy bends. They’re smoother, shinier, and a little more deliberate, which is why they look so good on long hair with an oval face.
The styling part is old-school in the best way. Curl the hair with a 1.5-inch barrel, pin each section to cool in a loop, then brush everything out once the heat is gone. That cooling step is what stops the curl from collapsing into a frizz halo. Skip it, and the style falls apart fast.
A polished wave pattern also keeps the face from looking too narrow on the sides. The curve sits close to the cheeks, then opens again at the shoulders. It’s formal without feeling stiff. If your hair is extra silky, mist each section with a light setting spray before curling so the shape holds beyond the walk from bathroom to car.
5. Beach Waves with Choppy Ends
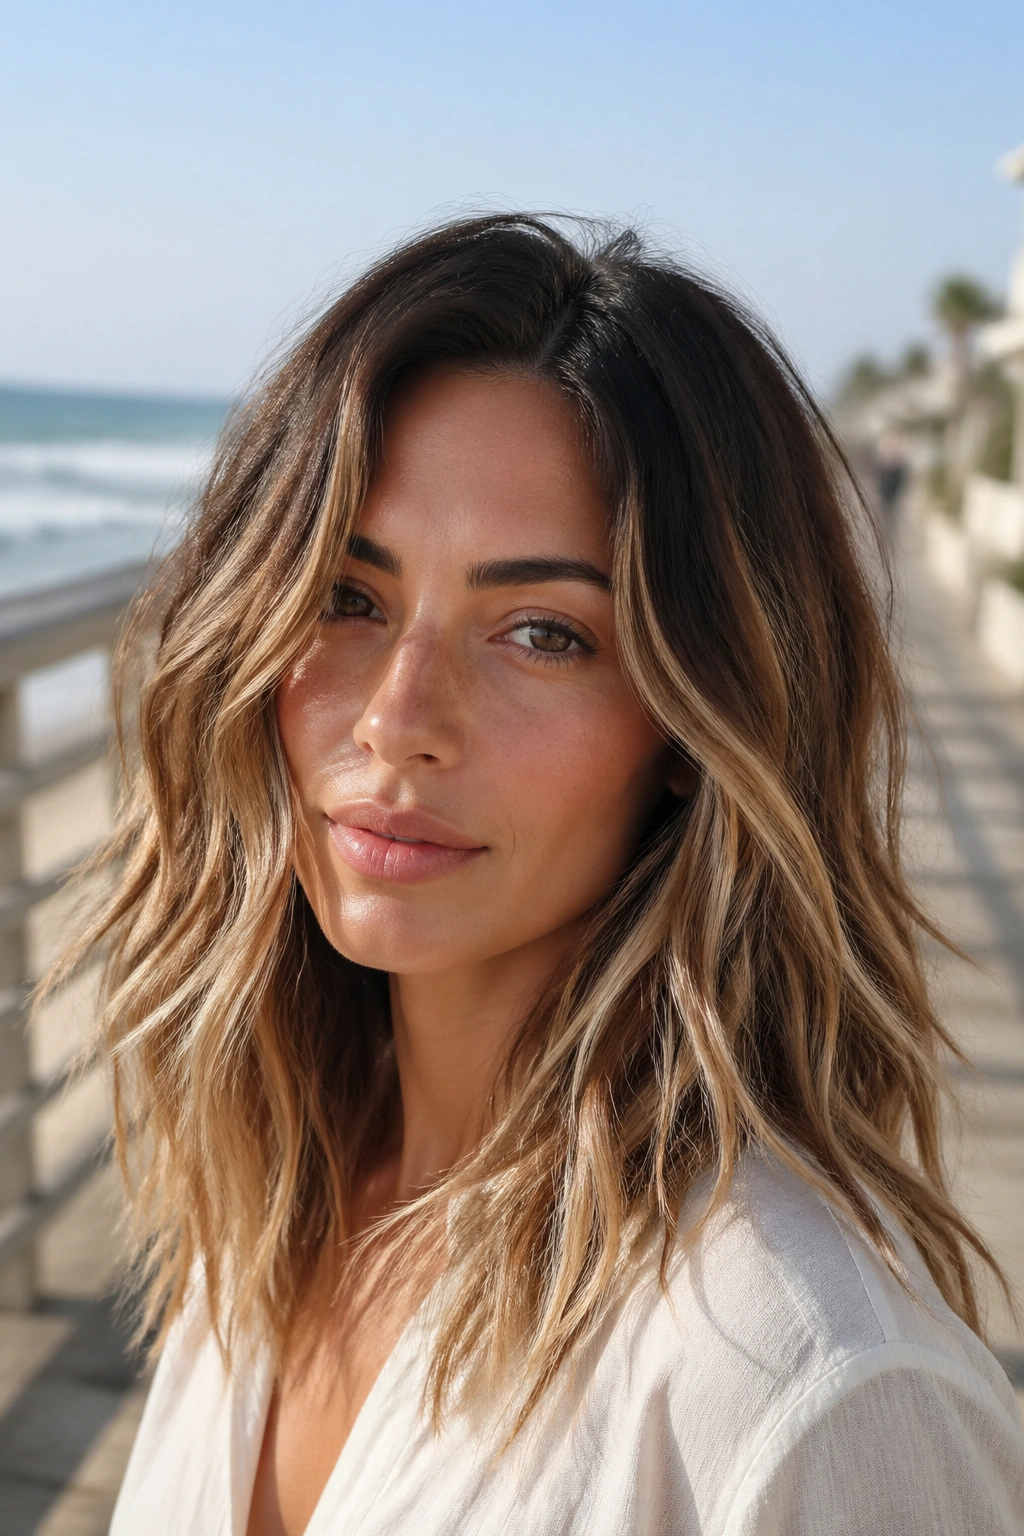
Beach waves get dismissed a lot because people think they’re lazy. Bad beach waves are lazy. Good ones have shape, spacing, and ends that don’t all land in the same place.
The choppy end detail matters here. It keeps the bottom from looking like a curtain and gives the whole style a rougher, lighter edge. On an oval face, that keeps the length from swallowing the features. The wave itself should start below the ear, not at the root, so the top stays a little sleeker.
Use a salt spray or wave spray on damp hair, then twist medium sections around your fingers before air-drying or diffusing. Once dry, shake it out and pinch a small amount of texture cream into the ends. If the waves look too neat, you’ve gone too far. They should move when you turn your head.
6. Mermaid Waves
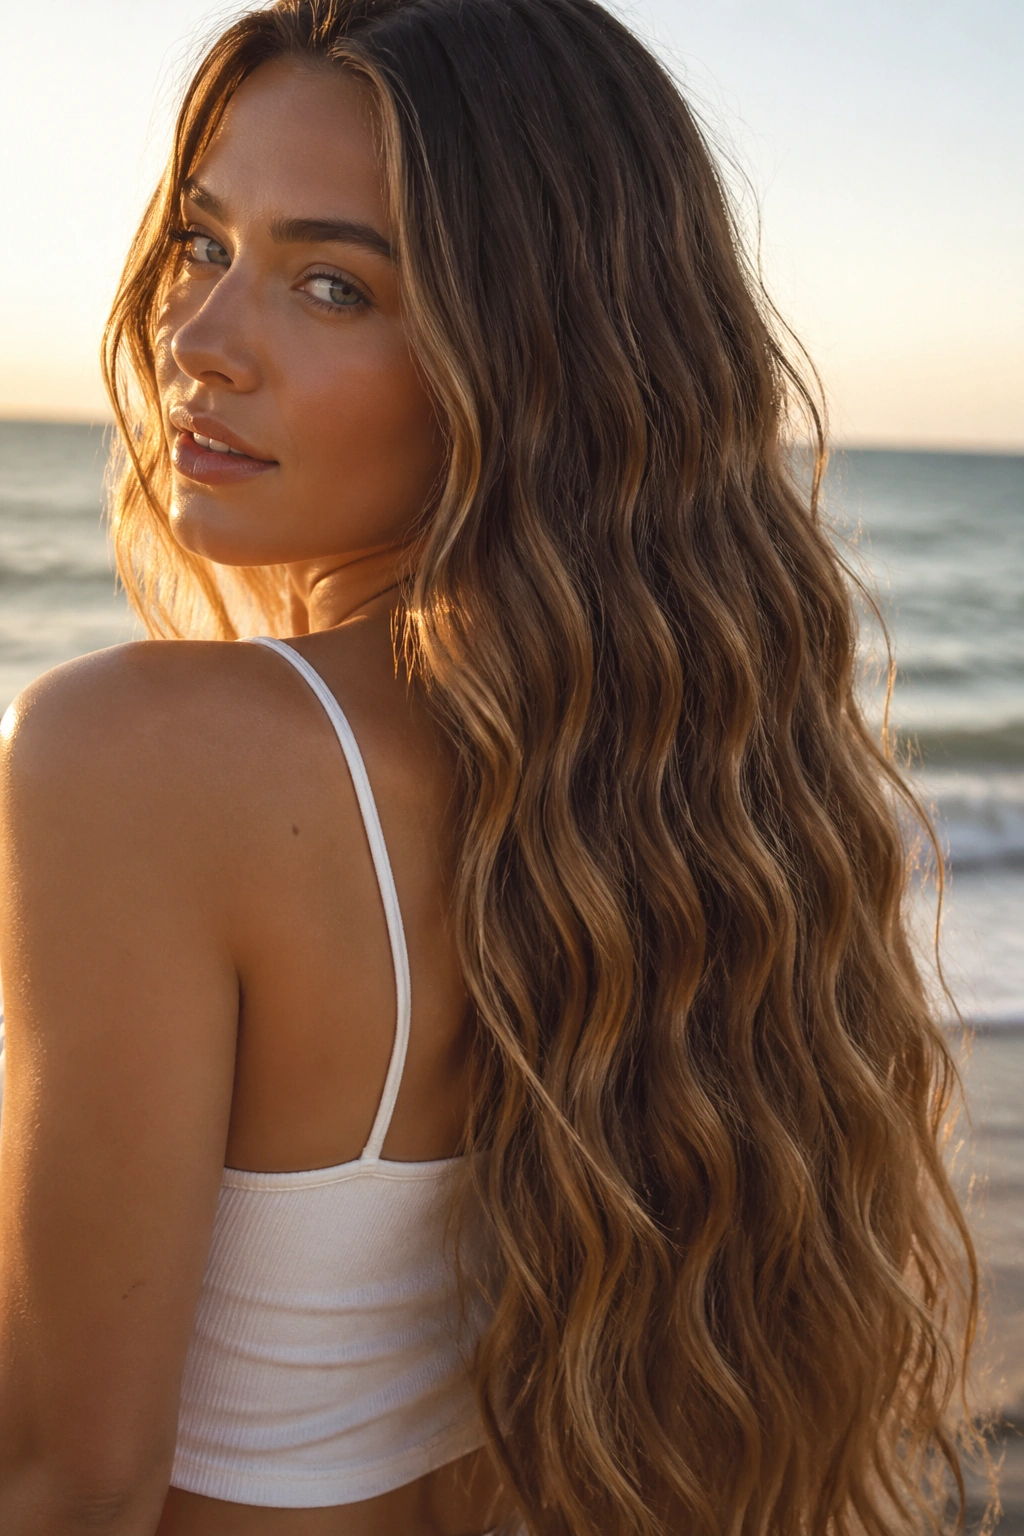
Mermaid waves are longer, smoother, and more continuous than beach waves. They suit waist-length hair especially well, because the pattern needs room to stretch out.
Unlike a broken-up wave, mermaid waves make the length itself part of the style. That works nicely on oval faces, which can handle extra length as long as there’s enough width through the midsection. The trick is keeping the roots quiet and letting the wave happen from about the cheekbone down.
Use a 1.5-inch curling iron or a triple-barrel tool if your hair is dense. If you’re using a single barrel, alternate the direction of each section and brush it out once it cools. The finish should look soft and continuous, not crimped. This style hates overstyling. Too much hairspray and it stops looking like hair.
7. Bottleneck Bangs With Long Waves
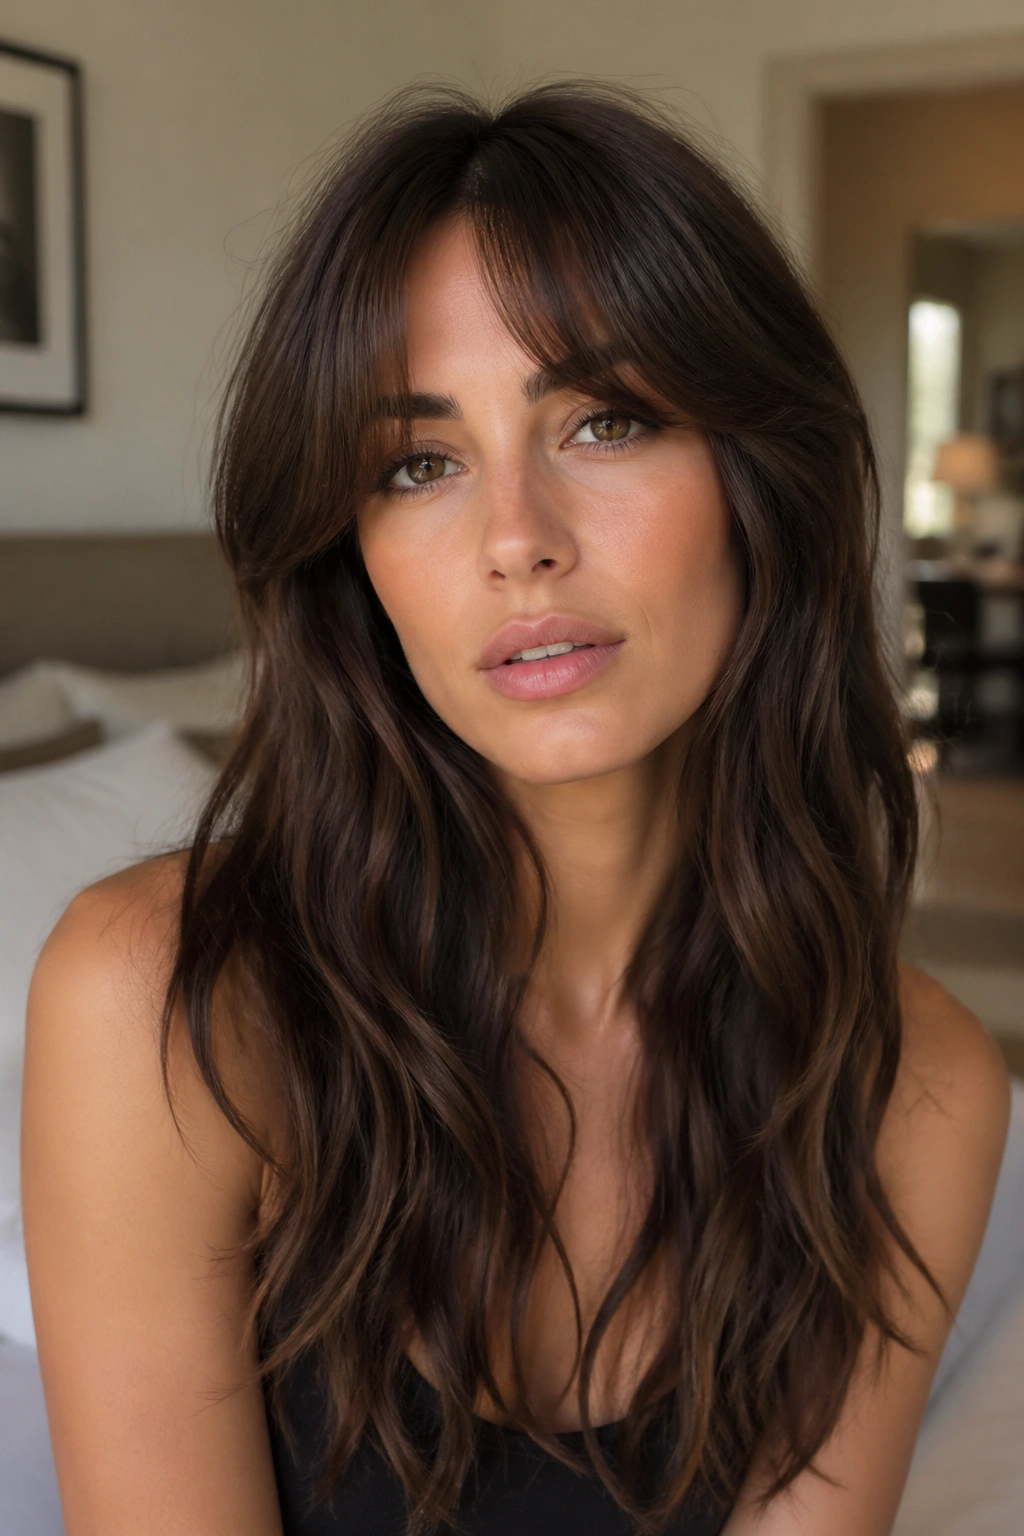
Bottleneck bangs have a narrow center and a softer, wider edge near the temples, and that shape does a lot of quiet work. They’re especially nice if you want the forehead softened without covering it in a heavy fringe.
On an oval face, the bangs create a little visual frame right where the face begins. That keeps long waves from feeling too open at the top. The rest of the hair can stay loose and wavy, which is useful if you like length but want some personality near the eyes.
What to Ask For
Ask for the shortest point of the fringe to sit a little below the brow line, then let it blend into longer temple pieces. That gives the front a soft taper. Keep the rest of the layers long and mobile so the fringe doesn’t become the only thing people notice.
The style looks best when the bangs are blow-dried with a small round brush and the waves underneath are slightly undone. If both parts are too perfect, the whole thing gets stiff.
8. Curtain Bangs That Sit Well on Oval Faces
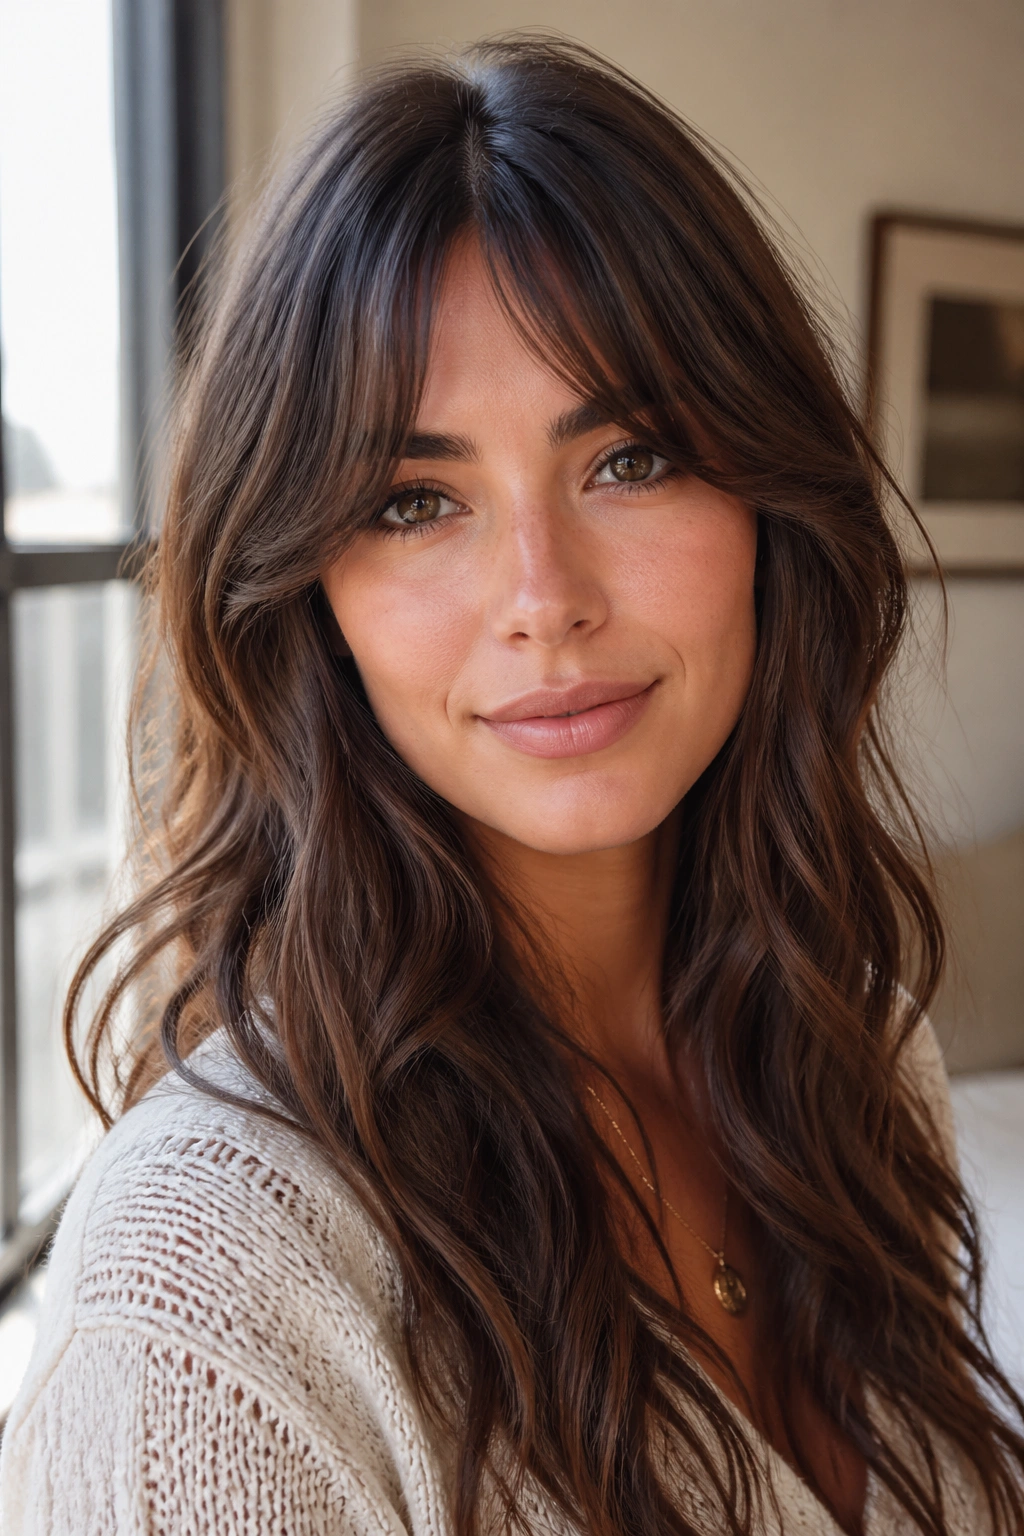
Curtain bangs are popular for a reason, and that reason is not mystery. They open the face, split the forehead softly, and connect to long waves without making the haircut feel chopped up.
I’d call this one of the safest bets for oval faces. The bangs add width near the eyes, then the rest of the hair drops in long, loose movement below. That combination keeps the face from looking elongated when the hair is very long. It also gives you a place to anchor the style on days when your waves are a little flat.
- Blow-dry the bangs forward first, then sweep them open.
- Use a round brush only at the roots.
- Keep the ends of the fringe slightly piecey.
A lot of people overcurve curtain bangs and turn them into a curled helmet. Don’t do that. The whole point is softness with a bit of bend.
9. Side-Swept Bangs With Waves
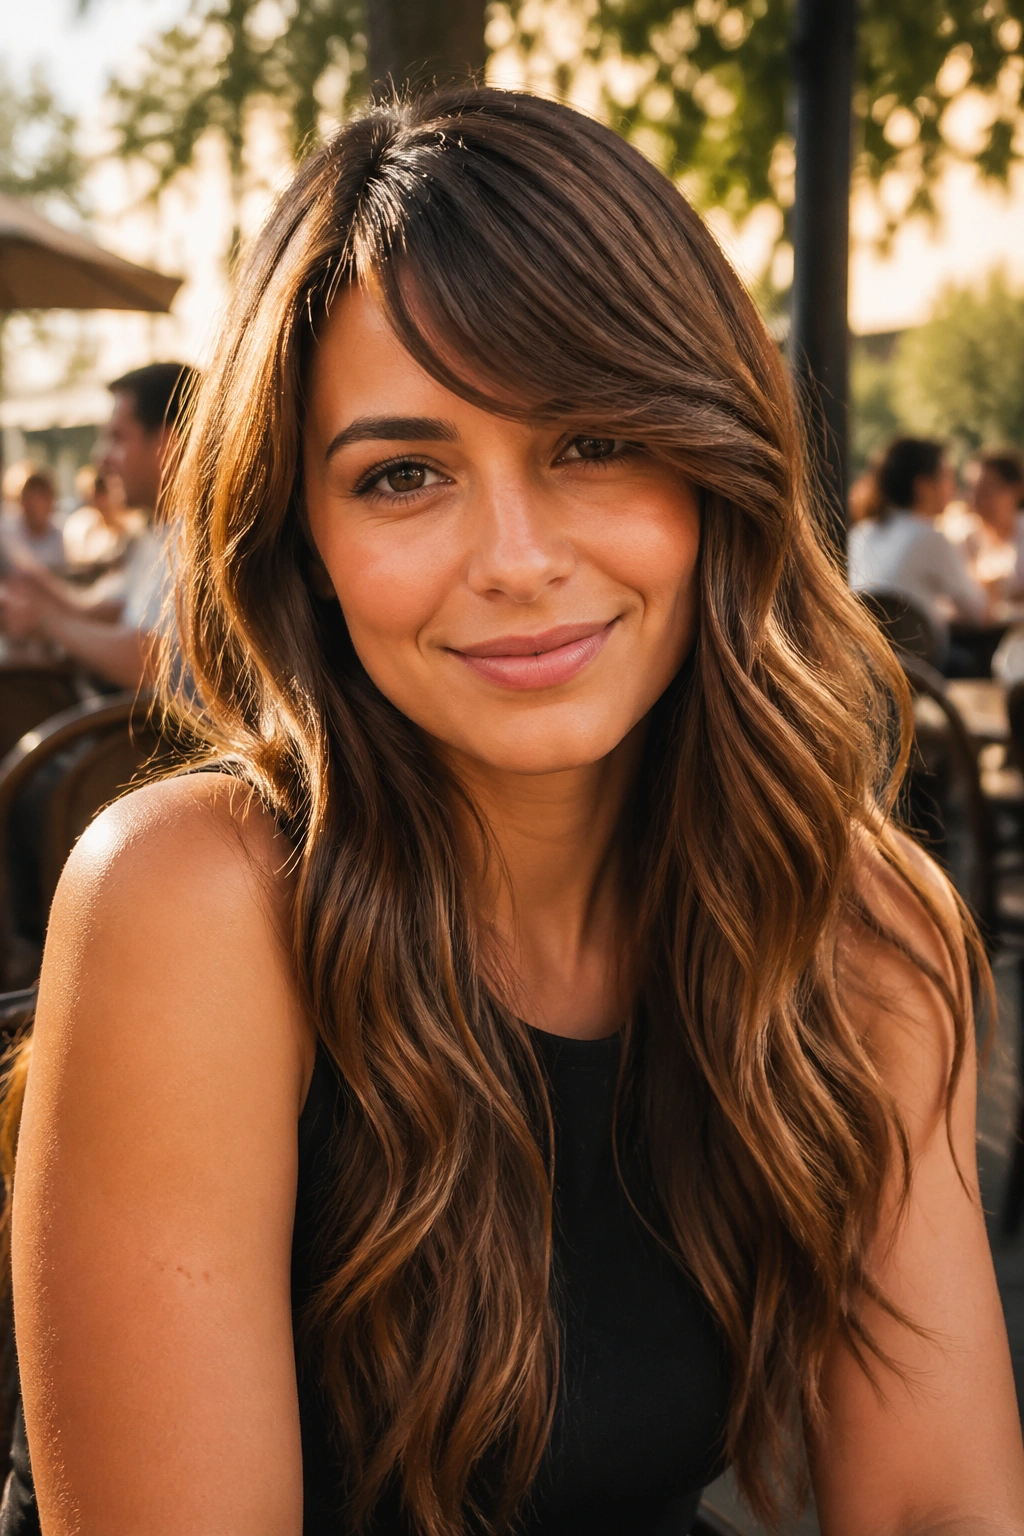
Side-swept bangs bring a diagonal line across the face, which is the kind of small detail that changes everything. On oval faces, they add interest without shortening the face too much.
The best version is long enough to blend into the side layers. Short, stiff side bangs can look old-fashioned fast. A longer sweep, especially with loose waves underneath, keeps the style modern and easy. It’s also helpful if one side of your hair tends to fall flatter than the other. The fringe gives you a built-in reset.
This look pairs well with medium-to-large waves rather than tight curls. Use a 1.25-inch iron and wrap away from the face on the heavier side, then toward the face on the opposite side so the balance feels natural. A tiny root lift at the part is enough. You do not need a giant bump. That usually makes the shape awkward.
10. Half-Up Half-Down Waves
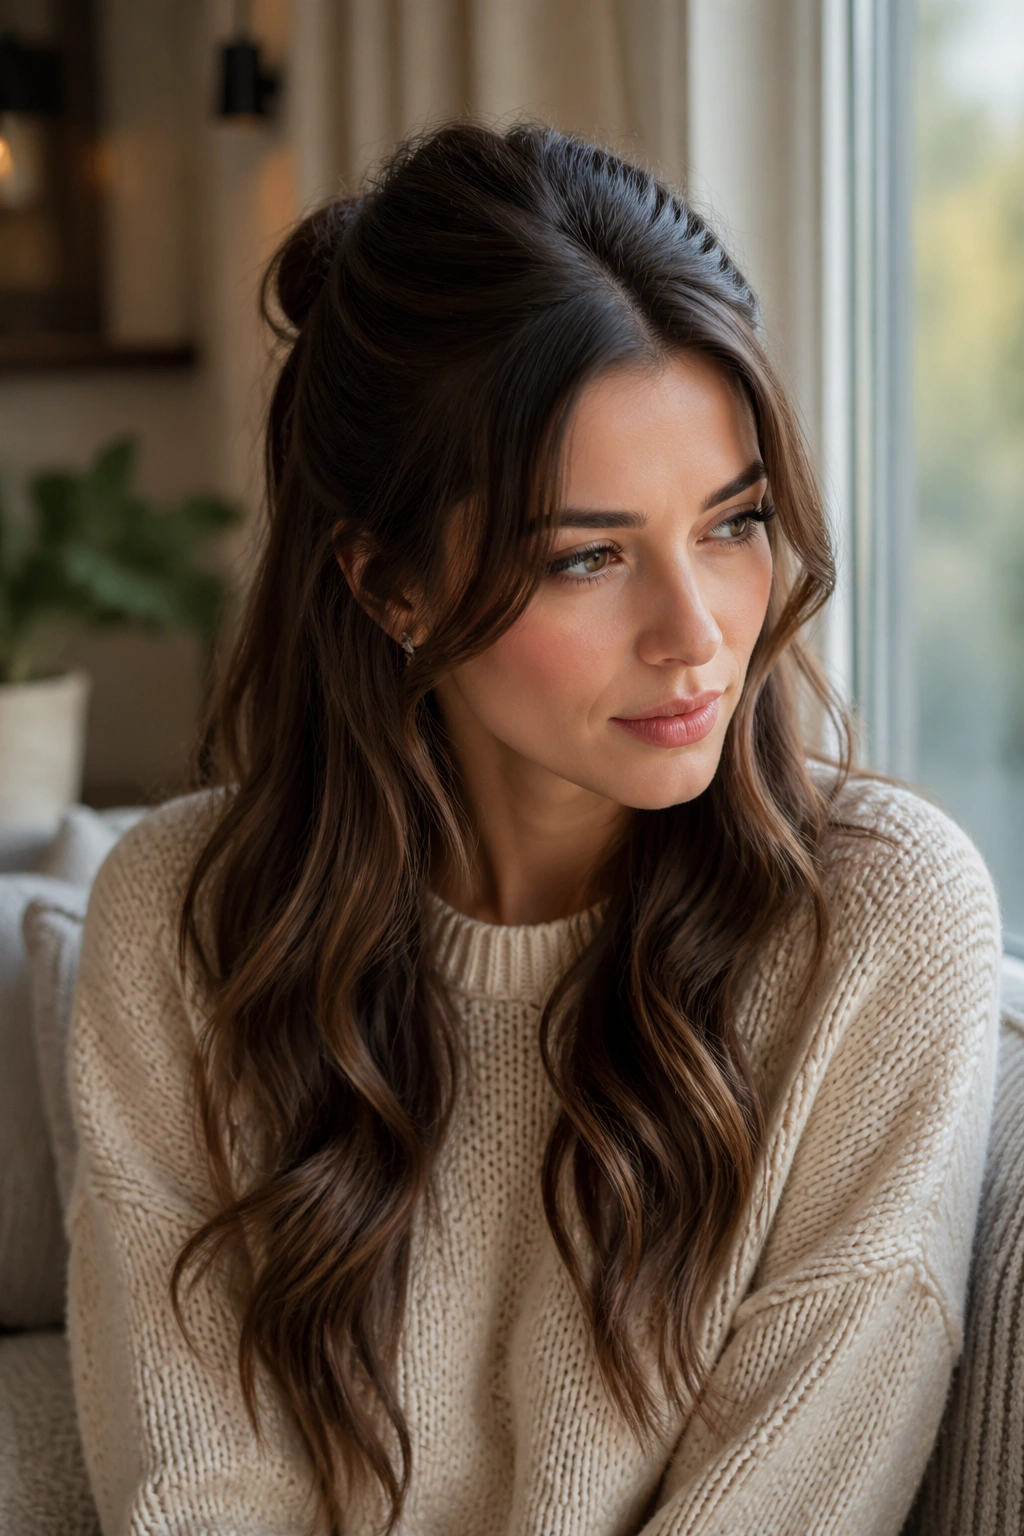
A half-up style is a neat way to show off long wavy hair without letting it cover the whole face. It gives the crown some lift and keeps the front open, which suits oval proportions nicely.
This is the hairstyle I reach for when I want the hair to look done but not overworked. Pull back just the top third of the hair, secure it with a clear elastic, then hide the elastic with a wrapped strand or a small barrette. Leave the front pieces out around the temples and cheekbones. That detail keeps the style from feeling too young or too strict.
The waves below should stay soft and touchable. If they’re too polished, the half-up section can look disconnected from the rest. A light mist of texture spray through the mids keeps everything linked. One small tease at the crown helps, too, but only a little. Too much and the style starts to look like it belongs to another decade.
11. Half-Up Top Knot With Waves
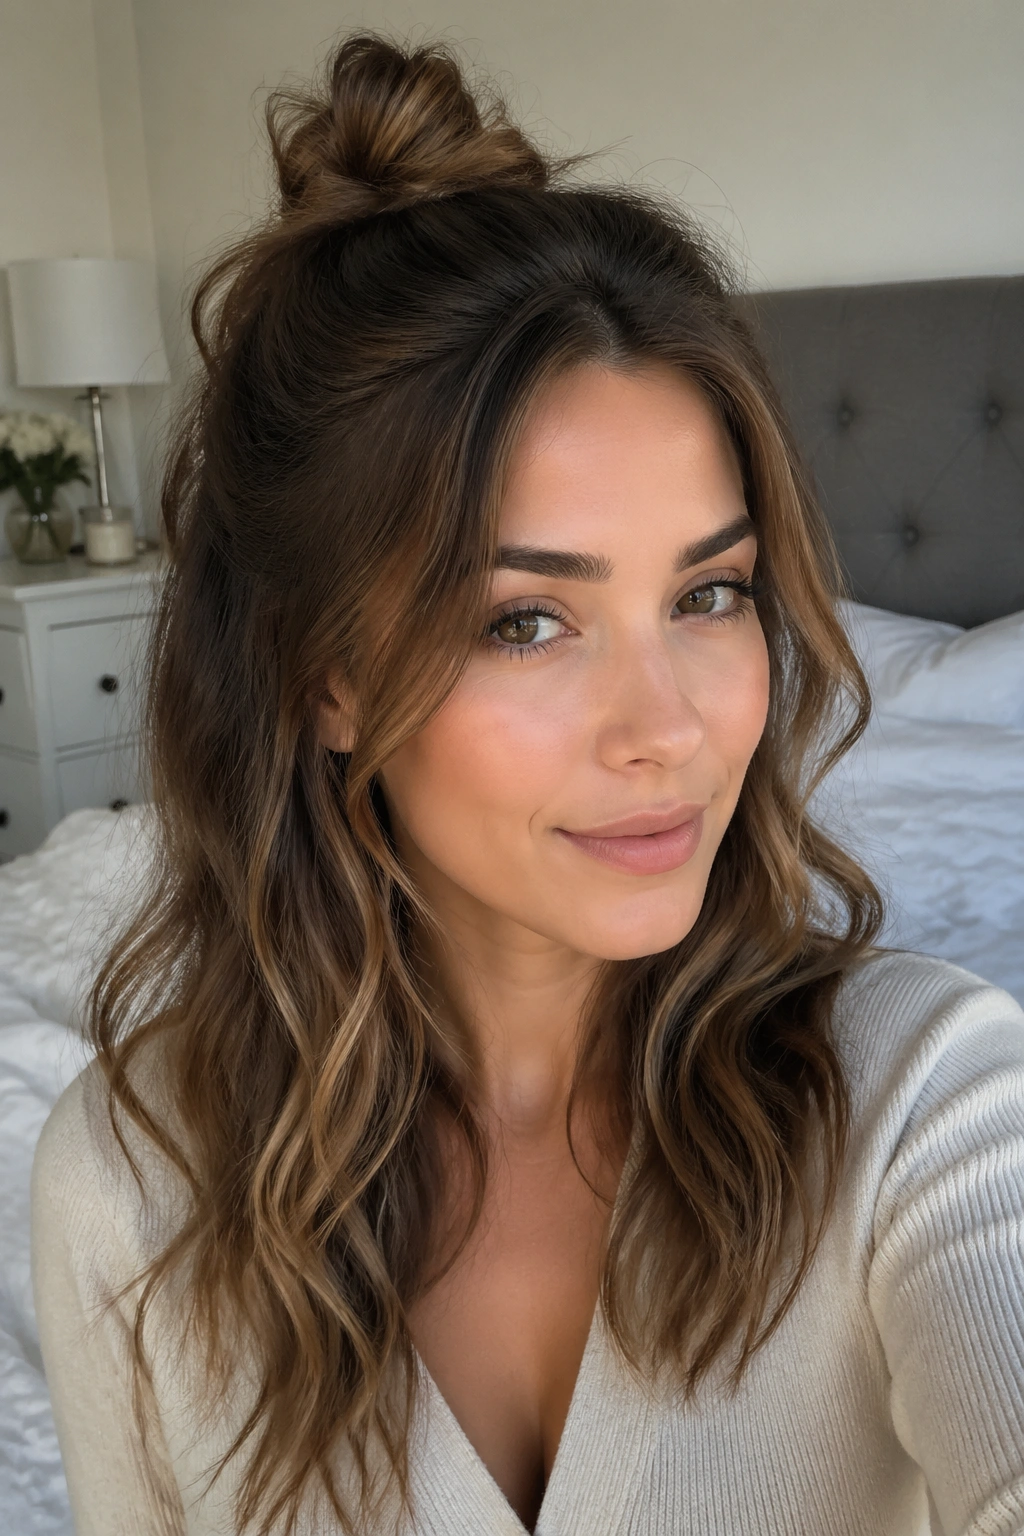
A small top knot gives long waves a casual lift, and on oval faces it works best when the knot stays compact. Big, tall buns can stretch the face visually. A smaller knot leaves the proportions alone and still gives you that lifted feel.
The trick is to keep the knot sitting at the highest point of the head, not shoved forward. That keeps the front clean and the back soft. Let a few face-framing pieces fall out near the temples. If those pieces are curled loosely, the whole style feels relaxed rather than messy.
This one is practical, too. It keeps hair off the neck, works on second-day waves, and survives long days better than loose styling. Use a matte pin or two if your hair is thick. If it’s fine, twist the top section a little tighter before wrapping it into the knot so it doesn’t sag by lunch.
12. Braided Crown With Loose Waves
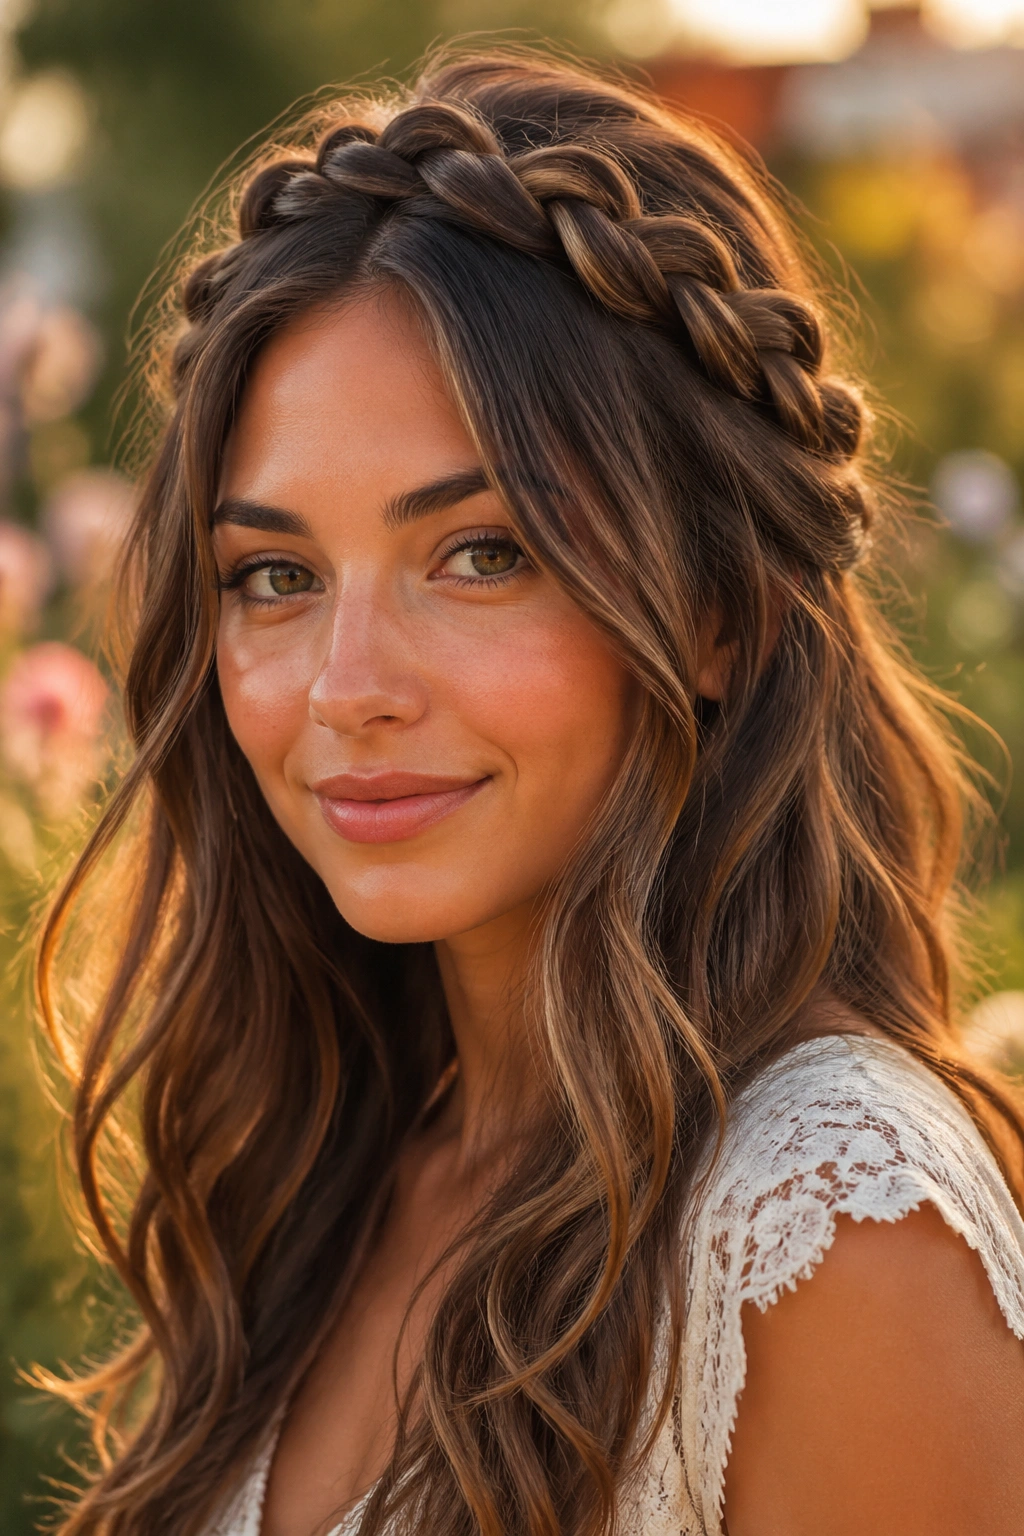
Braided crowns can look overly sweet if they’re too tidy. Keep this one loose and slightly broken up, and it becomes something much better: a soft frame on top, with length and movement underneath.
That balance matters on oval faces because the braid adds interest near the crown without stealing all the attention. The loose waves below keep the style from looking too fixed in place. I like this version for outdoor events, long dinners, or any setting where you want hair to stay off your face but still look like hair, not an updo trying too hard.
Braid from one temple across the top of the head, then stop before it gets severe. Pancake the braid gently with your fingers to widen it. Leave the rest of the waves soft. A touch of shine spray on the braid keeps it from looking dry against the looser hair.
13. Waterfall Braid Into Waves
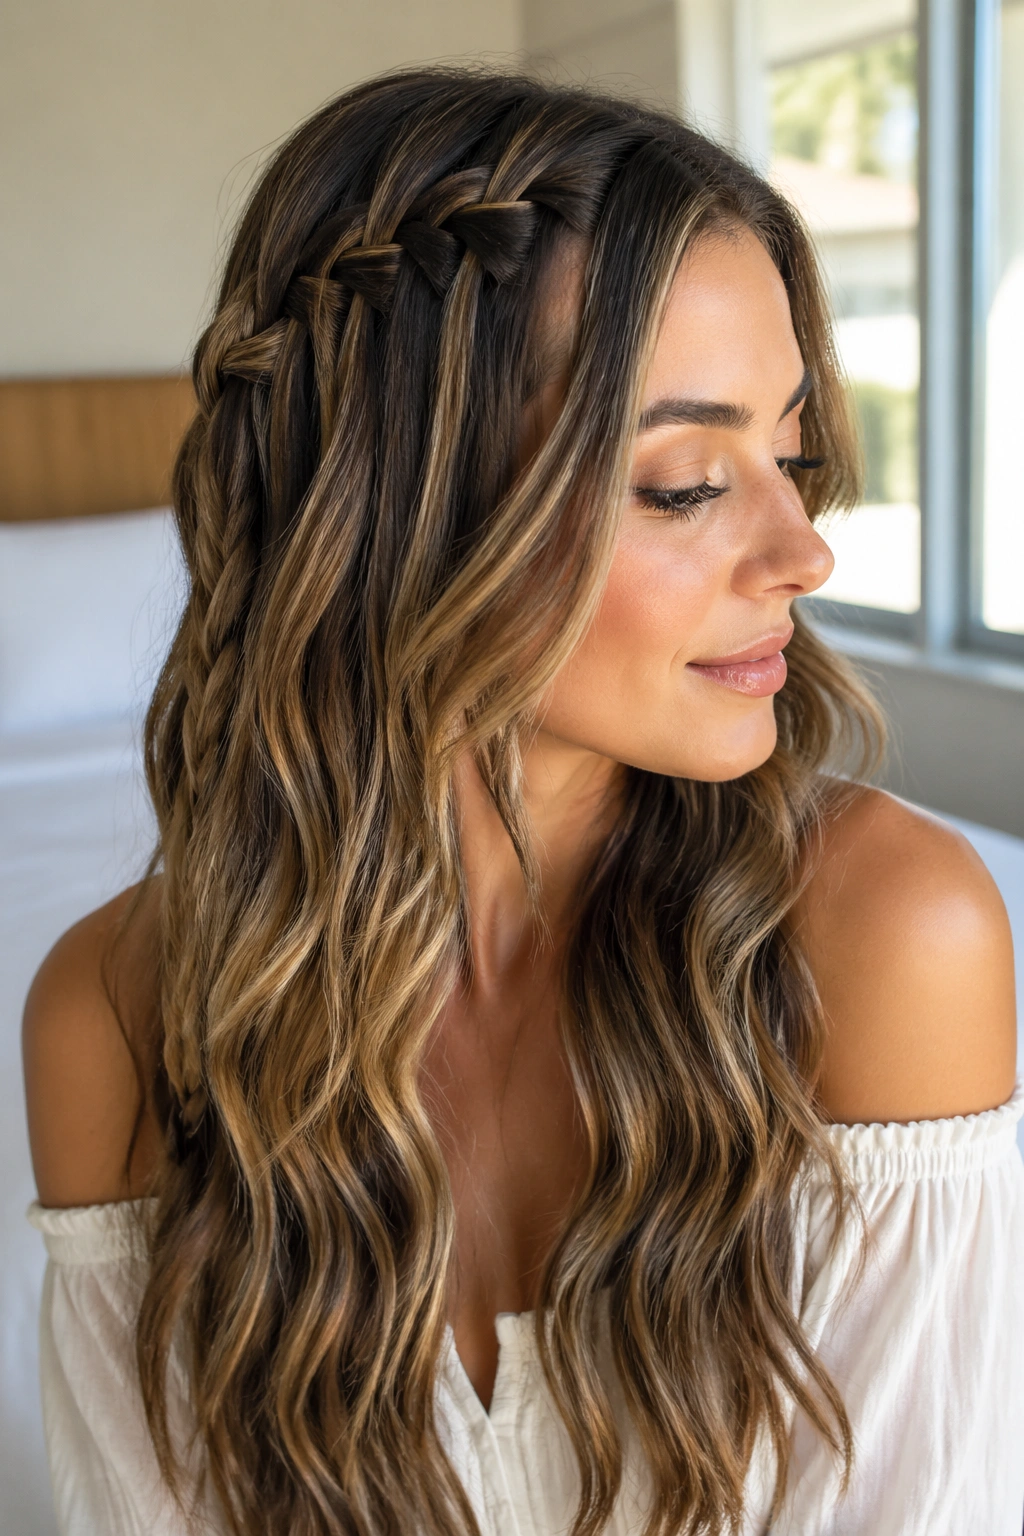
Waterfall braids are pretty, but they can turn fussy fast. The reason they still earn a place here is that the dropped sections create a soft path through the hair, which flatters an oval face without boxing it in.
Start the braid just above one ear and let the loose strands cascade into the rest of the waves. Keep the braid loose enough that you can slide a finger under it. Tight braids make the style feel hard. The loose version keeps the head shape open and gives the waves below a nice lead-in.
This style is a little more work than a simple half-up, and it shows. That’s the point. It suits long lengths especially well because the braid becomes a feature rather than an accent. If your hair is very slippery, rough it up first with dry shampoo or texturizing powder. Clean, silky hair can make the braid unravel before you’re done.
14. Claw-Clip Twist With Loose Waves
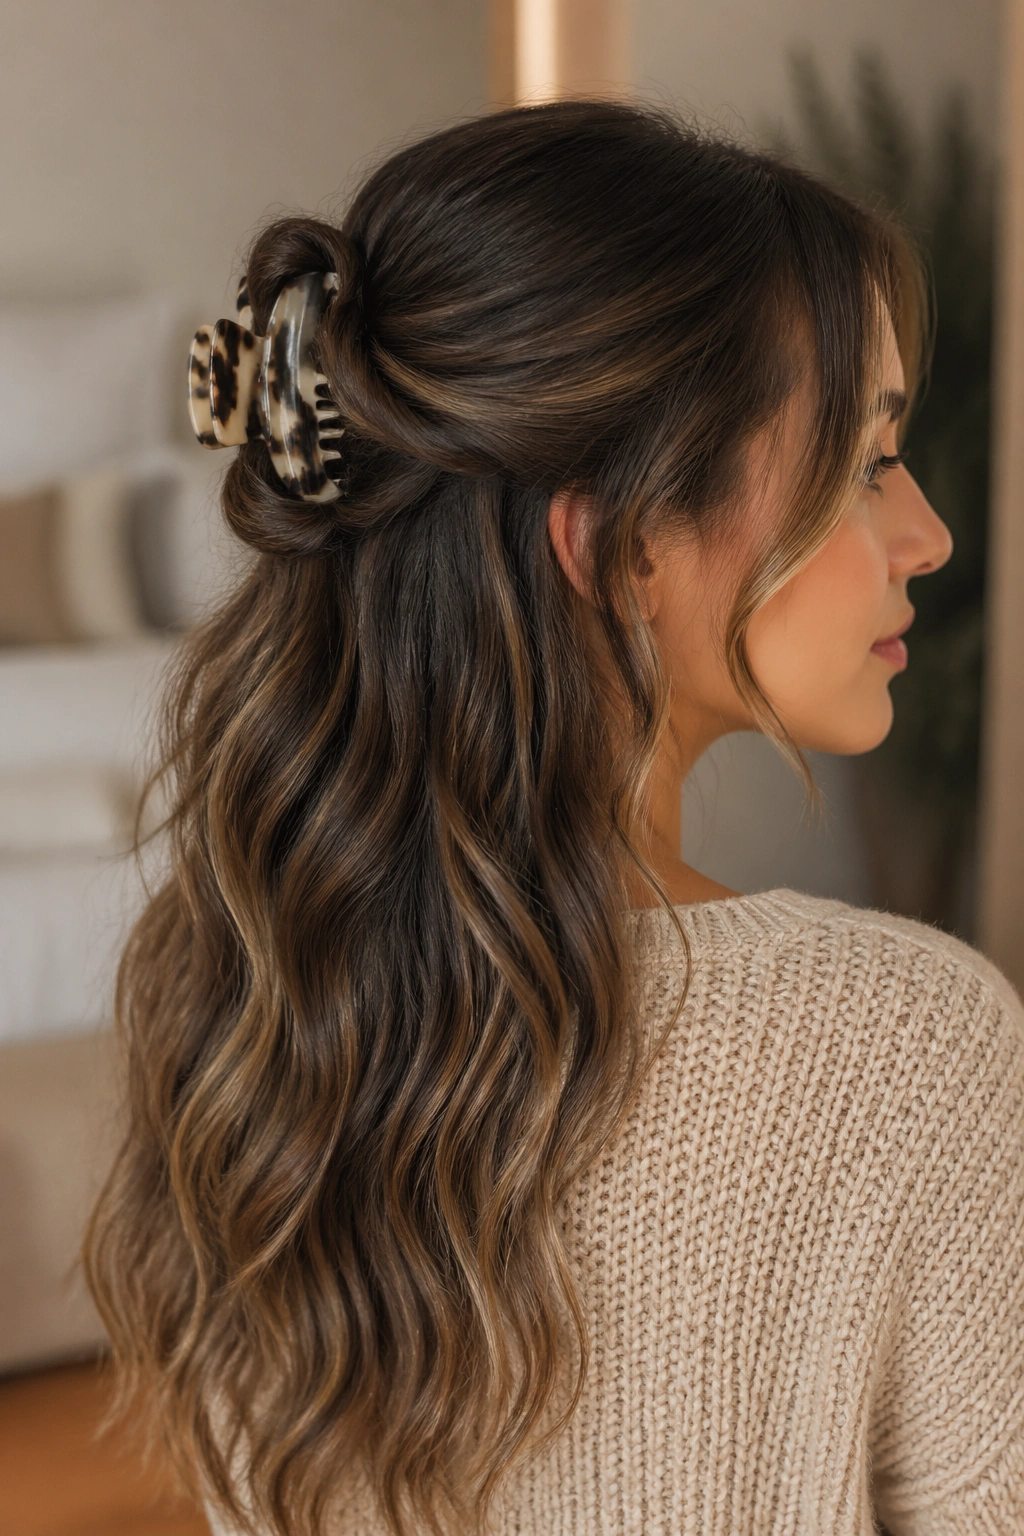
A claw clip is not a lazy choice when the shape is right. It can hold the top section away from the face and still let the rest of the waves spill down the back.
The safest version for oval faces is a low twist or a mid-level twist, not a high pile at the crown. High clips push the attention upward. A mid-level twist keeps the line soft and the face open. Pull out a few front pieces so the style doesn’t become too severe.
This hairstyle works especially well on medium-thick hair because the clip grips better. If your hair is fine, twist the section tighter before clipping it and use a smaller clip with strong teeth. The loose waves below can be brushed out or left piecey. Both work. What matters is that the clip looks like part of the shape, not an afterthought you grabbed on the way out the door.
15. Air-Dried Natural Waves With Layers
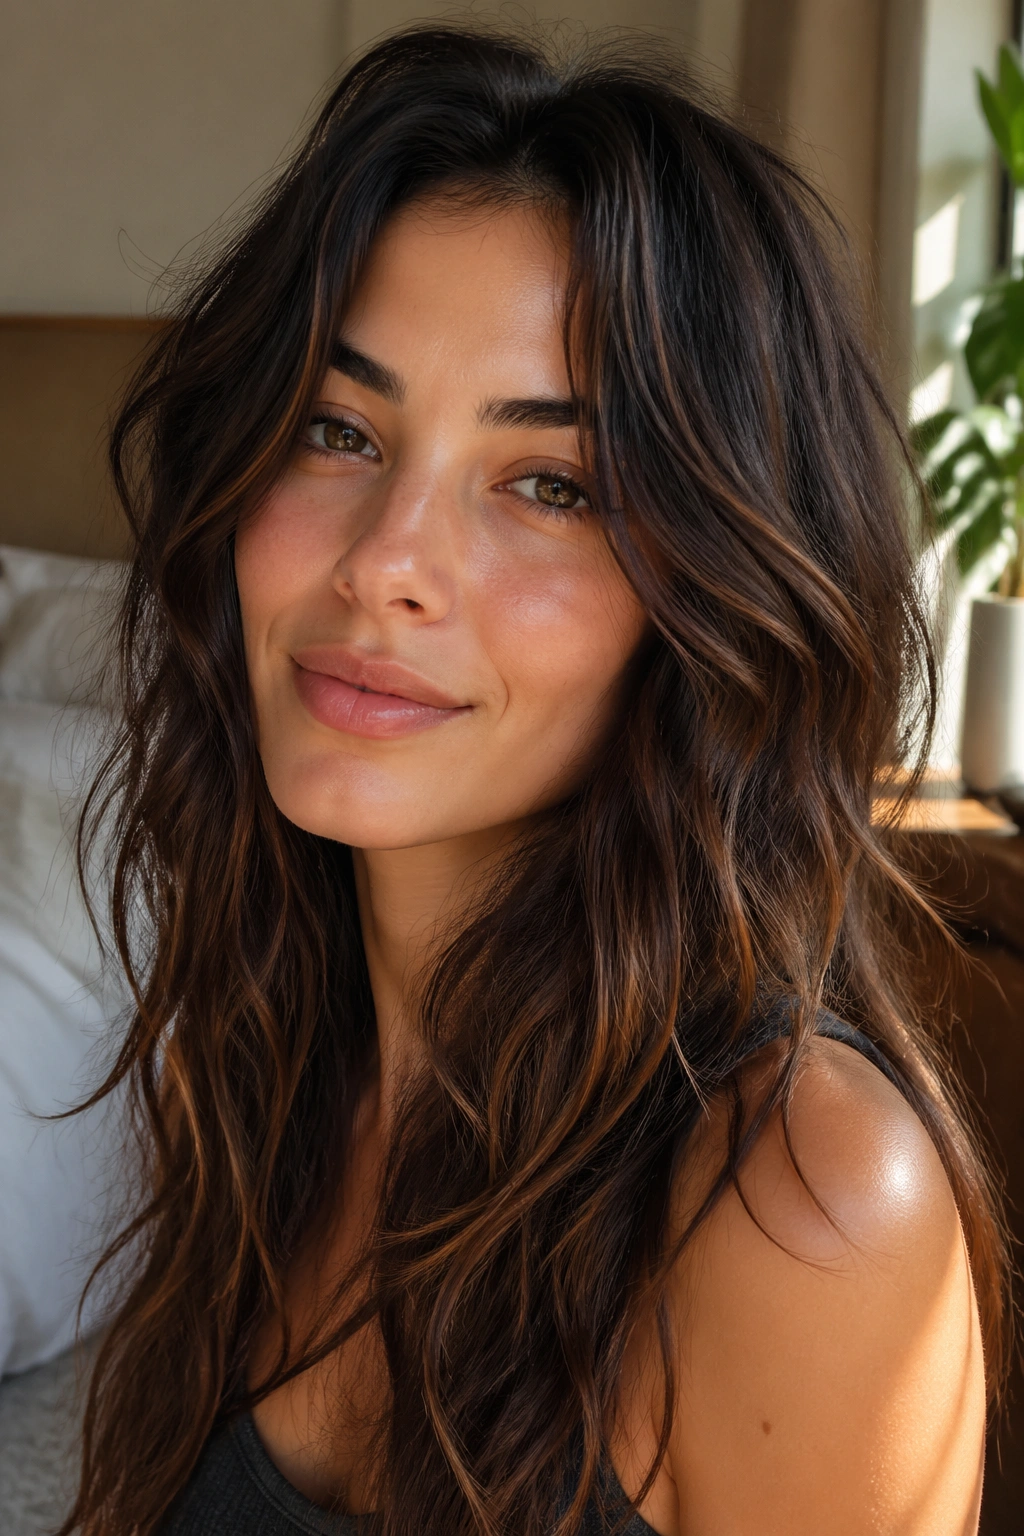
Air-dried waves can be beautiful on their own, but they need a cut that supports them. Without layers, the texture can fall into a heavy sheet. With the right shape, though, natural wave patterns look soft and honest in a way heat-styled hair never quite matches.
The Drying Routine That Helps
Start with a leave-in conditioner on damp hair, then work in a light mousse from the roots to the mids. Scrunch the hair upward with a microfiber towel or cotton T-shirt. If you want more lift, clip the roots at the crown for ten to fifteen minutes while the hair dries.
Oval faces handle this style well because the looseness around the cheeks keeps the face from looking overbuilt. The key is not to fight the wave pattern. Let some pieces dry straighter and others bend more sharply. That unevenness is part of the charm.
A little frizz is fine. Flat, shellacked natural waves are the enemy here.
16. Heatless Belt-Set Waves
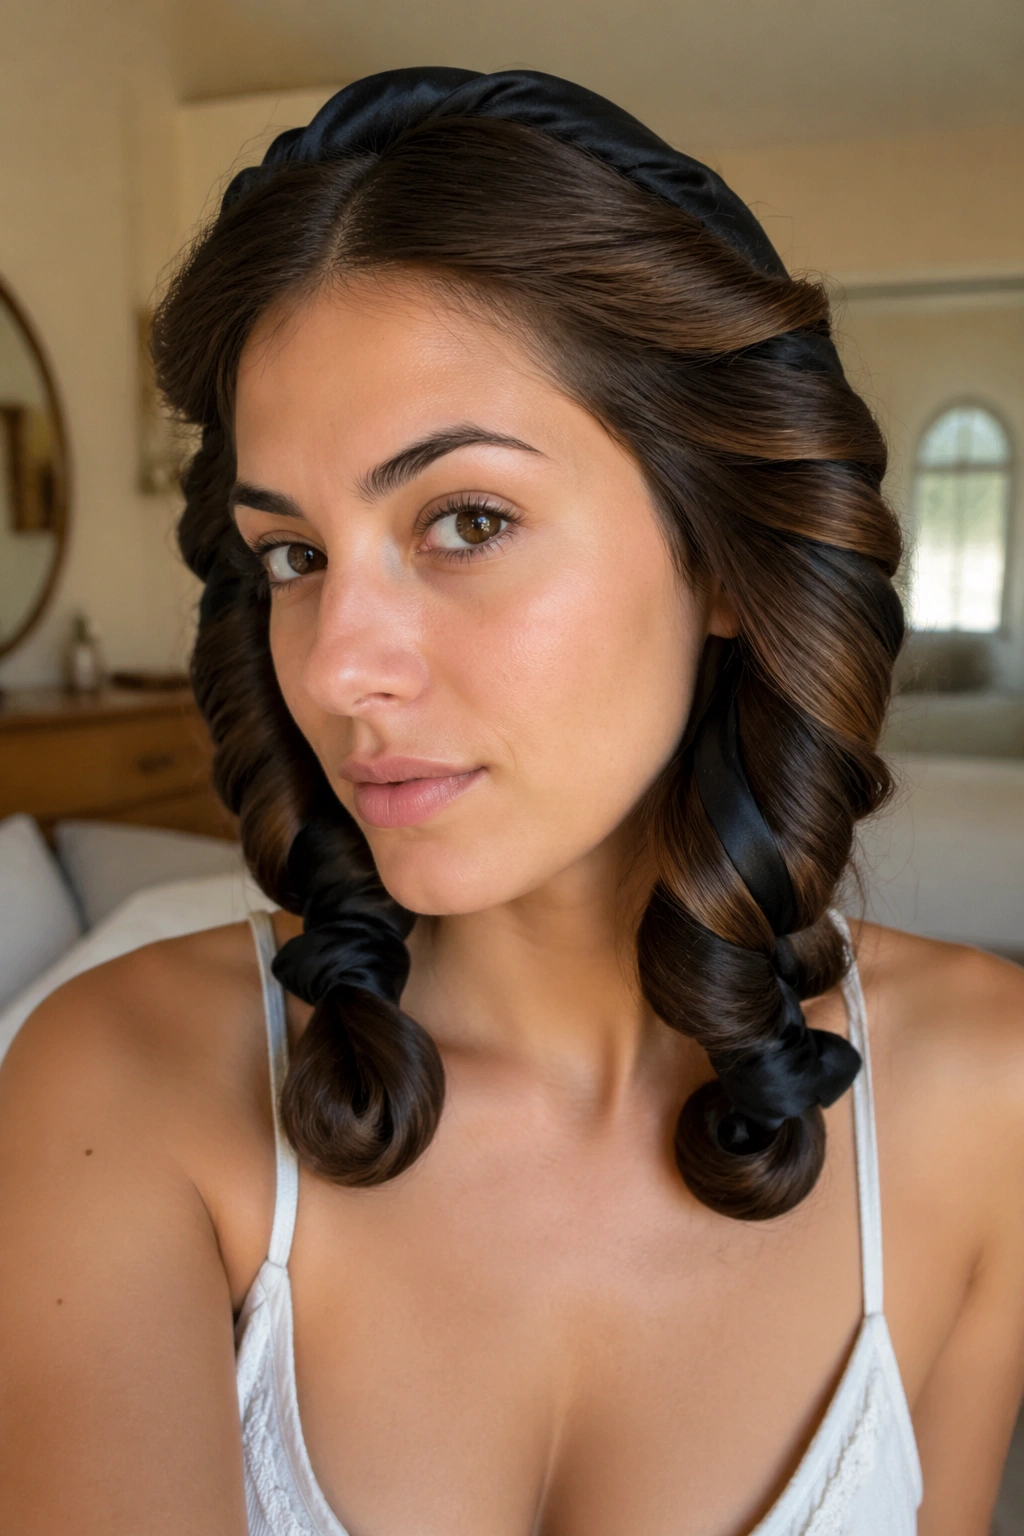
Heatless waves are worth knowing because they give a smoother finish than a lot of people expect. A robe belt, a silk ribbon, or a long cloth strip can set the hair overnight with almost no heat damage.
The shape suits oval faces when the waves stay soft near the front and slightly fuller at the sides. Wrap damp hair around the belt in two sections, secure the ends, and let it dry fully before taking it down. If you remove it too early, the wave pattern drops and turns uneven. That’s the annoying part, but it’s also the part that makes it worth doing properly.
Keep the wrapping flat and even. Twisted sections make an irregular bend that can look accidental rather than styled. Once the hair is dry, separate the waves with your fingers and add a tiny bit of oil to the ends. Don’t brush it hard. You’ll lose the whole point.
17. Glossy Defined Waves
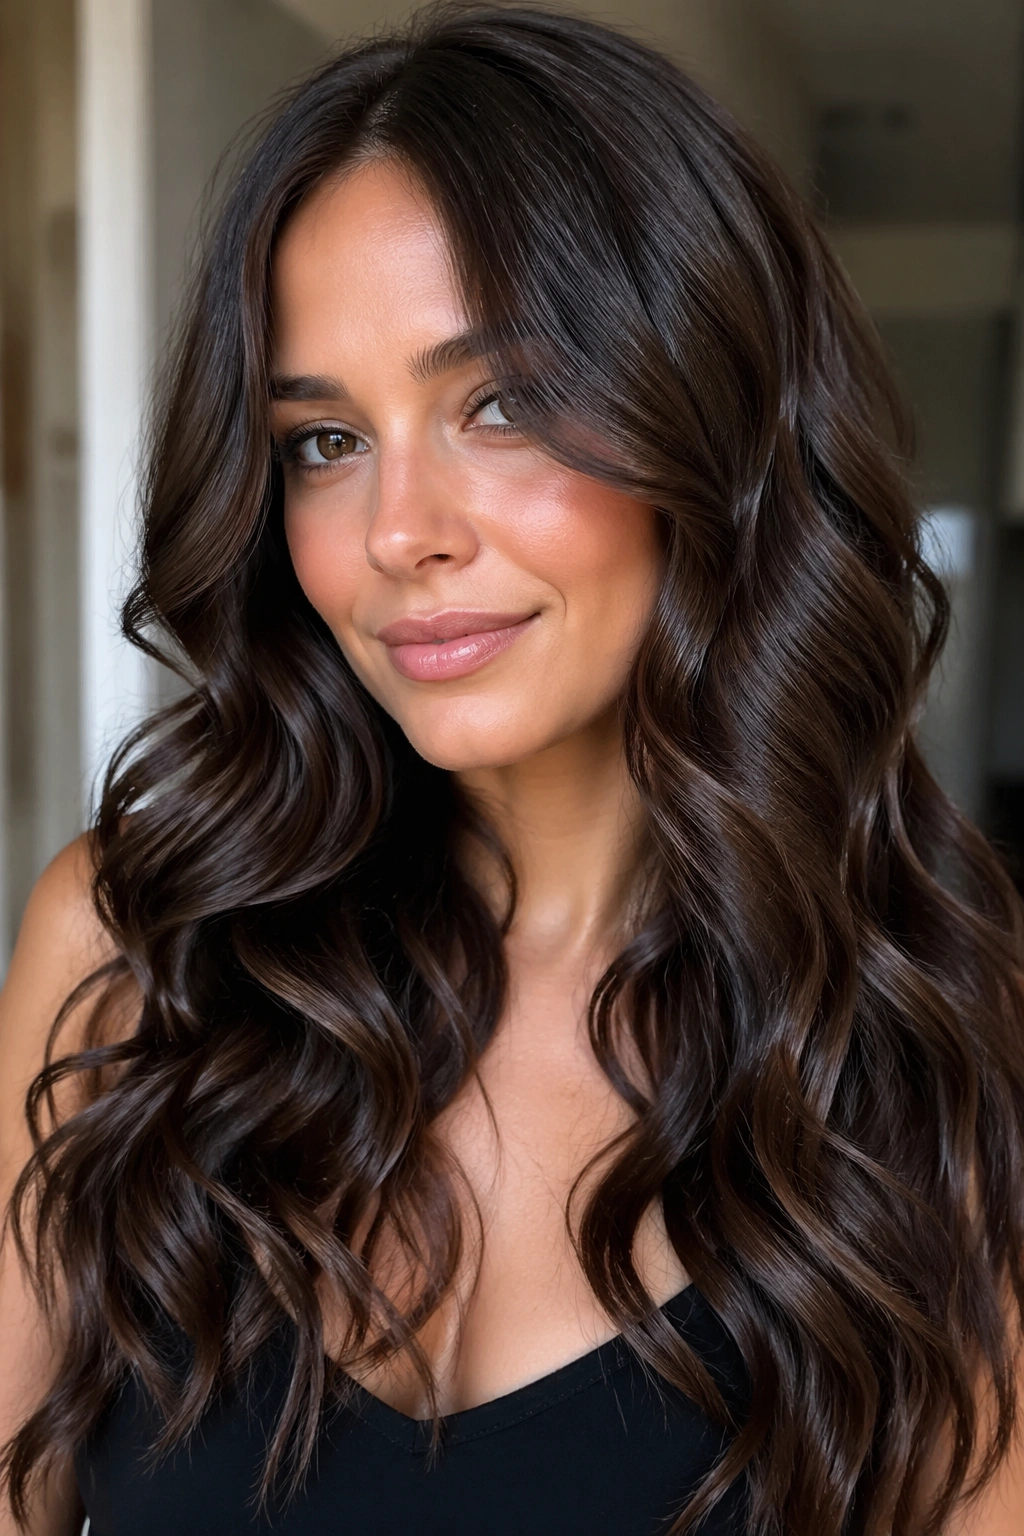
Not every long wave needs to look airy and tossed. Defined waves have their own appeal, especially on hair that’s thick enough to hold shape and shine.
This style works because the defined clumps make the face look framed rather than surrounded. On an oval face, that gives the length structure. Use a curl cream or smoothing mousse on wet hair, then dry with a diffuser or a low-heat blow-dry. Once the waves are set, separate only the larger sections with your fingers. No rough brushing. That turns the finish puffy.
A little serum on the ends brings out the shine, but keep it away from the roots. The roots need movement. The ends need polish. Those two things can live together if you don’t overdo either side. This is one of the few styles here that can go from day to evening with almost no change.
18. Piecey Messy Waves
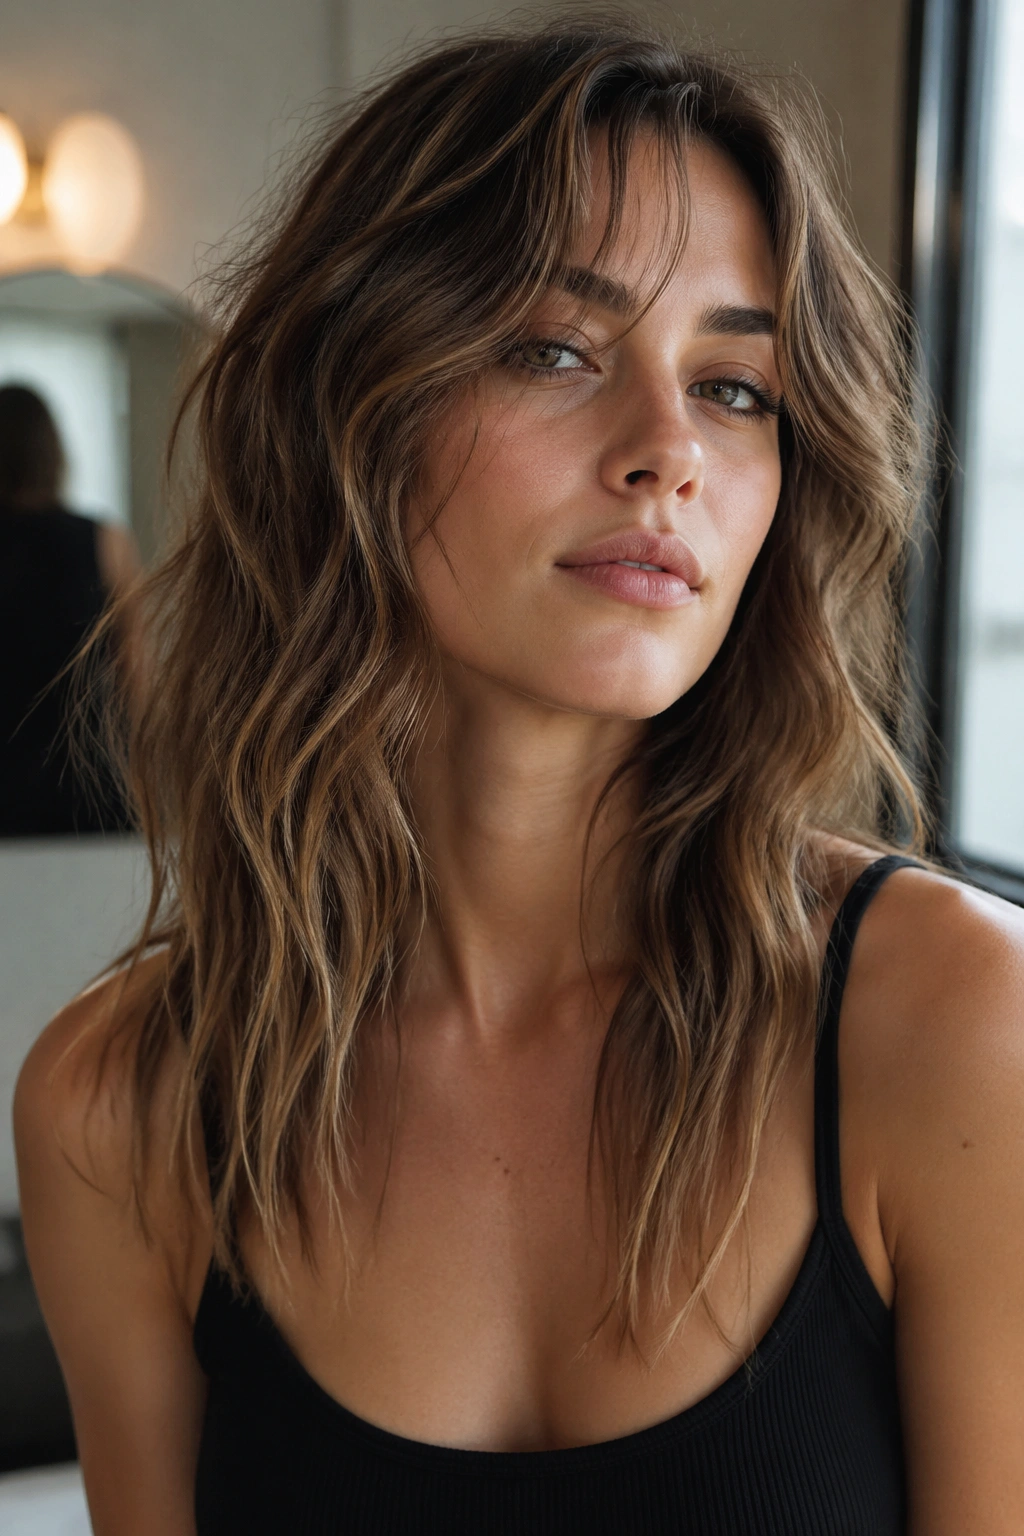
Some days the goal is control; some days it’s texture with attitude. Piecey waves land in the second category, and they’re especially useful when your hair has layers that want to separate on their own.
The style flatters oval faces by keeping the hair away from the face in thin, broken-up sections instead of one solid wall. That lets the features stay visible. It also gives long hair a bit of grit, which keeps it from looking too romantic or too polished.
Use a matte texturizing spray on dry hair, then pinch out small sections around the front and mids. Leave some ends straighter than others. That uneven finish keeps the shape alive. If the waves get too large and soft, they start reading as flat. If they’re too tiny, the style becomes crunchy. The middle ground is where this one lives.
19. Root-Volume Blowout Waves
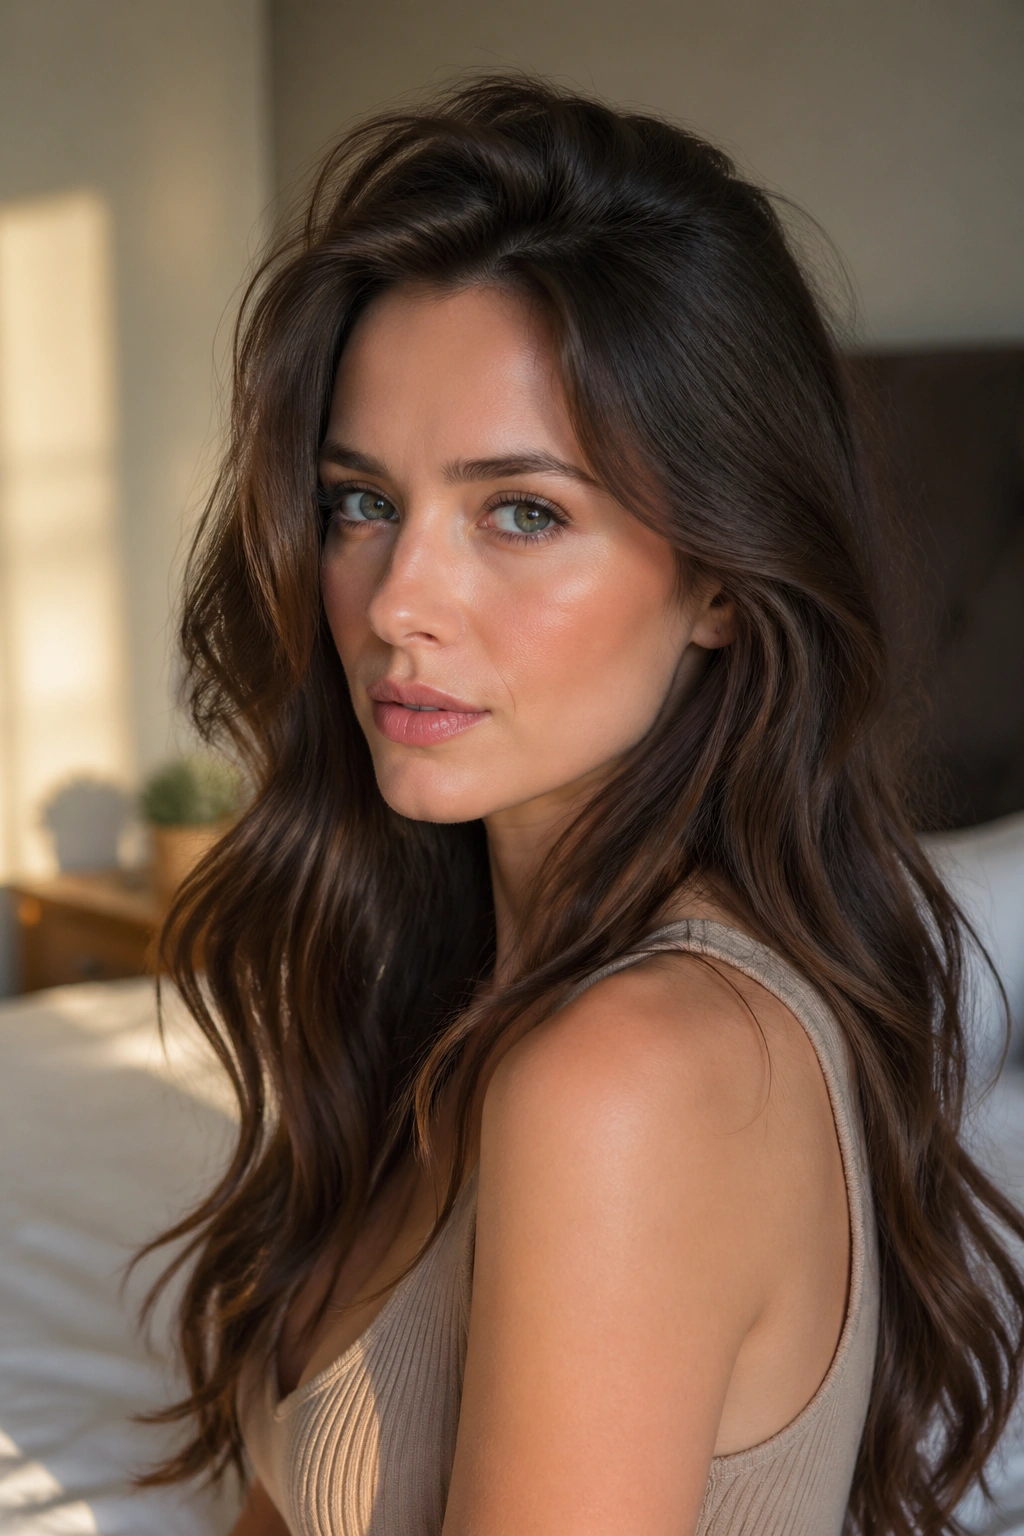
Volume at the root changes the whole silhouette. A little lift makes long waves feel lighter and keeps an oval face from looking too stretched by all that length.
The important bit is where the volume lives. Put it at the roots and upper crown, not in a giant teased mound. Then keep the wave movement from the mid-lengths down. That way the face stays open while the hair still has body. A round brush, a blow-dryer nozzle, and a setting spray at the roots are enough for most hair types.
How to Keep It from Going Puffy
Blow-dry the roots in the opposite direction of your part first, then switch back once they’re dry. That tiny trick creates lift without needing backcombing. Finish the ends with a barrel iron or a large roller if they need shape.
Fine hair loves this style. Thick hair can wear it too, but it needs less root teasing and more smoothing through the mids. If the top gets too big, the whole look turns top-heavy. Easy fix. Use less product and more directed heat.
20. U-Cut Waves for Oval Faces
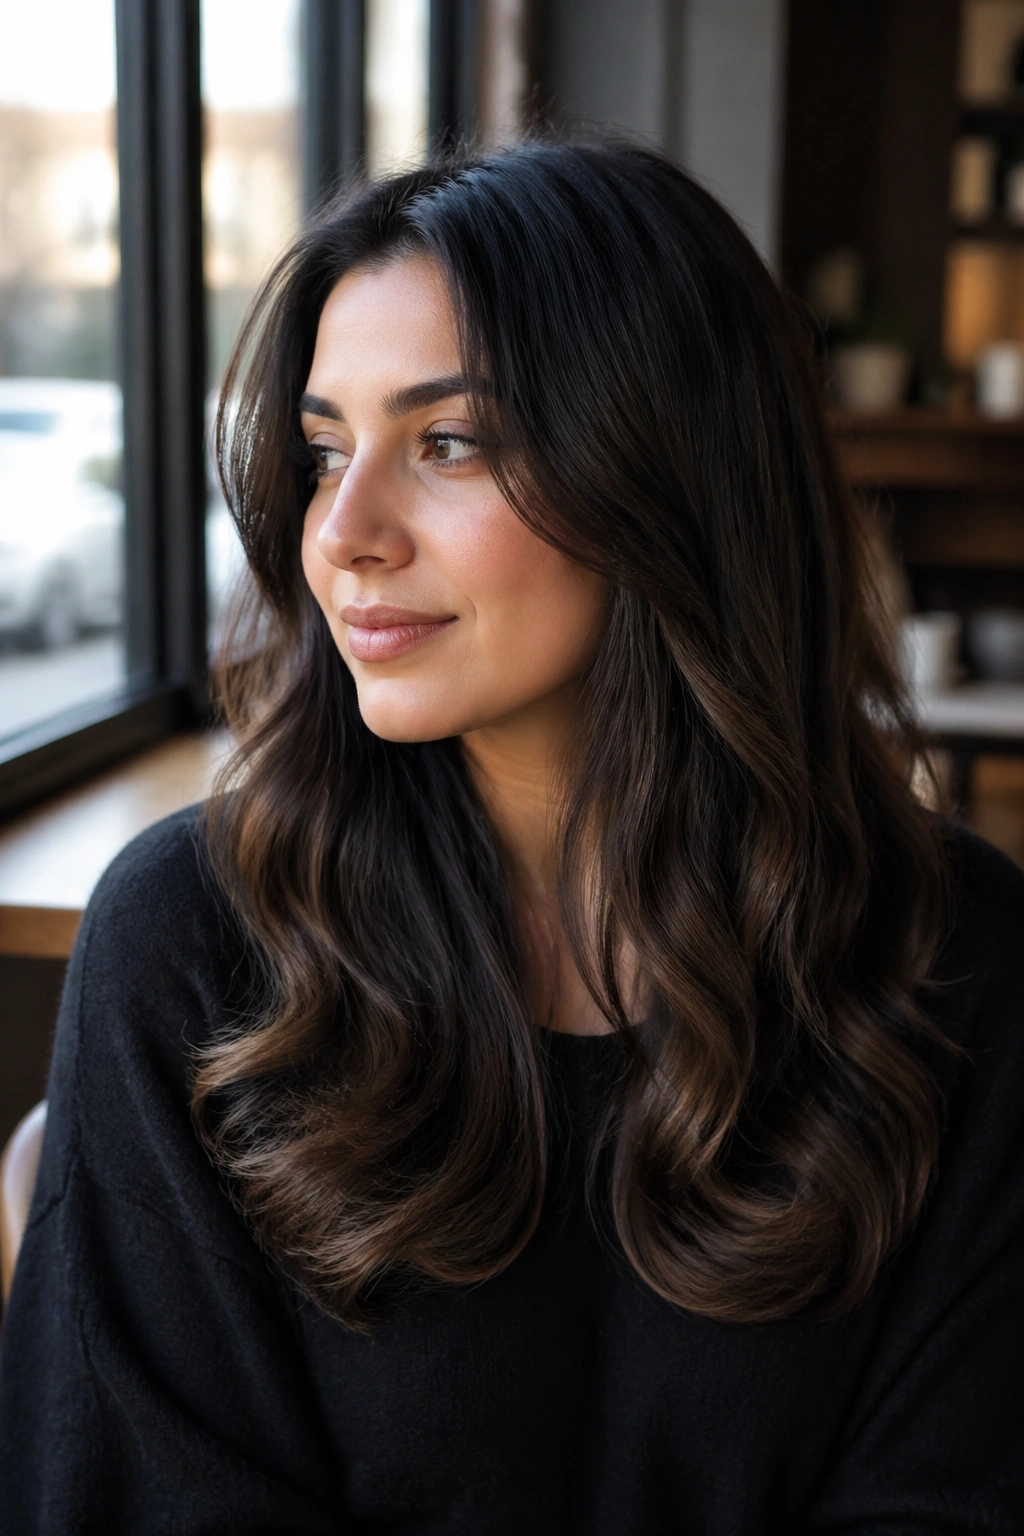
A U-shaped cut is one of the most flattering ways to keep long hair soft at the edges. The sides fall a little shorter than the center, which creates a rounded bottom line instead of a hard blunt edge.
That shape works well for oval faces because it keeps the hair from dropping straight down in a column. The sides add width where the face can use it, and the longer center keeps the length interesting from behind. When you wave a U-cut, the curve shows up even more clearly.
This is a quiet haircut, and I mean that as a compliment. It doesn’t scream for attention. It just keeps the hair moving in a way that feels natural. Ask for the perimeter to stay soft, with very subtle layers if your hair is dense. Too many layers and you lose the U. Too few and the style gets heavy.
21. V-Cut Waves
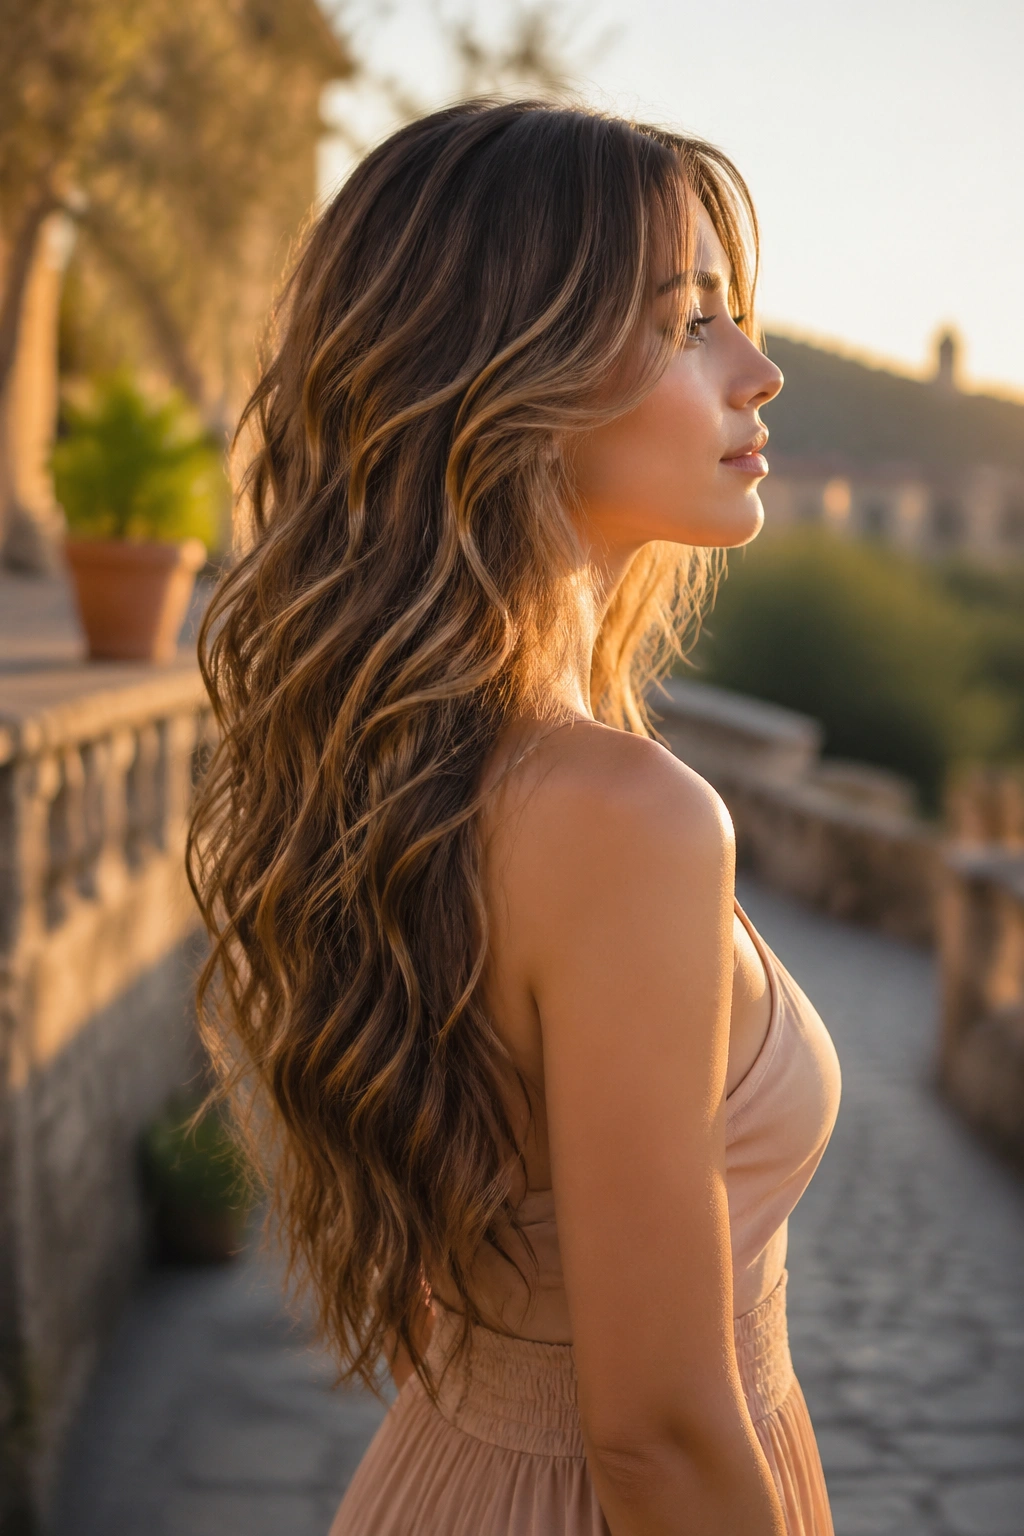
A V-cut is sharper than a U-cut. The back tapers into a point, which makes the length feel dramatic and a little more athletic in shape.
For oval faces, the key is balance. The point in back draws the eye downward, so the front and side areas need enough softness to stop the face from looking longer than it is. Face-framing layers or curtain pieces solve that. Without them, the cut can feel a bit too vertical.
Thick hair is the best candidate here. The V shape removes weight and lets the waves fall in layers instead of a solid block. If your hair is fine, the point can look thin at the bottom. That’s not the end of the world, but it is something to think about before asking for the cut. I’d keep the point subtle unless the hair has enough density to support it.
22. Invisible Layers With Soft Waves
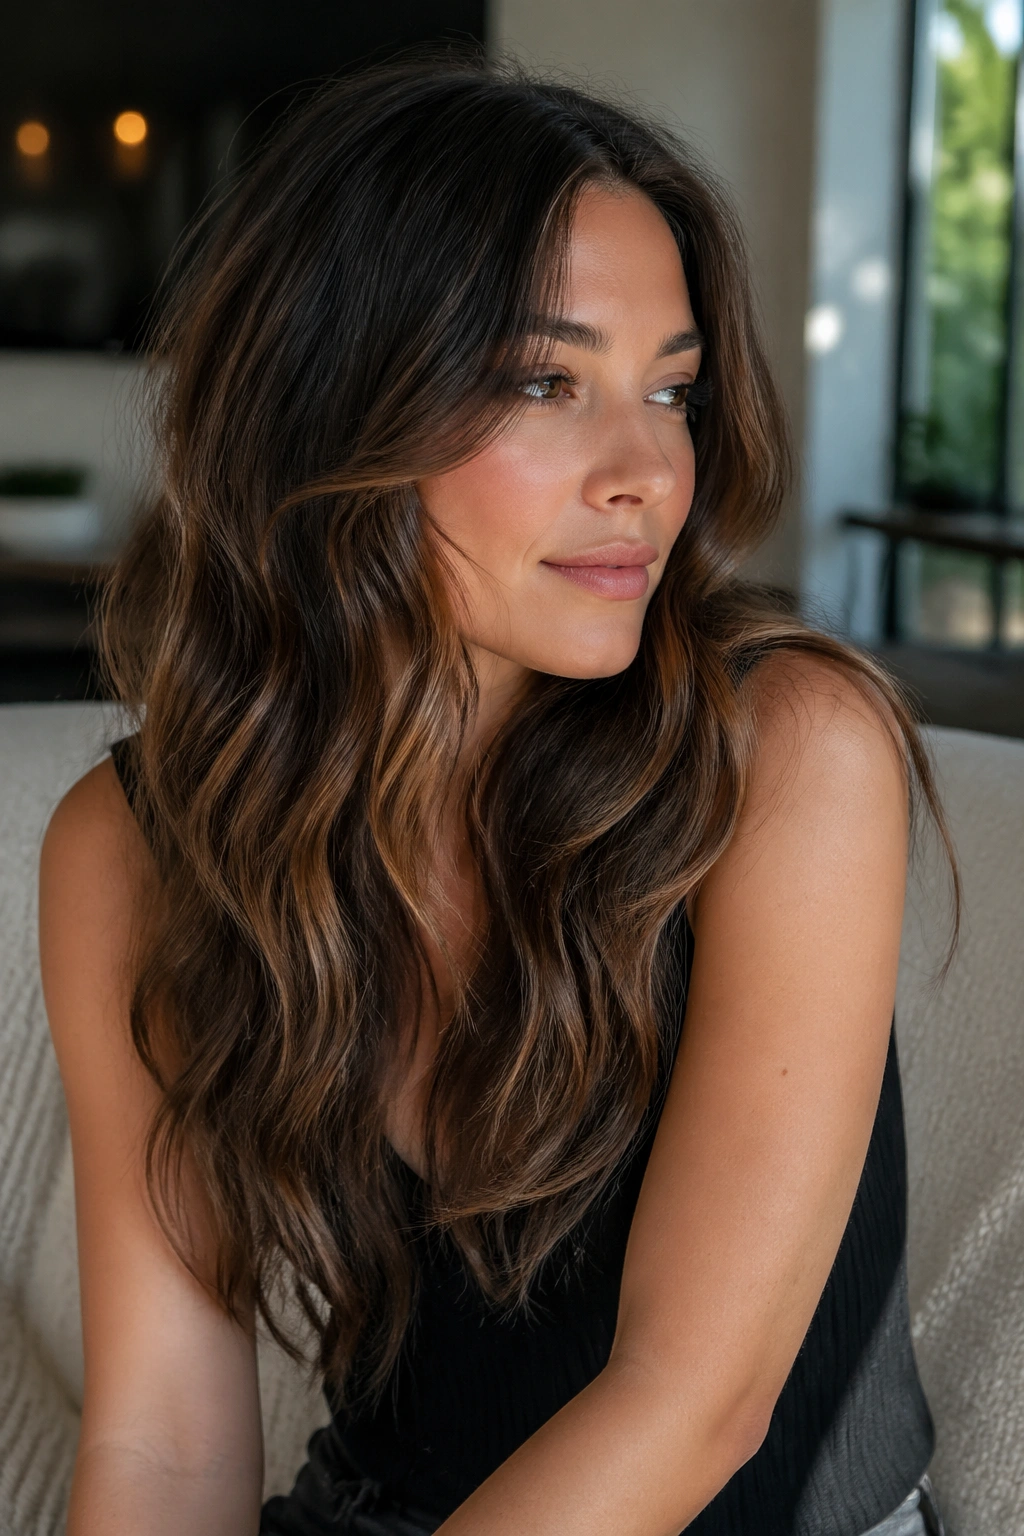
Invisible layers are one of those salon terms that sounds vague until you see the result. The hair still looks long and full, but it moves better because the weight has been taken out from inside the shape.
That’s useful on oval faces because the style keeps length while preventing the lower half from feeling heavy. The wave pattern falls more naturally when the hair doesn’t have to fight itself. If your hair is thick, this cut can be the difference between bouncy waves and a style that just hangs there.
Why They Matter More Than They Look
Invisible layers don’t scream “layered haircut.” That’s the point. The movement shows up when you turn your head or tuck one side behind your ear, not in choppy steps around the face.
Use them with soft, medium waves rather than tight curls. The bend should read as motion, not texture for texture’s sake. If you’re trying to grow your hair out, this shape is one of the least annoying ways to keep the ends from looking stale.
23. Long Shag Waves
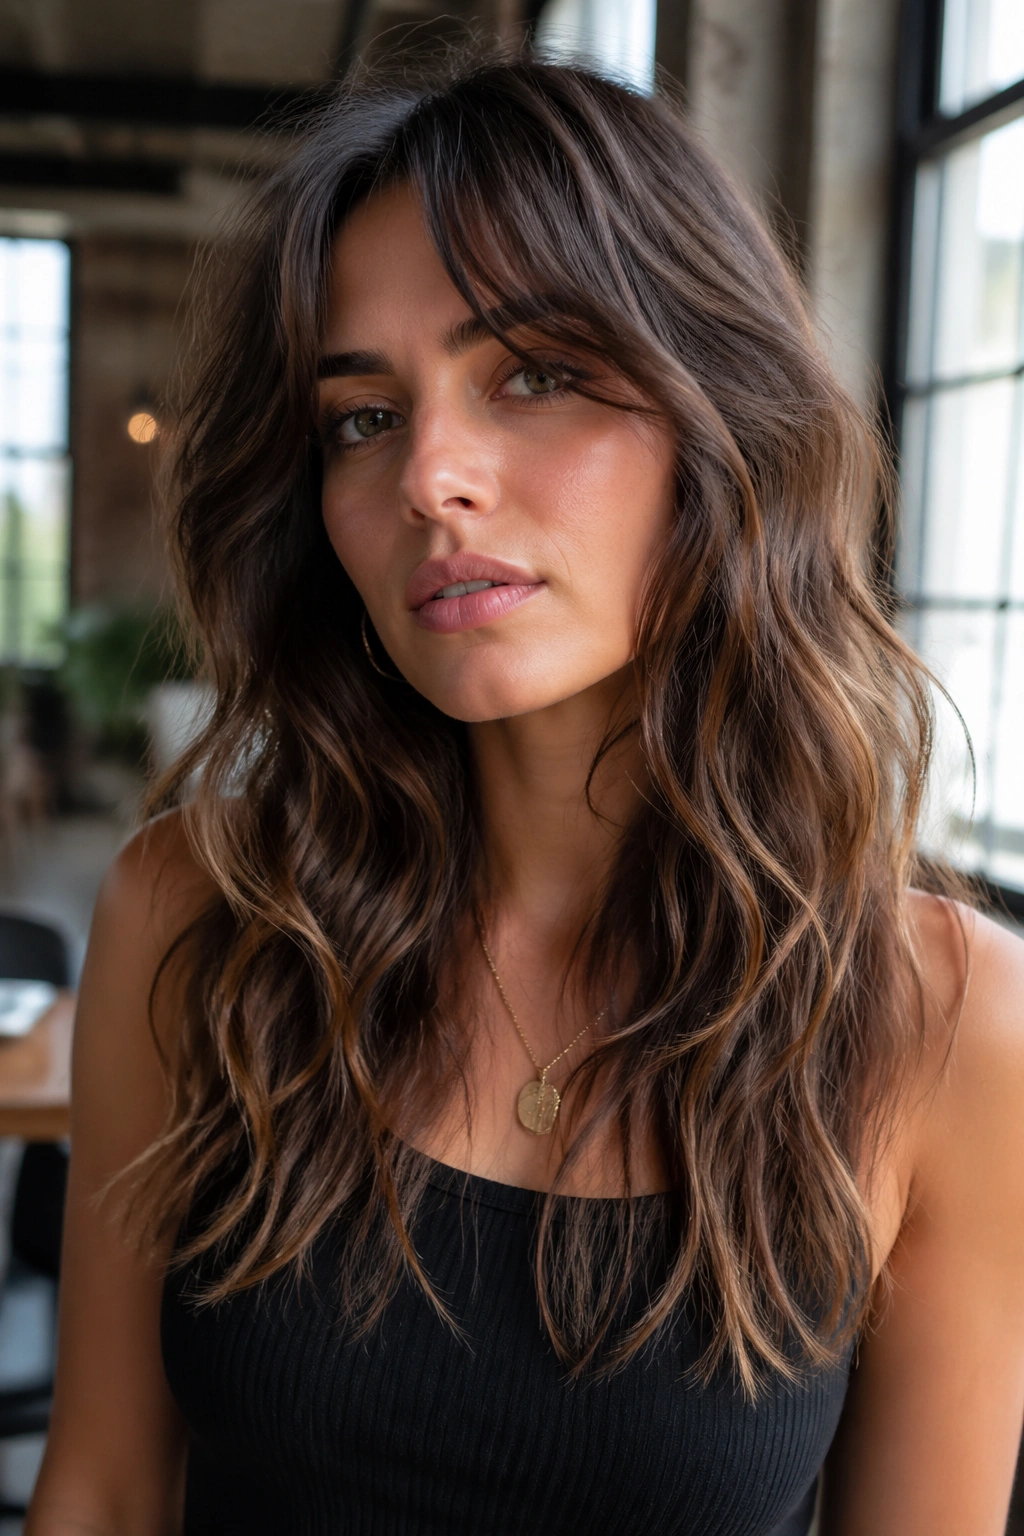
A long shag is not a short haircut in disguise. In the long version, the layering gets airier, the ends stay loose, and the front pieces often fall in a slightly messy frame around the face.
That makes it a strong pick for oval faces that can handle a bit of edge. The shape gives the hair movement through the crown and around the temples, which keeps the style from feeling flat or overly sweet. It also suits wavy textures that want to do their own thing. If your hair resists neatness, the shag can actually make that easier to live with.
Keep the fringe soft if you want the look to stay modern. Heavy, square bangs can fight the wave pattern and make the haircut feel boxed in. A long shag works best when the front pieces skim the cheekbones and the rest of the hair stays airy all the way down. It’s messy, but in a controlled way. There’s a difference.
24. Lived-In Highlighted Waves
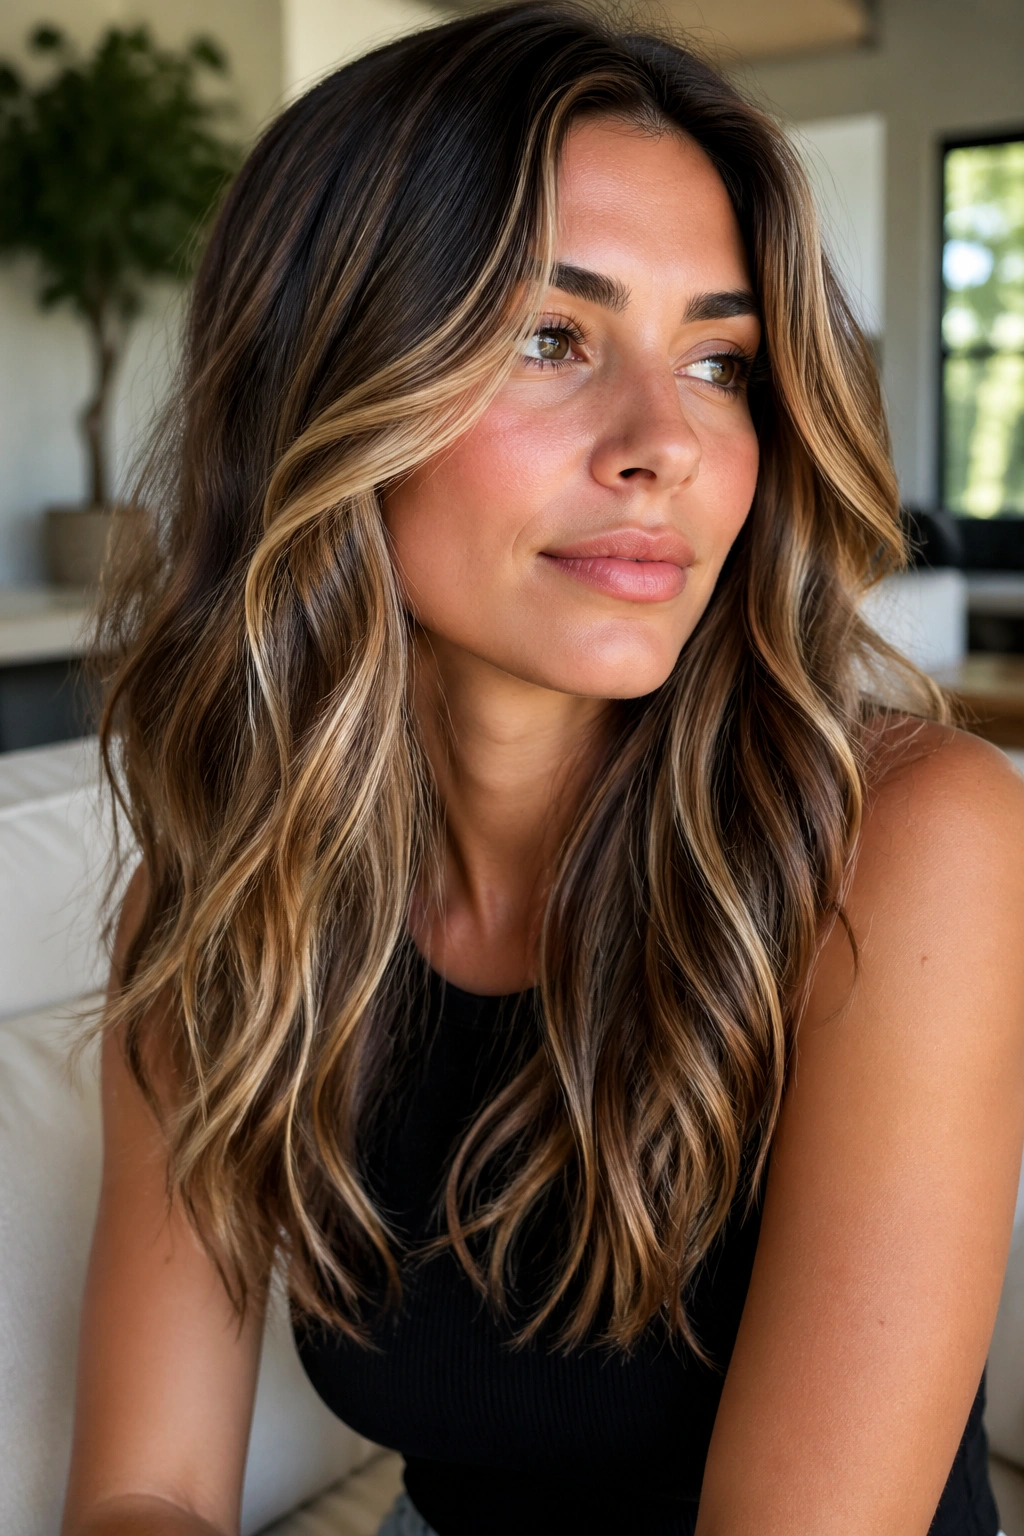
Color changes the way waves read, and that matters more than people like to admit. A few well-placed lighter pieces can make the bends and curves show up even when the styling is simple.
On an oval face, that extra movement around the front can brighten the cheek area without needing a drastic haircut. I prefer soft, hand-painted highlights that sit around the face and through the mids. They catch on the wave pattern and keep the length from looking like one solid block. If your hair is dark, even a subtle dimension shift can change the whole hairstyle.
This style is low-fuss once it’s there. The hair can be air-dried, diffused, or curled in loose sections, and the color still does part of the work. Avoid chunking too much brightness at the very top unless you want the crown to stand out. The prettier effect usually lives below the roots anyway.
25. Chunky Highlight Waves
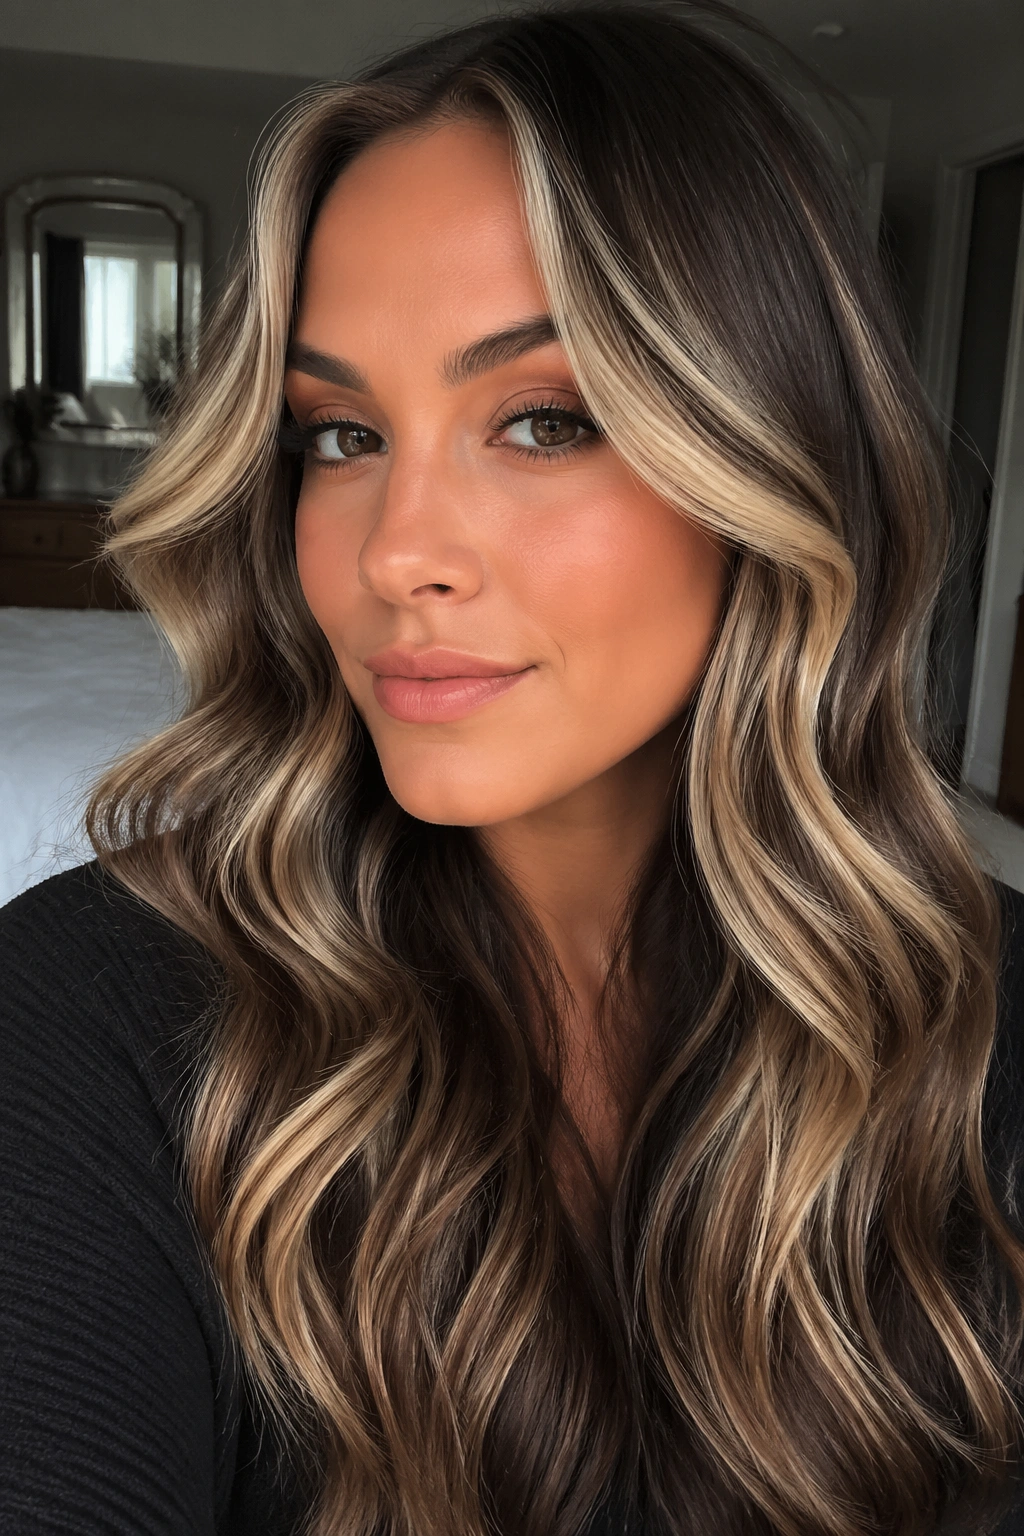
Chunkier highlights are bolder than soft balayage, and they give long waves a graphic edge. The wave pattern becomes more obvious because the light and dark bands alternate more clearly.
That can look especially good on oval faces that want a little more personality around the front. Place the brightest pieces near the cheekbones and temple area, then keep the ends a touch darker so the hair doesn’t lose depth. The contrast makes the waves pop, but the face-framing placement keeps it flattering instead of busy.
This style feels more directional than delicate. It suits people who like their hair to look styled even when the wave pattern is loose. If your texture is already dry or frizzy, chunky highlights can make that more visible, so the upkeep matters. Use a moisturizing mask and a heat protectant, or the texture will start winning the argument.
26. Romantic Ribbon Waves
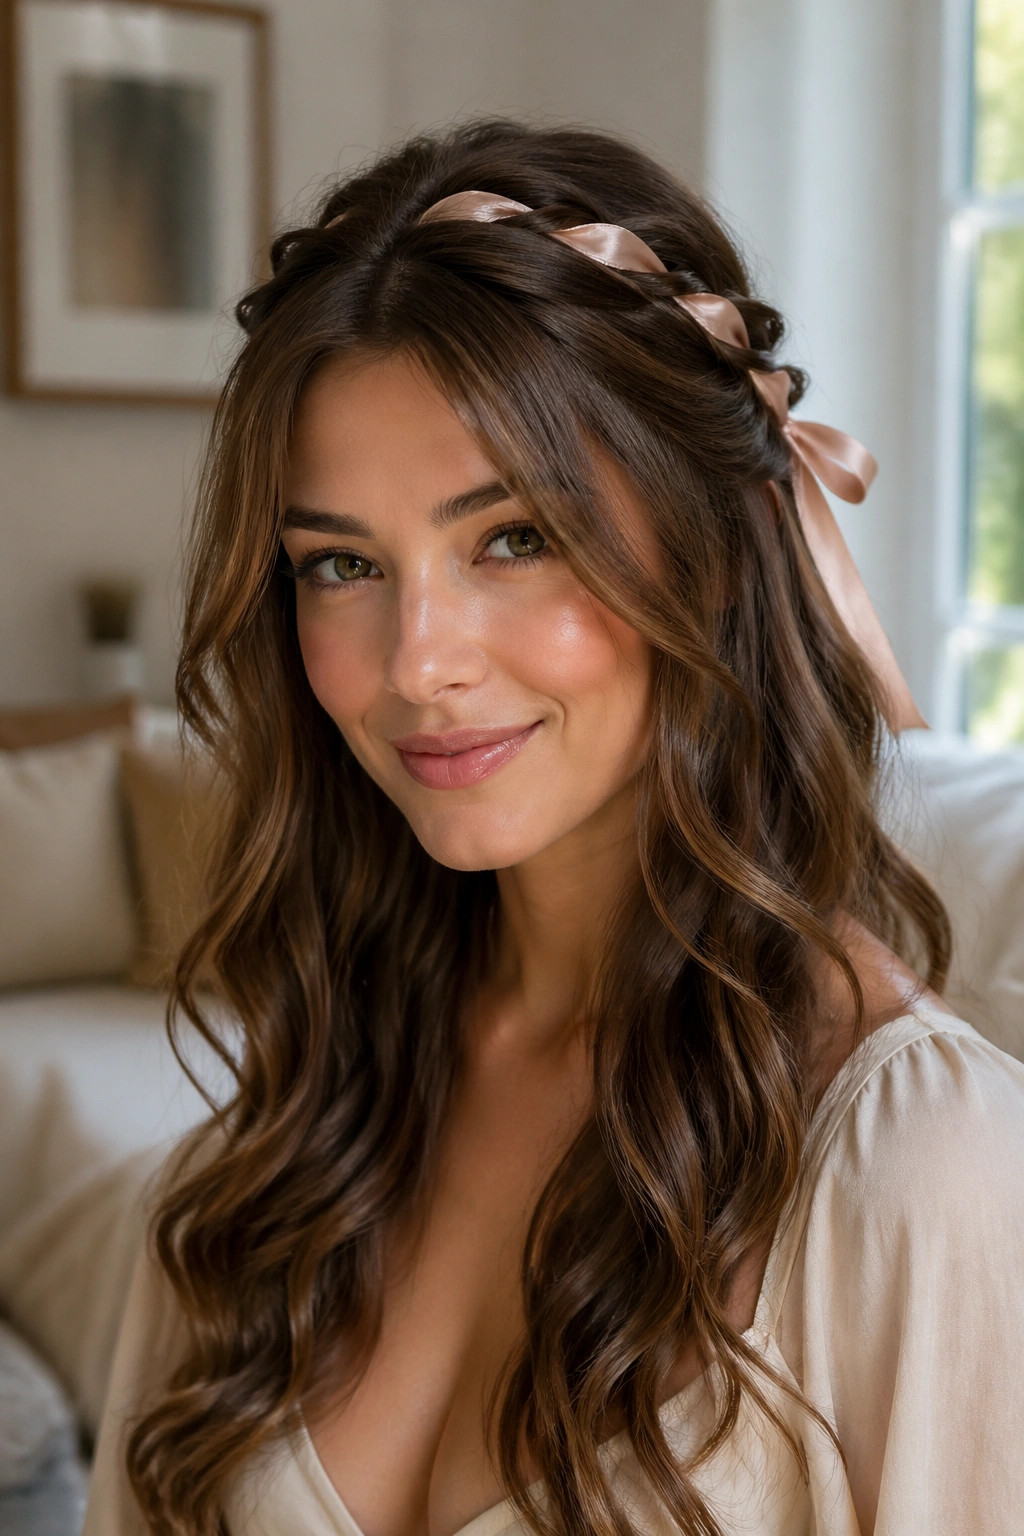
A ribbon tie changes the mood faster than almost any other accessory. Pulling back a small section with silk or satin gives the waves a softer focal point and keeps the face open without a hard elastic mark.
This works well on oval faces because the accessory sits off the forehead and lets the length do the rest. You can tie a half-up section at the back of the crown or use a ribbon to secure a low half pony. Either way, the waves below should stay loose and gently brushed out. The ribbon should look like part of the style, not like you borrowed it from a gift box five minutes before leaving.
Soft textures help here. A glossy wave pattern reads prettier with ribbon, while very piecey waves can look too scattered. Keep the color of the ribbon close to the outfit or hair tone if you want the style to feel calm. If you want contrast, go dark against blond hair or pale against deeper tones.
27. Side-Swept Formal Waves
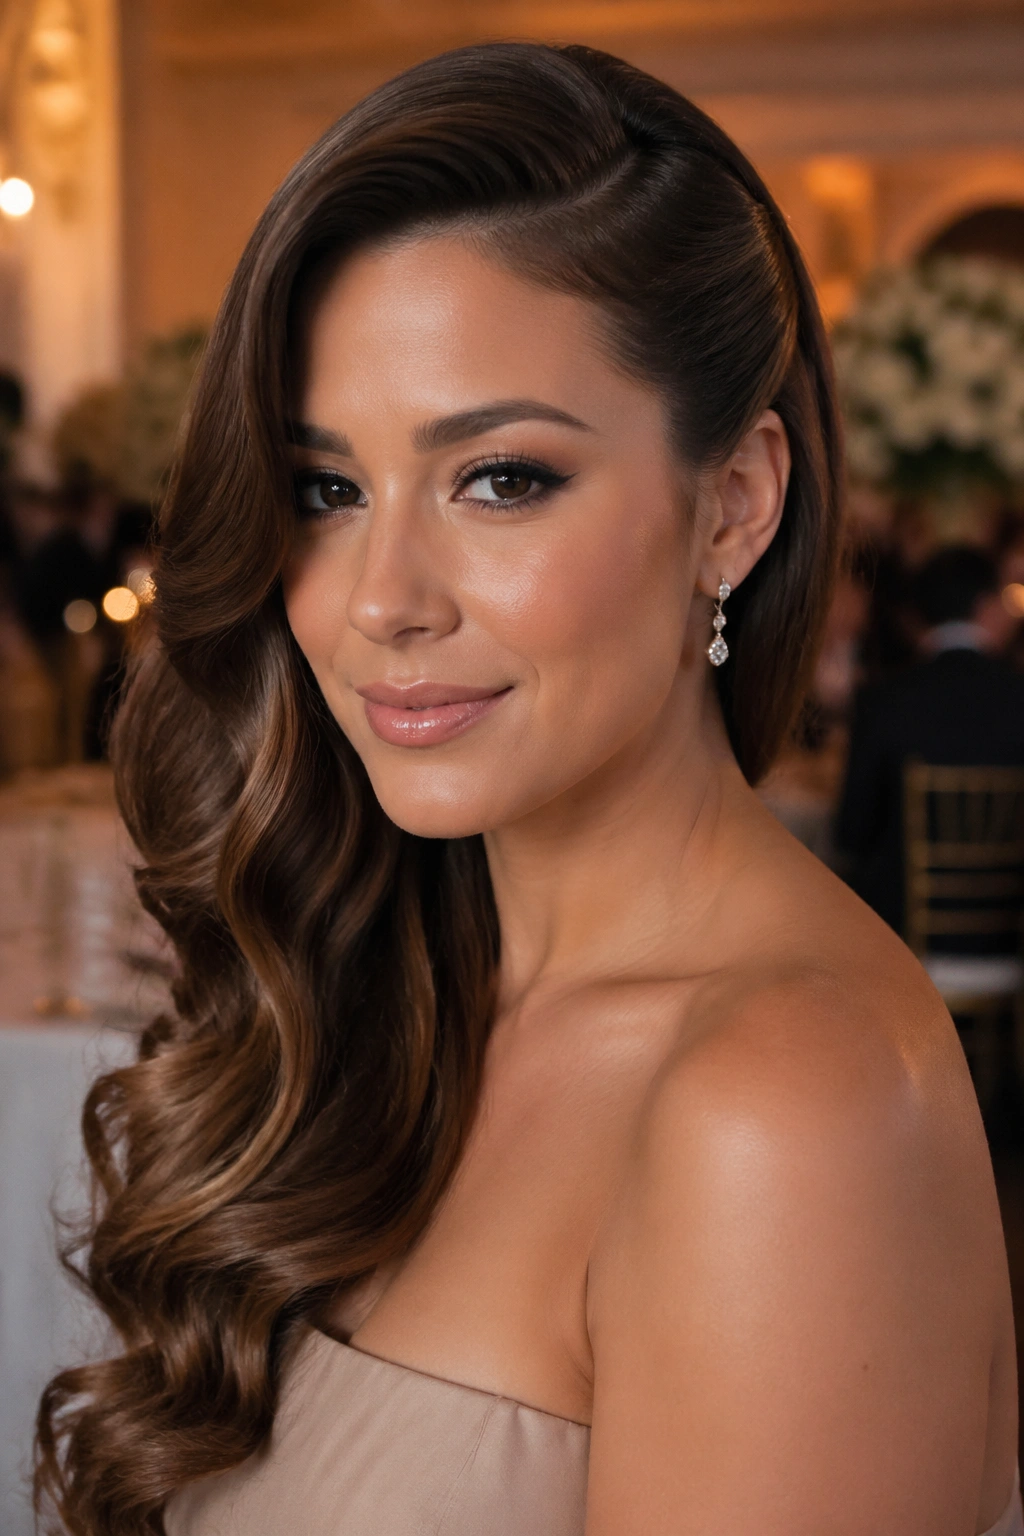
Side-swept formal waves lean into one shoulder and create a long diagonal line across the body. That line is flattering on oval faces because it adds motion without crowding the center of the face.
The style usually starts with a deep side part, then one side gets tucked and pinned back while the other side drapes forward in smooth waves. It feels grown-up without becoming severe. The pinned side should stay low and close to the head so the hairstyle keeps its length. If the pin sits too high, the whole thing turns awkward.
This is a good event style because it survives movement better than a fully loose wave. A few hidden pins behind the ear and a generous spray at the nape help it stay in place. Leave the front wave around the cheekbone soft, not curled into a ring. That soft edge is what keeps the style elegant instead of stiff.
28. Loose Curl-First Waves
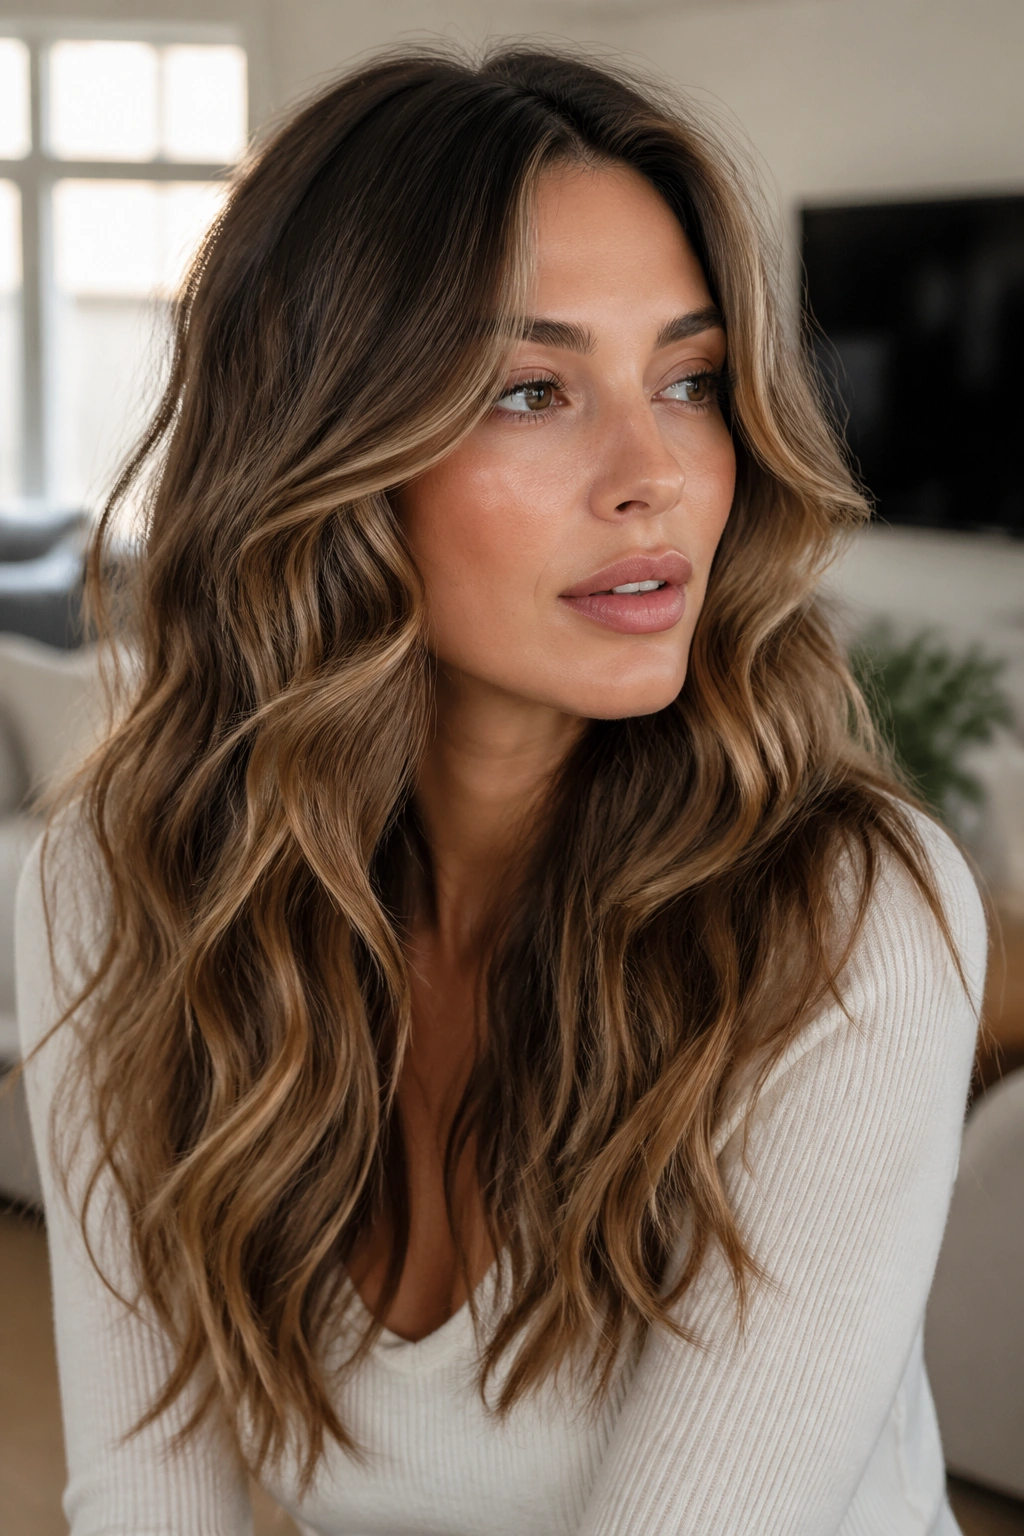
Some people get better waves by starting with curls and brushing them out later. If your hair is straight or only a little wavy, that route often gives a cleaner bend than trying to force the pattern with salt spray alone.
Use a 1-inch curling iron for tighter curls, then let the hair cool completely before separating it. Once the curls are cool, brush gently from the bottom up until they melt into soft waves. The finished style has more shape than a beach wave but less structure than a polished Hollywood set. That middle ground is where a lot of oval faces look their most balanced.
A curl-first method also gives the front pieces better control. You can direct them away from the face at the cheekbone, then let the rest fall looser. It’s a smart choice when you want the style to last past dinner. The curls set first; the waves come later.
29. Low Ponytail With Face-Framing Waves
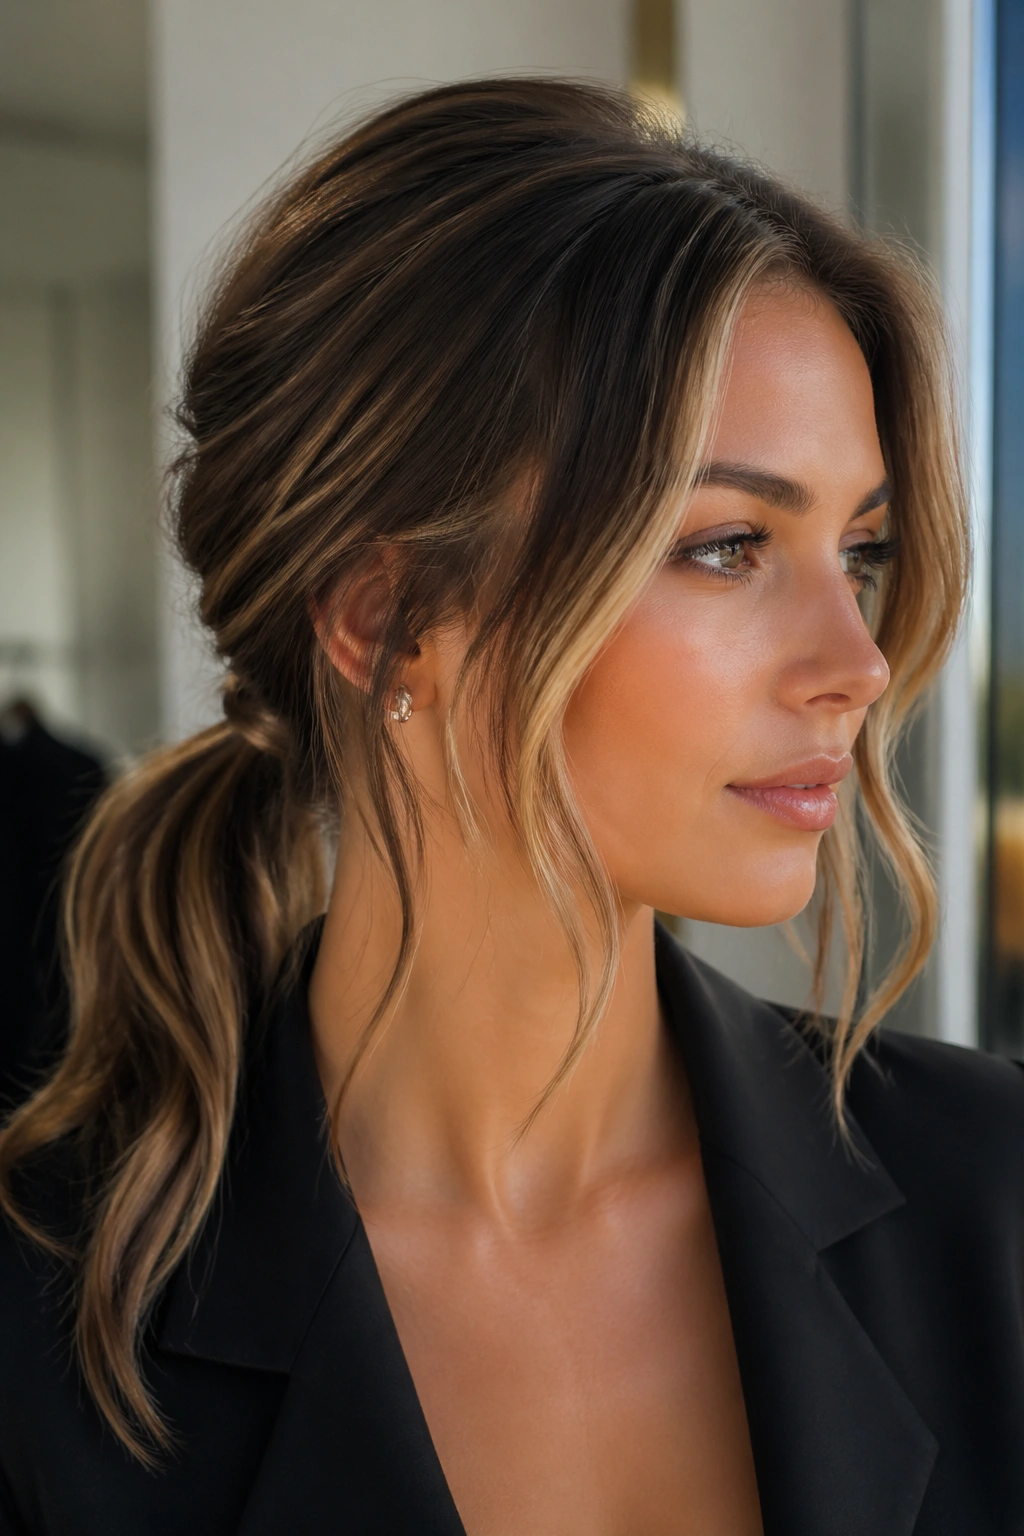
A low ponytail can still count as a wavy hairstyle when the length and texture stay visible. In fact, it’s one of the most useful ways to wear long wavy hair without hiding it.
For oval faces, the face-framing pieces are what keep this from feeling too plain. Pull the pony low at the nape, leave two loose sections out near the temples, and curl those pieces softly away from the face. If the hair around the crown is a little smoothed down, the face stays open and the ponytail keeps the style grounded.
This is a good workday version, but it also holds up for more dressed-up settings if the waves are glossy. Wrap a strand around the elastic, then pin the end underneath. That small move cleans up the whole look. If your hair is thick, don’t yank the pony too tight. A little looseness at the crown keeps the head shape flattering.
30. Soft One-Length Waves for Oval Faces
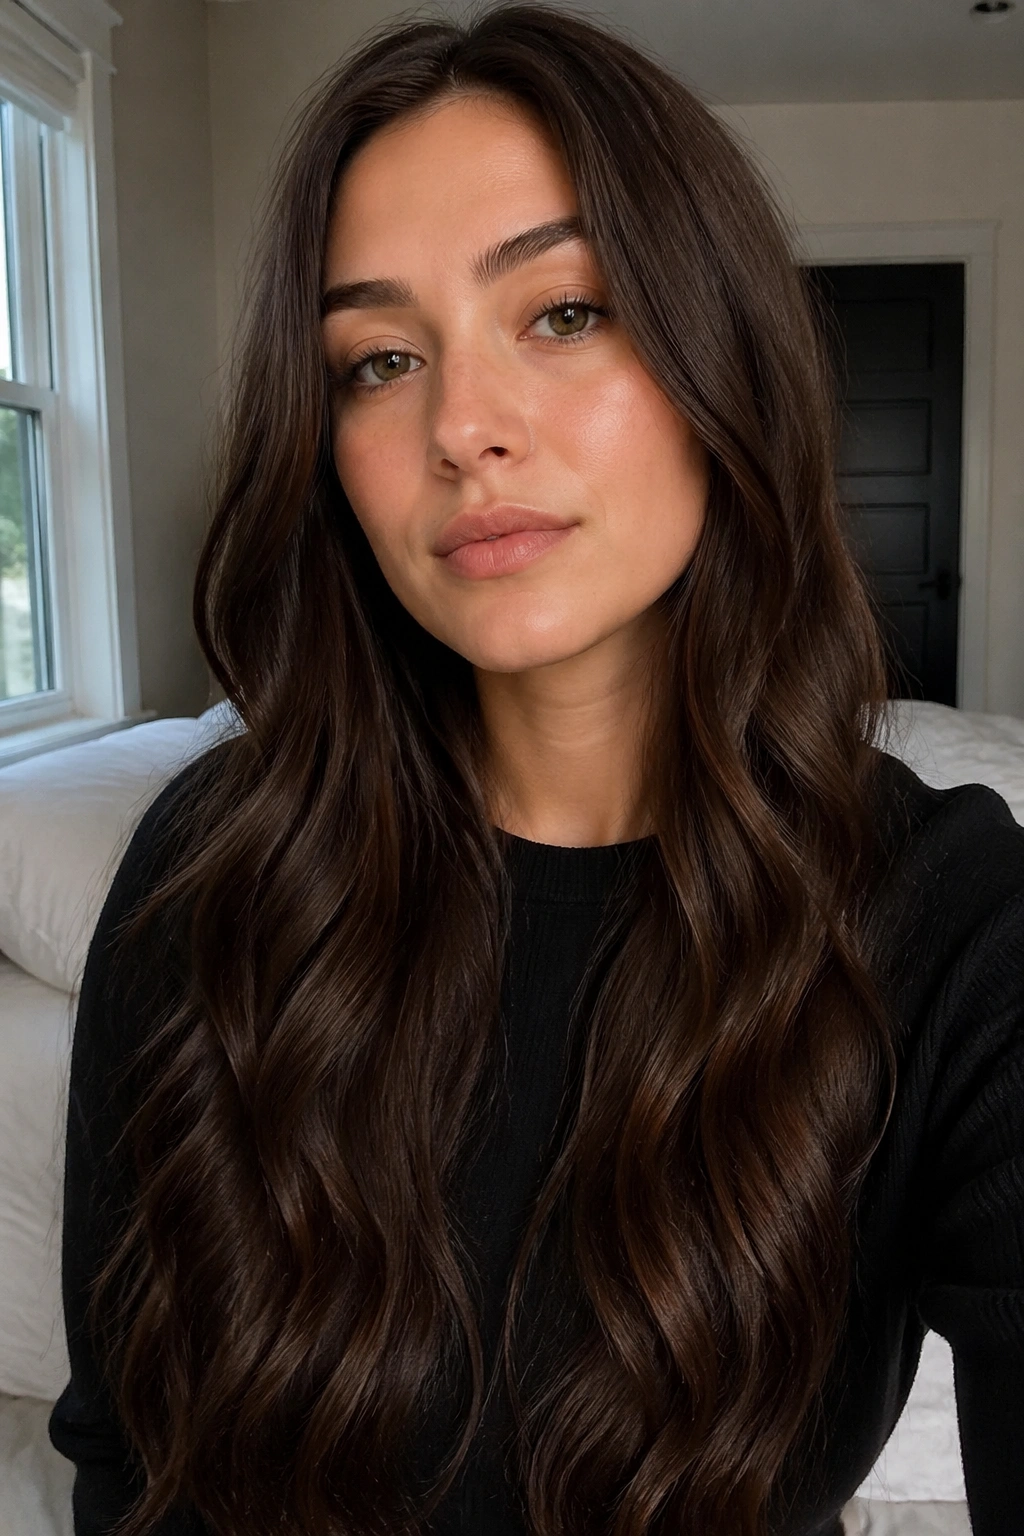
A one-length cut with soft waves is the simplest option on this list, and I mean that in the best way. No obvious layers, no heavy fringe, no extra tricks. Just long hair with enough wave to keep the shape alive.
This style works when the hair is thick enough to support its own body. The ends stay full, which gives the length a lush feel, and the oval face gets framed by a clean wave pattern rather than a lot of chopped-up pieces. If you want your hair to look dense from top to bottom, this is a strong choice. It also ages well, which is more useful than people admit.
The only real catch is maintenance. One-length waves can look flat if they’re under-styled, so a bit of root lift or a soft bend through the mids helps. If you like a style that feels steady, polished, and easy to understand at a glance, this is the one I’d keep on the shortlist.
