



Four braids into a bun is one of those deceptively simple formats. It looks minimal. It reads clean. And once you start paying attention, you realize there’s a whole universe of variation hiding inside that basic structure — how the braids are parted, where they meet, how the bun is shaped, what texture the rest of the hair brings. Four cornrows sounds like a small number until you start placing them differently. Then it becomes a language.
The four-braid cornrow bun works for almost every hair length over 4 inches, most face shapes, and a genuinely wide age range. It’s the style I default to on travel weeks because it survives airports, hotel pillows, and humidity without needing touchups. And when someone asks me for a go-to protective style that doesn’t scream “I just spent 6 hours at the braider,” this is usually what I recommend.
What makes four braids different from, say, eight or twelve is the visual weight distribution. Four braids sit farther apart. Each one reads as its own line against the scalp. You see the parts, you see the shape, and when they converge into a bun, the bun itself becomes more of a focal point — a natural anchor — rather than one detail among many.
I’ve gathered 22 variations here that each treat the four-braid foundation differently. Parting matters. Bun placement matters. Whether the braids fuse into the bun or remain distinct matters. The list moves from simple to complex, with a few unexpected directions in between.
The Foundation of a Four-Braid Bun
Four cornrows can be parted in multiple ways. Straight-backs are the default. Two on each side from a center part, all meeting at the crown. But you can also do diagonals, zigzags, or cross-parts where the braids angle toward each other before meeting.
The bun itself comes at the ends. Once all four cornrows reach the gathering point (usually the crown, sometimes the nape), the remaining hair is wound into a bun shape and secured. The bun can be neat and tight, loose and messy, or sculpted into a specific form.
Understanding these two layers — the parting on the scalp and the bun at the end — is the key to getting the most out of every variation.
Prep That Sets the Bun Up to Hold
A bun that won’t stay put is almost always a product issue, not a technique issue. Wash 24 hours before styling. Let the hair fully dry. Apply a medium-hold edge control along the hairline and a lightweight styling cream through the rest of the hair.
Skip heavy butters and oils on braid day. They make the cornrows slide around while braiding and cause the bun to loosen faster. If your hair is dry, add moisture 48 hours before the appointment with a deep conditioner — not the day of.
Sectioning Cleanly for Just Four Parts
With only four braids, the parts have to be perfect. Crooked parts on a 12-braid style hide in the crowd. Crooked parts on a 4-braid style are the first thing anyone sees.
Use a rat-tail comb and work slowly. Section with clips as you go. A good first part runs dead center from the hairline to the nape. Then two more parts, one on each side, to split each half into two equal pieces. That’s your standard four-section foundation.
Hold a mirror behind your head when you finish. If any part zigzags or dips in the middle, redo it before braiding. It takes 60 seconds to fix a bad part now and hours to live with it later.
Tools for the Bun Finish
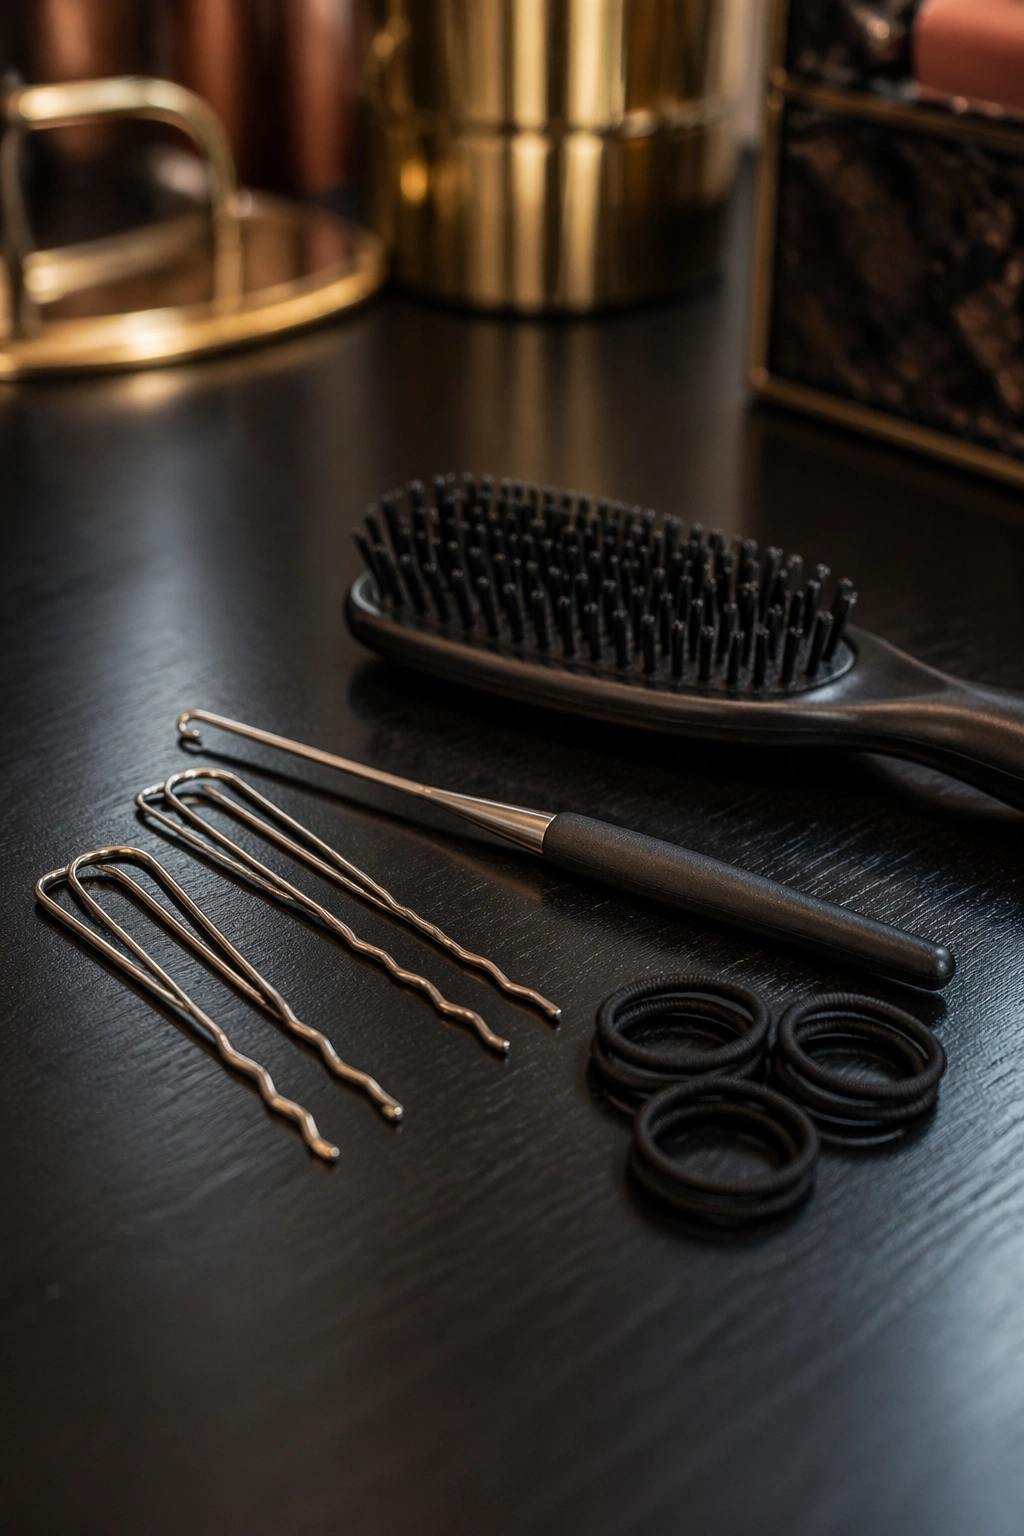
A few items beyond the usual: hair pins (the U-shaped ones, not bobby pins), a small crochet hook for tucking loose ends into the bun, and a soft bristle brush for smoothing the bun surface. Elastic bands to gather the four braids before bun formation. That’s the basic kit.
Choosing Your Bun Height
Low buns at the nape read as polished and professional. High buns at the crown read as playful or athletic. Mid-head buns are the sweet spot — formal enough for most settings, casual enough for everyday.
Pick based on face shape. Low buns elongate round faces. High buns balance longer faces. Mid-height works on almost everyone.
1. Simple Straight-Back to Low Bun
The classic starting point. Four straight cornrows from the hairline to the nape, where they converge and are wound into a tight, low bun at the base of the neck.
Why It Works
The horizontal lines of the cornrows and the spherical shape of the bun create a clean visual rhythm. Nothing competes. Nothing distracts.
- Use 4 even-spaced parts running straight back
- Keep each cornrow medium-tight at the root and the same width throughout
- Gather all four into a single elastic at the nape
- Wrap the remaining hair into a tight ball and pin with 6-8 U-pins
Tip: Before pinning, smooth the bun surface with a wet toothbrush and a dab of edge gel. This makes the bun photograph cleanly and prevents flyaways from ruining the look within hours.
2. Side-Part Four Braids to Crown Bun
A deep side part replaces the center. Two braids on the smaller side, two on the larger side. All four still converge at the crown for a high bun.
The asymmetric parting gives the style immediate visual interest. The side with fewer braids (just the two narrow ones) looks sleeker. The larger side with two wider braids has more scalp showing between the parts, creating a kind of negative space balance.
Best for oval or long face shapes — the high bun with asymmetric parts gives a bit of width across the top of the head.
3. Two-Tone Braids Into a Chunky Bun
Two of the four cornrows are braided with a contrasting color extension (burgundy, honey, or a lighter brown), and the bun shows both colors mixed together.
The color placement matters. You can alternate (natural-color-natural-color) for a striped bun, or cluster (both colored braids on one side) for a lopsided color moment in the final bun.
This variation works well on anyone who’s not ready to color their actual hair but wants a color story in their style. The color comes out at takedown.
4. Four Braids With a Messy Bun Finish
Same four-braid foundation, but the bun is deliberately loose and imperfect. Some ends pulled out. Some wrapping visible. No pin-straight edges.
What Makes It Different
Where the tight low bun reads formal, the messy version reads relaxed and confident. It’s not literally messy — there’s technique involved in making something look effortless — but the visual energy is softer.
Leave about 20% of the hair out of the initial gather. Twist it loosely around the base of the bun so some strands escape and fall naturally. Avoid the temptation to pin everything perfectly. A few visible pins and loose strands sell the style.
5. Four Angled Braids to Off-Center Bun
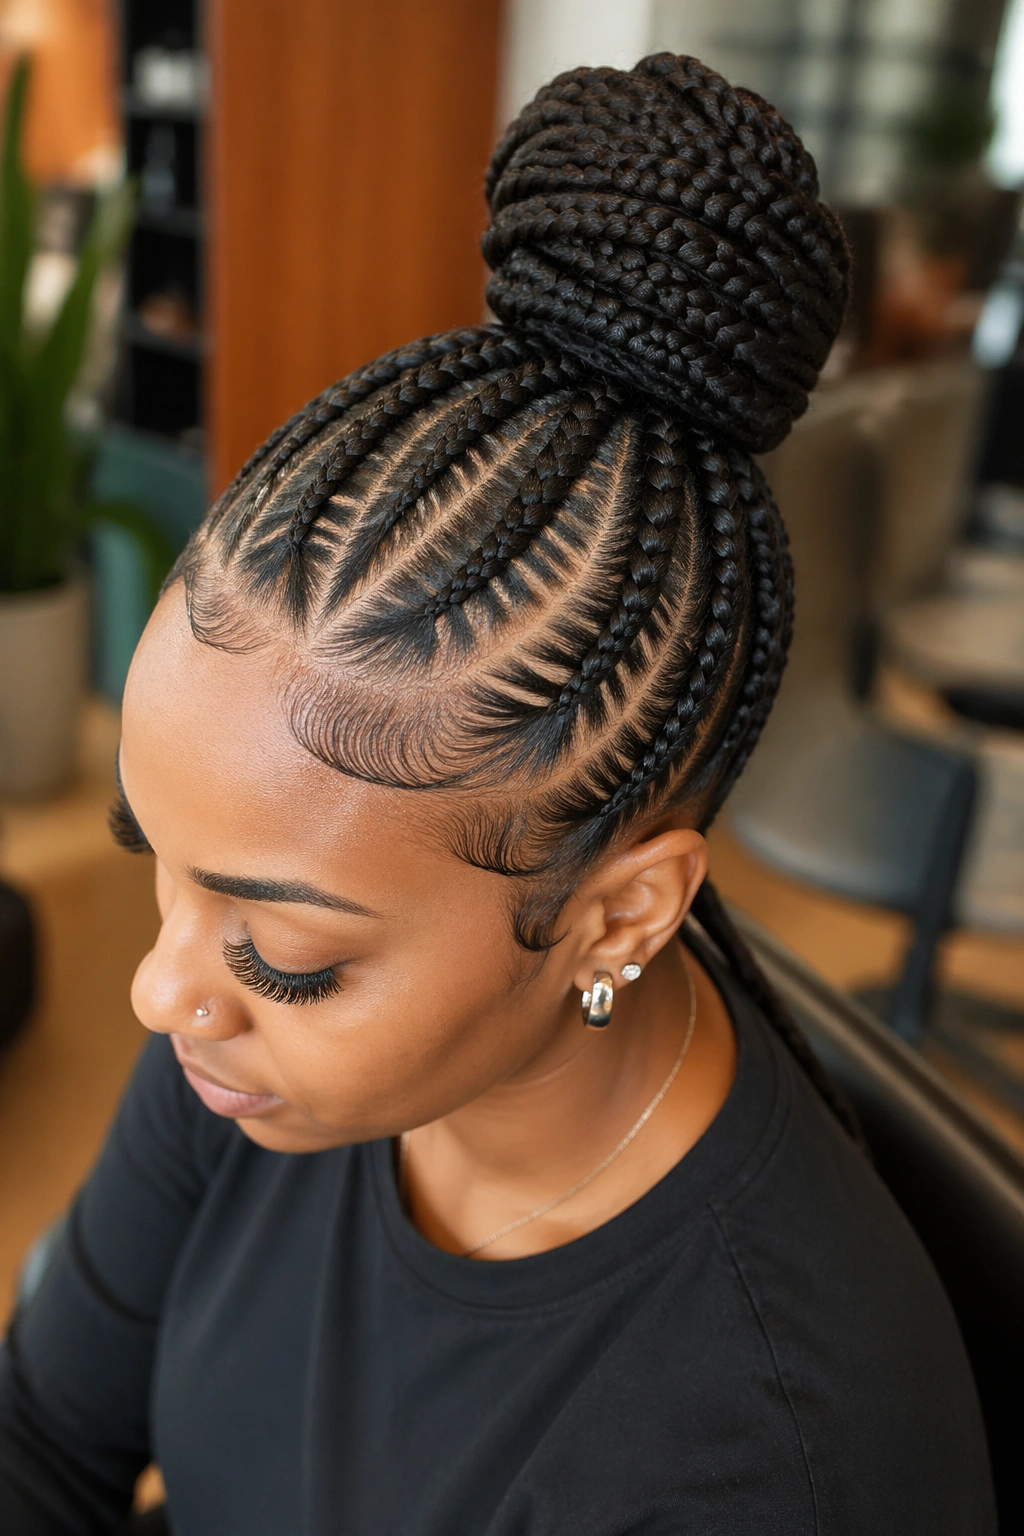
The braids don’t go straight back. They angle toward a single point that sits off-center — maybe 2 inches to one side of the crown. The bun forms there instead of at true center.
The angle creates visual movement. The finished style has a diagonal energy that straight-backs lack.
This takes a skilled braider. Angling four cornrows so they all meet cleanly at a specific off-center point requires planning before the first part is drawn. Ask for a sketch if your braider is willing — even a rough one on paper helps.
6. Braids With Gold Thread Wrap Into High Bun
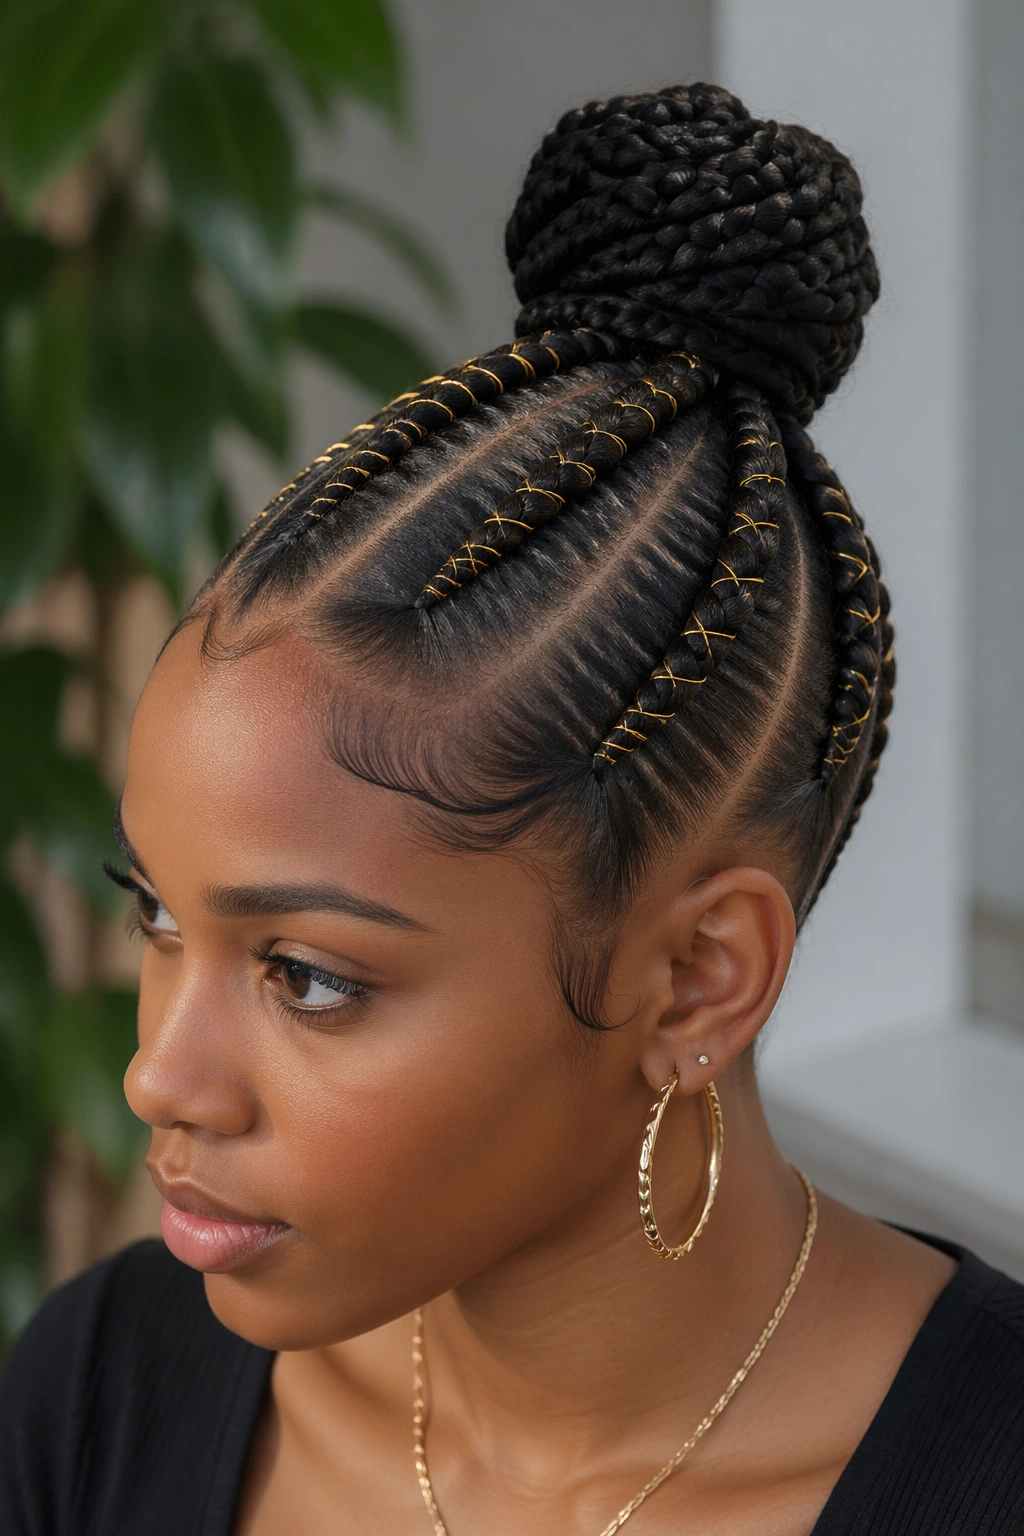
All four cornrows wrapped in fine gold thread along part of their length. The thread wraps stop about 2 inches before the ends, so the gathered hair forming the bun is thread-free.
Metallic thread catches light differently than fabric dye. The gold reads brighter outdoors and more muted indoors, giving the style different personalities through the day.
Use thread, not yarn. Yarn is too thick and makes the cornrows look bulky. Embroidery floss or specialty metallic thread from a fabric store gives the right scale.
7. Four Jumbo Braids Into a Chunky Top Knot
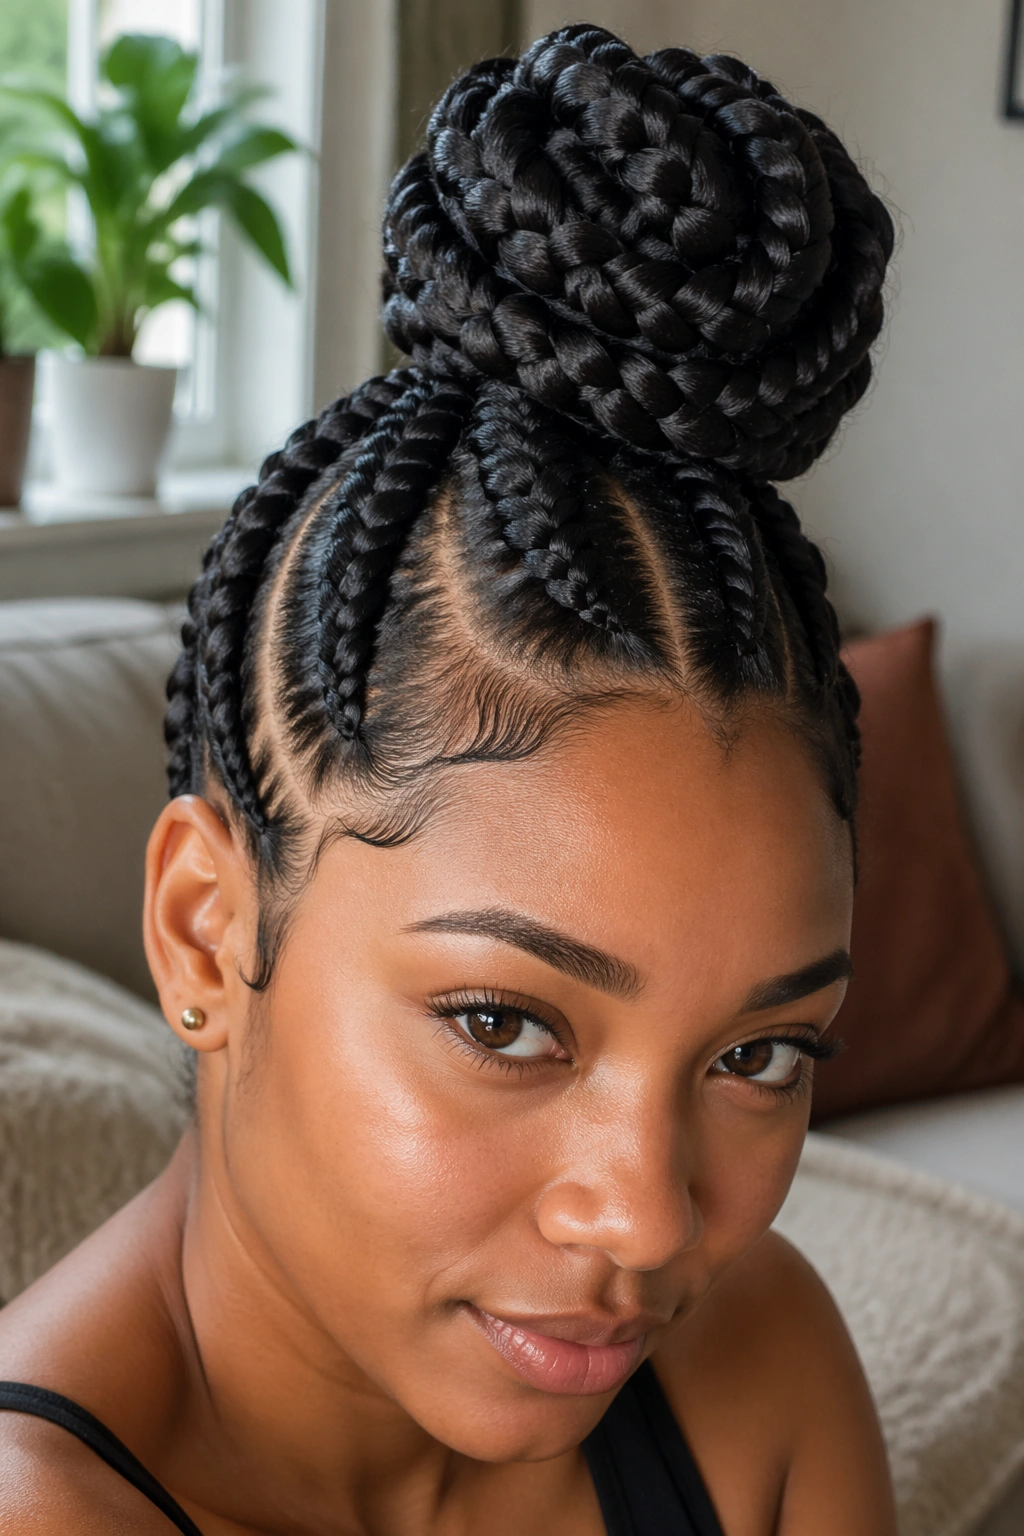
Scale up. Each cornrow is inch-wide at the root. The bun sits at the very top of the head, rounded and substantial — more top knot than bun.
Jumbo braids finish fast. Budget 90 minutes for the whole style. The downside: less longevity. Expect a clean look for about 10 days, then expected frizz sets in.
The top knot should sit slightly forward — not dead center crown, more toward the front. This forward placement gives the style a stronger profile.
8. Four Curved Braids Into a Braided Bun
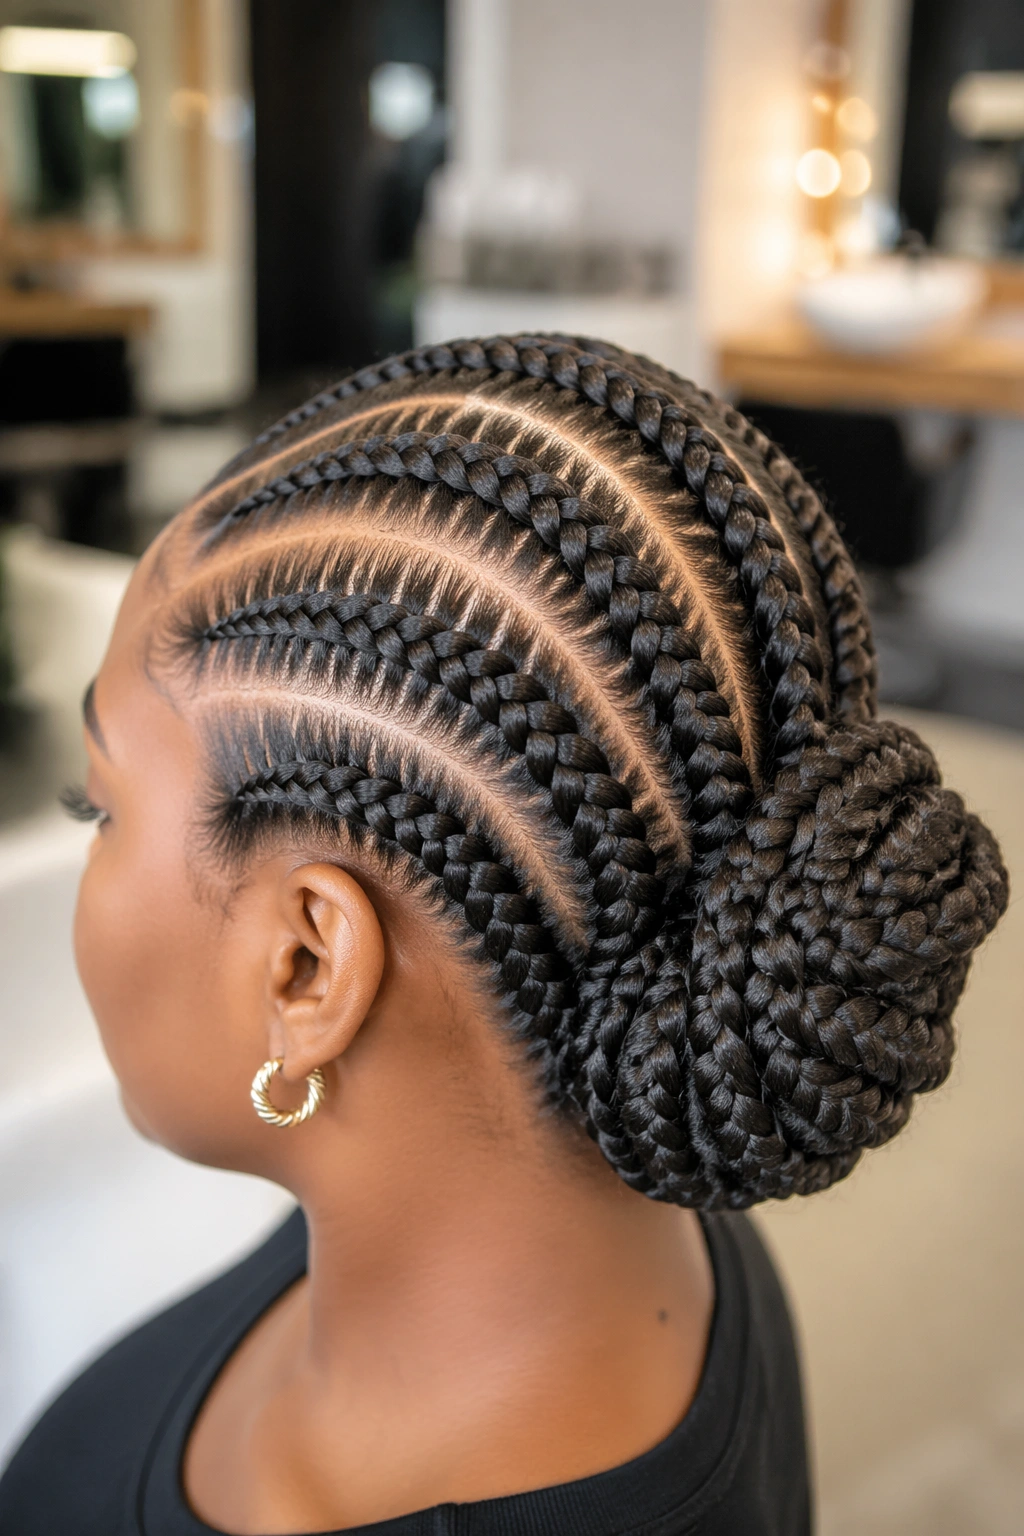
The braids don’t go straight. Each one curves along the scalp following a gentle C-shape, meeting at the back of the head. Once they converge, instead of winding the loose ends into a plain bun, the loose hair gets braided first, then those braids get coiled into a larger bun structure.
The layered braiding creates a textured bun surface that reads very different from a smooth wound one. You see the braid pattern continue into the bun itself.
This variation benefits from having 8+ inches of length beyond the base gather point. Shorter lengths can’t produce enough braid to coil convincingly.
9. Four Braids With Zigzag Parts
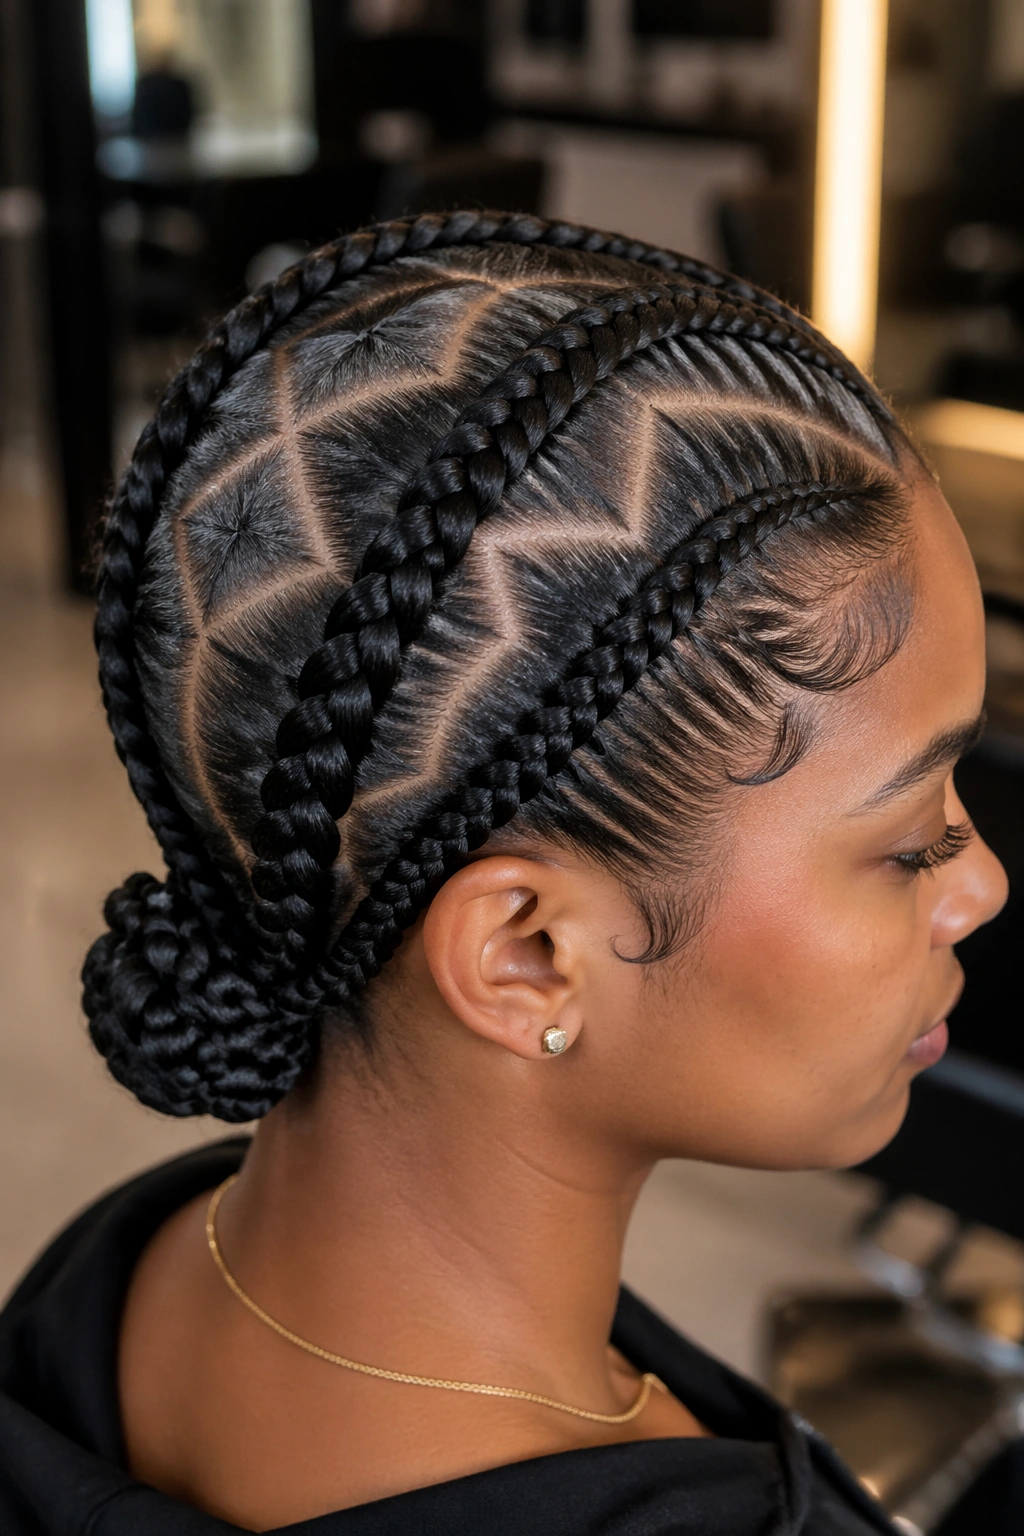
Each part follows a zigzag path rather than a straight line. Four cornrows, four zigzag parts, meeting at a standard bun at the nape.
The zigzags add texture to the whole top of the head without adding any more braids. The effect is almost architectural — you see the geometry of the parts clearly, especially in profile.
Zigzags require more prep time. Add 30-45 minutes to whatever your usual cornrow appointment runs. The extra time is worth it for the visual payoff.
10. Four Braids With Beaded Ends Into Loose Bun
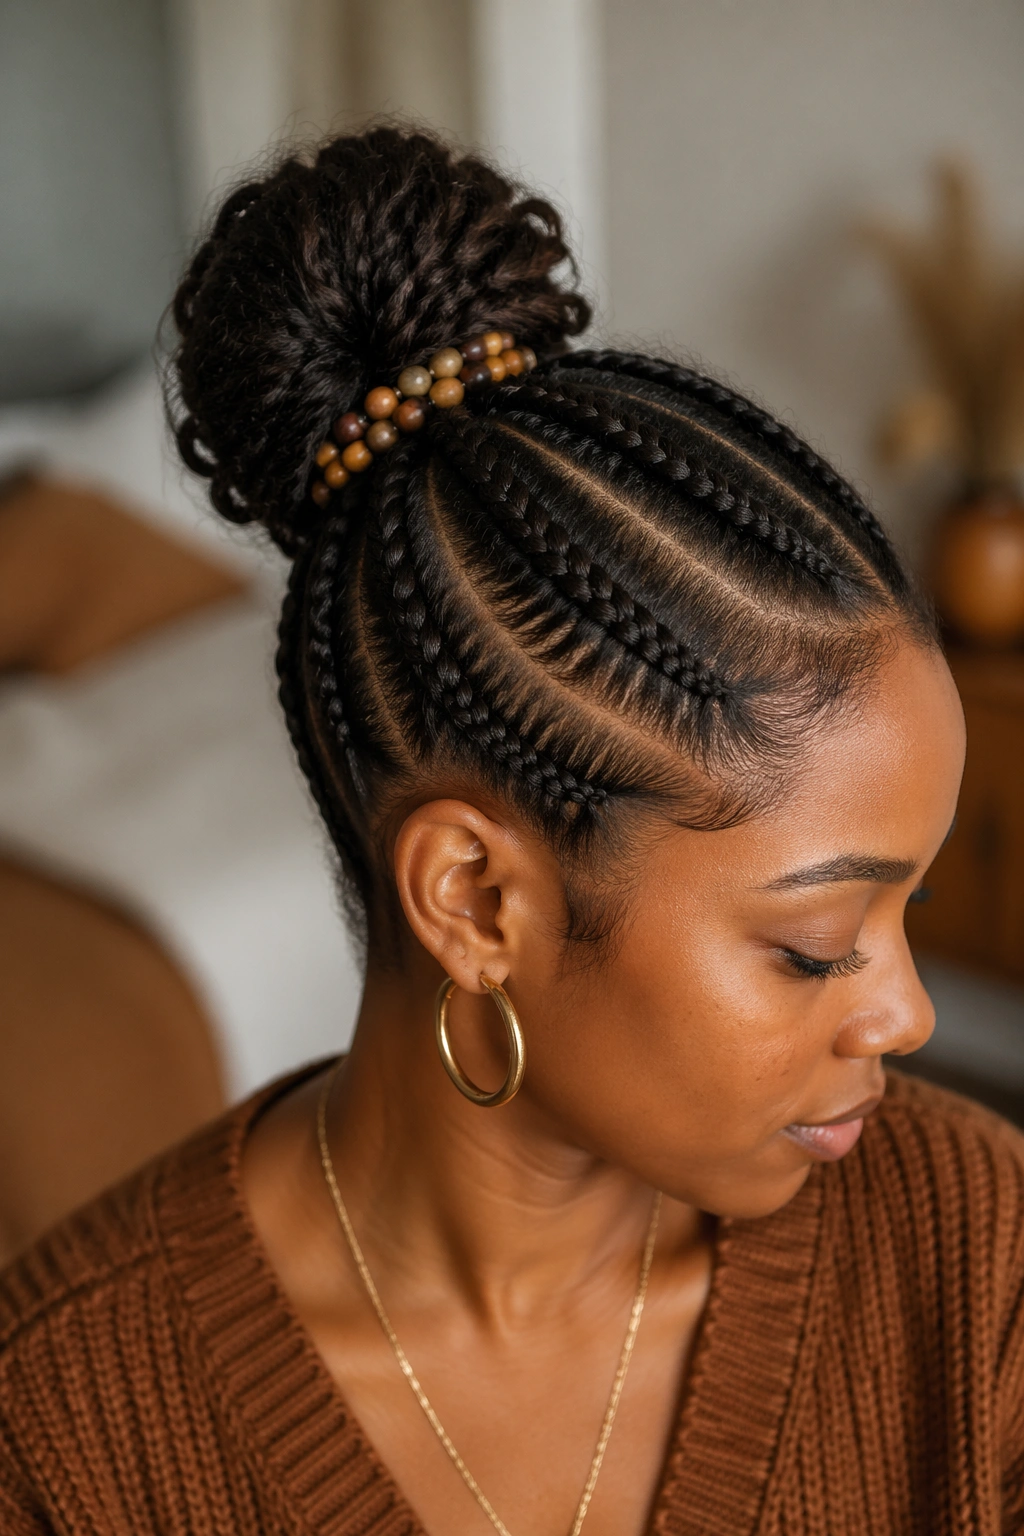
Beaded ends peeking out of the bun. The four cornrows are tipped with 3-5 wooden or glass beads each, and those beaded tails are gathered loosely at the base of the bun rather than tucked in.
The beads create a small decorative ring at the base of the bun. As you move, you hear the faint clack of wood or glass.
Pick beads that match the season or your wardrobe tone. Warm wood beads look settled and earthy. Clear glass beads read more polished and formal. Painted ceramic beads can add specific color accents.
11. Four Braids With Accent Cornrows Added
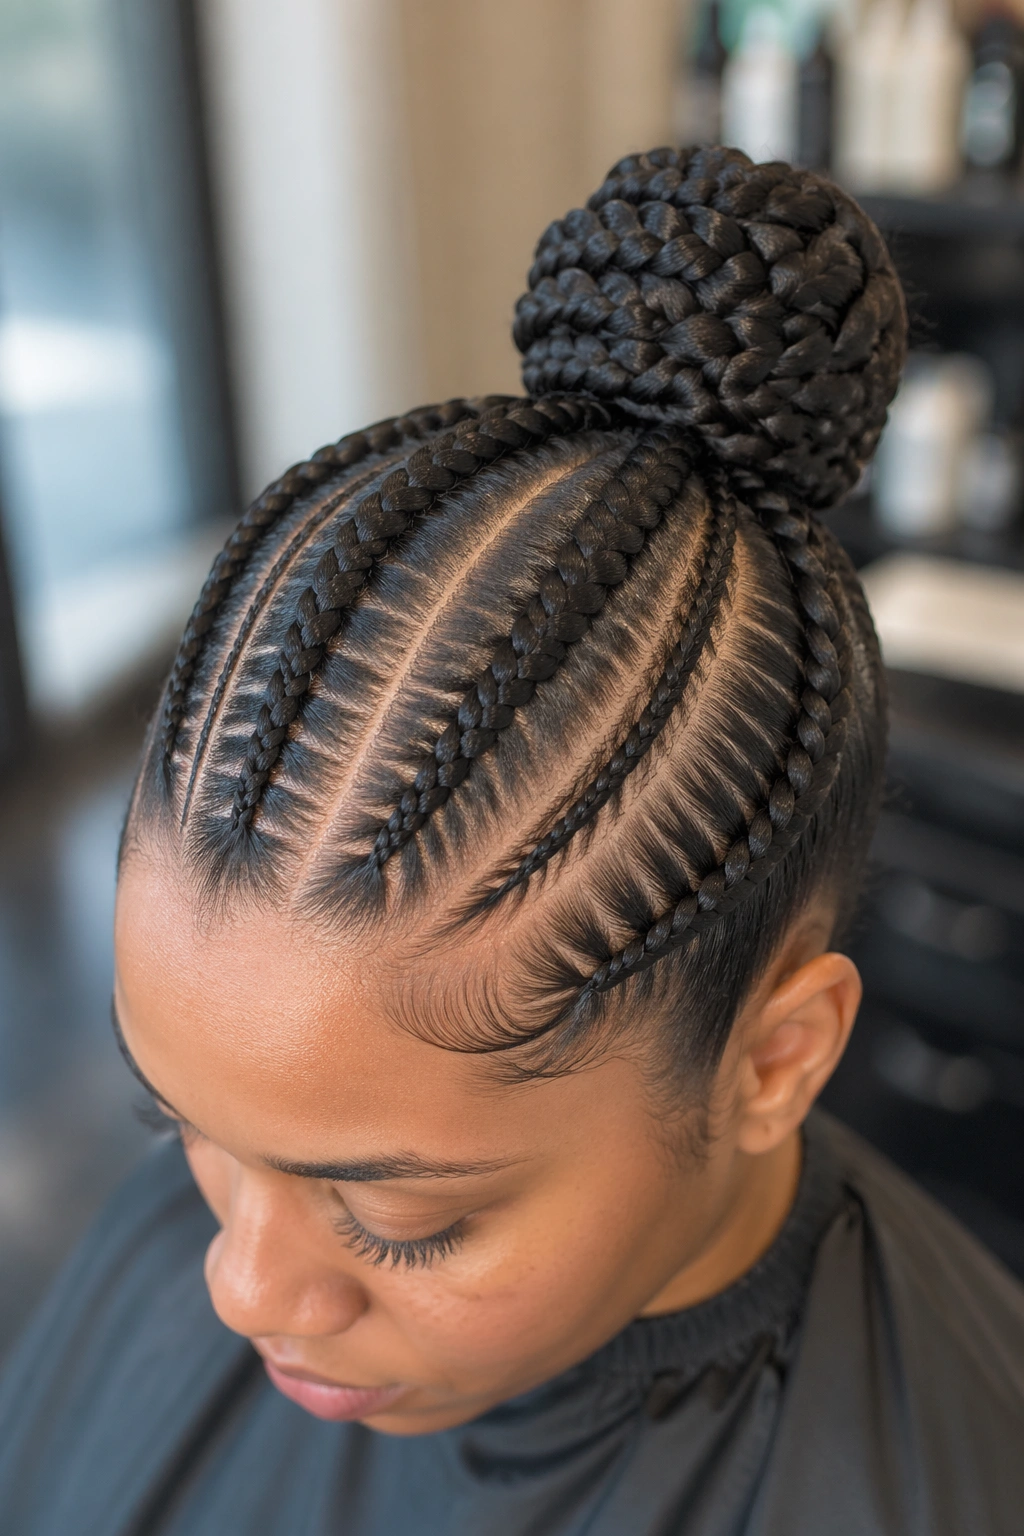
The four-braid structure stays. But two smaller accent cornrows get added between the main four — one on each side, sitting close to the larger braids.
These thin accents don’t continue into the bun. They start at the hairline but stop at the gather point, creating decorative detail on the scalp that disappears as the main four go into the bun.
The effect is visual density on the scalp without changing the bun shape. Useful if you want something a little more layered but don’t want to commit to 8 full braids.
12. Four Braids With Invisible Extensions
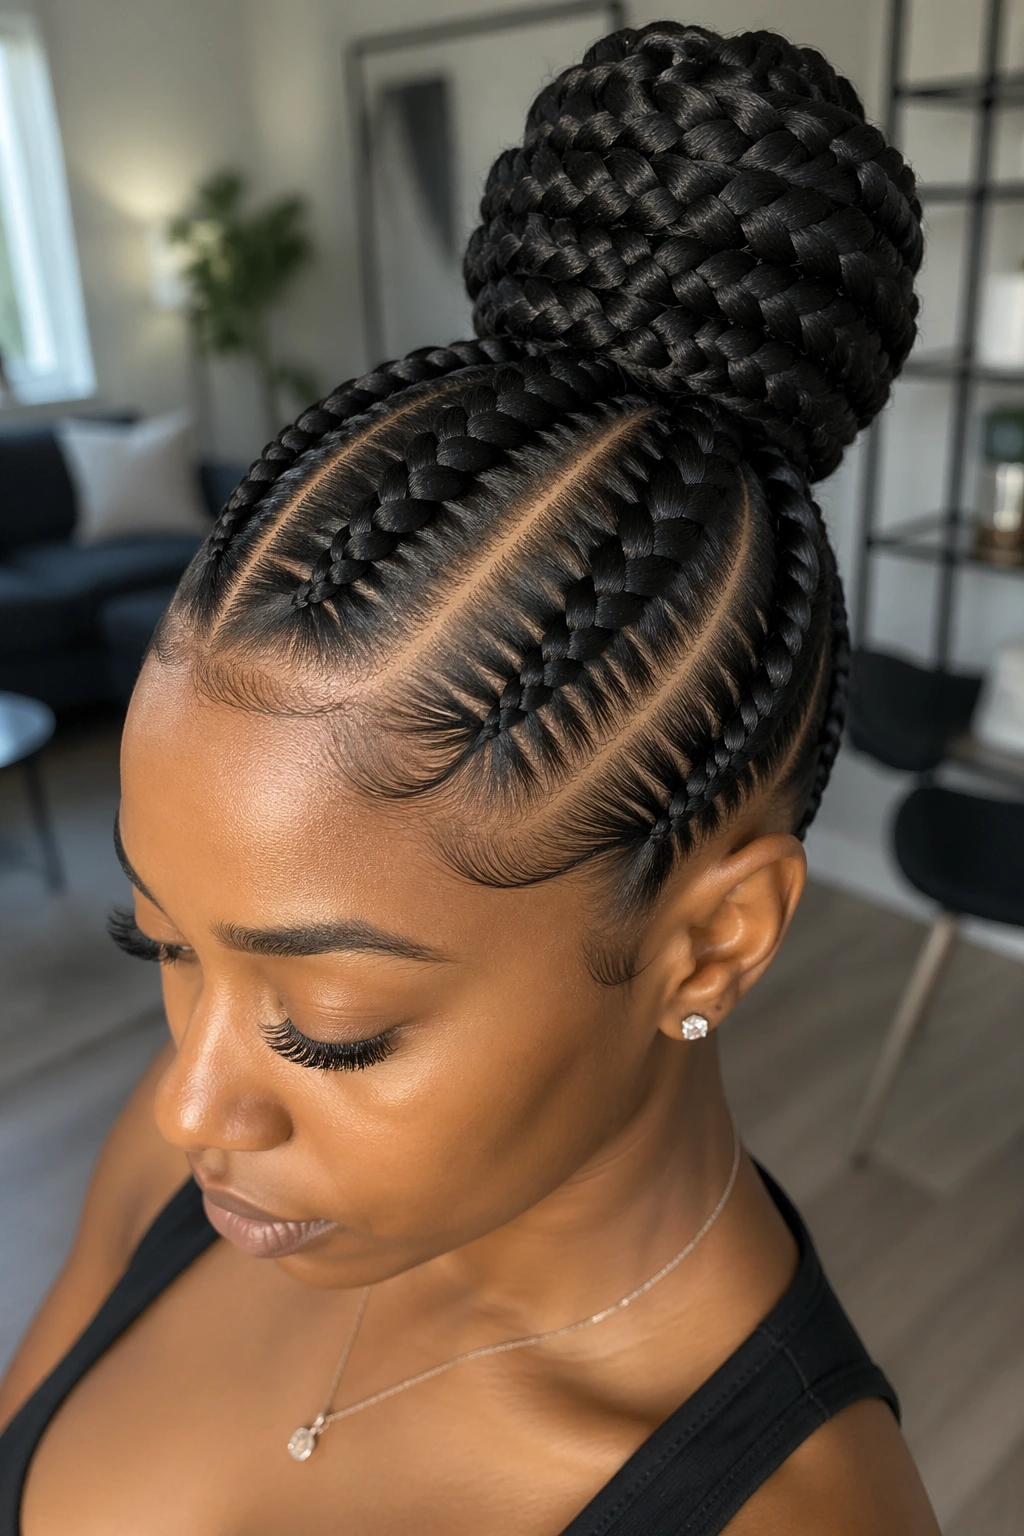
Feed-in technique, where extension hair gets gradually added as each braid progresses. The extensions are the same color as your natural hair, so they’re invisible — they exist purely to add length for a fuller bun.
How to Style It
Ask for kanekalon matching your natural color precisely (not “close enough”). Even slight differences show up when the bun forms and the light hits it.
The bun from four feed-in braids will be noticeably larger than from natural hair alone. Adjust the bun placement accordingly — a big bun at the nape can look heavy, so consider going slightly higher for balance.
This variation lasts longer than natural-hair-only buns because the extensions don’t shed or frizz at the same rate. Expect 4-6 weeks of wear before the style needs redoing.
13. Four Braids With an Extended Ponytail-Bun
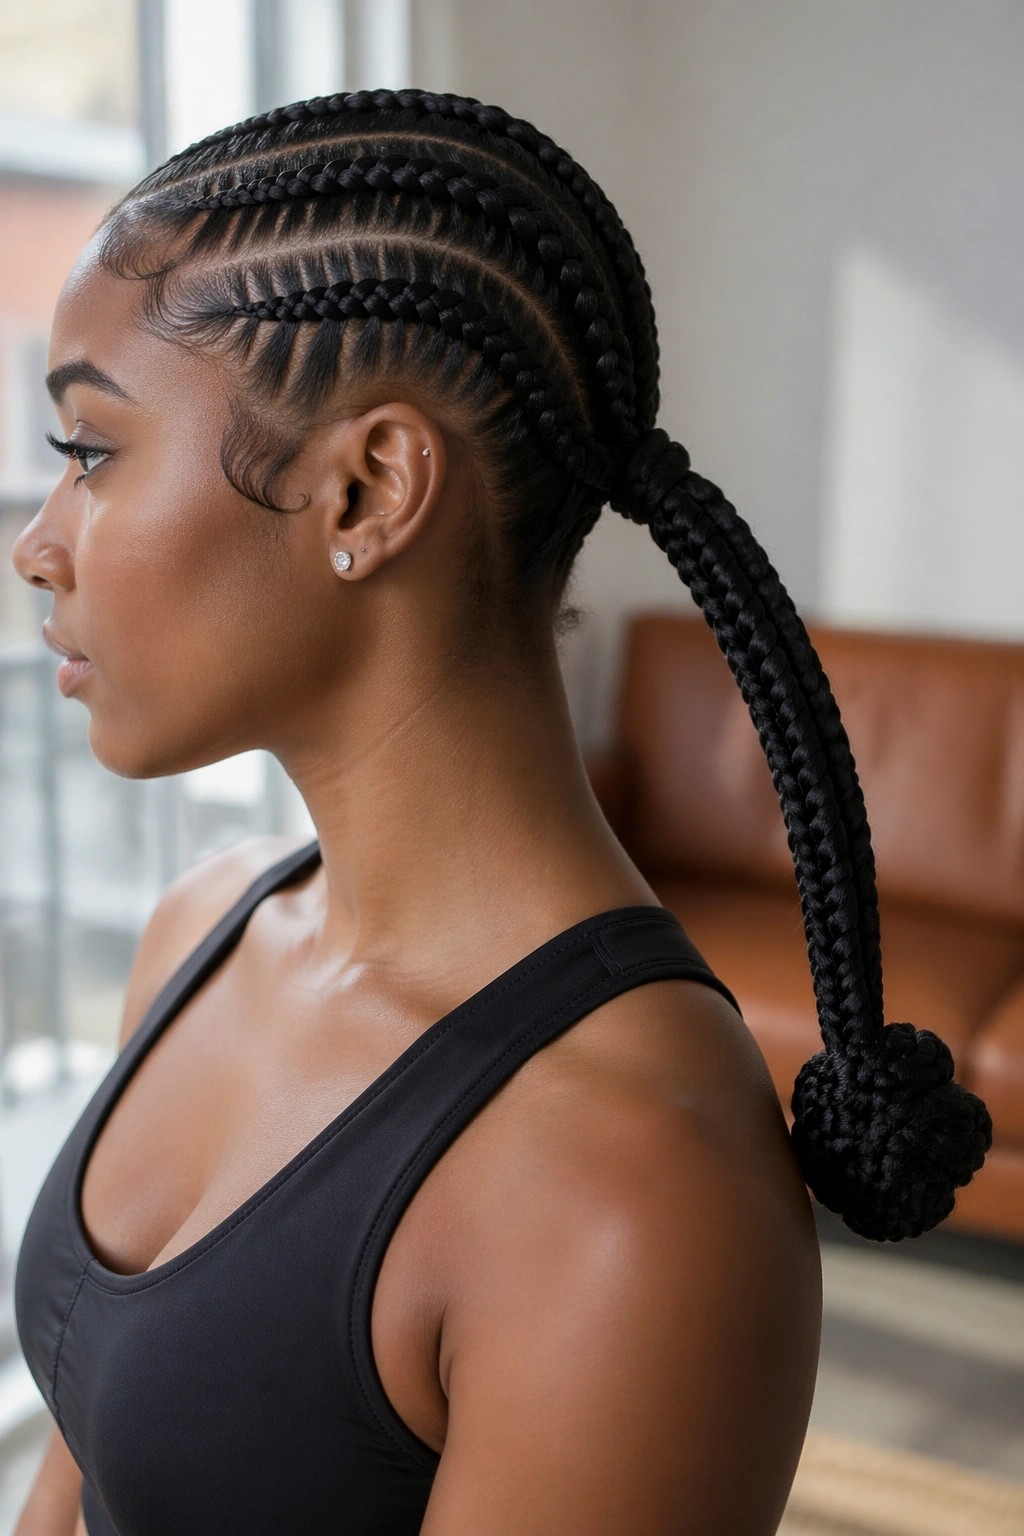
The four cornrows convene into a single long braid or twist that extends 8-10 inches beyond the gather point before being wound into a bun at its tail end.
The long braid forms a pigtail-looking element between the cornrows and the bun. It’s an unusual silhouette. Some people love it; others find it strange. Try it on a weekend first.
This variation photographs especially well from the side. The horizontal element of the extended braid section, combined with the bun at the far end, creates a profile unlike any other cornrow bun.
14. Four Braids With a Flower Bun
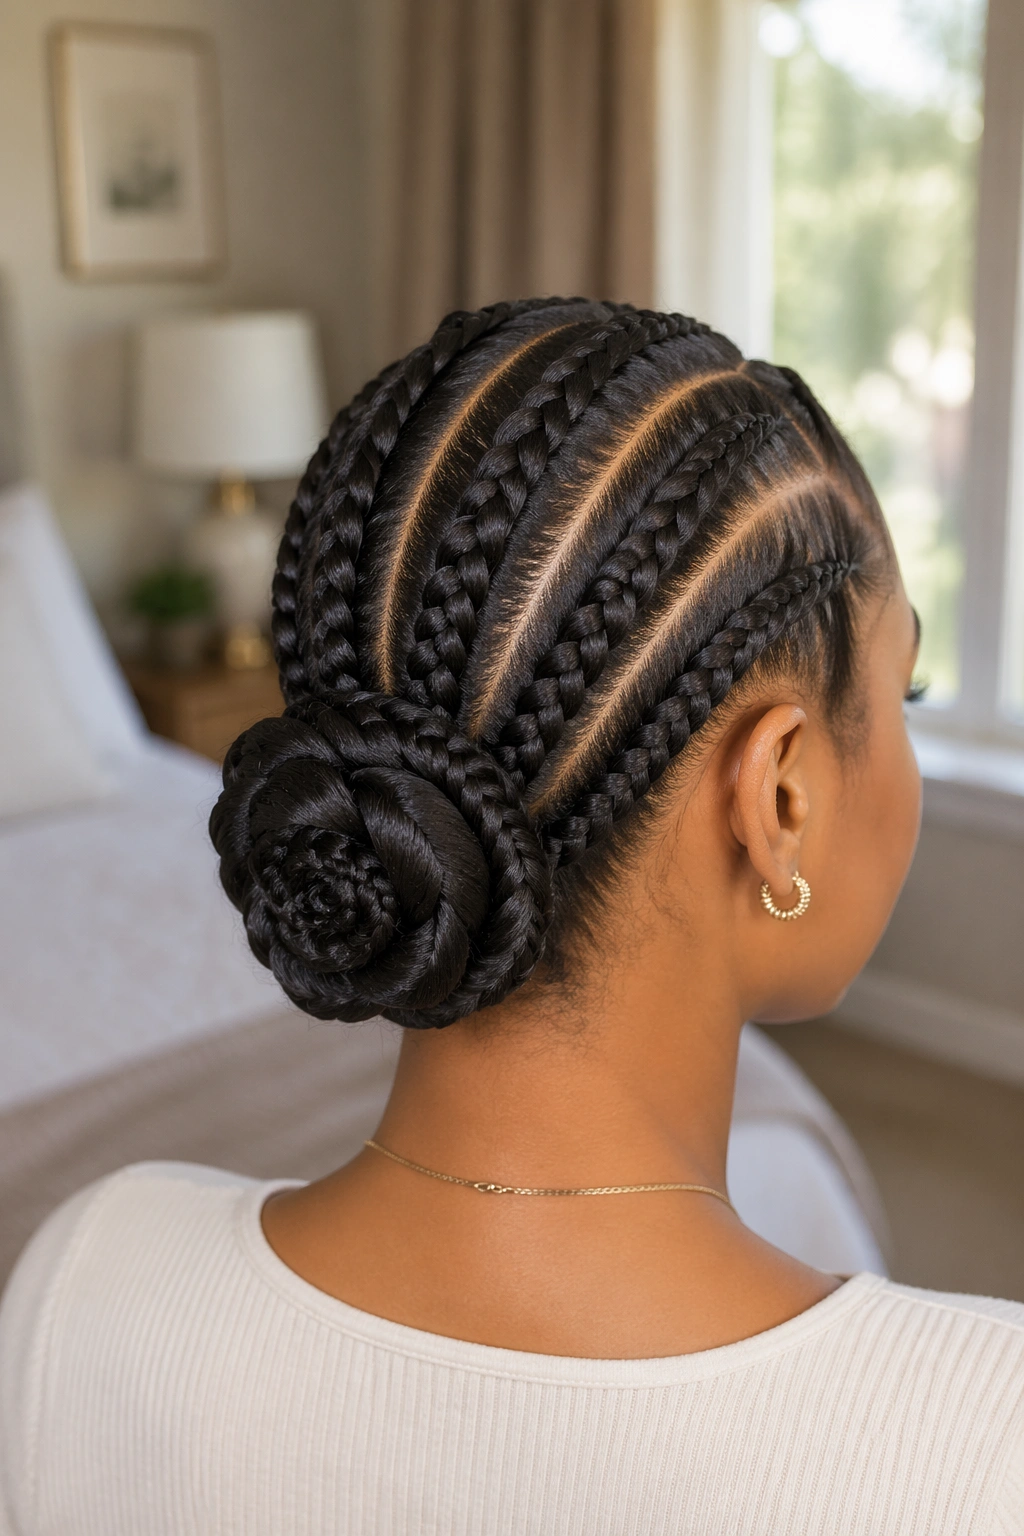
Instead of a round bun, the loose hair is styled into a rose-shaped spiral — concentric loops that form a flat flower shape against the back of the head.
The flower bun requires length. At least 10 inches of hair beyond the gather point. Short hair simply can’t form enough petals.
Pin each loop of the spiral individually as you go. A flower bun that isn’t pinned layer-by-layer collapses into a regular bun within an hour.
15. Four Braids With Scarf Bun Wrap
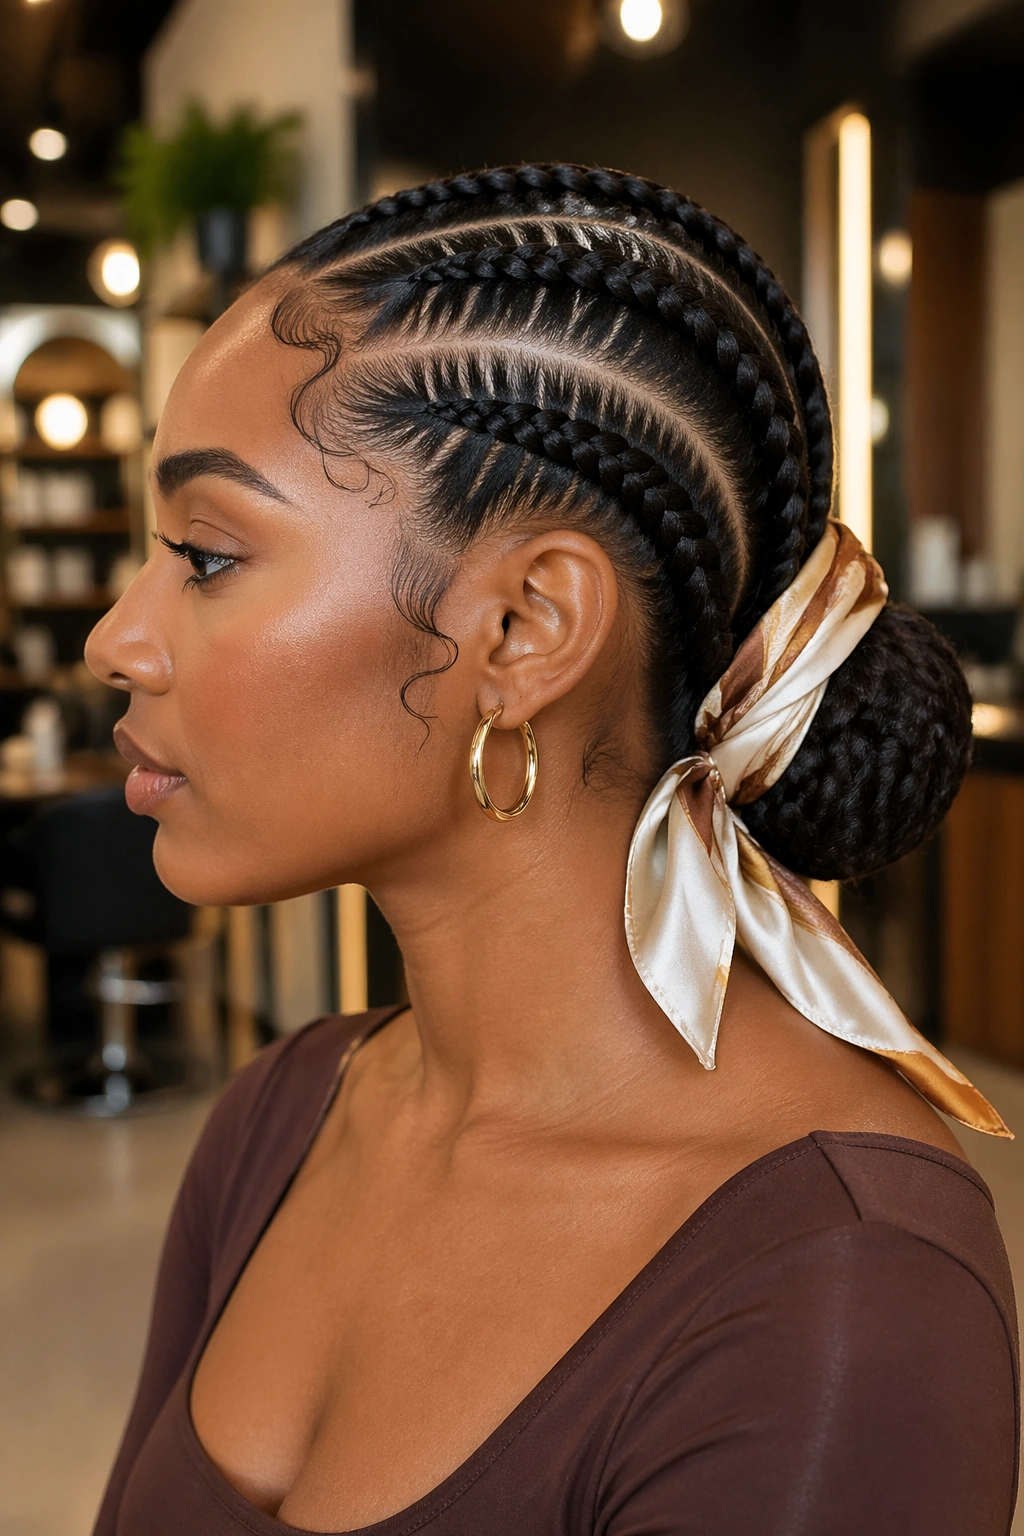
Classic four-braid to low bun, then a silk or satin scarf wrapped around the bun base to cover the elastic and add color.
The scarf is visible but doesn’t replace the bun — it frames it. Pick scarves with small prints or solid colors. Large patterns fight with the braid lines for attention.
This variation doubles as protective styling. The scarf keeps the bun from rubbing against coat collars or bag straps, extending the life of the style by 3-5 days.
16. Four Braids With a Half-Down Bun
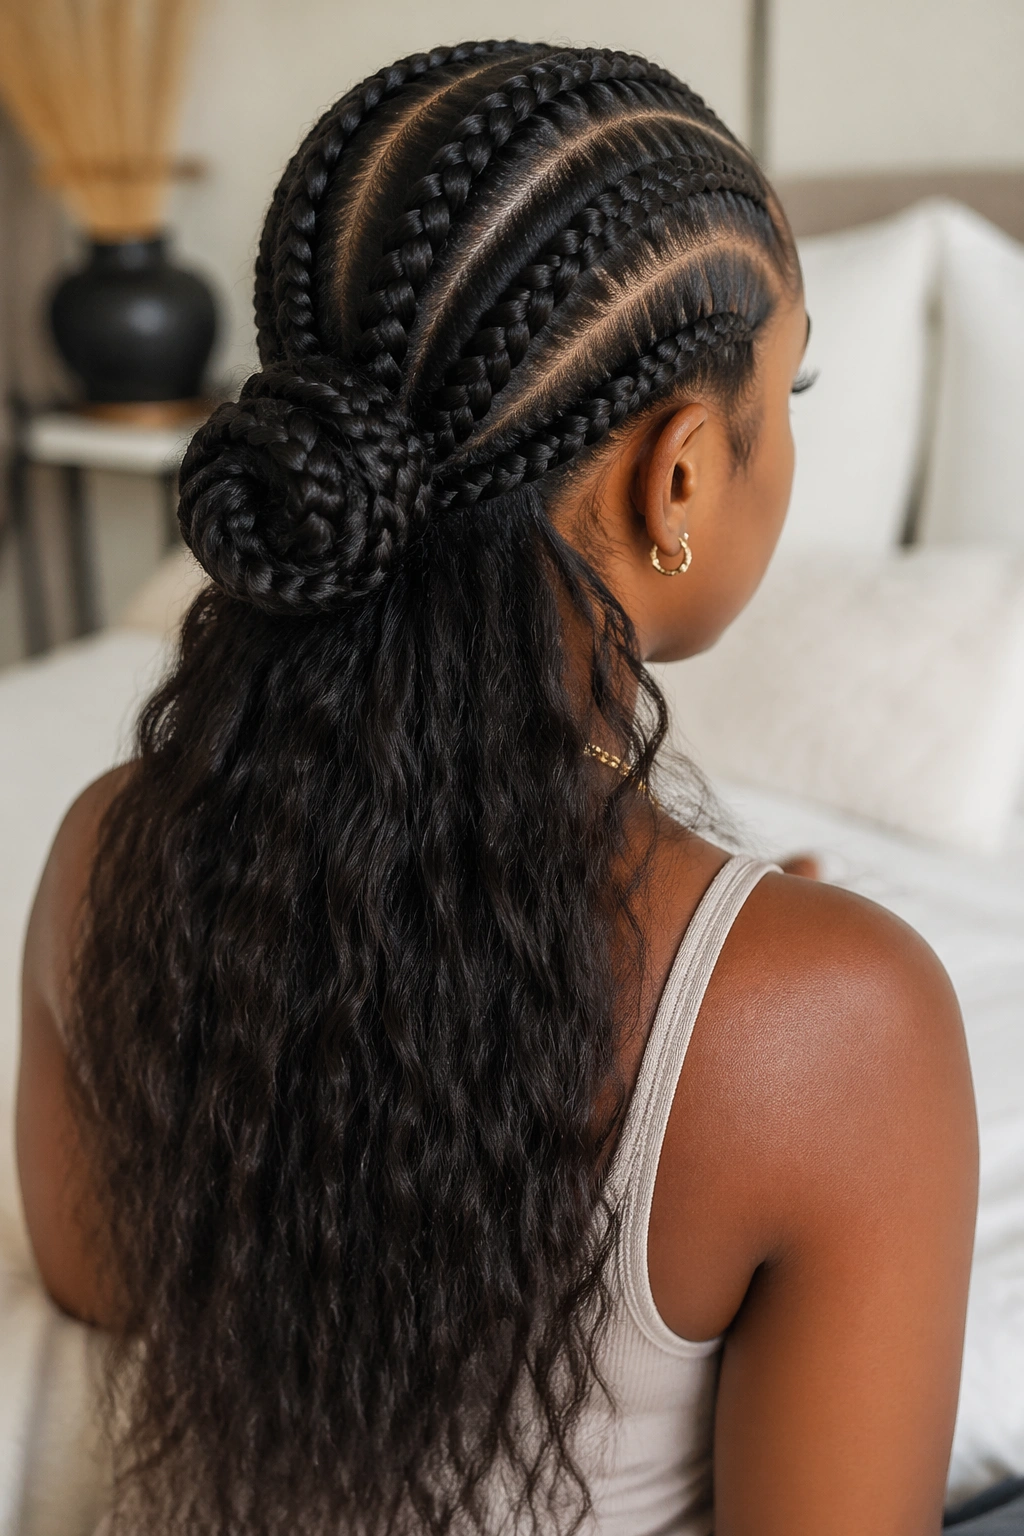
Only half of each cornrow’s loose hair goes into the bun. The other half hangs down behind it, forming a curtain of loose hair below the bun itself.
Maintenance Notes
The loose section needs more attention than the braids. Twist it at night in sections and secure with satin scrunchies. Without overnight care, the loose portion frizzes within days and the whole style looks neglected.
This works best when the loose hair is the same texture as your natural hair (4A-4C). If you’re adding extensions for length, pick a texture that matches rather than bone-straight.
17. Four Braids With Crown Accessory
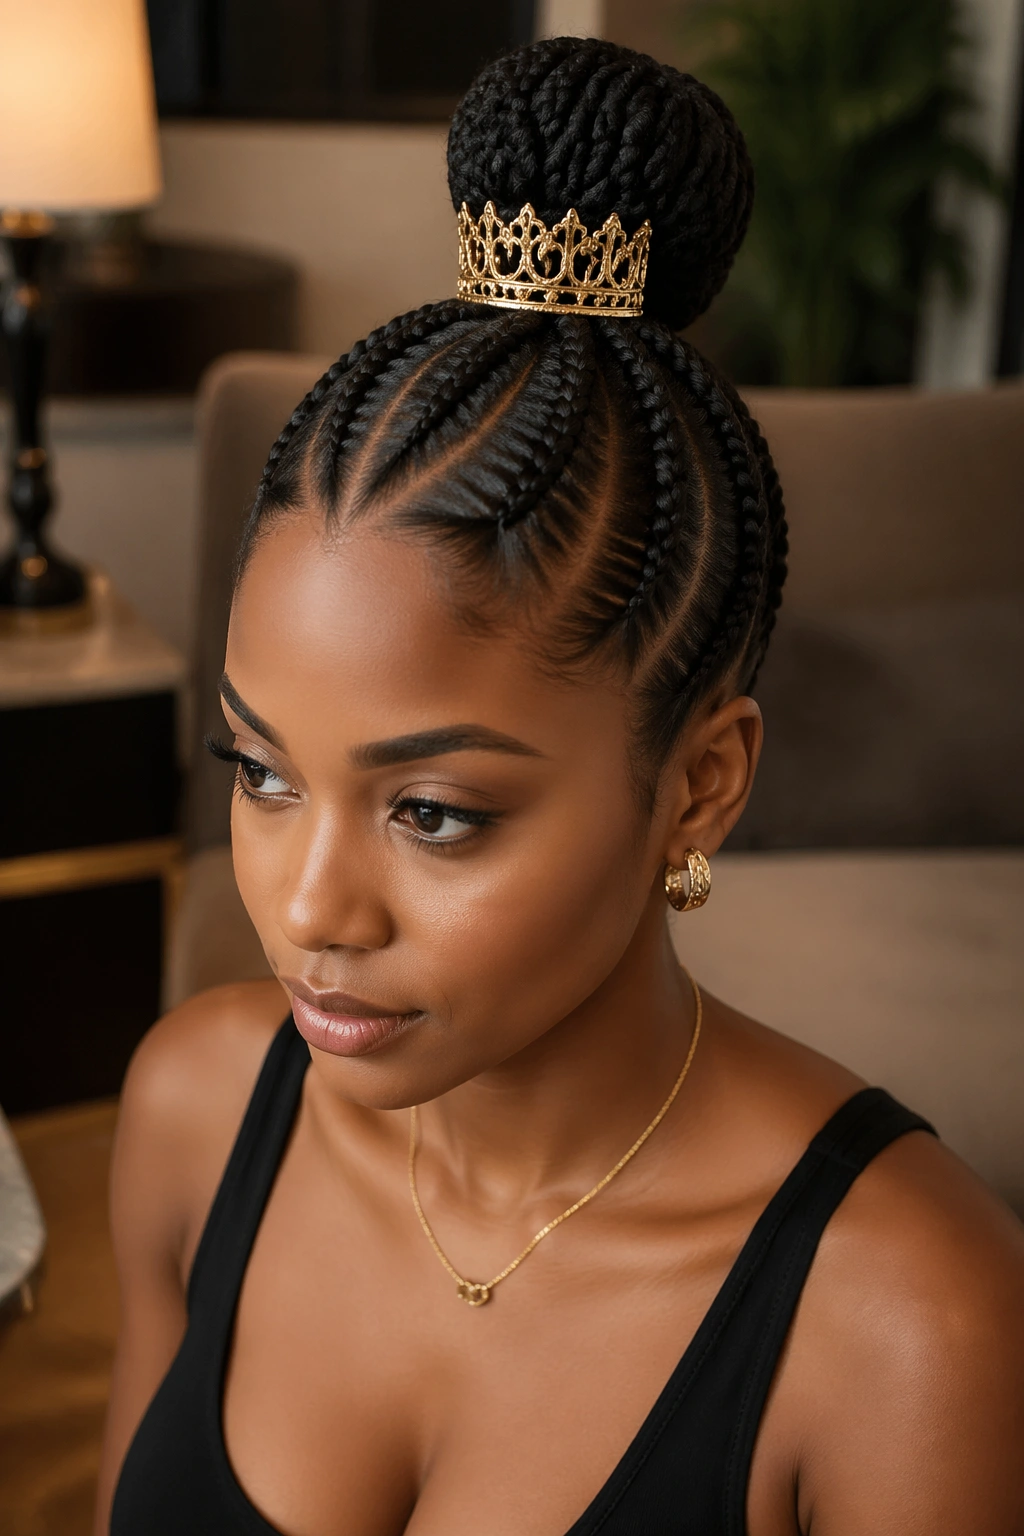
Straightforward four-braid bun, but a decorative cuff, pin, or flat hair jewelry piece is placed at the center where the braids converge — right before the bun.
The accessory is the hero. The braids and bun are deliberately simple to let it stand out.
Gold or silver cuffs with a sleek geometric shape work best. Avoid anything with dangling parts — they catch in the bun or the surrounding braids and create constant small tangles.
18. Four Braids With Peekaboo Color Underneath
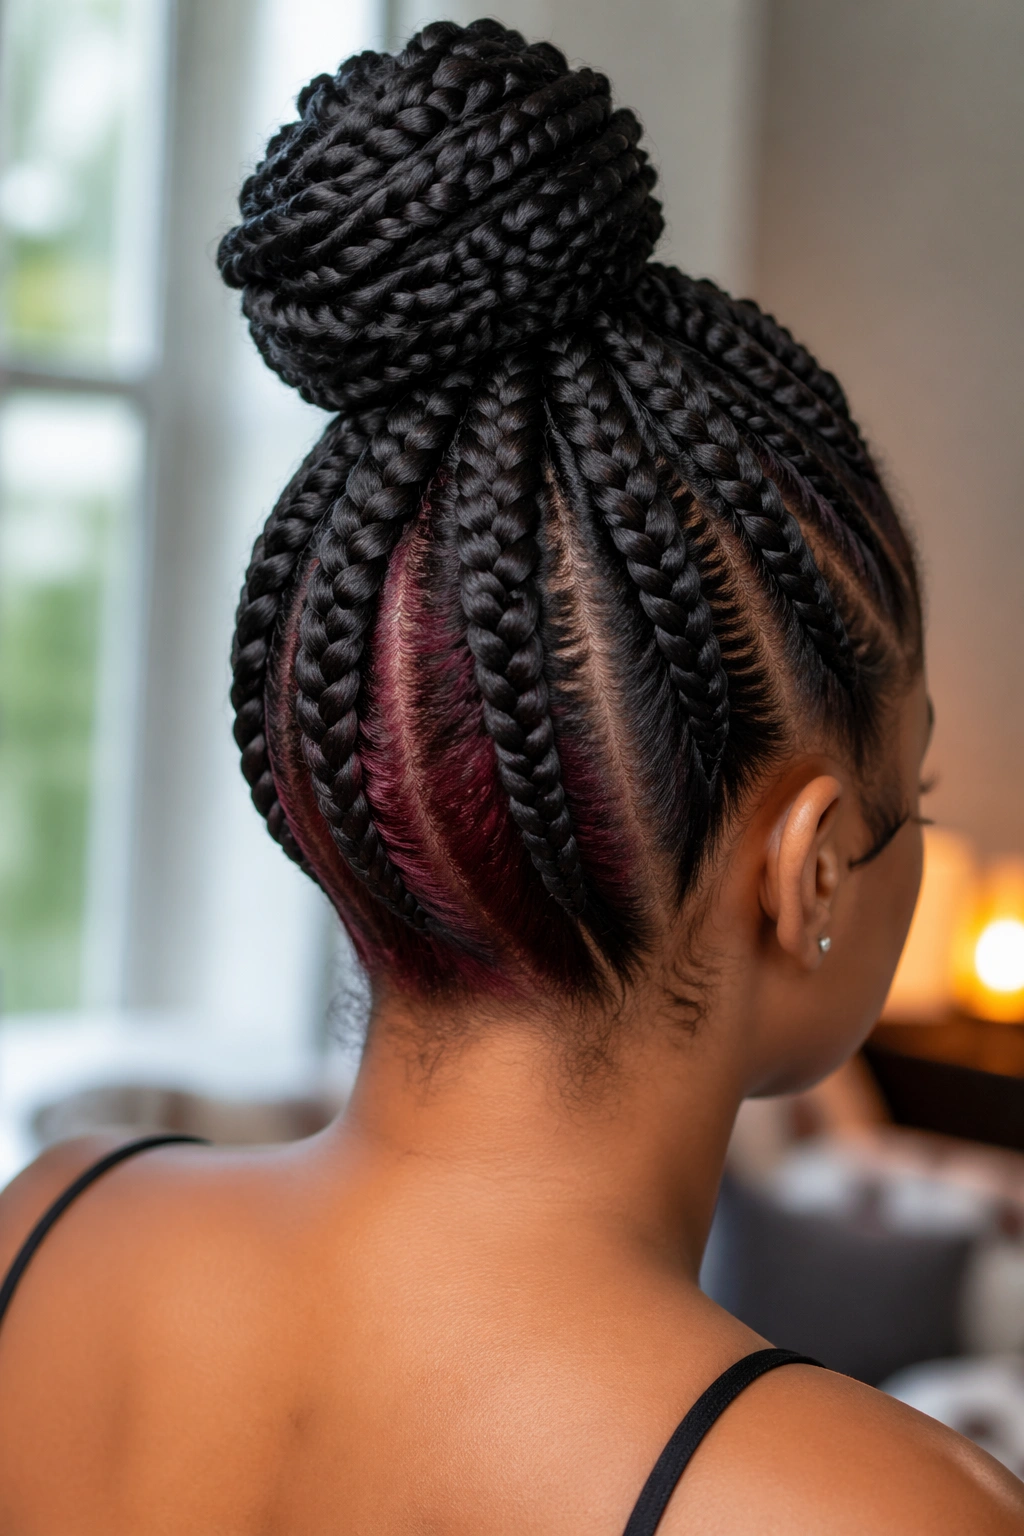
The four cornrows and bun use your natural hair color. But a thin layer of hair underneath (not braided into the main four) is dyed or extended in a contrasting color, and it peeks out from below the bun.
The peekaboo color shows only from certain angles — mostly when you tilt your head forward or when someone sees you from a lower vantage point. A quiet color surprise.
Burgundy, deep plum, or honey under dark hair all work well. Avoid platinum for this one — it photographs as an accidental gray streak rather than an intentional color choice.
19. Four Braids Into a Sculpted Low Side Bun
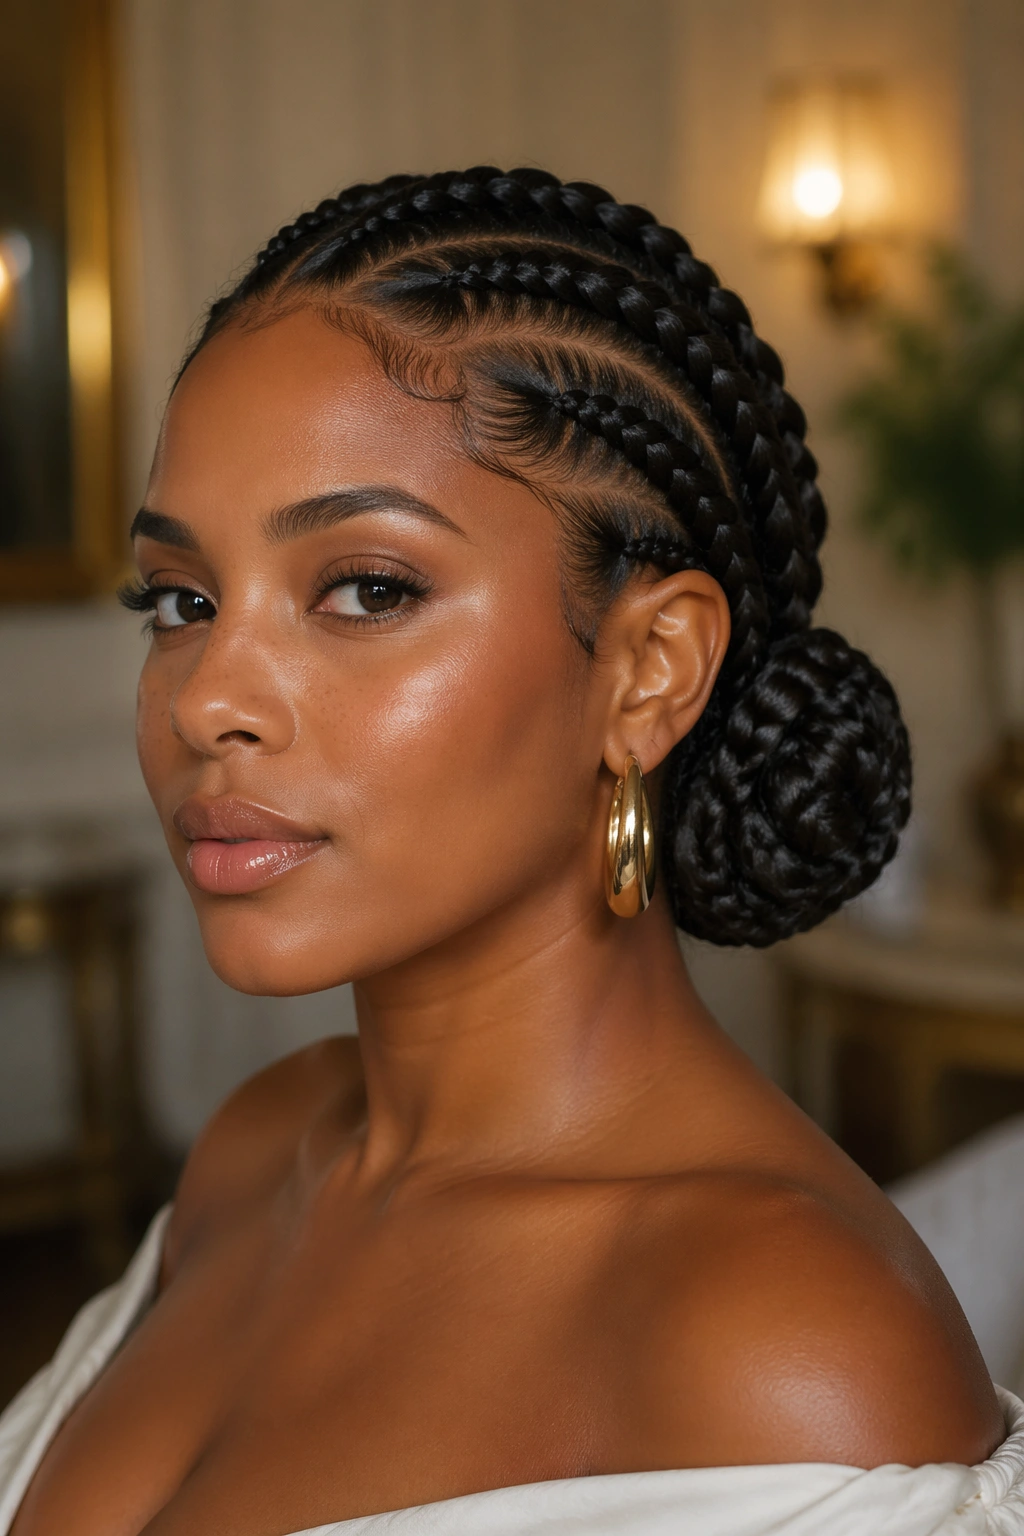
The four braids all angle toward one side of the nape. The bun forms low and to the side, almost behind the ear.
The asymmetry gives the style movement even when you’re standing still. From the front, you see a hint of the bun behind one shoulder but not the other.
This is a dressier variation. It suits events where a standard bun reads too casual. Pair with statement earrings — the asymmetric bun leaves one ear fully visible, which is where you want to draw attention.
20. Four Braids With Baby Hair Styling
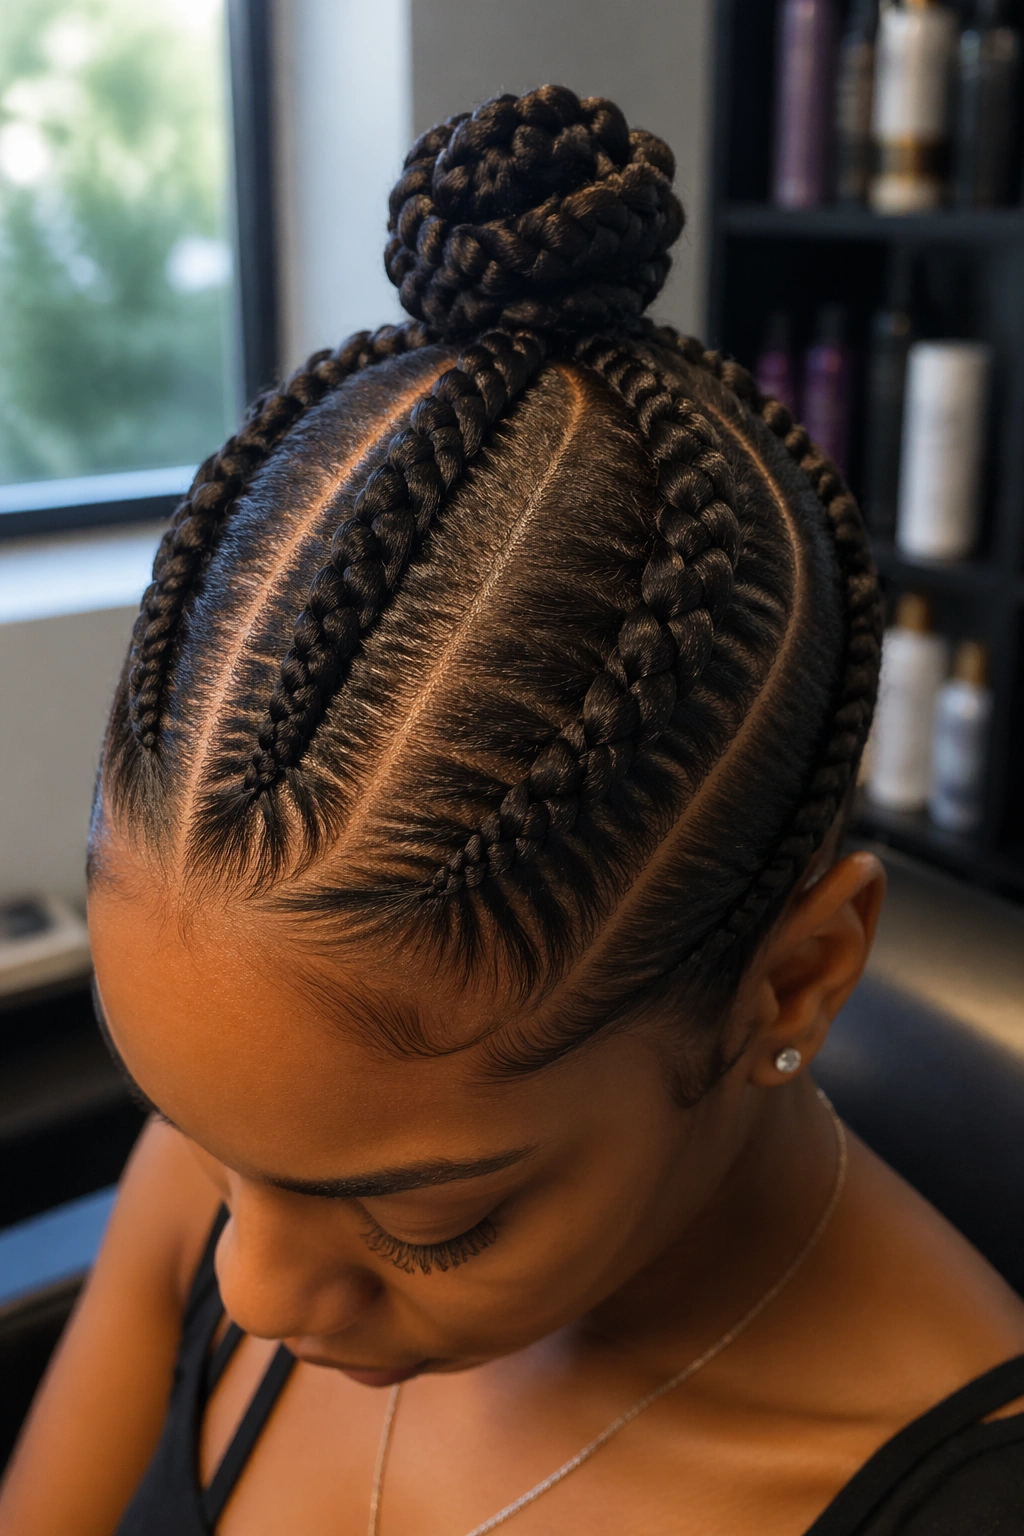
The four-braid bun itself is straightforward. The styling moment is in the baby hairs — carefully laid edges with swirls, waves, or sharp geometric patterns along the hairline.
Baby hair work can take as long as the braiding itself on a short style like this. Budget a solid 45 minutes for the edge design. Use a soft toothbrush, strong edge gel, and work in small sections.
The edge design can be simple (two symmetric waves at each temple) or elaborate (full swirls and lines across the entire hairline). Match the complexity to the formality of where you’re going.
21. Four Braids With Dramatic Length Mismatch
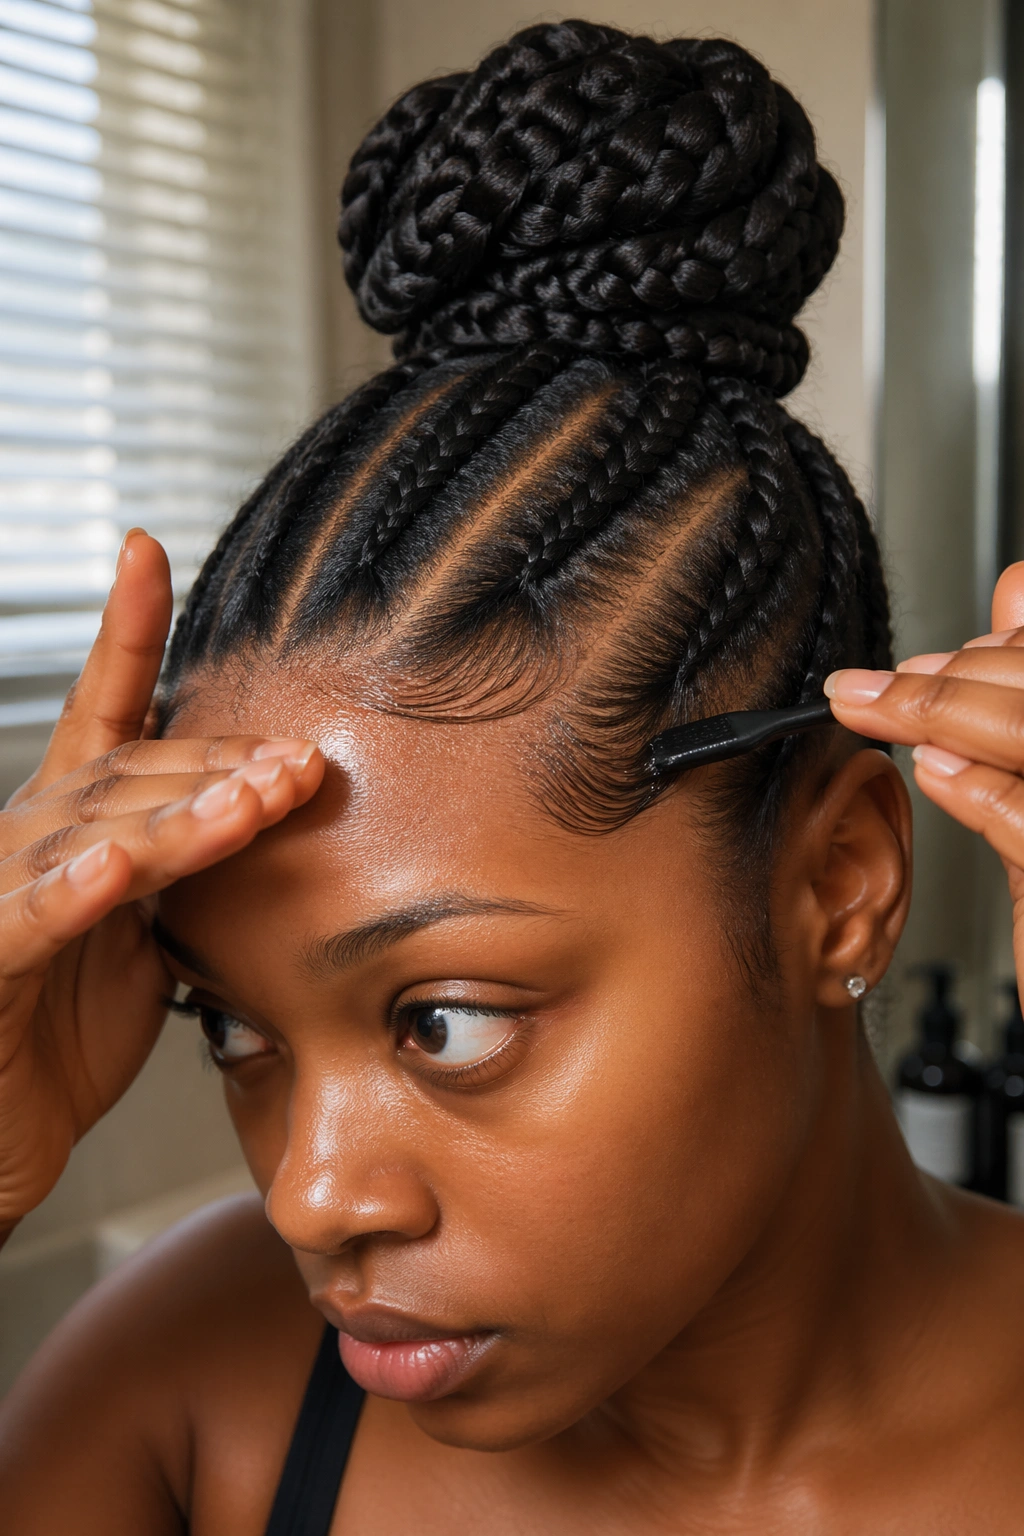
Two of the braids are kept short — their ends tucked neatly into the bun. The other two are extended to waist length with kanekalon, and those two hang free below the bun rather than being tucked in.
Who This Is For
Anyone who wants the clean-cornrow-bun look with a twist. The two loose long braids create a split-silhouette effect — a bun up top, two long braids hanging down. It’s visually arresting without being over the top.
Weight them carefully. Both long braids should come out of the same general side of the bun rather than being split left and right. The asymmetric hang photographs and wears better than a symmetric one, which can look accidental.
22. Four Braids With a Bow-Shaped Bun
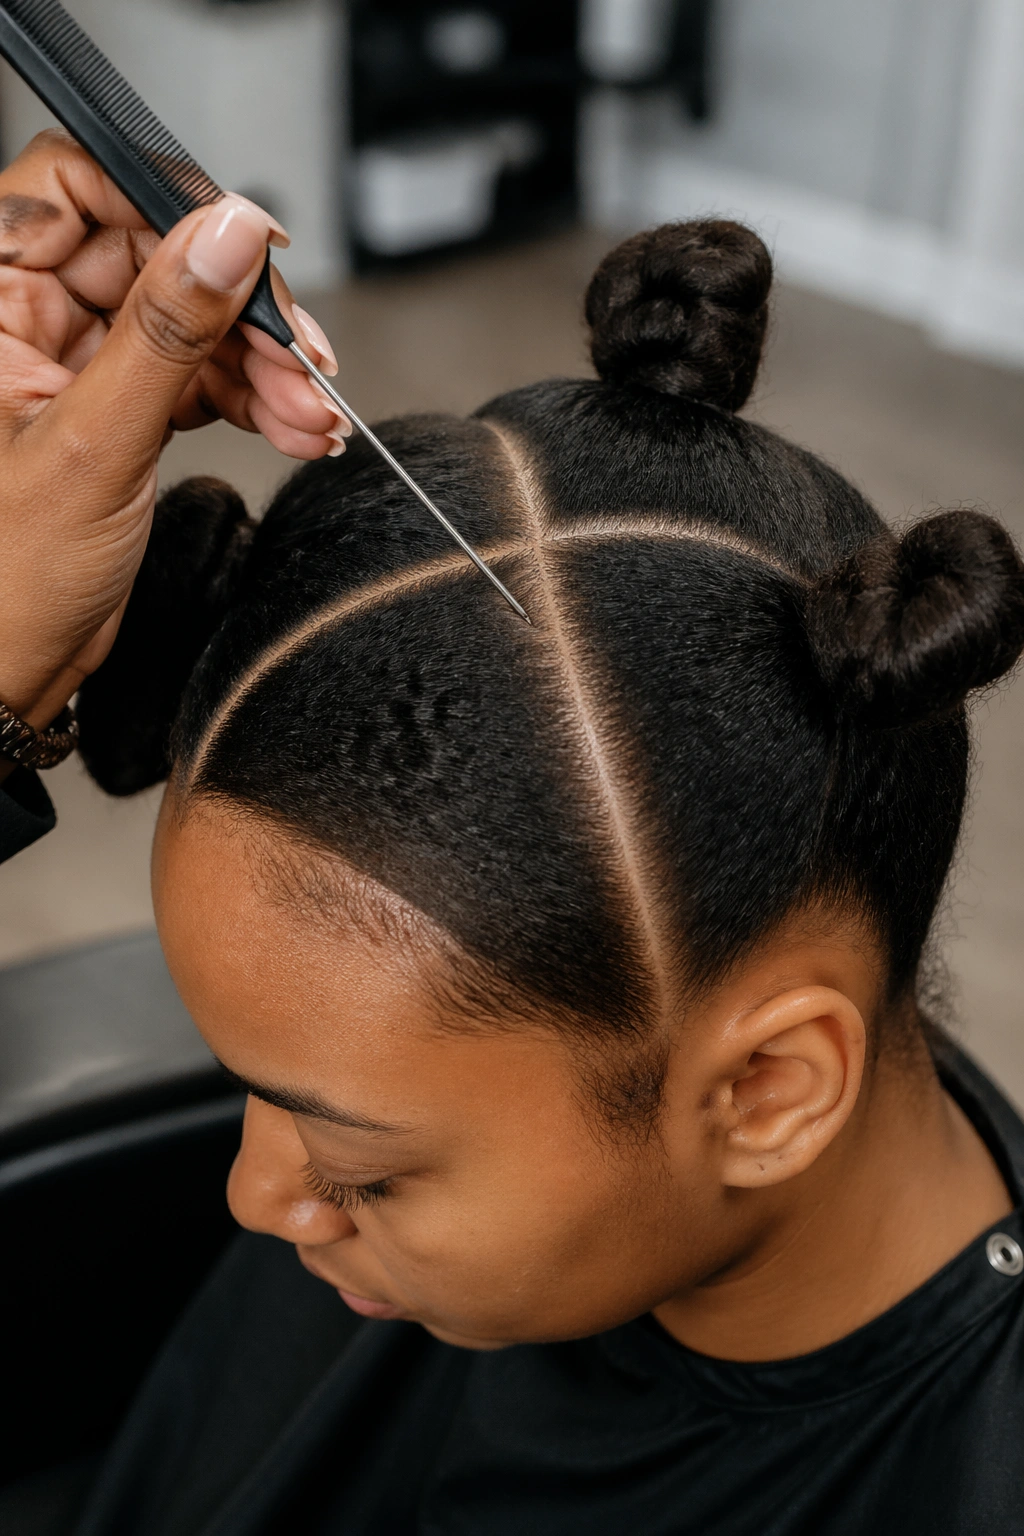
The hair gathers at the base like a regular bun, but instead of forming a circle, it’s looped into a bow shape — two loops on either side of a center knot.
The bow bun is a specialty technique. Not every braider offers it. Look for someone who’s done bow buns on regular hair first, then adapt to the four-braid base.
Pair with clean, tight cornrows. A bow bun with messy cornrows reads confused. The bow already has enough going on. The braids should be quiet.
Maintenance Through the Week
Buns with four braids hold up better than most cornrow styles because the bun itself acts as a tension-distribution point. Weight doesn’t hang off the ends. It sits against the scalp at the back.
Re-wrap the bun every 3-4 days. The elastic at the base loosens with movement, and the loose hair forming the bun migrates outward. Spending 10 minutes tightening the elastic and re-pinning the bun brings the whole style back to day-one tightness.
Use a silk pillowcase or bonnet at night. The bun itself will squash somewhat in sleep — that’s unavoidable — but silk prevents the frizz that cotton causes. A morning bun reshape takes 2 minutes with a mirror and a pack of U-pins.
Keeping the Scalp Healthy Between Washes
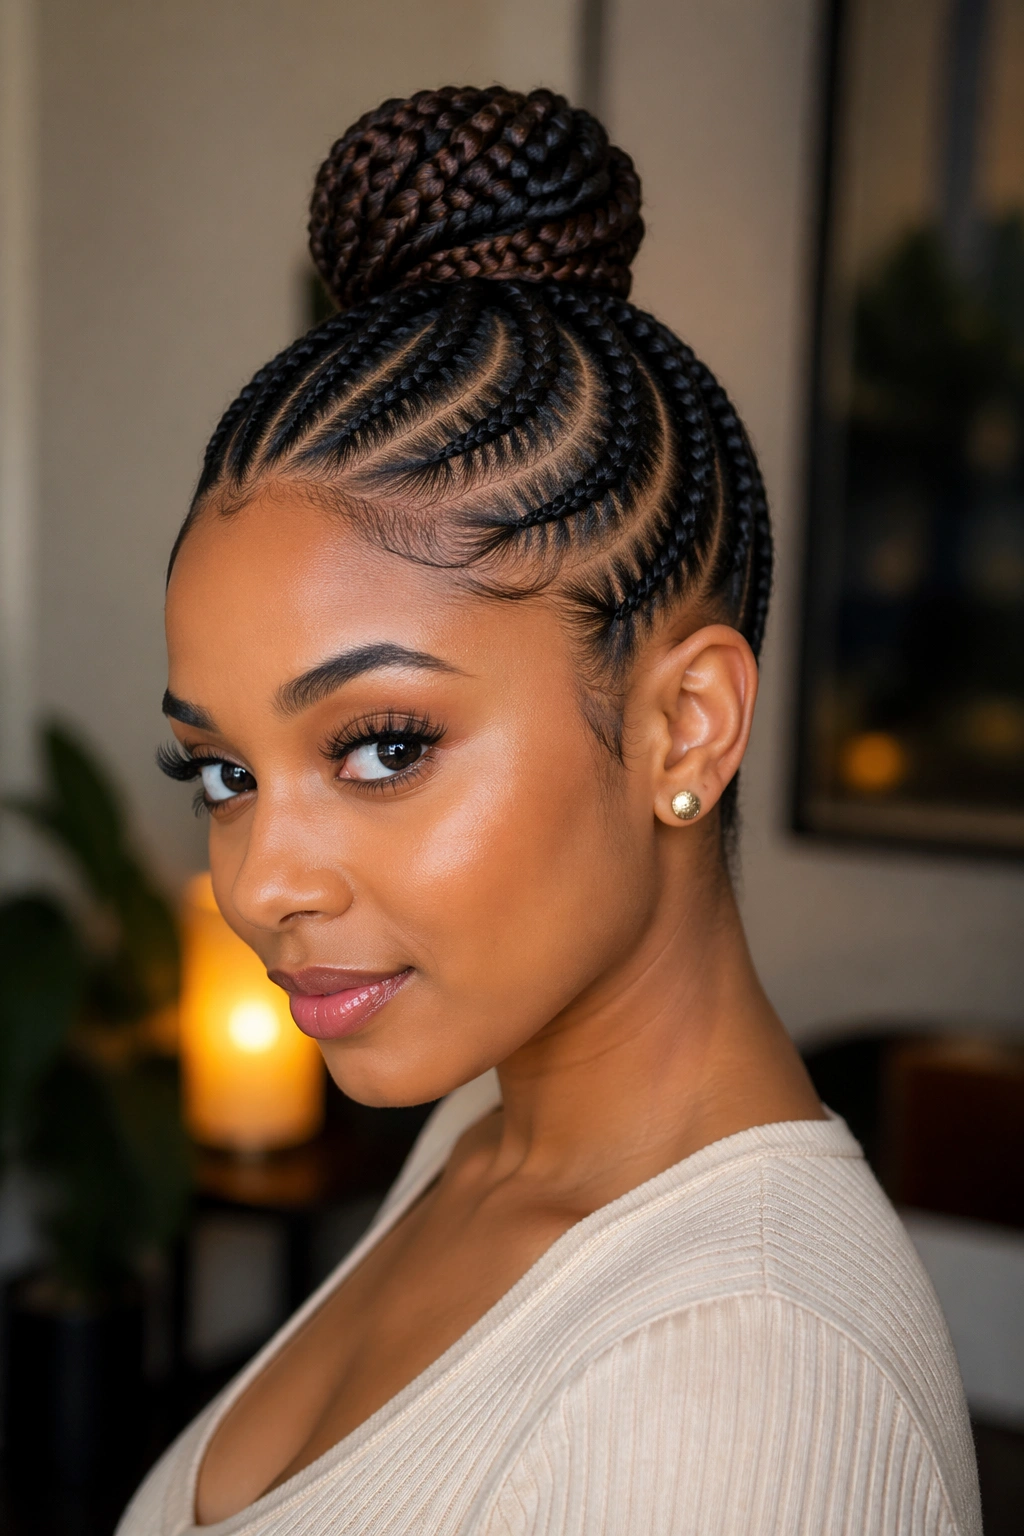
Any cornrow style puts oil, sweat, and product in close proximity to the scalp for extended periods. A four-braid style wears longer than most (3-6 weeks), which means more accumulation.
Once a week, apply a scalp-specific product directly to each part line. Look for formulas with tea tree, peppermint, or salicylic acid — they clear buildup without saturating the hair. Apply with a dropper or nozzle tip, not by pouring.
If you experience itching, it’s almost always buildup rather than allergy. Rinse with diluted apple cider vinegar (1 part vinegar, 3 parts water), leave on for 10 minutes, rinse with cool water. The itch usually resolves within a day.
Washing Without Wrecking the Style
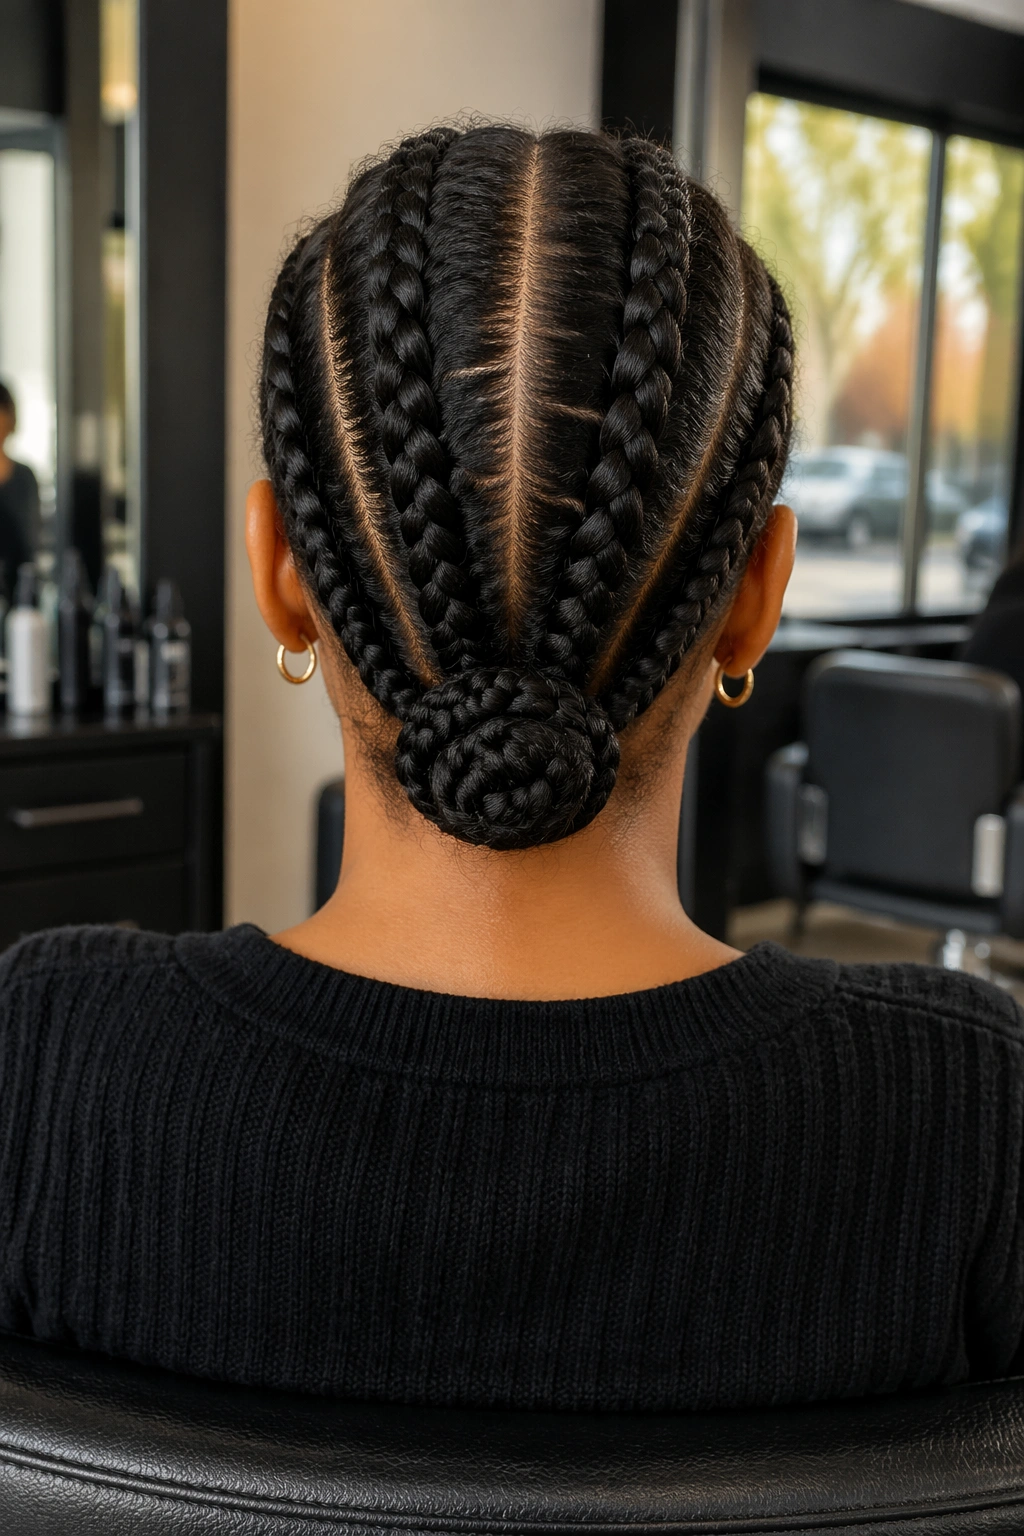
Yes, you can wash four-braid cornrow buns. The trick is keeping the water focused on the scalp, not the braids.
Take the bun down but leave the four cornrows in place. Use a sulfate-free cleanser diluted 50/50 with water in a squeeze bottle. Apply only along the part lines and massage gently with fingertips. Rinse with cool water, using a handheld showerhead aimed at the scalp rather than letting water run over the braids.
Pat dry with a microfiber towel. Redo the bun. The cornrows will have loosened slightly — that’s normal and acceptable for up to 3 washes. After that, consider redoing the style.
Taking Down the Style Without Damage
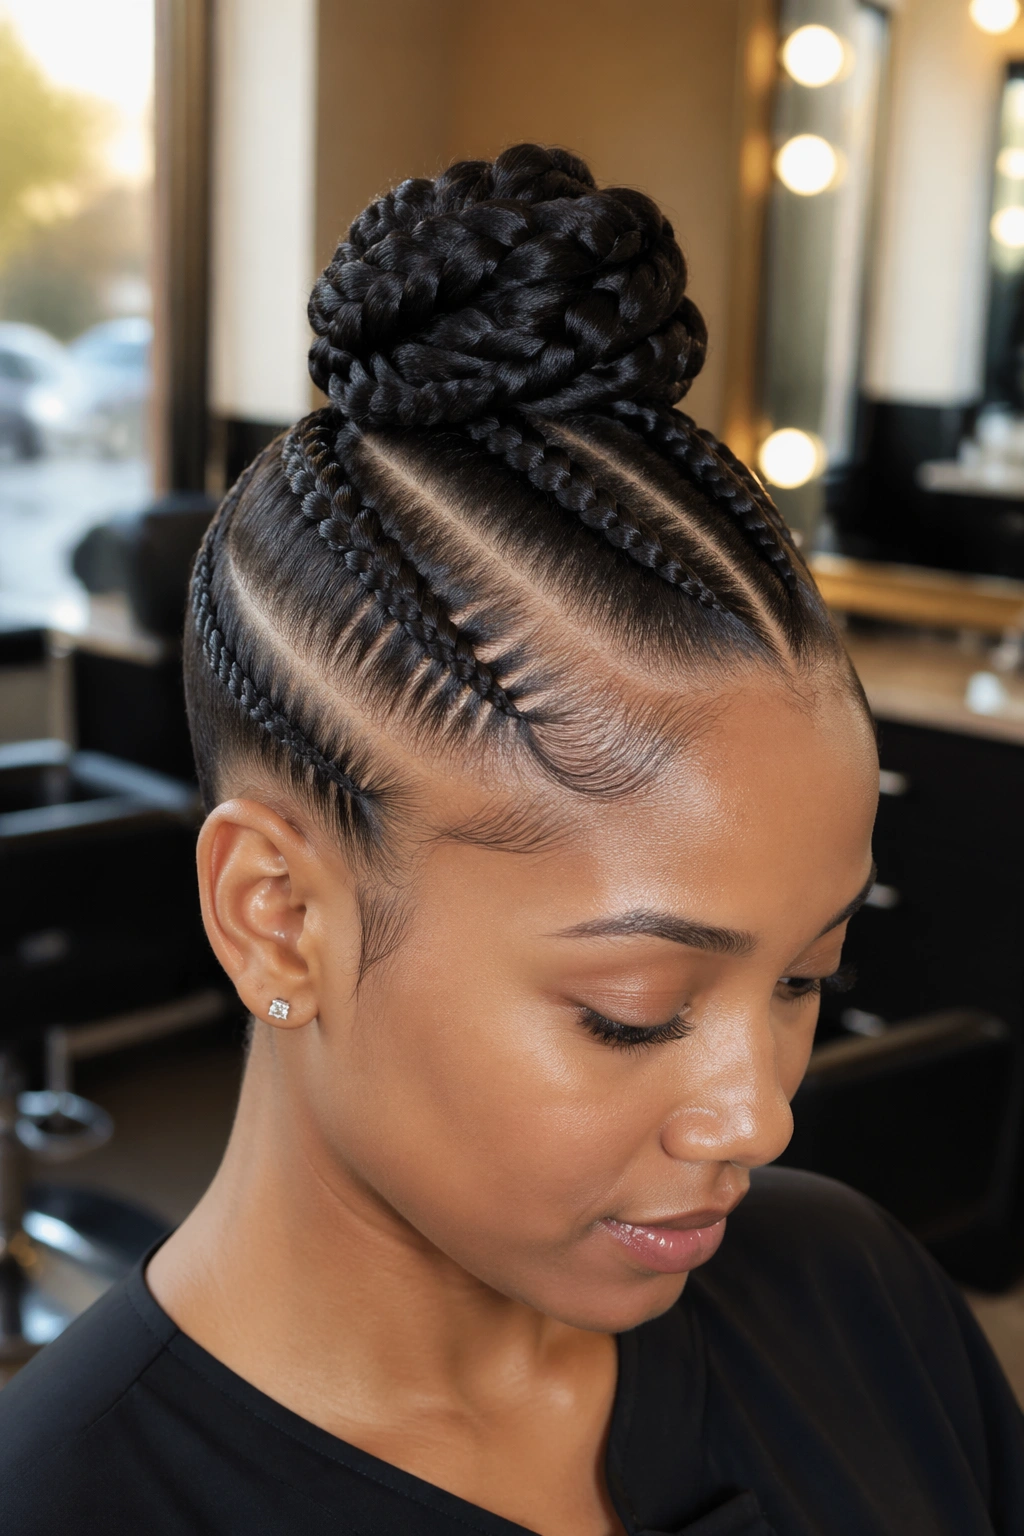
Four braids take down fast. The whole process should take 30-45 minutes, including a final detangle.
Unwrap the bun first. Remove the elastic. Separate each braid by unpicking from the ends up. Don’t pull. Don’t rush.
After all four braids are out, do not comb immediately. Apply conditioner generously, finger-detangle, then shampoo and condition normally. Combing dry after a long-wear style is the single biggest cause of takedown breakage.
Picking the Right Variation for You
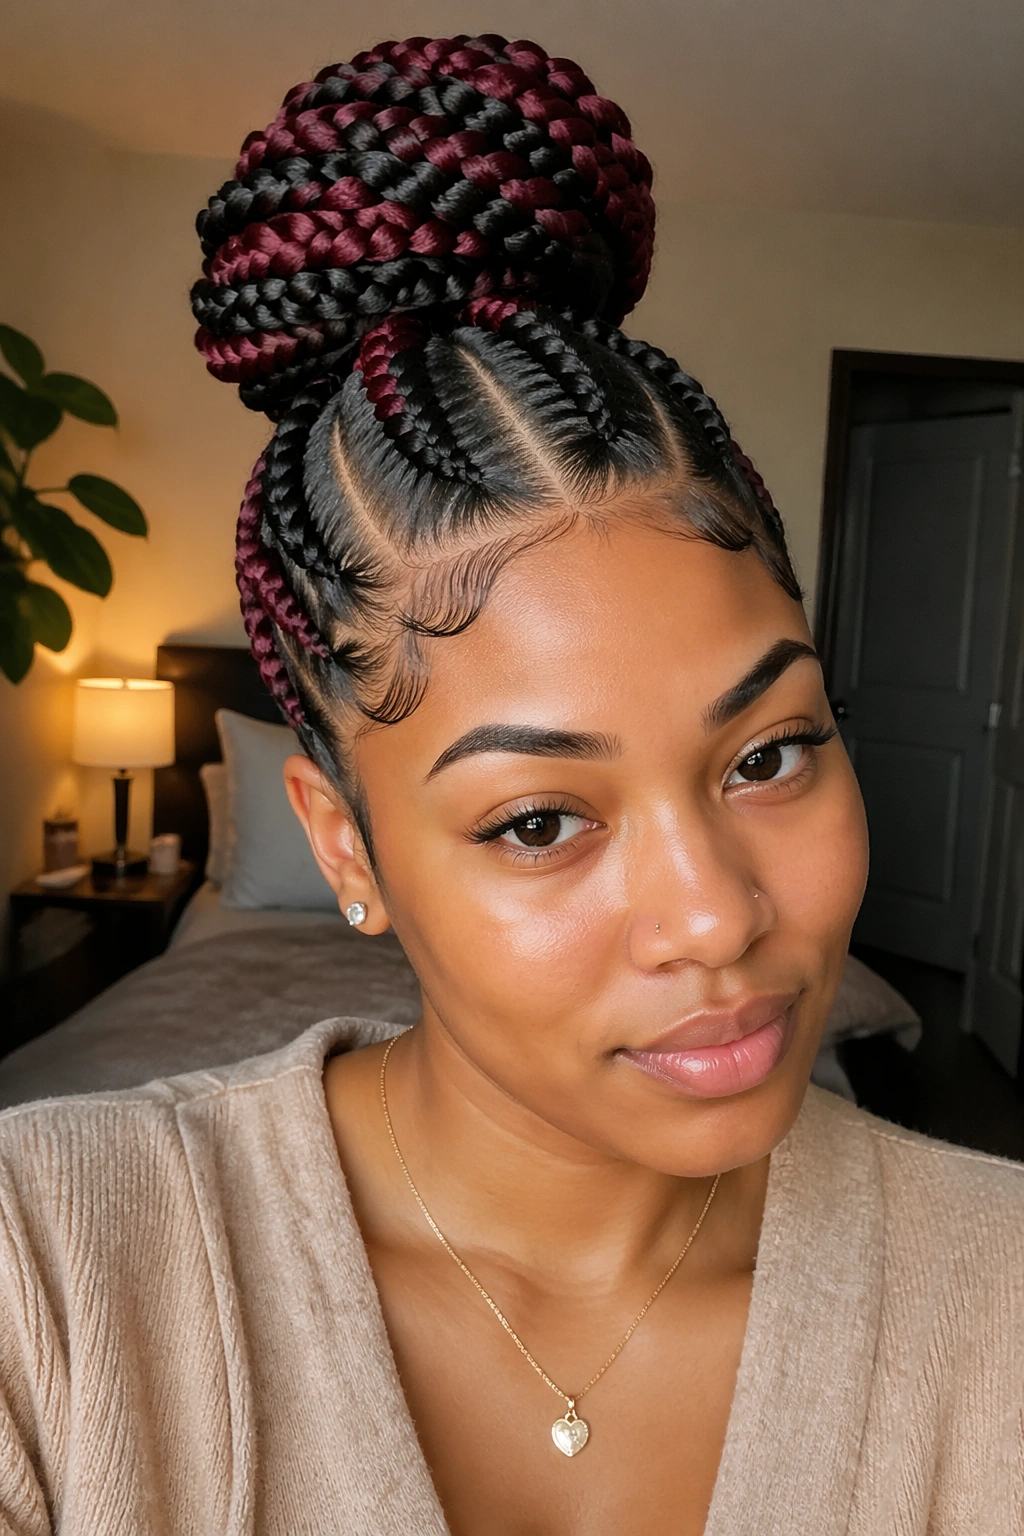
Four-braid buns suit almost everyone, but the specific variation matters. Quick checks to narrow things down:
If you want something that wears for weeks without attention, pick simple: straight-back to low bun, or four straight braids to mid-height bun. Complex parts and accessories need more upkeep.
If you have a formal event, go sculpted: the low side bun, the bow bun, or the flower bun. Formal structures photograph well and hold up through long evenings.
If your hair is thick or long, jumbo braids and chunky buns balance the density. Thin hair benefits from accent cornrows or feed-in extensions to add visual weight.
If you’re in a conservative workplace, skip the dramatic length mismatch and bold colors. The simple four-braid low bun reads as polished without telegraphing “creative hairstyle.”
Mistakes That Make the Bun Fall Apart
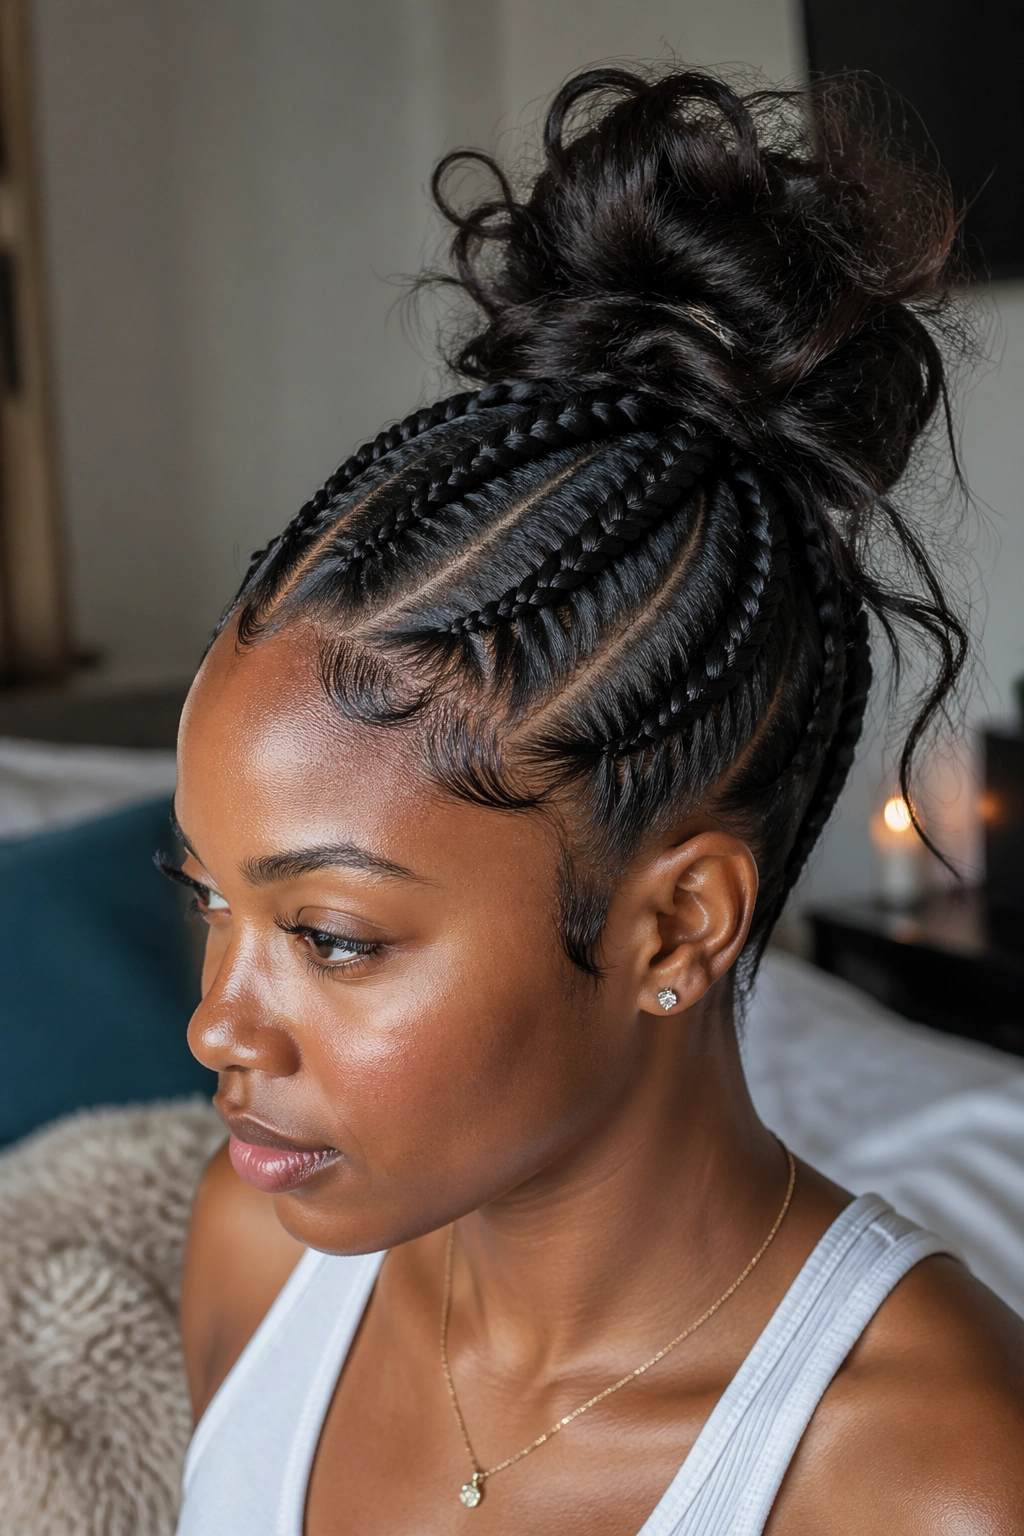
Three mistakes show up over and over:
Under-pinning the bun. Four U-pins are never enough. Six to eight. Spread them around the bun’s circumference, pushing each pin into the center of the bun rather than just grazing the surface.
Slipping elastic. The band gathering the four braids has to be tight enough that you can barely stretch it around. A loose band lets the bun slide down the braids over the course of a day.
Over-moisturizing. A light leave-in on the braids is fine. Heavy creams and oils turn the whole style greasy and shapeless within 48 hours. Less is more, especially on the bun itself.
A good four-braid bun looks like it took no effort. That’s the illusion. The effort happens in the prep, the parting, and the pinning — then the style lives easily for weeks with minimal fuss. Pick the variation that fits your hair type and your life, and the four braids will do the rest.
