Simple cornrows on natural hair don’t need to be boring. They just need to be clean, comfortable, and kind to your strands. That’s the brief. Whether you wear a protective style between wash-and-gos or you want something low-fuss for a work week, simple cornrows give your hair a rest while still looking pulled together. And natural hair — 4A, 4B, 4C, or any mix in between — holds these styles beautifully when the prep is right.
What most tutorials skip is the real stuff. The part about how your hairline feels on day three. The honest talk about how much tension is too much. The small details that separate a cornrow set you’ll wear for two weeks from one you’ll take down by Thursday. This guide covers 22 simple cornrow ideas that look intentional without being complicated, and it covers them with enough practical depth that you can actually wear them — not just pin them to a mood board.
Why Simple Cornrows Suit Natural Hair So Well
Natural hair responds to low-manipulation styling better than just about anything else. Cornrows — when done with moderate tension and decent prep — let your coils rest from daily combing and product layering. Your scalp gets to breathe. Your ends stay tucked. Your wash day stretches from every five days to every two weeks without looking rough.
Simple doesn’t mean plain. It means uncluttered. Five straight-back cornrows with a clean center part reads simple. The same five cornrows with beads, cuffs, and a side swoop reads styled. Same foundation, different energy. That’s the trick with this category.
Natural hair holds a part better than relaxed hair. The texture grips itself, which means cornrows don’t slide or loosen as fast. That’s a quiet advantage — and one worth leaning into.
Prep Work Before You Part the First Section
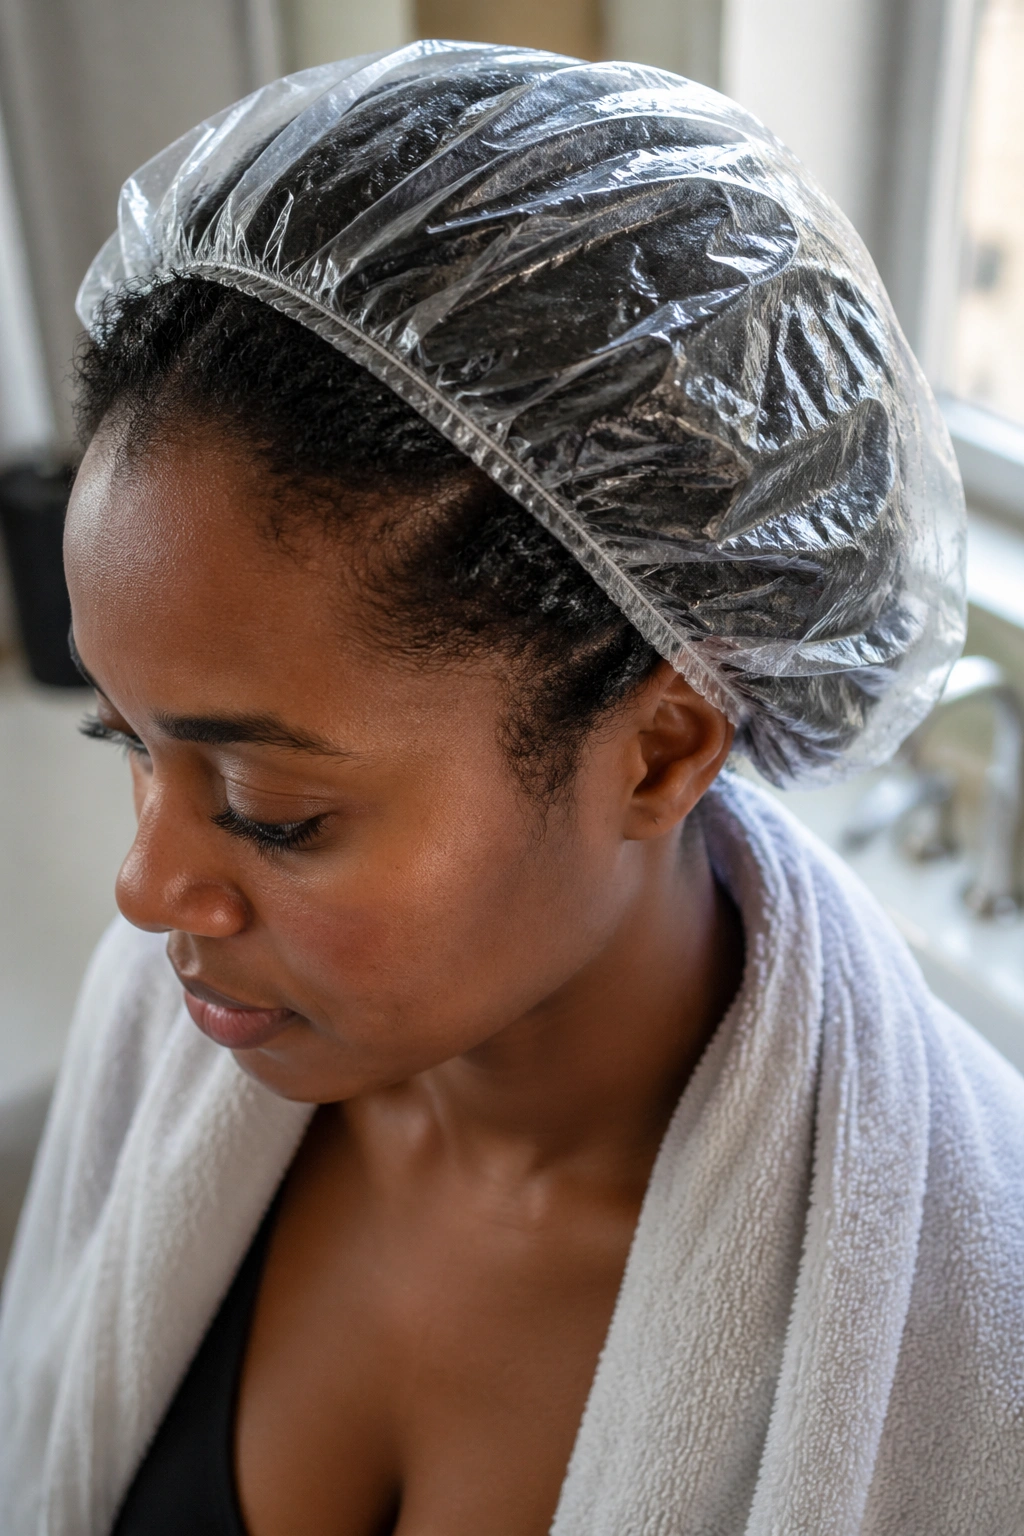
Wash day matters more than technique here. If your hair is dirty or product-saturated, cornrows will lift at the roots within 48 hours. Shampoo with a clarifying wash once every four to six weeks. In between, use a gentle sulfate-free cleanser. Deep condition for 20-30 minutes under a plastic cap.
Stretch the hair. Air-dry in chunky twists, flat-twist overnight, or blow-dry on cool with a wide comb attachment. Wet cornrows shrink and pop up at the roots once they dry — you want the stretch baked in before you start.
Key prep tip: your hair should feel hydrated but not slippery. Slippery hair won’t hold a part. Crispy hair won’t smooth flat. The sweet spot is soft, moisturized, and slightly dry to the touch.
Tools That Make the Difference
A rat-tail comb with a pointy metal tip. A tub of edge gel with real hold — not flake-prone, not tacky. A wide-tooth comb for detangling. Clean, labeled sections held with jaw clips. A spray bottle with water and a teaspoon of leave-in. Hair grease or light oil for the scalp after parting. A silk or satin bonnet for sleep.
That’s it. No fancy gadgets. If you’ve been cornrowing for a while, you’ve probably got all of this already.
What to Skip
Skip the heavy wax pomades for the braiding process itself. They gum up the hair and make the cornrow look greasy by day two. Save those for smoothing the top layer after the braids are already in place. That’s a small detail that changes the look a lot.
Technique Basics for Clean, Low-Tension Cornrows
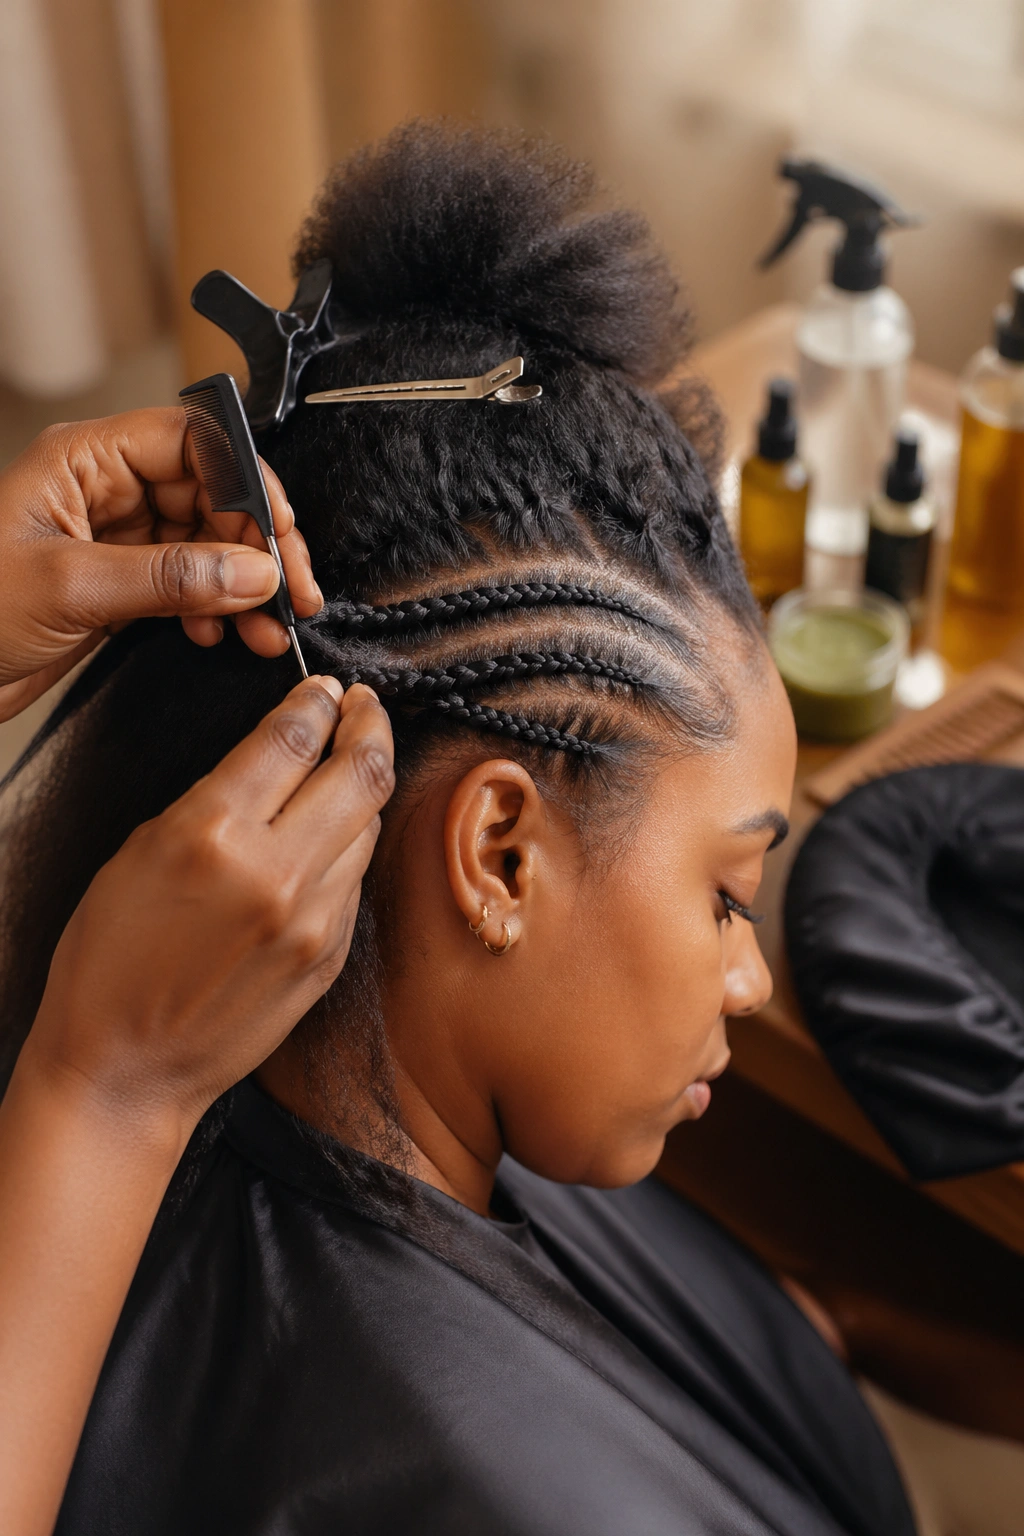
Part with purpose. Use the rat-tail to draw a line — not to carve a canyon. A clean part is about 1/8 inch wide, not a gaping gap showing scalp. Smooth each section flat with the comb before you divide it into three strands.
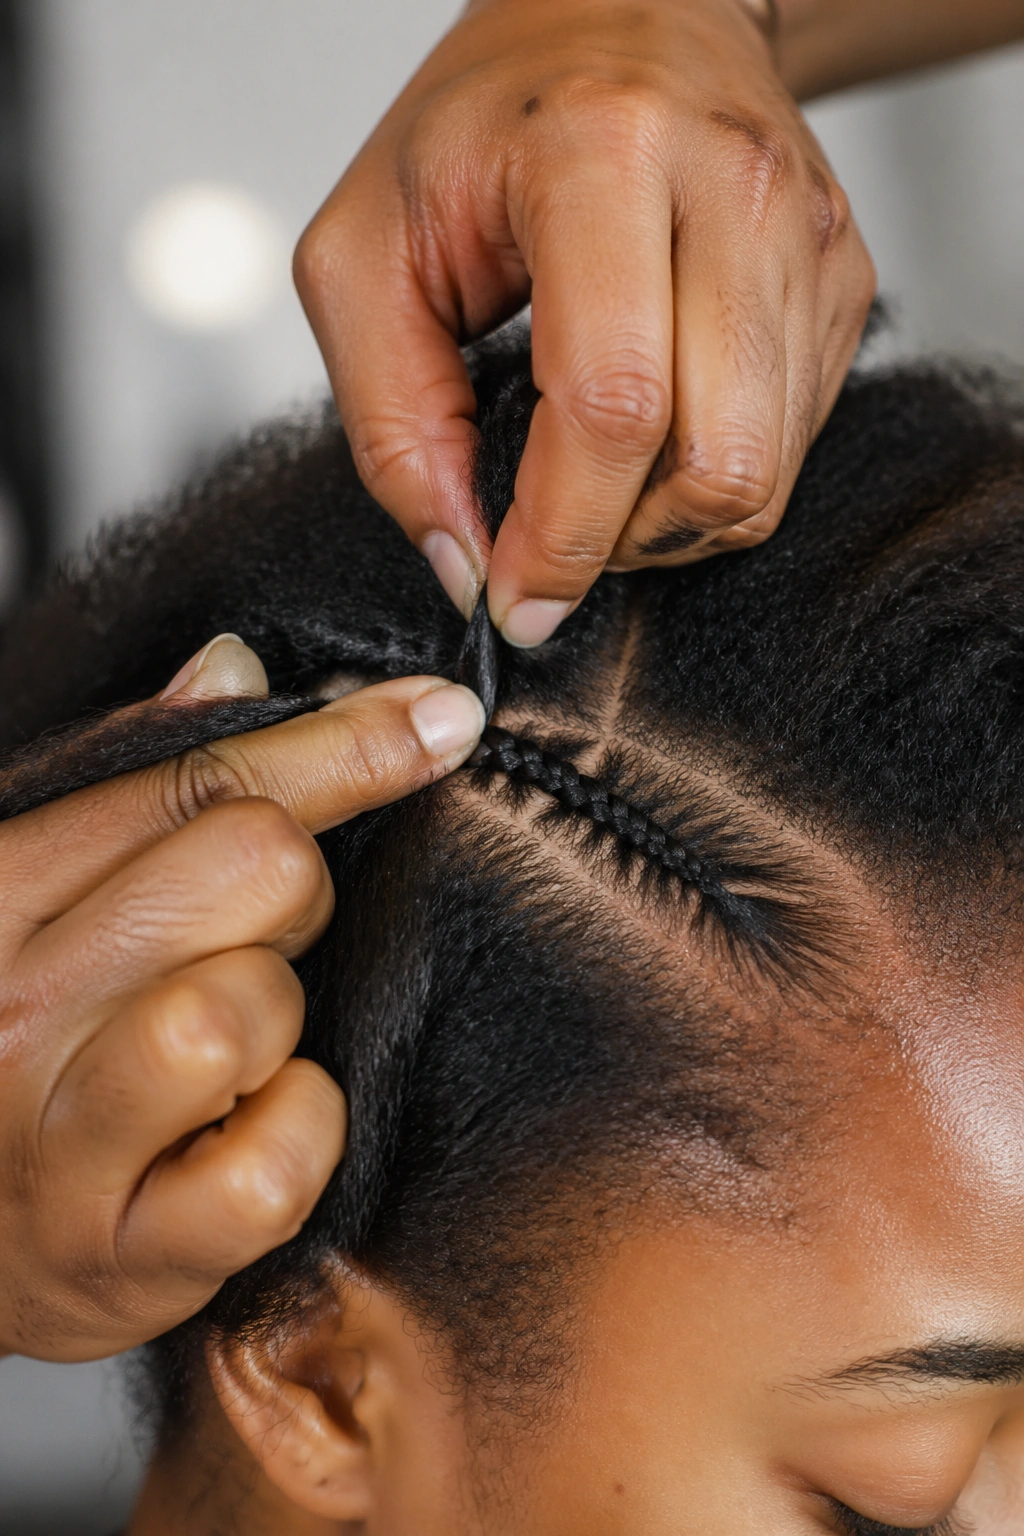
Start the braid on the scalp, not floating above it. The first stitch locks the style. Use under-hand strokes — pulling each strand under the middle section — for a raised, three-dimensional cornrow. Over-hand gives you a flat, French-braid look that sits closer to the head.
Feed your strands evenly. Lopsided feeding is what makes cornrows look bumpy. Take time here. It’s worth the extra minute per row.
A Brief History Worth Knowing
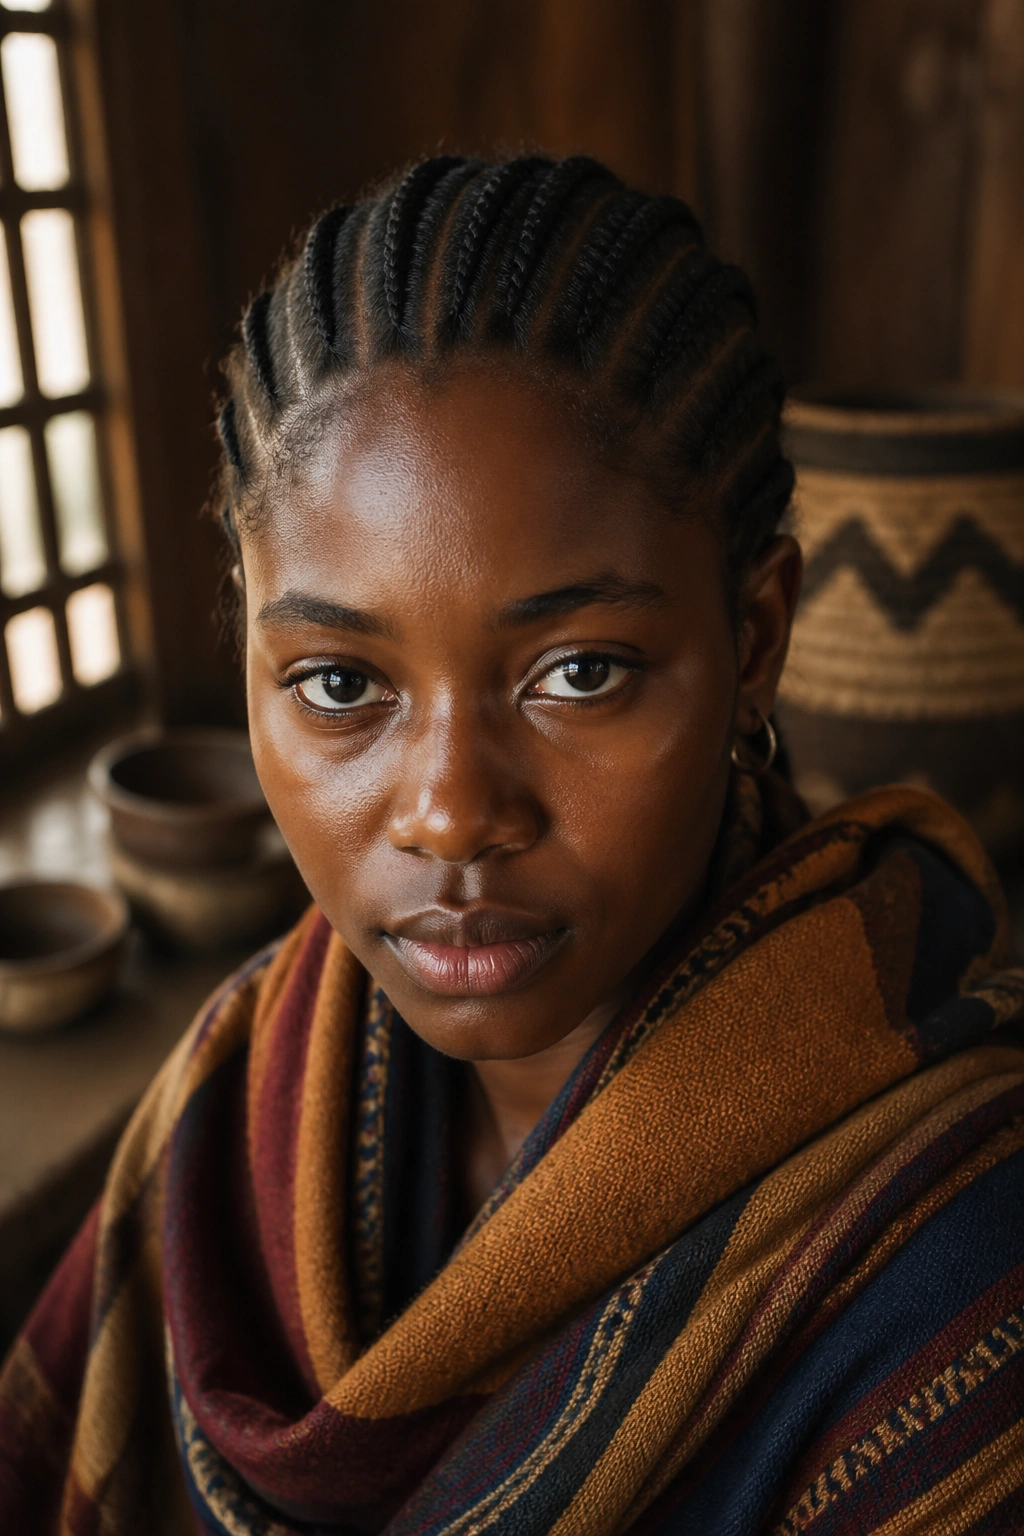
Cornrows are ancient. Evidence traces back to around 3000 BCE in African art and sculpture, with regional patterns signaling age, tribe, marital status, and social rank. The style crossed an ocean during forced migration and carried encoded meaning — sometimes even maps. Generations later, the patterns survive as both everyday styling and cultural signature.
When you wear cornrows, you’re wearing history. Simple styles or elaborate ones, the thread runs back thousands of years.
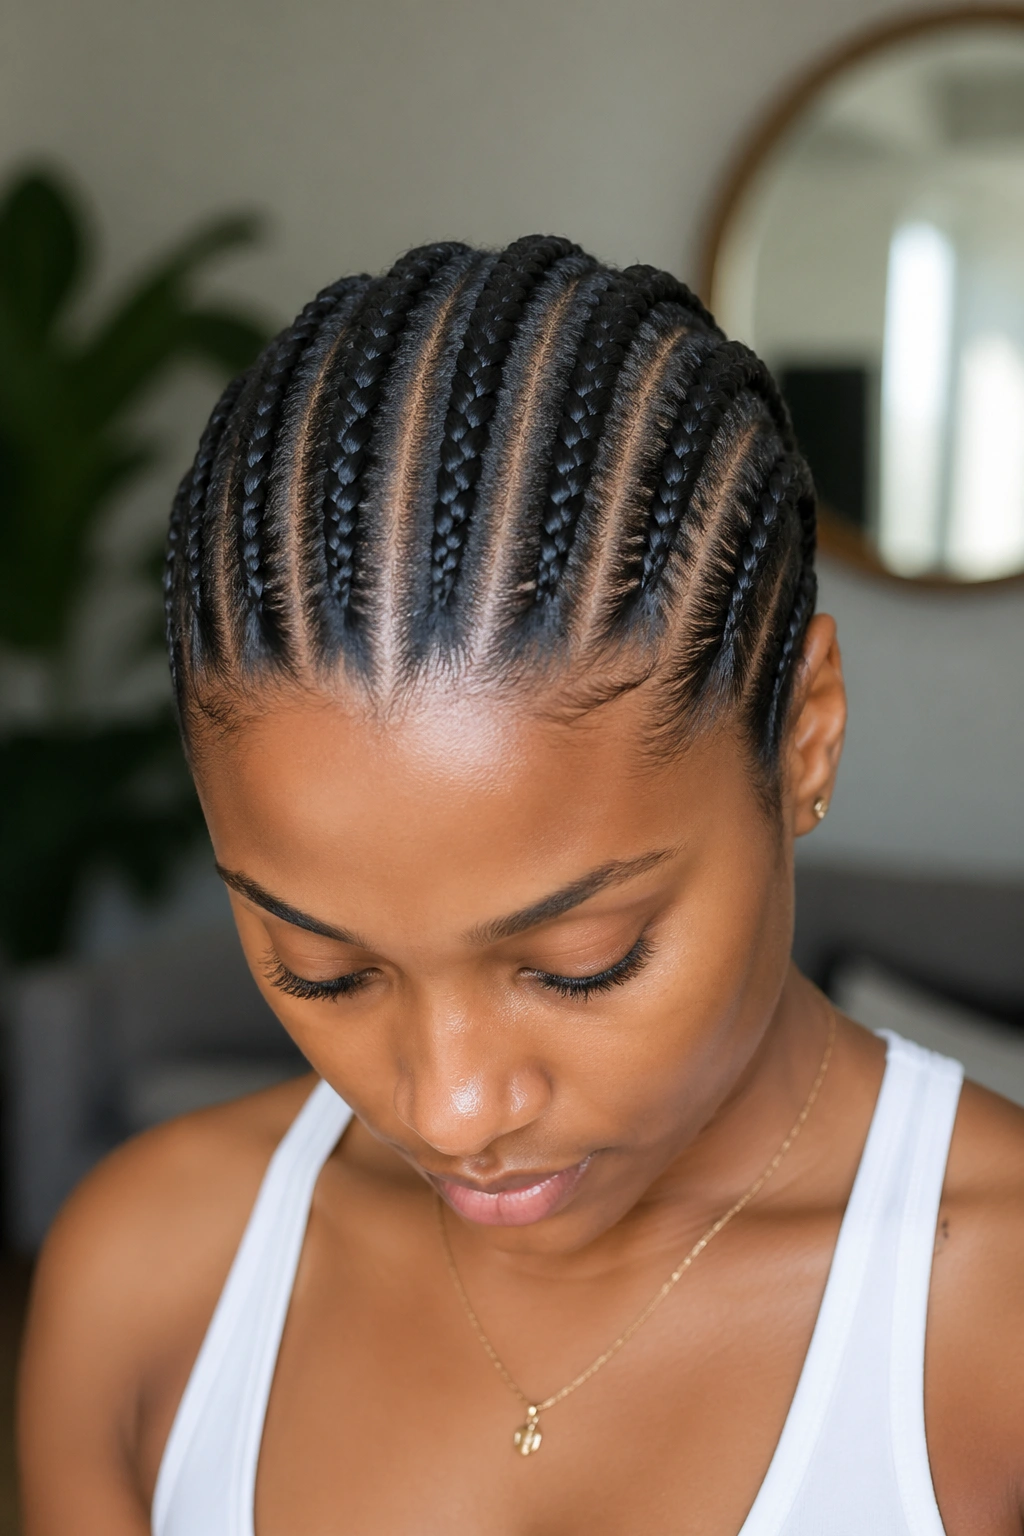
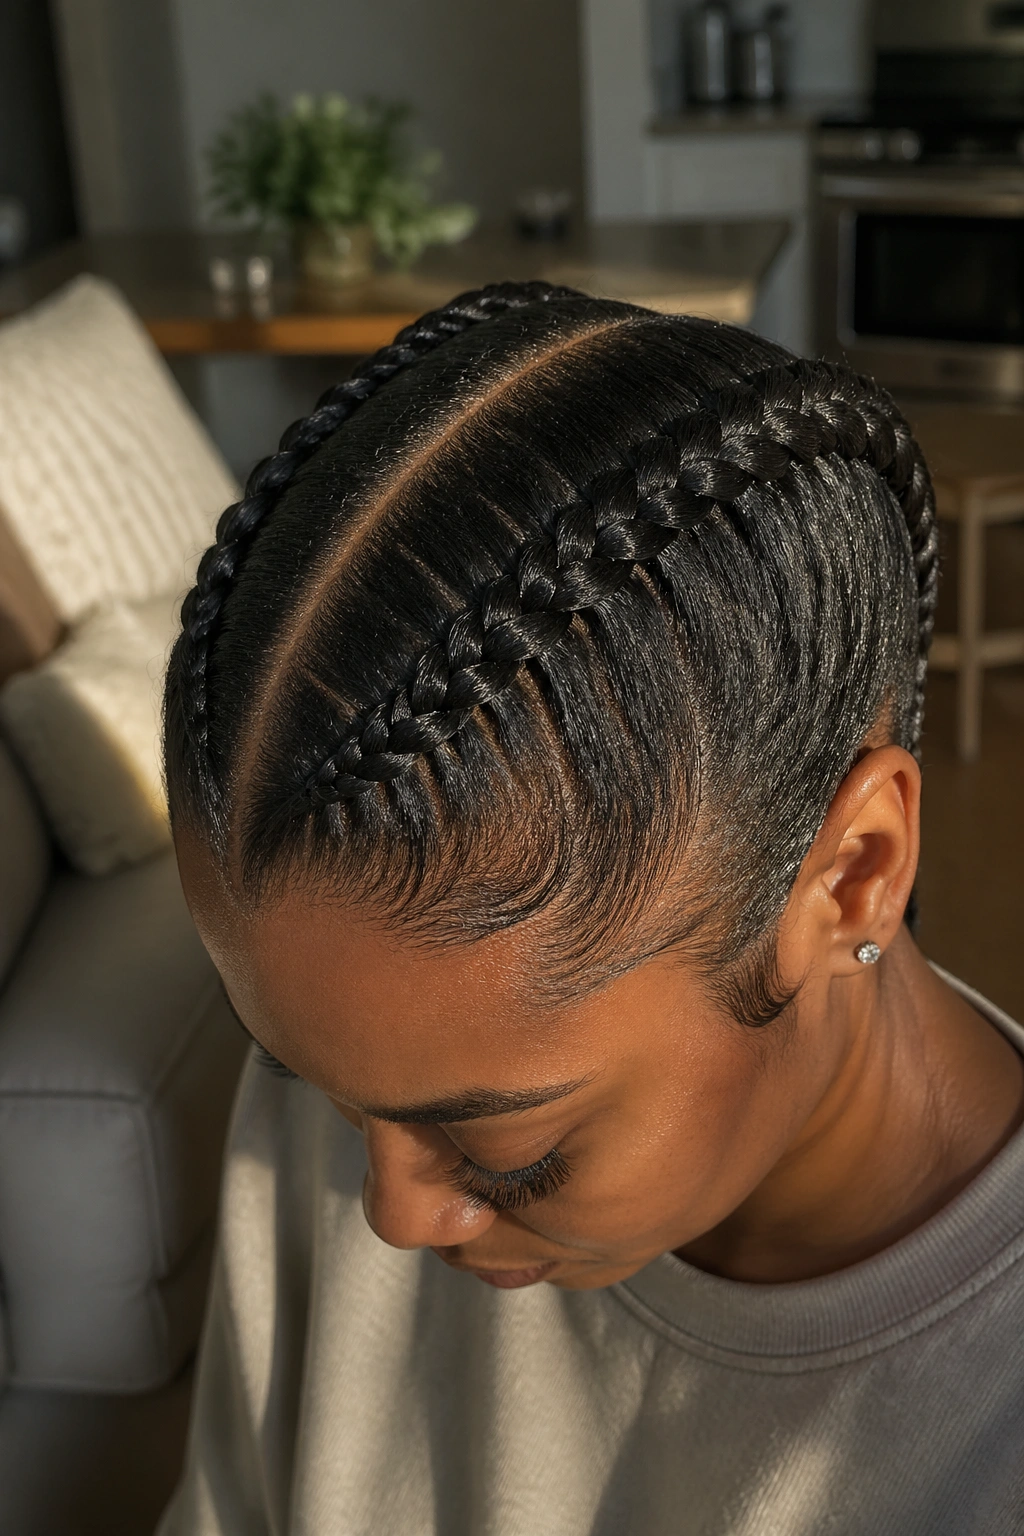
1. Five Straight-Backs With a Clean Center Part
The baseline. The style everyone masters first and comes back to forever. Five even cornrows running from hairline to nape, with a razor-sharp center part and two cornrows flanking each side.
Why It Works
- Equal distribution of tension across the head
- Easy to sleep on — no bulk at the crown
- Low time investment: 45-90 minutes depending on speed
- Reads polished with zero accessories
Each row should measure roughly the same width at the hairline. Thicker rows at the front and thinner at the back throw off the symmetry. Keep them even from start to finish.
Best tip: wrap your bonnet loosely the first night so the rows settle without pressing flat on one side.
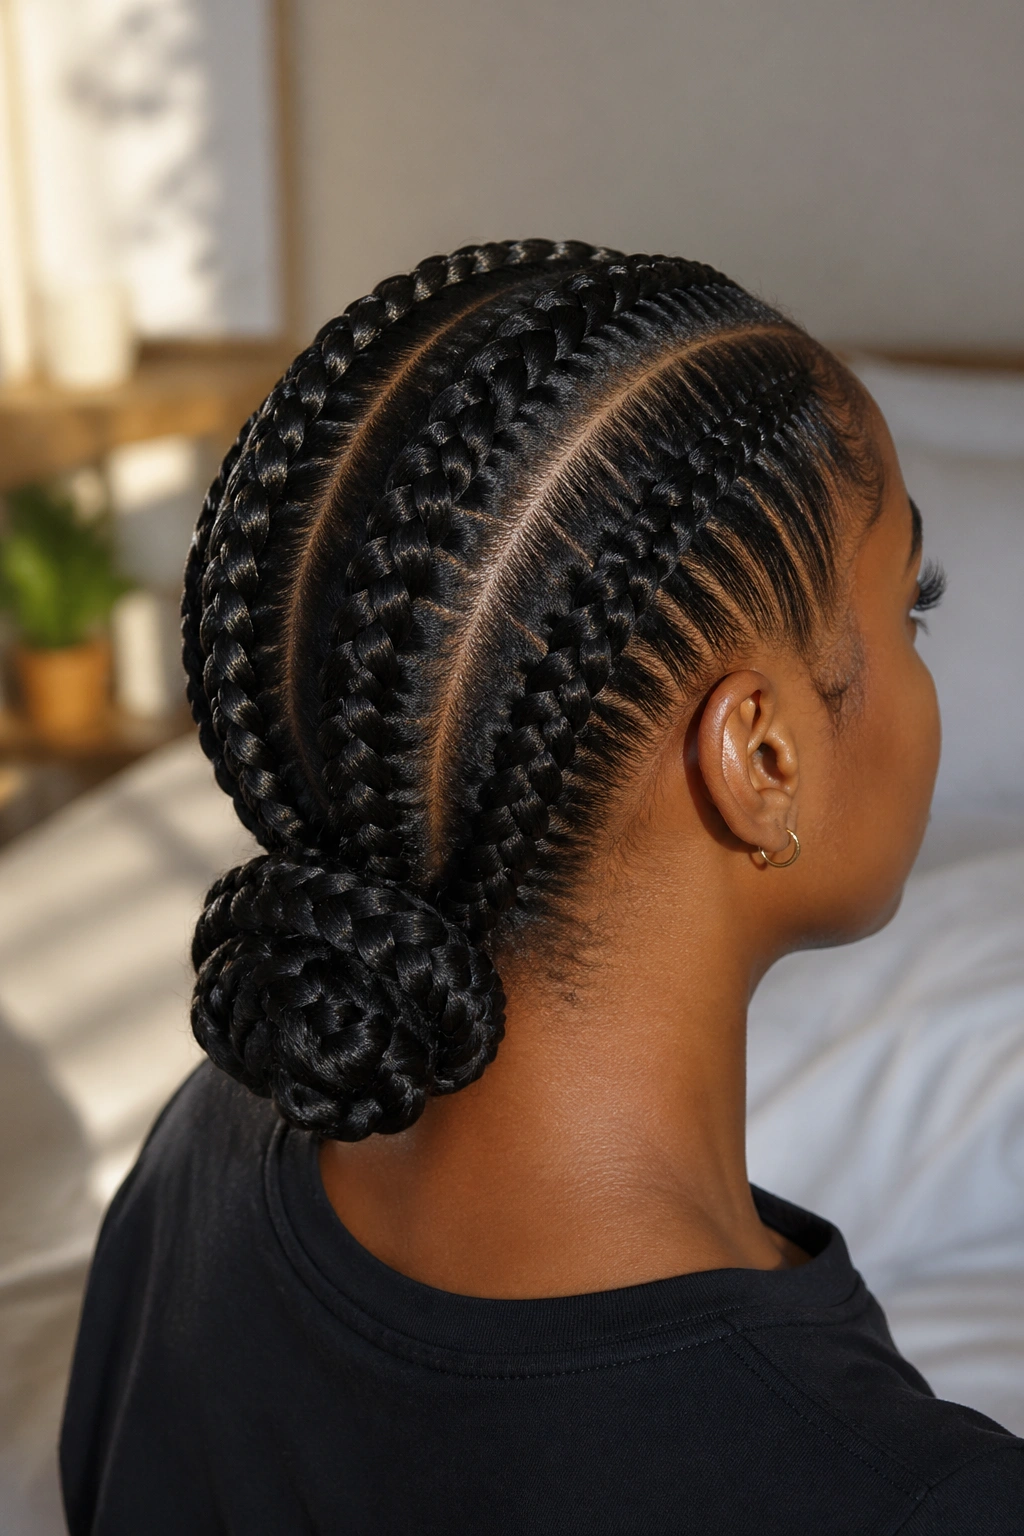
2. Three Thick Cornrows to a Low Bun
Unlike five straight-backs, three chunky rows give you more drama with less work. The thicker the row, the bigger the statement, and the faster you’re done. Three cornrows, fed into a low bun at the nape, finished with a bit of foaming mousse on the flyaways.
What’s different here is the proportion. Fewer parts, wider sections, bolder presence. It’s also forgiving — small inconsistencies in the braid tension don’t show as much on a thick cornrow as they would on a skinny one.
Who this suits: anyone with medium to long natural hair who wants a two-hour style that looks like it took four.
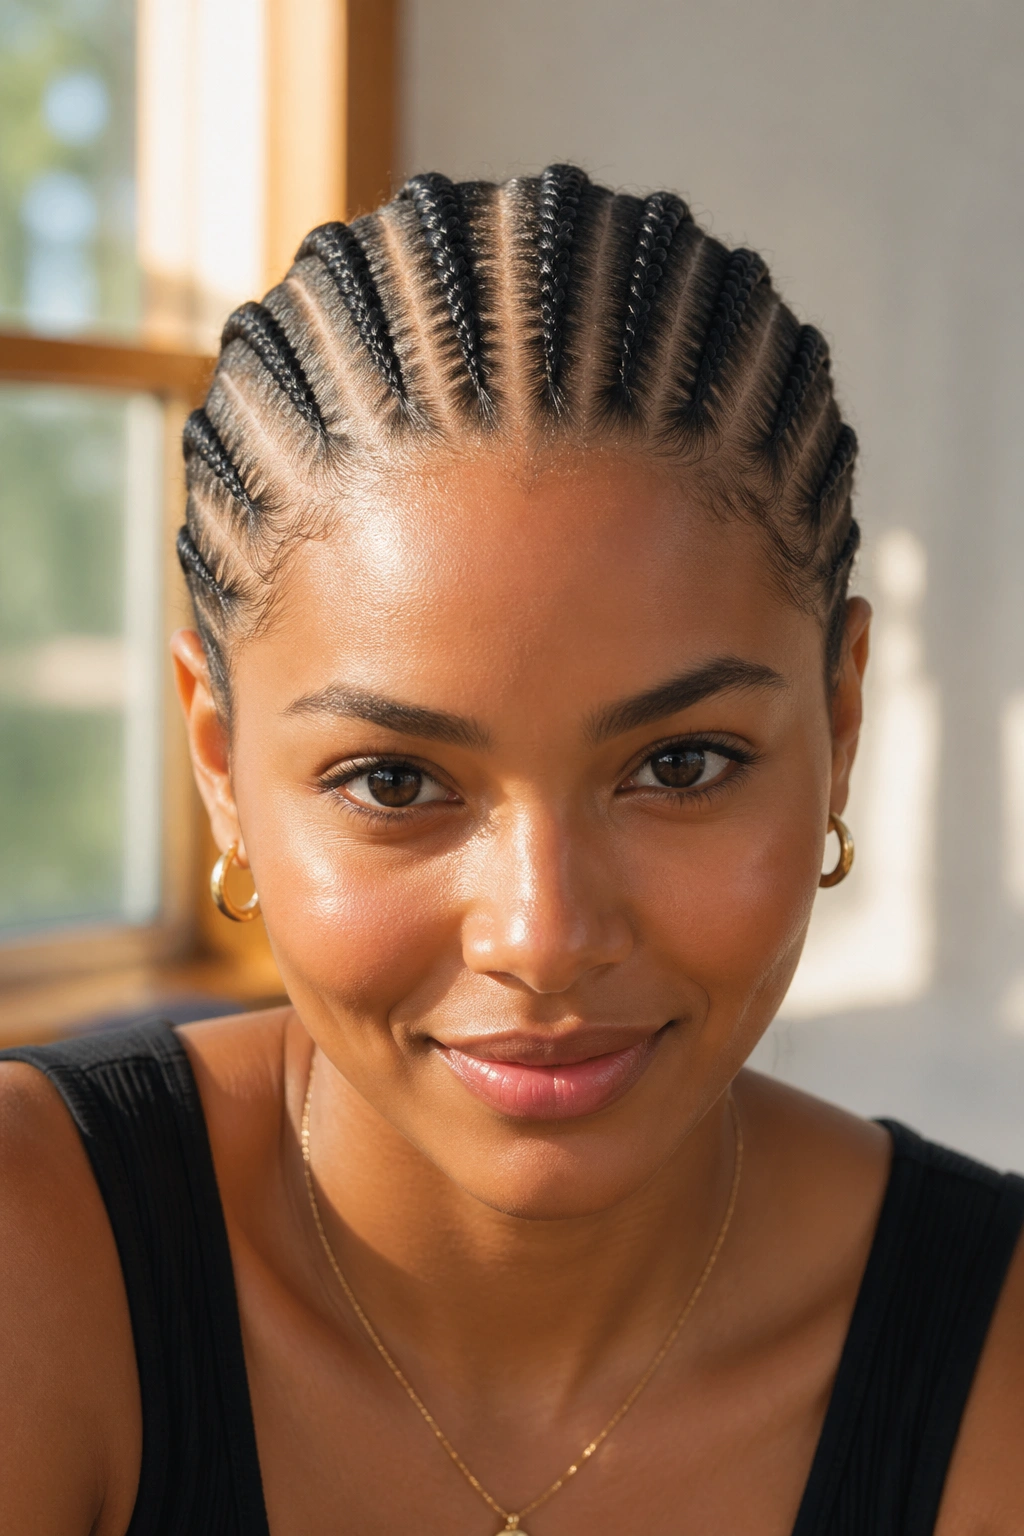
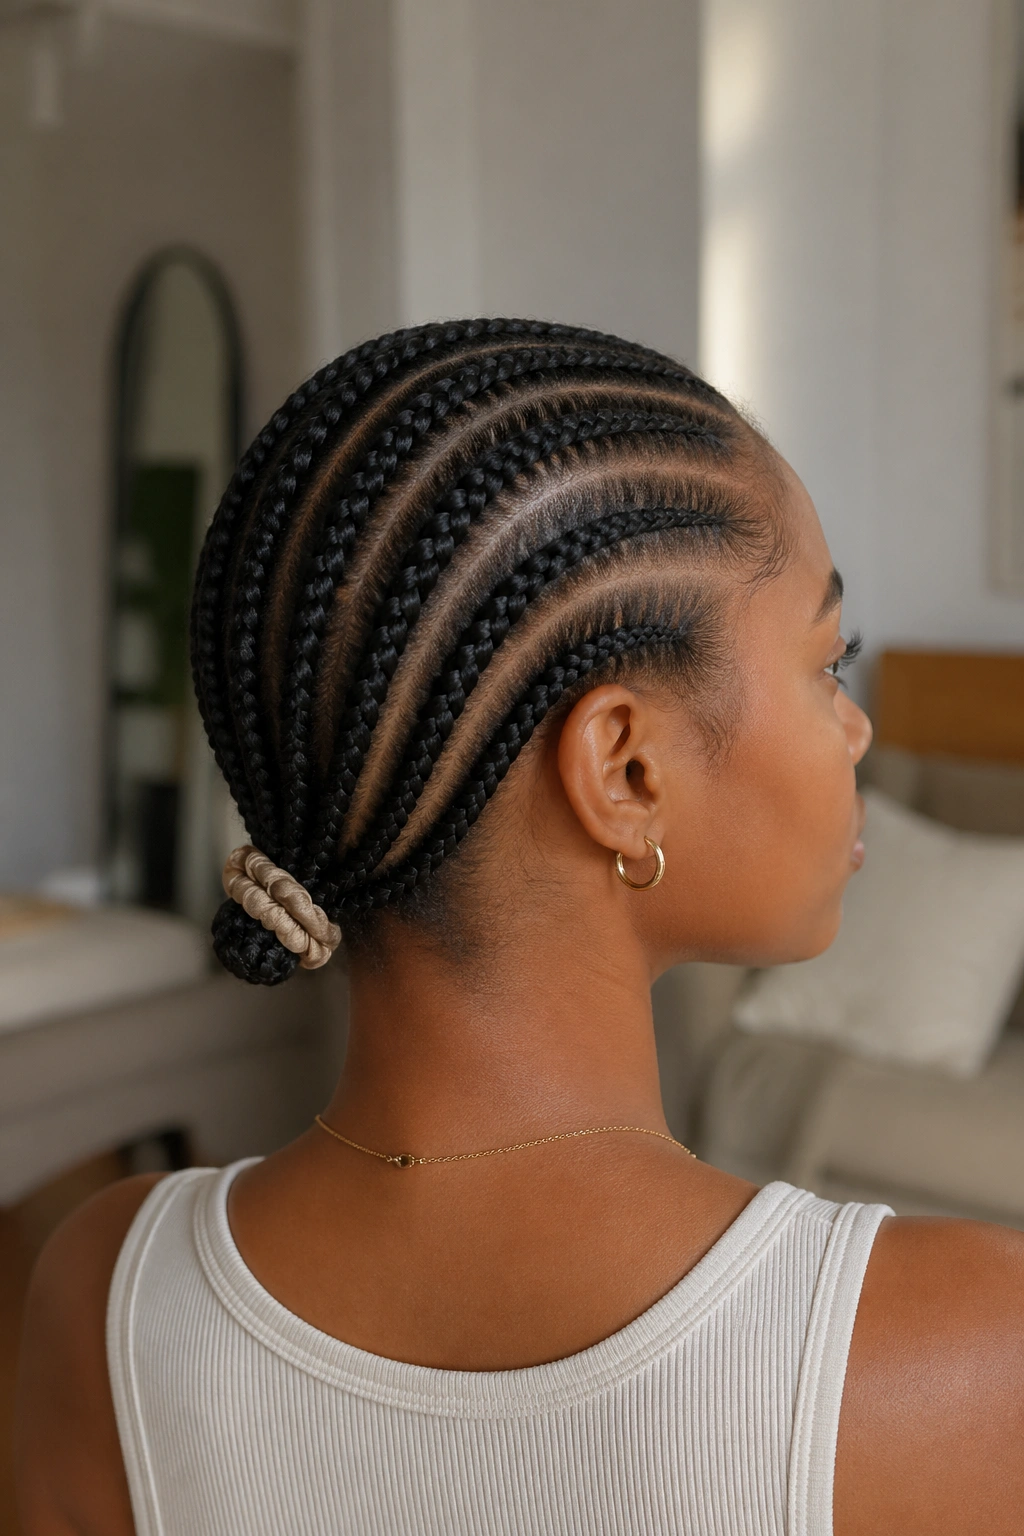
3. Seven Slim Cornrows to the Nape
Thinner rows read more refined. Seven slim cornrows — each about half an inch wide at the hairline — running straight back and gathered at the nape with a neutral-color scrunchie or a hair tie wrapped in a strand of your own hair.
Slim cornrows take longer. A full head runs 90 minutes to two hours if you’re doing them yourself. But they last. Slim rows stay cleaner longer because each braid has less bulk to shift as it dries and settles.
The hairline on a slim-row set is where the style lives or dies. Take extra time on the front three rows. Smooth them flat. Use the comb’s teeth to neaten the part lines before you start braiding each one.
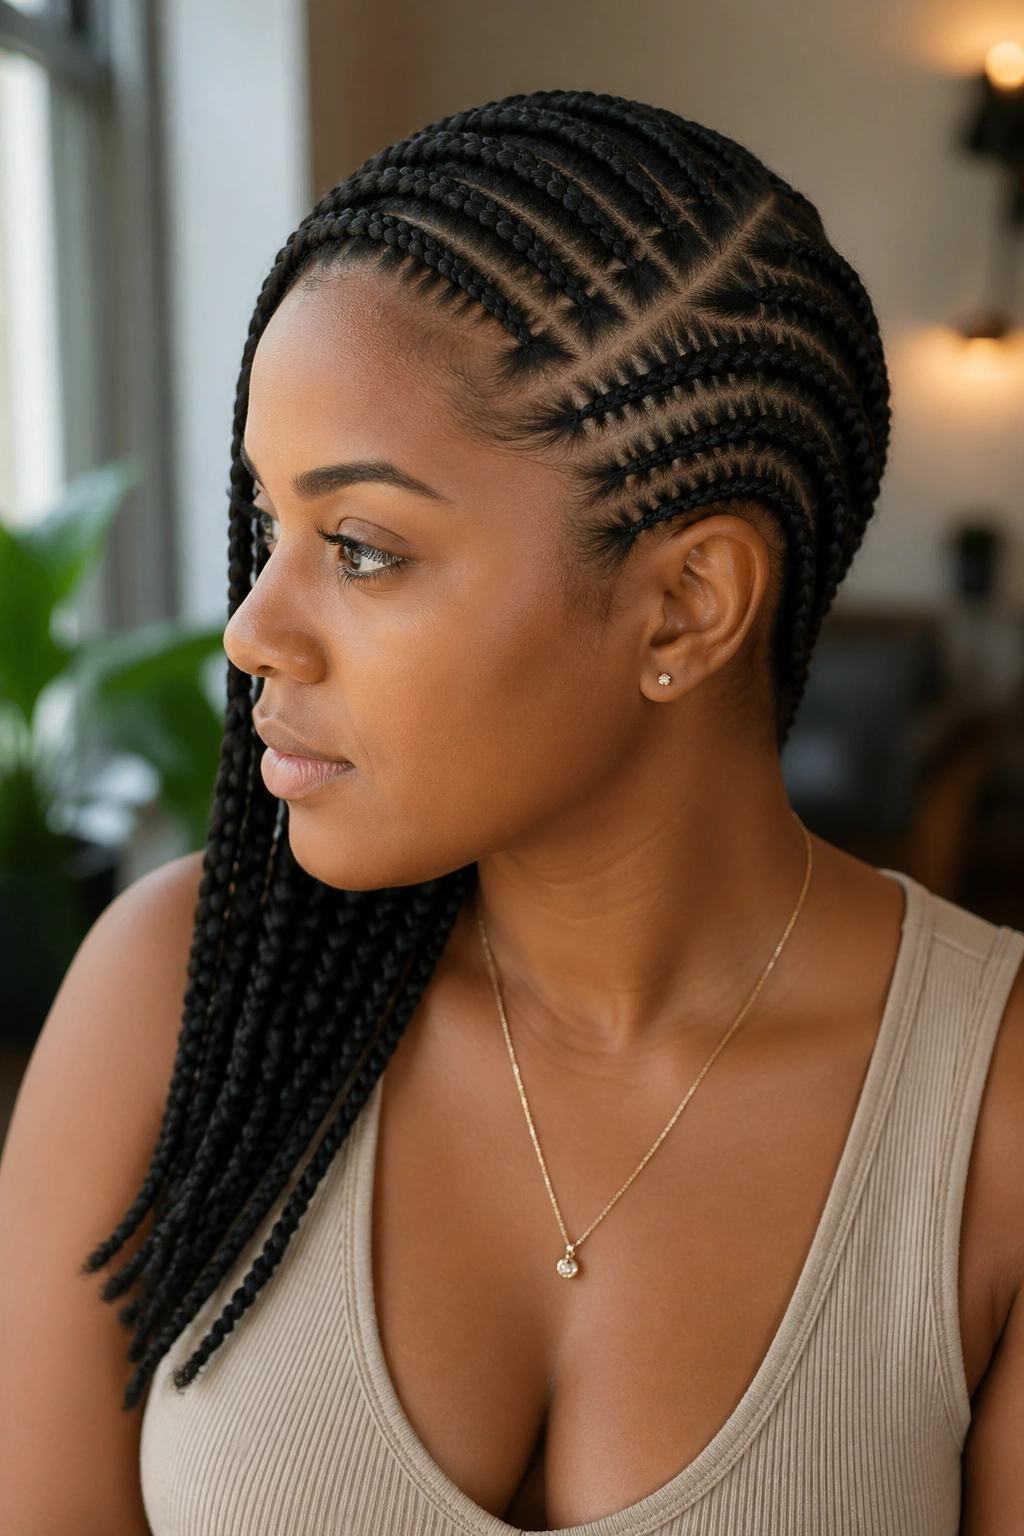
4. Side-Swept Cornrows With a Deep Right Part
A deep side part changes everything. Instead of dividing the head into two mirror halves, you drop the part over the right brow and sweep all the cornrows diagonally toward the left shoulder. The result looks asymmetric, intentional, and softer on the face than a center part.
A deep side part works especially well for round faces because it breaks up the symmetry. It also gives you a place to tuck ends — right behind the ear, where they disappear without needing a bun or accessory.
How to Style It
- Part from the outer corner of the right eye straight back to the crown
- Angle each cornrow slightly toward the back-left, not straight back
- Gather the ends in a loose side twist that sits over the left shoulder
- Finish with a drop of argan oil on the part line to keep it smooth
5. Two Chunky Cornrows — The Classic Warm-Up
Two cornrows. That’s it. One running down each side of the head from a clean center part. This is the style you wear under a wig, under a sew-in, or as a standalone for a lazy Sunday you don’t want to be lazy about.
Two cornrows take 20-30 minutes. They’re the style your aunt or cousin could do while you held your own phone up. Easy, fast, and honest.
The only catch: two cornrows put pressure on two narrow strips at the hairline. Keep the tension moderate. If your scalp feels tight, unbraid the first two inches and redo them looser. Don’t push through the discomfort just to save time.
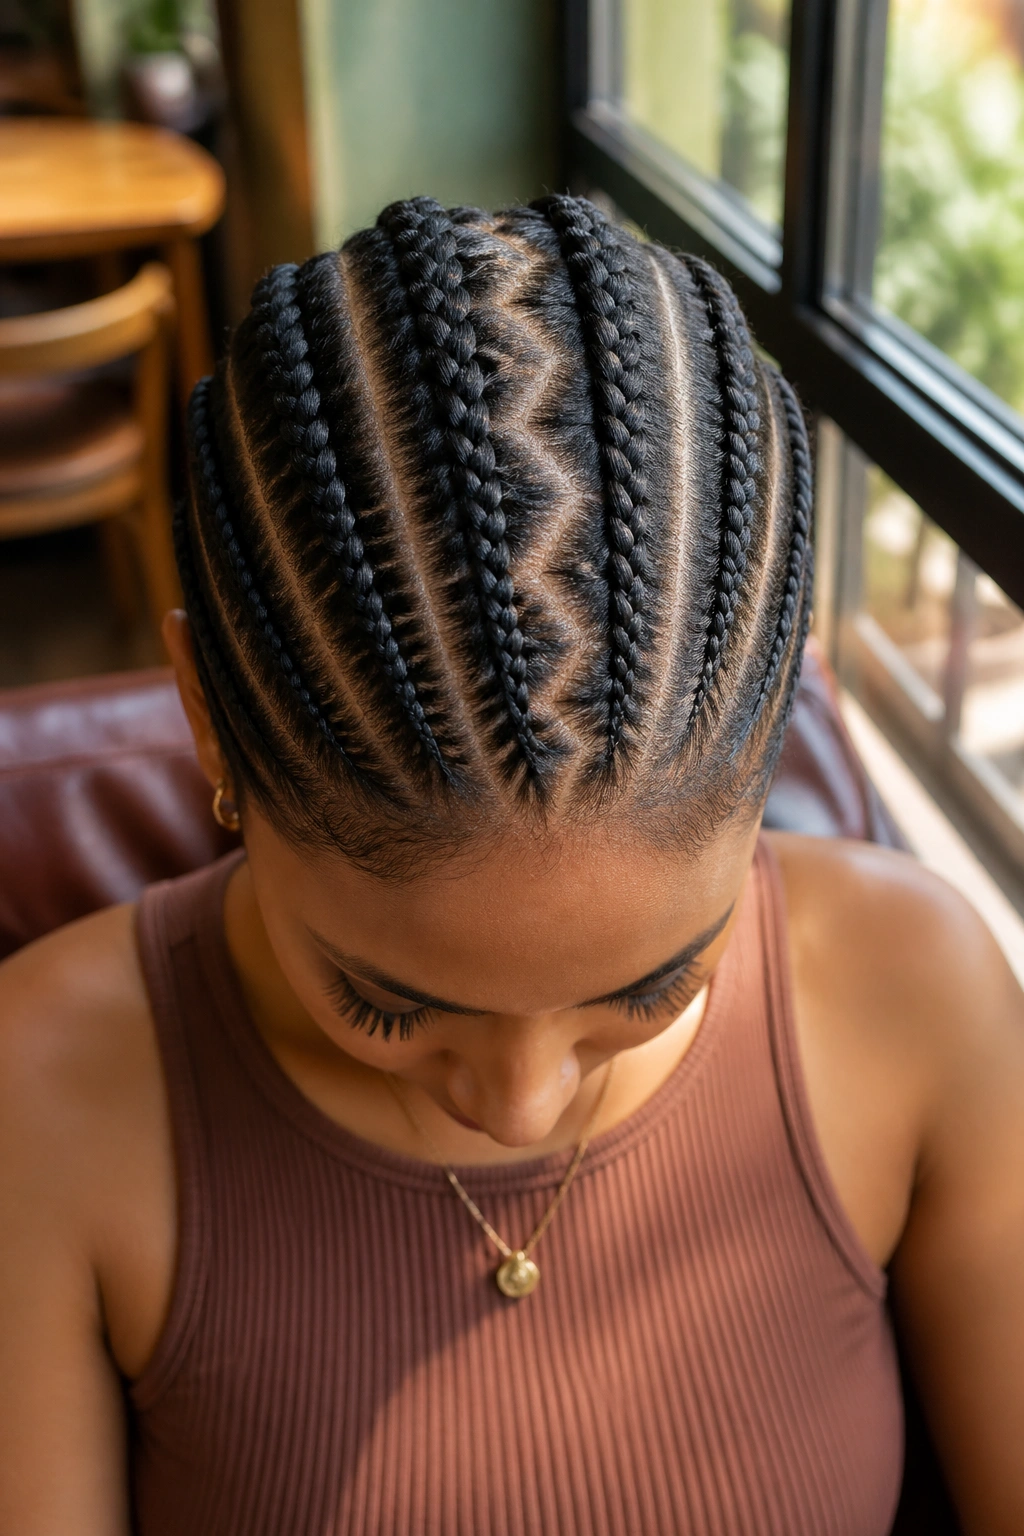
6. Four Cornrows With a Zigzag Center Part
A zigzag part breaks up the visual monotony of a straight line. You still get four cornrows — two on each side — but the part between them snakes in three or four pointed angles from front hairline to crown.
Bold fact: a zigzag part adds maybe two minutes to your total time but changes the style’s personality by about 60 percent. The cornrows themselves stay simple. The part does the heavy lifting.
Use the rat-tail comb’s tip to draw the zigzag first. Go slow. Each angle should be about an inch wide and hit a clean point. Then part the rest of the head into the four sections on either side.
Done right, this reads creative without feeling fussy. Done sloppy, it looks like your part wandered off.
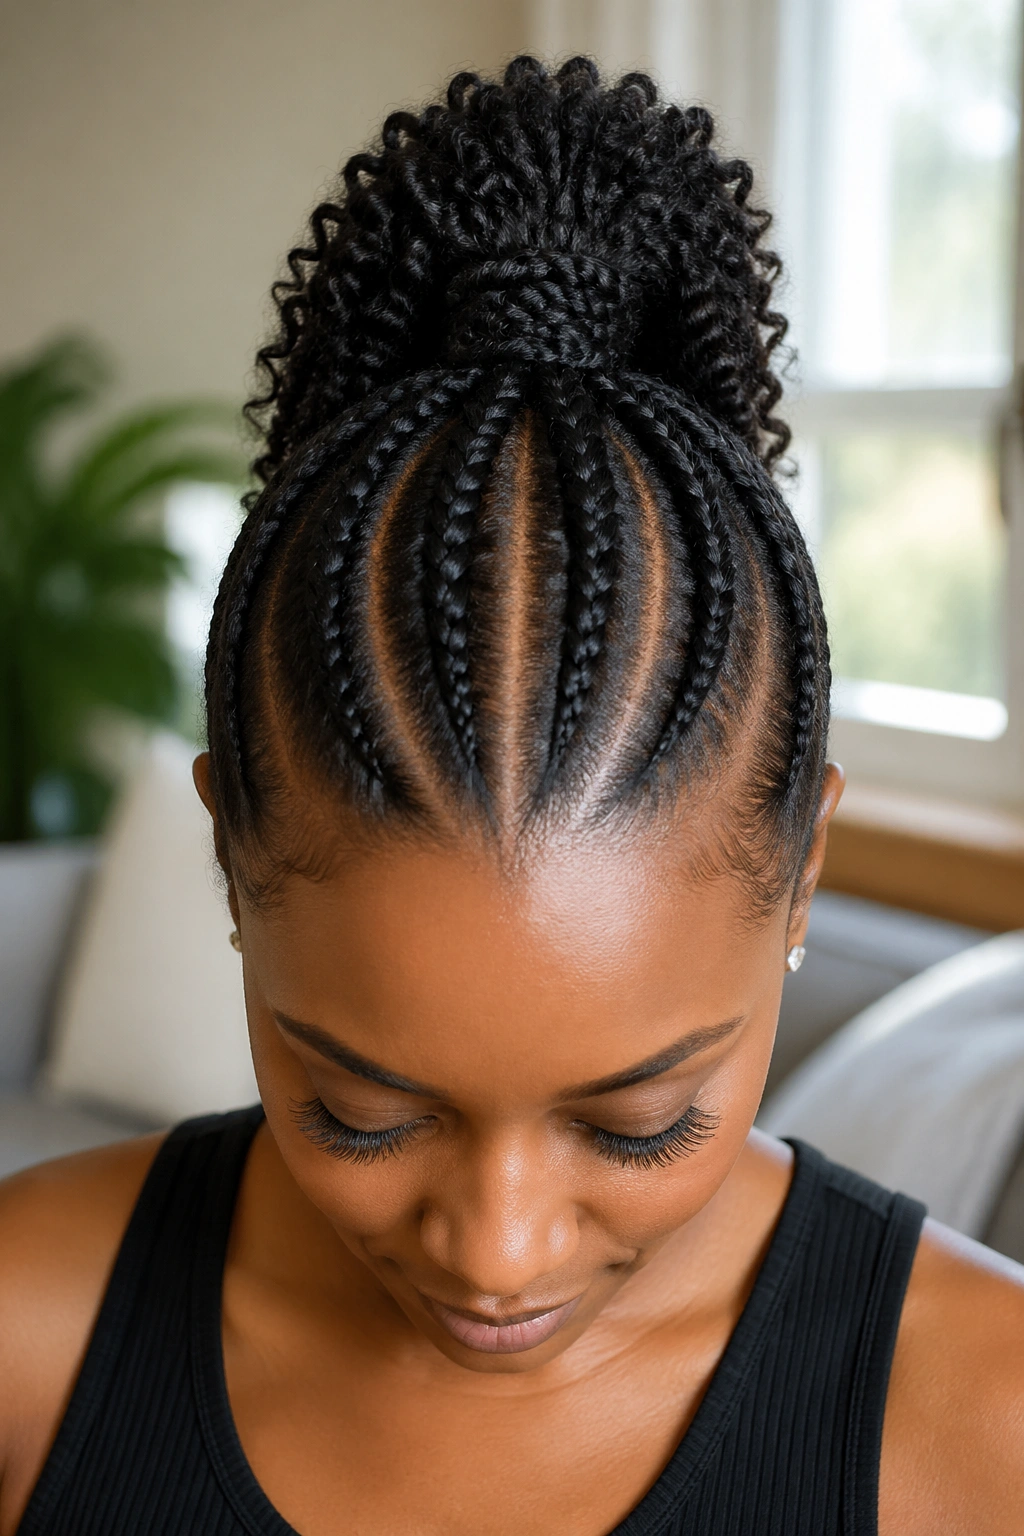
7. Six Cornrows Into a High Ponytail
Six rows feeding into one gathered point at the crown gives you the ponytail look without needing straight hair or extensions. Each row curves slightly inward so the endpoints meet at a single spot about two inches above the crown.
What to Watch For
- Tension at the front hairline — gathering upward pulls on the edges harder than a straight-back style
- Curve the parts gently; sharp angles make the cornrows buckle
- Stop cornrowing about three inches before the gather point, then smooth the loose hair into the ponytail
A high gather is more flattering to longer face shapes. Oval and long faces carry the height well. Rounder face shapes may prefer a mid or low gather instead.
8. Cornrowed Halo With Loose Curls on Top
Cornrow the perimeter of the head in a halo — following the hairline all the way around — and leave the crown loose. The result is part protective style, part showcase for the natural texture on top.
This one takes practice. The halo isn’t one continuous cornrow; it’s usually three or four smaller cornrows curving around the perimeter and meeting at the back. Each starts at the temple or ear and sweeps toward the nape.
Who this is best for: anyone with defined natural texture they want to show off without giving up the braided look entirely. It’s also a clever option if you’re growing out a haircut — the cornrows hide the shorter sections while the longer top stays free.
Styling tip: dampen the loose crown with a foam setting lotion and twist it into small coils for a defined curl pattern that lasts two or three days.
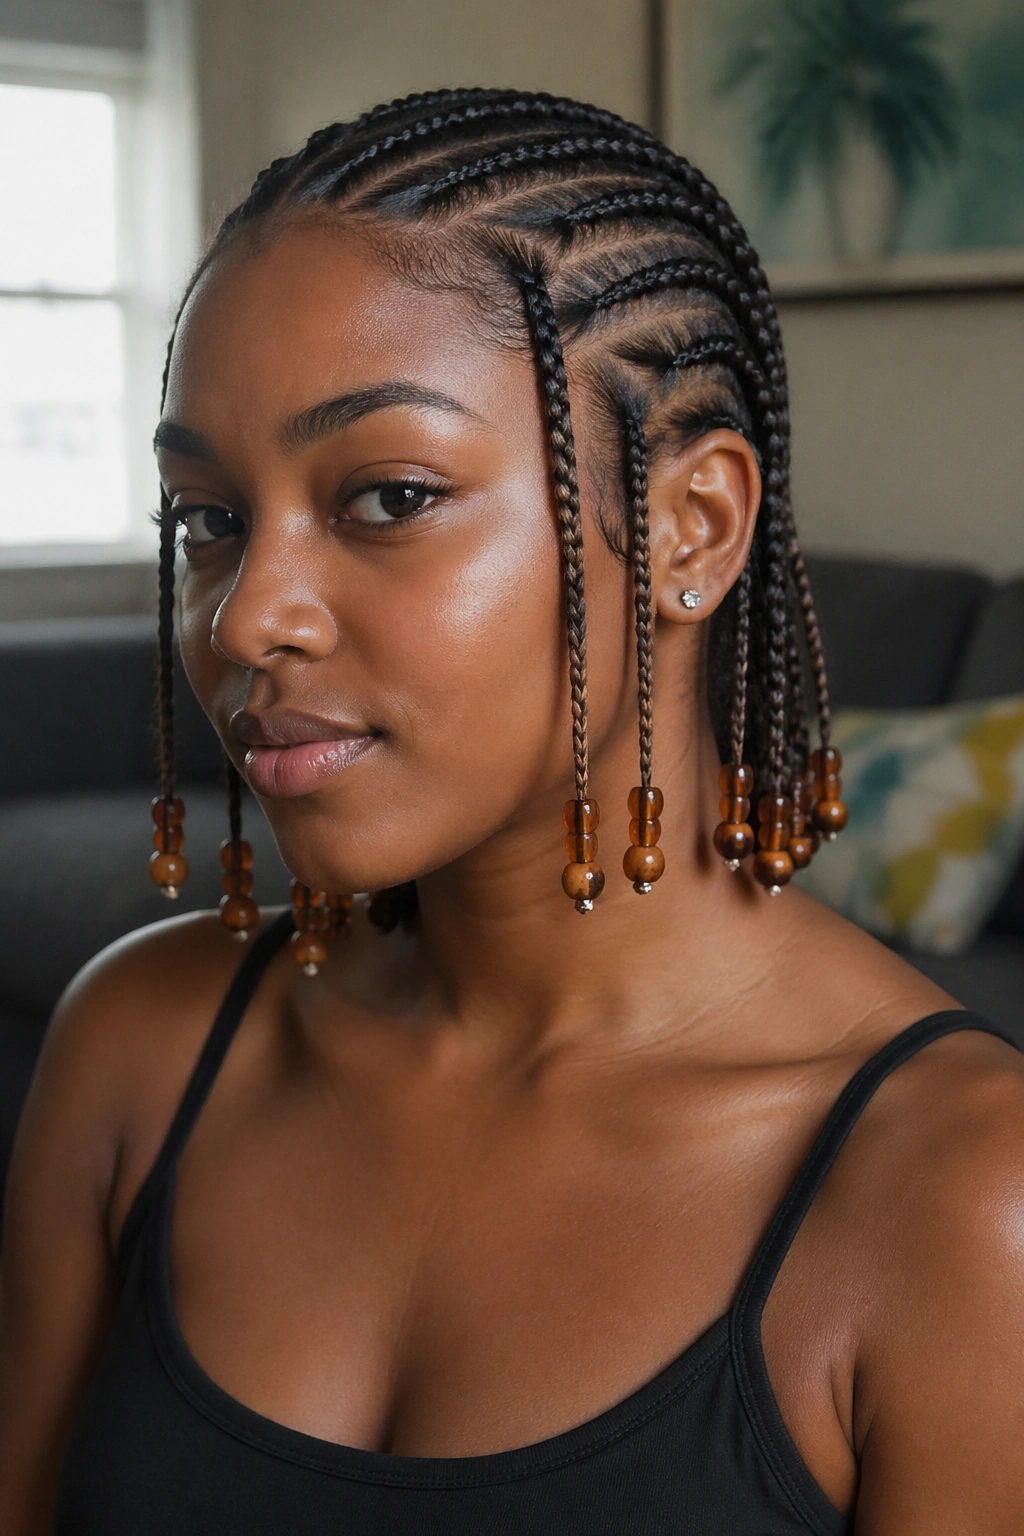
9. Cornrows With Beads at the Ends
Wooden beads, glass beads, or plain silver cuffs at the ends of each cornrow take a simple style into statement territory. Five straight-backs with three beads on each braid tip. That’s the formula.
The beads slide on using a beader tool — a thin wire loop that grips the end of the braid and pulls it through the bead hole. Once the bead’s in place, a small rubber band locks it.
Weight matters. Heavy glass beads on a thin cornrow pull the braid down and loosen the root within days. Stick with light wooden beads or small metal cuffs if your hair is fine. If it’s thick, you’ve got more room to play.
10. Cornrows Ending in Loose Twists
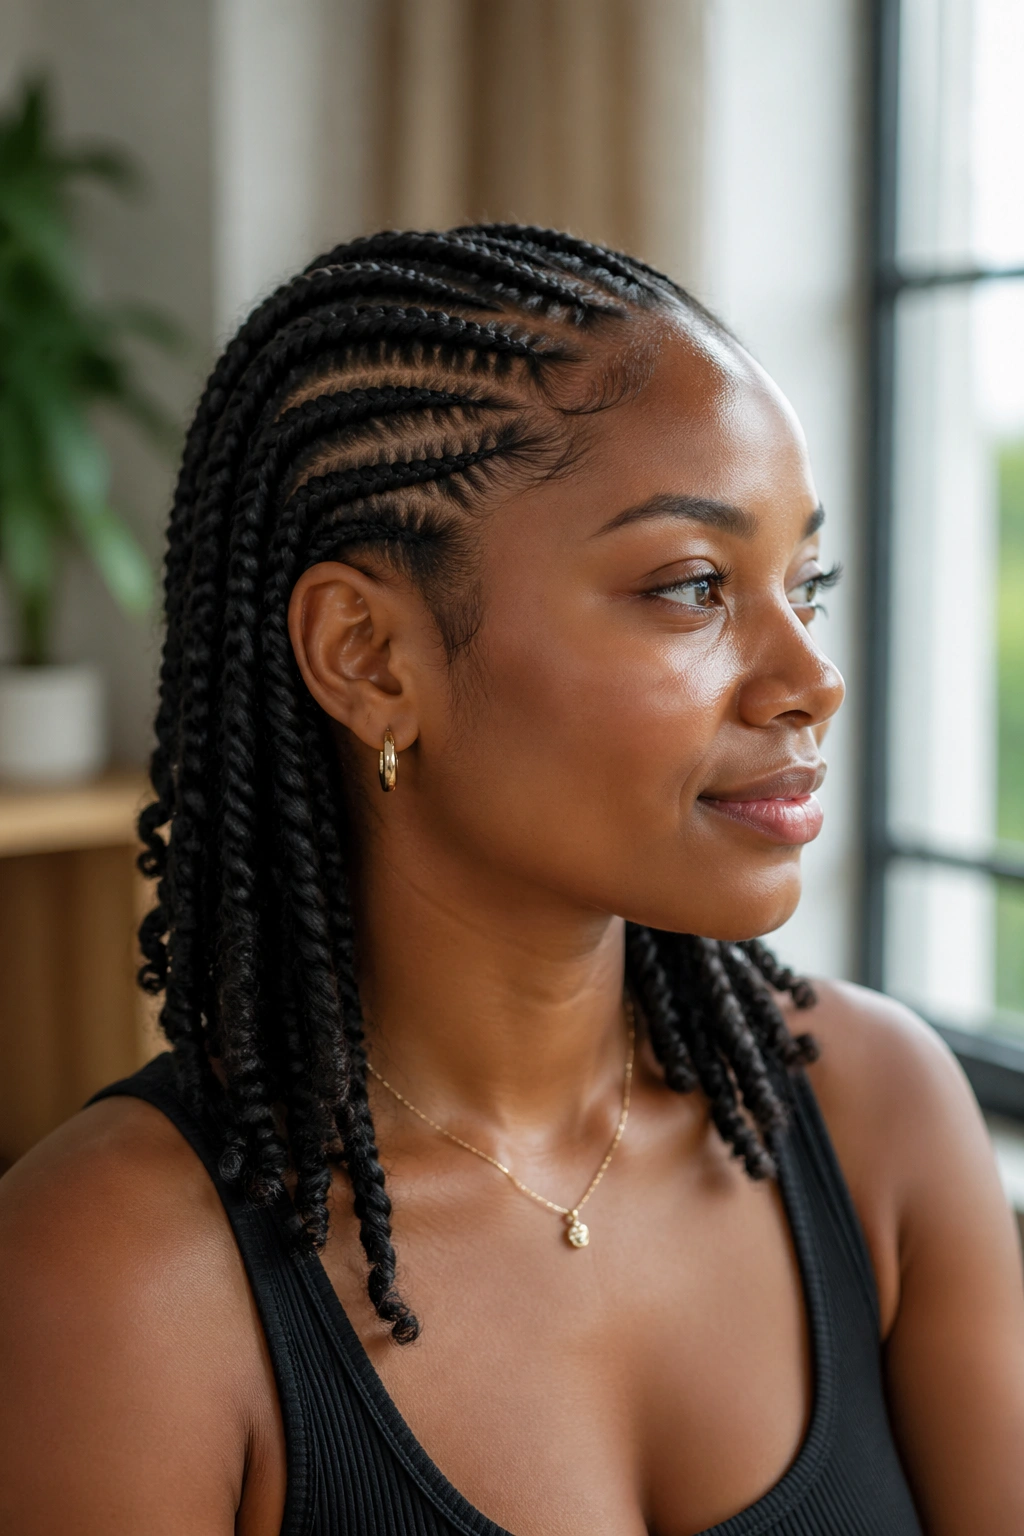
Cornrow the scalp for about eight inches, then transition into two-strand twists for the remaining length. You get the tidy, pulled-back look at the crown and the soft, free movement of twists at the ends.
Picture this: the cornrow sits flat and clean from hairline to mid-crown, and then the hair springs out into a defined twist that bounces against your shoulders. It’s two textures in one style. The contrast is the point.
Mechanism-wise, the transition happens where you stop feeding hair into the cornrow and start dividing the loose tail into two sections.
- Stop adding hair to the braid at your chosen transition point
- Split the remaining tail cleanly in half
- Two-strand twist to the ends with steady, even tension
- Seal each twist with a drop of oil and a rubber band if needed
The result holds up well under a bonnet and takes about 10 extra minutes per row compared to a plain cornrow.
11. Diagonal Cornrows From Right to Left
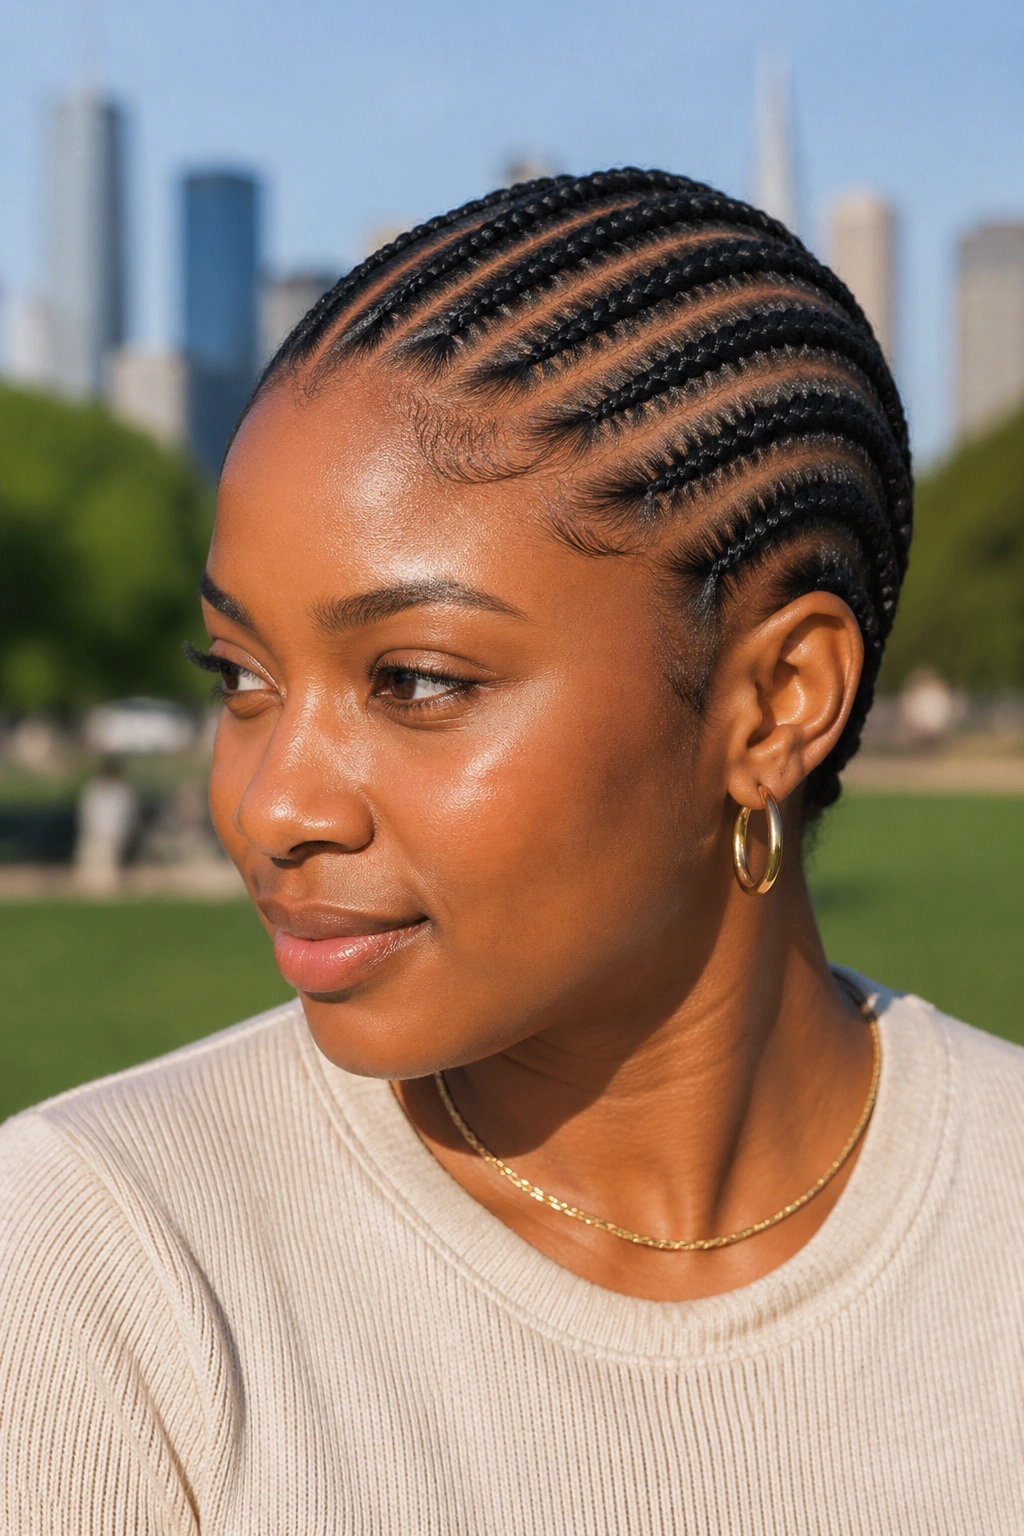
Instead of straight-back rows, every cornrow runs at a 45-degree angle across the head. Six to eight diagonal rows, all sloping from the top-right to the lower-left, creating visible motion in the style.
This one plays with geometry. The sharper the angle, the more the style feels like it’s in motion — even when you’re sitting still.
Do a deep side part first to set the starting line. Then fan the cornrows out from there, each one running parallel to the last. The key is keeping the angle consistent across all the rows. If one runs at 45 degrees and the next at 30, the whole thing looks accidental instead of designed.
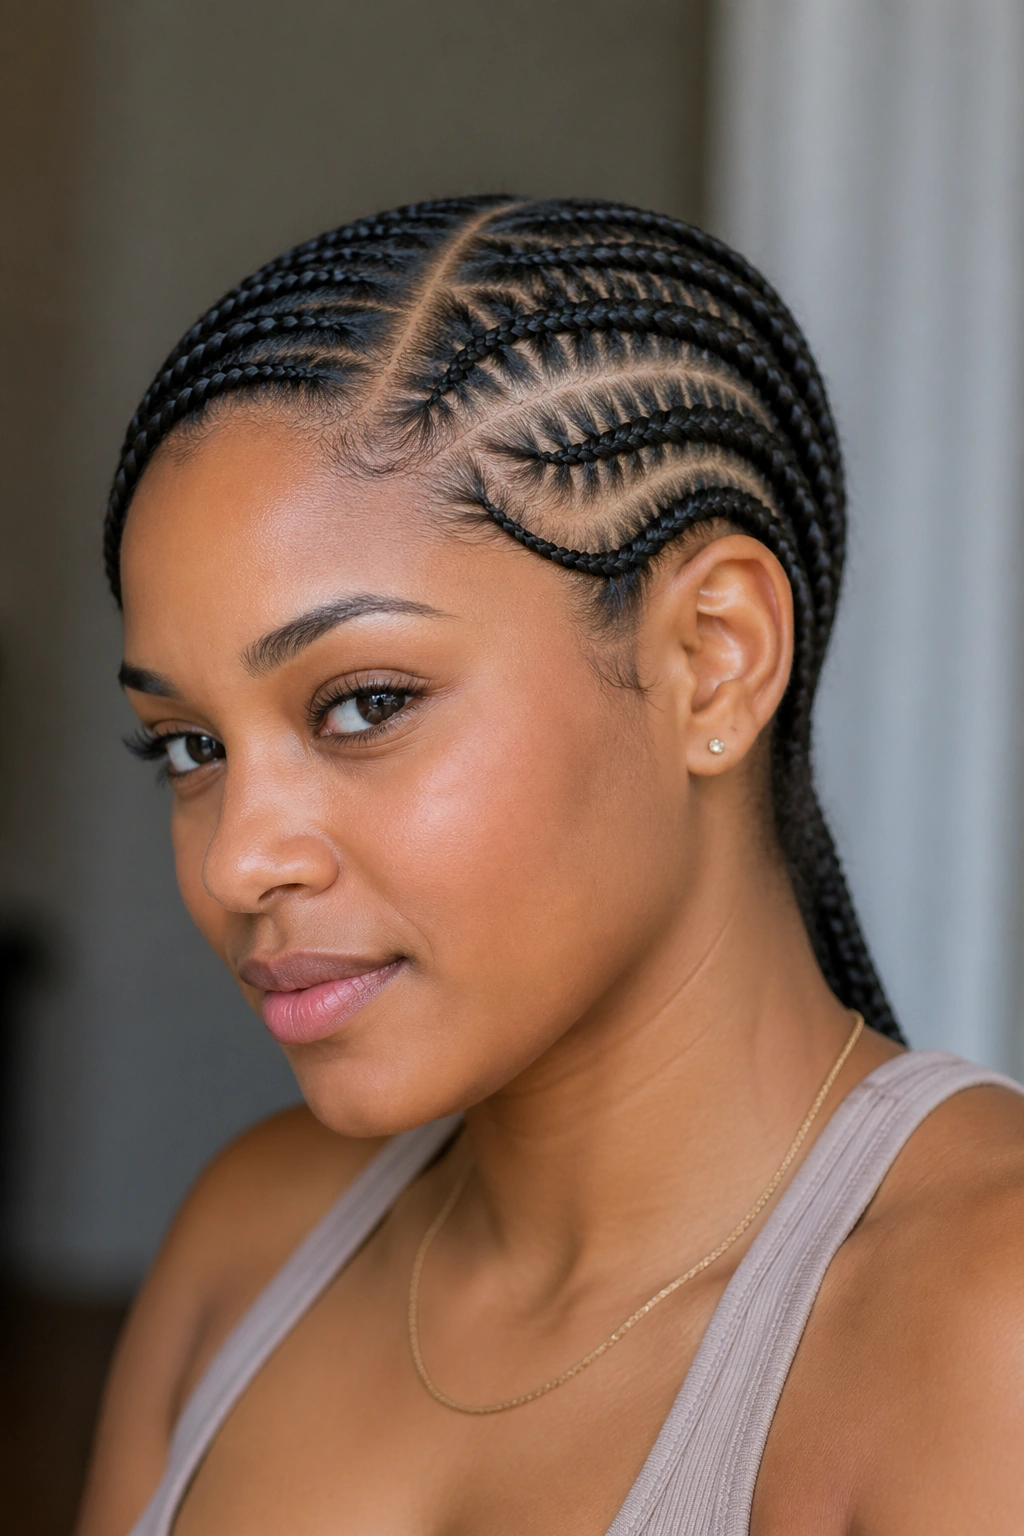
12. Four Cornrows With a Triangle Part Grid

A triangle part pattern — where the front sections form small pyramids instead of rectangles — adds texture without adding braids. The triangles sit at the front hairline and feed into four back-running cornrows.
This structure borrows from triangle-box-braid styling and adapts it to cornrows. The geometry reads as elevated even though the braiding itself is still the same basic technique.
Parting takes about 15 extra minutes because each triangle has three sides to measure. Use the comb tip to mark each corner before you draw the lines. Sloppy triangles look worse than no triangles at all.
13. Cornrowed Side Part With a Deep Swoop
One cornrow follows the side part line, curves around the ear, and disappears into the nape. The rest of the hair on the other side is braided in straight-backs. The single curved cornrow on the parted side is the design element.
Unlike fully symmetric styles, this one leans into asymmetry. The swoop cornrow is the focal point — it draws the eye across the face and adds a soft, almost romantic line to the look.
Who this is best for: anyone bored of center parts and looking for something that feels more styled without being more work. It photographs well from the front-three-quarters angle.
14. Cornrows Finished With a Silk Scarf Wrap
Simple cornrows — five straight-backs works — topped with a silk scarf tied at the nape or looped into a soft headband. The scarf adds color, softens the edges of the style, and covers any front-row fuzz between wash days.
Pick a printed scarf if your cornrows are simple. Pick a solid scarf if your cornrows are styled. The two should balance each other.
A square scarf folded in a bias triangle works best. Place the long edge at the hairline, bring the two end corners around to the nape, and tie them in a half-knot. The third corner tucks in underneath.
The Catch
Silk scarves slip. If yours keeps sliding back, dampen the scarf very lightly along the hairline edge. The damp silk grips the cornrow foundation enough to stay put through an afternoon.
15. Chunky Two-Row Lemonade Cornrows
Two thick cornrows that start at the top-right corner of the hairline, curve across the forehead, and sweep diagonally toward the lower-left shoulder. Named after a music video but worn long before. Still beautiful, still simple, still effective.
The curve is everything. A straight diagonal reads like a zig from a zigzag; a proper lemonade cornrow follows the curve of the skull — slightly arching over the crown, then tapering down behind the ear.
Feed-in hair is optional for this style. With natural hair alone, the cornrow thickness depends on your density. Thicker hair gets a bolder look; finer hair benefits from a subtle feed-in at the first few stitches for visual weight.
16. Skinny Cornrows With a Bold Edge Design
Eight to ten slim cornrows, all running straight back, paired with swooped baby hairs at the hairline. The edges are the design — not an afterthought. Sharp swoops, small curls, or geometric angles at the temples.
Edge gel choice matters here. You want something that holds a hard shape without flaking by hour four. Apply with a small toothbrush or an angled edge brush. Build up in thin layers rather than gobbing on a single thick coat.
Baby hairs only look good when the rest of the style is clean. Frizz on the cornrows competes with the design at the hairline. Pick one focal point per style; in this case, it’s the edges.
17. Cornrows Into a Braided Crown
Cornrow the hair flat against the scalp up to the nape, then take the loose ends and braid them into a single wide braid that wraps over the top of the head like a crown. Secure with bobby pins and tuck the tail under.
Scenario: you want a wedding-guest style, you’ve got medium-length natural hair, and you don’t want extensions. This is the one. The cornrows do the base work; the wrapped braid does the special-occasion lifting.
The crown braid needs to be flat and wide — not a tight rope. Braid loosely, then press the finished braid between your palms to flatten it before pinning. A flat braid reads like a halo. A tight rope reads like a rope on your head.
- Braid the loose tail in a standard three-strand braid, keeping tension light
- Flatten the braid by pressing it between your hands after you finish
- Pin at the crown in four or five spots along the length
- Tuck the tail under the far side so no end shows
18. Cornrows With a Middle Cross-Part
A horizontal part across the crown divides the head into a front half and a back half. The front cornrows run from the hairline to the cross-part; the back cornrows run from the cross-part to the nape. It’s cornrows, but with a second parting axis.
The cross-part itself becomes a design feature. It reads like a horizon line running ear to ear, with cornrows meeting it from above and below.
Why bother with the cross-part? Because the hair at the back of the head is often thicker or drier than the hair at the front. Separating the two sections lets you adjust tension and add moisture differently to each half. Practical reason, aesthetic payoff.
19. Four Cornrows With a Low Side Gather
Four cornrows — two on each side of a center part — all sweeping toward one side and gathered into a low loose ponytail or braid over the left shoulder. Simple structure, asymmetric finish.
The gather is loose, not tight. You want the ponytail to fall softly, not stick out rigidly. Use a small hair tie in a color that matches your hair, or wrap a thin strand of your own hair around the tie to hide it completely.
This one flatters heart-shaped and oval faces especially well because the side gather balances wider foreheads with more weight at the jawline.
Best for: weekdays when you want to look done without effort, or date nights that don’t need a full beat.
20. Simple All-Back Cornrows With Bantu Knot Ends
Six cornrows straight back. At each end — instead of letting the tails hang loose — wrap the tail into a small Bantu knot and pin or tie. You end up with six tiny coiled balls at the nape.
This is simple styling with a textural finish. The cornrows are flat and basic. The Bantu knots add a bit of sculpture and, bonus, lock the ends out of the way so they don’t unravel.
Bantu knots work best on hair that’s moisturized but not soaking wet. Wrap each tail around its own base in tight circles until you can’t wrap anymore, then tuck the end under or secure with a small rubber band.
Unwrapping the knots after a week gives you a second style — defined curly ends — without needing to rebraid.
21. Cornrows With a Scalp-Line Cuff at the Hairline
A single decorative cuff — gold, silver, or colored metal — threaded onto each cornrow right at the hairline. Not on the ends. Right at the front, where it catches the light and frames the face.
The cuffs sit on the first two inches of the cornrow. Thread them on after the front half of the cornrow is done and before you continue braiding down the back. Slide, then braid over or around depending on the cuff’s opening style.
Compared to end-beads, hairline cuffs draw attention to the face rather than to the shoulders. It’s a subtle shift with a real impact on where the eye lands.
Not every cuff fits every braid thickness. Buy a mixed pack and test-fit before committing. A cuff that’s too tight pinches the hair; one that’s too loose slides down and looks sloppy by lunchtime.
22. Cornrows Styled Under a Headwrap
The final entry is almost cheating — because the cornrows are the foundation, not the star. Simple cornrows (five straight-backs or four chunky rows) with a cloth headwrap tied over the top. The cornrows let the headwrap sit flat and smooth. The wrap is the look.
Fabric choice: ankara, silk, cotton jersey, or a printed satin. Each drapes differently. Ankara holds a shape; silk slips and moves; cotton jersey stays put but reads casual.
Tying technique is half the battle. A half-turban with the ends twisted and tucked gives you height. A flat headband wrap reads more minimalist. A full crown wrap with a knot at the front brings drama.
Cornrows under wraps are how many women protect their natural hair for weeks at a time without committing to extensions. The cornrow set lasts two to three weeks, and the wrap changes the outfit every day.
Caring for Your Cornrows Between Wash Days
Scalp care is the longest-running chapter of cornrow maintenance. Dry scalp shows. Flakes embarrass themselves on dark braids. Tightness turns into a headache by day four.
Use a lightweight scalp oil — jojoba, argan, or a mix with peppermint — and apply it with the tip of a nozzle bottle directly to the parts, not on top of the cornrows. A few drops per section, then massage with the pads of your fingers. Don’t scratch. Never scratch.
Moisturize the braids themselves with a light spray leave-in. Once every three days is enough for most hair types. Over-spraying leads to fuzzing and lifting.
Night Care
- Satin bonnet or silk scarf every single night — no exceptions
- Sleep on your back or side, not face-down (face-down crushes the front rows)
- Re-tie the scarf if it slips off during the night — don’t sleep without protection
Scalp Health Over Style Longevity
A cornrow set can look perfect and still be damaging you. Too-tight braids cause traction alopecia at the edges over time. Little bumps along the hairline the morning after are a warning sign, not a badge of honor.
Signs to loosen a style:
- Persistent tightness beyond the first 12 hours
- Small white bumps or soreness at the hairline
- Redness or tenderness along the part lines
- Headache that doesn’t fade after two ibuprofen
If any of these show up, get the front row or two redone looser. Don’t tough it out. Your edges are worth more than a two-week style.
Takedown Without Breakage
Takedown is where most damage happens. People unbraid dry, yank at the roots, and lose length they didn’t need to lose. Do this instead.
Spray each cornrow with a mix of water and a teaspoon of conditioner before you start unbraiding. Work section by section, starting at the tip and moving toward the scalp. Fingers first, wide-tooth comb second. Detangle the shed hair as you go — not all at once at the end.
Expect a lot of shed hair. A two-week cornrow set can shed 100-200 strands just from normal daily shedding that got trapped in the braids. That’s normal. That’s not breakage. The difference matters.
After takedown, do a proper wash and deep condition before your next style. Your hair has been under tension; it needs the reset.
Picking the Right Simple Style for Your Hair

Not every simple cornrow style works for every head. A few honest factors to weigh.
Face shape: round faces suit side parts and diagonal cornrows. Long faces suit center parts and horizontal volume. Square faces soften under swooped cornrows that frame the jaw.
Hair density: thick natural hair supports thicker cornrows without disappearing; finer hair looks sparse with thick rows — go slim instead.
Lifestyle: gym five days a week means a lower-maintenance style that handles sweat. Office job with a dress code means a cleaner, less accessorized look. Weekends with kids means nothing that snags on small fingers or toys.
Common Mistakes That Wreck a Simple Style
- Over-tight braiding at the hairline — the number one cause of edge damage
- Skipping the satin bonnet “just this once” — one skipped night can add three days of frizz
- Using heavy product on freshly braided hair — leads to buildup and a dull finish
- Washing cornrows too aggressively — patting with a damp cloth beats scrubbing
- Keeping the style past three weeks — the hair underneath needs a break and a real wash
- Skipping scalp oil for days — leads to flaking and itch that’s hard to reverse
- Applying edge gel in thick layers — creates flakes and a crusty finish
- Pulling the bonnet on too tight — leaves a visible ridge across the forehead by morning
Simple cornrows reward the basics. Good prep, moderate tension, consistent maintenance, and a realistic two-week window before takedown. Do those four things and the 22 styles above are all within reach on any given wash day.