



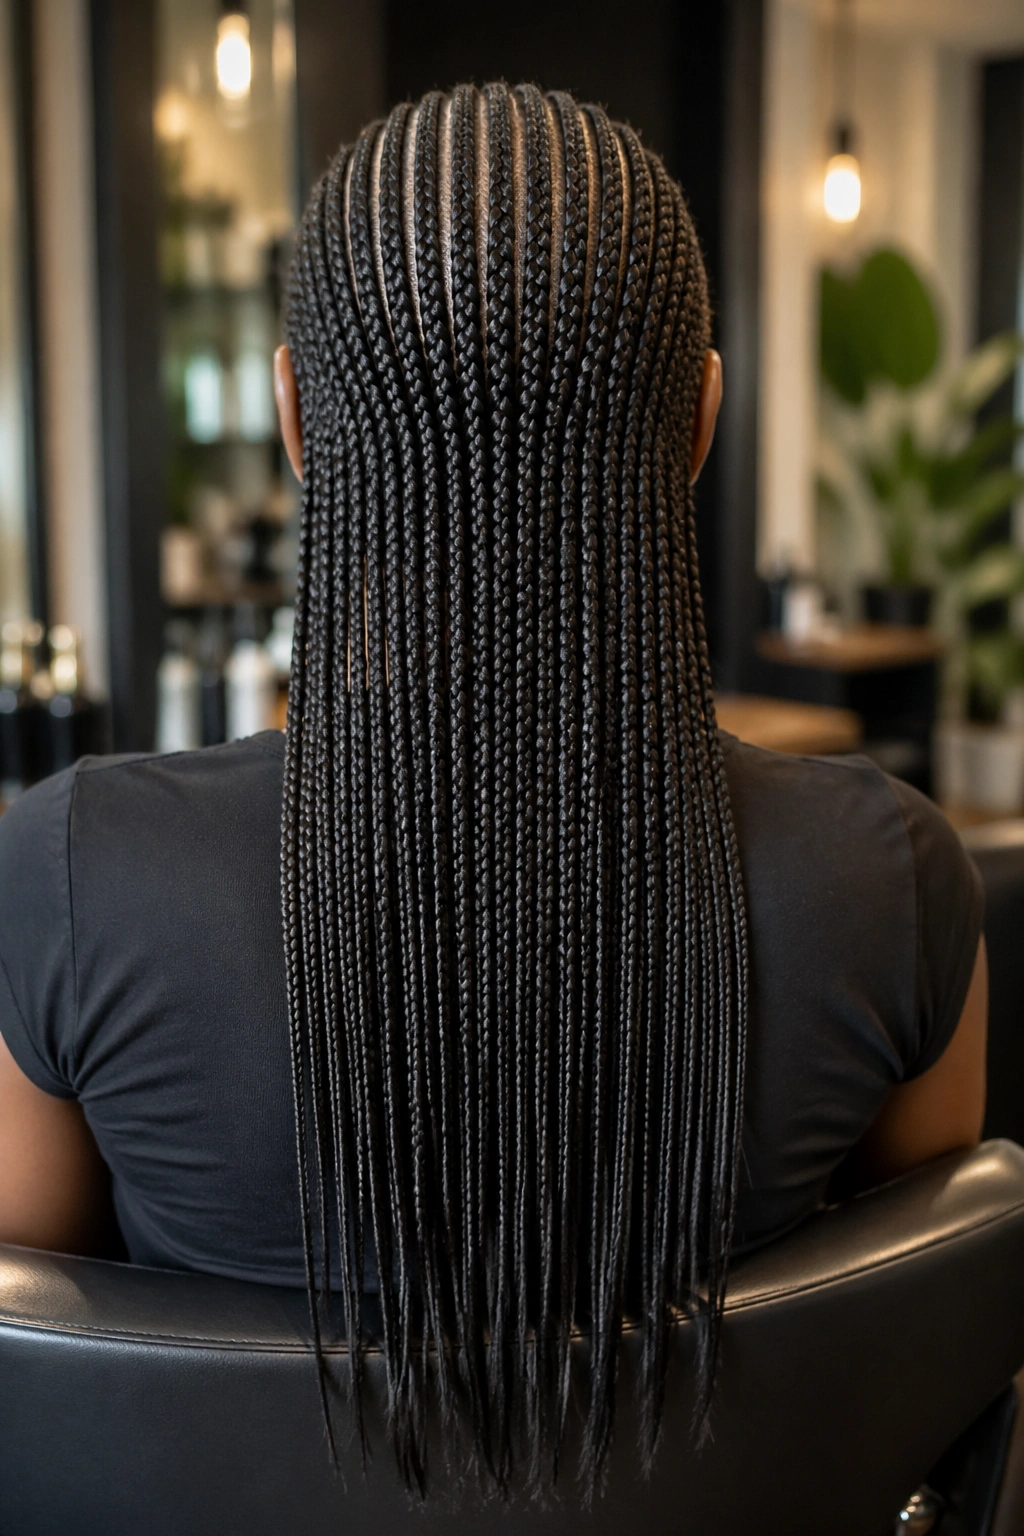
Small feed in cornrows are the style that taught me patience. Sitting through a 6-hour install, watching the braider tuck tiny pieces of kanekalon into the base of each row inch by inch, you learn quickly that this isn’t a quick protective style. It’s a craft. And the result is worth every minute — small feed in cornrows give you a delicate, intricate finish that no other braiding technique can match. The scalp shows in clean lines between dozens of fine braids, the hairline starts whisper-thin, and the length builds gradually until each braid is full-bodied by the mid-back.
Feed-in technique is what separates these from traditional cornrows. Traditional cornrows attach all the extension hair right at the root, which creates a chunky, obvious starting point and tugs hard on the front edges. Feed-ins build slowly. The braider starts with your natural hair, then weaves in a small piece of kanekalon after a few stitches, then another piece a few stitches later, and so on. The result is a braid that starts microscopic at the hairline and grows fuller as it moves back.
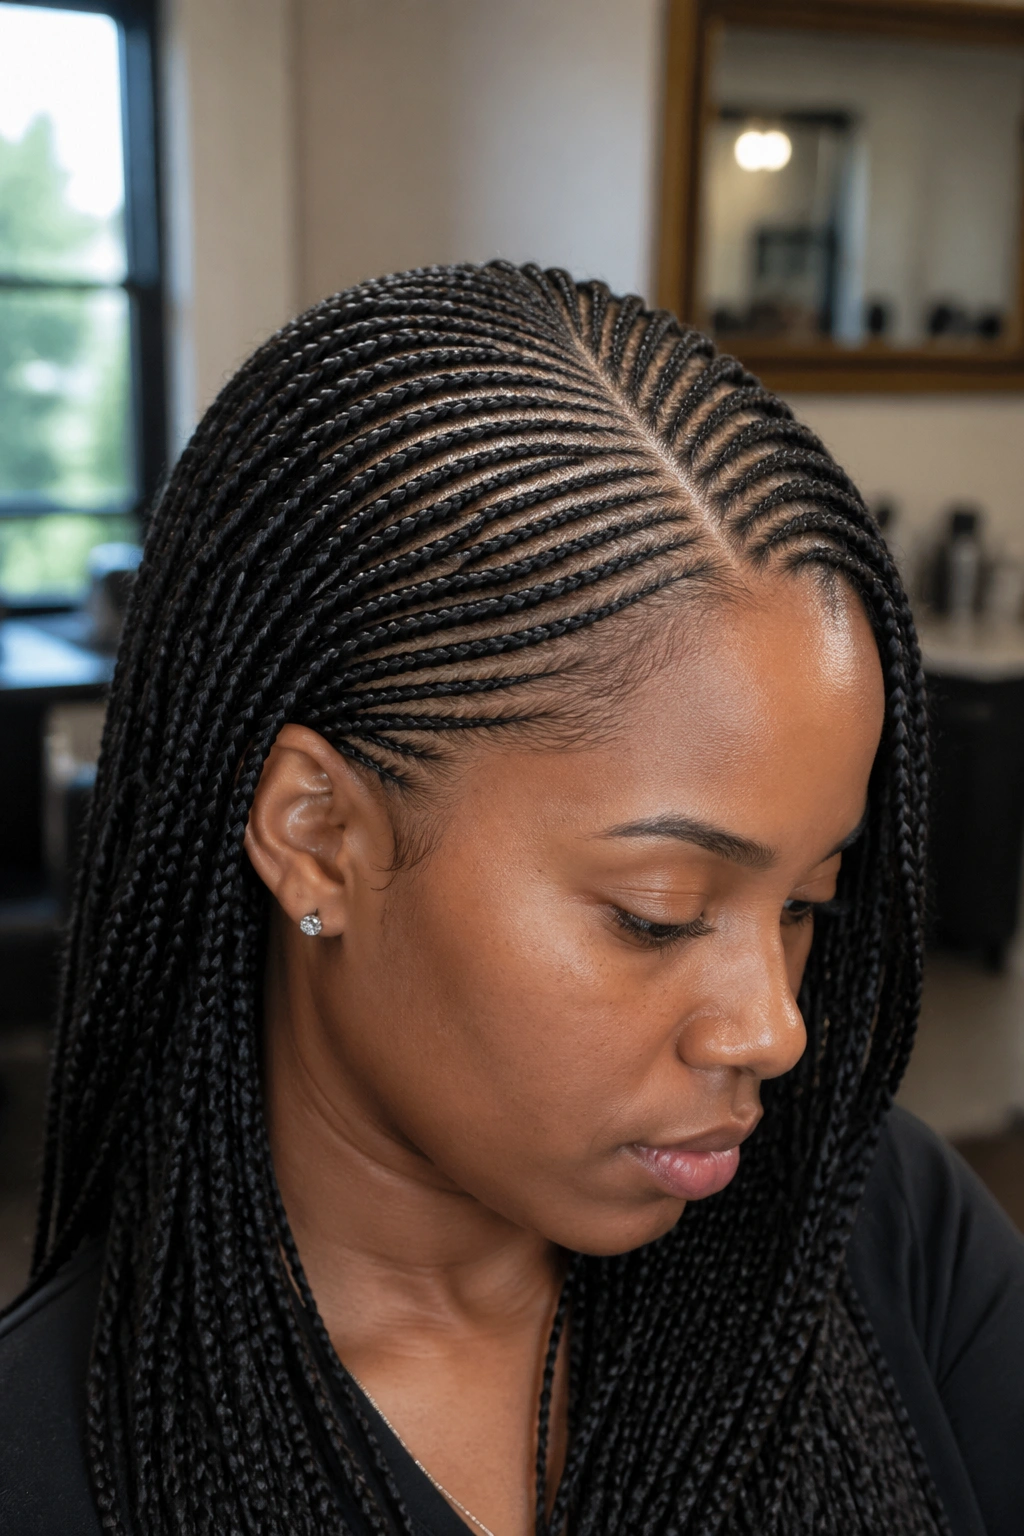
For small feed-ins specifically, you’re talking 30-50 individual rows on a full head. Each row is about a quarter-inch wide at the scalp. The fineness is the point. Done right, small feed-ins look like they grew out of your head — no obvious start, no telltale knot at the root.
I’ve worn small feed-in cornrows in every style configuration that exists. Below are 22 versions, each genuinely distinct in pattern, length, finish, or aesthetic. Before the list, some essential context.
What Makes Small Feed-Ins Different
Three things — fineness, gradual buildup, and natural hairline.
Fineness means more rows. A standard medium cornrow set might have 10-12 rows. A small feed-in set has 30-50. Each row is intentionally thin to create that delicate, scalp-revealing pattern.
Gradual buildup means the braid starts small and grows over its length. The kanekalon is added in small pieces — usually no more than 6-7 inches at a time — so the visual effect is one of organic growth rather than glued-on extension.
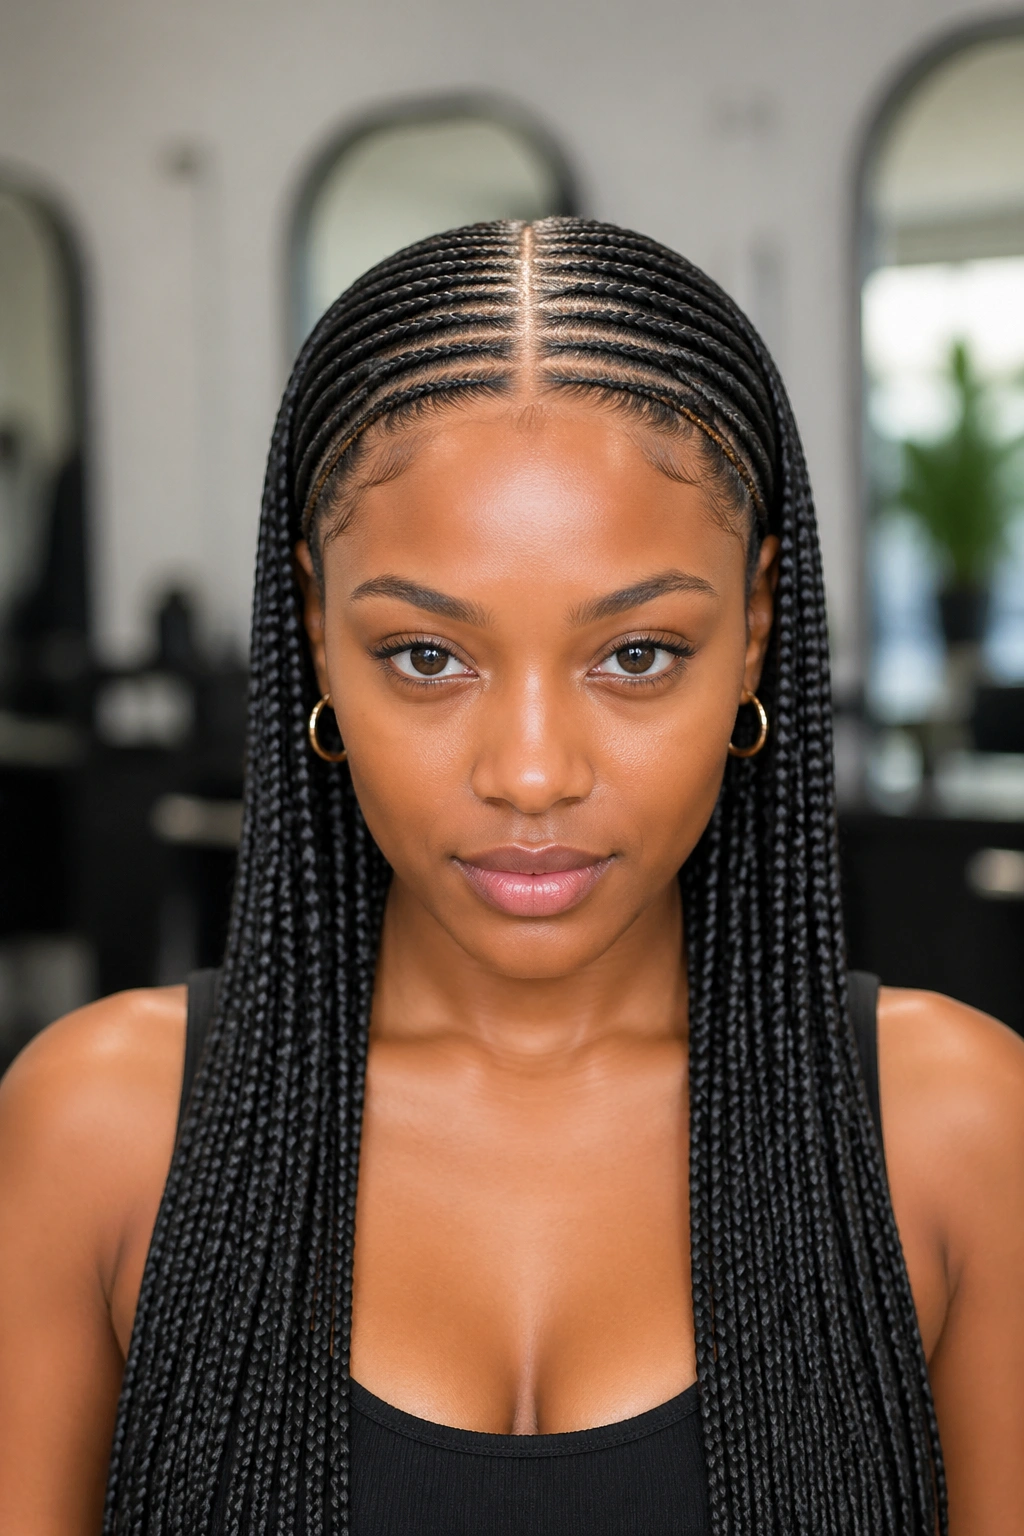
The natural hairline is the biggest selling point. Because the front of each braid uses only your real hair, the start of the braid blends into the scalp instead of creating an obvious boundary. Your edges look real and untouched.
Why the Install Takes So Long
Small feed-ins are labor-intensive. Each tiny braid needs multiple feed-ins along its length. A 30-row install with 4-5 feed-ins per row equals 120-150 individual feed actions, each requiring the braider to stop, grab a piece of kanekalon, integrate it smoothly, and continue.
Plan for 5-7 hours minimum for a skilled braider. Don’t book back-to-back appointments. Don’t expect to leave quickly.
Bring water, snacks, and entertainment. Your braider will appreciate not feeling rushed, and you’ll have a better experience overall.
Hair Prep for Small Feed-Ins
Wash with a clarifying shampoo to remove all buildup. Deep condition for at least 30 minutes — small feed-ins put fine pressure on each individual section, and well-moisturized hair handles that pressure better.
Stretch the hair, don’t blow-dry on high. Bantu knots overnight or a low-heat blowout works. The hair needs to be smooth so the braider can section cleanly.
Trim split ends. Damaged ends braided into a feed-in look fuzzy and frizzy from day one.
Oil the scalp lightly the night before, but not the day of. Heavy product on install day makes the kanekalon slip during feed-in.
Picking Kanekalon for Small Feed-Ins
Pre-stretched kanekalon is essential. The pre-stretched version is softer, less shiny, and integrates more naturally with your hair. Avoid the stiff, glossy kanekalon that comes coiled — it screams “extension” and defeats the purpose of the feed-in technique.
Color match matters. The kanekalon should match your natural hair color exactly. Off-tones look artificial.
For small feed-ins, you’ll typically use 2-3 packs of kanekalon. Less than for thicker styles because each individual feed is smaller.
Tools the Braider Needs
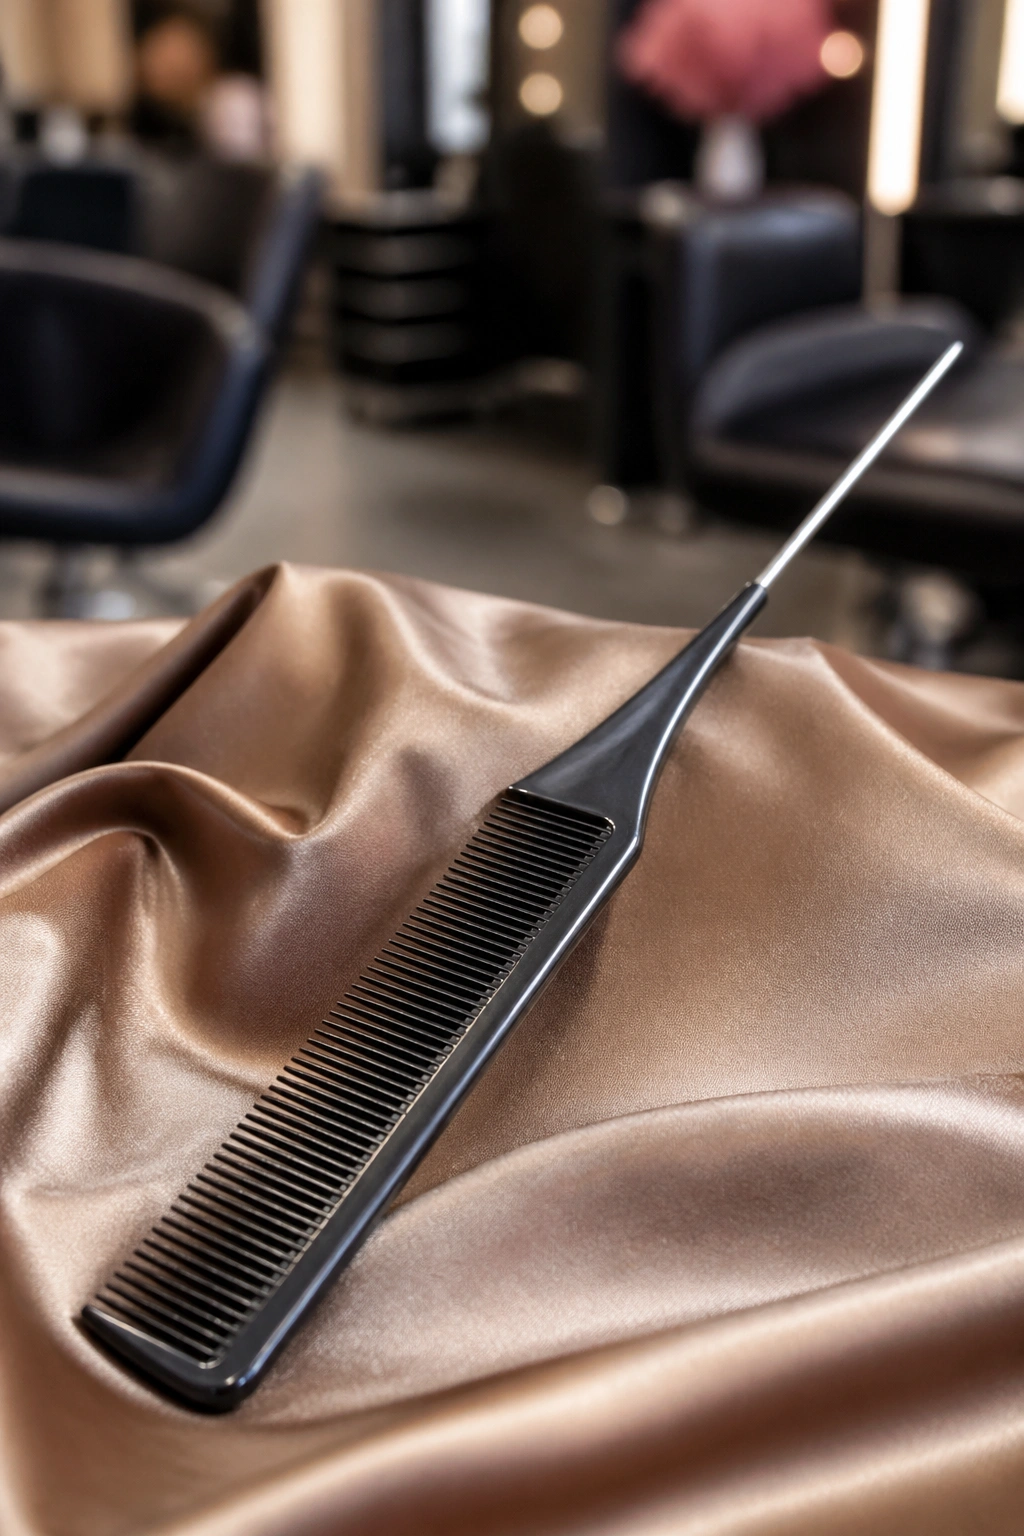
A fine-tooth rat-tail comb for narrow parts. A water spray bottle on mist setting. Edge control with strong hold. Light scalp oil. Pre-stretched kanekalon in your color. Hair clips. That’s the kit.
1. Small Feed-In Cornrows Straight Back to Mid-Back
The classic delivery. 30-40 thin rows running from hairline to nape, then continuing as braids to mid-back length.
Why It Works
- Looks like an extension of your natural hair, not a separate styling piece
- Lasts 6-8 weeks with proper care
- Easy to style — ponytails, buns, half-up
- Works for every face shape
Pro tip: ask for the rows to be slightly thinner at the front and gradually wider toward the back. This natural taper makes the style read as more organic.
2. Small Feed-Ins With a Side Part
A deep side part with all the small braids sweeping diagonally backward. The denser side has 20+ rows, the lighter side has 10-15.
The side part on small feed-ins reads particularly elegant because the fine braids fall in soft cascades rather than chunky waves. Best for face shapes with sharp angles — the soft fall offsets the angularity.
The side part needs touching up every 4-5 days. The fine rows tend to drift toward each other if not maintained.
3. Small Feed-Ins With a Center Part
Bold contrast — a precise center part dividing the head into two perfectly symmetric halves, each containing 15-20 fine rows.
The center part on small feed-ins is unforgiving. Any drift looks obvious. Make sure your braider takes time to mark the part with chalk or gel before starting.
This works best for faces with strong central symmetry. Slight asymmetries (most people have them) are highlighted by a center part.
4. Small Feed-In Pony at the Crown
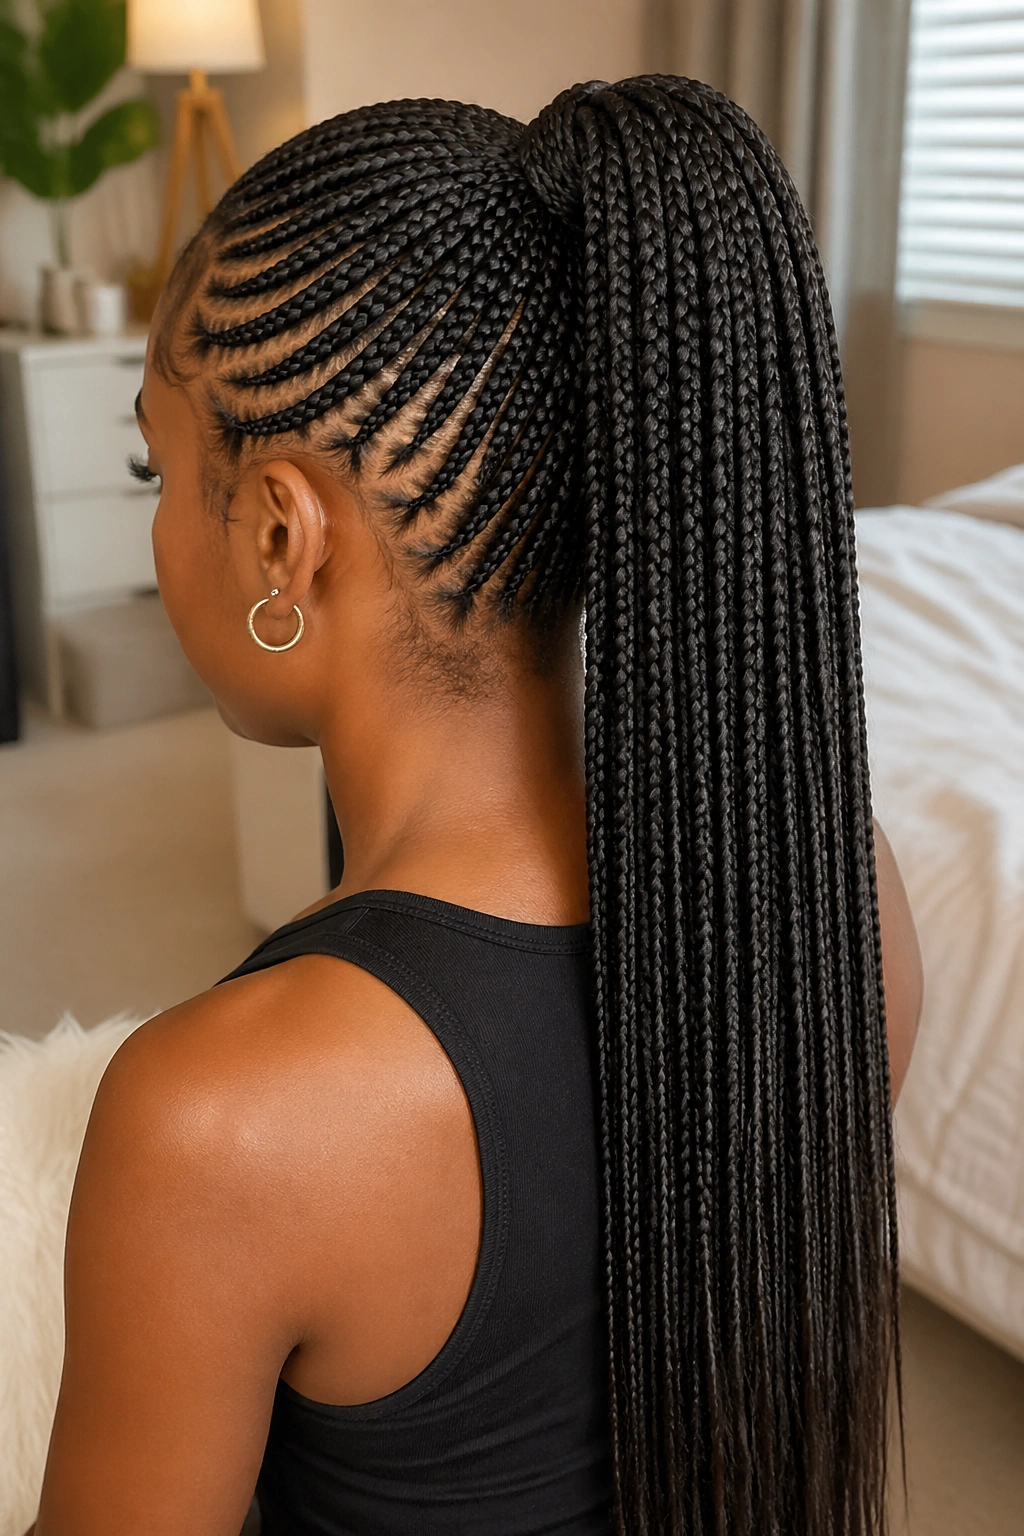
All small feed-in rows gathering at the crown into a single high ponytail. The ponytail is dense — 30+ braids feeding into one gathered point — and falls in a thick mass down the back.
The high gather creates an instant face-lift effect. Your features pull up slightly with the tension. Works for casual and formal alike.
The ponytail itself can be left as individual braids or wrapped with a piece of the kanekalon to create a single thick tail.
5. Lemonade-Style Small Feed-Ins
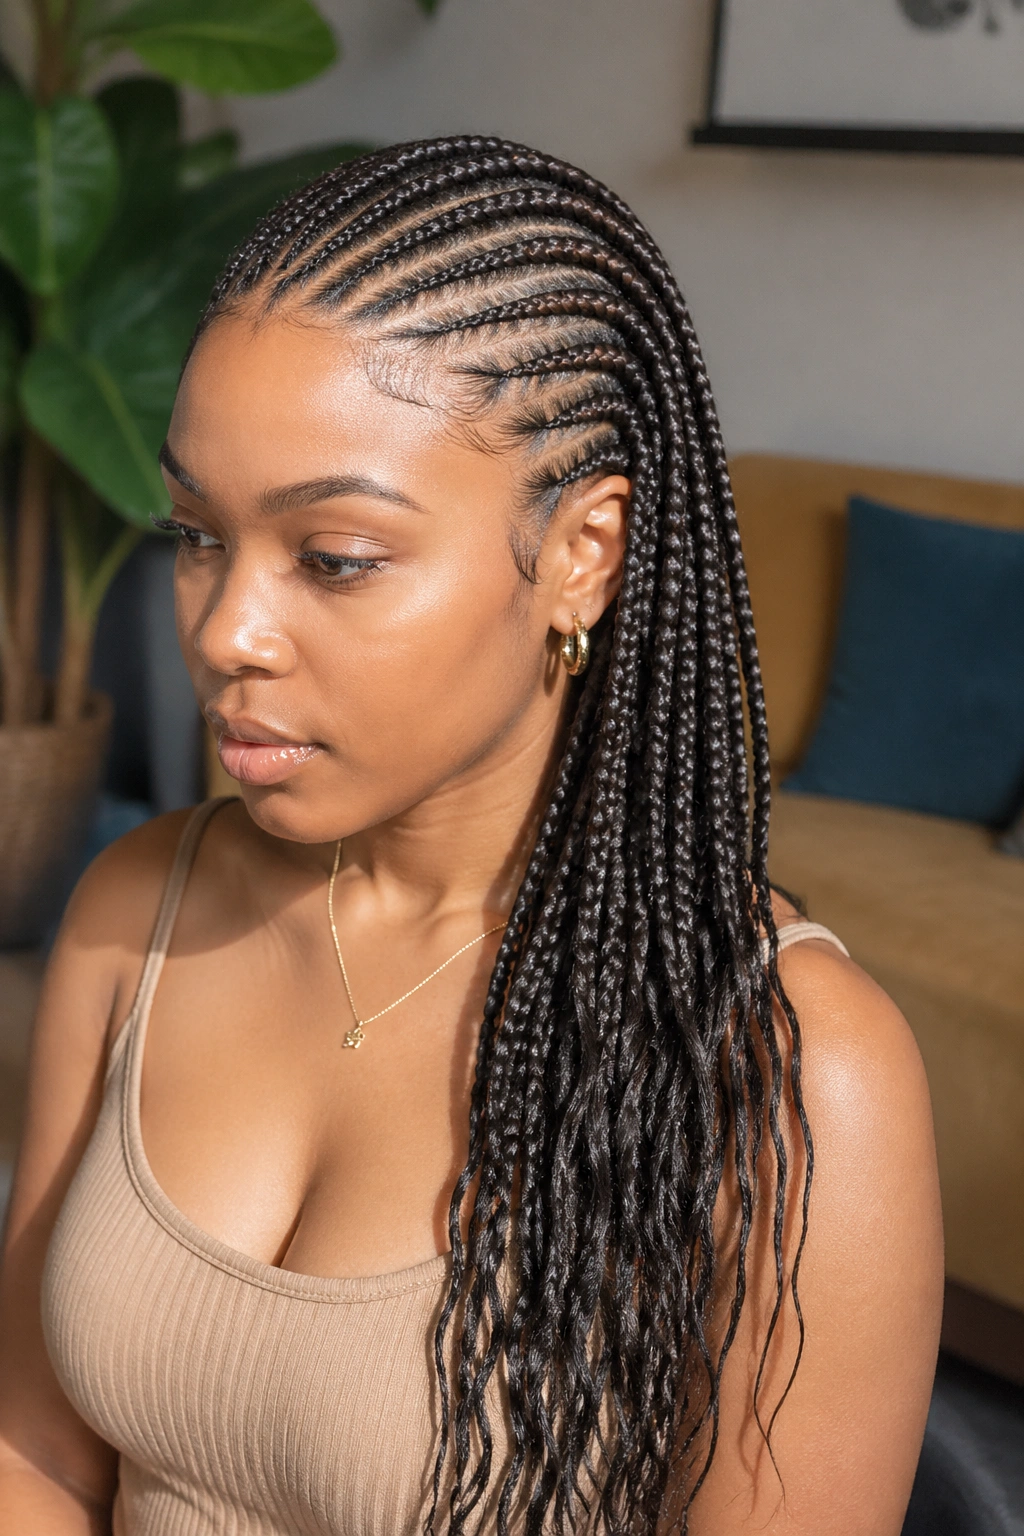
All small feed-in rows sweeping in one direction across the head, finishing in a side cascade. Inspired by the layered side-braided looks that have remained popular over the years.
The directional flow gives the style movement. Best for those with longer face shapes — the side fall breaks up vertical length.
The shorter side (where the braids start) needs attention. Edge work has to be especially clean since the start of each braid is more visible than in symmetrical styles.
6. Small Feed-Ins With Curved Parts
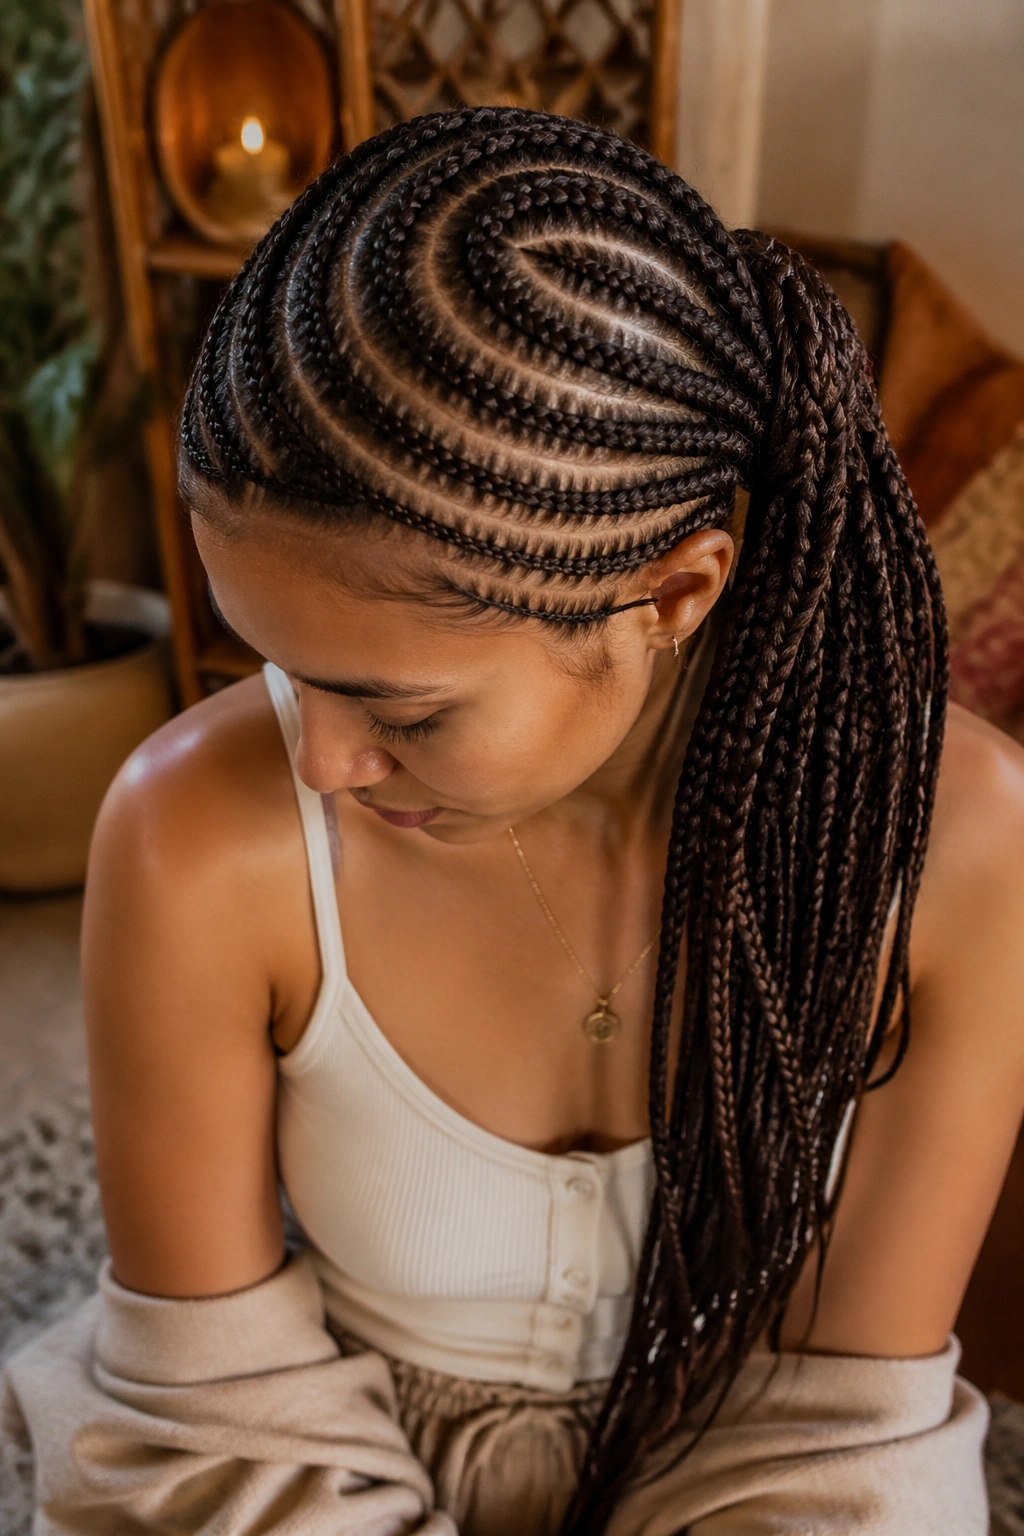
Each row follows a gentle curve rather than a straight line. The curves can spiral subtly across the head or arc more dramatically toward a side gather point.
Curved parting requires real skill. Your braider needs to plan the path of each row before starting, often using gel or chalk to mark the curves on the scalp.
The curved version reads as more bohemian and less structured than straight-back small feed-ins. Good for soft, romantic styling.
7. Small Feed-Ins With a Heart-Shaped Part at the Crown
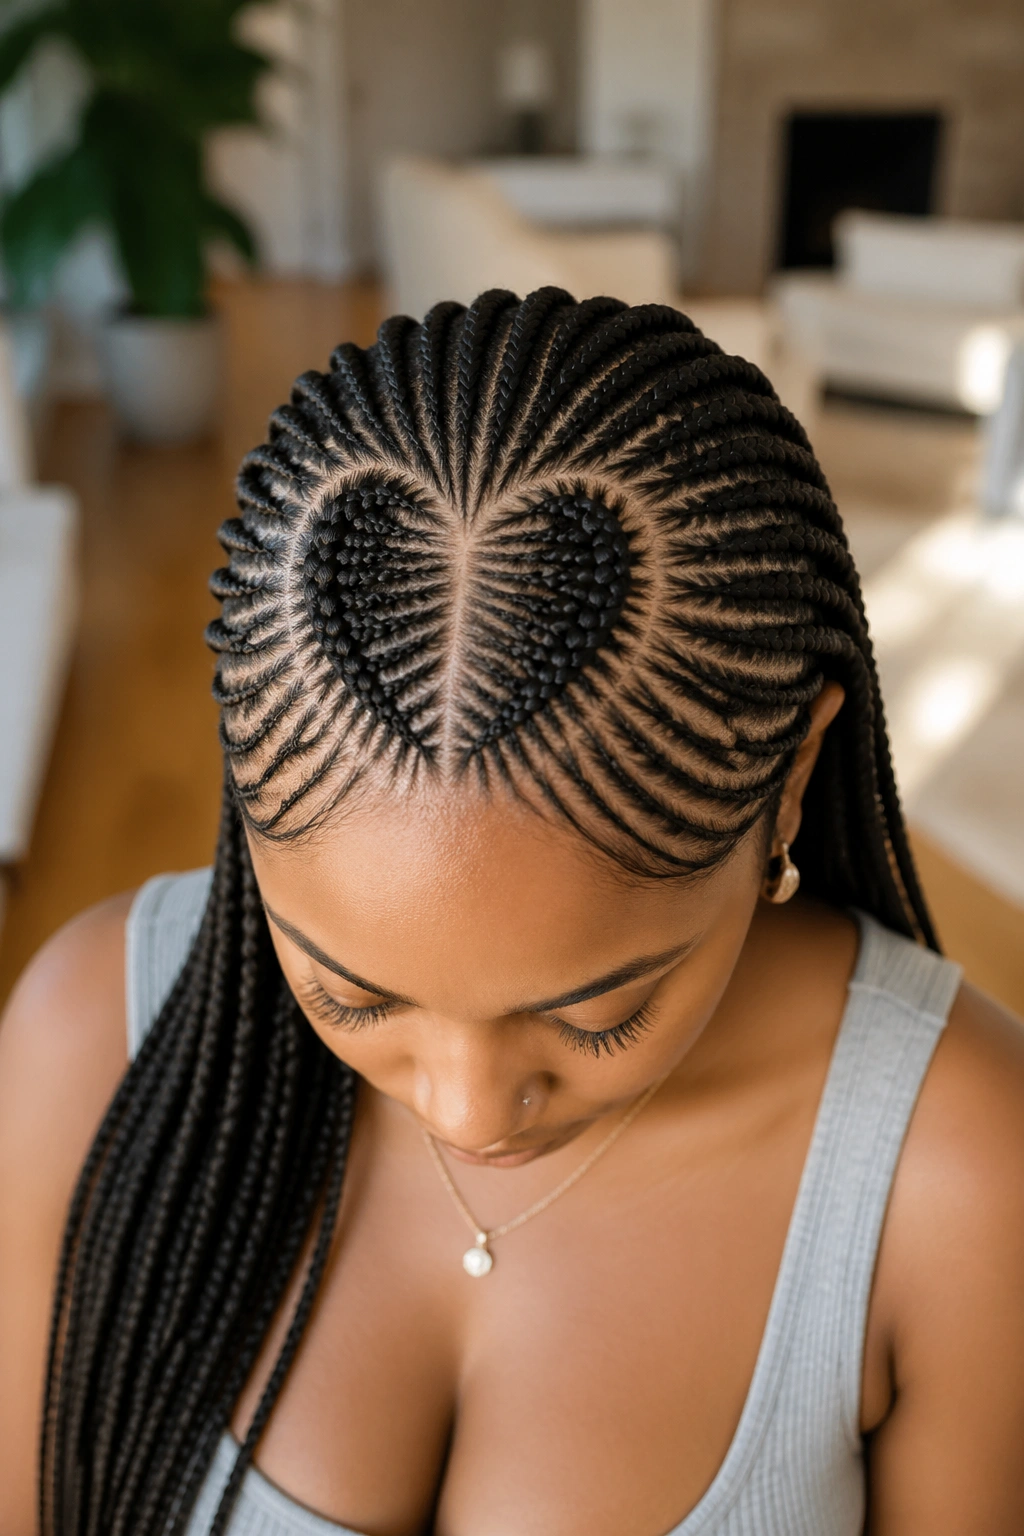
A clear heart shape outlined in the parting at the crown, with all the small feed-in rows emerging from the bottom point of the heart and flowing backward.
The heart shape is a cultural detail with West African roots. It’s a pattern that signals intentional, traditional styling.
This works for younger looks especially well — there’s a slightly playful quality to the heart that pairs with the delicate small feed-in texture.
8. Small Feed-Ins With Beaded Tips
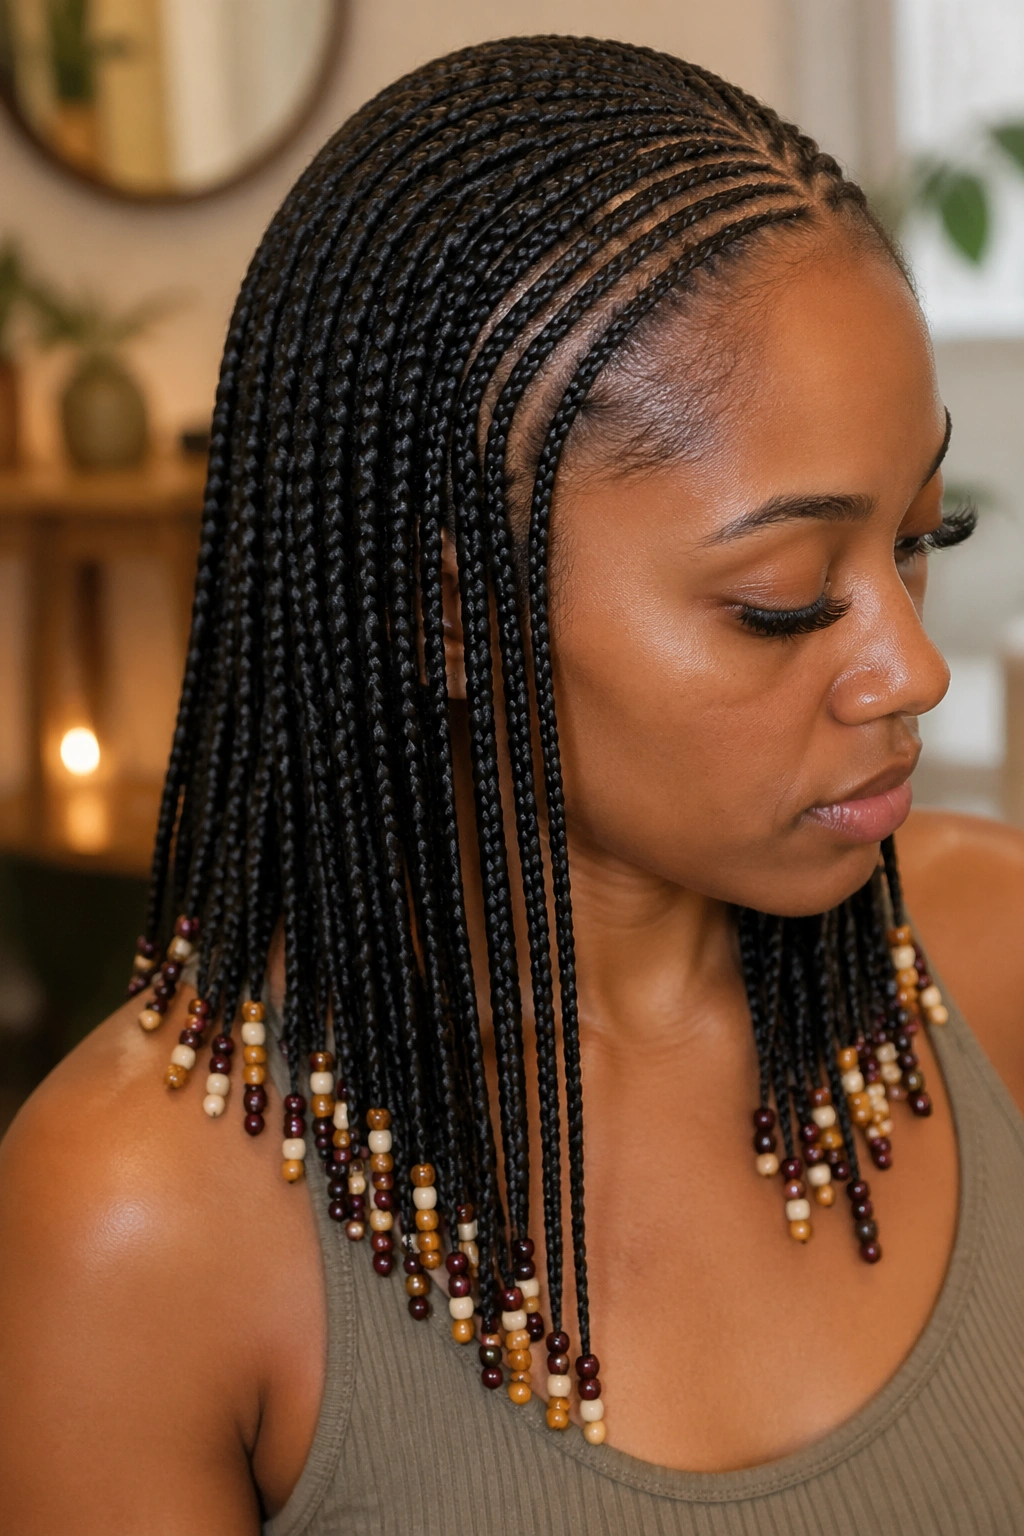
Small feed-in cornrows finishing with delicate beads at the tips. Glass, ceramic, or thin metal beads in 3-4 colors create variety without overwhelming the fineness of the braids.
Bead size matters. Use small beads — large beads weigh down individual fine braids and can cause them to break.
The bead clusters at the tips add a soft sound when you move. Some find it pleasant, some find it distracting. Decide before committing.
9. Small Feed-Ins With a Crown Wrap
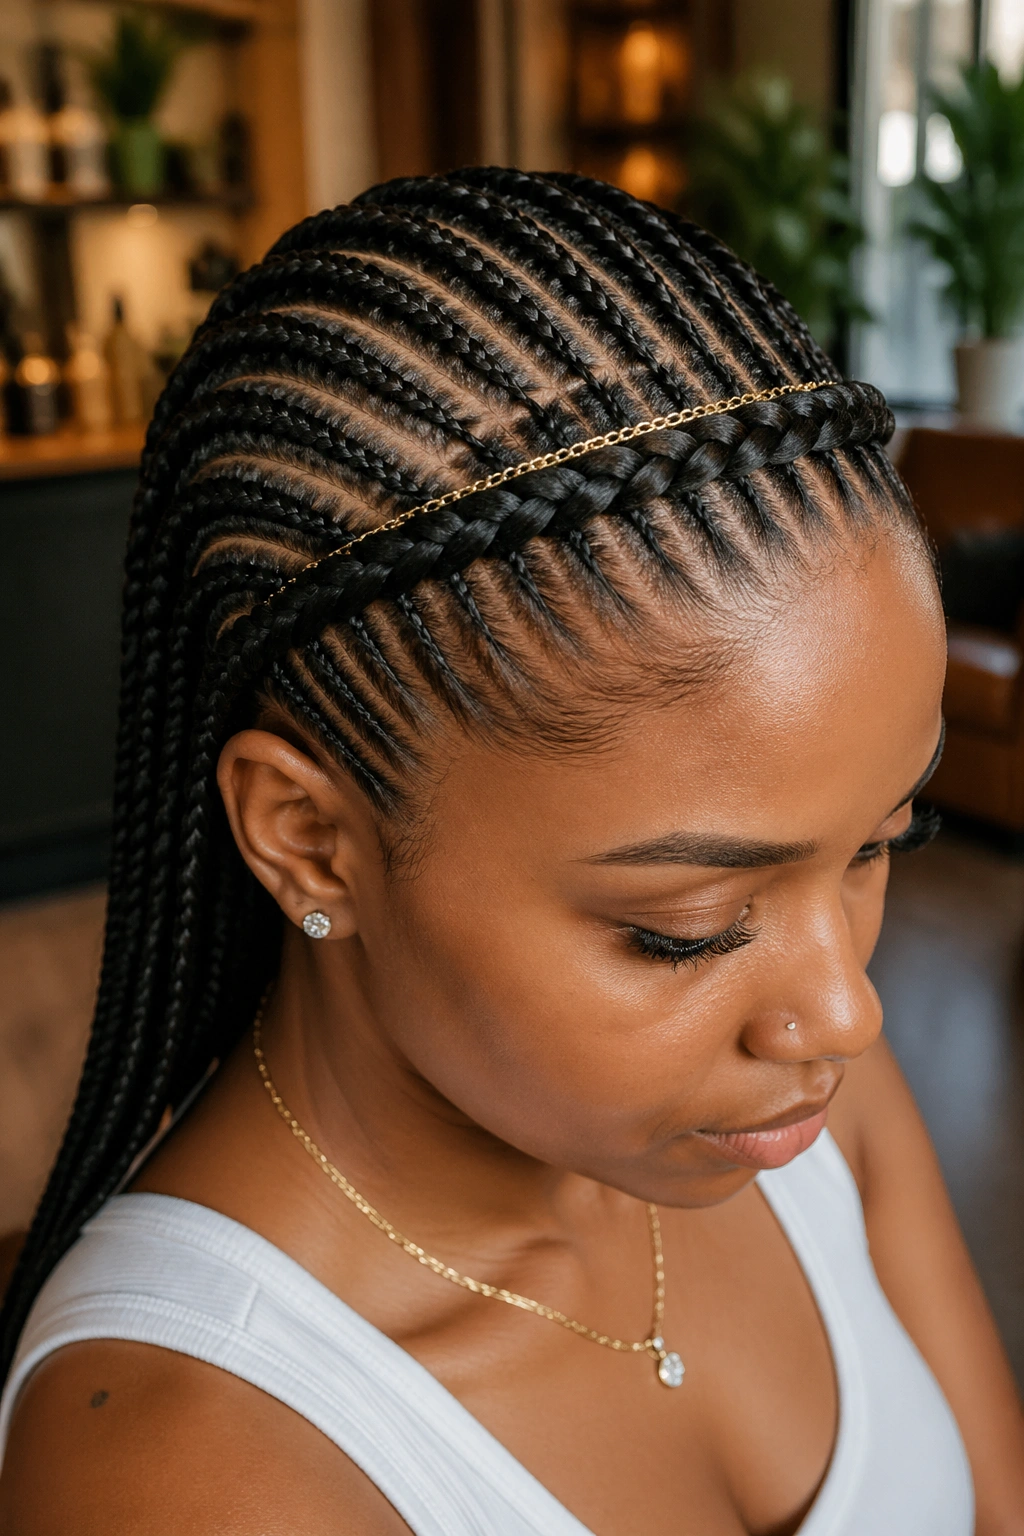
A thin braid wrapped around the front like a crown, with all the small feed-ins emerging from below the crown braid and flowing backward.
The crown braid acts as a decorative hairband. It can be thicker or thinner than the surrounding feed-ins.
For an extra touch, wrap a thin gold or silver chain along the crown braid for a subtle metallic line.
10. Small Feed-Ins With Mixed Lengths
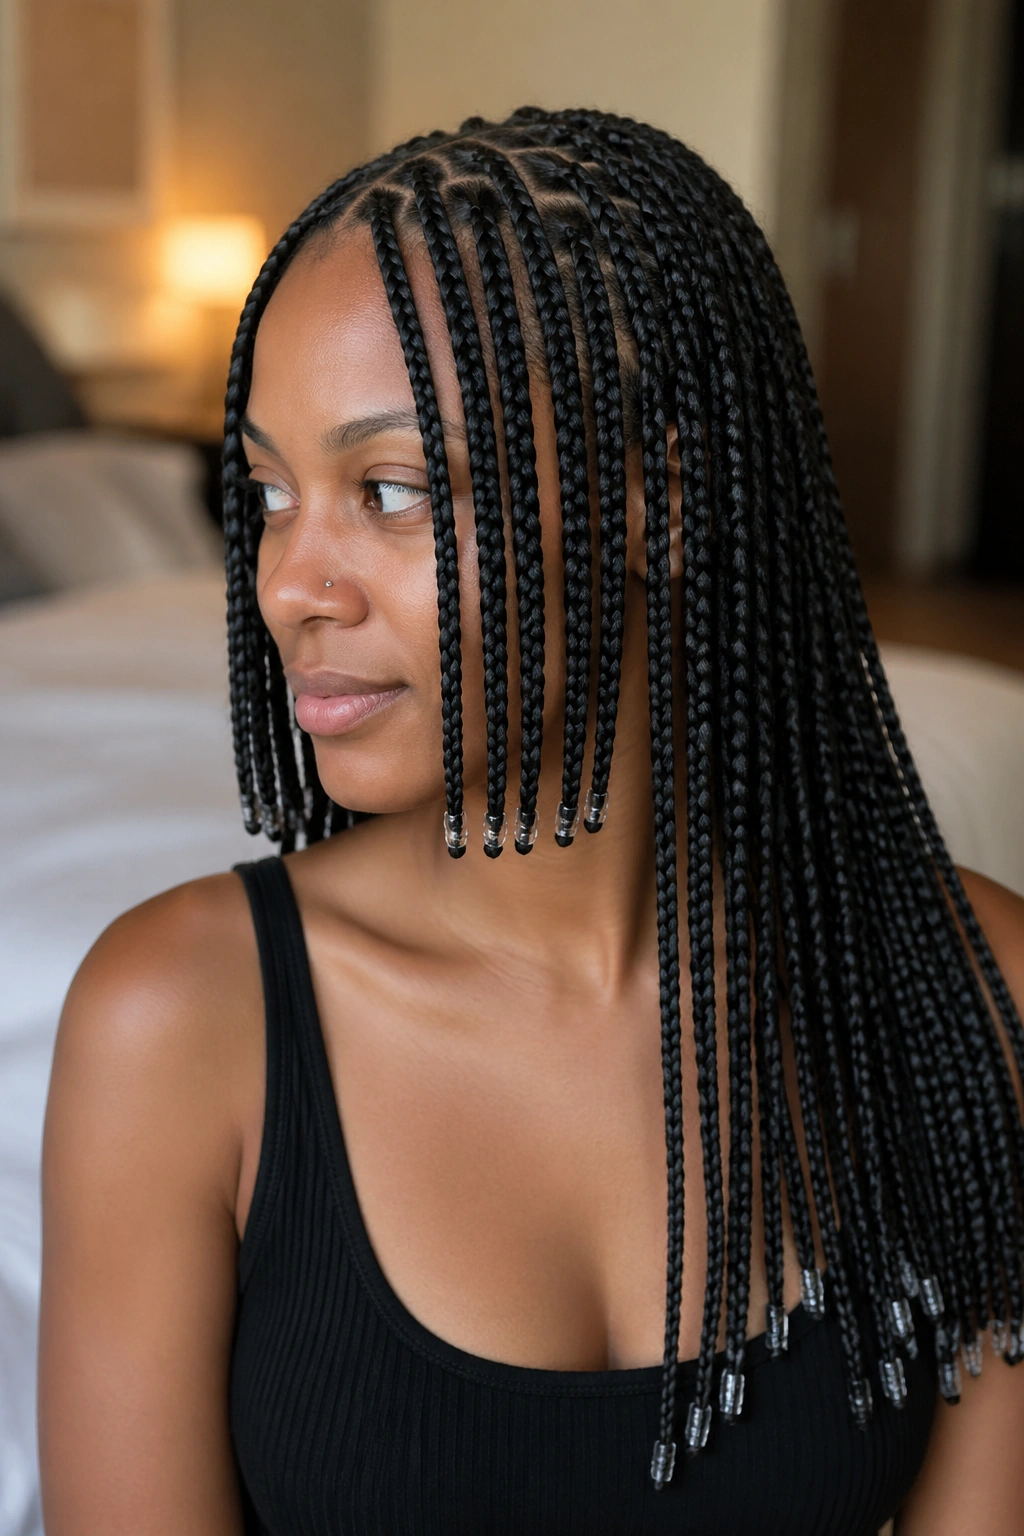
Most rows reach mid-back length, but a few — usually the front 4-5 rows — stop at the chin or jaw, creating an asymmetric front and back. The shorter front pieces frame the face like blunt fringe.
The mixed lengths give the style a cut-and-styled quality rather than uniformly long.
The front shorter pieces can be added as a separate technique after the main install, with the shorter braids tied off with thin clear bands.
11. Small Feed-Ins With Color Tips
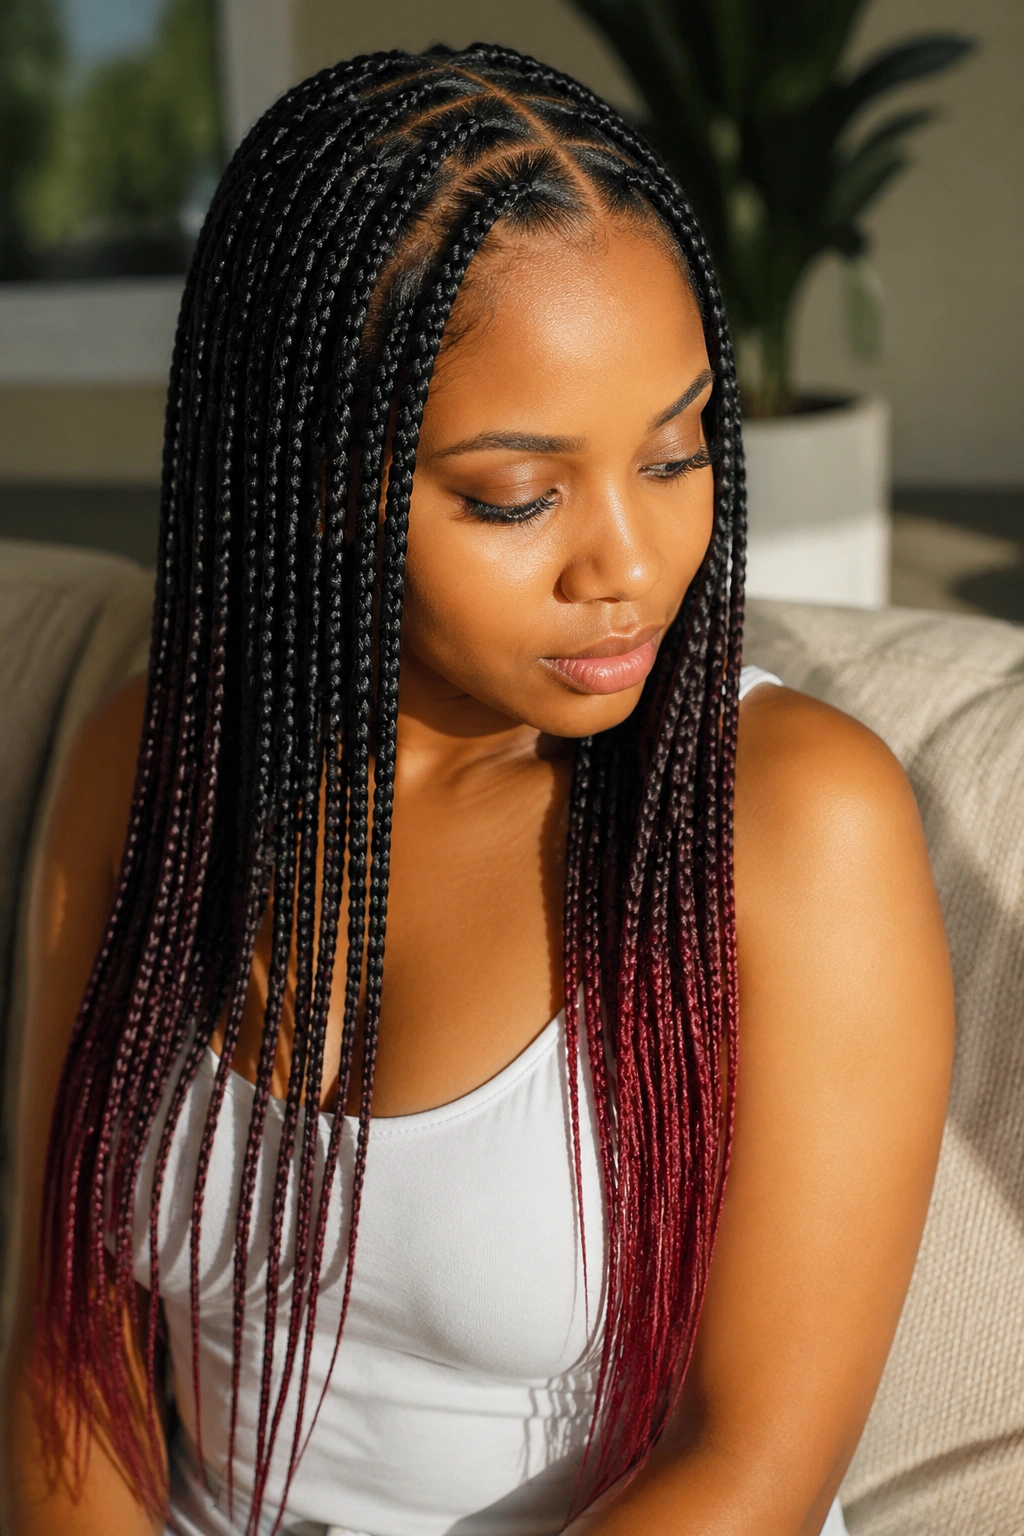
The bottom 4-6 inches of every braid dipped or installed in a contrasting color — burgundy, copper, or a soft caramel. The color appears only at the tips, creating a dipped-dye effect without any actual chemical color.
This is achieved by feeding in colored kanekalon for the final segments of each braid. The color arrives naturally as the braid extends.
The dipped effect is especially flattering on long styles where the color tips swing visibly with movement.
12. Small Feed-Ins With a Bun at the Crown
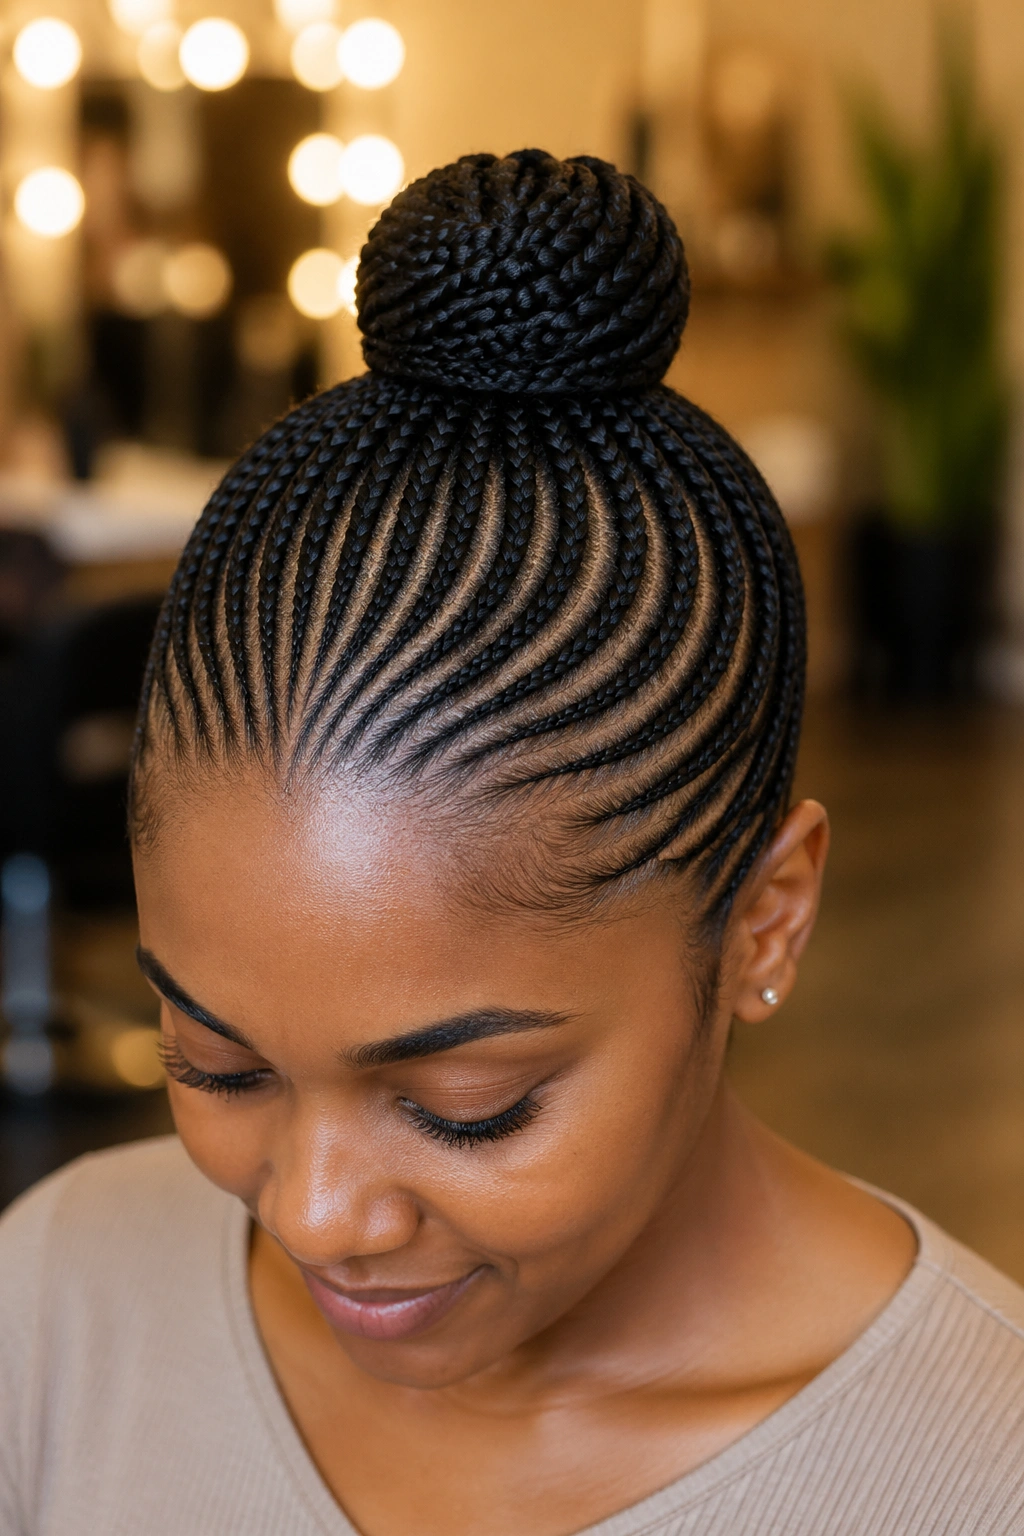
All small feed-in rows gathering at the crown into a tight bun. The bun can be a wrapped shape, a coiled spiral, or a donut form covered with the kanekalon braids.
A bun at the crown is the most polished version of small feed-ins. It works for weddings, formal events, and professional settings.
The tension at the gather point is significant. Don’t wear this style continuously — alternate with looser variations to give your scalp recovery time.
13. Small Feed-Ins With a Low Bun
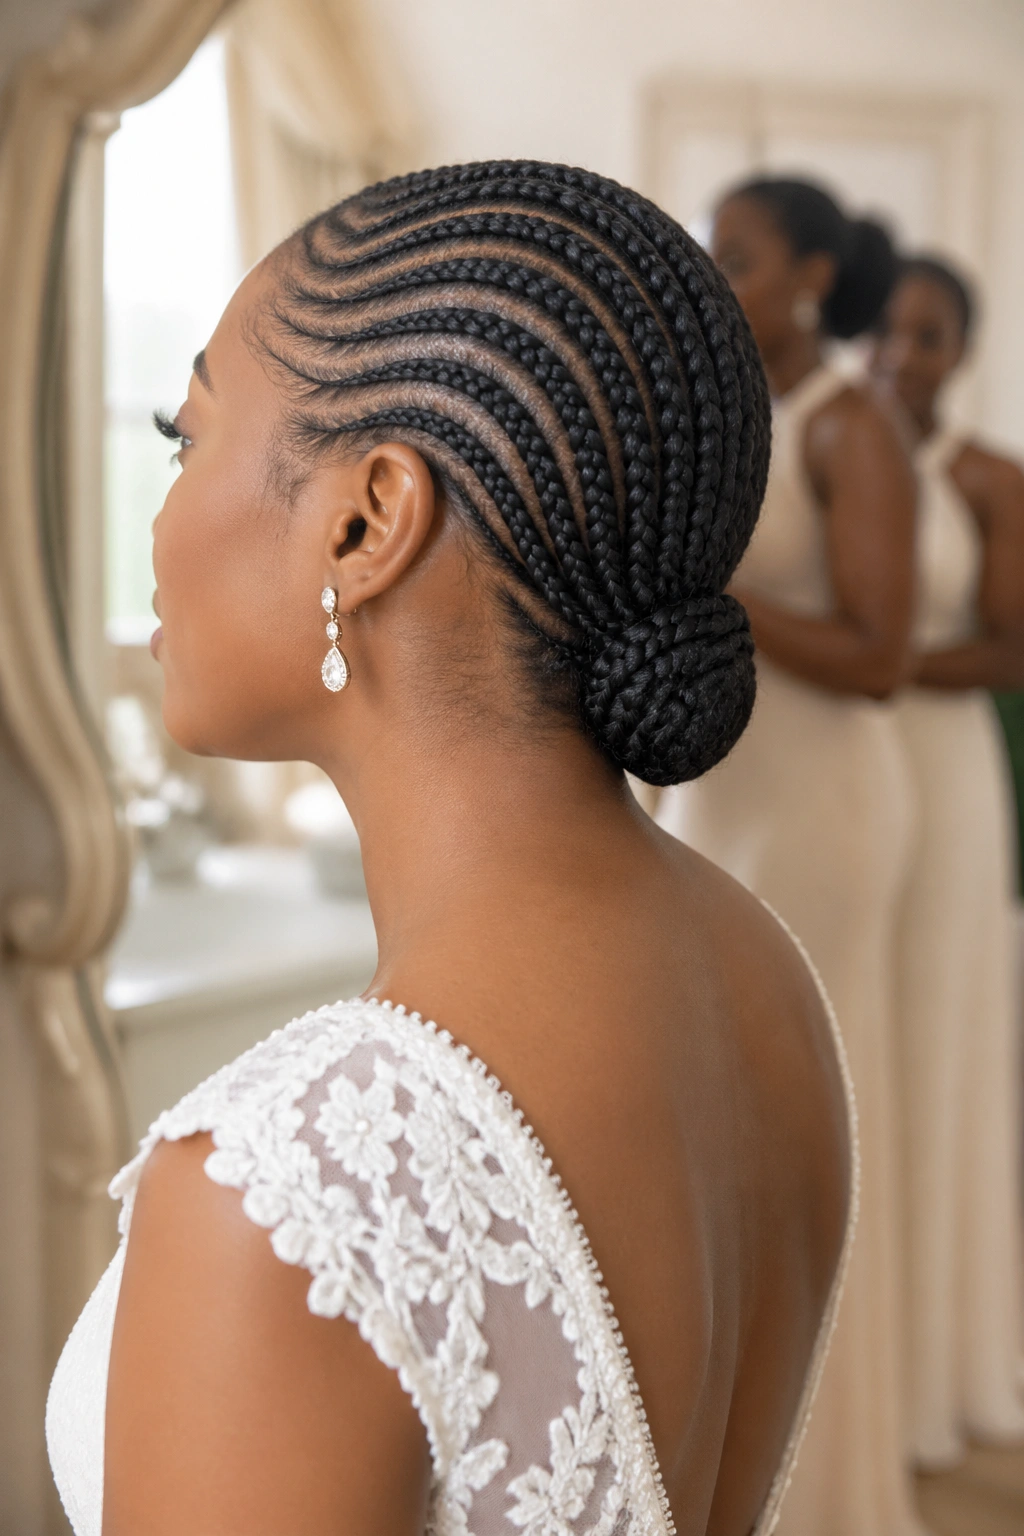
Same gather concept as the crown bun, but at the nape instead. The lower placement reads more demure and is gentler on the scalp.
The low bun is a wedding-favorite styling option. It pairs with formal dresses and reads as sophisticated.
For a particularly clean look, wrap the bun base with a silk or velvet ribbon that matches your outfit.
14. Small Feed-Ins With a Ponytail and Wrapped Base
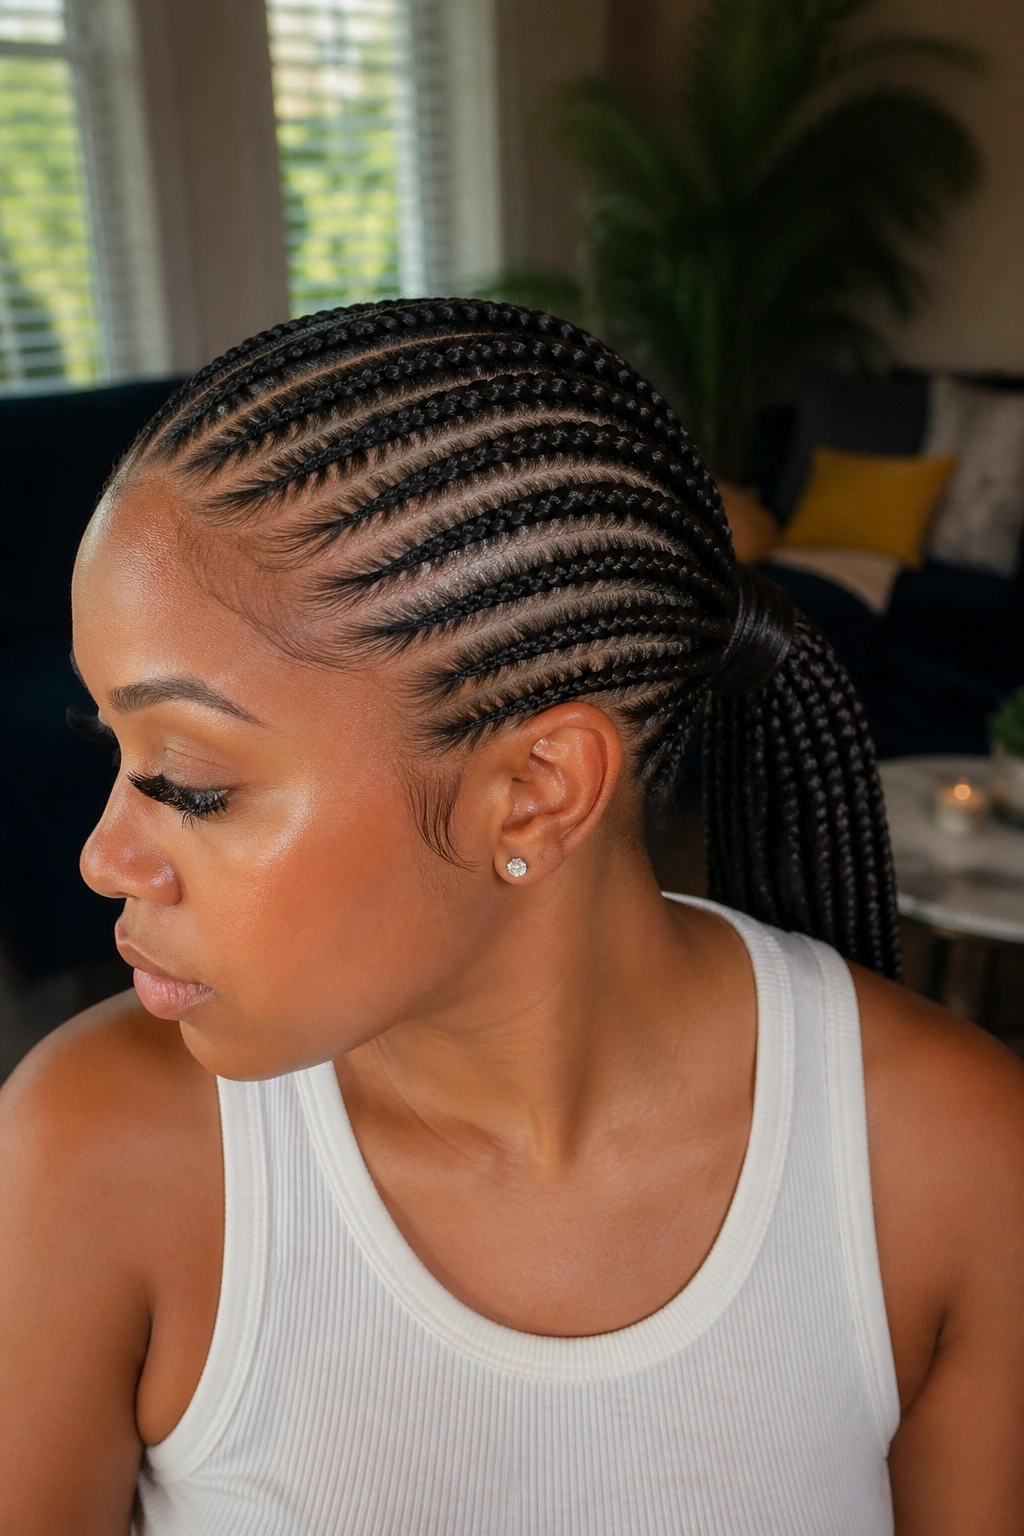
A single low or mid-height ponytail with the gather point wrapped tightly with a piece of kanekalon to create a sleek, finished base. No visible elastic.
The wrap technique is what distinguishes a polished ponytail from a quick gathered one. It takes about 5 minutes extra at the end of installation.
This style is the everyday workhorse. Easy to wear, easy to maintain, easy to pair with any outfit.
15. Small Feed-Ins in Pigtails
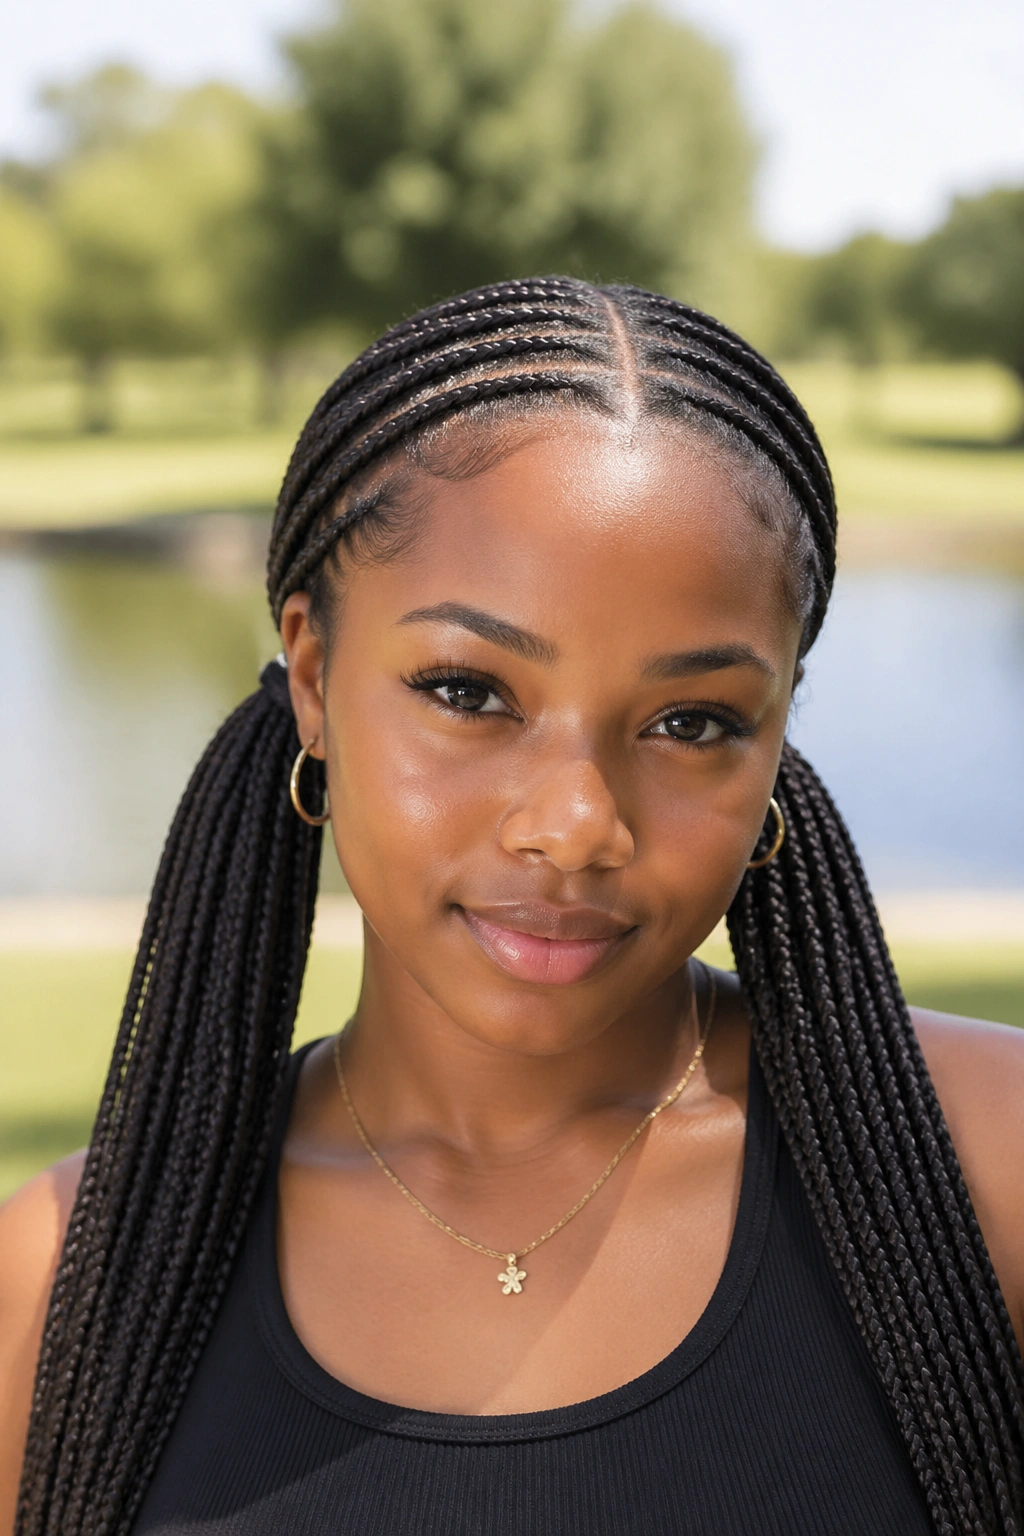
All small feed-in rows divided down a center part and gathered into two low pigtails — one on each side. The pigtails can be at the nape, behind the ears, or higher up on the sides.
Pigtails read youthful and playful. Best for casual settings, festivals, photoshoots.
The split needs to be precise. A wonky center part on pigtails is immediately obvious.
16. Small Feed-Ins With Twisted Ends
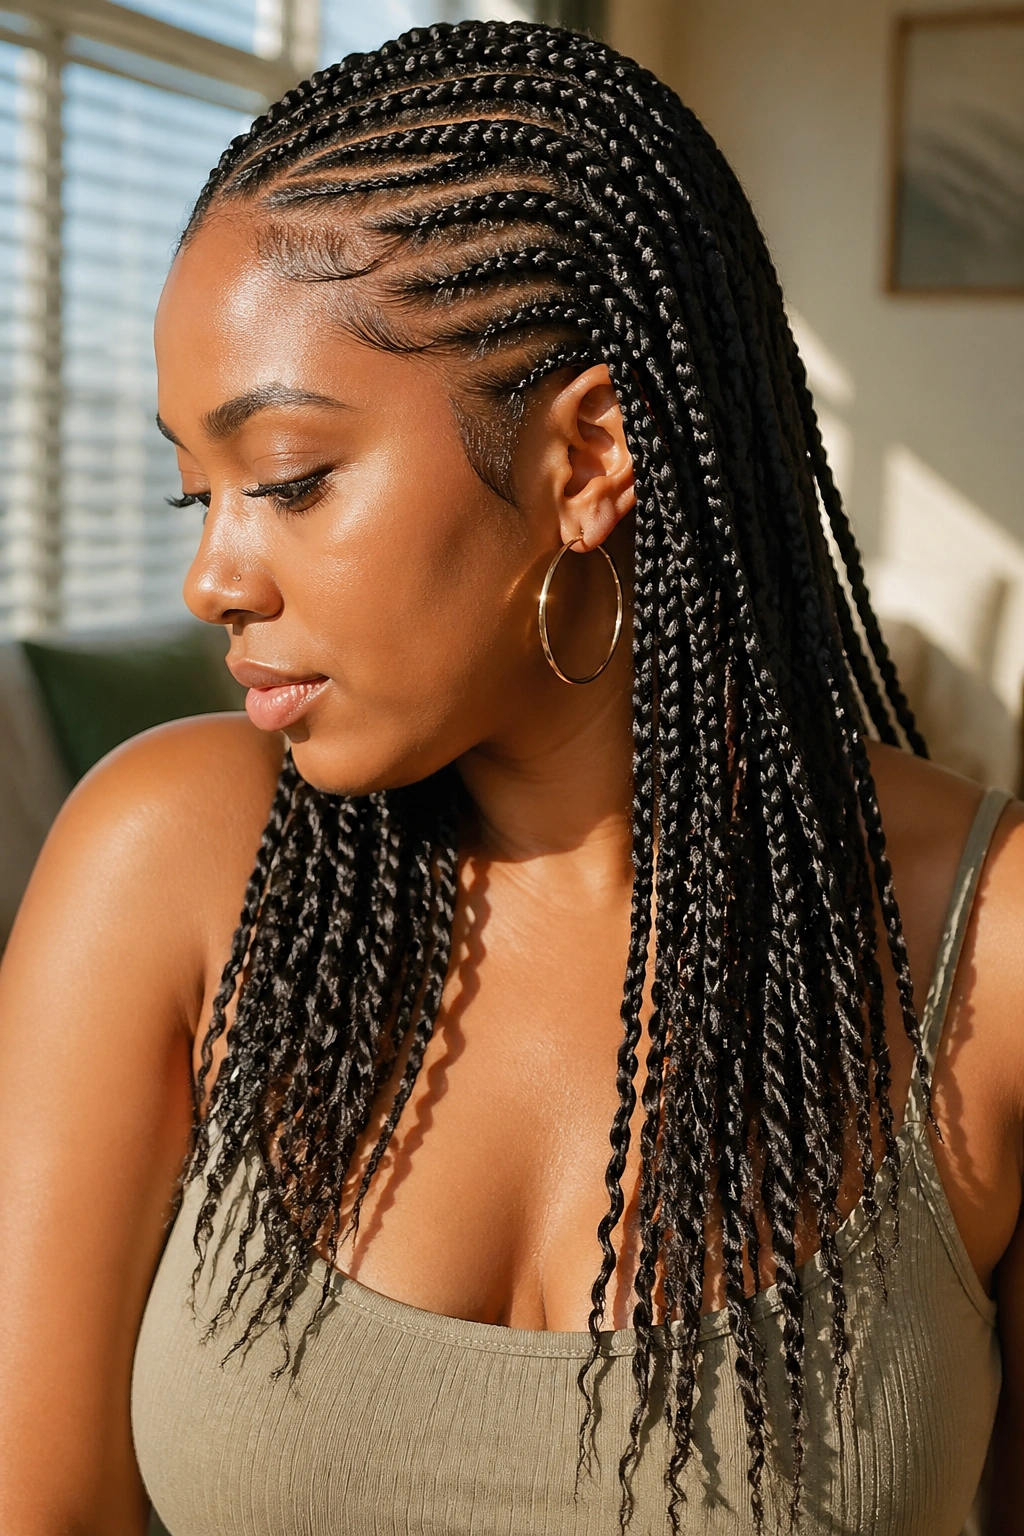
The braids transition into twisted ends for the final 6-8 inches. Twists give a different texture than continued braids — softer, slightly looser, more rope-like.
The twist transition happens naturally — the braider switches from a 3-strand braid to a 2-strand twist at the chosen point.
Twisted ends are also easier to undo if you want to mix up styling halfway through the install’s lifespan.
17. Small Feed-Ins With a Decorative Halo Pattern
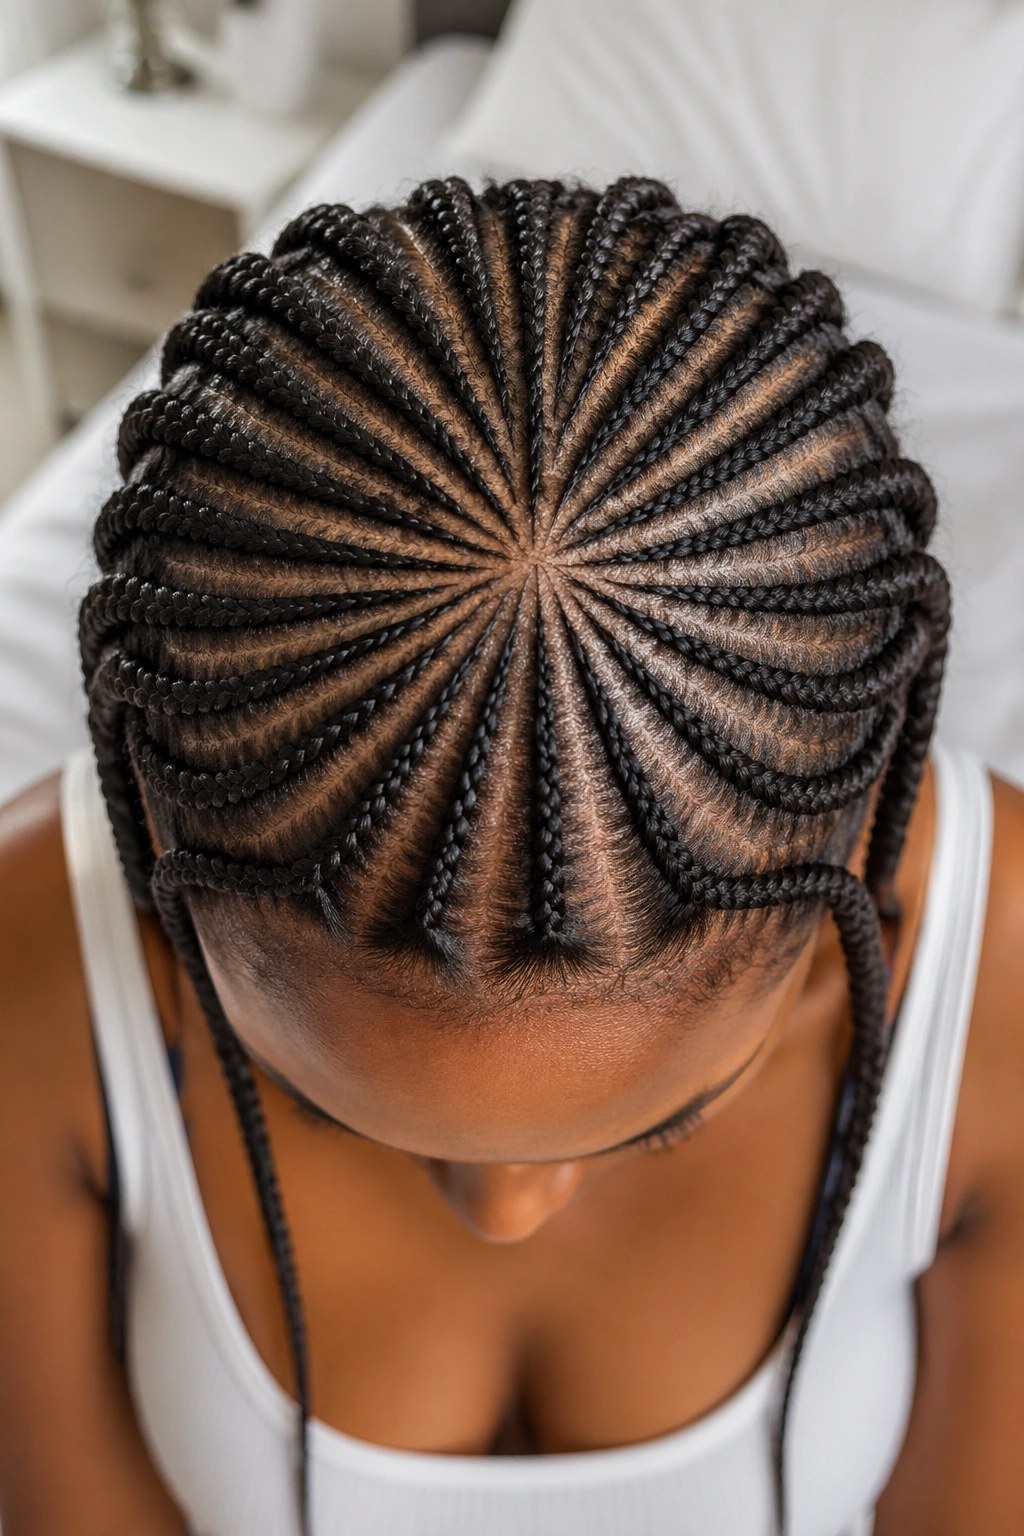
A circular pattern of small feed-in cornrows around the crown of the head, with the braids radiating outward like rays from a central point. From above, the head looks like a halo design.
This is a decorative, almost bridal style. The halo pattern shows up most clearly in overhead photographs.
It pairs well with simple jewelry — small studs, a delicate pendant — that doesn’t compete with the head design.
18. Small Feed-Ins With Open Spaces Between Sections
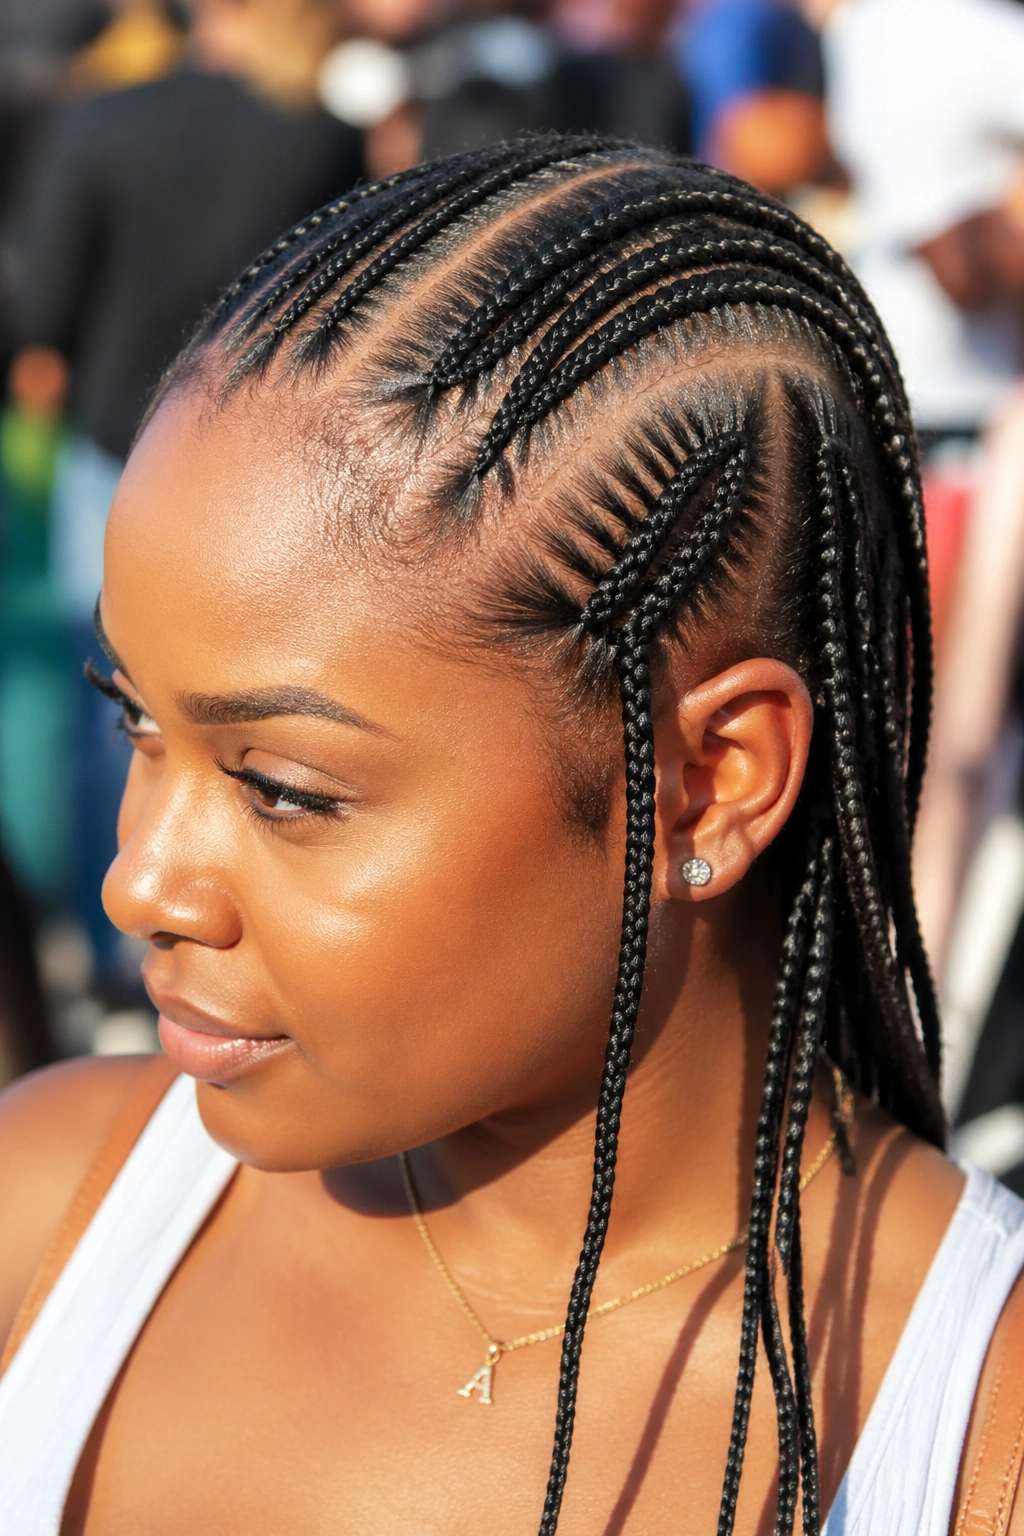
Instead of continuous coverage, the small feed-in rows are grouped into 3-4 sections with intentional gaps of bare scalp between them. The gaps create a striking architectural look.
The bare scalp sections require precise edge work to look intentional. Sloppy borders make the gaps look like missing braids.
This style is best worn for events. The gaps need maintenance to stay clean and don’t hold up as well as continuous coverage over weeks.
19. Small Feed-Ins With an Updo Crown
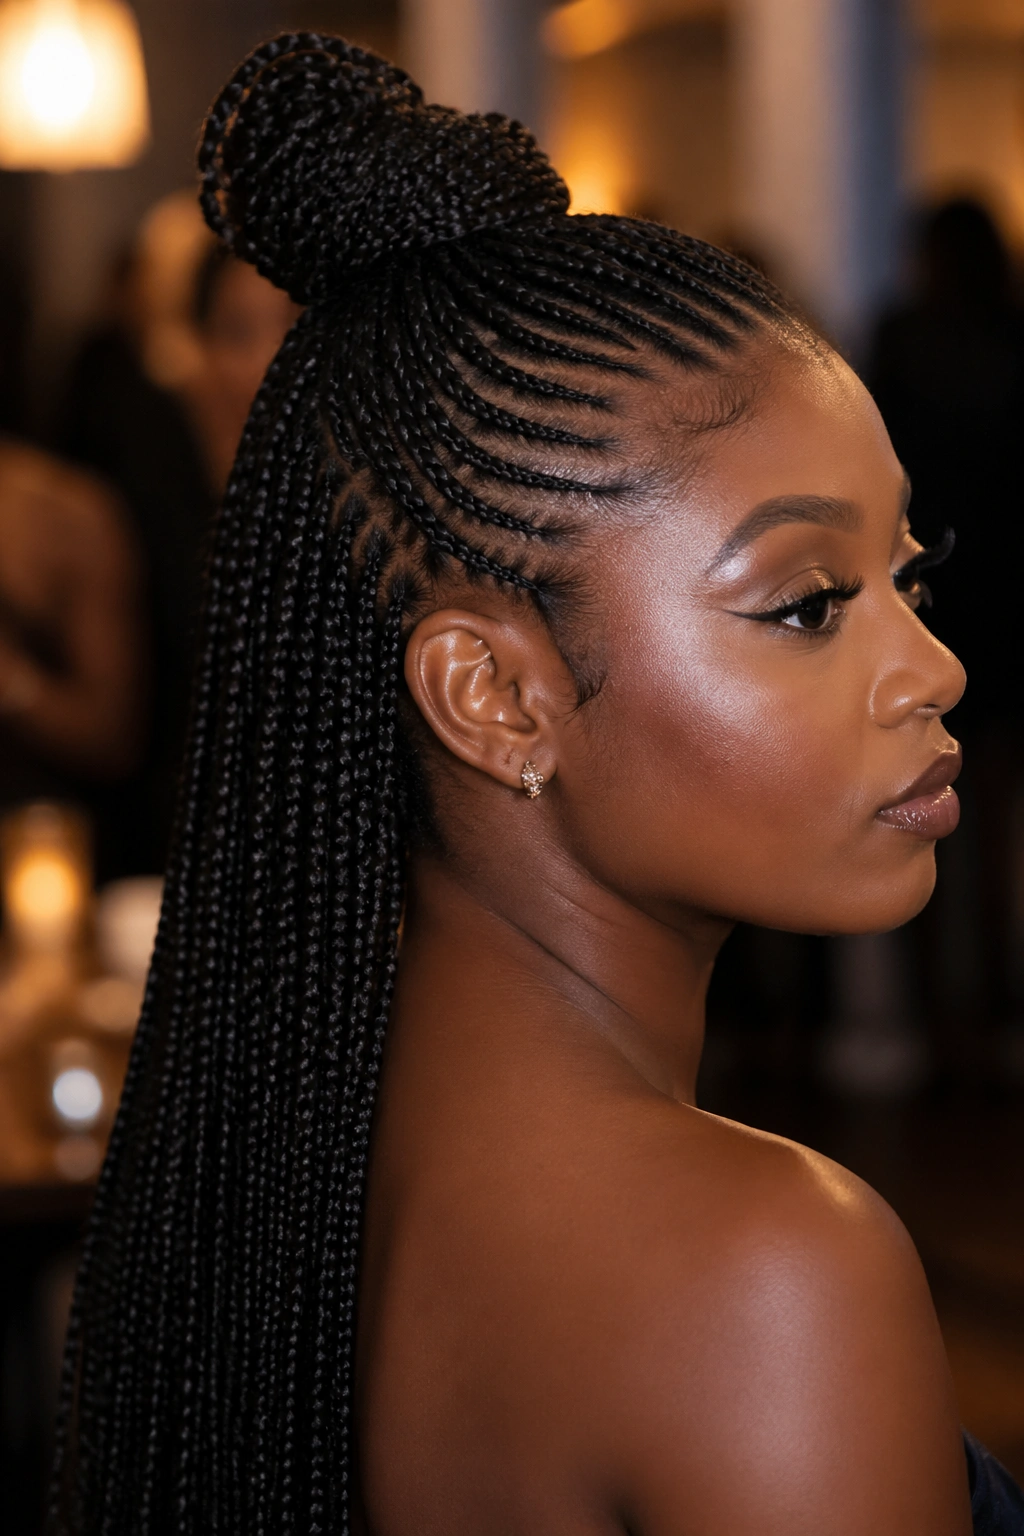
Half the small feed-in rows gathered into an updo at the crown, while the bottom half flow loose down the back. The updo creates a half-up, half-down effect with structured small braids on the bottom and a sculpted form on top.
This works well for formal events because it has structure without removing the visual benefit of the long flowing braids.
The updo can be a simple tucked roll, a small bun, or a more elaborate French twist depending on the event.
20. Small Feed-Ins With a Beaded Border
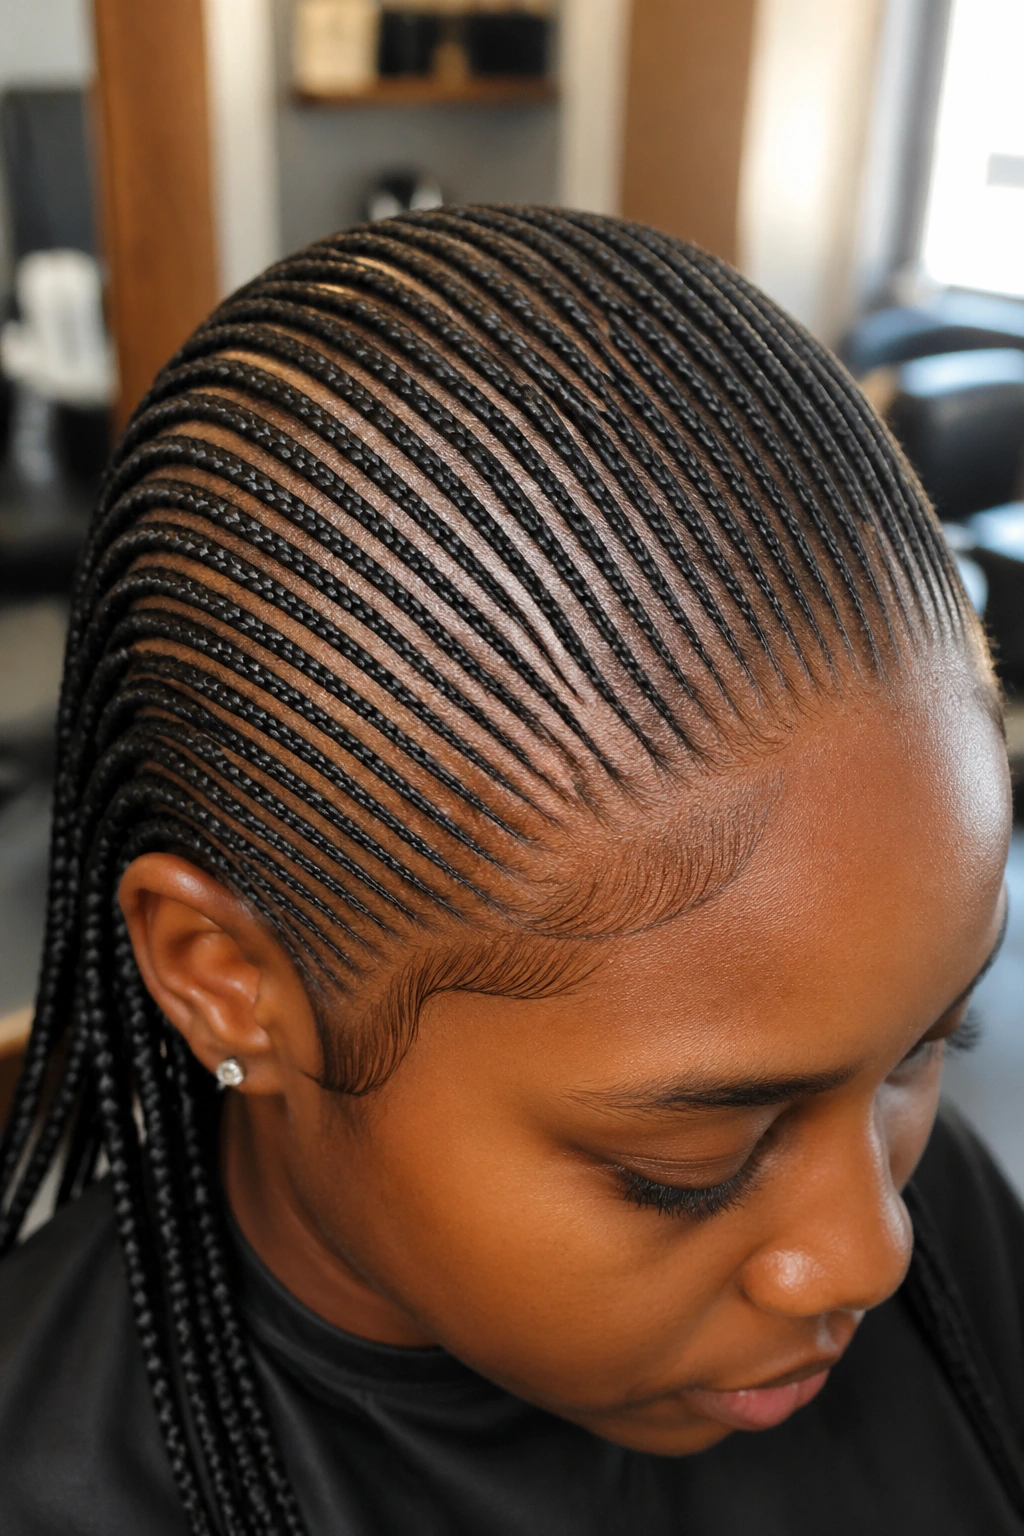
A row of small beads runs along the front hairline, woven into the very first inch of each braid as it leaves the scalp. The beaded border creates a continuous decorative line across the top of the head.
The beads should be small and consistent in size to maintain the smooth border line.
This style adds a cultural and decorative element without overwhelming the fineness of the small feed-ins.
21. Small Feed-Ins With a Side Sweep and Statement Earrings
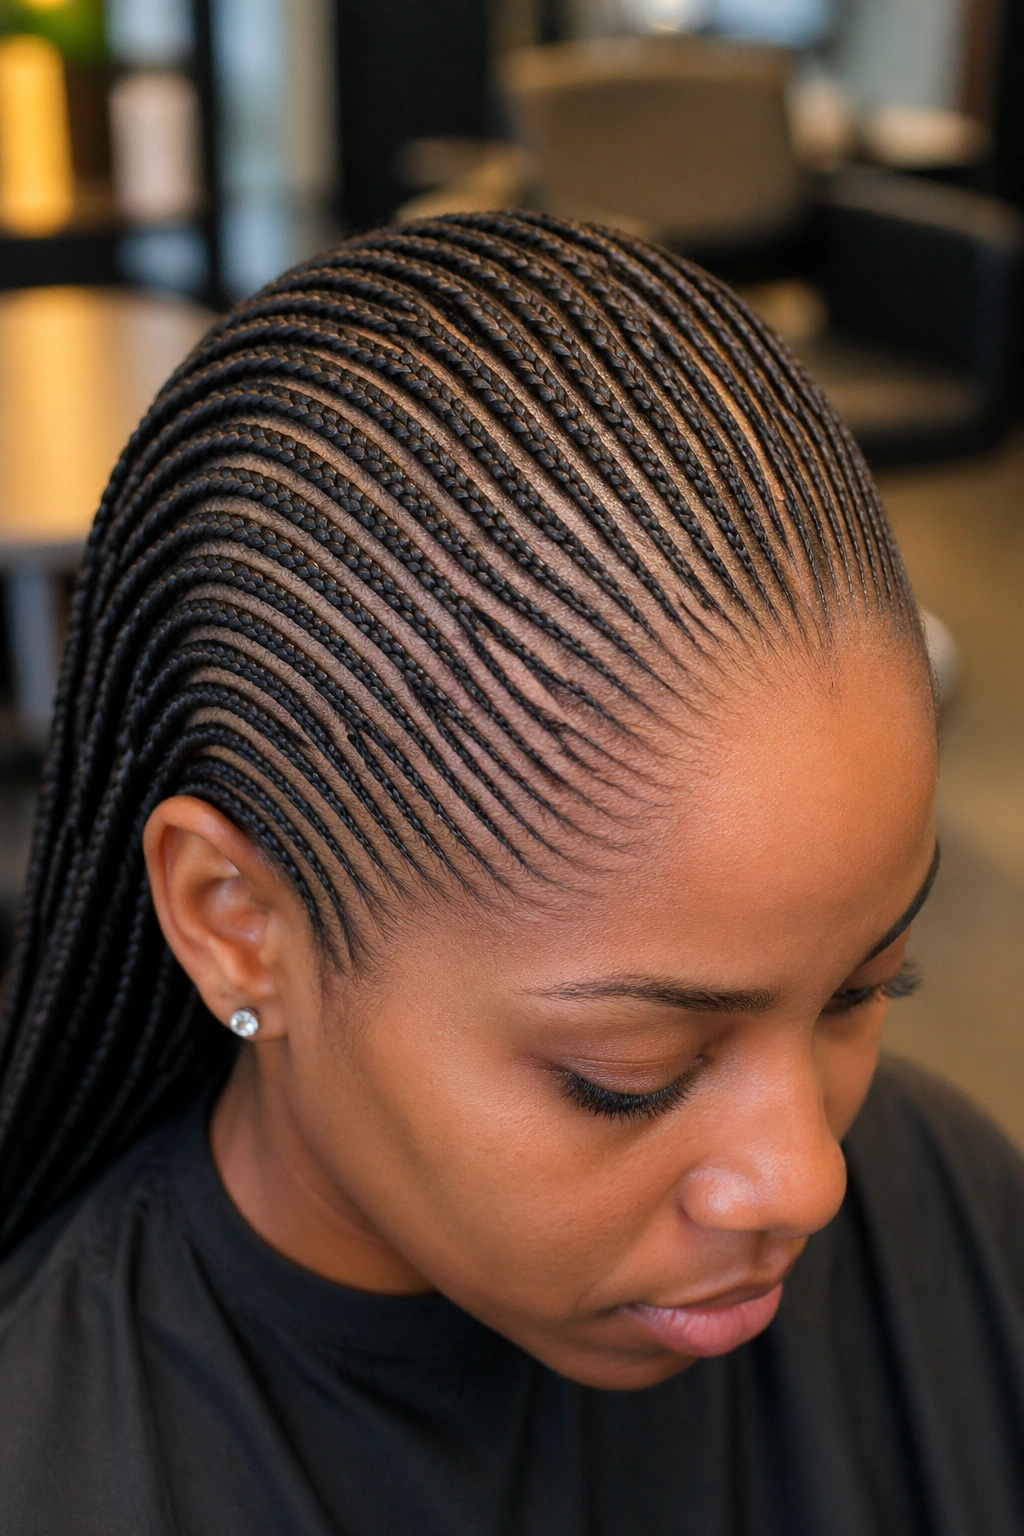
Small feed-ins swept dramatically to one side, leaving the opposite ear fully exposed. The exposed ear becomes the statement zone — large hoops, dramatic studs, or statement earrings.
This styling decision is about visual balance. The side sweep creates an asymmetric direction, and the bold earring on the exposed side completes the visual flow.
Best for occasions where your accessories matter — events, dates, photoshoots.
22. Small Feed-Ins With Floor-Length Drama
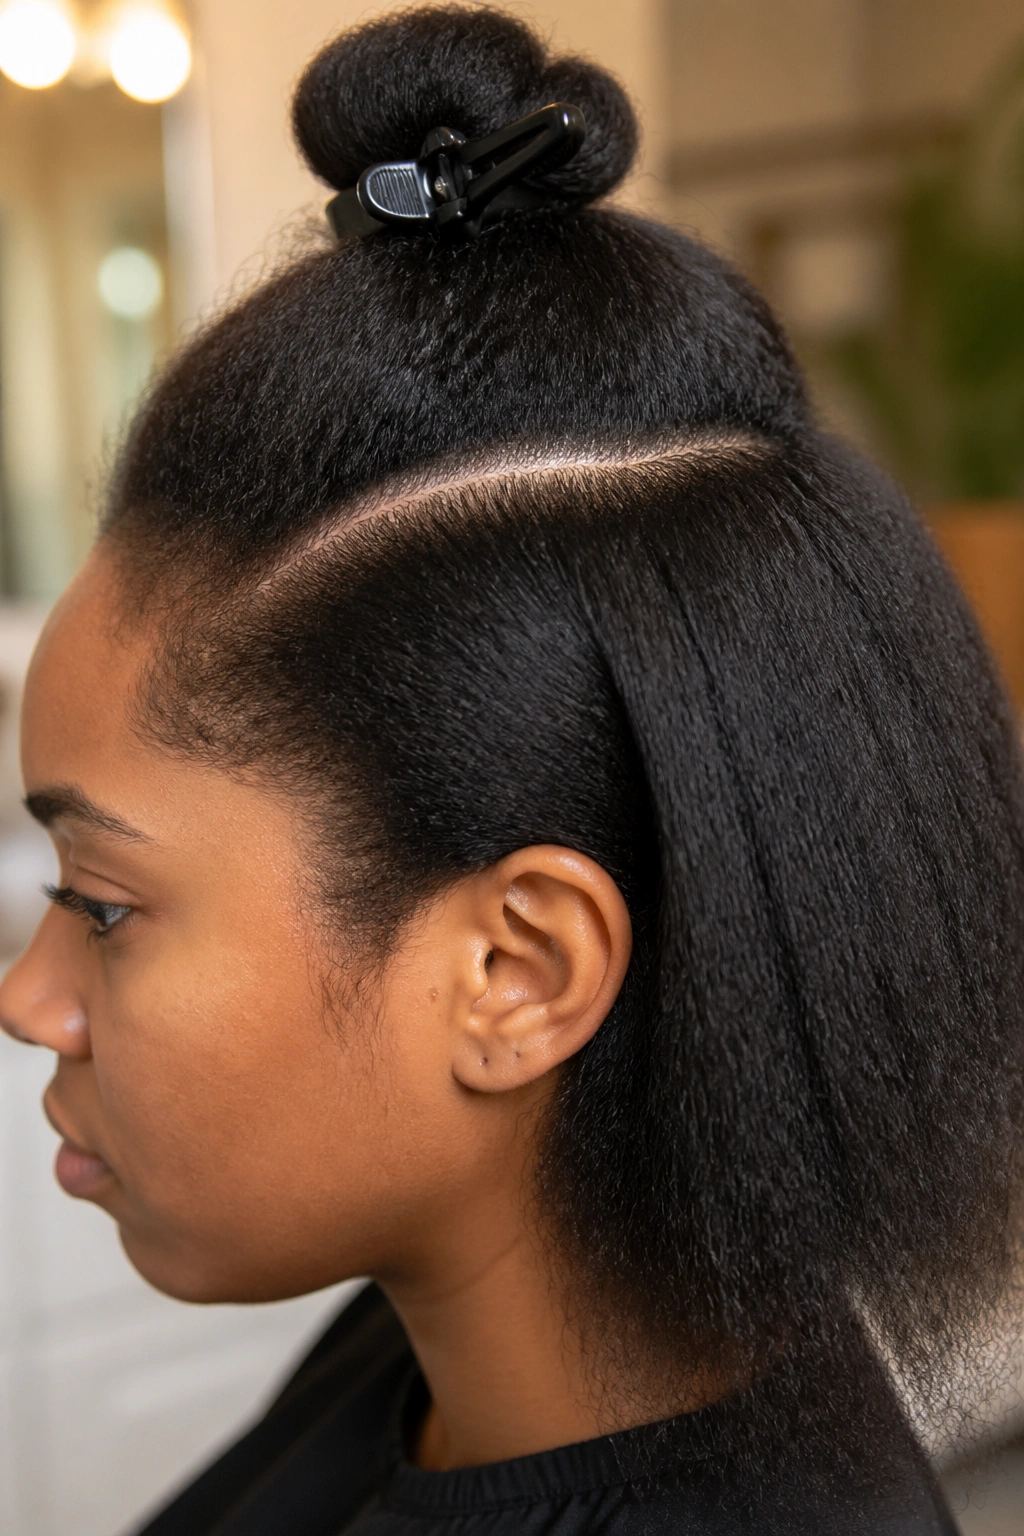
The longest possible variation — small feed-in rows with extension hair reaching past the waist, sometimes to the floor for true statement looks. This is reserved for high-fashion or editorial moments.
Floor-length feed-ins require expert skill in extension placement to maintain the natural-look feed-in start while building extreme length.
The weight is significant. Consider this style for short-term wear (days, not weeks) rather than ongoing protective style.
Maintaining Small Feed-In Cornrows
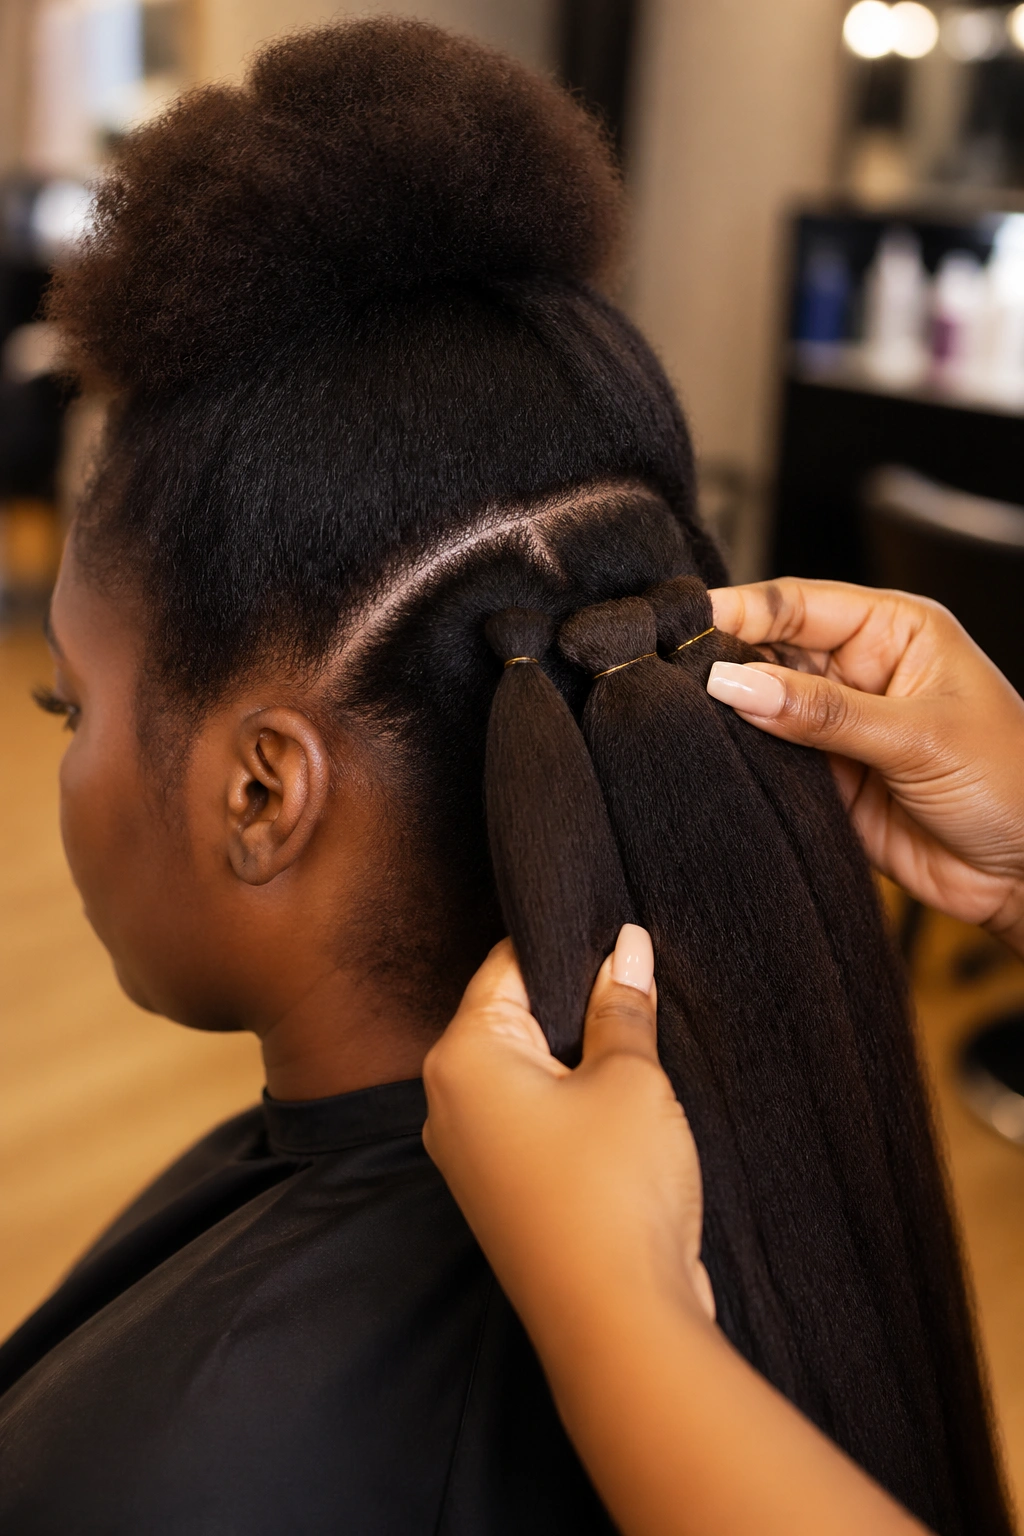
Sleep on satin every night. Cotton frizzes the fine rows quickly because each tiny braid has more surface area exposed to friction than a thick braid.
Mist scalp and braids lightly with water and conditioner mix every 3-4 days. Small feed-ins dehydrate faster than thick braids because they have less mass per row.
Light oil on the scalp — jojoba, argan, or sweet almond. Heavy oils sit on the fine braids and look greasy.
Edge touch-ups weekly with a small amount of gel. The fine front braids show edge frizz quickly.
Washing Small Feed-Ins Without Frizz
Wash every 7-10 days. More frequent washing damages the fine braid integrity over time.
Use a sulfate-free shampoo diluted with water in a squeeze bottle. Apply directly to the scalp through the parts. Massage gently.
Rinse with cool water. Don’t scrub the length — the small braids will frizz. Just let the water flow through the braids while you work the scalp.
Pat dry with a microfiber towel. Air dry completely before bonneting. Damp small feed-ins under a bonnet mildew quickly because the braids are dense.
Taking Down Small Feed-Ins
Plan for 2-3 hours of takedown for a full small feed-in install. The fine braids are individually delicate and the multiple feed-in points need careful unweaving.
Apply generous conditioner or detangling cream throughout the braids before starting.
Work one row at a time. Use your fingers for the first stage of unweaving, then a wide-tooth comb only when the braid is mostly undone.
Don’t rip or pull. The fine braids can break individually if forced. Patience pays.
After full takedown, finger-detangle thoroughly, then deep condition immediately. Your hair has been in a fine pattern for weeks and needs hydration and gentle handling before the next install.
Picking the Right Density of Small Feed-Ins
The number of rows depends on your hair density and head size.
For fine hair, 25-30 rows is enough. More rows on fine hair create gaps between braids that show too much scalp.
For medium density, 30-40 rows is the sweet spot. Most people fall in this range.
For dense hair, 40-50 rows distributes the natural density without making any single braid too thick.
Your braider can assess after one parting test — if the scalp shows more than 3 millimeters between rows, go denser.
Why Small Feed-Ins Last So Long
The technique itself protects the install. Because the kanekalon is added gradually, no single point of attachment carries excessive weight. The strain is distributed along the braid’s length.
The fine braids also lose their sharpness slowly. Where thick braids might look fuzzy by week 2, small feed-ins maintain their structure into week 4 because the proportions stay even as small frizz accumulates.
Properly installed small feed-ins can hold up to 8 weeks. That’s 2 months of one styling commitment — the longest of any common cornrow style.
Common Mistakes That Ruin Small Feed-Ins
Choosing a braider without feed-in expertise. Small feed-ins require specific technique. A general cornrow braider may not have the skill set. Ask for portfolio examples specifically of small feed-in work.
Using cheap kanekalon. Stiff, glossy kanekalon ruins the natural look of feed-ins. Spend the extra few dollars on pre-stretched, soft kanekalon.
Skipping deep conditioning before install. The fine pressure on each section requires moisturized hair to handle without breaking.
Pulling too tight at the front. Small feed-ins should look like they emerge from your scalp naturally. Tight tension at the front creates obvious lifting that defeats the purpose.
Not protecting at night. Small feed-ins frizz dramatically in one night without a bonnet because each tiny braid has high surface area for friction.
Small feed-in cornrows are the most refined version of cornrow styling. They take time, skill, and patience to install — and they reward all of it with weeks of beautiful, natural-looking protection. Done right, no other style gives you the same delicate-yet-dramatic finish.
