



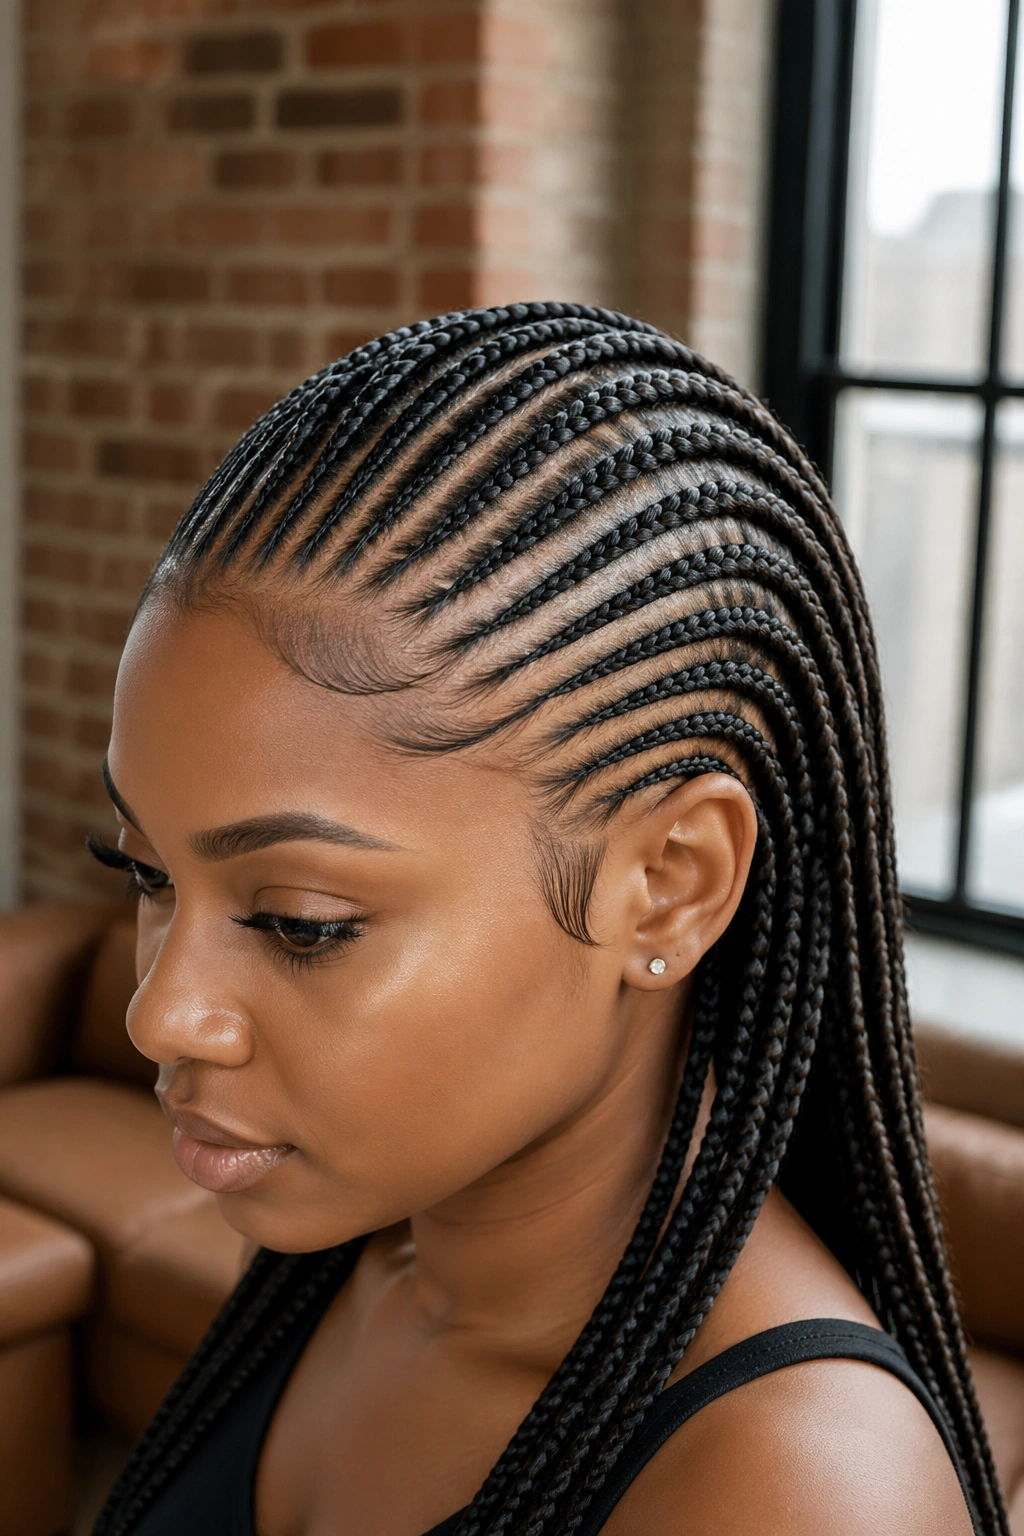
Small straight back cornrows for long hair represent one of the most refined applications of the cornrow tradition. Where larger braids make a statement through volume, small braids make their statement through detail. Each braid is delicate, no more than half an inch wide at most, and when you stack 20 or 30 of them across the head, the result reads as patterned fabric — clean lines marching from forehead to nape with the kind of precision that takes a skilled braider hours to achieve.
When you have long hair, small straight back cornrows take on a different character than they do on shorter lengths. The braids hang well past the shoulders, sometimes grazing the lower back, and the long tails create a curtain effect that frames the body. There’s no need for extensions in most cases — your own length carries the style.
For Black women with 4A through 4C textures, this style protects every strand by tucking it into a tight braid against the scalp. The hair shaft isn’t exposed to friction, weather, or daily styling stress. Done well, small straight back cornrows can serve as a multi-week protective style that lets your natural hair rest and grow.
What follows is a deep look at 22 specific variations of this style — different parting patterns, different finishes, different end treatments — with the practical details that separate a polished install from a so-so one.
Why Small Cornrows Work So Well For Long Hair
Long hair has weight. That weight has to go somewhere when you braid it, and small cornrows distribute that weight more evenly than larger braids. Twenty small braids each carrying a portion of your length is gentler on the scalp than four jumbo braids each loaded with a quarter of your hair.
Small braids also age better. They show frizz less obviously because the surface area of each braid is so narrow. Where a jumbo braid develops visible halos of fuzz by day 10, a small braid stays defined for two to three weeks with proper care.
The trade-off is install time. Small straight back cornrows on long hair can take five to seven hours depending on your hair density. That’s a real commitment. But for the duration of the style — typically three to four weeks — you essentially don’t have to do anything to your hair beyond basic scalp care and nightly bonnet wear.
Prep Work That Makes Or Breaks The Install
Wash with a clarifying shampoo a day or two before your appointment. Product buildup makes hair slippery, and slippery hair won’t grip into a tight braid. The braid will loosen within days if your hair was greasy at install time.
Deep condition for 30-40 minutes under a plastic cap. This is your last chance to deeply hydrate before the hair gets locked into braids for weeks, so don’t rush it. Use a moisture-protein balanced conditioner — heavy on moisture if your hair feels dry, balanced with protein if it’s been overprocessed.
Stretch the hair after conditioning. Tension dry, blow dry on cool, or banding overnight all work. The goal is hair that lays flat and behaves predictably under the rat-tail comb. Coily hair that hasn’t been stretched fights the parting process and creates uneven sections.
What Tools You Need In The Chair
A quality rat-tail comb. The pointed end matters — cheap plastic combs have rounded points that can’t draw clean parts. Look for one with a steel or strong nylon point.
Edge control gel with moderate hold. Crunchy gels create that white residue and flake at the part lines. Softer gels with hold work better — Eco Styler Olive Oil is the budget classic, KISS Edge Fixer is a popular middle option, and Mielle Honey Edge Gel sits in the higher-end tier.
Duckbill clips to hold sections. At least 15 of them. You’ll be sectioning constantly and don’t want to wrestle with hair falling into your work area.
A spray bottle with water and a few squirts of leave-in conditioner. Keeps hair pliable throughout the long install.
Pre-made small clear elastics for the ends if you’re not heat-sealing.
How Tight Is Too Tight
This deserves its own section because it’s the single biggest cause of damage from small cornrows. Tightness should feel firm but not painful. If your scalp throbs at hour one of the install, it will feel like fire by hour six and the days after.
Specific signs of over-tight braiding include white bumps along the part lines, sharp pinpoint pain at any single follicle, headache after install, and hair that breaks at the root when you take the braids out.
A good braider checks tension by asking how it feels. They also adjust based on visual cues — they look for the scalp to remain its normal color, not turn red or pale around braid bases.
Speak up early. The first braid is the test. If it hurts at the start, every braid that follows will hurt the same way.
The Right Parting Strategy
Small braids need narrow parts. Aim for sections about 0.4 to 0.5 inches wide. Wider parts create thicker braids that don’t qualify as “small” anymore. Narrower parts create such thin braids that they snap during normal wear.
Consistent part width across the head is what makes the style look professional. Inconsistent parts — some 0.4 inches, some 0.7 inches — create braids of different sizes that look amateur even from a distance.
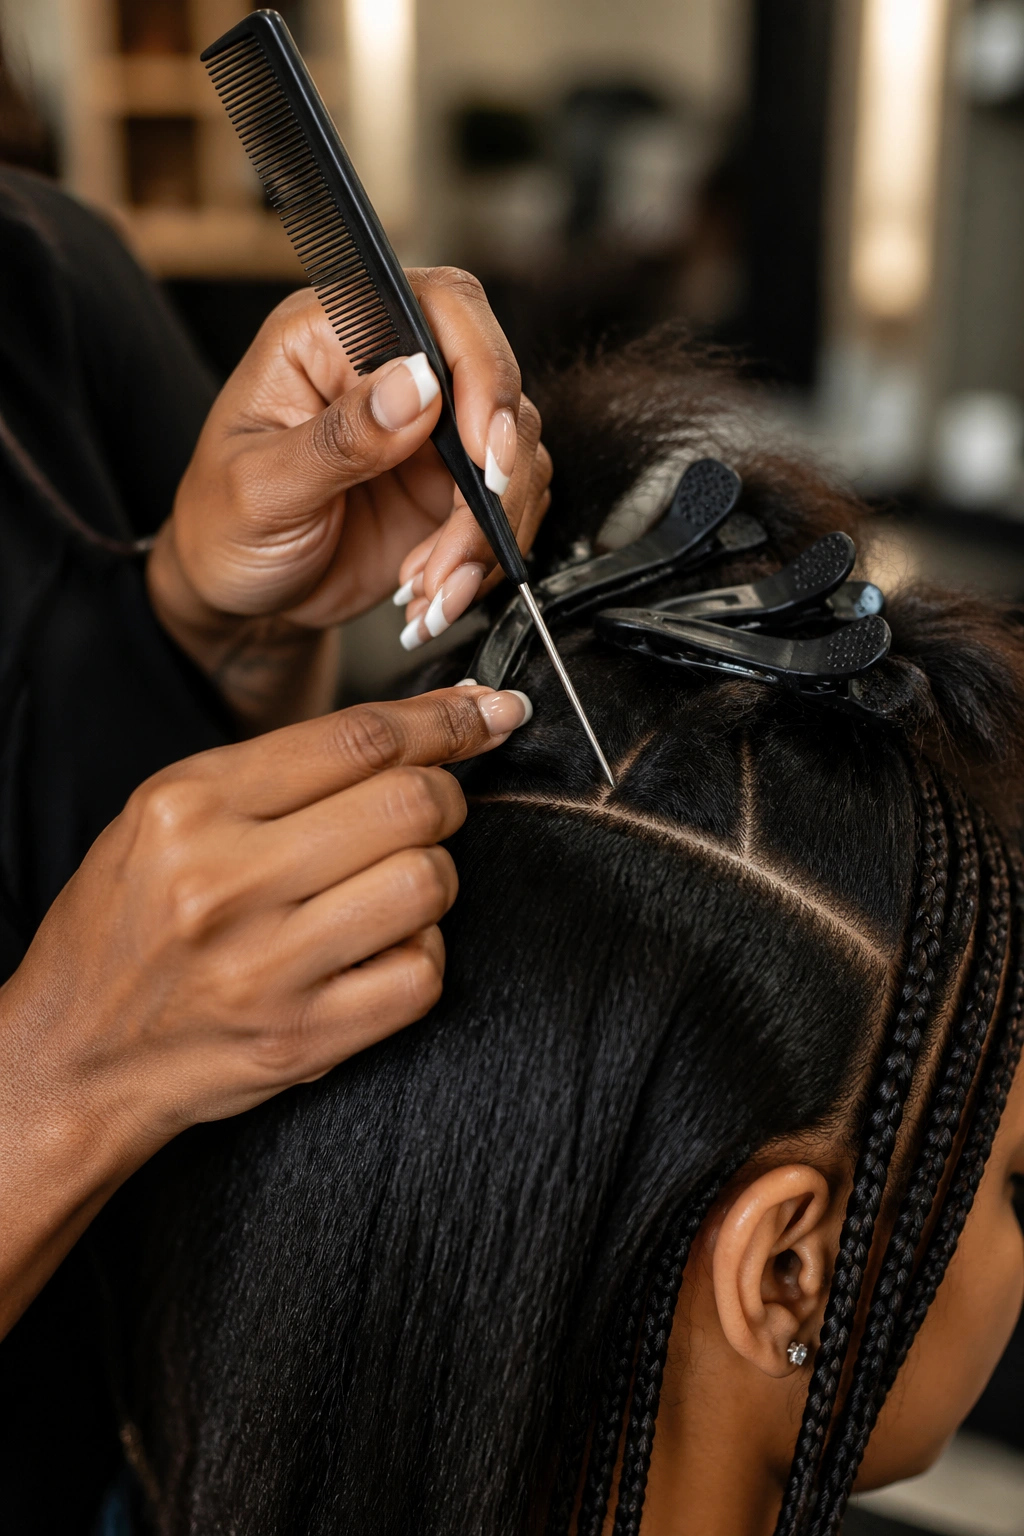
Use the rat-tail comb to draw straight, parallel parts from forehead to nape. For the cleanest geometry, work in zones: do the front section first, then the middle, then the back. Don’t jump around.
1. Twenty Small Cornrows In Perfect Parallel
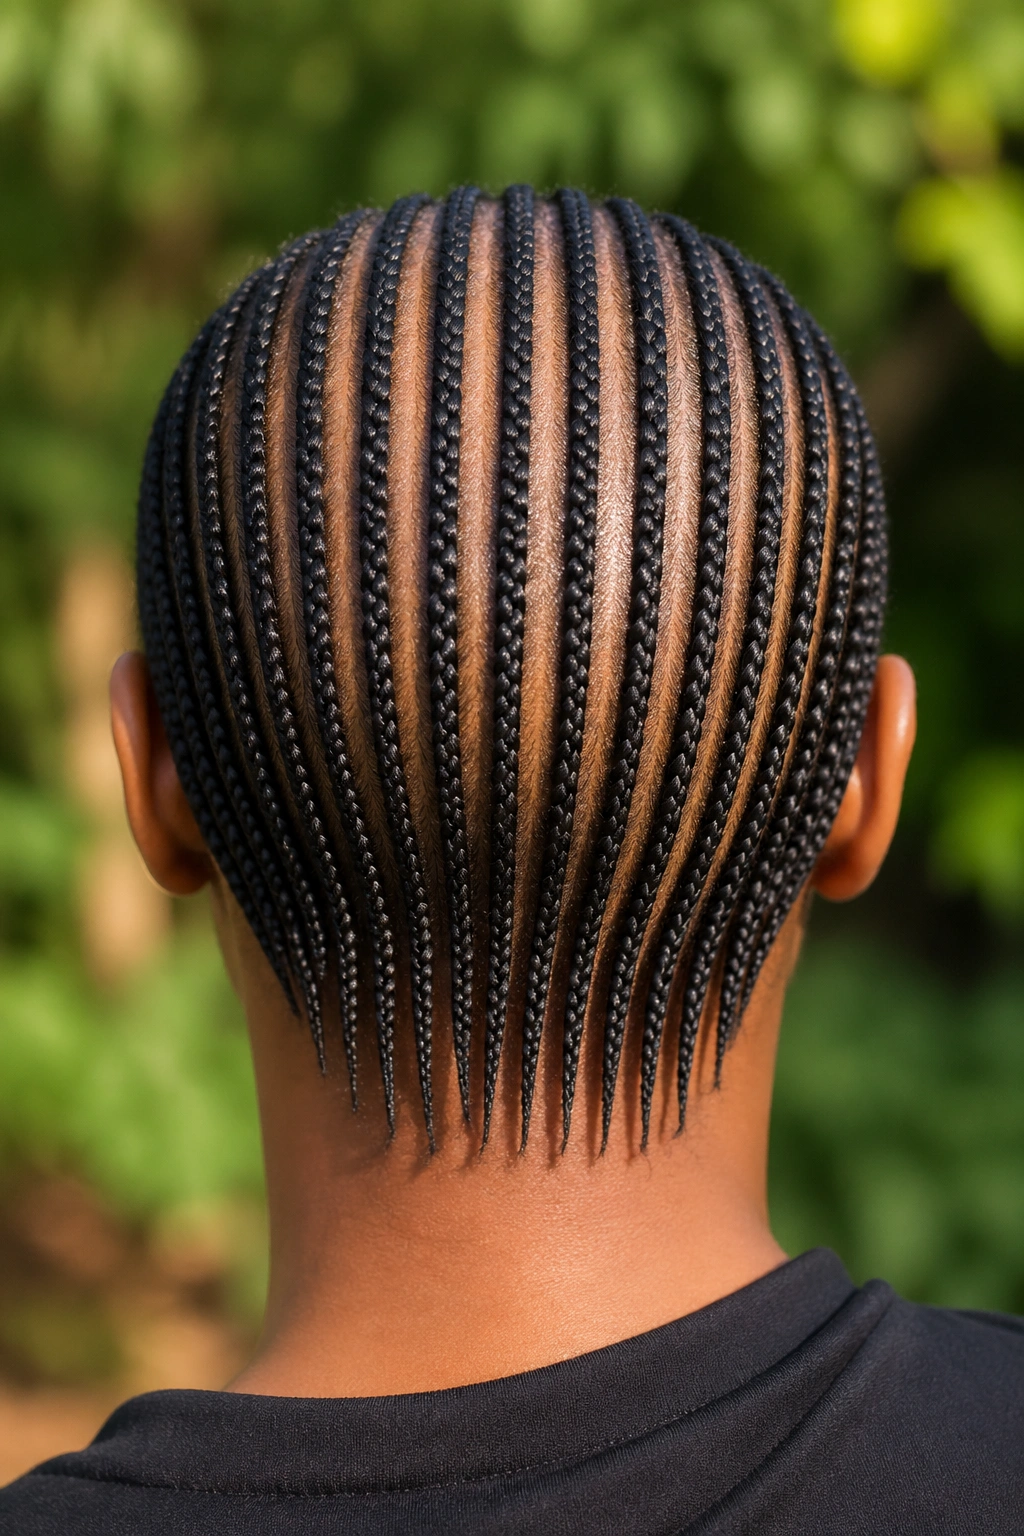
The textbook execution. Twenty small cornrows running in straight parallel lines from the forehead down to the nape, each one identical in width, each one tapering to a thin point at the end of your natural length.
Why It Works
Twenty braids hits a sweet spot for most head sizes — enough to read as detailed and patterned, but not so many that the install becomes prohibitively long.
- Part width: about 0.5 inches per section
- Install time: 5-6 hours for shoulder-length and longer hair
- End treatment: small clear elastics or heat-sealed tips
Pro tip: Ask the braider to count braids before they start so you know exactly how many sections to plan for. If you end up with 19 or 21, the asymmetry will bother you every time you look in the mirror.
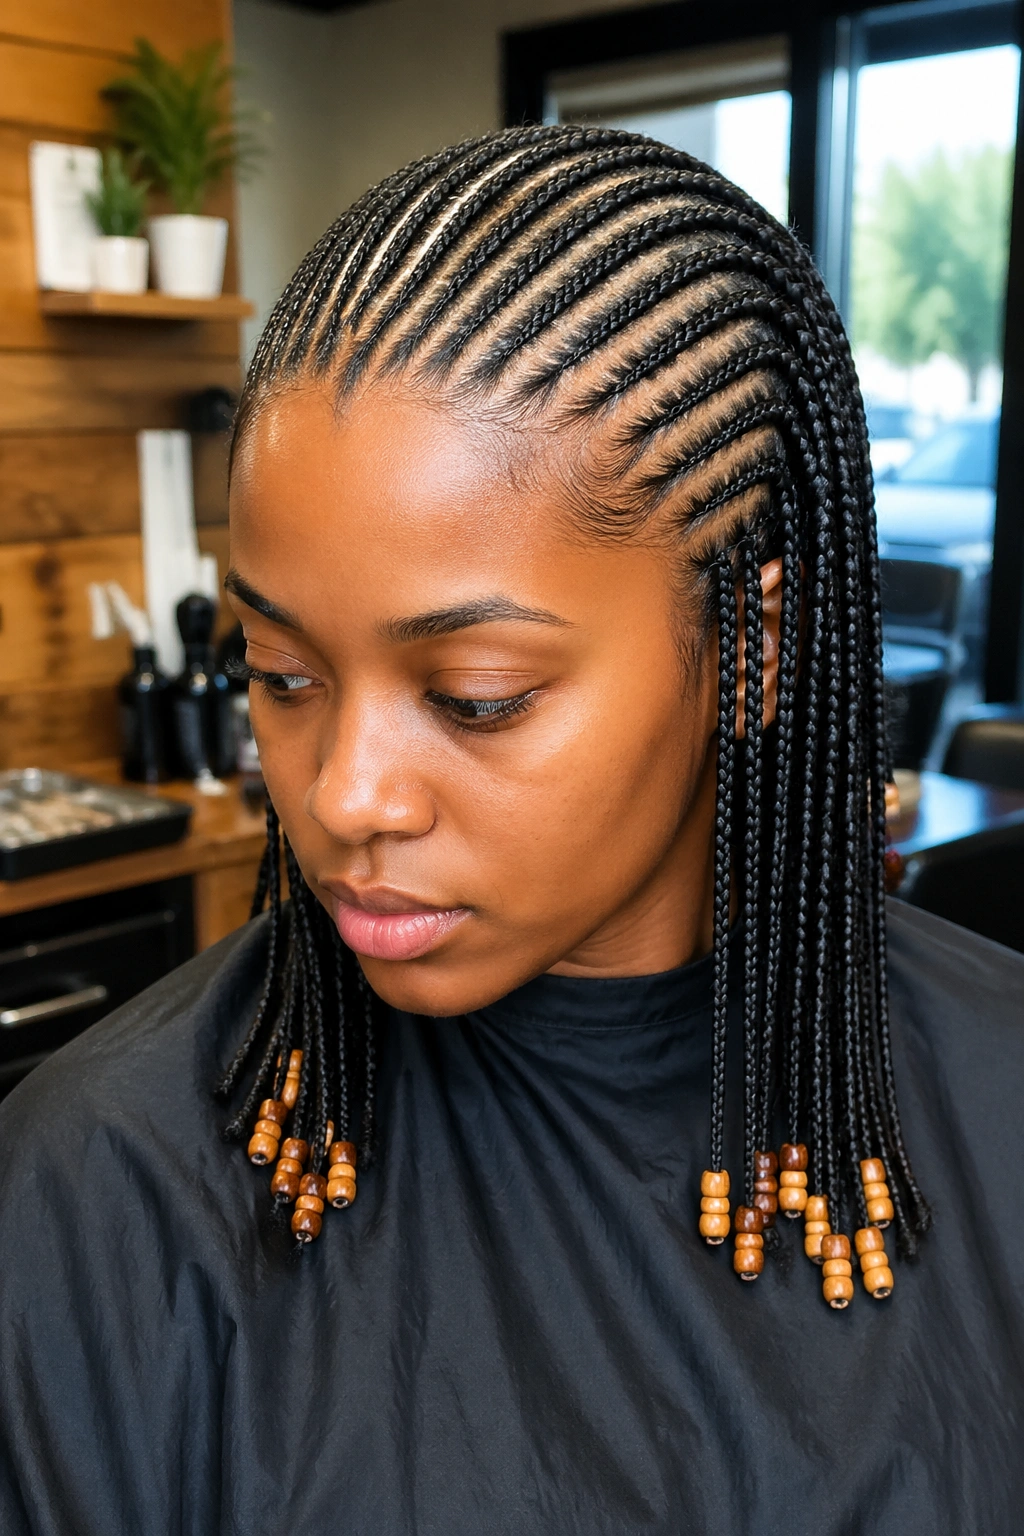
2. Twenty-Five Tiny Cornrows With Hair Beads
Twenty-five thin braids creates an even more delicate, intricate look — and the natural finish of beads at the ends adds rhythm and movement. This count edges into “micro-cornrow” territory where the parts are barely a third of an inch wide.
The install for 25 small cornrows on long hair regularly hits the 7-8 hour mark. It’s a full-day commitment. Eat before you go, bring water, and consider stretching during bathroom breaks because sitting that long stiffens up the lower back.
Beads at the ends create a satisfying clink-clink as you move. Choose lightweight wood or plastic beads if you’re stringing many — heavy metal beads on 25 individual braids becomes a real weight at the back of the head over time. The beads also catch on clothing collars, so factor that into your wardrobe choices for the duration of the install.
A nice variation: bead only every third or fifth braid rather than all 25. The rhythm of beaded-unbeaded-unbeaded-beaded reads as more deliberate and less heavy.
3. Small Cornrows With A Center Part Twenty Total
A clean center part divides the head into two equal halves, each containing 10 small straight back cornrows. The braids on either side mirror each other for a symmetrical, balanced look.
What Makes It Different
The center part adds a clean visual line down the crown that breaks up the field of small braids. Without the part, twenty braids in parallel can read as monotonous. With the part, the eye has somewhere to rest.
Symmetry matters here. Both sides should have the same number of braids, the same part width, and the same length at the ends. Asymmetry that isn’t intentional reads as sloppy work.
This style works well for face shapes that benefit from a vertical line down the center — heart-shaped and oval faces especially.
4. Twenty-Two Small Cornrows With Stitched Detail
Stitch braids have horizontal lines etched into each braid, creating a ribbon-like pattern. Combined with small straight back cornrows on long hair, you get the delicate width of micro-braids plus the textural interest of stitch work.
The stitches are created by deliberately tightening the hair at intervals as the braid progresses. Each tight pull creates a small valley between two raised ridges. Done well, the braids look like miniature railroad tracks running down the head.
Stitch braids on small cornrows take longer than non-stitched versions. Add another 1-2 hours to the install time. The result photographs beautifully because each stitch catches light differently, creating depth that flat cornrows don’t have.
One downside: the tighter pulls during stitching can create more tension at the hairline. Make sure your braider uses a lighter touch on the very front braids to protect your edges.
5. Twenty Small Cornrows With Curved Front Parts
The straight back braids stay straight in the back of the head, but the front parts curve in elegant arcs across the forehead before settling into the parallel pattern. The curves frame the face.
The curves are typically C-shapes or gentle S-shapes drawn in the first 2-3 inches of each braid before they straighten out. The braider needs to plan the curves in advance — drawing them with edge gel before braiding so they can be adjusted if needed.
This style works particularly well for round face shapes because the curved fronts soften the perceived width of the face. The curves redirect the eye in a way that elongates rather than emphasizes roundness.
Expect to pay extra for curved parts. They require more time and skill than straight-line parting.
6. Twenty-Two Small Cornrows With A Side Part
Instead of a center part, the head is divided with a deep side part — about three inches off-center. The result is asymmetrical: one side gets more braids than the other.
Who This Is For
Side parts add personality. Center parts are classic and balanced; side parts are confident and deliberate. People with strong jawlines or angular features tend to look great in side parts because the asymmetry complements their face geometry.
The deeper side has more braids — typically 14-15 — while the shallower side has 7-8. This intentional imbalance is the whole point of the style.
When you sleep, the side part wants to revert to the center. Train it by tying down the deeper section with a satin scarf for the first few nights after install.
7. Tiny Cornrows With Diagonal Parts Twenty Total
The parts run diagonally across the head rather than straight back. The braids angle from one corner of the forehead toward the opposite ear, creating dynamic visual lines.
Diagonal parts make a strong design statement. The eye follows the angles around the head rather than the standard front-to-back flow.
Plan the diagonal angle before starting. A 30-degree angle is dramatic. A 15-degree angle is subtle. Anywhere in between depending on the look you want.
The braids end at varying points along the back of the head depending on where their diagonal line lands. Some braids are longer than others. This is intentional but should be planned so the lengths look graduated rather than random.
8. Twenty Small Cornrows With Wooden Bead Tips
The same straight back small cornrows, but every braid ends with two or three wooden beads strung onto the tail. The wooden beads have a warm, organic look that complements the texture of natural hair.
Wood is the lightest bead material, which matters when you have 20 braids each carrying multiple beads. Heavy beads at the ends pull on the braid base and accelerate frizzing.
Color-wise, wooden beads come in natural light tan, dark walnut, painted bright colors, and burned/etched designs. Light wood looks subtle. Painted beads look festive. Etched beads look ceremonial.
Secure beads with small clear elastics at the bottom. Heat-sealing the kanekalon end below the bead also works to prevent slippage.
9. Twenty Small Cornrows In A Diamond-Shaped Pattern
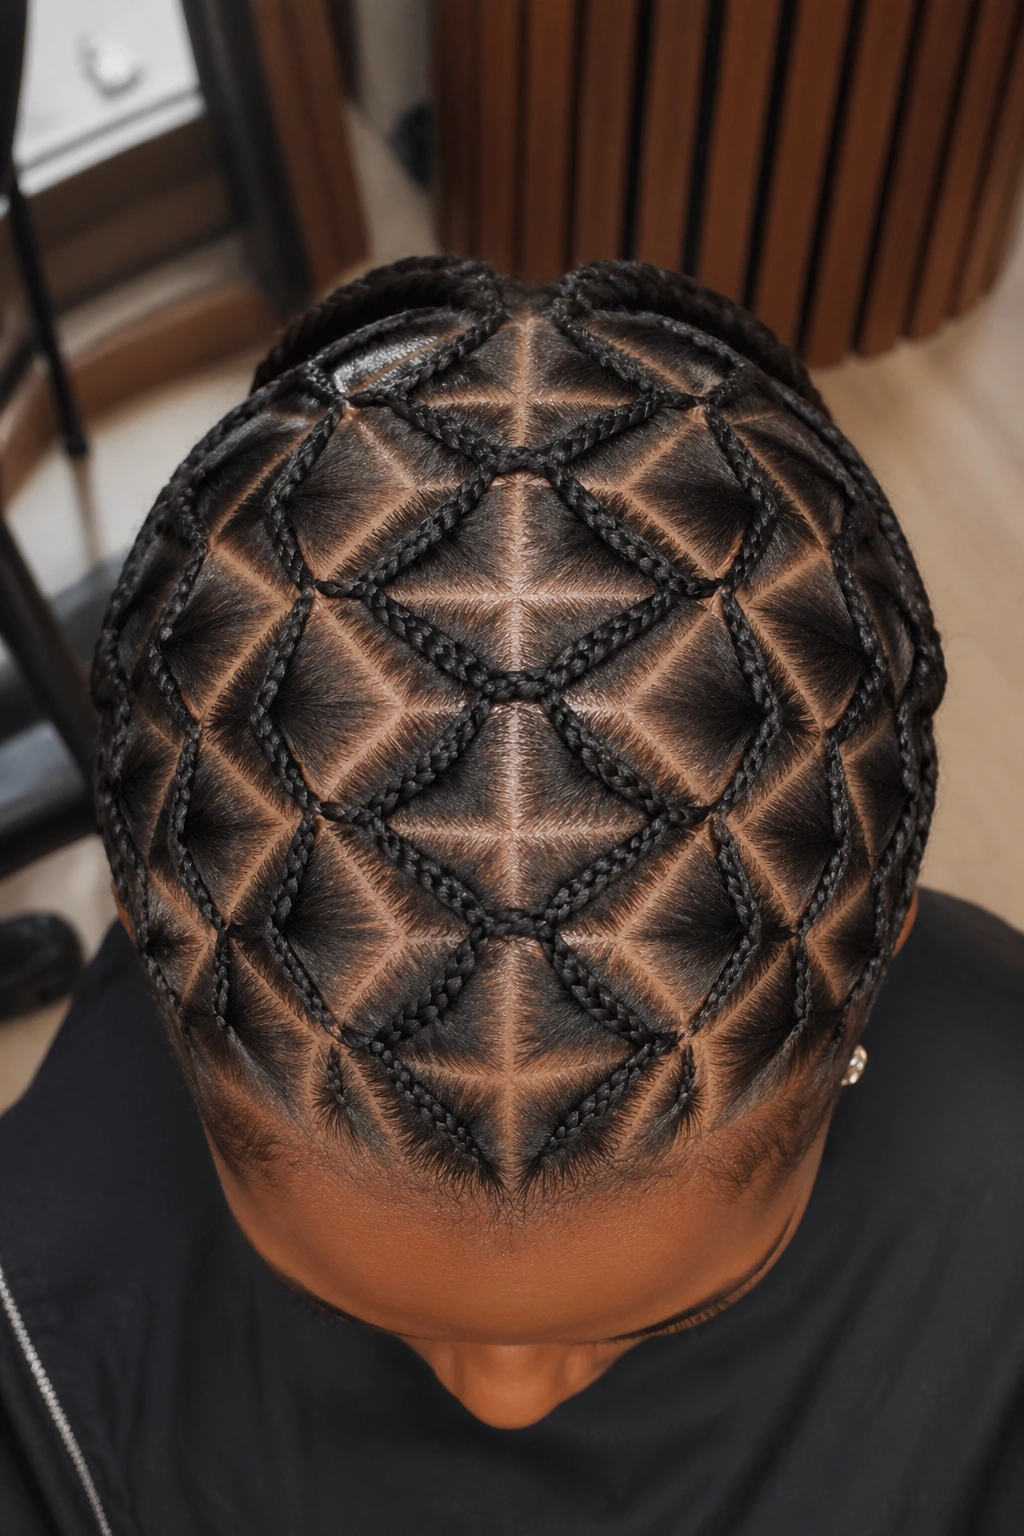
Instead of straight parallel lines, the parts form diamond shapes across the head. Each diamond contains a smaller cornrow that runs through its center, with the surrounding diamonds creating a quilted, geometric effect.
Styling Tips
Diamond patterns require advanced parting skills. Most braiders charge a premium for geometric designs because the planning and execution are more demanding than straight lines.
The diamonds can be small (1 inch per side) for a dense pattern, or larger (2-3 inches per side) for a more visible geometric statement. Smaller diamonds with more braids per row create a textile effect; larger diamonds make each shape a focal point.
This style photographs incredibly well from above and from the back. It’s the kind of style worth booking a photographer for to document properly.
10. Twenty-Two Small Cornrows With Long Loose Ends
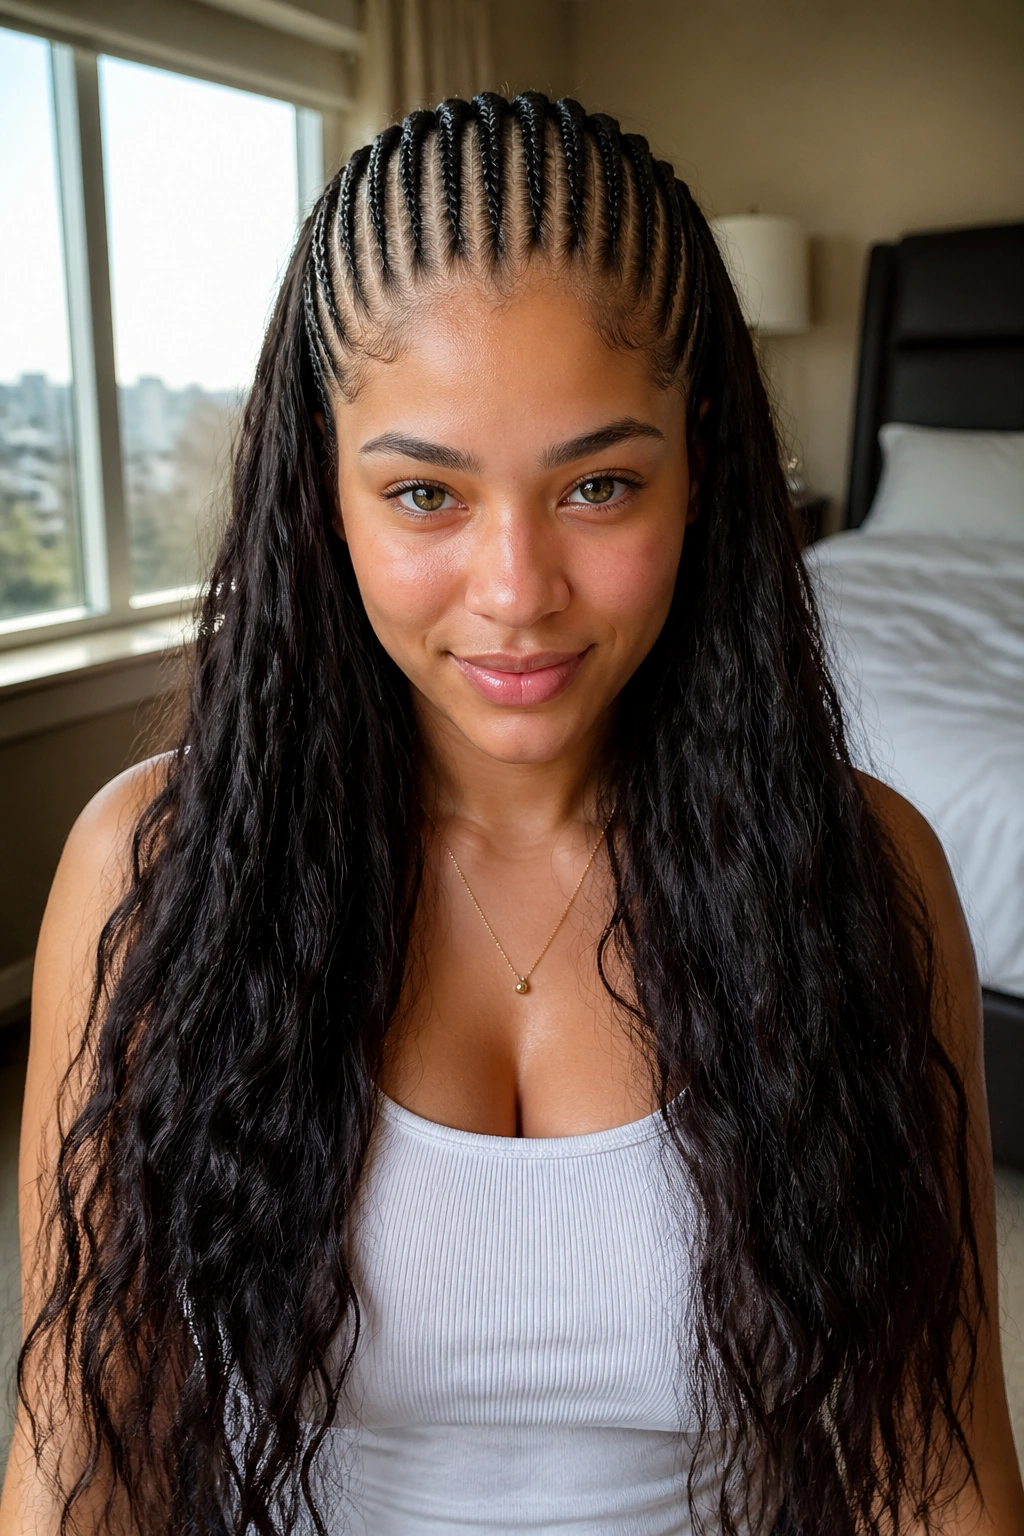
The cornrows are tight against the scalp from forehead to crown, but the back portion of the braids is left loose, with the natural hair flowing out like a fringe at the end of each braid.
The transition from braided to loose hair happens around the crown or the upper back. After that point, the hair is left in its natural texture — twisted, wavy, or curly depending on your texture.
This style is shorter-lived than fully braided versions because the loose ends tangle and frizz faster. Expect 10-14 days max before the loose portions need detangling and possibly re-braiding.
The loose ends can be styled differently each day. Curled with rods. Stretched into puffs. Wrapped into temporary buns. The variety extends the style’s wearability even if the loose portions need more daily attention.
11. Small Cornrows Twenty Total With A Pop Of Color
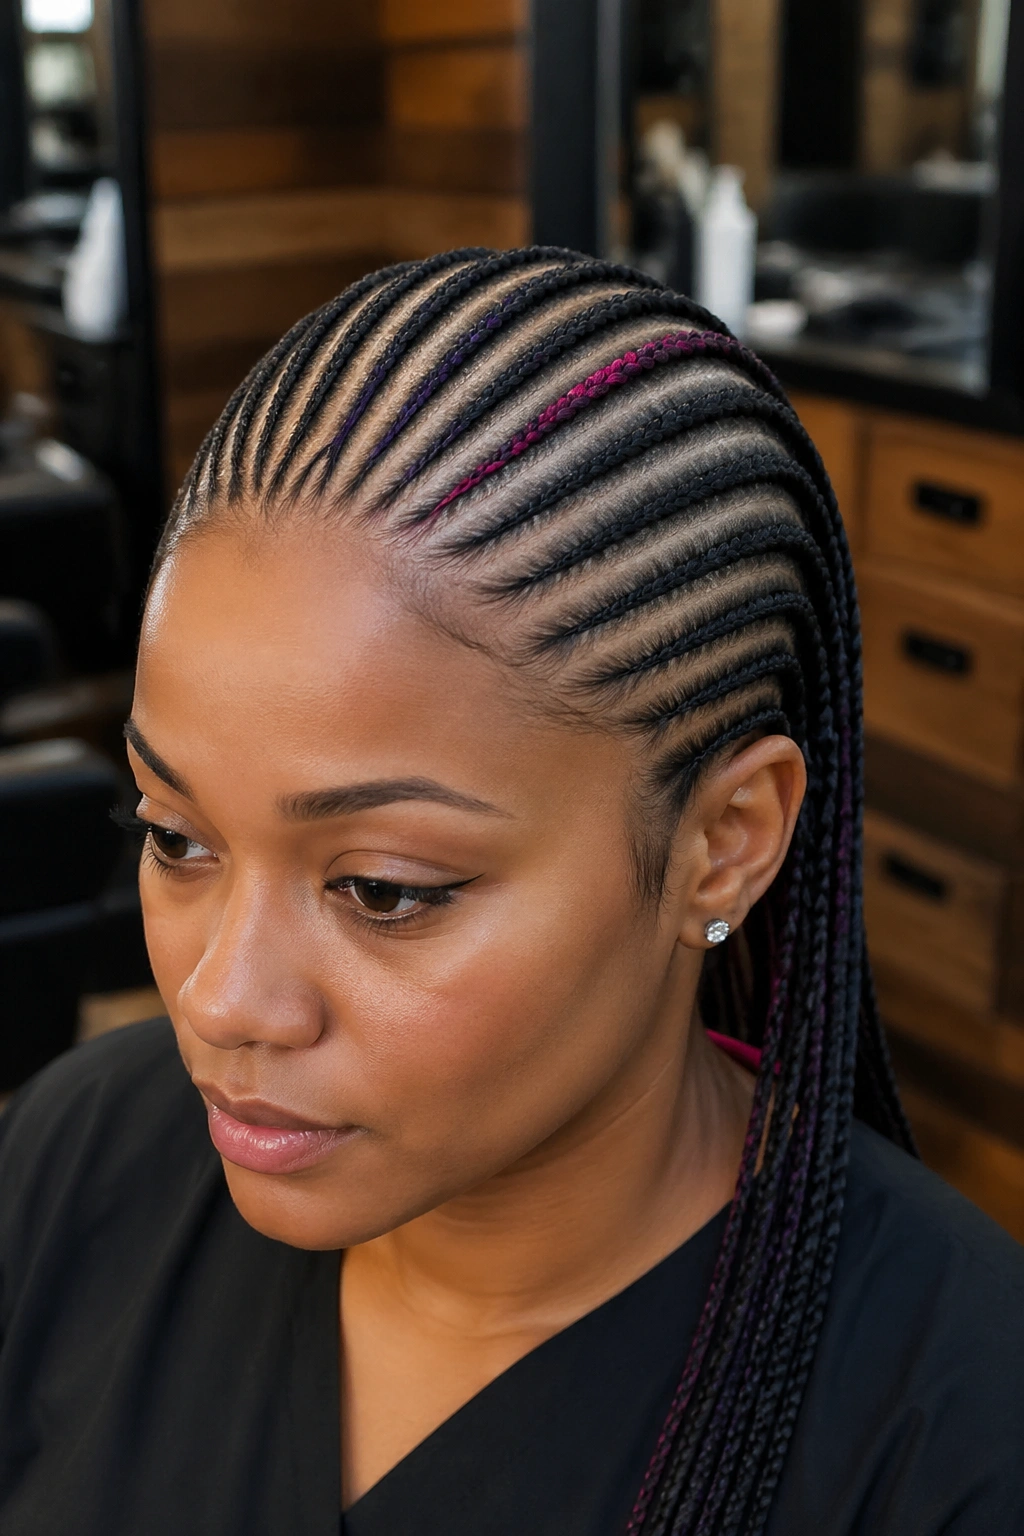
Out of 20 small cornrows, two or three are braided with colored extension hair — typically a bright shade like burgundy, copper, or electric blue. The colored braids are scattered, not clustered.
The visual effect is a flash of color among the natural-toned braids. When you move, the colored braids peek out from between the others, creating moments of unexpected detail.
Choose color placement carefully. Front colored braids draw attention to the face. Back colored braids create surprise reveals when you turn your head. Side colored braids show up in profile.
For Black women with darker skin tones, jewel tones (deep burgundy, emerald, sapphire) tend to look richer than pastel shades.
12. Twenty Small Cornrows With A Beaded Crown Detail
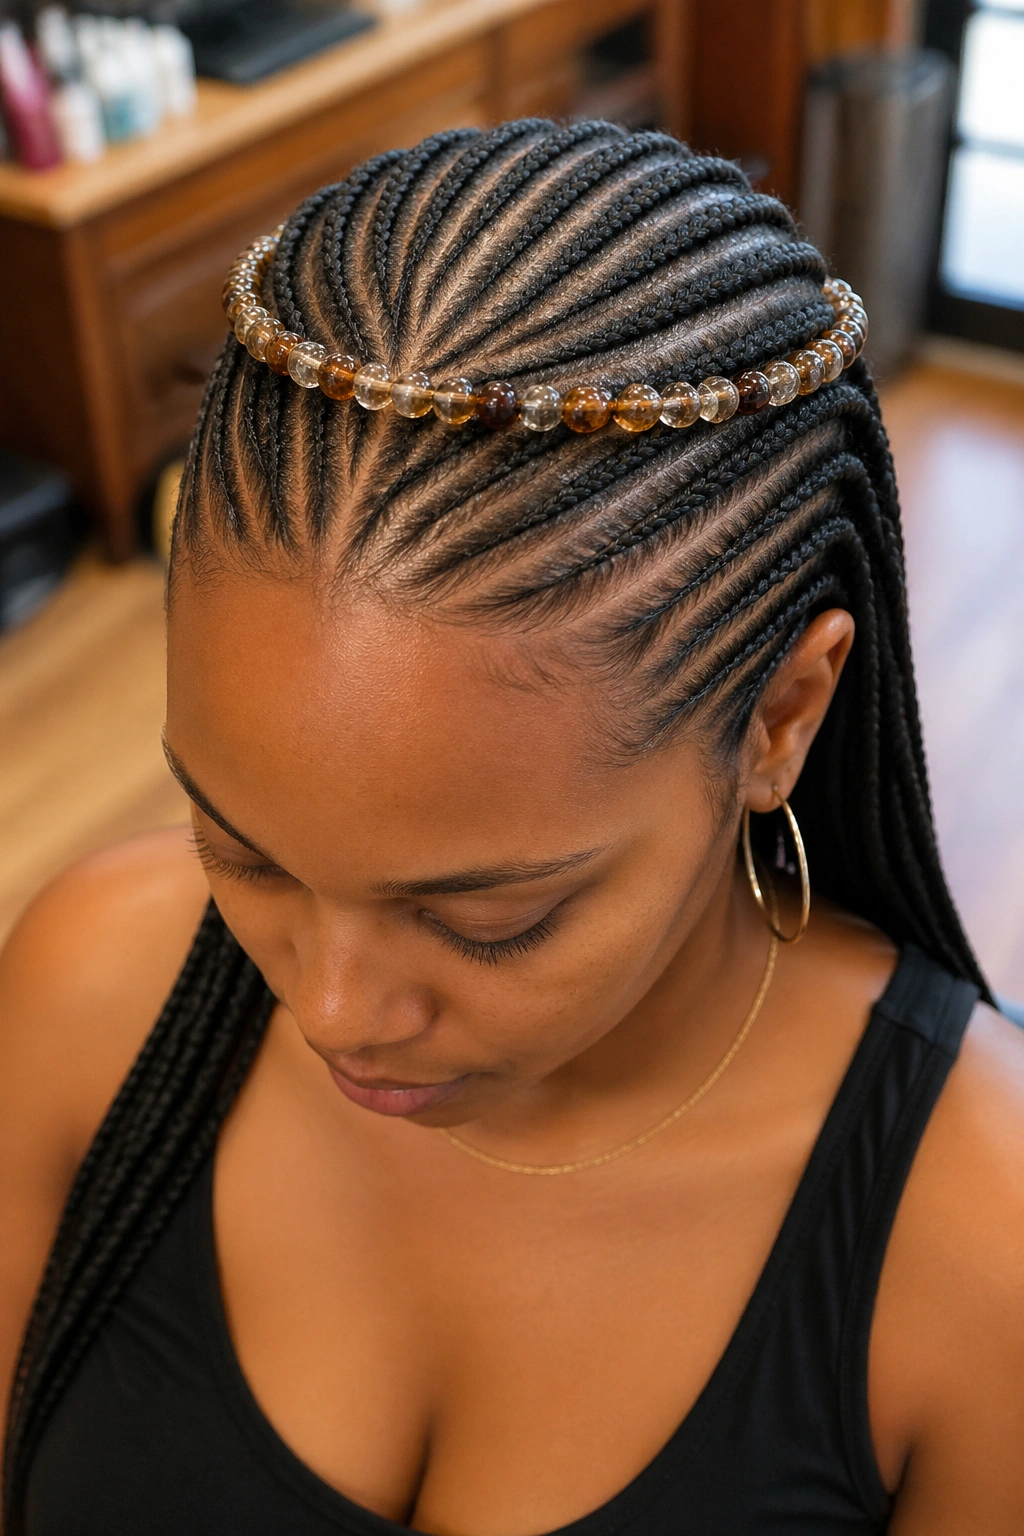
The cornrows are standard small straight backs, but a row of beads is woven into the braids around the crown of the head, forming a horizontal band of beads that circles the head like a crown.
The Catch
The crown band requires planning. Each bead is threaded through the braid at a specific point — typically about 4-5 inches from the scalp — and held in place with elastic above and below.
This adds significant install time (1-2 hours) because each braid needs the bead threading done individually.
The beaded crown looks ceremonial and elaborate. It’s a great choice for weddings, milestone birthdays, or photo shoots where you want a signature visual element.
13. Twenty-Two Tiny Cornrows With Natural Length Showcase
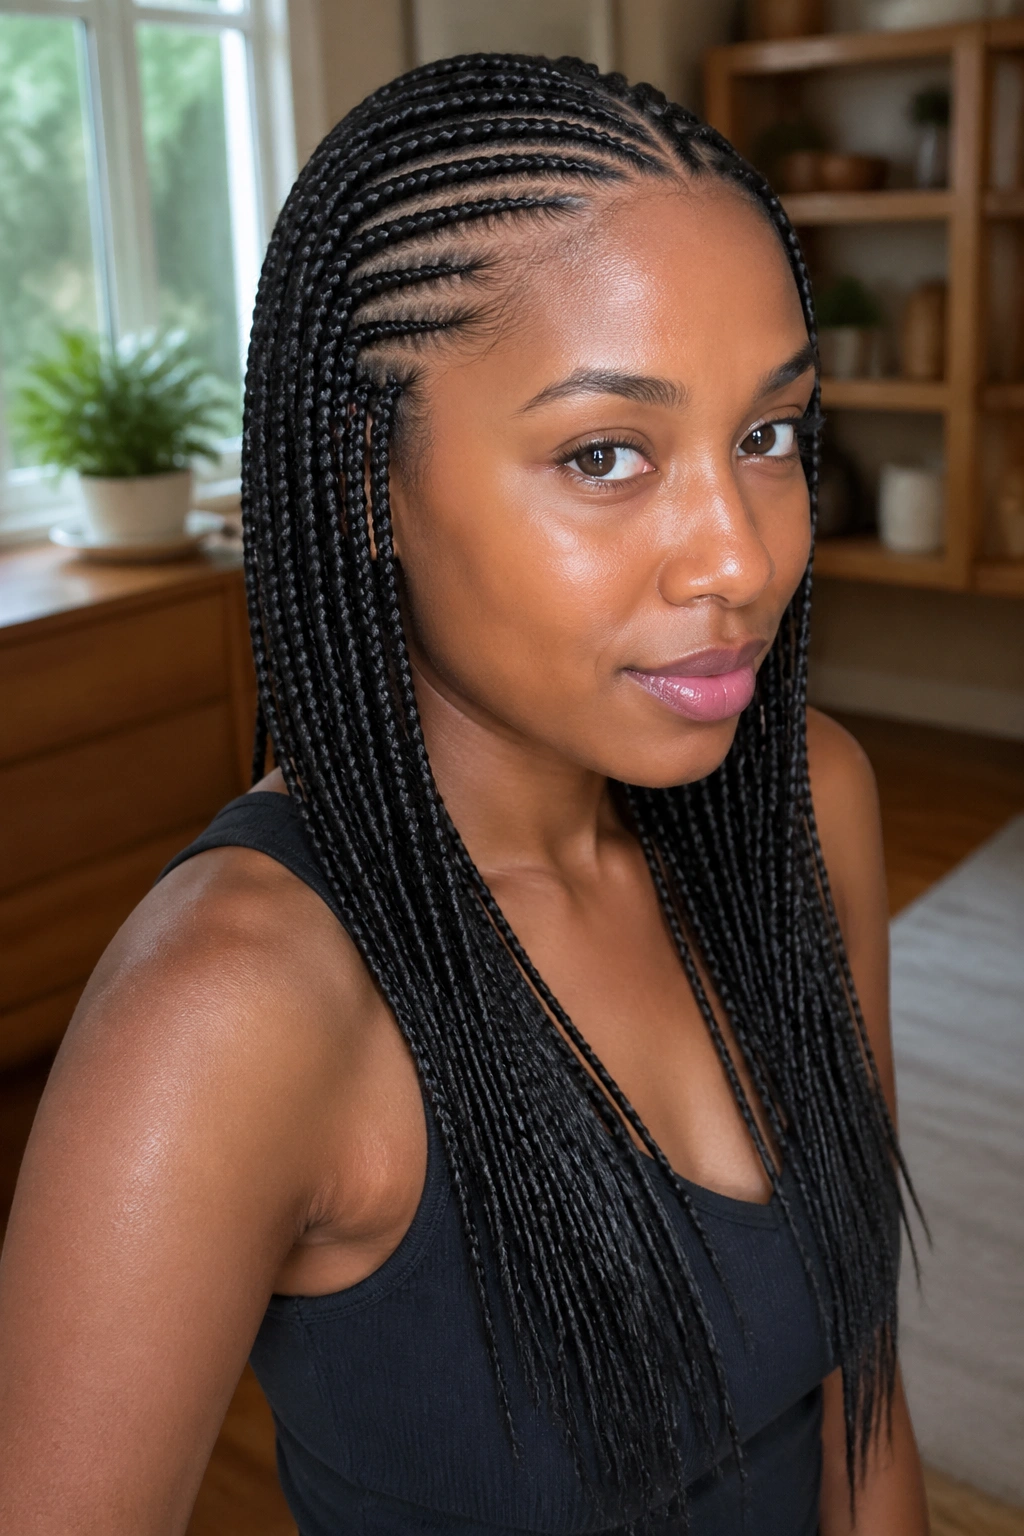
Done without extensions to highlight your actual hair length. The braids are tight and small at the scalp, but the tails are pure natural hair flowing free at the bottom of each braid.
This is a style for people proud of their hair length and texture. No kanekalon. No added bulk. Just your hair, braided neatly and showing what you’ve grown.
The end of each braid will have whatever your natural texture does — coiled, curled, or wavy. Some braiders heat-seal these ends to prevent unraveling, but for natural hair only, that step isn’t necessary.
The style ages differently than extension styles. Without kanekalon, the ends are softer and don’t show frizz the same way. The braids may loosen slightly faster, but they don’t develop that “stuffed” look that overaged kanekalon styles can have.
14. Small Cornrows In Multiple Lengths Twenty Total
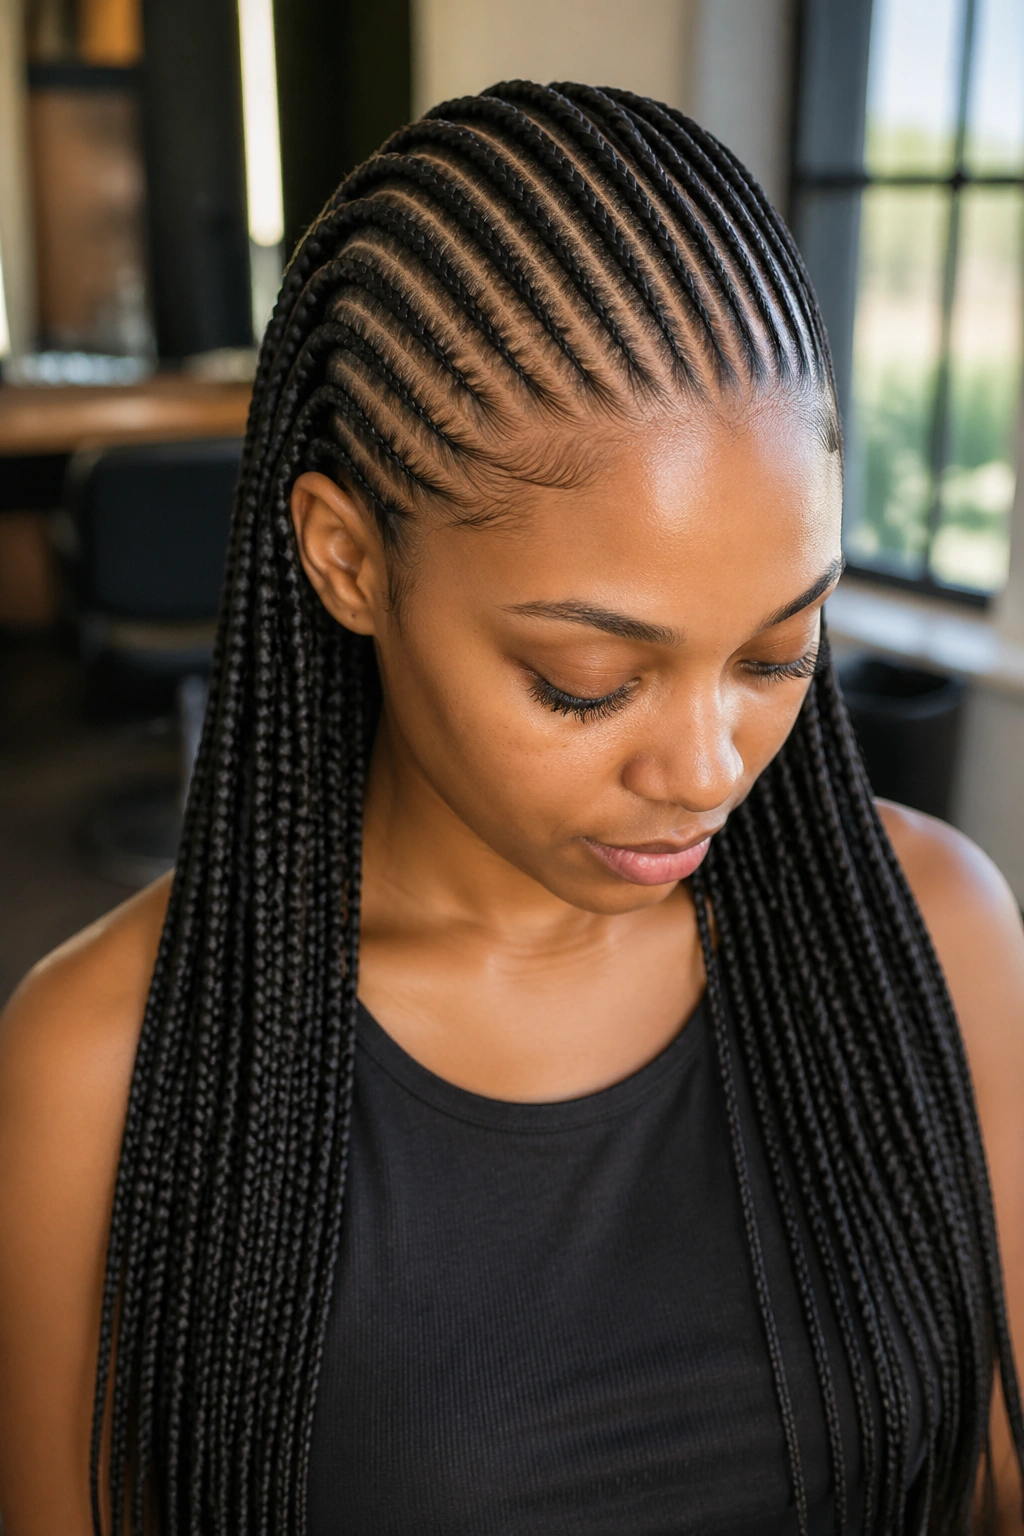
Of the 20 small cornrows, half are full length while half are styled shorter — either deliberately ended at the shoulders or wrapped under for a layered effect.
Mixed lengths create dimension. The longer braids hang past the back, while the shorter braids frame the face and shoulders. The visual effect is layered and dynamic rather than uniform.
Plan the placement carefully. Shorter braids in the front and longer braids in the back creates a forward-falling layered look. Random length placement throughout the head creates a more avant-garde, asymmetric feel.
This style is harder to maintain because the different lengths require different care. Shorter braids tangle less but need styling more often. Longer braids hang independently and need bonneting at night to prevent frizz.
15. Twenty Small Cornrows With Gold Cuffs
Metal cuffs slide onto specific braids to add hardware accents. Gold is the classic choice — warm, luxurious, photographs well — but silver, rose gold, and copper cuffs all work.
Maintenance Notes
Cuffs don’t need daily attention but do need occasional adjustment. They can slide down a braid over time, especially in the first few days of install before the braid settles fully.
- Place cuffs on 4-6 braids out of the 20 for selective accent
- Position cuffs at varying heights for asymmetric visual rhythm
- Choose cuffs that match other jewelry you typically wear
Pro tip: When you take the style down, save the cuffs. They can be reused on future installs for years if you keep them in a dedicated container.
16. Twenty-Two Small Cornrows With A High Bun At The End
The braids feed into a tight, high bun at the crown of the head. The small braids gather at the gathering point and twist up into a coiled bun on top.
A high bun made from 22 small braids has a different texture than a bun made from loose hair. The braids stay defined within the bun shape, creating a textured, detailed surface that catches light interestingly.
The bun should be wrapped tightly to hold its shape over multiple days. Use bobby pins along the inside of the bun to anchor each loop, then smooth the exterior with edge gel.
17. Small Cornrows With Hair Tied Back Twenty Total
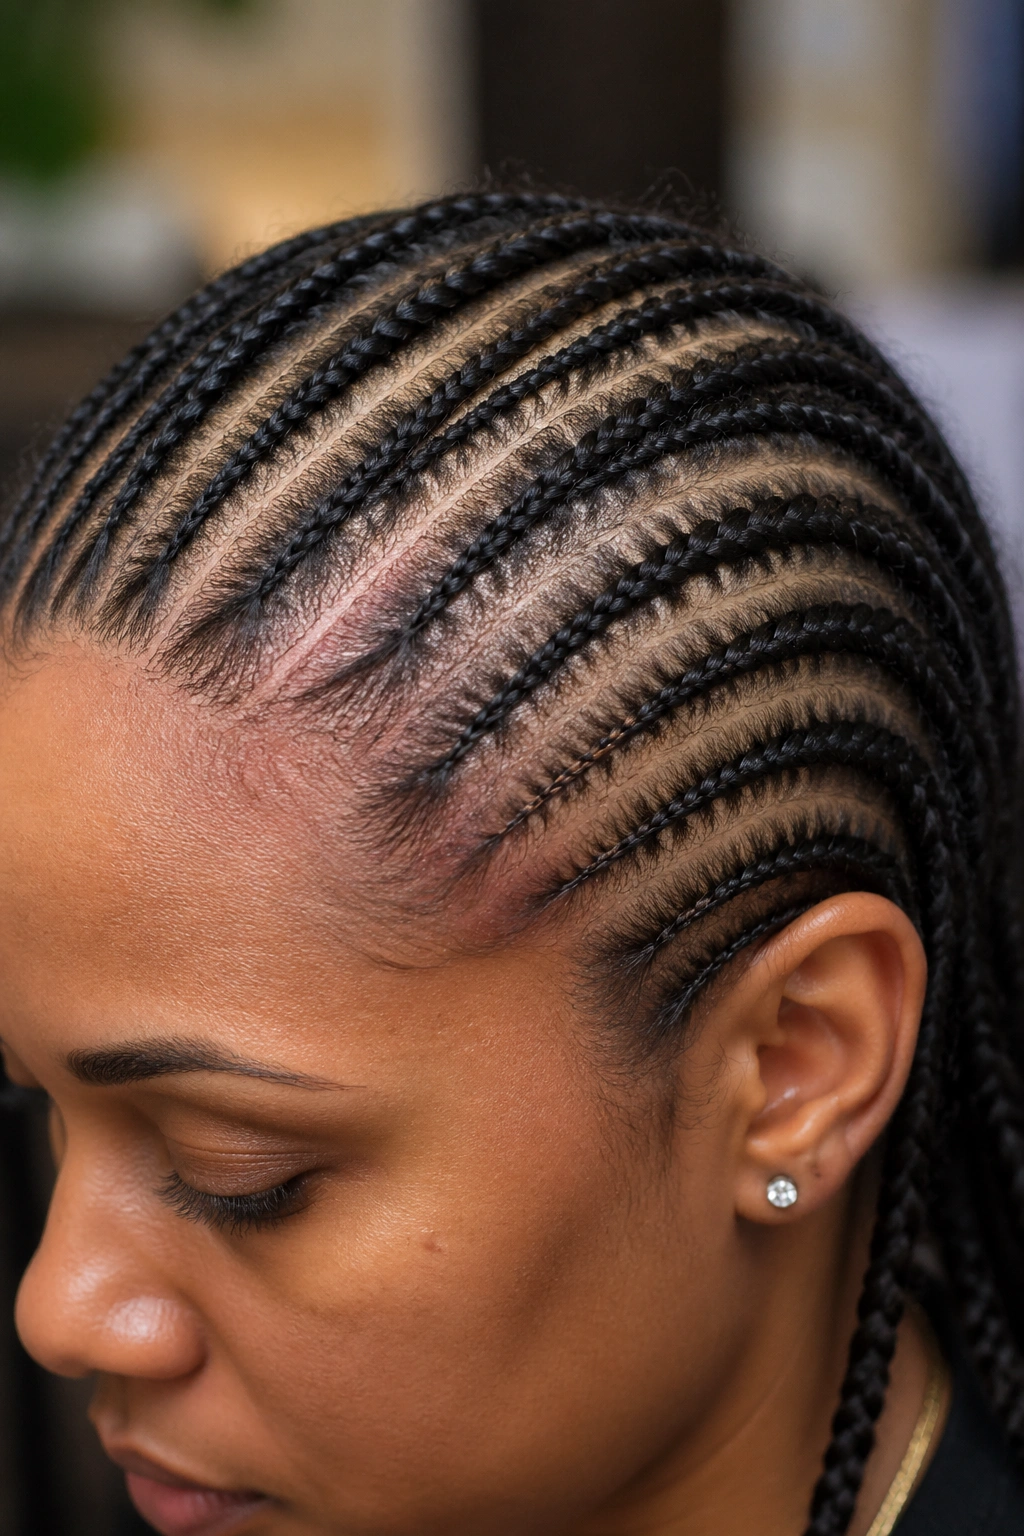
Same parting pattern as a standard 20-braid install, but the braids feed into a single low ponytail at the nape. From the front, it looks like a clean head of small braids. From the back, the long pony hangs straight down.
This combination is professional-friendly because the pony keeps the braids from swinging around during meetings or commutes, but the small cornrows still read as polished hair styling rather than a quick pony.
Use a fabric-covered elastic to gather the pony — uncovered rubber bands snag on small braids and cause damage at the gathering point.
18. Twenty Small Cornrows With A Headband Wrap
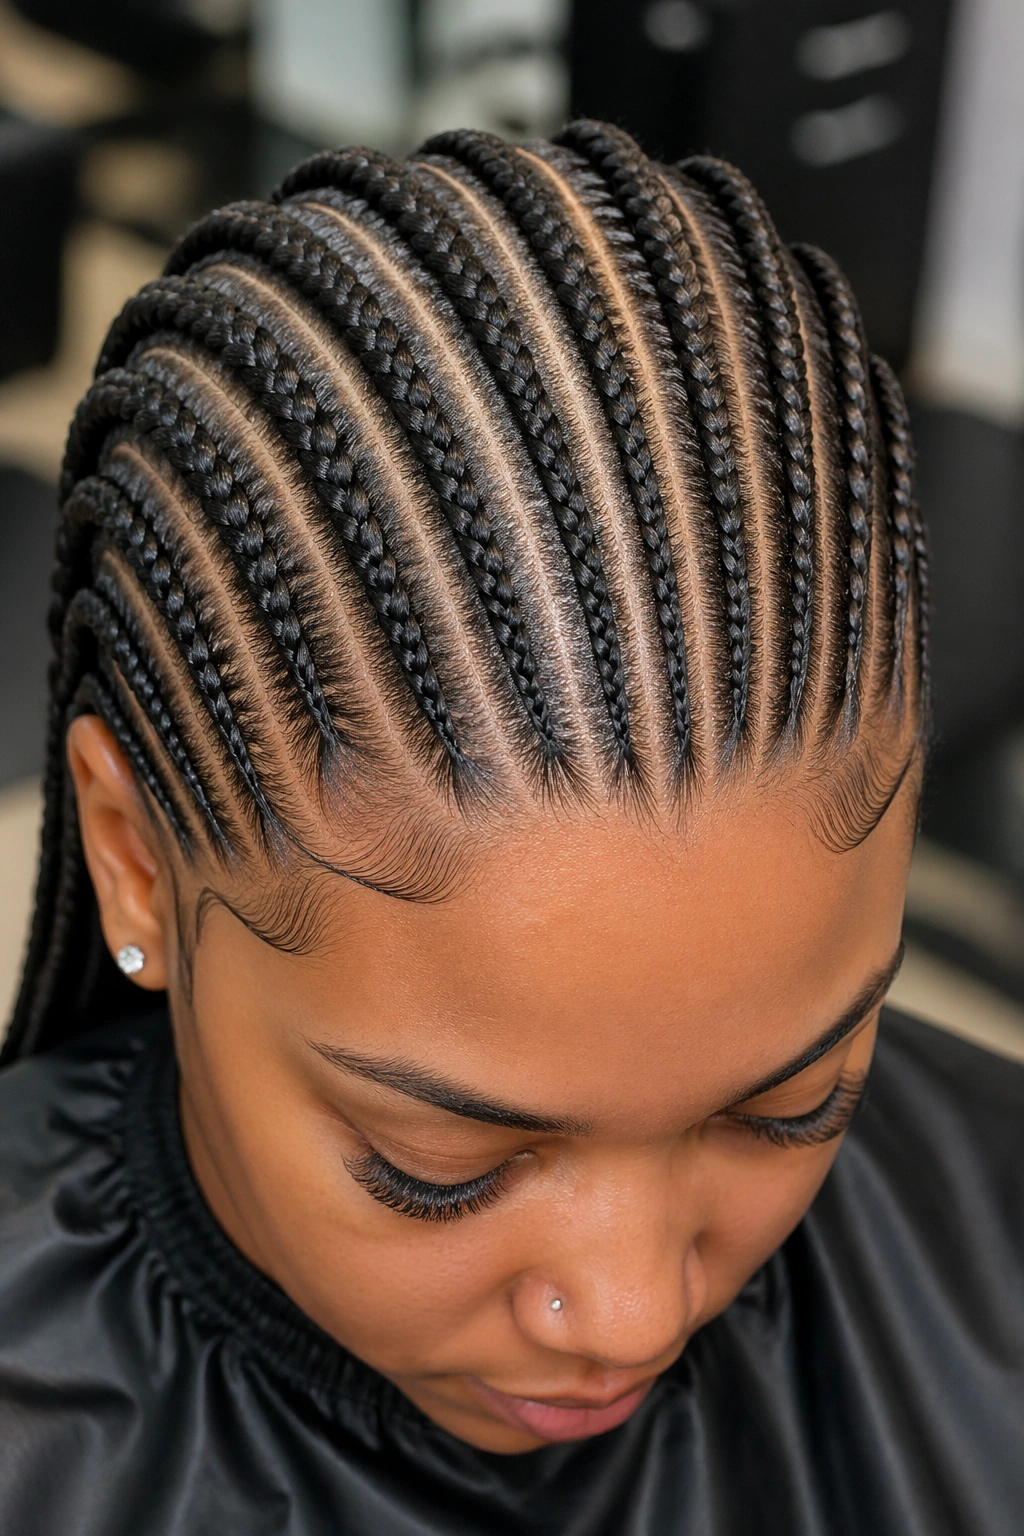
A silk or satin headband sits across the front of the head, adding a fabric accent that contrasts with the braided texture below it. The headband can match an outfit or pop in a contrasting color.
Choose silk or satin headbands rather than elastic ones. Elastic headbands compress the front braids and can cause frizz at the contact points. Silk and satin slide smoothly without damage.
Wear the headband across the forehead for a vintage look, or further back along the crown for a more bohemian feel. Both styles work — they just send different aesthetic signals.
19. Twenty-Two Tiny Cornrows With Twisted Sections
Some of the small braids are styled as cornrows, while others are gathered into two-strand twists. The mix creates textural variation across the head — flat braids next to dimensional twists.
What To Watch For
The twists need different maintenance than the cornrows. Twists tend to unravel faster, especially at the ends, so they need more attention to keep their definition.
A typical mix is 70% braids and 30% twists, with the twists clustered in specific zones (like the crown or the front) rather than scattered randomly.
This style is best for people who want to play with texture without committing to a fully different look. The cornrows give structure; the twists add softness.
20. Small Cornrows With A Side Sweep Twenty Total
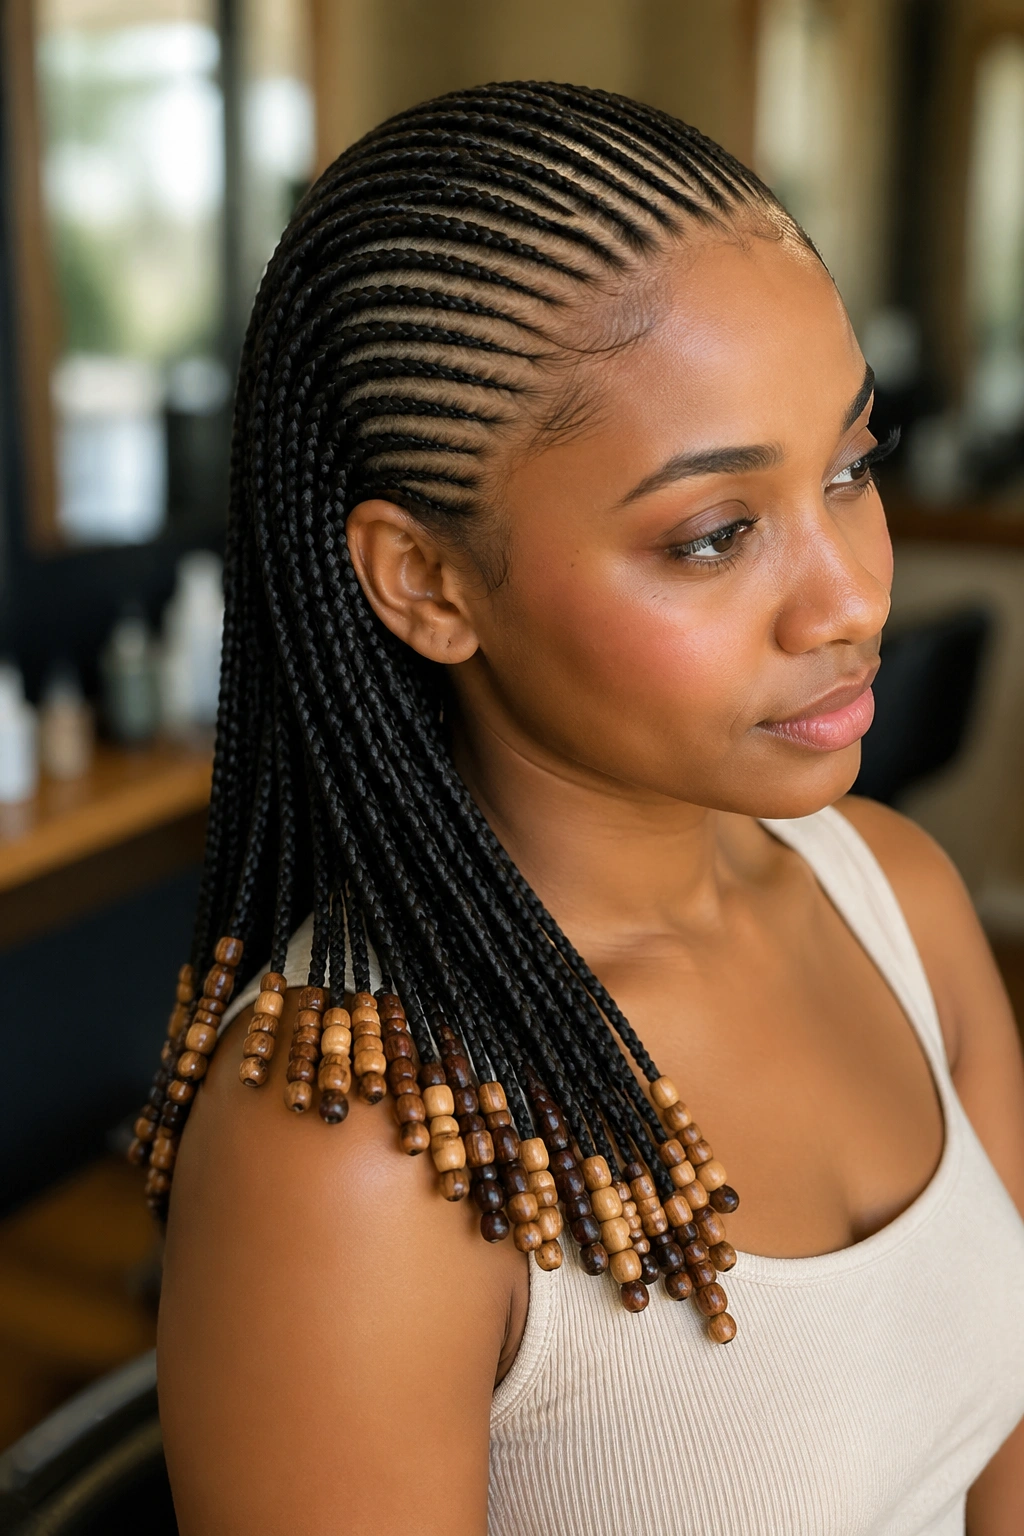
All 20 braids angle to one side rather than running straight back. The starting points are at the hairline, but they all end at the opposite shoulder, creating a unified diagonal sweep.
The sweep is more pronounced than a simple side part. The braids are actively angled all the way down, not just parted off-center at the top.
This style drapes well over one shoulder, which is flattering for off-shoulder tops or evening wear. It also gives a different photo angle than straight-back styles, which is part of its appeal.
The braids on the “downhill” side of the sweep land closest to the shoulder and tend to be the longest visually because of where they fall on the body.
21. Twenty Small Cornrows With A Braided Crown Wrap
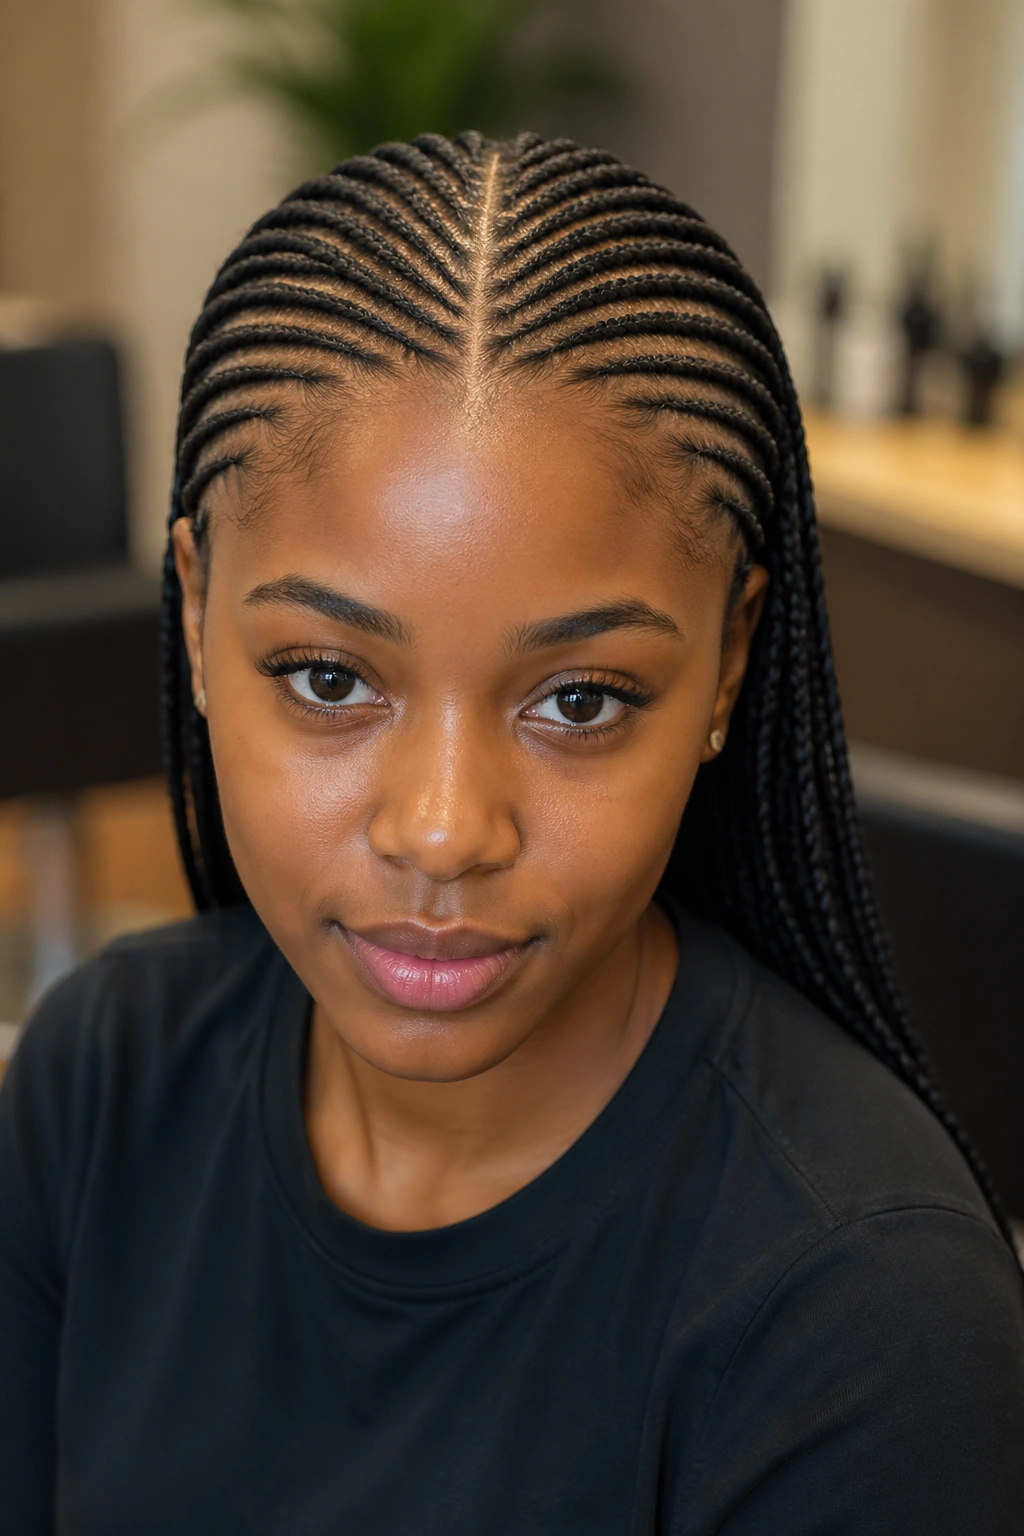
After installation, two of the braids from each side are pulled across the top of the head and pinned in a crown formation. The remaining 18 braids hang free below.
The crown braids create a halo effect around the upper portion of the head. The hanging braids give the silhouette its length. The combination is regal — like a literal crown built from your own hair.
Use bobby pins matched to your hair color to secure the crown braids. Visible pins detract from the look. Tucked-in pins disappear into the braids.
22. Twenty-Two Small Cornrows With Layered End Treatment
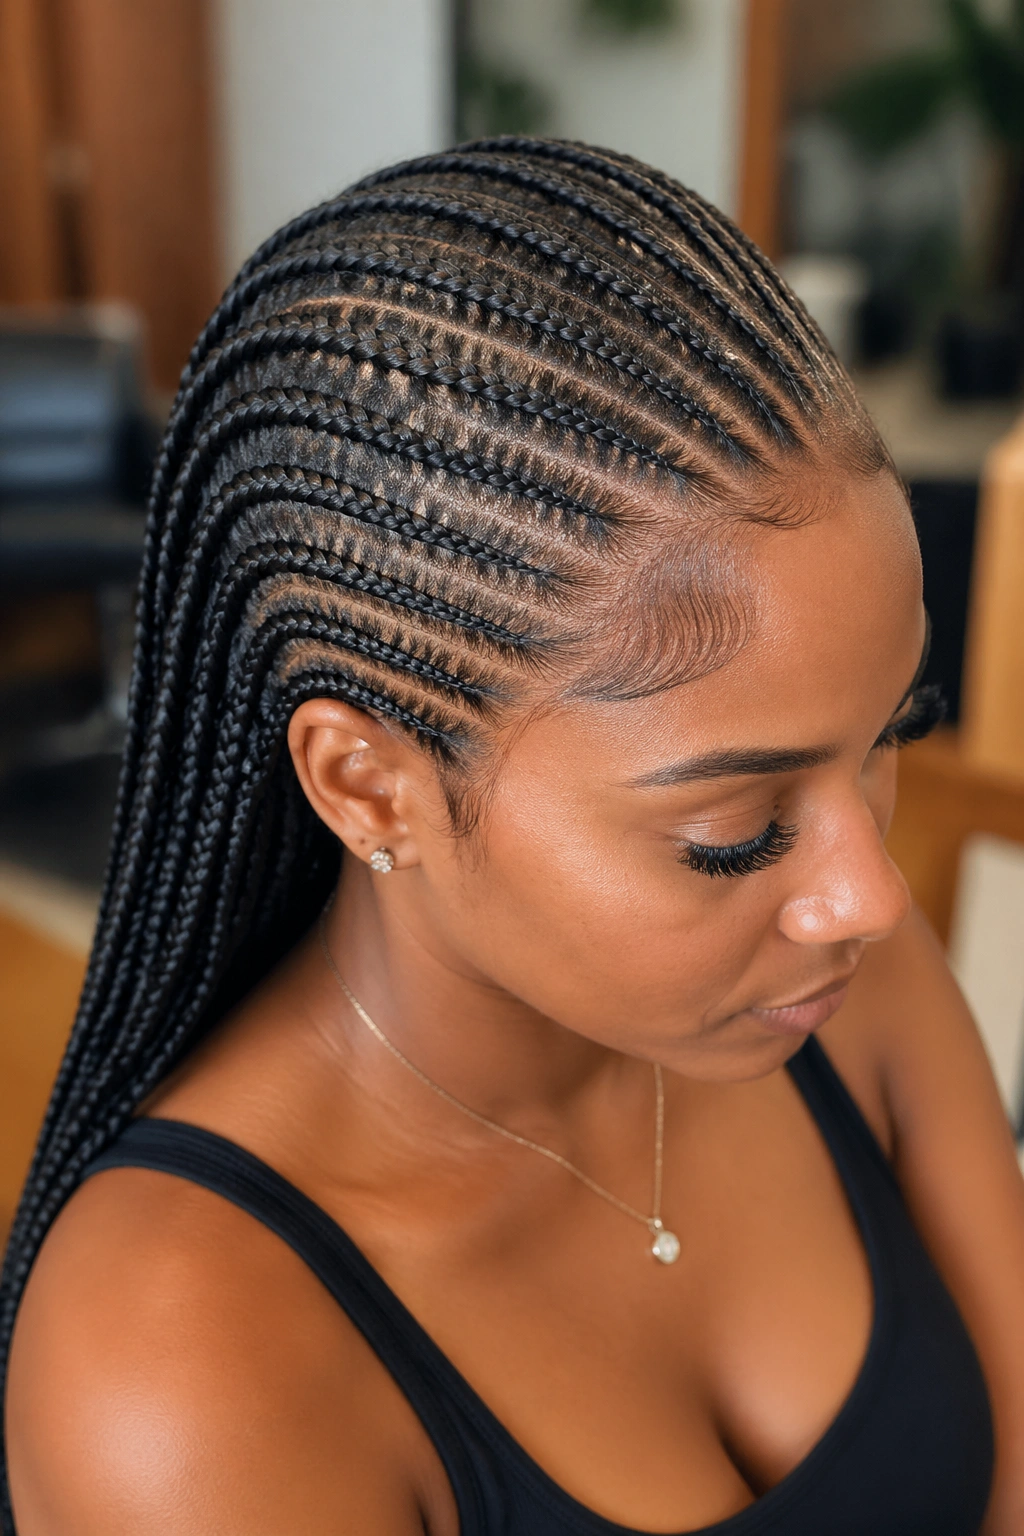
Each braid ends with a different finish — some with beads, some with cuffs, some with thread wraps, some with simple elastics. The variety creates visual interest at the bottom of the style.
The challenge is keeping the layered ends from looking chaotic. Each finish should be intentional and balanced across the head, not random.
A good approach: pick three or four end treatments and rotate them in a pattern. For example, every fifth braid gets a bead, every fourth braid gets a cuff, and the remaining braids get thread wraps.
Day To Day Care For Small Cornrows
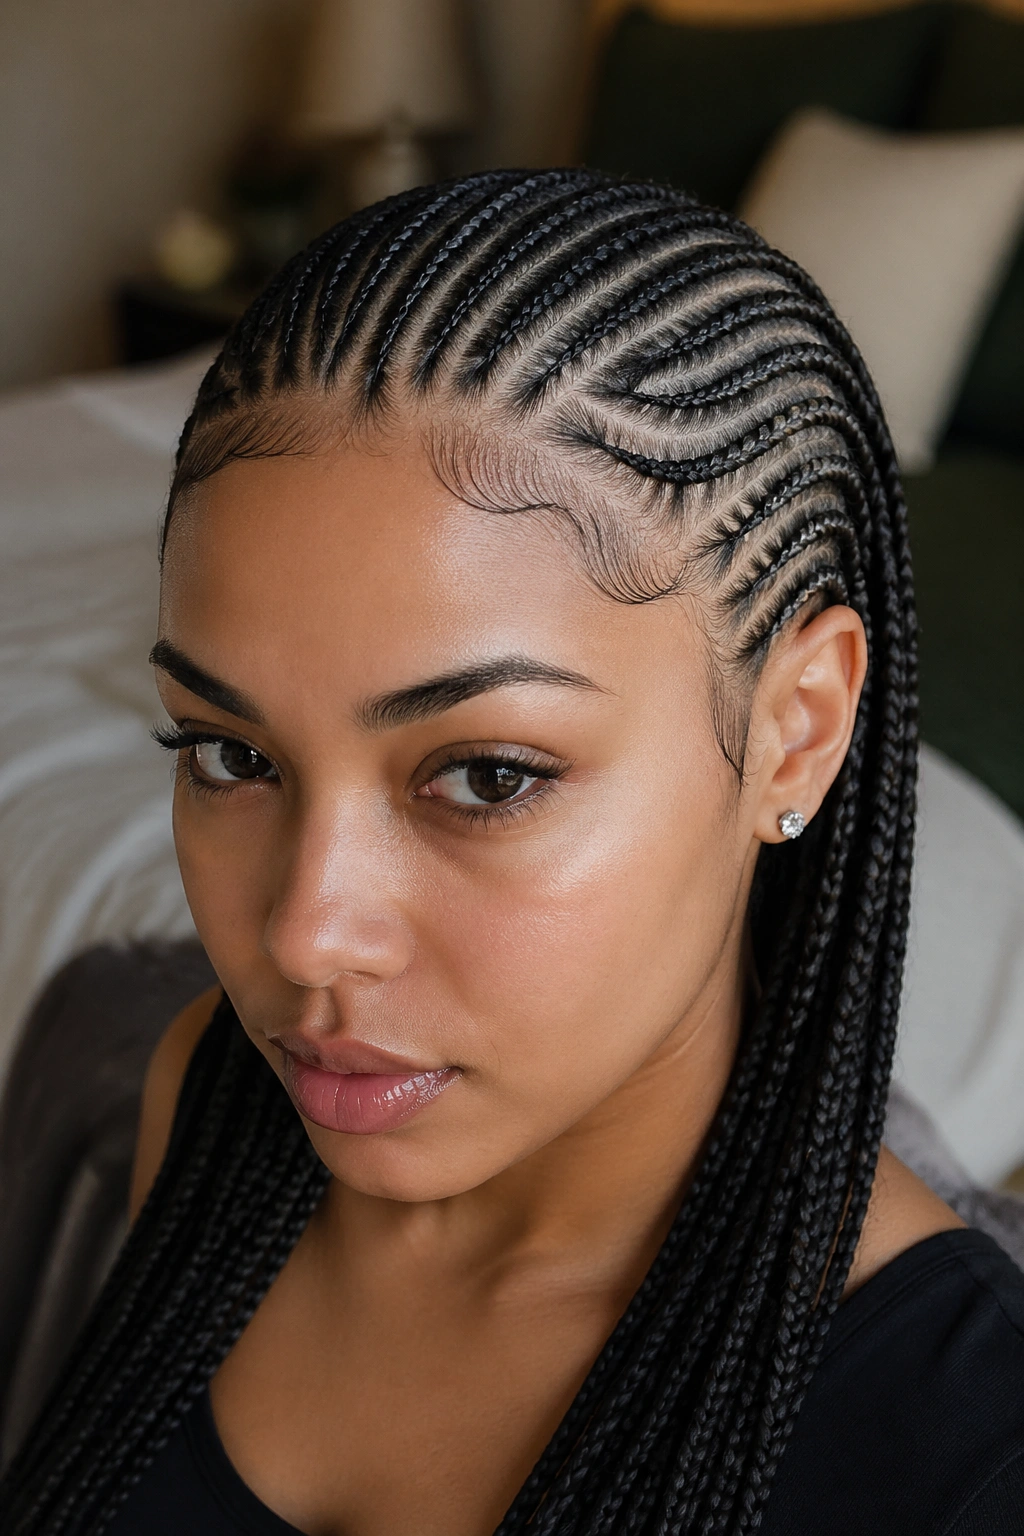
Hydration matters more for small cornrows than for jumbo braids. The smaller braid surface dries out faster because there’s less hair mass to retain moisture. Mist with a water-glycerin-leave-in mix every other morning, focusing on the scalp first and then lightly along the braid length.
Avoid heavy butters and oils. They build up on small braids and create dark, greasy residue near the scalp. Light oils like jojoba or argan are safe in small amounts. Stick to a few drops at a time, applied directly to the scalp with a pointed applicator.
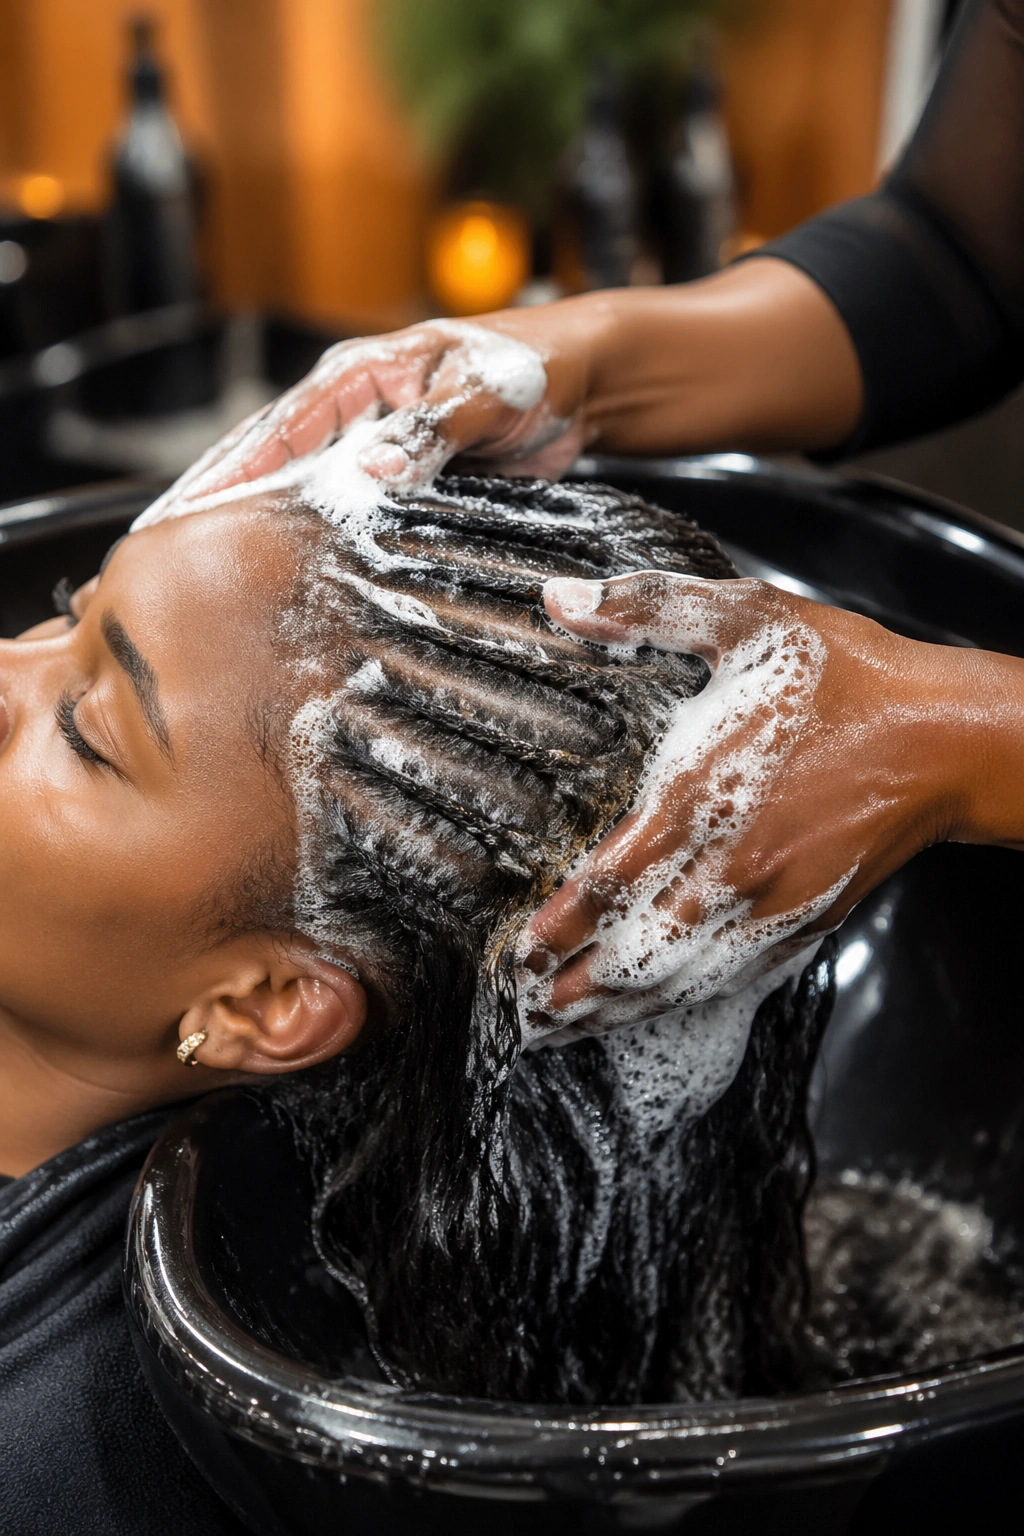
Wash every 10-14 days with diluted shampoo. Squeeze the suds onto the scalp through a squeeze bottle, work it in gently with fingertips, and rinse thoroughly. Don’t scrub the braids themselves.
Scalp Care Throughout The Wear
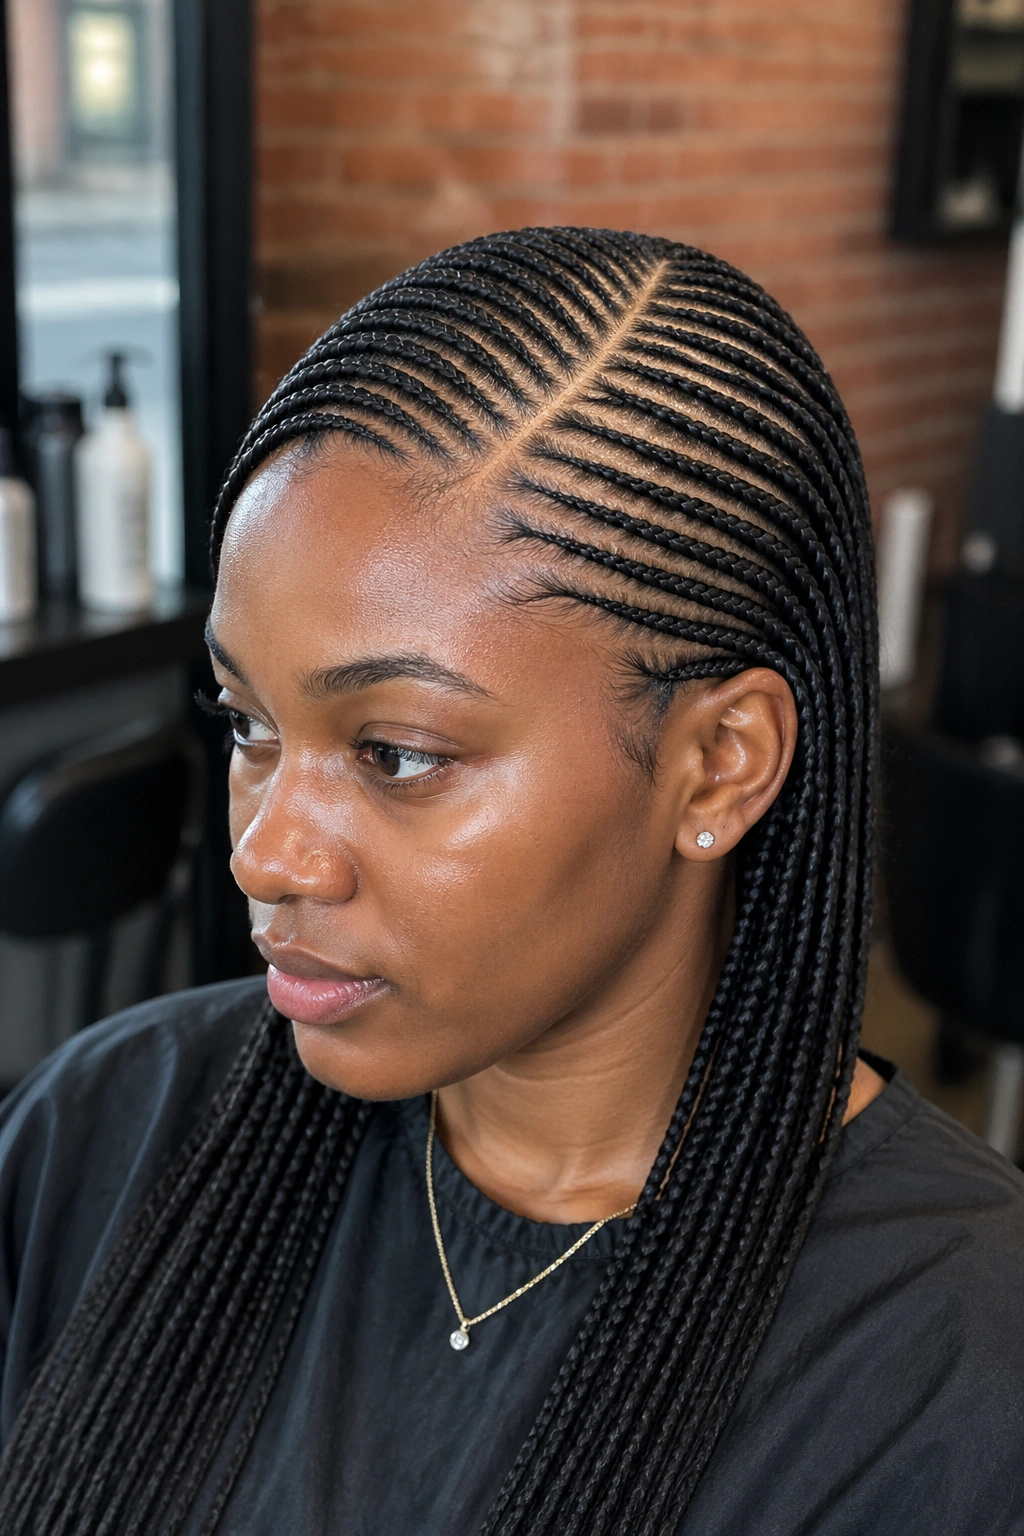
Small cornrows expose more scalp than jumbo styles because the braids are narrow. This makes scalp care both easier (better access) and more important (more visible scalp area to maintain).
Apply a scalp serum twice a week. Tea tree oil mixed with a carrier oil works for itch prevention. Rosemary oil supports hair growth. Peppermint oil cools and tingles, providing relief for itchy spots.
Watch for any persistent itching, redness, or bumps. Small cornrows can occasionally trigger reactions to the kanekalon (if extensions were used) or cause folliculitis from sweat trapped near the scalp. Catching issues early prevents bigger problems.
How To Take Down Without Damage
Takedown for 20-25 small cornrows is a multi-hour project. Don’t rush it.
Start by spraying each braid with diluted conditioner and water mix. Let the braids sit damp for 5-10 minutes to soften. Then work braid by braid from the ends up — gently pulling apart the plait and combing through with a wide-tooth comb.
Expect significant shedding. A month of trapped shed hair will release at takedown. The pile will look alarming. It’s normal.
Do not yank or rush. Small braids that have been in for three to four weeks have the natural hair tightly woven against itself. Ripping through this creates breakage at the hair shaft and damages your length.
After takedown, wash with clarifying shampoo, deep condition for 30+ minutes, and apply a protein treatment if your hair feels weak. Rest your scalp for 48-72 hours before installing any new style.
Common Issues And How To Solve Them
Loose braids by week two usually mean the install was done on slippery hair or with insufficient tension. There’s not much to do once it’s happened — you can re-braid the loosest sections, but full re-installation of the affected areas is the only real fix.
Frizzy halos along each braid by week three are normal. They indicate the style has reached its functional end. Take down within a week to prevent matting.
Itchy scalp that doesn’t respond to scalp serum could indicate fungal growth from trapped moisture or product buildup. Try an apple cider vinegar rinse (1 part ACV to 4 parts water) applied to the scalp with a squeeze bottle.
Pain at any point during wear means tension is too tight on at least one braid. If you can identify which braid is causing the pain, take it down individually rather than waiting weeks. Continued tension on a single follicle can cause permanent damage.
Tangling at the ends after multiple weeks is often a sign you need to bonnet more carefully or wash the ends specifically. A bit of leave-in conditioner worked into the tangled section, then gently combed with a wide-tooth comb, usually frees the tangle without breakage.
