There’s something about an afro puff that hits different. It’s effortless in a way that takes actual skill to pull off well — the kind of style that looks like you rolled out of bed looking perfect, but you and I both know there was a leave-in, some gel, and at least one do-over involved. Afro puff styles for natural hair have been a staple for decades, worn by women across 3C, 4A, 4B, and 4C curl patterns who want full, defined, unapologetically voluminous looks without braids or twists. And the range is wider than most people realize.
Because a puff is never just a puff. You can go high and tight, low and loose, offset to one side, doubled up into two puffs, or stretched so the shape shifts completely. You can add accessories, structure the edges into art, or keep the whole thing deliberately undone. Every version communicates something different — which is why this style has stayed relevant across generations without feeling tired.
Why Afro Puffs Work for Every Natural Hair Type
Let’s clear something up: afro puffs are not reserved for hair with tight coils or maximum shrinkage. They work across the full spectrum of natural textures, though the technique shifts depending on your pattern. If you’re 3C, you’ll get a more defined, rounder silhouette. If you’re 4B or 4C, your puff might go wider than tall, and the edges will respond differently to gel versus edge control wax.
The key factor isn’t your curl pattern — it’s your hair density and length. A thick, dense natural will get a full, dramatic puff even at shorter lengths. Fine naturals with more loosely packed curls might need a little extra volume work — diffusing or lightly picking the roots — to get the same effect. Neither approach is wrong. They just require different prep.
Shrinkage also plays a role. Hair that shrinks significantly will give you a compact, tight puff with strong shape retention. Hair that shrinks less tends to spread outward instead of building height. Knowing which you’re dealing with helps you set realistic expectations and style accordingly.
What You Actually Need Before You Start
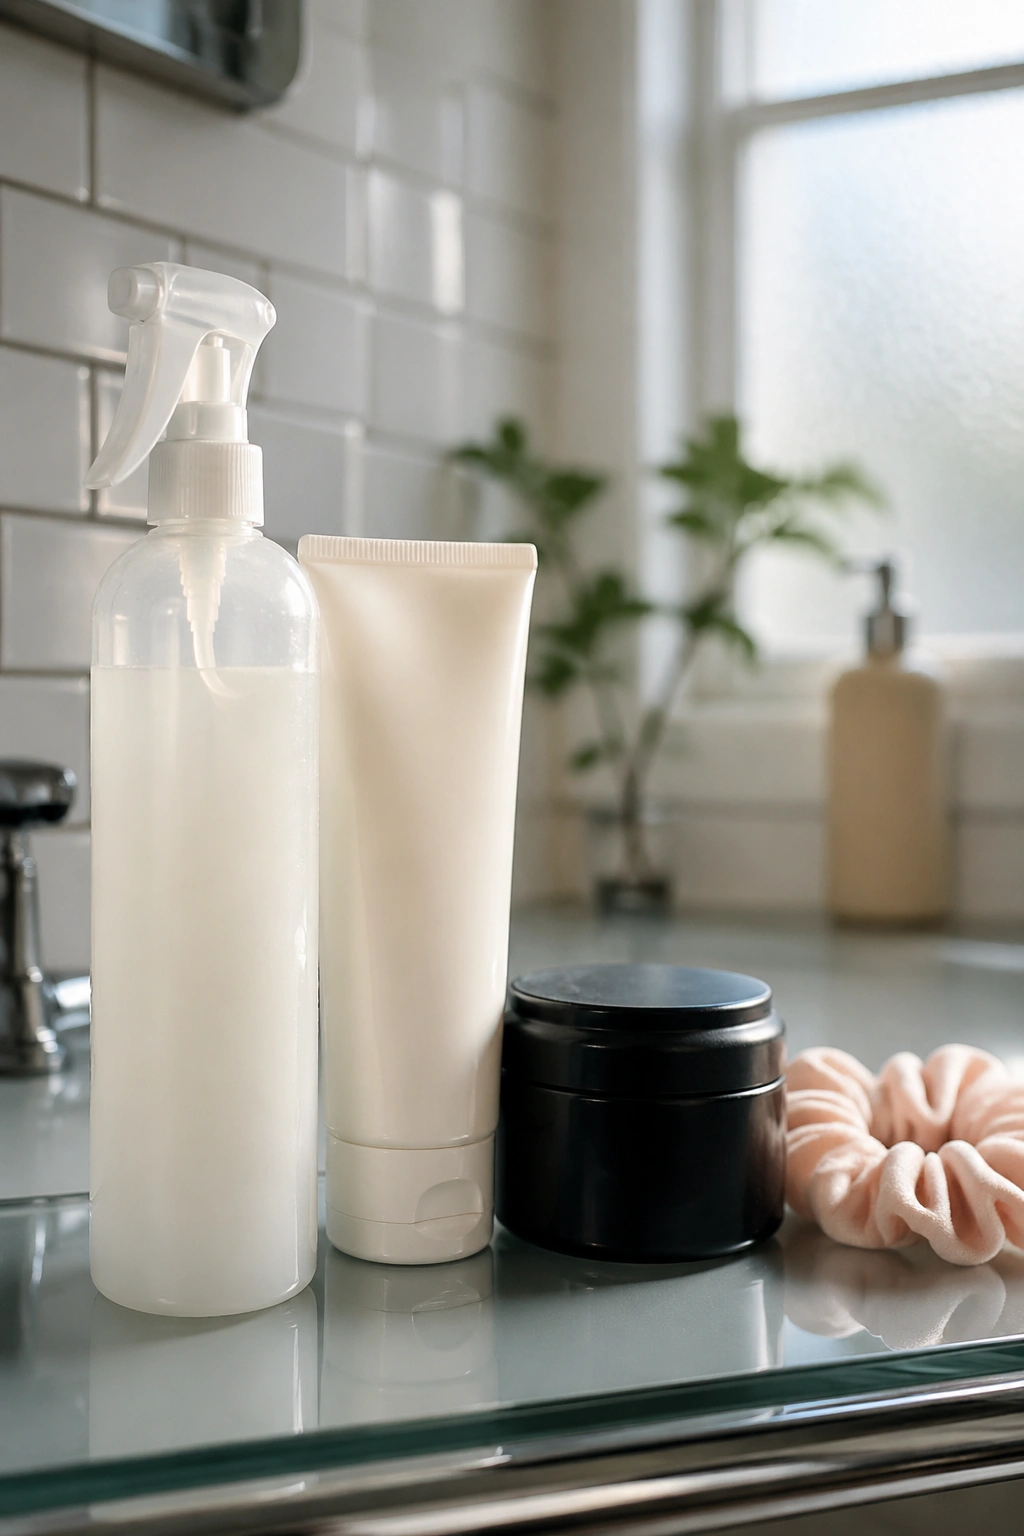
You don’t need a dozen products. You need the right four.
A good leave-in conditioner is your foundation — it adds slip, softens the cuticle, and gives your curls something to hold onto. Apply it to freshly washed or refreshed hair, working it through section by section. Don’t rush this step. The second thing you need is a styling cream or curl pudding — not a hard-hold gel at this stage, just something that clumps your curls and reduces frizz without stiffening them. Apply from mid-shaft to tip.
Edge control or a firm-hold gel goes on third, only around the hairline. Apply it with an edge brush in short strokes, using a scarf tied tight for 10-15 minutes to lay everything smooth. Last is a satin scrunchie or a fabric-wrapped elastic — never a bare rubber band, which snaps strands and causes breakage right at the point where your hair is already under tension from being gathered.
That’s the full kit. Everything else is optional.
How Puff Height and Placement Change the Look
This matters more than most people think. A puff placed at the very crown of your head reads formal, polished, almost architectural. Pull it back to the nape and suddenly it’s relaxed and bohemian. Offset it to one side and you’ve got an editorial look that doesn’t require a single accessory.
Height is a separate variable. A tall puff — achieved by pulling the elastic up high and fluffing aggressively — reads bold and dramatic. A low puff that sits at the base of the neck reads laid-back. Neither is better. They suit different face shapes and different outfits. Oval and heart-shaped faces can usually handle any placement. Round faces tend to look most balanced with a high puff that adds vertical length. Square jaw lines soften with a lower, wider puff.
Experiment before committing. Put your hair in the puff, step back, look at the full picture — not just the hair but your face, your shoulders, the clothing you’re wearing. A style that looks off in isolation often clicks into place when you see the whole look.
The Edge Work That Makes or Breaks It
No part of an afro puff styling routine gets more scrutiny than the edges — and rightly so, because they are the difference between a pulled-together look and one that reads rushed. But edge work doesn’t have to be complicated.
The classic smooth wave is the most versatile. Using a small brush (boar bristle gives the cleanest result), apply a small amount of edge gel — about the size of a pea for each side — and brush in the direction your hair naturally grows. Hold a scarf over the area for at least 10 minutes. Longer if your edges are thick or resistant.
For the swooped baby hair look, you need a lighter hand and a finer brush. Work in small sections, swooping and curving the hair before it dries. Don’t try to do all of it at once. Work one section, let it set a bit, move to the next.
The one thing to avoid: stacking too much product. More gel does not equal better edges. It equals white residue and flaking, which ruins the whole look by midday.
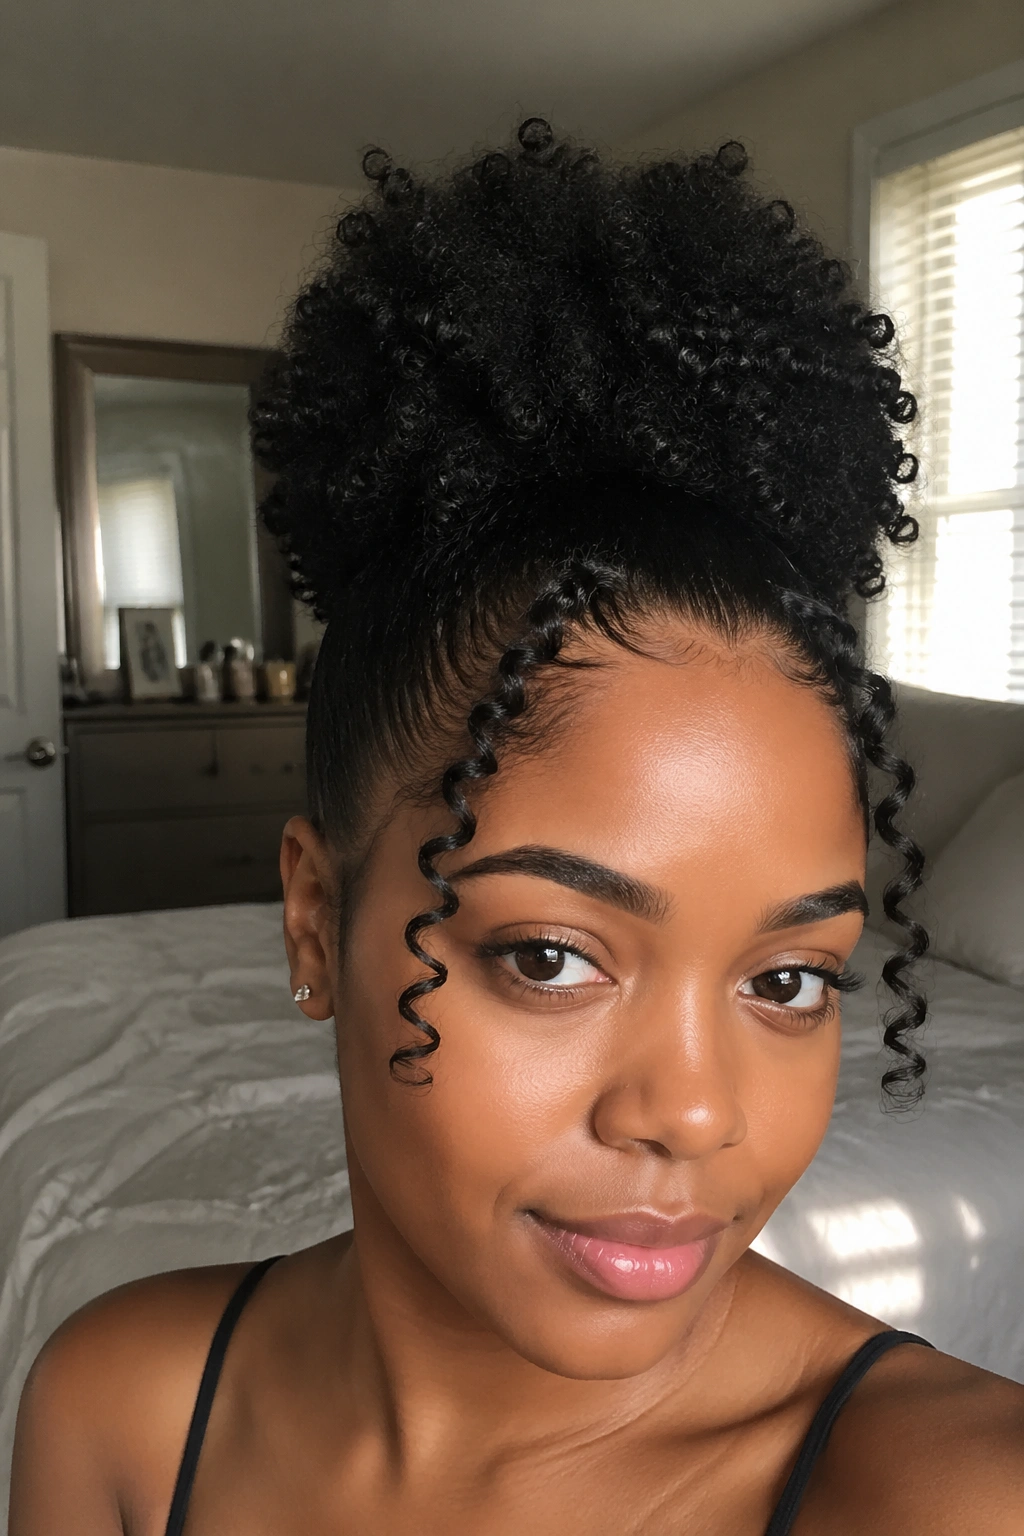
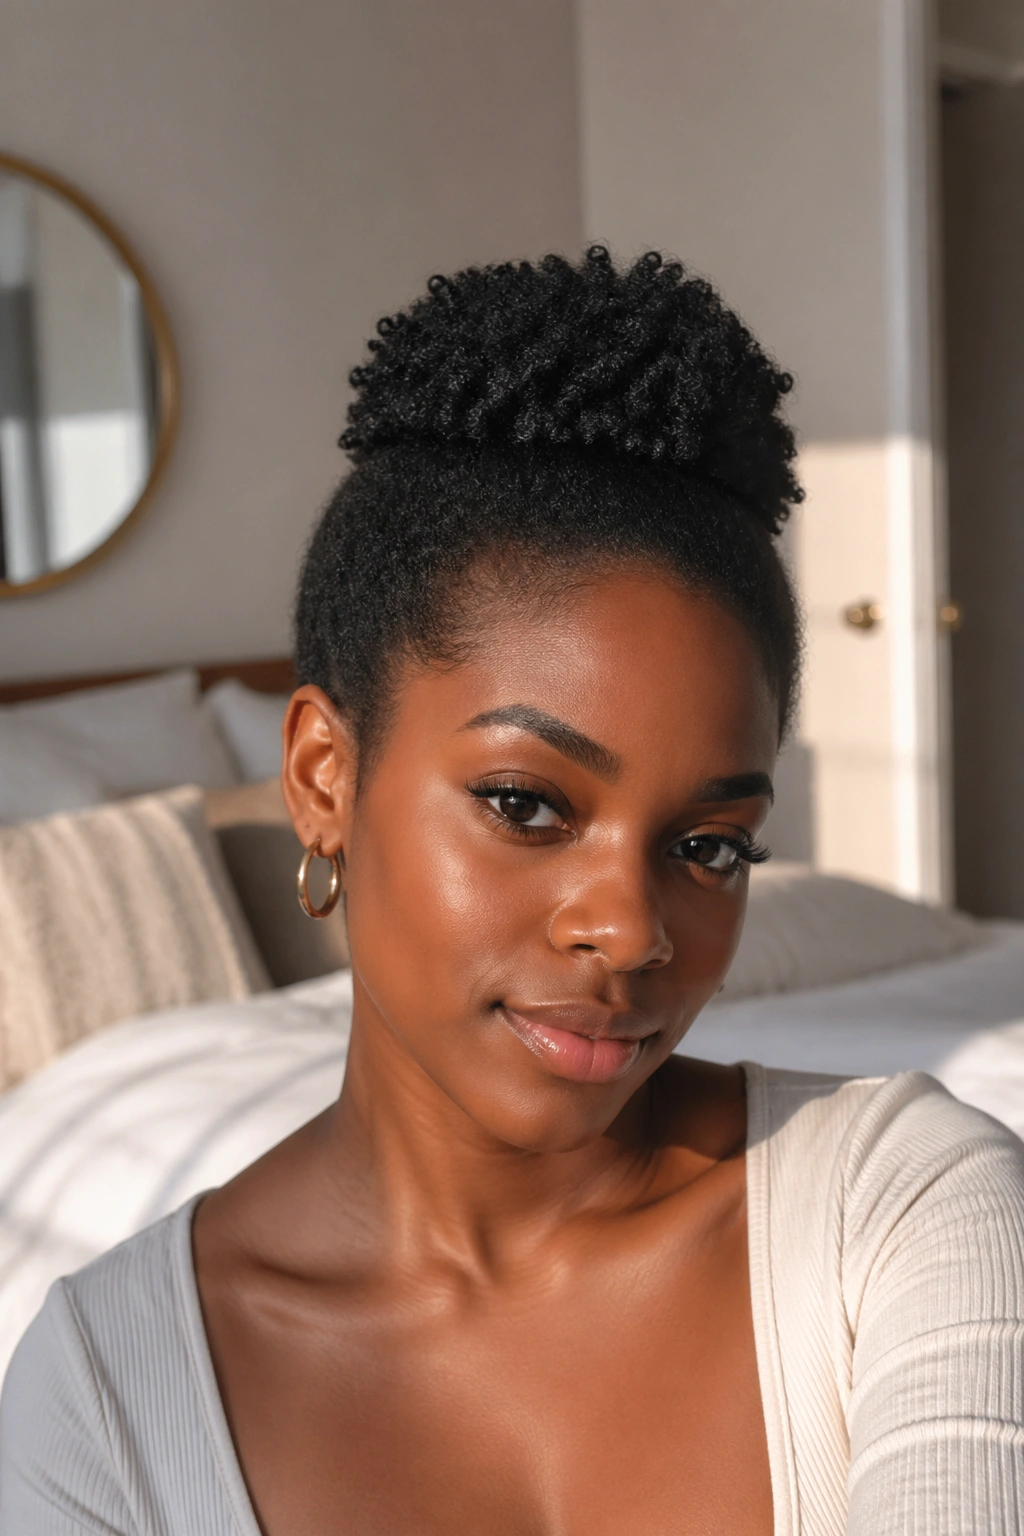
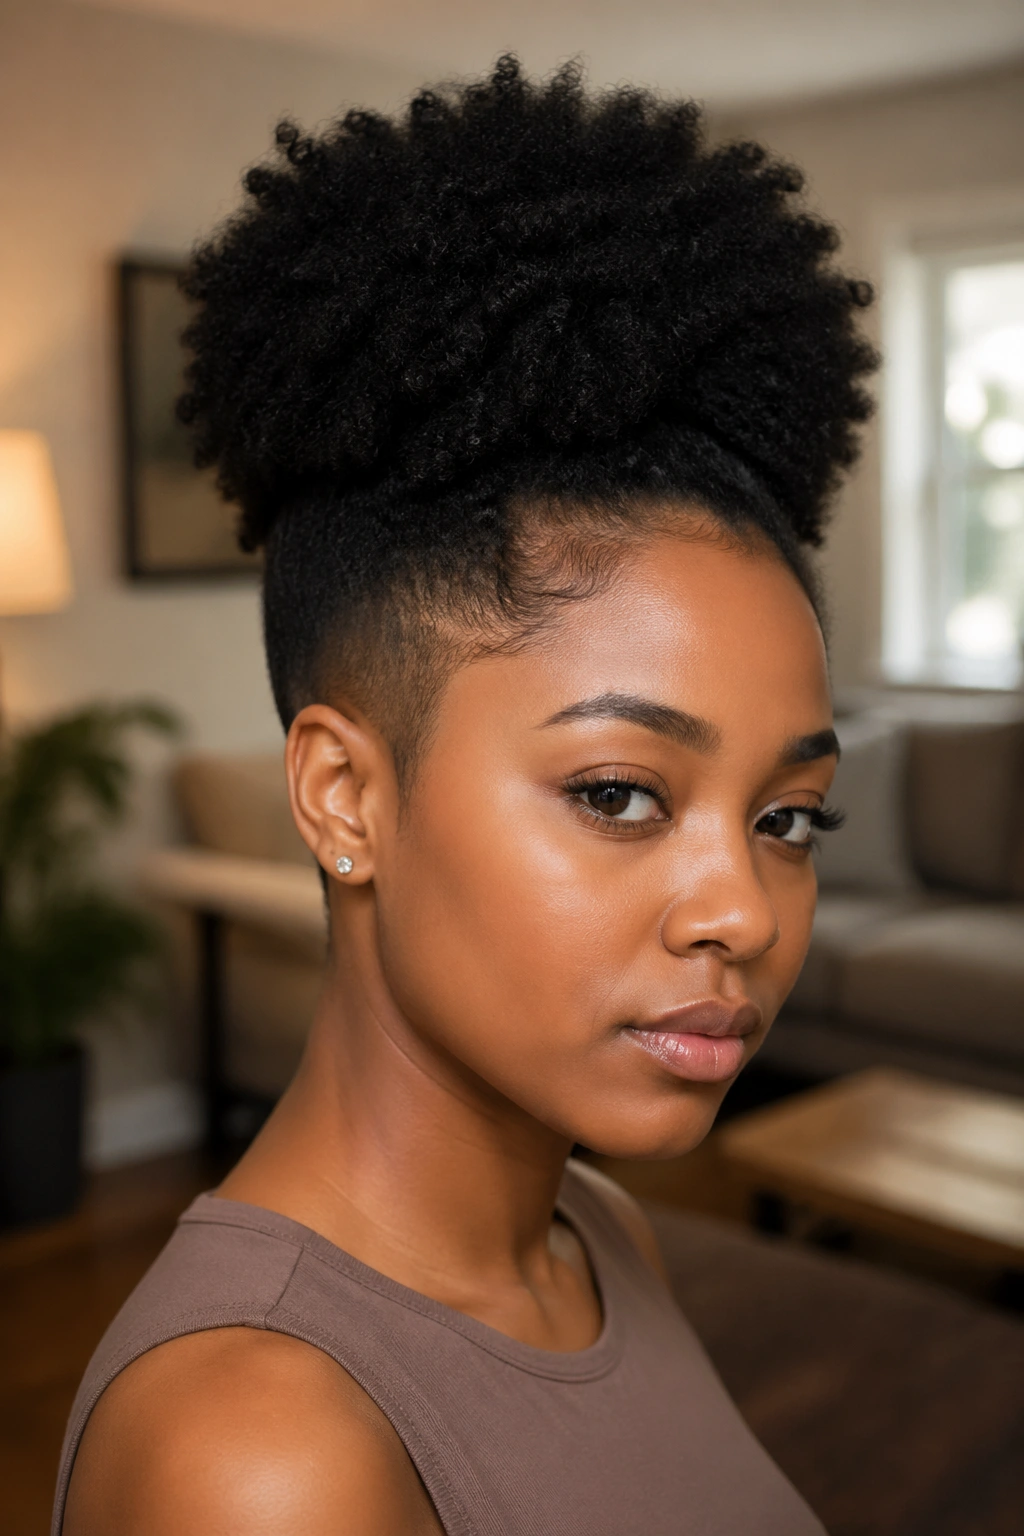
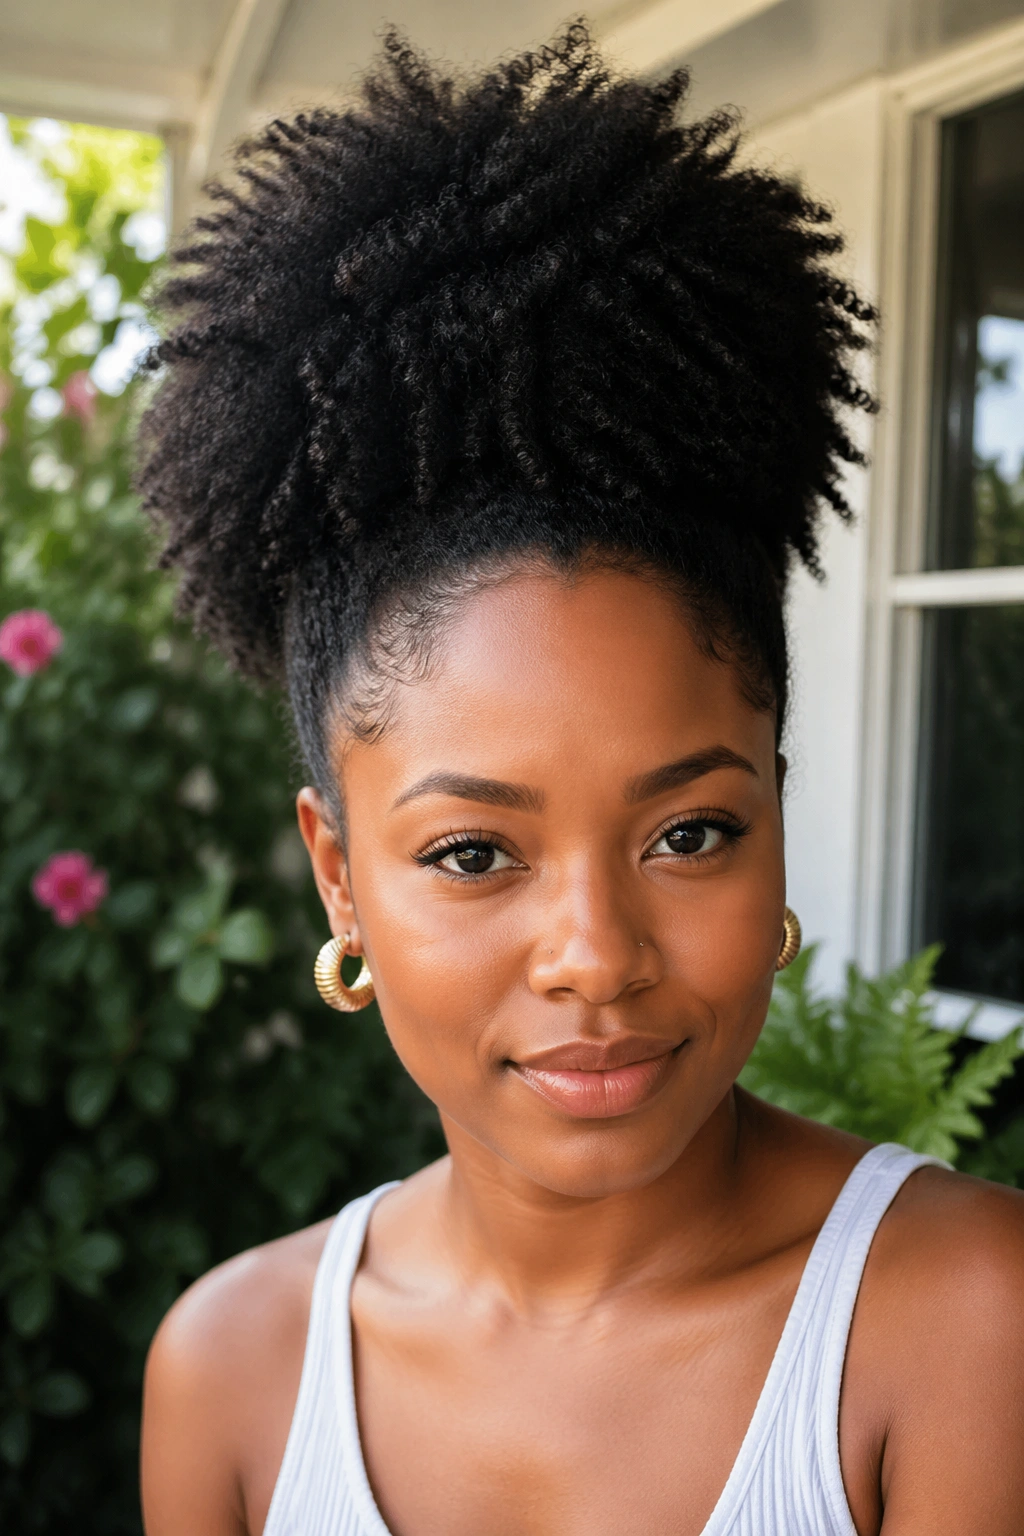
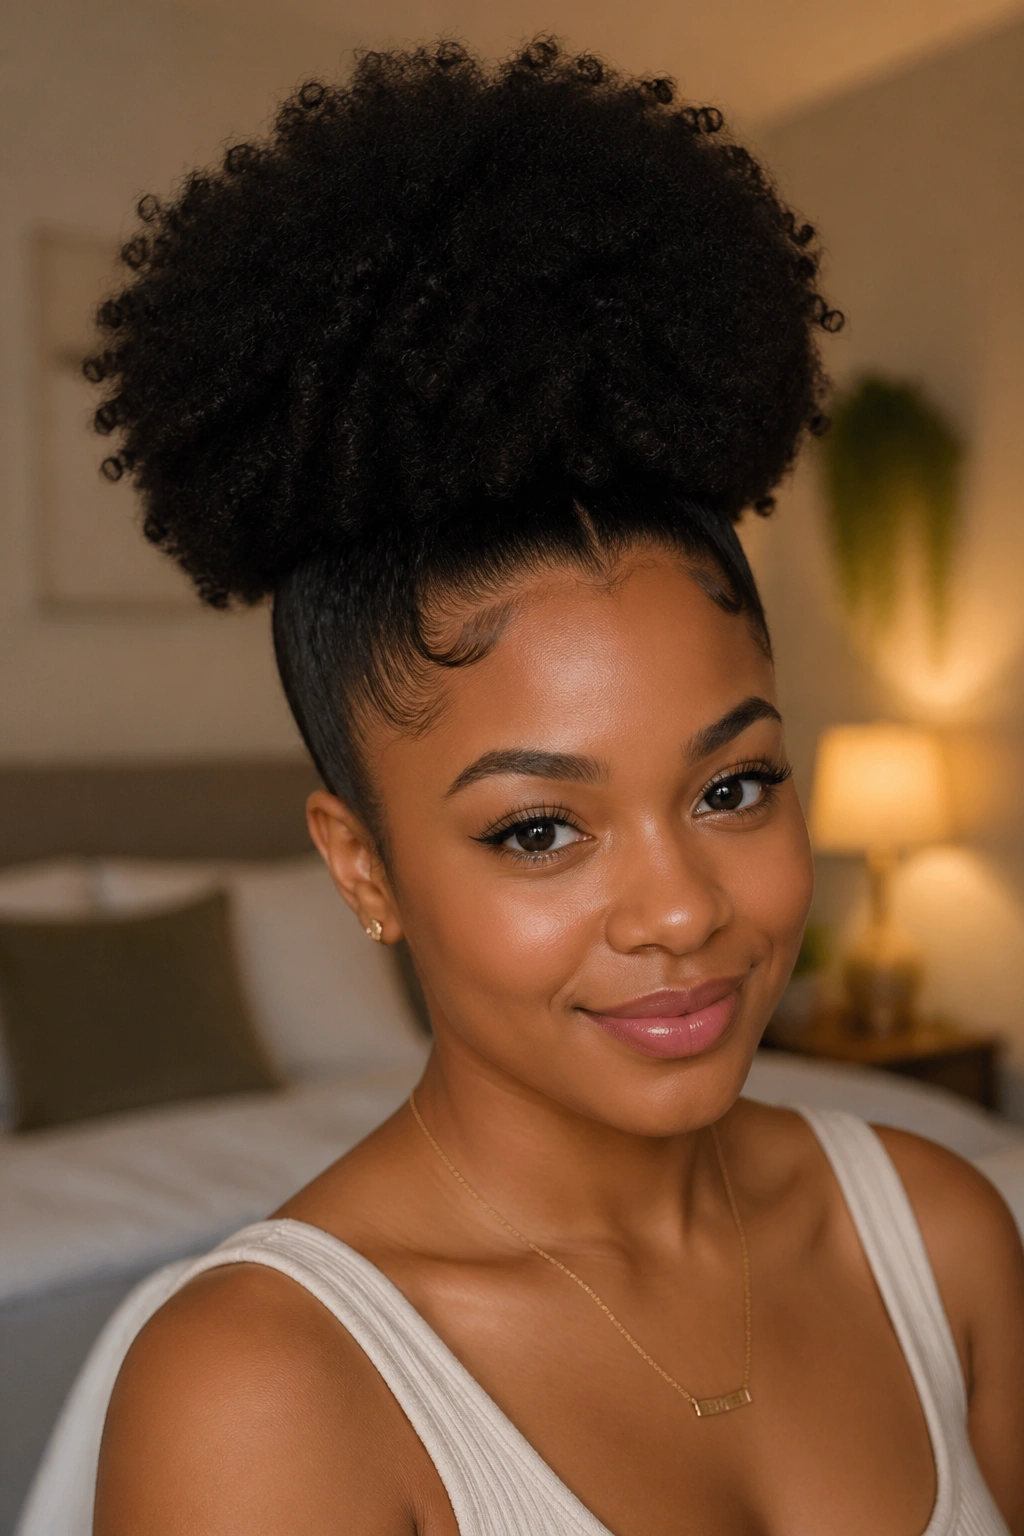
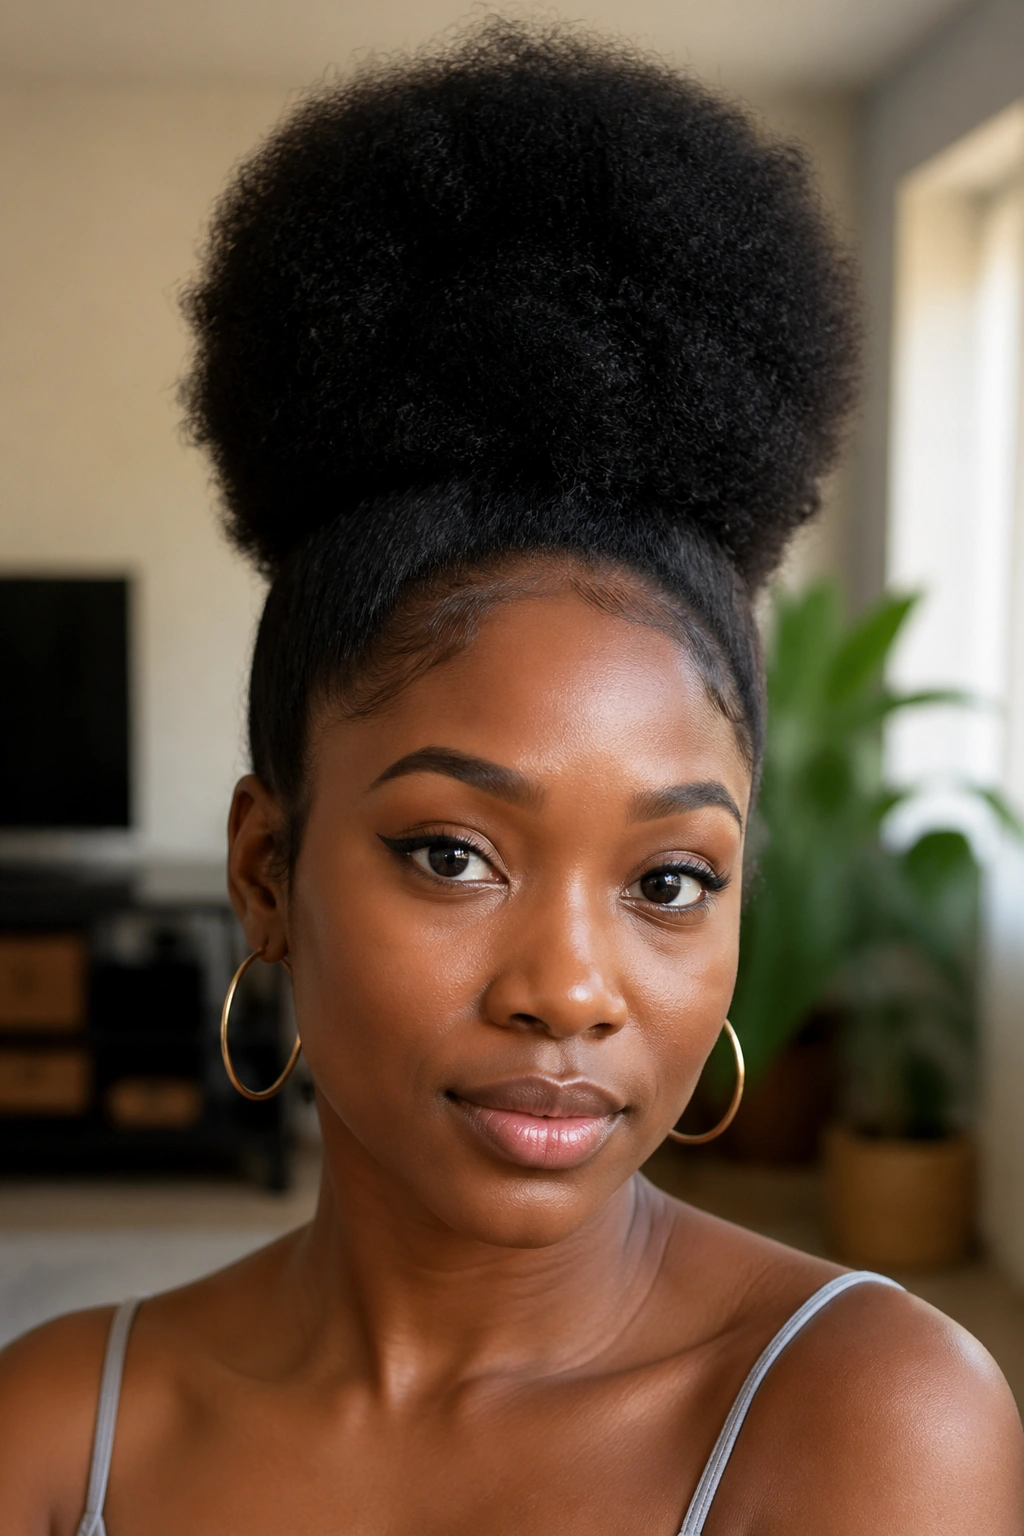
1. Classic High Afro Puff
Pull everything up to the top of your head with a satin-covered elastic, positioned right at the crown or slightly forward. Fluff the puff from the root outward using your fingers, working in a circular motion to encourage volume in every direction. The goal is a full, round silhouette — like a globe.
Why It Works
The high placement gives you instant height, which elongates the face and draws the eye upward. It’s the most universally flattering version of the puff, and it works on 3C through 4C hair. Thick hair puffs naturally; finer textures benefit from a light spritz of water before fluffing to reset any flatness.
Keep the edges clean and the rest of the look minimal. This style speaks for itself. Bold earrings, yes — a competing accessory situation, no.
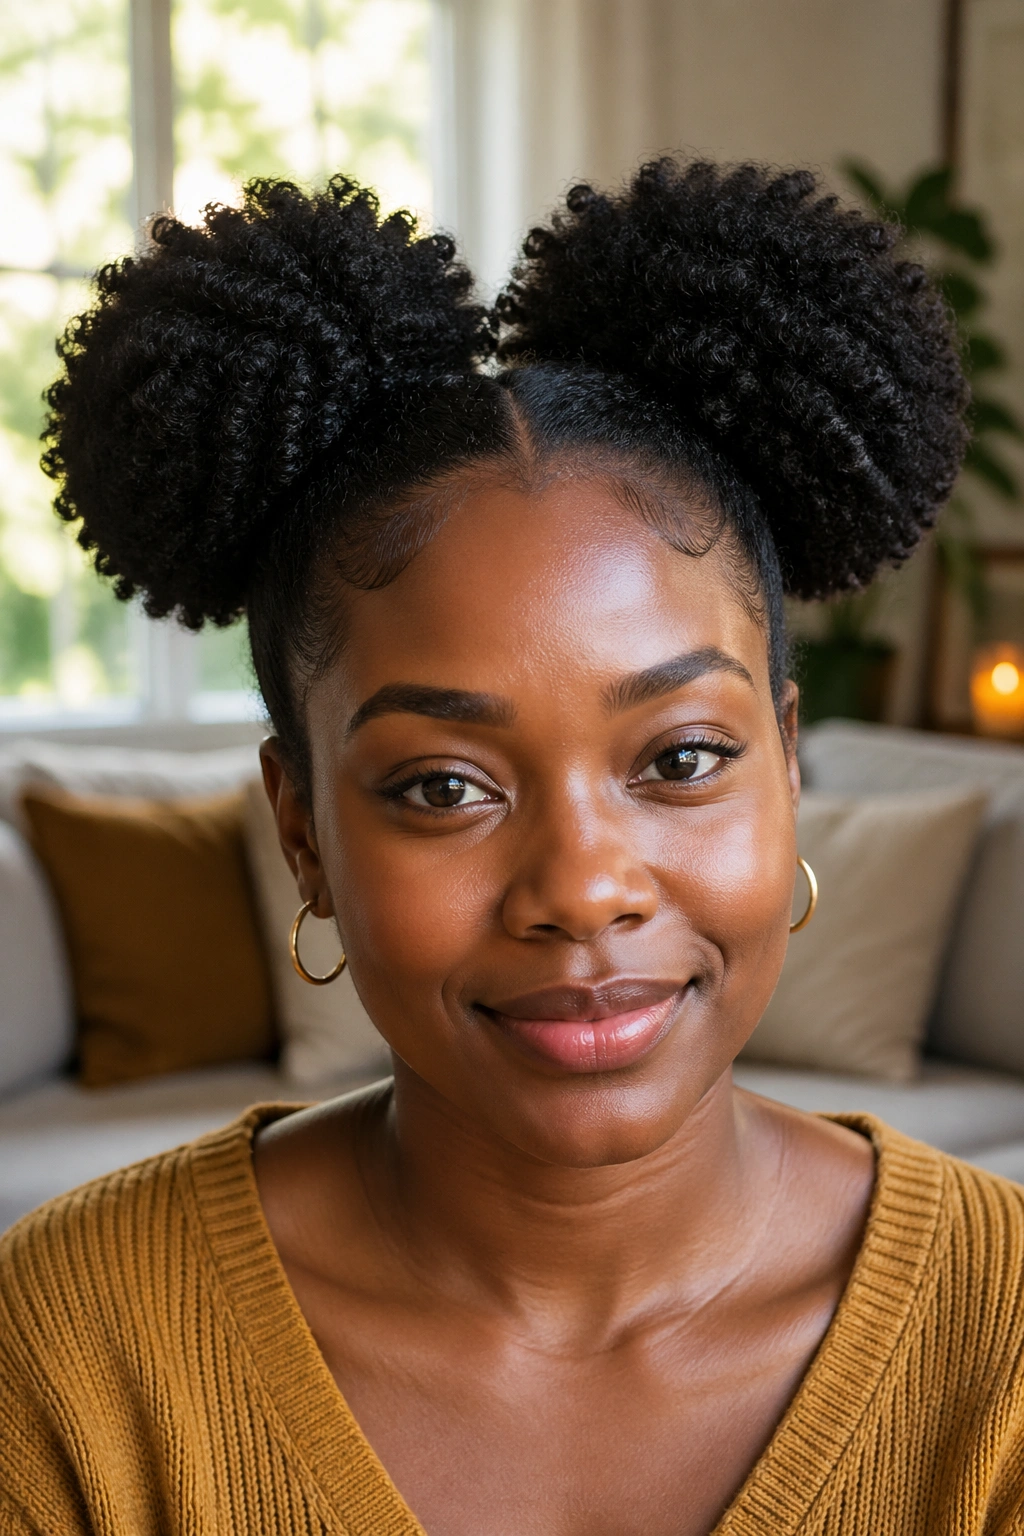
2. Double Puffs (Afro Pigtails)
Split your hair down the center with a rat-tail comb — straight down the middle, from forehead to nape. Secure each side with its own satin scrunchie, positioning both puffs at the same height on either side of your head. Fluff each one to match.
This is a genuinely playful look that tends to get dismissed as juvenile, which is completely unwarranted. It’s an incredibly versatile style. Worn with a crisp white tee, it reads effortlessly cool. With an oversized blazer, it’s got an editorial edge. It also works as a protective style because having the weight distributed between two points puts less strain on any single section of the scalp.
Make sure both puffs are genuinely symmetrical — height, size, position. A slight mismatch in height is normal and adds character. A significant one just looks like you were in a hurry.
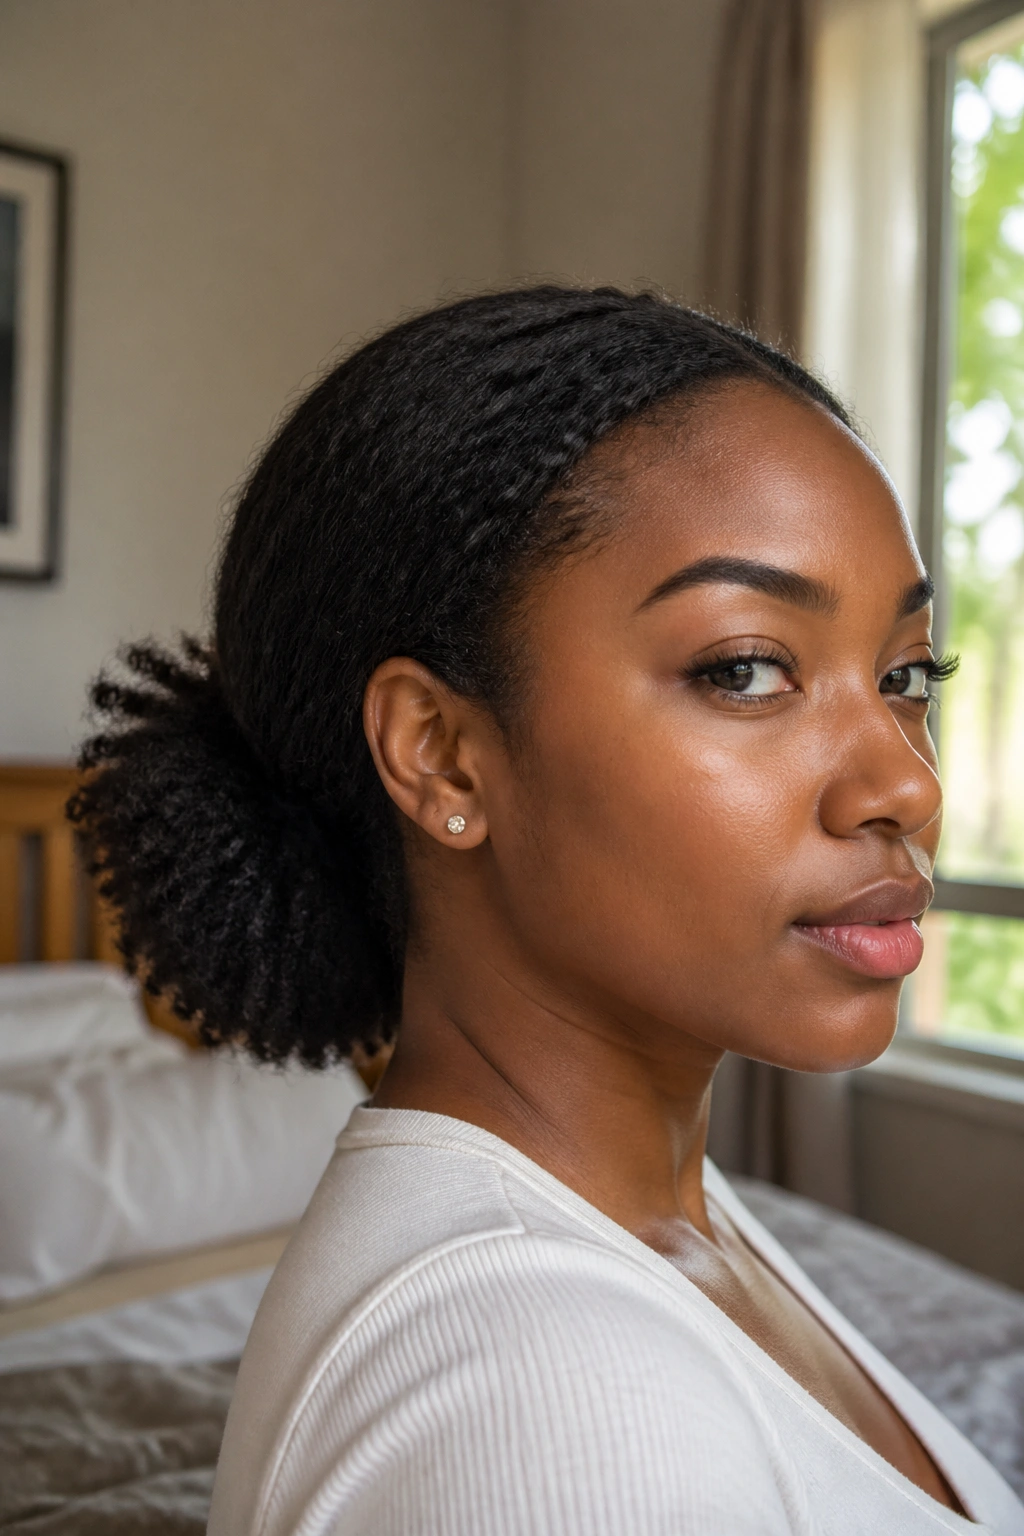
3. Low Puff at the Nape
Gather everything toward the back of the head and secure it low, just above the nape of the neck. Don’t pull it too tight — you want it to sit naturally, not be strained. The puff itself sits against the back of the head and fans out slightly.
What makes this different from a ponytail: the lack of tension and the natural spread of the hair. You’re not trying to create a smooth, sleek shape. The curls are meant to bounce and spread freely once the elastic is on. Leave a bit of hair out at the hairline if your edges are delicate — this style doesn’t require tight edges to work. In fact, some of the most beautiful low puffs have a deliberately soft, undefined frame around the face. Loose, soft, unstructured. Sometimes that’s exactly right.
4. Side Puff (Offset Placement)
Who decided puffs had to be centered? A puff placed off-center — gathered toward one side and positioned high above the ear — is arguably the most editorial version of this style. It creates asymmetry, draws attention to the neckline on the opposite side, and works incredibly well with statement earrings worn on the lower side.
How to Get the Most From It
Gather your hair as you would for any puff but shift your gathering point to one side, about two inches above one ear. Secure it there. Then spend your time on the edges of the opposite side — because with the hair pulled away, that side of your face gets more visual emphasis. Clean, defined edges on that side balance the asymmetry.
The puff itself doesn’t need to be particularly large. A medium-sized offset puff often reads better than a massive one, which can throw the whole look off balance.
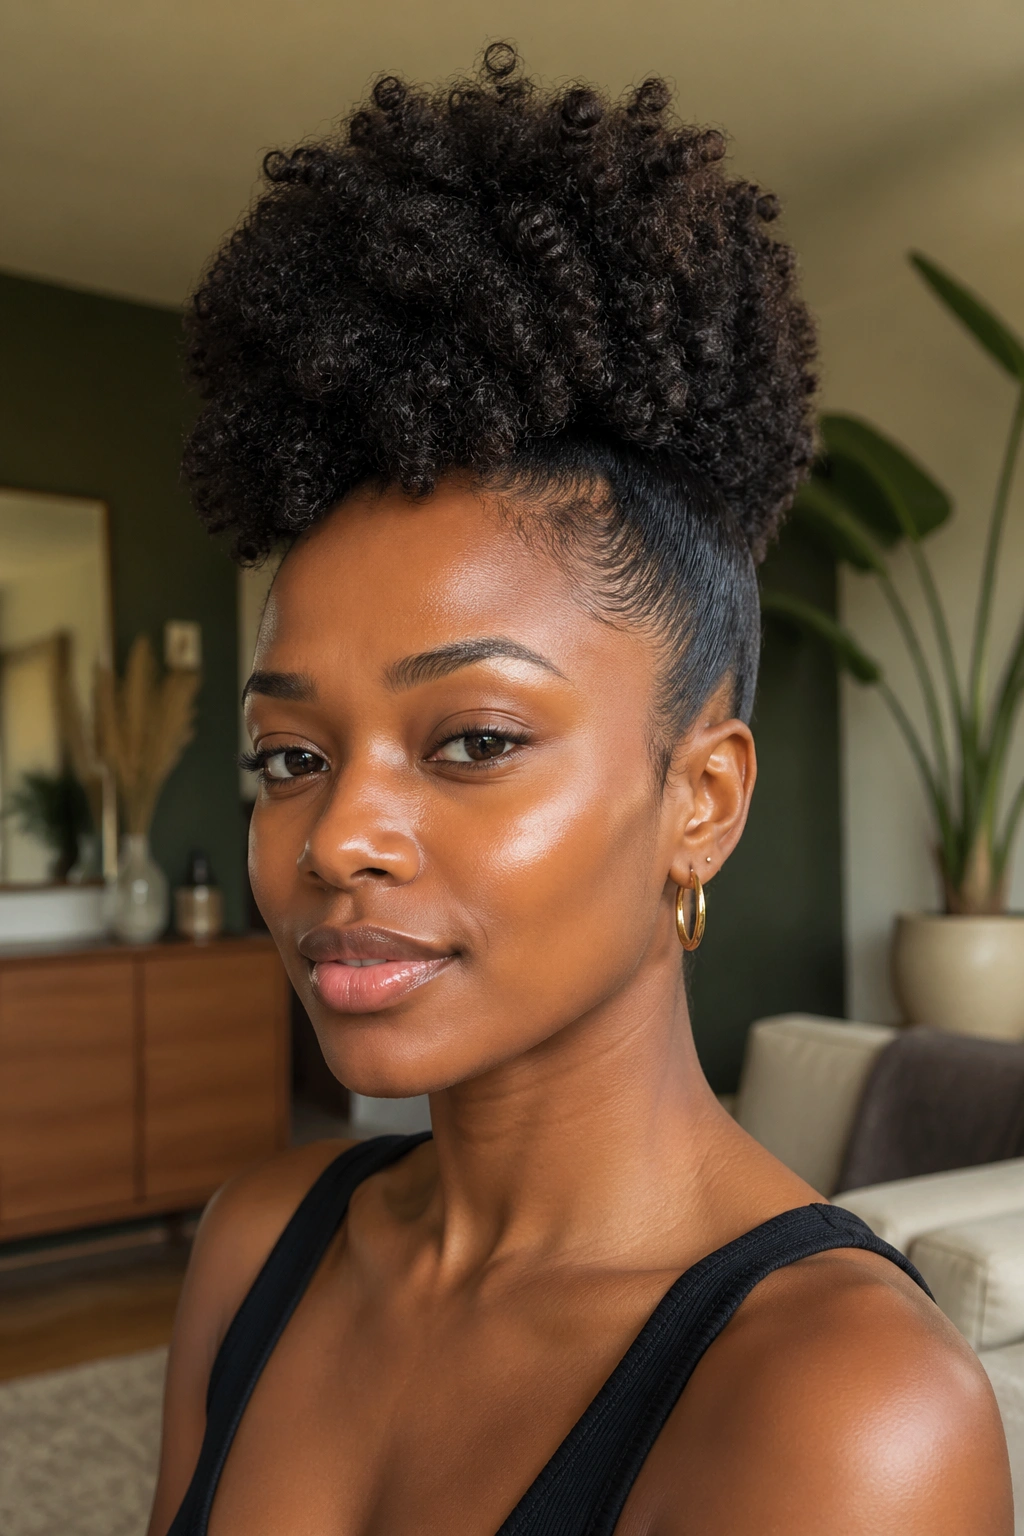
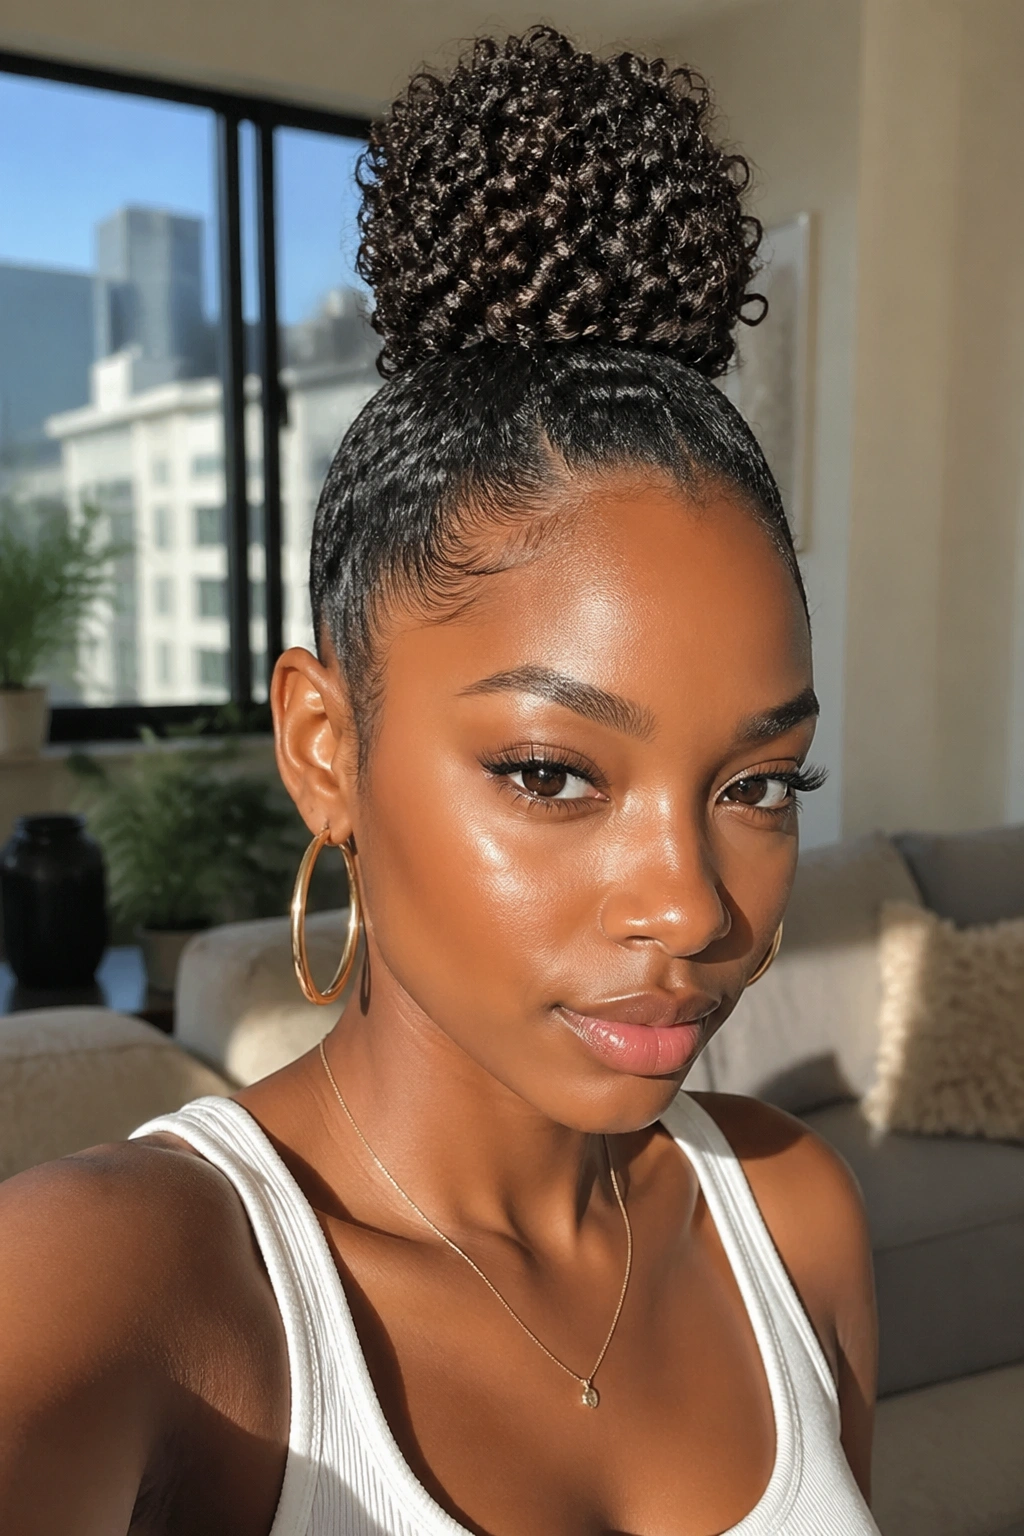
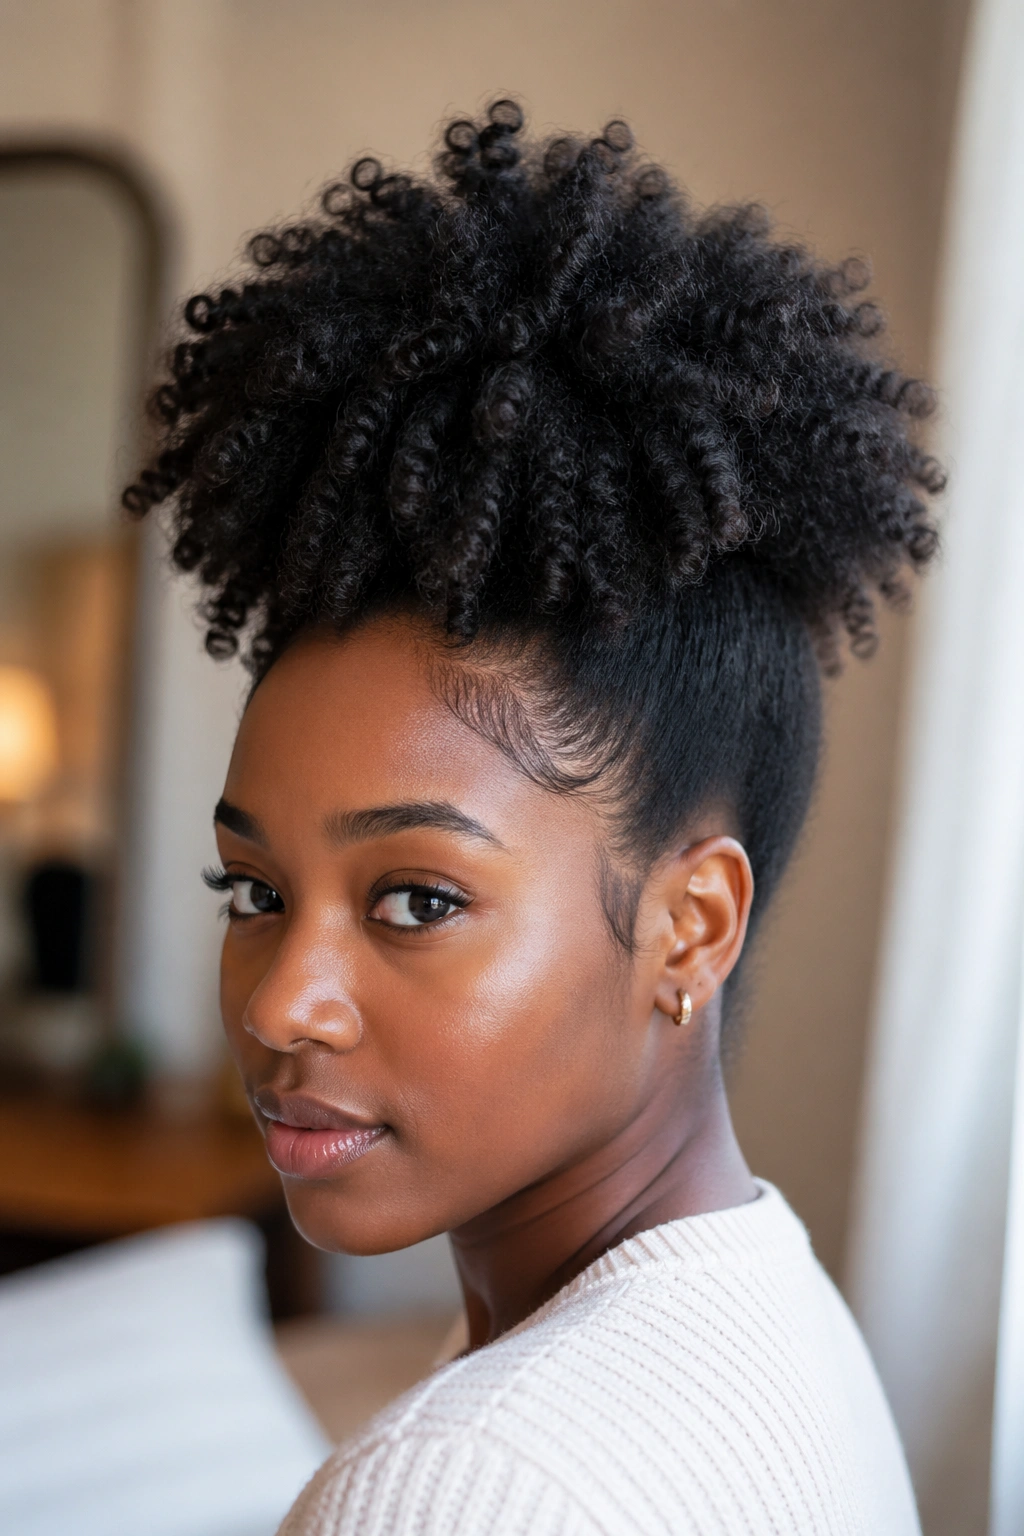
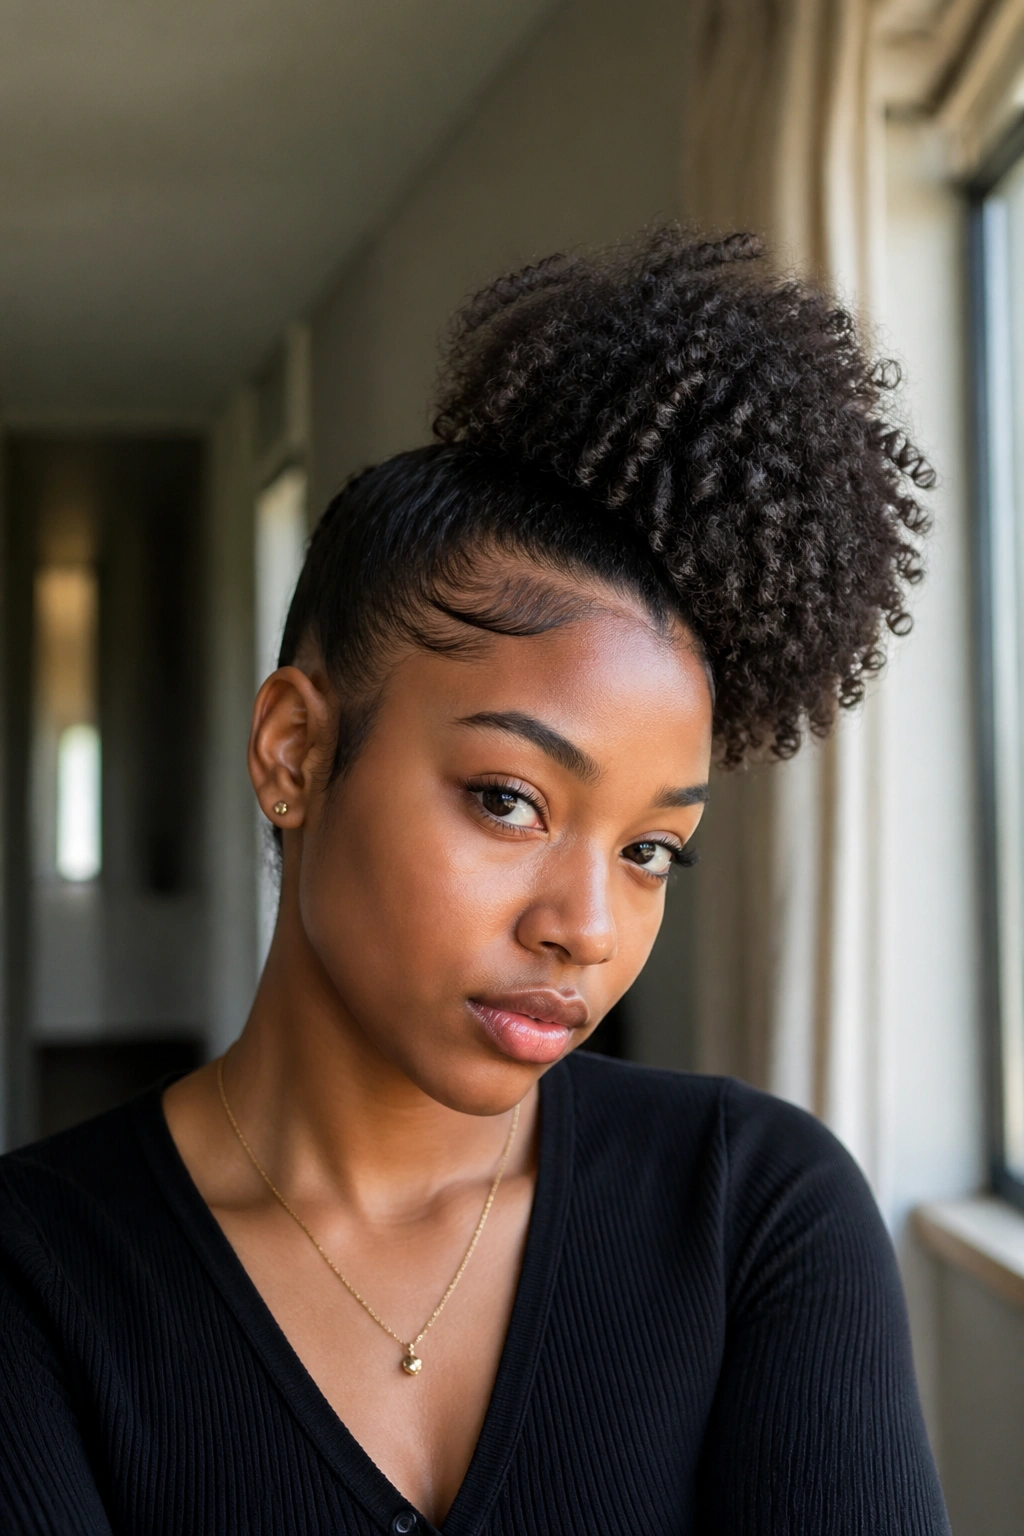
5. Stretched Afro Puff
This is for naturals who want height and definition without the full-shrinkage compact look. Before putting your hair up, stretch it first — either by banding (wrapping small sections with multiple elastics from root to tip) or by lightly blowing out the roots with a low-heat diffuser. Then gather and secure into a puff.
The result is a puff with more vertical lift and less outward spread. The texture still reads natural but the curls appear longer, which changes the silhouette dramatically. 4C hair in particular benefits from this — the natural puff on unstyled 4C can go wide rather than tall, and stretching first gives you control over the direction of growth.
Don’t overdo the stretch. You want volume, not blowout. The curls should still be visible and defined.
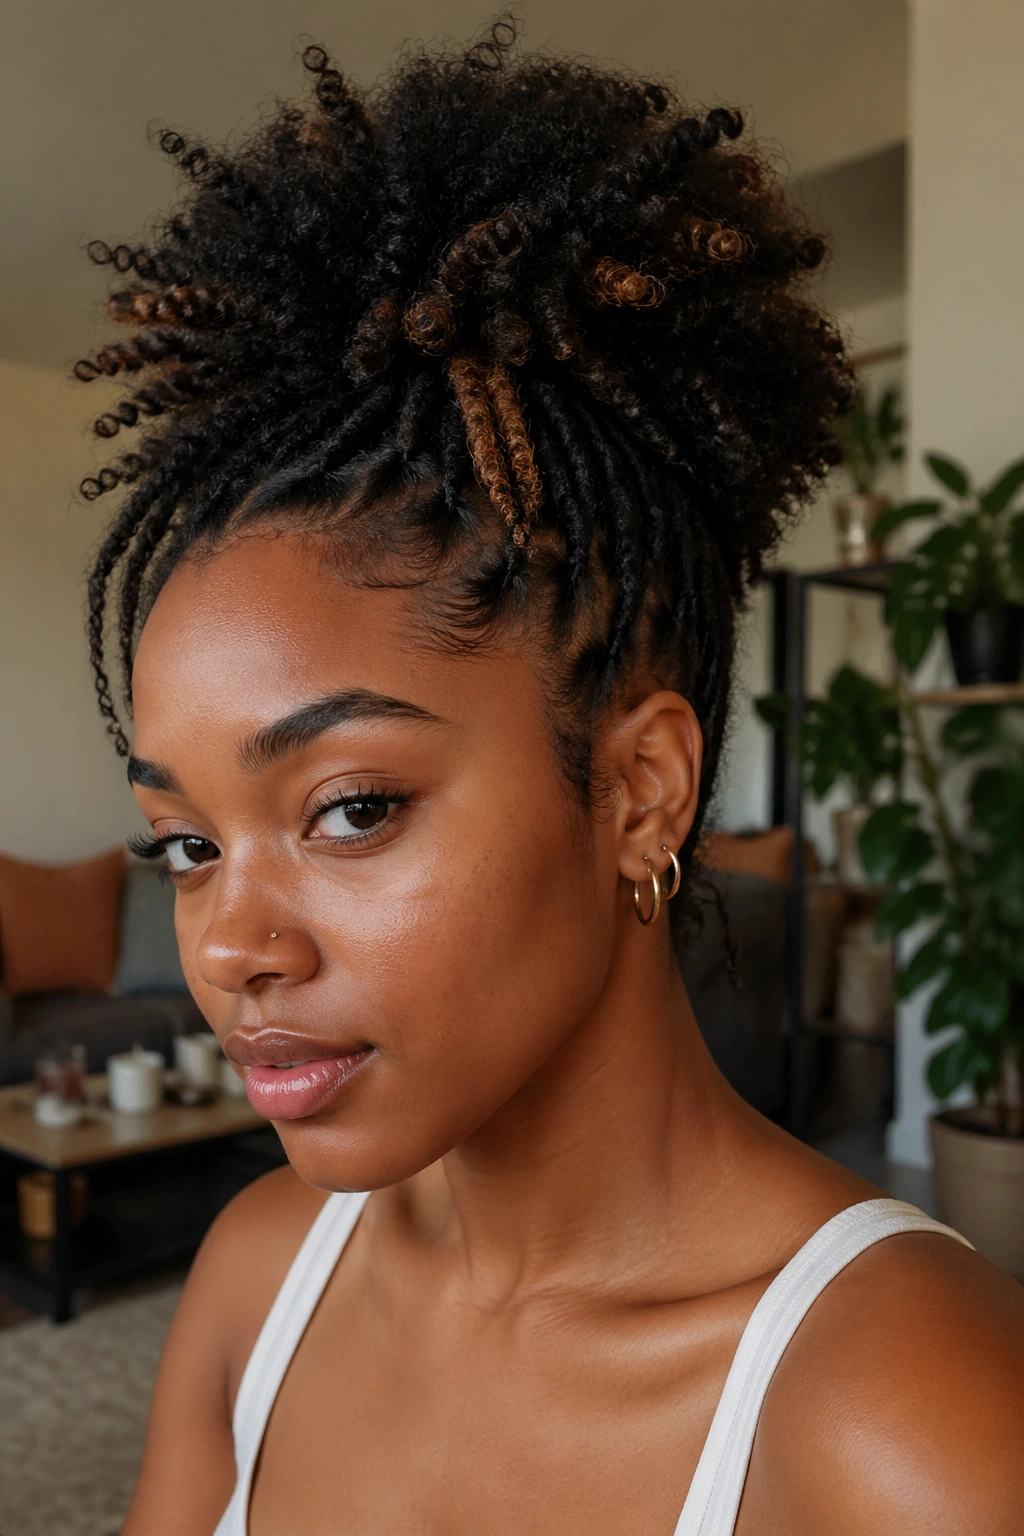
6. Puff with Defined Curls at the Front
Separate the first inch or two of hair at your hairline before gathering everything else into a puff. Apply a curl-defining cream to those front sections and smooth them down so they frame your face in defined spirals or waves. Then gather the rest into your puff.
What to Watch For
This only works if your front sections are long enough to actually form curls rather than just frizz. The minimum workable length is about 2 inches — enough to coil and hold shape. If your hair is shorter at the hairline, skip this variation and opt for defined edges instead. Trying to force curls that are too short just creates a messy, undefined frame that detracts from the puff rather than adding to it.
The curl-defining cream needs to be applied to damp hair and left undisturbed to dry completely before you go anywhere. Touching them while they’re drying gives you frizz.
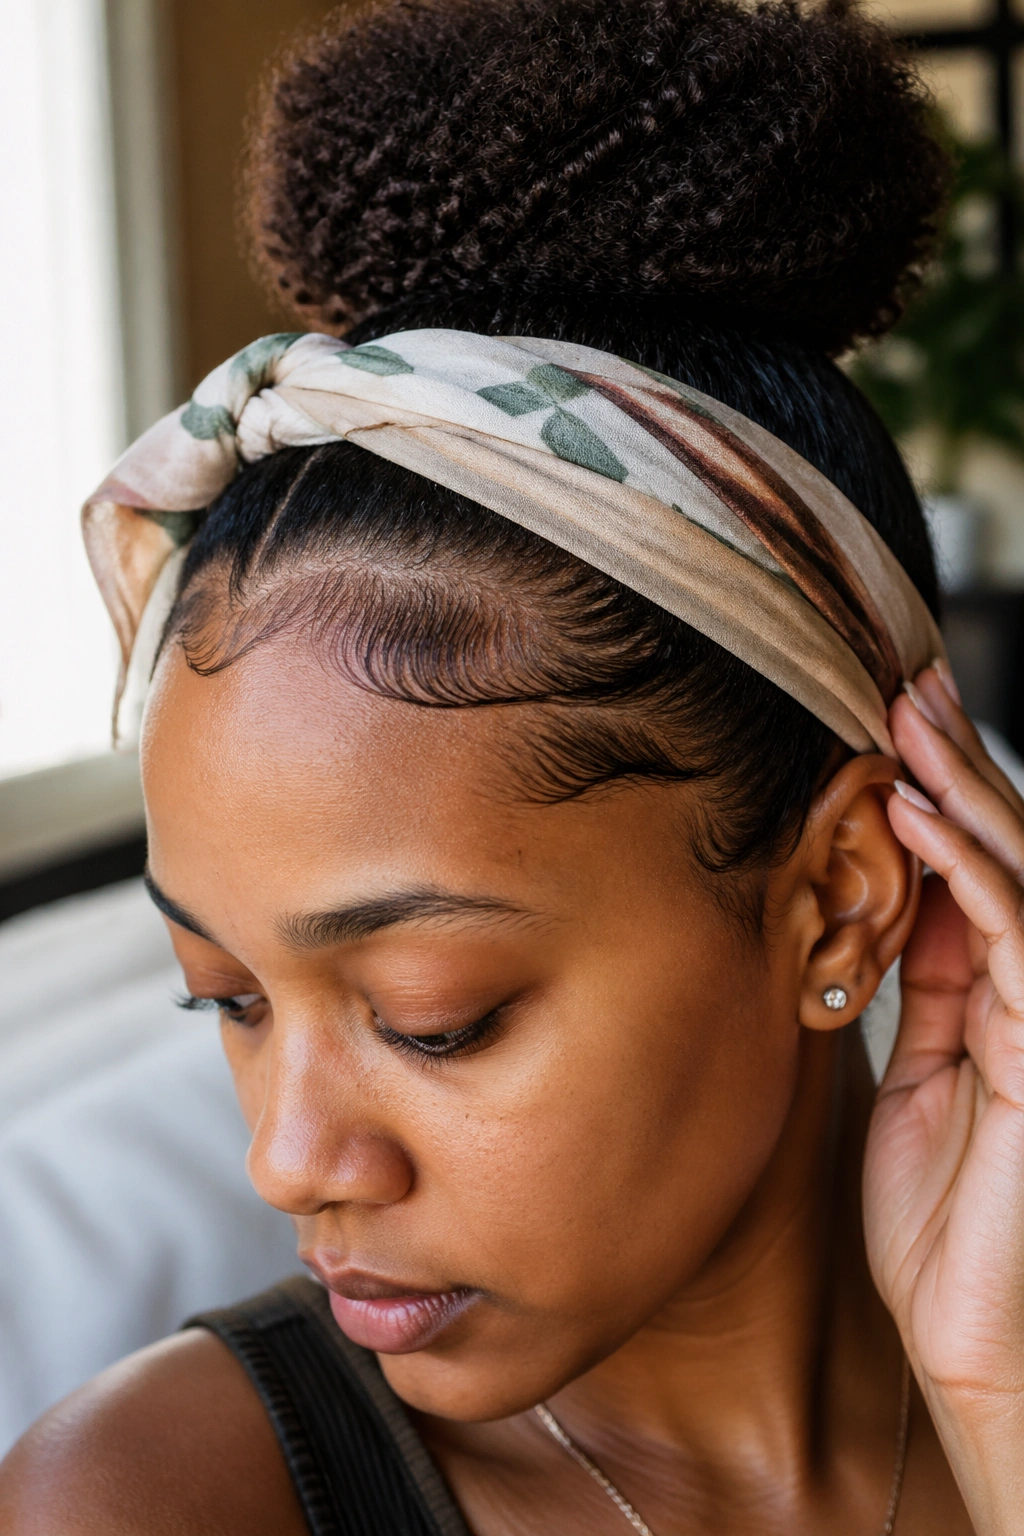
7. Afro Puff with a Scarf Wrap
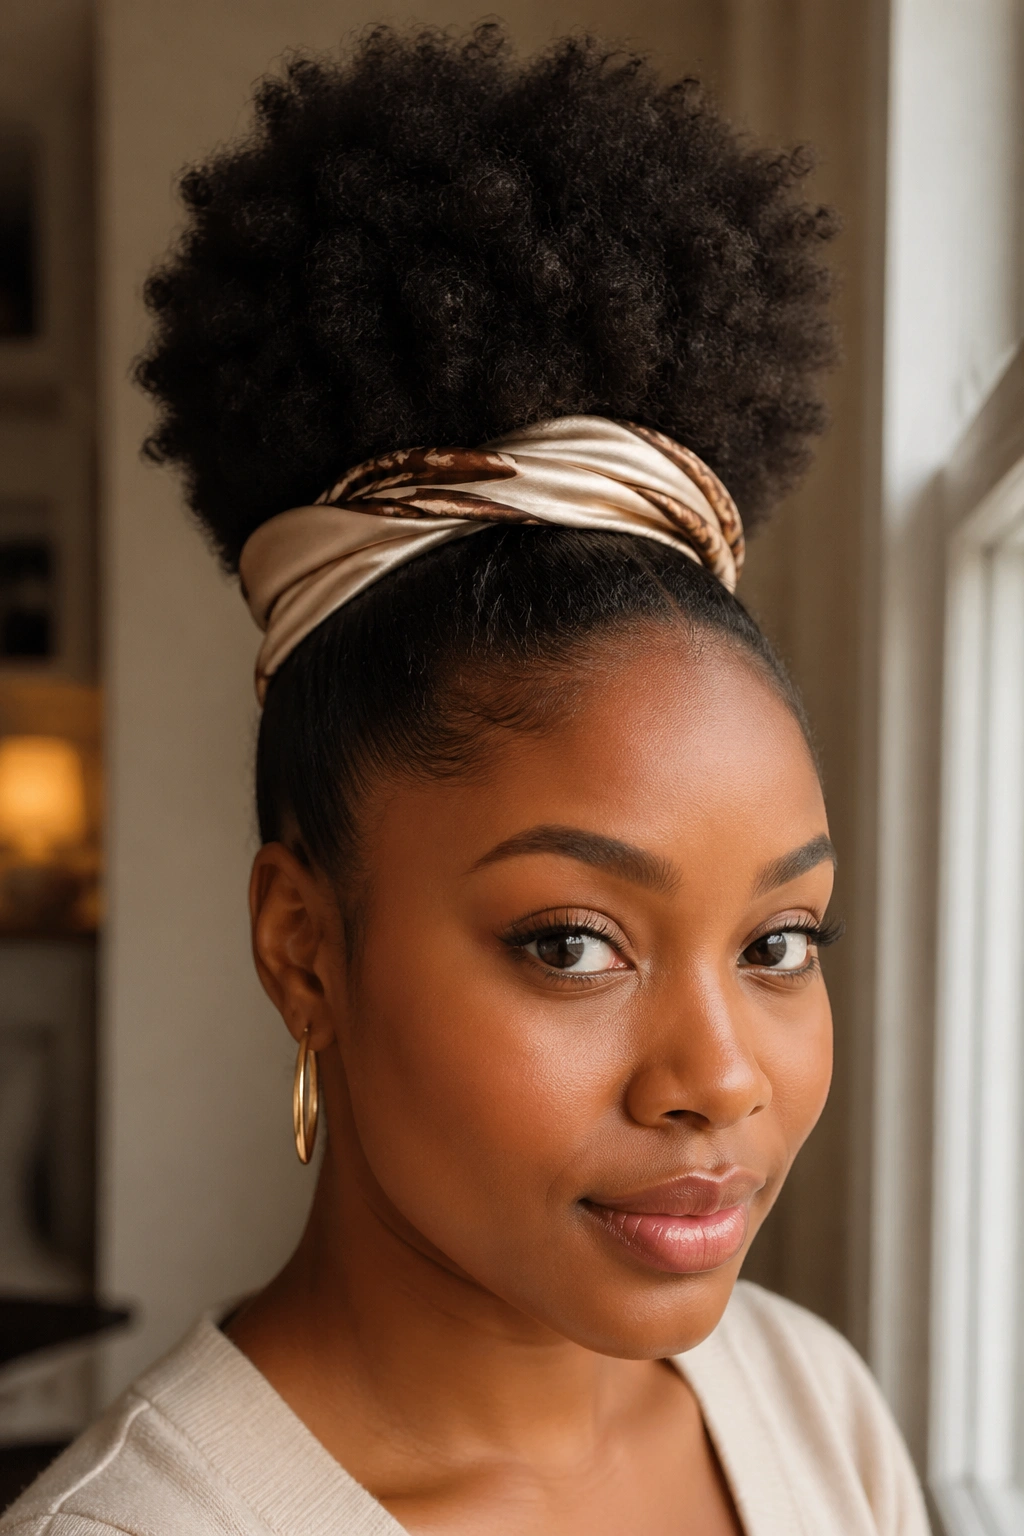
Take a long satin or silk scarf — ideally something with width, at least four inches across. Put your hair into a puff first, then wrap the scarf around the base of the puff, tying it at the front. Leave the ends hanging, tuck them in, or tie them into a bow depending on your preference.
Unlike a headband, which just sits at the hairline, a scarf wrapped at the base of the puff actually changes the shape of the style. It cinches slightly, making the puff appear rounder and more defined. It also protects the roots from friction. Satin is the material you want — it creates no tension and won’t absorb your hair’s moisture the way cotton does.
This is, genuinely, one of the best quick-refresh options for day-two or day-three hair. Fresh scarf, fresh look.
8. Pineapple-Turned-Puff
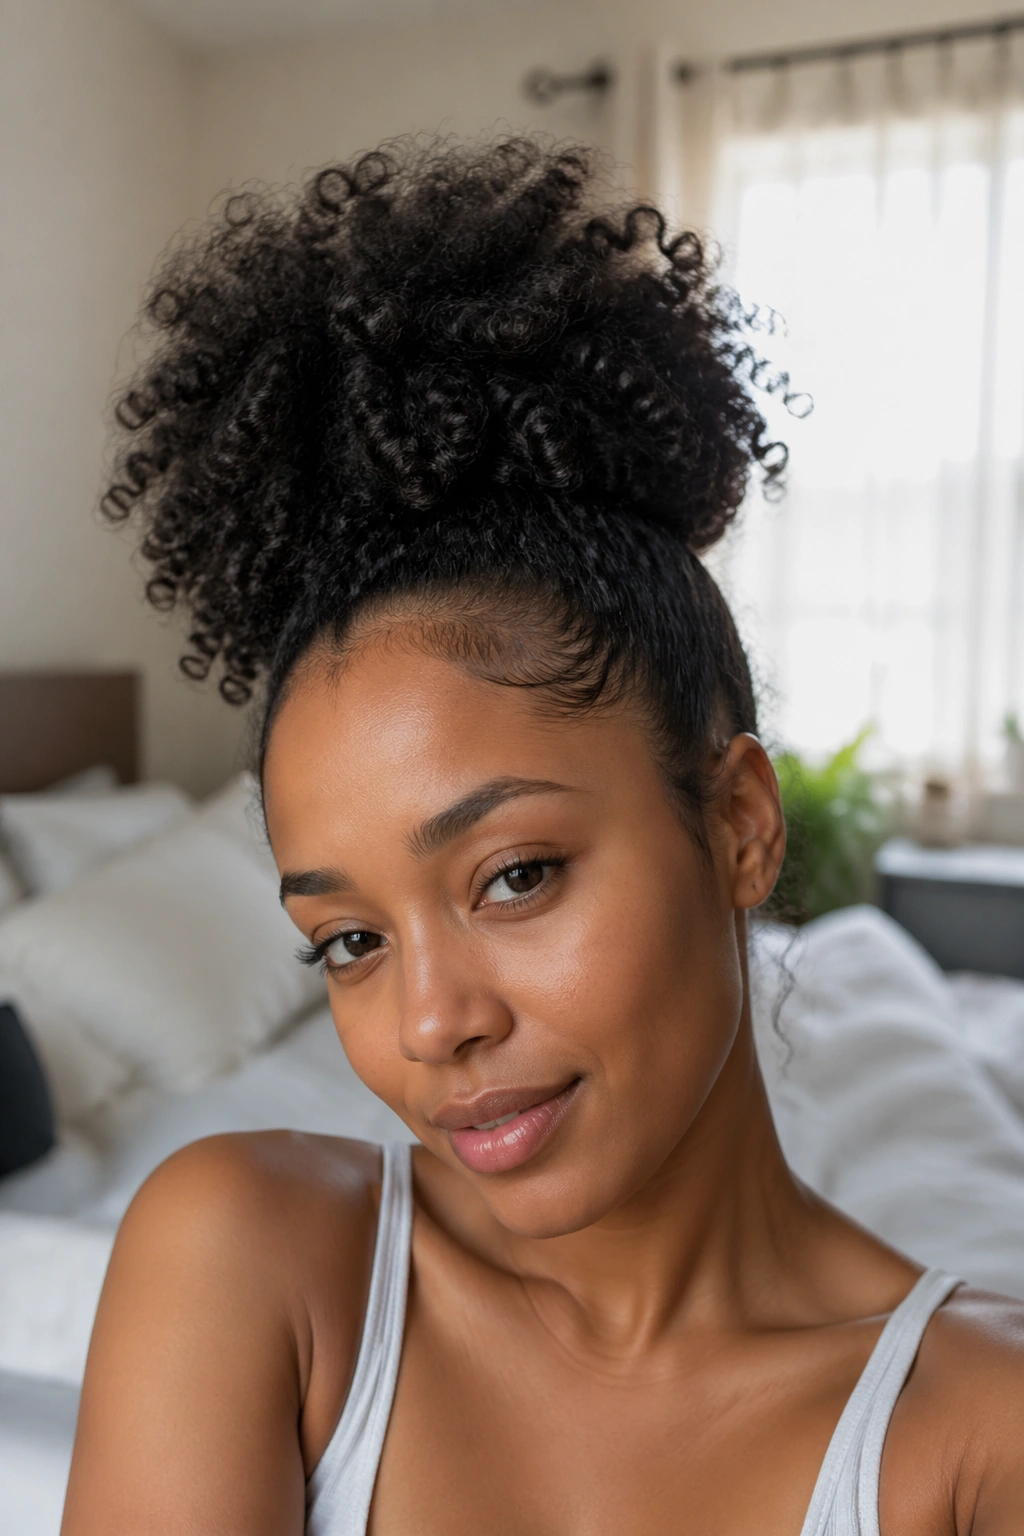
The pineapple is a preservation method — hair gathered loosely at the top of the head before sleep to preserve the style underneath. In the morning, instead of taking the pineapple down and restyling, you simply tighten it, fluff it, and leave. You now have a puff.
What makes this different from just doing a puff from scratch is the texture. Overnight, the curls rest against each other in a specific configuration. When you fluff a pineapple into a puff in the morning, you get a more organic, looser texture than you’d get starting fresh. Less perfect, more interesting. The edges will need some attention — they always do after a night in a scarf — but the body of the style often looks better than it did the day before.
9. Faux Hawk Puff
Leave the hair at the center of your head free and flat-iron or gel down the sides. The center section gets gathered into a puff. The result reads like a mohawk but with a natural puff rather than shaved sides.
Or — and this is the approach that works better for most naturals who don’t want heat on their sides — use hair gel and a scarf to smooth down the sides, leaving them wavy rather than sleek. Tie the scarf tightly for 20 minutes, remove, and the sides stay flat enough to create the hawk effect without permanent straightening.
This is the puff version for naturals who want an edge. It’s bold, it’s structured, and it reads completely different from any other puff on this list.
10. Mini Puff on Short Natural Hair
You don’t need long hair for a puff. If your hair is at least 2 inches long all over, you can gather enough into a small, tight puff that sits high on the crown. It won’t be large — that’s the point. A compact mini puff has its own appeal.
Who This Is For
TWA stages (teeny-weeny afro), post-big-chop naturals, or anyone whose growth pattern means some sections aren’t long enough to join a full gather. You work with what reaches. The puff will be small, and that’s fine. What you’re going for is shape and definition, not size. A small, clean puff with sharp edges can be more striking than a big, messy one.
11. Puff with Flat Twist Front

Flat twist the front sections of your hair — either one large flat twist from temple to temple or two smaller ones on each side — then gather everything else into a puff. The flat twists add structure and visual interest to the front without covering the puff itself.
This is a protective-styling hybrid. The flat-twisted sections are tucked into themselves, reducing manipulation and exposure to friction. The puff in the back does the heavy lifting visually. It’s the kind of look that reads like you did something intentional, even though the actual work is relatively minimal once you know how to flat twist.
12. Curly Top Knot Puff
Pull your puff up high and then twist the elastic once more — tight enough that the puff folds over itself slightly into a more topknot shape. For looser curl patterns, this might compress the puff into a smooth bun shape. For tight 4C coils, it’ll fold into a sculptural, rounded top knot with visible texture.
The difference from a standard bun: there’s still visible curl texture at the surface. You’re not smoothing the hair into a polished shape — you’re letting the coils show while creating a more compact silhouette. It’s neater than a loose puff but less formal than a bun. Right in the middle, which is exactly where you want to be on most casual occasions.
13. Puff with Accessory Crown
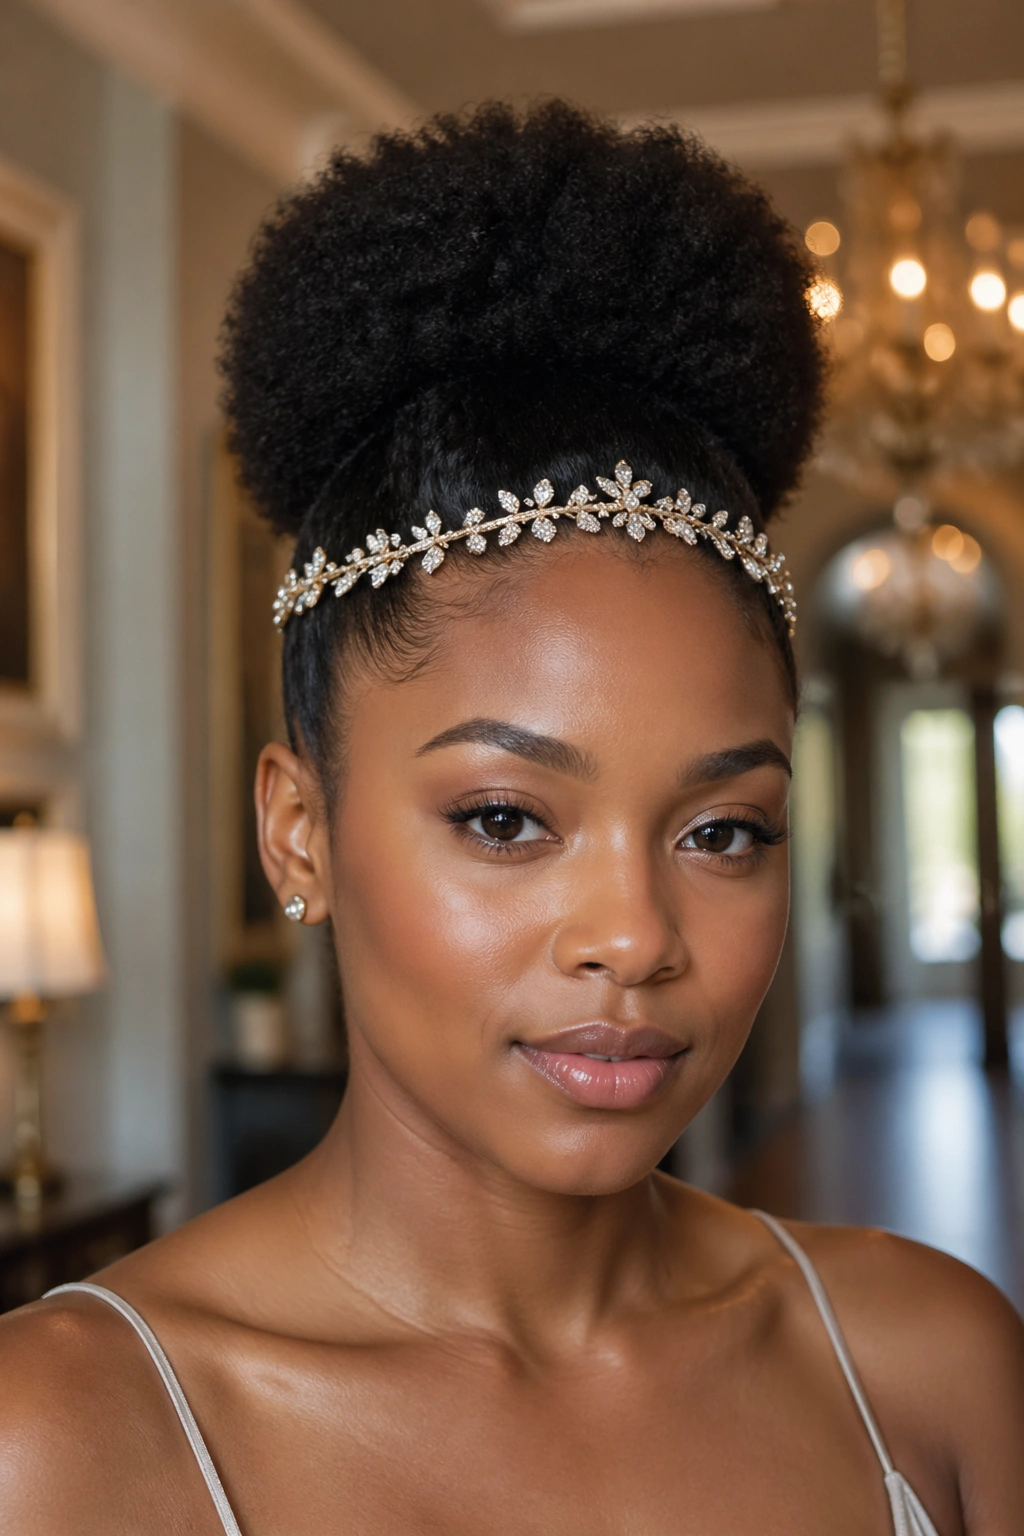
A thin headband worn across the forehead — not at the hairline but across the front of the head — combined with a puff behind it creates an almost regal effect. The puff rises behind the headband, and if the headband is ornate (beaded, embellished, twisted) it becomes the focal point. The puff becomes the backdrop.
This is worth mentioning because of how dramatically an accessory changes the entire reading of a puff. The same style you wear to run errands can become a special-occasion look just by adding the right headband. Keep the edges soft and let the accessory do the work.
14. Gathered Puff with Braided Base
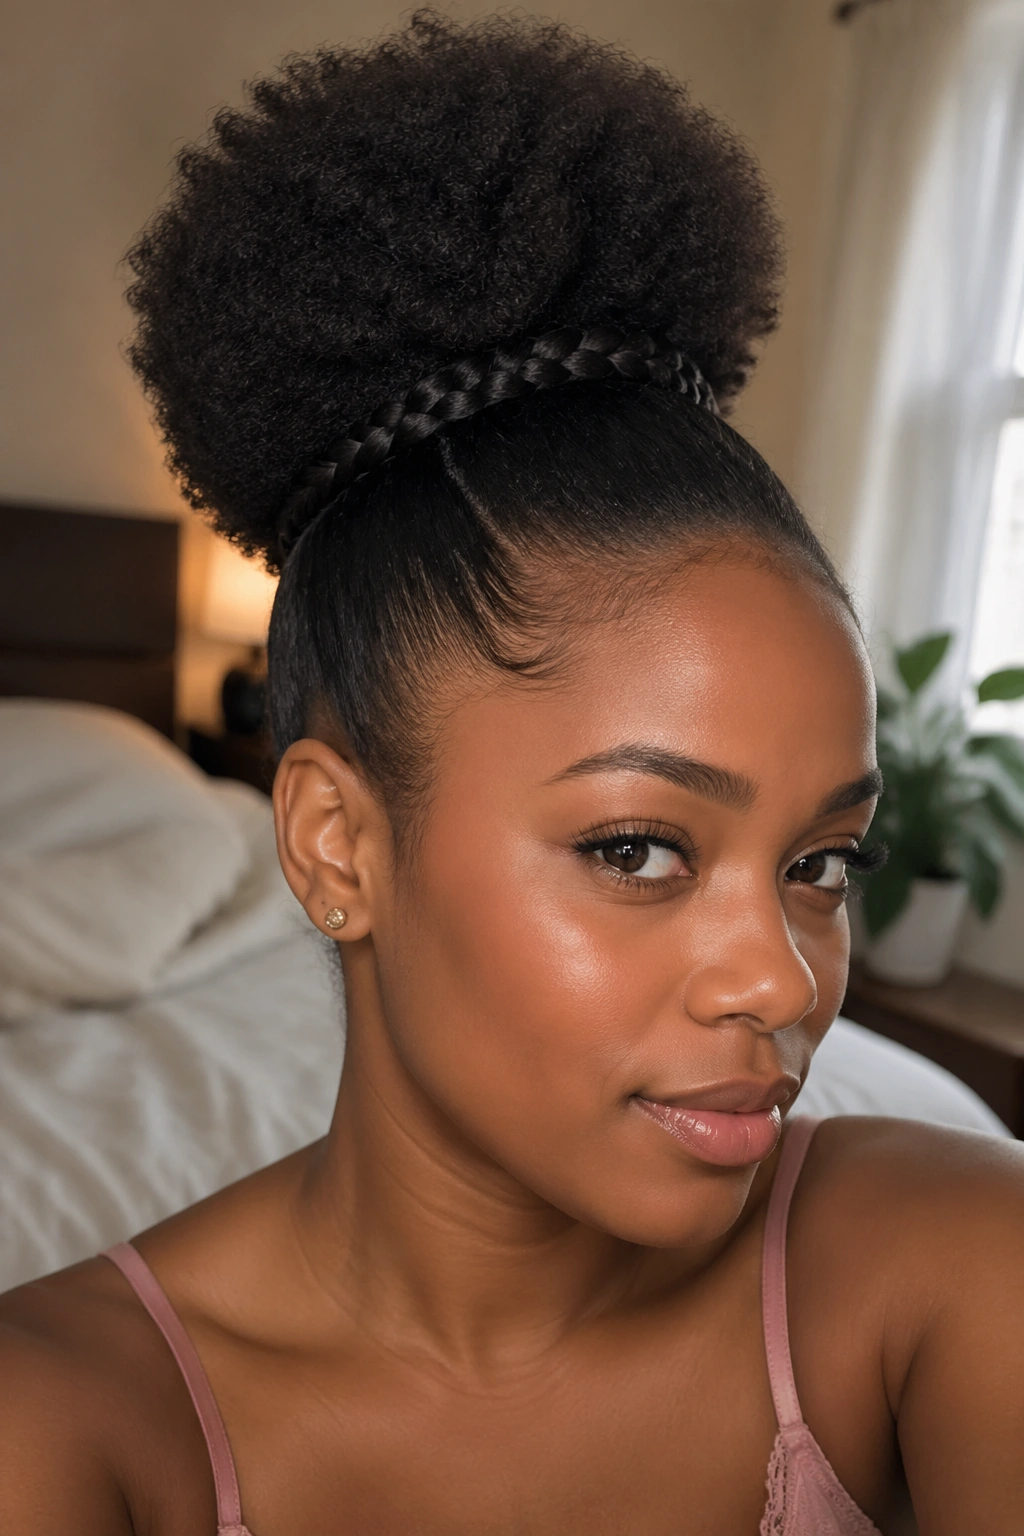
Before securing your puff elastic, add a simple three-strand braid to a small front section of hair. Once the puff is in place, wrap the braid around the elastic and tuck or pin it in place. The braid becomes a natural “tie” around the puff base.
It looks much more intricate than it is. Total extra time: about 4 minutes. And it solves the elastic-visibility problem — instead of a scarf to cover the hair tie, you’ve got a braided accent that’s part of the style itself.
15. Tapered Sides Puff
If you keep the sides and nape trimmed shorter than your top, your natural hair will create a built-in taper effect. When you pull the top into a puff, the shorter sides act like a fade — the puff sits on top with clearly delineated sides. No gel required to create that contrast.
This approach requires commitment to regular trims on the sides, but the payoff is a consistently sharp silhouette every time you put your hair up. The puff looks intentional rather than like something you threw together. Which, honestly, is the goal for any style.
16. Fluffy Wash-and-Go Puff
Do a thorough wash-and-go — apply your styling product to soaking wet hair, let it air dry or diffuse fully — and then gather the whole thing into a puff rather than wearing it loose. The resulting puff has defined, separated curls throughout rather than the more uniform texture you get when styling before washing.
Why would you do this instead of just wearing your wash-and-go loose? Volume control. A wash-and-go on very thick 4C hair can grow quite large throughout the day. Gathering it into a puff gives you the same texture and definition but in a more controlled silhouette. You get definition without the spread.
17. Locs-and-Puff Combo
This one is for natural hair that’s either in starter locs or in a mix where some sections have loc’d and others haven’t. Gather the locs and free natural hair together into a single puff and secure it. The contrasting textures — smooth-surfaced locs against fluffy coils — create an interesting visual mix.
What Makes It Different
You can’t fake this look. It only works in genuine transitional loc stages or if you have sections that are intentionally in different states. The appeal is in the honesty of the texture contrast — it’s not styled to look a specific way, it looks the way your hair actually is.
18. Puff with Braided Undercut Design
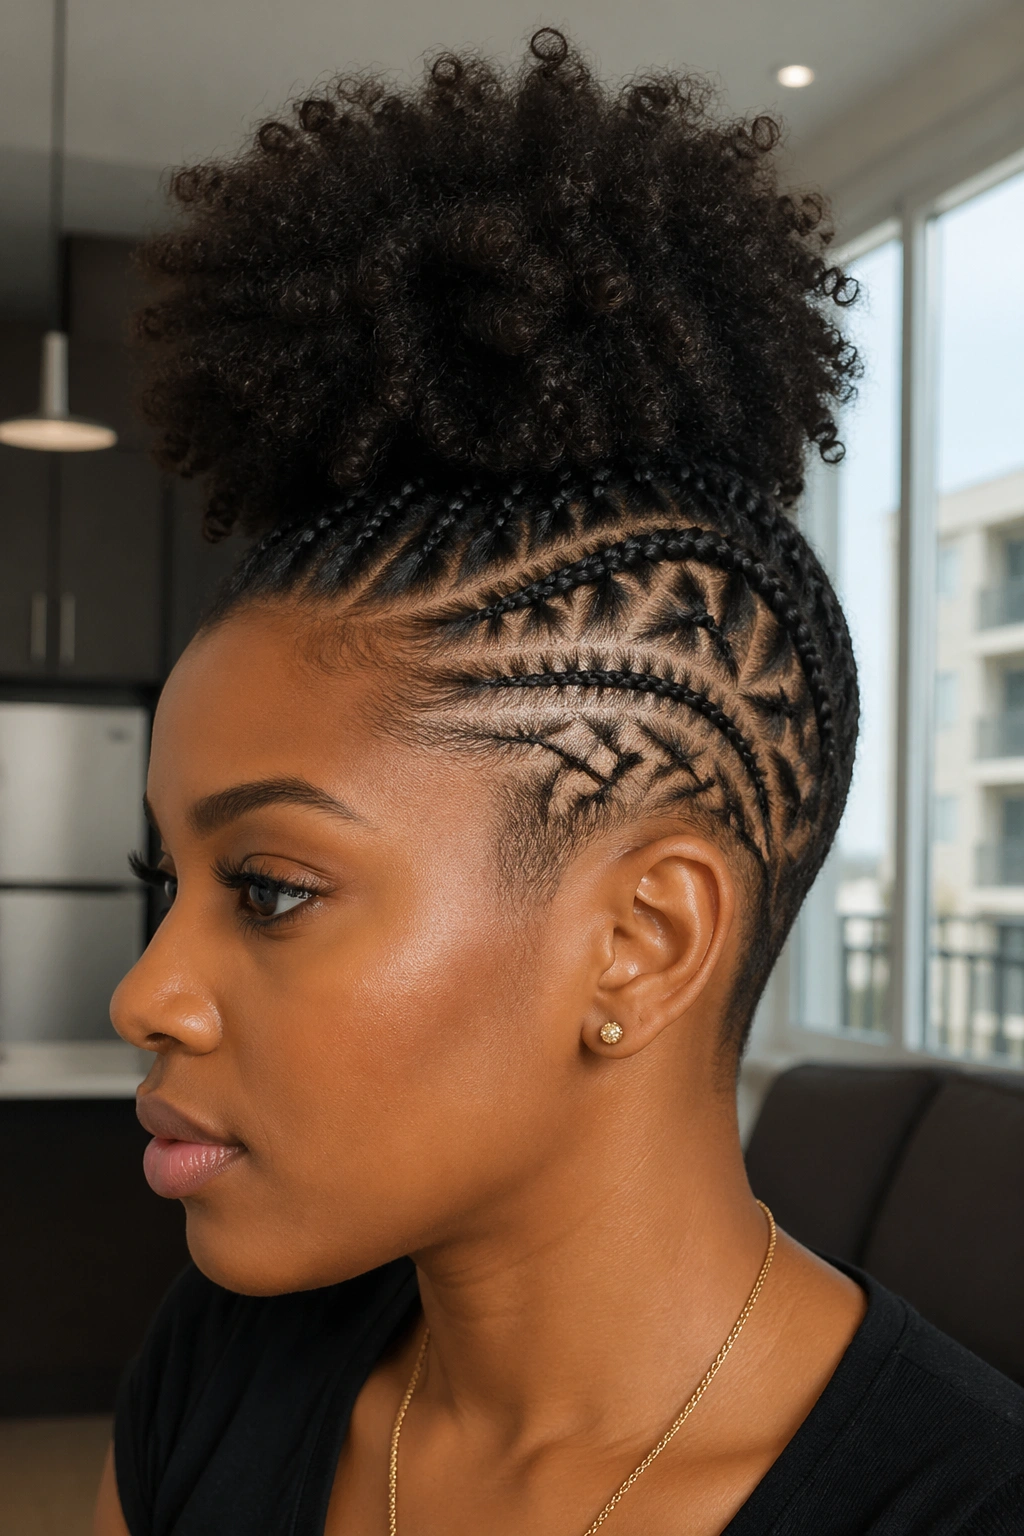
Some naturals shave or cut designs into the sides and nape while keeping the top at puff length. When the hair is gathered up, the designs are revealed. This is a commitment — you need a regular barber appointment to maintain the designs — but the effect when the puff goes up is genuinely striking.
Bold patterns, geometric lines, freehand curved designs — all of it becomes part of the style every time you wear a puff. It’s a 3D look. The design is the foundation the puff sits on.
19. High-Volume Puff with Picked Roots
Once your puff is gathered and secured, use a wide-tooth afro pick at the roots — slide the teeth down toward the elastic and lift upward in short, firm strokes. Work all the way around the circumference of the puff. This lifts the roots away from the scalp and adds significant volume.
Most naturals know this technique but under-use it. The difference between a flat puff and a full one is often just a 90-second pick. You don’t need a bigger elastic or more product. You need to physically lift the hair from the roots. Do it every morning on days you’re wearing a puff and the style will look better consistently.
20. Puff with Stretched Bangs
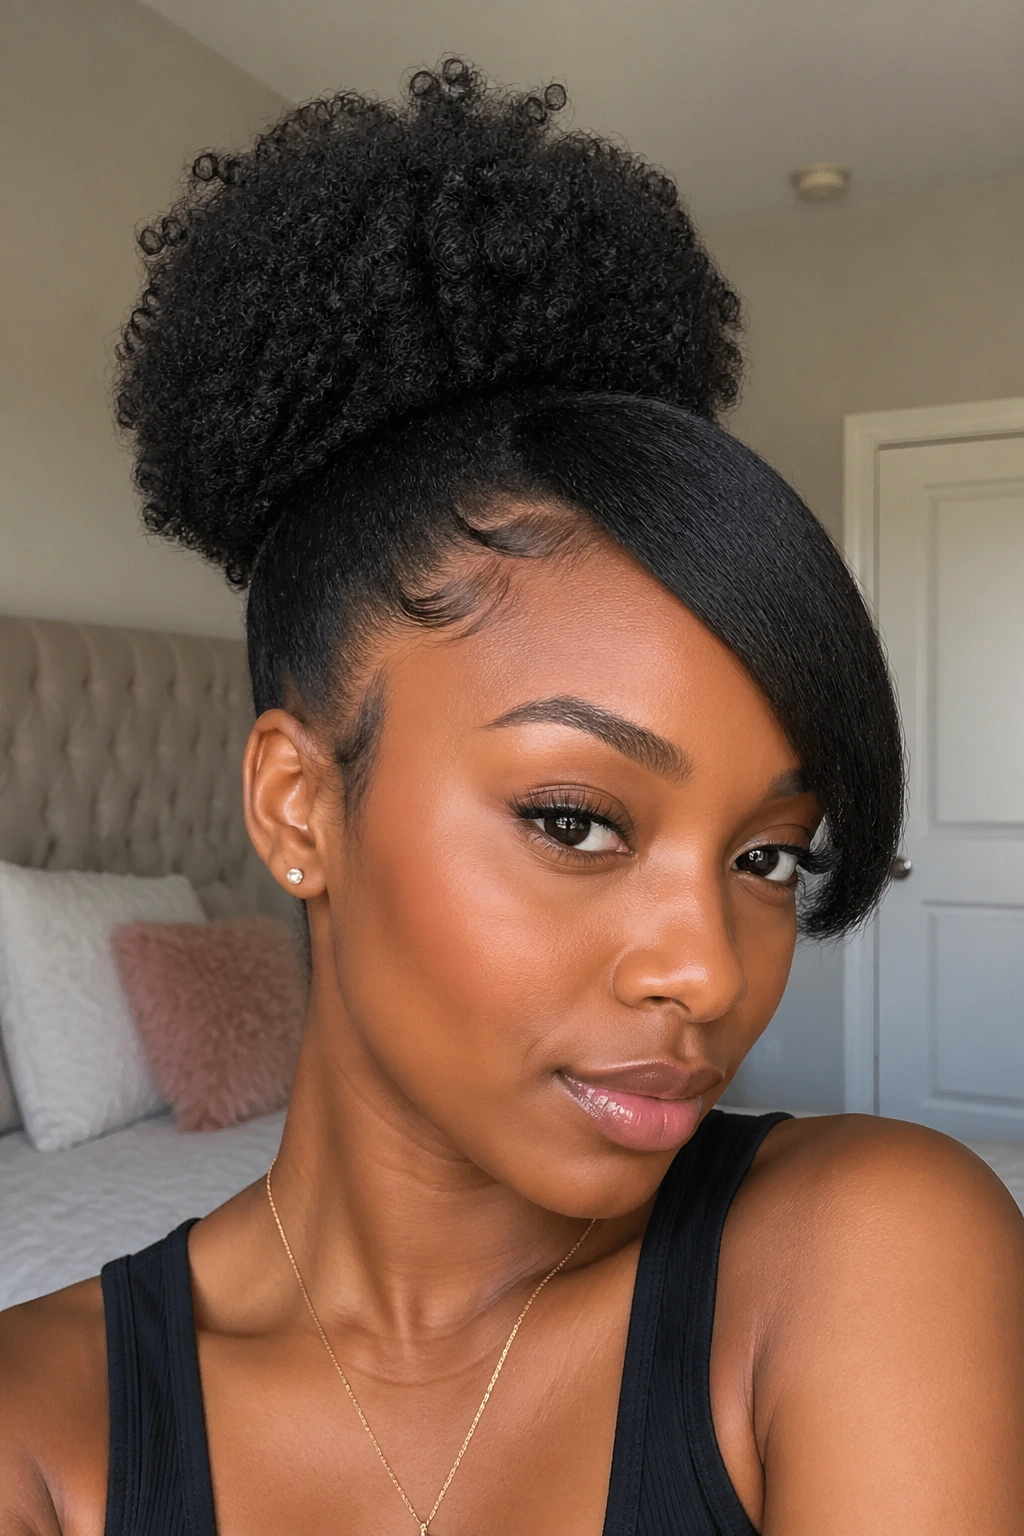
Pull the majority of your hair back into a puff but leave a section at the forehead loose. Stretch that front section — using your fingers or a small bristle brush — and smooth it forward so it sits like a bang. The contrast between the smooth, stretched front and the voluminous puff behind creates an interesting split in texture.
This doesn’t work if the front section is shorter than about 3 inches. The minimum length you need to actually control and smooth forward is 3 inches; shorter than that and it’ll spring back rather than lying flat. It also helps to use a very light hold product — too much gel and the bang section looks wet and heavy against the dry puff.
21. Half-Up Puff
Leave the bottom half of your hair loose and gather only the top half into a puff. The gathered top section creates the puff silhouette; the loose bottom section falls around your shoulders or rests at your back. The visual effect is somewhere between a puff and a half-updo — full and voluminous on top, free and natural below.
For this to work well, your hair needs enough length to actually fall freely once the bottom half is released. Generally that means at least 4-5 inches in those lower sections. If your hair is uniformly short, the “loose” bottom sections won’t have enough length to create the half-up effect — they’ll just stick out at the sides. Medium to longer naturals are the ideal fit.
22. Bantu Knot-Out Puff
Do your Bantu knot-out as usual. Instead of wearing the loose result down, gather it into a puff. The coiled, spring-like texture that a knot-out produces looks completely different from a standard puff — the curl pattern is more defined and structured, the coils sit separately rather than blending together. The whole thing has a more deliberate, intentional quality.
The timing matters here. Gather into the puff while the knot-out definition is still fresh — ideally day one or early day two. By day three, the definition has softened enough that you lose the visual distinction between this and a regular puff.
23. Puff on Transitioning Hair

Here’s a puff specifically for those in the transition from chemically processed to natural hair. Your hair has two distinct textures — the natural root growth and the relaxed or colored ends. Gathering it all into a puff actually hides the line of demarcation better than wearing it loose, because the different textures get bundled together and the contrast is less visible.
The catch: the relaxed ends are fragile at the demarcation line, and gathering them tightly can cause breakage right at that weak point. Use a very loose, gentle gather. A wide, fabric-wrapped elastic rather than a tight satin scrunchie. And don’t manipulate the style repeatedly throughout the day — put it up once and leave it.
24. Decorated Puff with Kanekalon Additions
Take a few strands of Kanekalon hair — in a color that either matches your natural hair or contrasts deliberately — and wrap them loosely around the base of your puff, twisting them together before tucking the ends. The addition of Kanekalon can add length to the puff itself (by pre-blending it into the gathered section before securing) or serve as a decorative wrap at the base.
This is one of the more creative options on this list. Done subtly with matching hair, it just looks like your puff is particularly full and long. Done with a contrasting color, it becomes a deliberate color accent. Neither requires extensions expertise — you’re not sewing anything in or braiding anything down. You’re literally just wrapping a few strands and securing them.
Common Mistakes That Flatten or Ruin a Puff
The single most common mistake is gathering dry, unstyled hair into a puff and wondering why it looks flat, shapeless, or frizzy. A puff needs moisture to hold its shape. That doesn’t mean soaking wet — it means properly moisturized. If your hair is dry to the touch before you start, spray it with water, apply a leave-in, wait two minutes, then gather.
The second most common mistake is pulling too tight. A tight puff might look neater initially but it puts excessive tension on the hairline and causes traction alopecia over time — especially if you’re wearing this style daily. The elastic should feel secure, not like it’s pulling. If you’re getting a headache or your scalp feels tight after an hour, loosen it.
Third: using a plain rubber band. They grab individual strands and break them on removal. After a week of rubber bands on the same section of hair, you’ll notice breakage at that exact point. Satin-covered elastics are $3 for a pack of 20. This is a non-negotiable swap.
How to Keep Your Puff Looking Fresh All Day

Humidity is the enemy of edges. A light coating of castor oil along the hairline before applying your edge product creates a barrier that resists moisture in the air. It won’t last forever — if you’re in very high humidity, touch-ups are inevitable — but it extends your edge hold by a few hours.
Carry a small spritz bottle of water and a pea-sized amount of your edge product in your bag. Not for a full redo — just for targeted maintenance on the sections that release first. Usually that’s around the temples, which are finer and more prone to curling back up.
A satin or silk scarf at night keeps the puff’s shape better than anything else. If you’re trying to preserve a puff for a second day, use the pineapple method — gather everything loosely at the top with a very gentle elastic, wrap in a satin scarf, and in the morning it’ll need only minimal refluffing.
Protective Styling Notes for Puff Wearers
Wearing a puff daily is not inherently damaging, but daily manipulation of the same sections — gathering, elastic, removal — does add up. If you’re wearing a puff every single day, alternate the placement. High puff one day, low the next, side-placed the day after. The strain shifts away from any single area.
The hairline takes the most abuse in puff styles. Edges are fine hairs and they’re the first to thin if you’re pulling too tight or using too much product that dries hard and stiff. Give your edges a break once or twice a week — a low manipulation style or a protective style that doesn’t require a tight elastic at the front.
Your hair deserves puff days and rest days in equal measure.
Choosing the Right Puff for Your Face Shape
Face shape isn’t a rule — it’s a starting point. But understanding how different puff placements interact with your facial structure can save you time experimenting and give you a cleaner framework for making choices.
Round faces: height is your friend. A high puff placed at the crown adds vertical elongation that visually lengthens the face. Wide, low puffs add width at the top of the head, which can amplify roundness rather than balance it. If you have a round face and want a low puff, keep it at the nape rather than high on the sides.
Oval faces: genuinely the most versatile situation. High puffs, low puffs, side puffs — all of them work on oval faces because the proportions are already naturally balanced. If you have an oval face, your limiting factor is preference and occasion, not geometry.
Heart-shaped faces — wide forehead, narrow chin — can feel like the high puff exaggerates the width at the top. A lower, softer puff that sits at mid-crown or nape balances this. Or go the other direction entirely: a very high, very dramatic puff that owns the width rather than trying to minimize it. Either approach works. In-between is harder.
Square faces — strong jawline, similar width at forehead and jaw — soften beautifully with a rounded puff that adds volume above the jaw level. The circular shape of a well-fluffed puff draws attention upward and creates a softer, rounder impression that contrasts with the angular jaw line.
Long faces benefit from a wider, more horizontal puff rather than a tall, vertical one. The goal is to add visual width at the top to balance the elongation below. A puff that spreads wide — achieved by fluffing outward rather than upward — does this effectively.
Products Worth Knowing for Puff Styling
Edge control versus edge gel is a real distinction that matters. Edge control — usually a wax-based product with a creamy, thick texture — is excellent for laying edges flat and keeping them in place for most of the day. It’s the right tool for the classic smooth edge look. Edge gel — water-based, typically more firm-hold, dries harder — is the right tool for more defined, sculpted baby hair patterns. It holds detail better but can flake if over-applied.
For the body of the puff itself: a leave-in conditioner is essential as the moisture base. A water-based styling cream or curl pudding for curl definition and frizz reduction. These two are the core. The leave-in goes on first while the hair is still damp; the styling cream follows section by section.
What you don’t need: a separate anti-frizz serum (the styling cream handles this), a pre-poo treatment specifically for puff styling, or any kind of hard-hold gel applied to the puff body — it stiffens the texture and makes fluffing feel like pulling through straw. Save the hard hold for edges only.
Castor oil, used sparingly and specifically on the hairline before edge product, is the single most effective edge-hold extender available. Apply a thin layer — you should be able to barely feel it, not see it — before your edge control or gel. The oil creates a sealing layer that resists humidity for longer than the edge product alone. Not dramatically longer. But noticeably longer, which matters when your edges are the most visible part of your style.