Cornrow styles for afro hair women have one of the longest continuous histories of any hairstyle on earth — thousands of years of documentation across African cultures, worn as identity, status, mourning, celebration, and art. That context doesn’t disappear when you sit in a salon chair. Every geometric part, every tightly braided row, every carefully laid pattern carries that weight. Which is one reason why cornrows look the way they look — not just good, but significant.
What’s less often talked about is the sheer range. When most people think cornrows, they picture straight rows going back from the forehead to the nape. That’s one option. But cornrow styles for afro hair women also include curved patterns that swoop and arc across the scalp, diagonal rows that create a windswept effect, intricate designs that look like they were drawn freehand, and hybrid styles that combine cornrows with puffs, buns, crochet hair, or extensions for length and drama. The variety is enormous.
This is also, unambiguously, a protective style. When done at the right tension, with proper moisturizing, and removed at the right time, cornrows protect the length of your natural hair from the daily manipulation that causes breakage. They are genuinely useful as well as beautiful.
How Cornrows Work on Afro-Textured Hair
Afro hair — particularly type 4A, 4B, and 4C textures — is structurally ideal for cornrows. The natural kinking and coiling of the hair fiber allows it to grip itself as it’s braided, creating tighter, neater cornrows with less need for product assistance than straighter textures. The coil pattern also means cornrows on afro hair tend to look full and defined rather than flat, because the hair has spring and body even under tension.
The one consideration is shrinkage. Depending on your texture and its level of moisture, afro hair shrinks significantly after washing — sometimes 40-70% of its actual length. This shrinkage doesn’t affect the cornrow once it’s installed, but it can make the braided sections look shorter or slightly looser if the hair was stretched for installation versus done at natural shrinkage. Most experienced braiders will either stretch the hair slightly before braiding or account for shrinkage in their tension and section size.
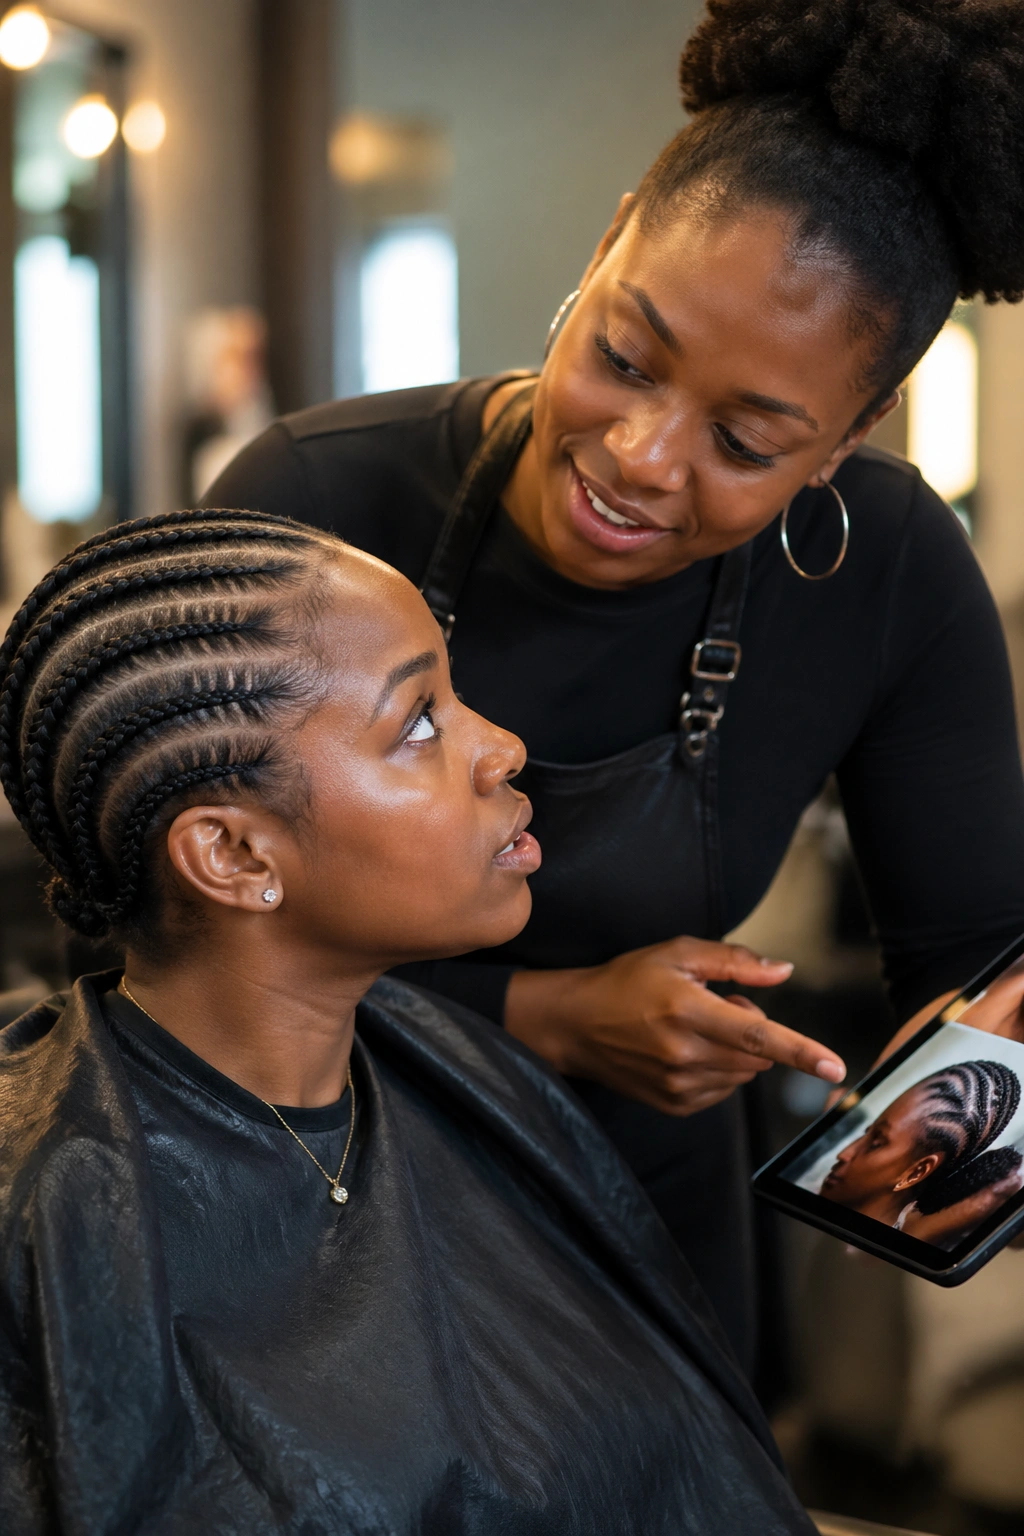
Choosing the Right Braider
This deserves its own conversation because it’s genuinely important. Not every person who can braid can cornrow afro hair well. Look for a braider who regularly works with 4B and 4C textures, ask to see photos of their work on similar hair types, and pay attention to the details in those photos: are the parts clean and straight? Are the rows even in width? Is the tension consistent throughout the braid, or does it start tight at the root and loosen toward the end? These tell you more than any Yelp review.
A crucial thing to tell your braider before they start: the tension. Cornrows should feel snug but comfortable — not so tight that your scalp feels like it’s being stretched or pulled. If the style is so tight that you feel pain for more than a few hours after installation, take them out. Chronic traction from too-tight braids causes traction alopecia, and the hairline damage from that condition is very difficult to recover from.
Installation Prep: Setting Your Hair Up for Success
The best cornrow installation happens on clean, detangled, lightly moisturized hair. Wash with a sulfate-free shampoo, follow with a deep conditioning mask for 20-30 minutes (use heat if possible — a plastic cap under a warm towel), rinse thoroughly, and then apply a light leave-in conditioner. The hair should feel soft, flexible, and manageable — not squeaky clean and stripped, not weighed down with heavy product.
Some braiders prefer to work on completely dry hair because it gives them more grip. Others prefer slightly damp hair because it’s more pliable. This is a stylist preference, not a right-or-wrong situation. What you want to avoid is fully dry, unmoistured hair that’s been sitting without product for days — that hair breaks under braiding tension.
The Longevity Reality
Most cornrow styles last 2-4 weeks before they start to look grown-out at the root and the braids begin to look fuzzy. Some styles, particularly neater, smaller braids on denser hair, can go 4-6 weeks. The edge around week 4 is when you need to make a decision: re-braid the perimeter to freshen the look, or take the whole style down.
The critical mistake is leaving cornrows in past the point where the natural hair underneath starts to knot and mat. After about 6-8 weeks, the shed hair that normally falls away daily has accumulated inside the braids and can form mats at the root. Taking down knotted, matted cornrows without patience and a detangling conditioner causes significant breakage.
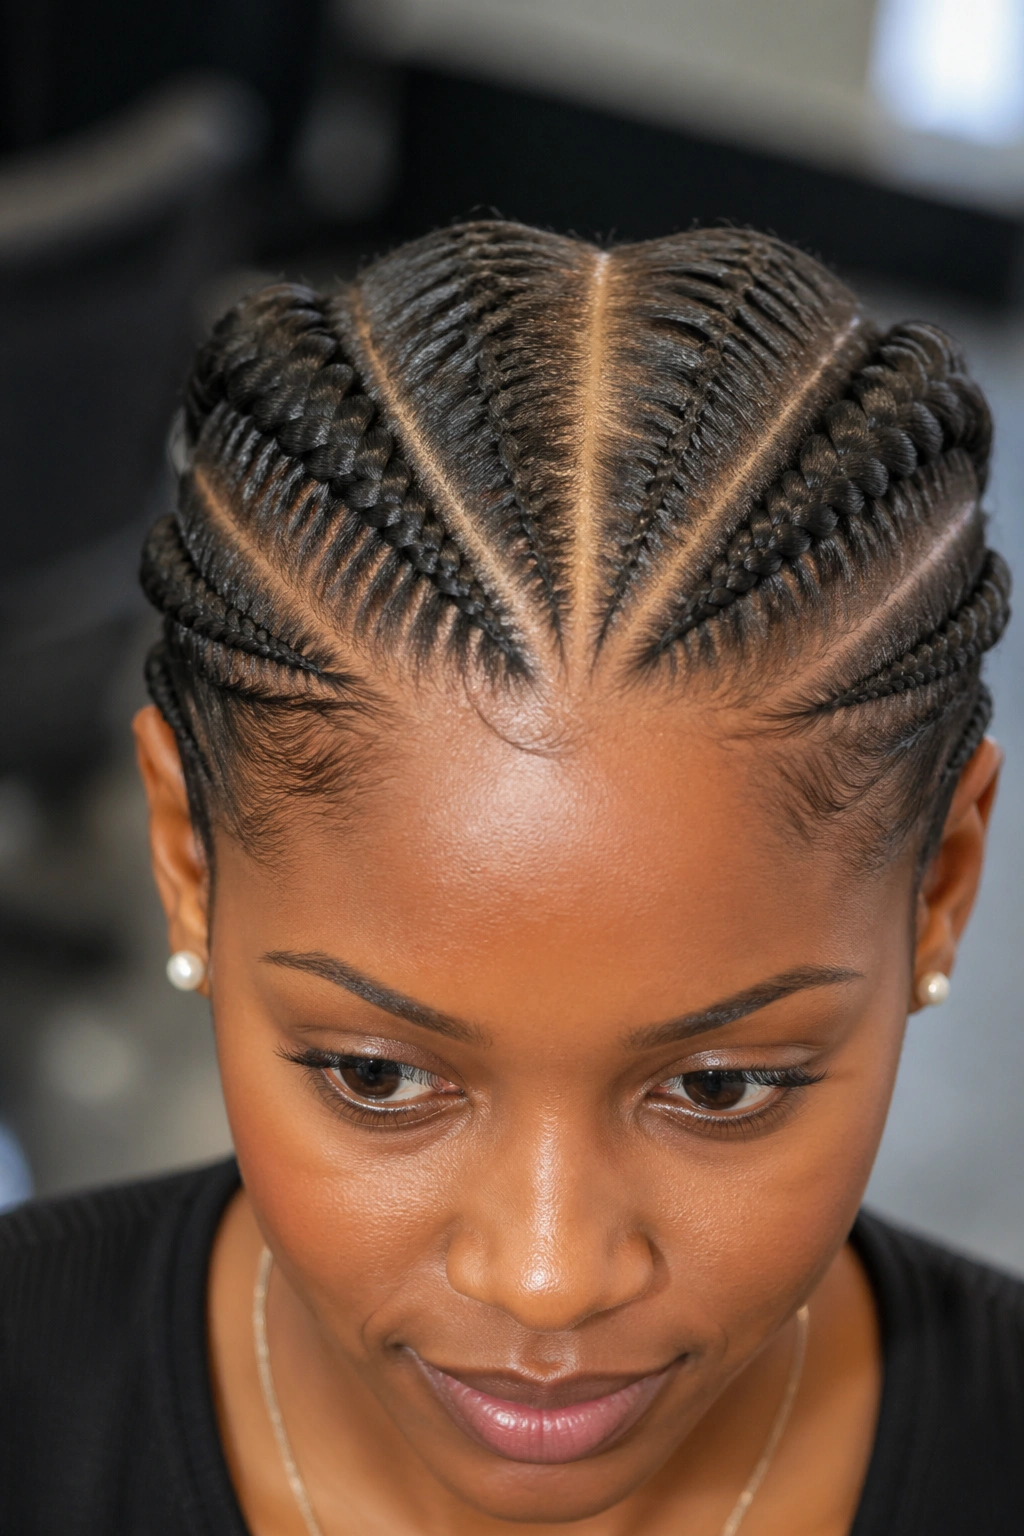
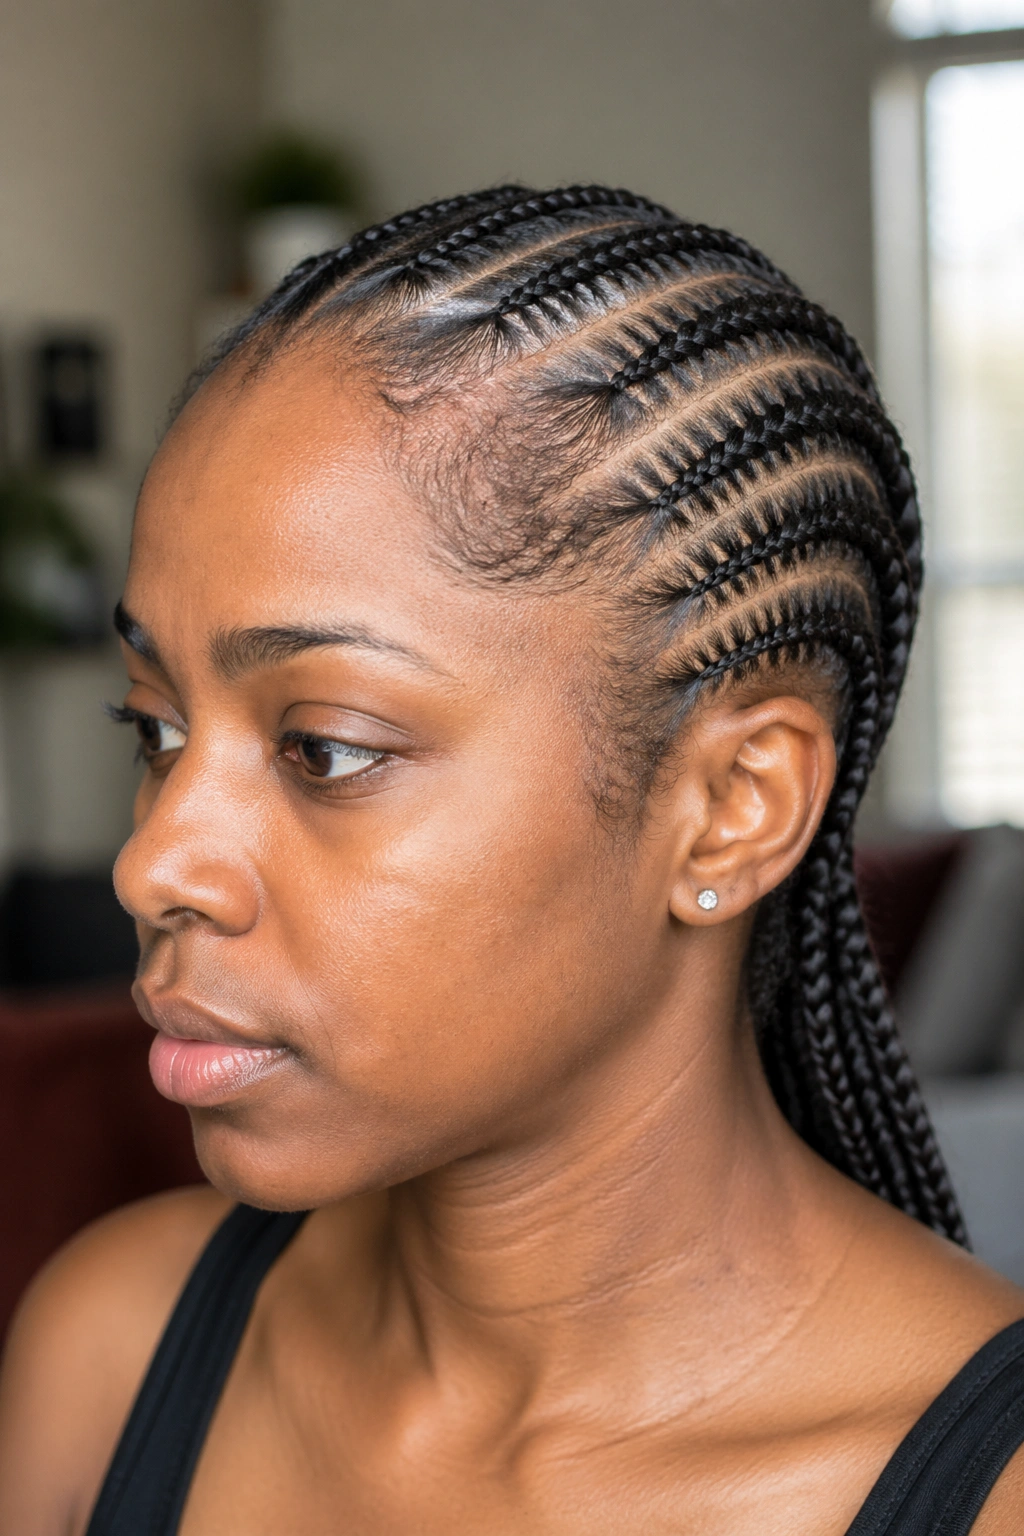
1. Classic Straight-Back Cornrows
The foundation. Six to ten rows, running parallel from the forehead straight back to the nape, perfectly even in width, every part ruler-straight. This is the style that comes to mind first, and for good reason — it’s clean, graphic, and works on every face shape.
Why It Works
The clean geometric lines draw the eye along their length, creating an elongating effect that’s especially good for rounder faces. The straightness of the rows contrasts with the natural texture of the hair in a way that reads as deliberate and styled. Nothing about this look is accidental.
The parts need to be precise. A rattail comb, good lighting, and patience create the kind of parts you can photograph from directly above and still see as perfectly straight. Crooked parts are the most common thing that separates a professionally installed set of straight-back cornrows from a home installation.
- Number of rows: 6 is graphic and bold; 10 is more delicate and detailed
- Extension hair adds length and thickness; choose a weight that matches your natural hair’s density
- Sleep in a satin scarf wrapped around the rows to prevent frizzing at the scalp
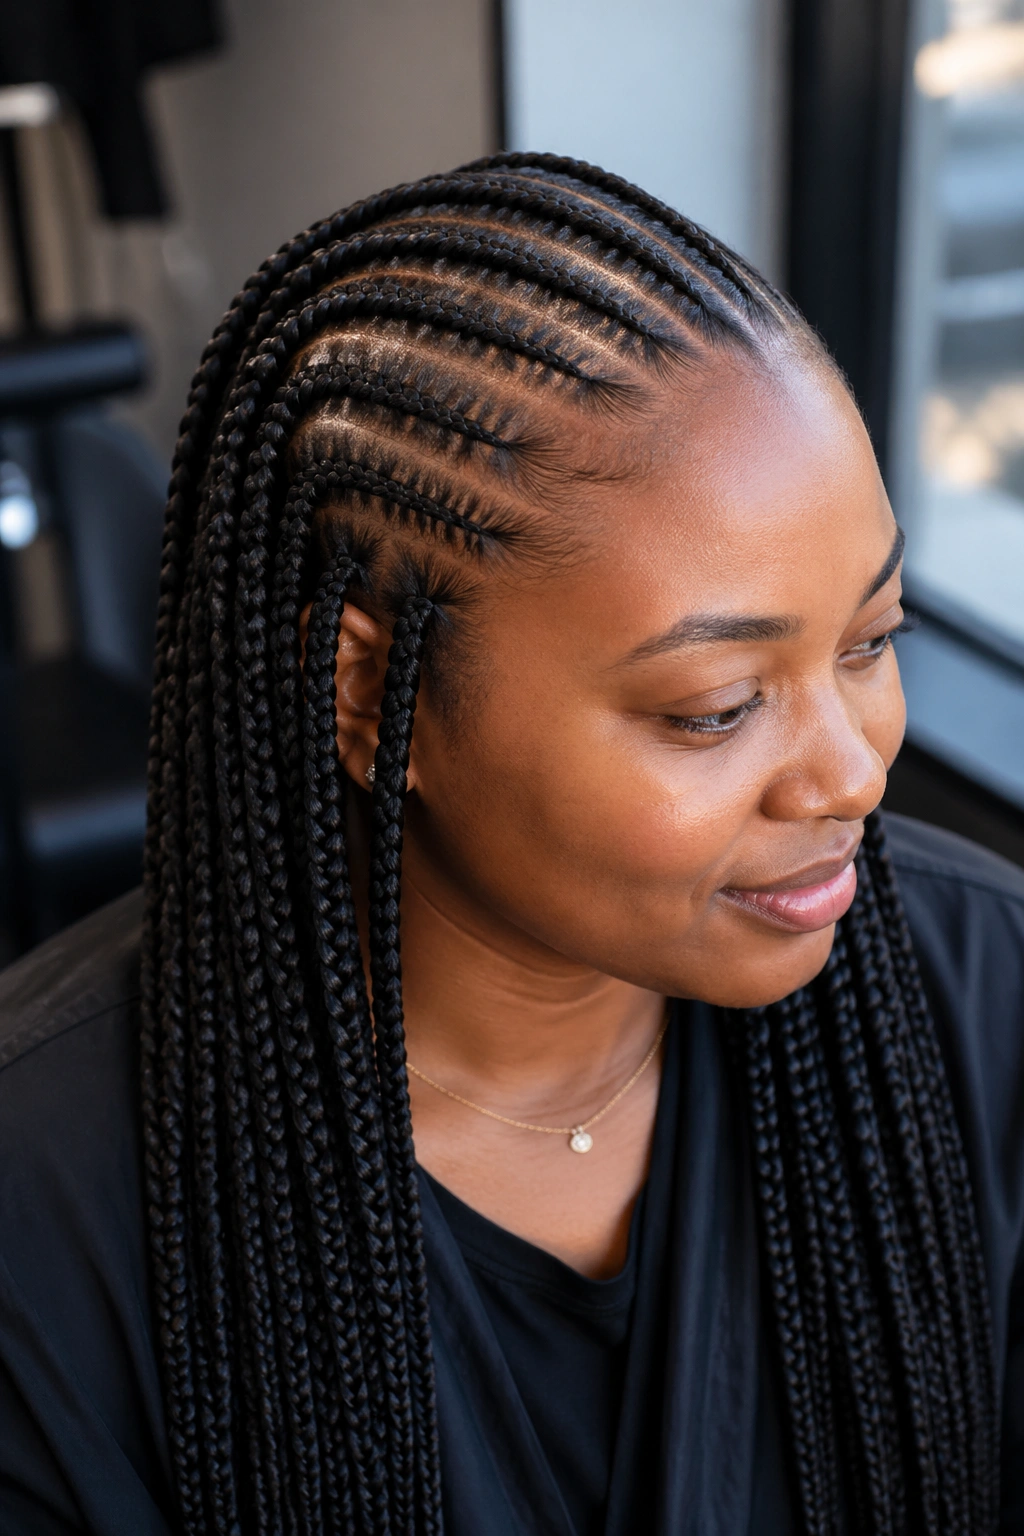
2. Feed-In Cornrows
Unlike traditional cornrows where extension hair is added only at the start, feed-in cornrows incorporate extension hair gradually — a small amount added every inch or so as the braid progresses. This creates a tapered, natural-looking root because the braid starts thin (just your natural hair) and gradually thickens as extension hair is added in.
The result looks dramatically more natural than a standard extension cornrow, which often has an obvious bump or knot at the root where the extension was added. Feed-in technique eliminates that. The root looks smooth and neat — almost like the hair grew that way.
This is more time-consuming to install, which usually means a higher price point at the salon. But the finish quality difference is significant enough to be worth it for most people.
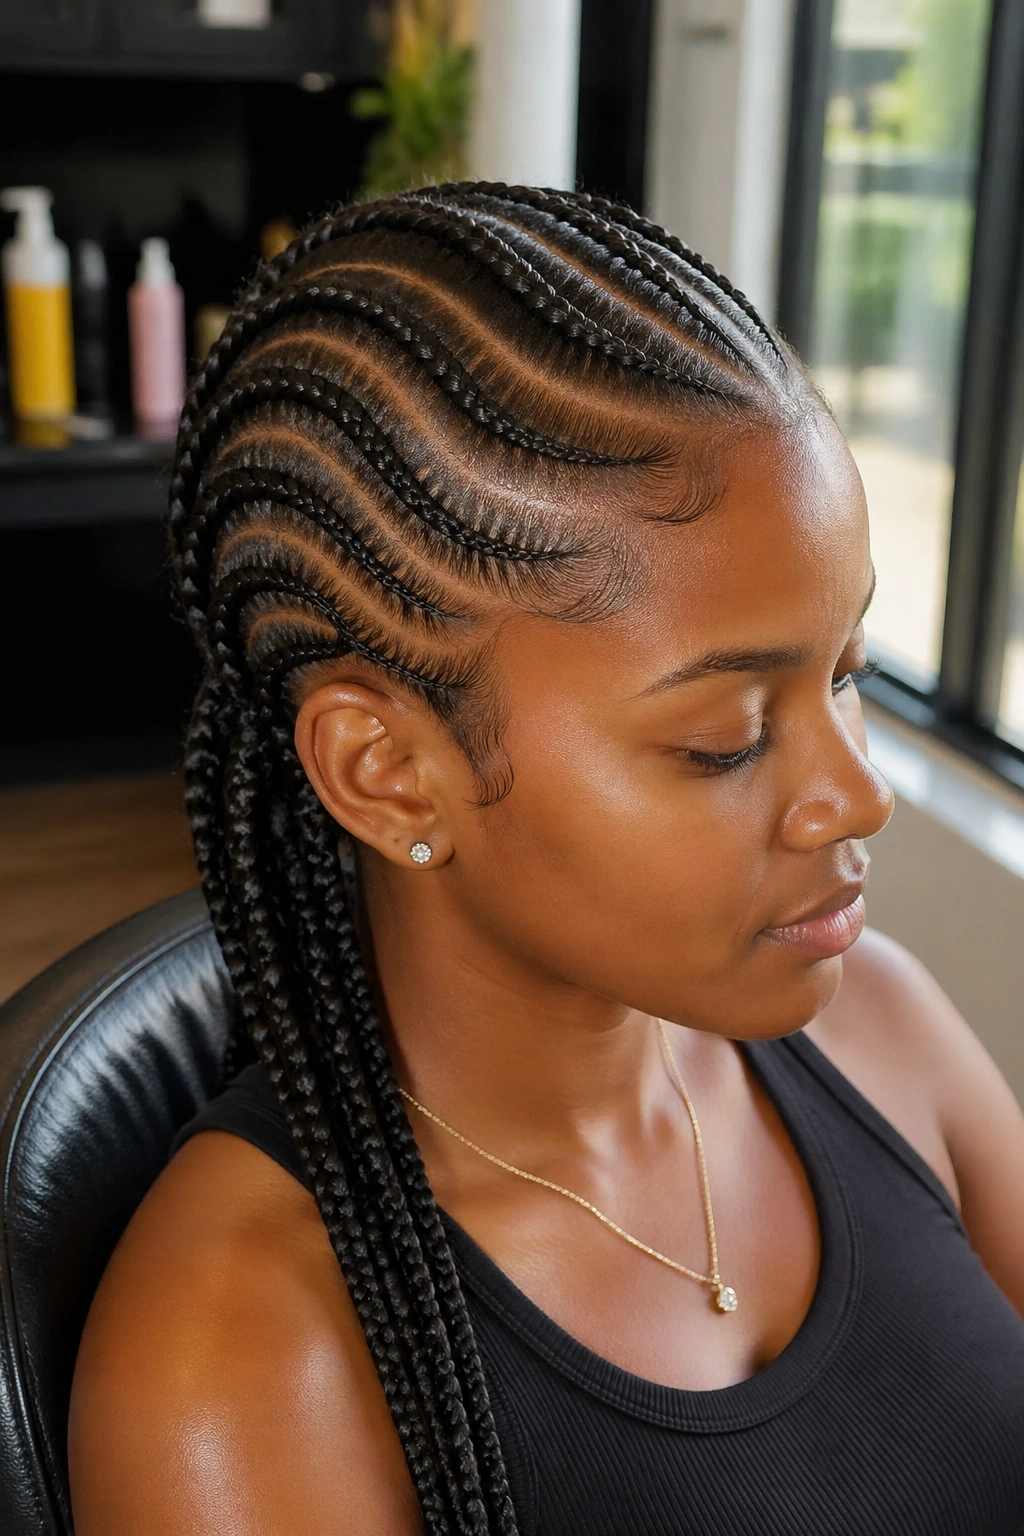
3. Curved Cornrows
Cornrows don’t have to go straight back. Curved cornrows sweep across the scalp in arcs — sometimes curving back and around from the center, sometimes creating a spiral effect from the crown, sometimes swooping from one side to the other. The curved pattern creates movement that straight rows don’t have.
The visual effect is completely different from straight rows. Where straight rows elongate and formalize, curved rows feel organic and dimensional. The curves follow the natural round shape of the skull, which makes the style look like it belongs to the head rather than being laid on top of it.
Curved cornrows take longer to install because each row requires more planning — the braider has to anticipate where the curve will go before the first row is placed. Changing direction partway through leaves visible gaps or uneven parts.
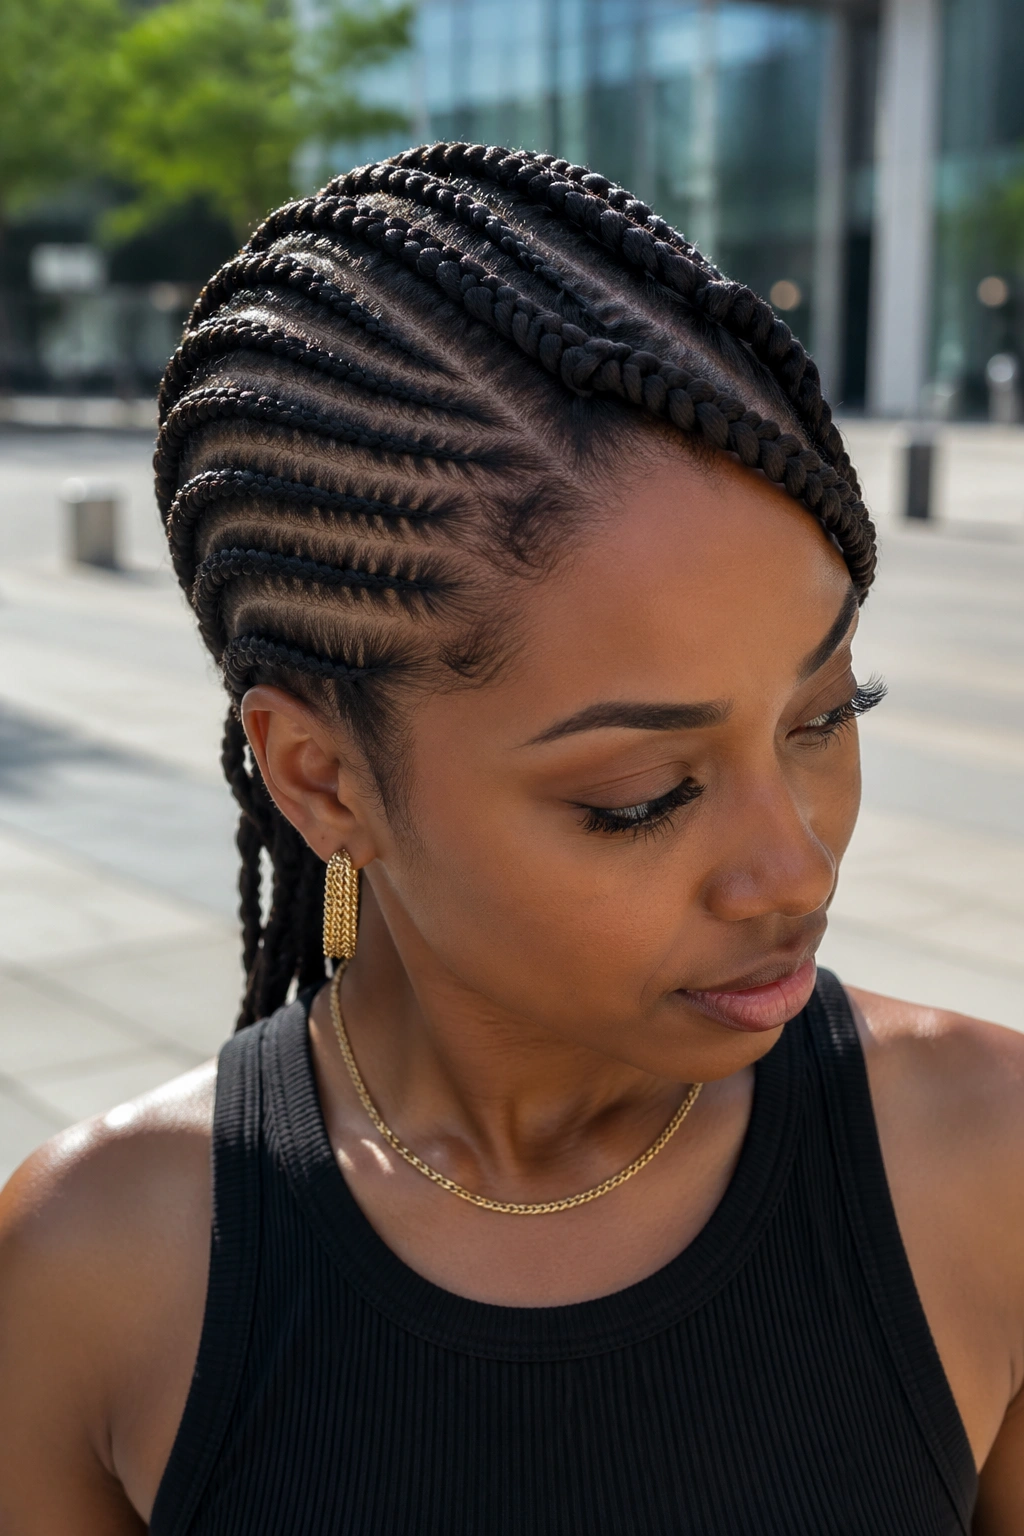
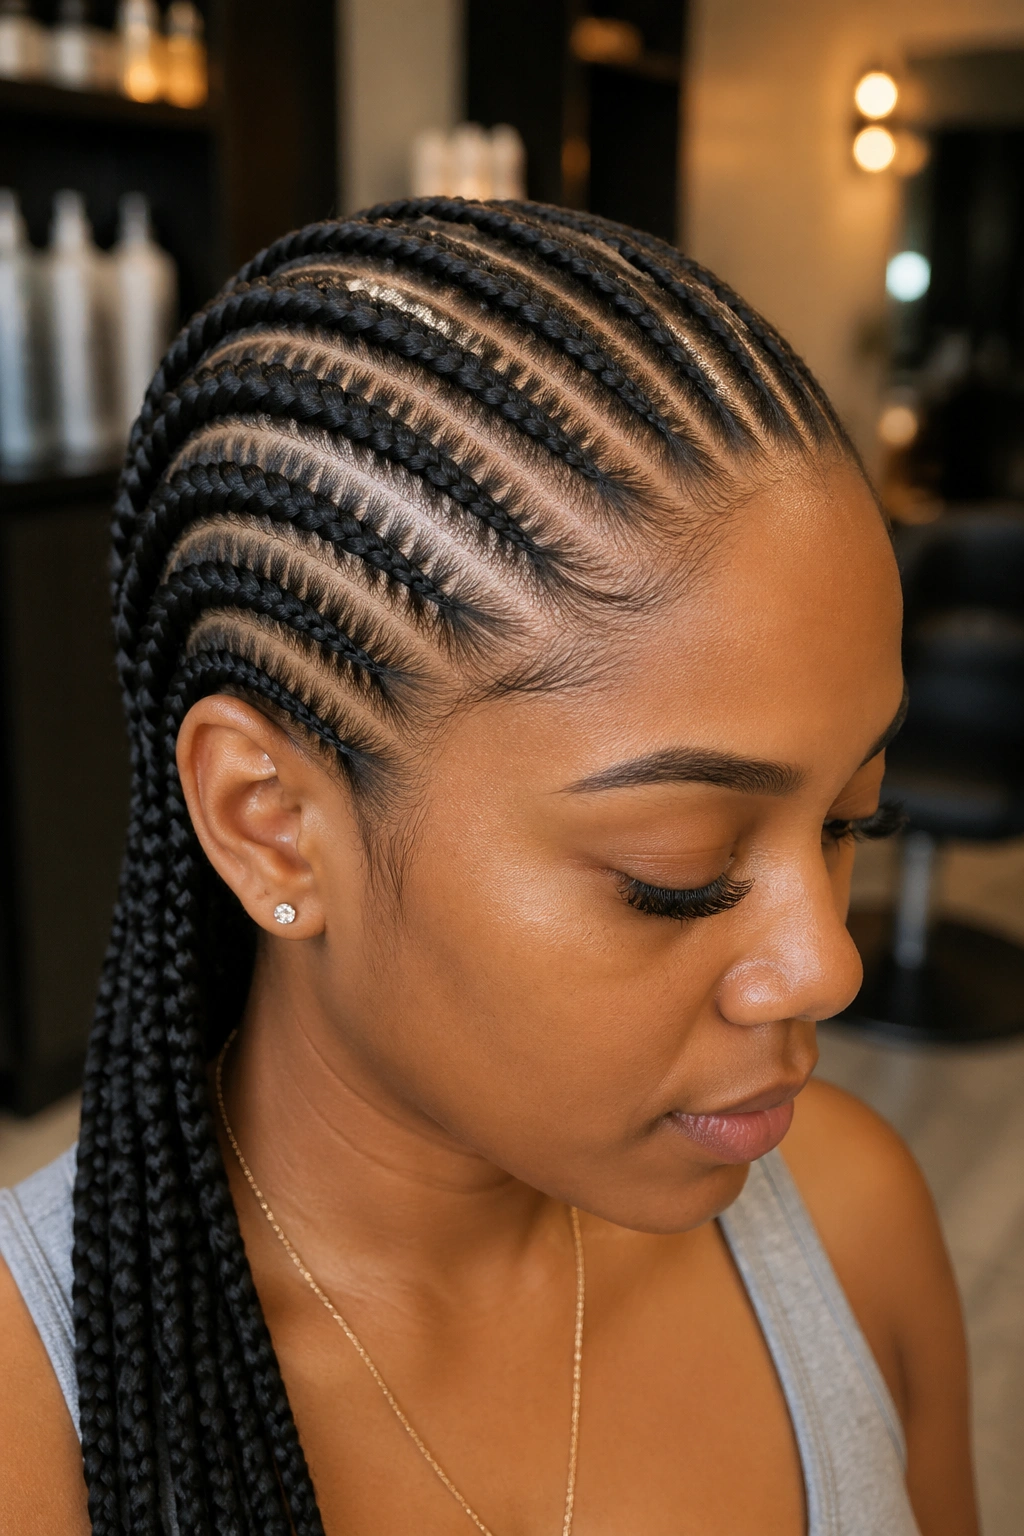
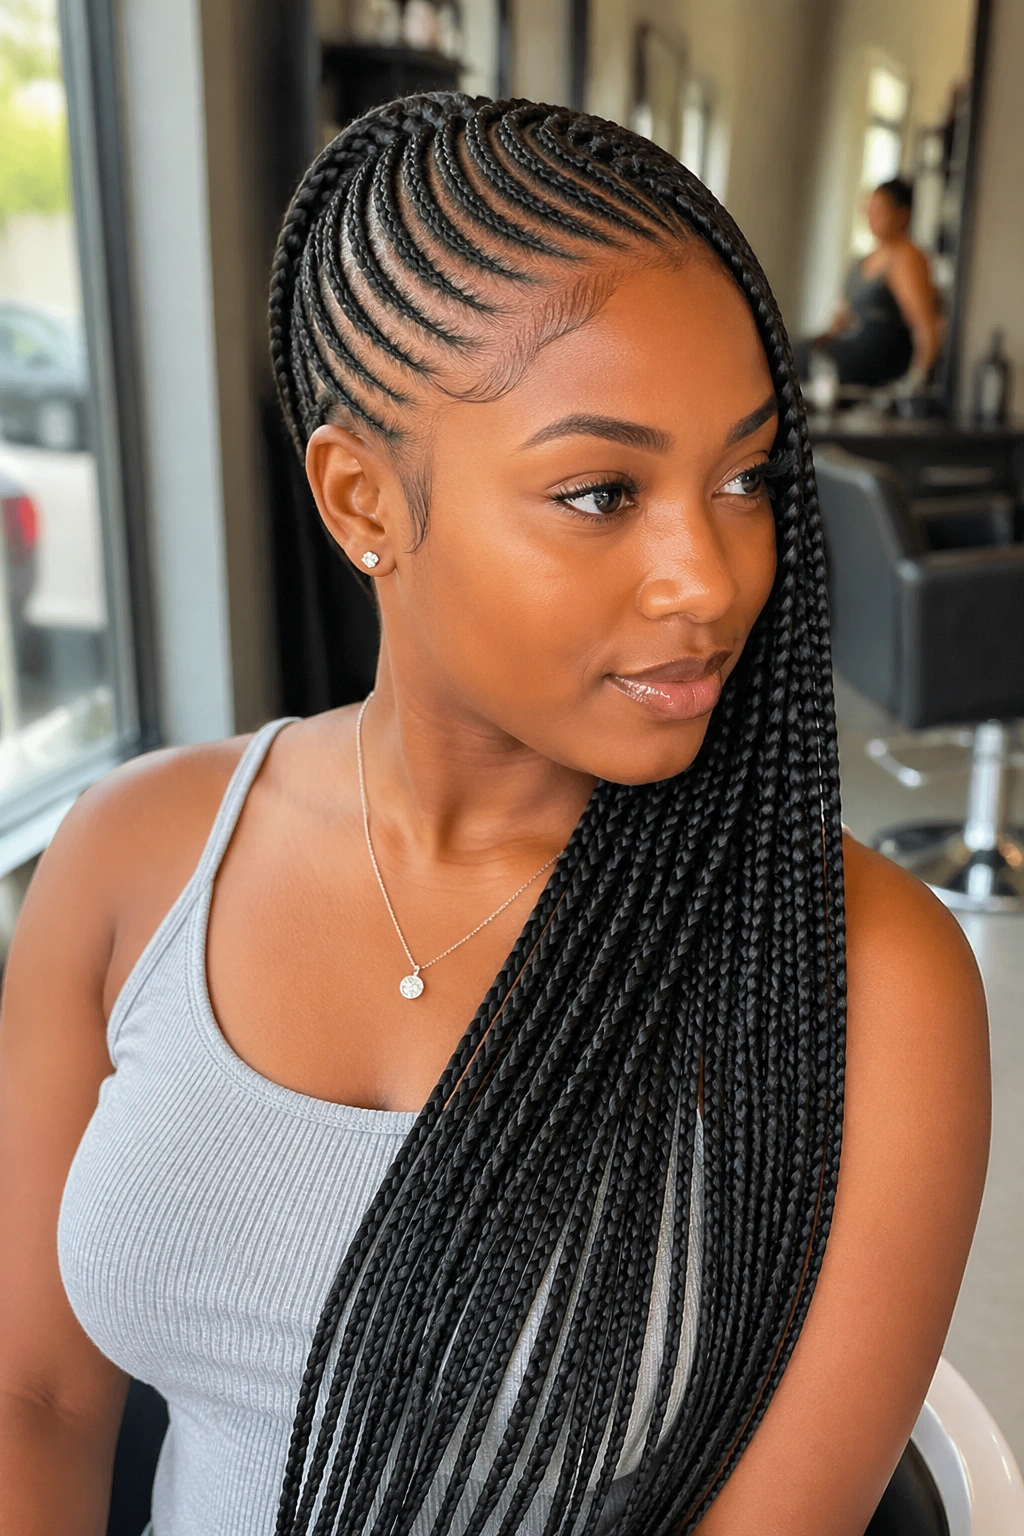
4. The Lemonade-Style Side Braids
Cornrows braided from one side of the head to the other in a diagonal sweep — all rows going the same direction, starting at one ear and ending above the opposite ear. This style went from regional preference to mainstream recognition after being worn prominently by a major artist and it hasn’t left popular consciousness since.
The side braid direction creates an asymmetrical look that’s very flattering on round and square faces because the diagonal lines visually slim and reshape. The rows are typically feed-in style for a natural root.
Length on the extension braids can go anywhere from shoulder-length to waist-length. Longer braids swing more dramatically when you move — which is either a feature or a consideration depending on your daily life.
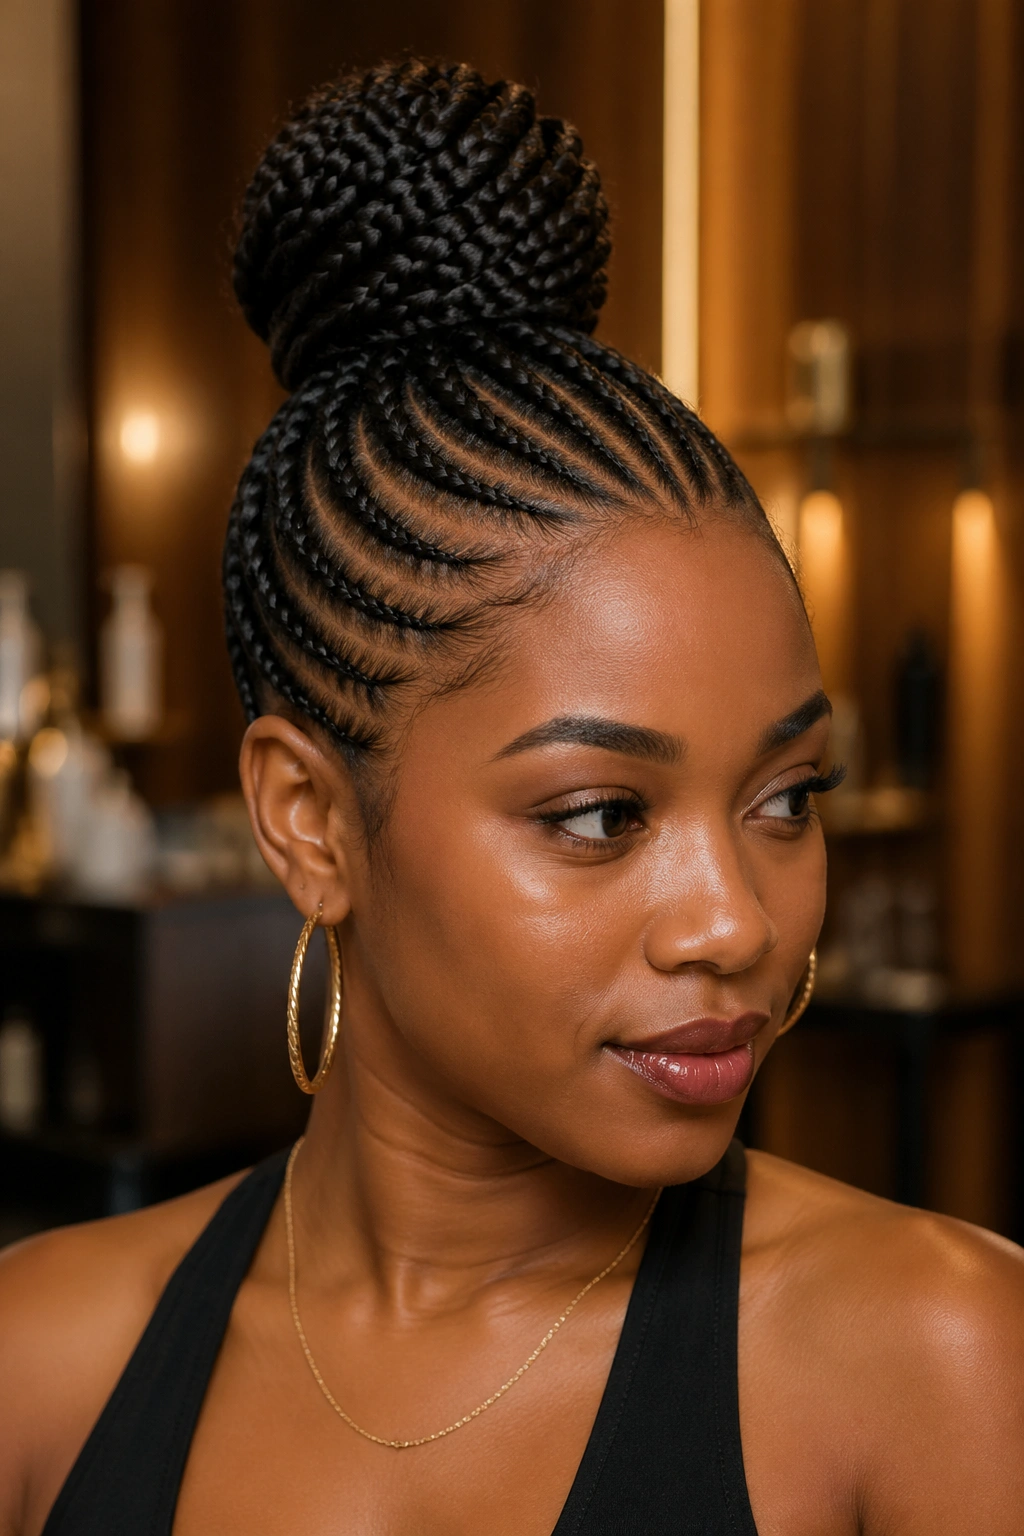
5. Cornrows into a High Bun
Cornrows braided from all around the head, converging at the crown and then gathered into a bun or puff at the top. The bun can be your natural hair (if it’s long enough to form one after the braids come together) or additional extension hair braided in and wrapped into a bun shape.
This is genuinely elegant. The braided base gives the style its structure, and the bun at the crown creates height and focal point. The flat scalp allows earrings to show clearly, making it one of the most jewelry-friendly styles on this list.
How to Get the Most From It
The direction of each cornrow matters for how cleanly they converge at the crown. Rows that start at the front need to angle slightly toward the crown, not run straight back. Rows at the sides need to arc upward. Your braider needs to plan the entire pattern before braiding the first row.
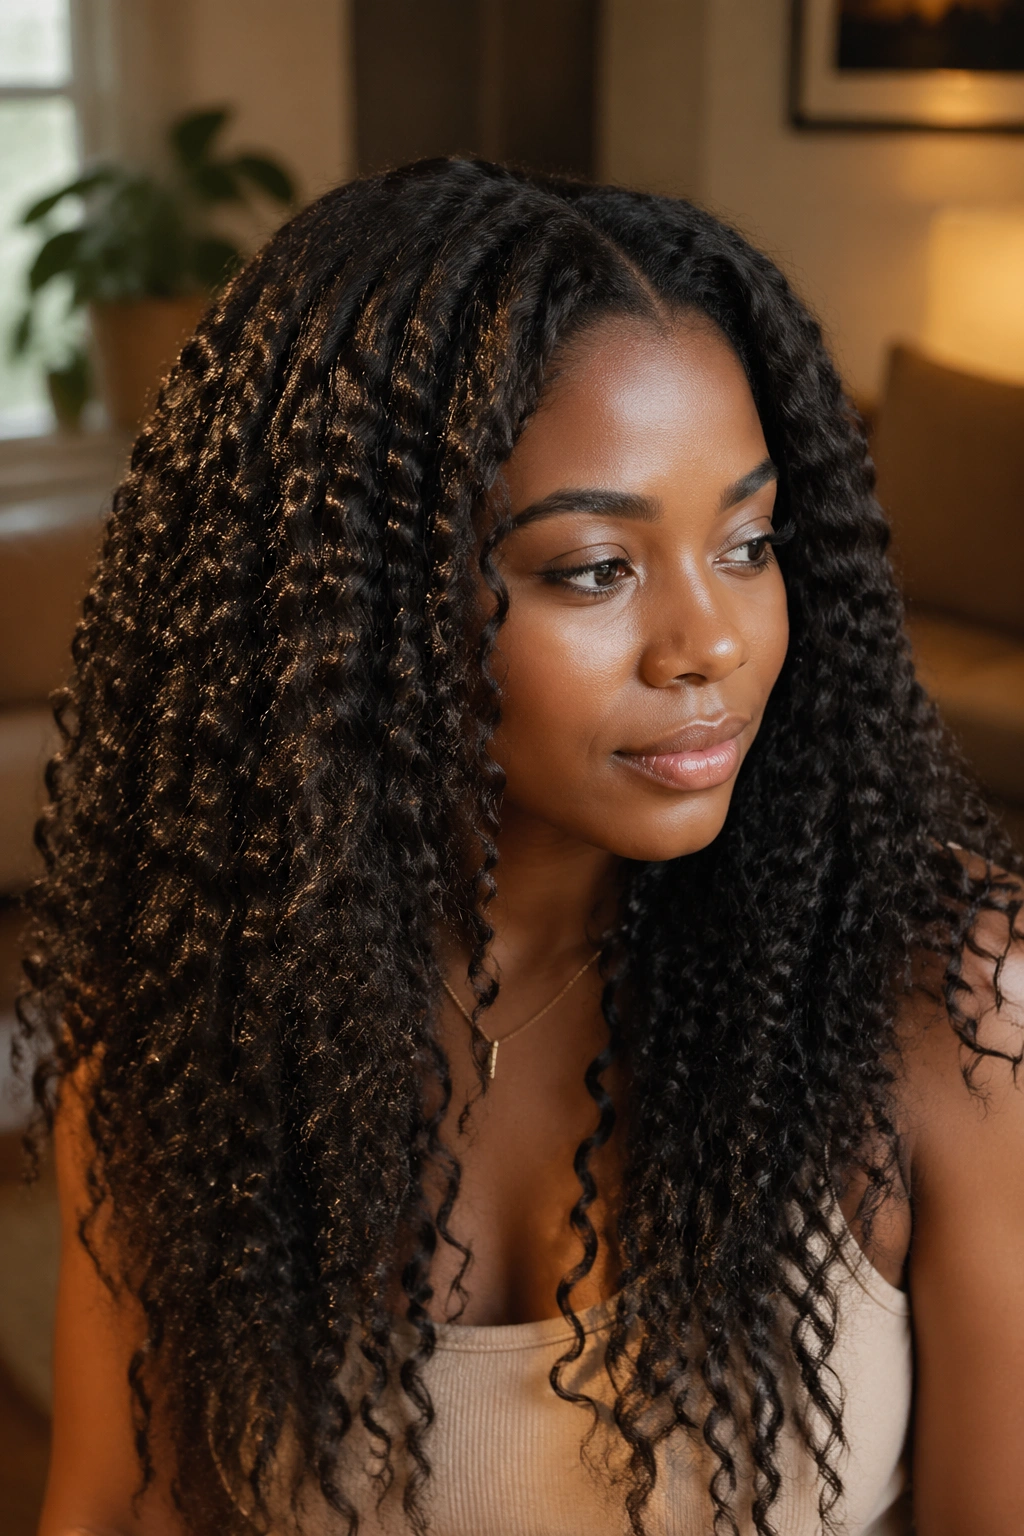
6. Goddess Cornrows with Curly Ends
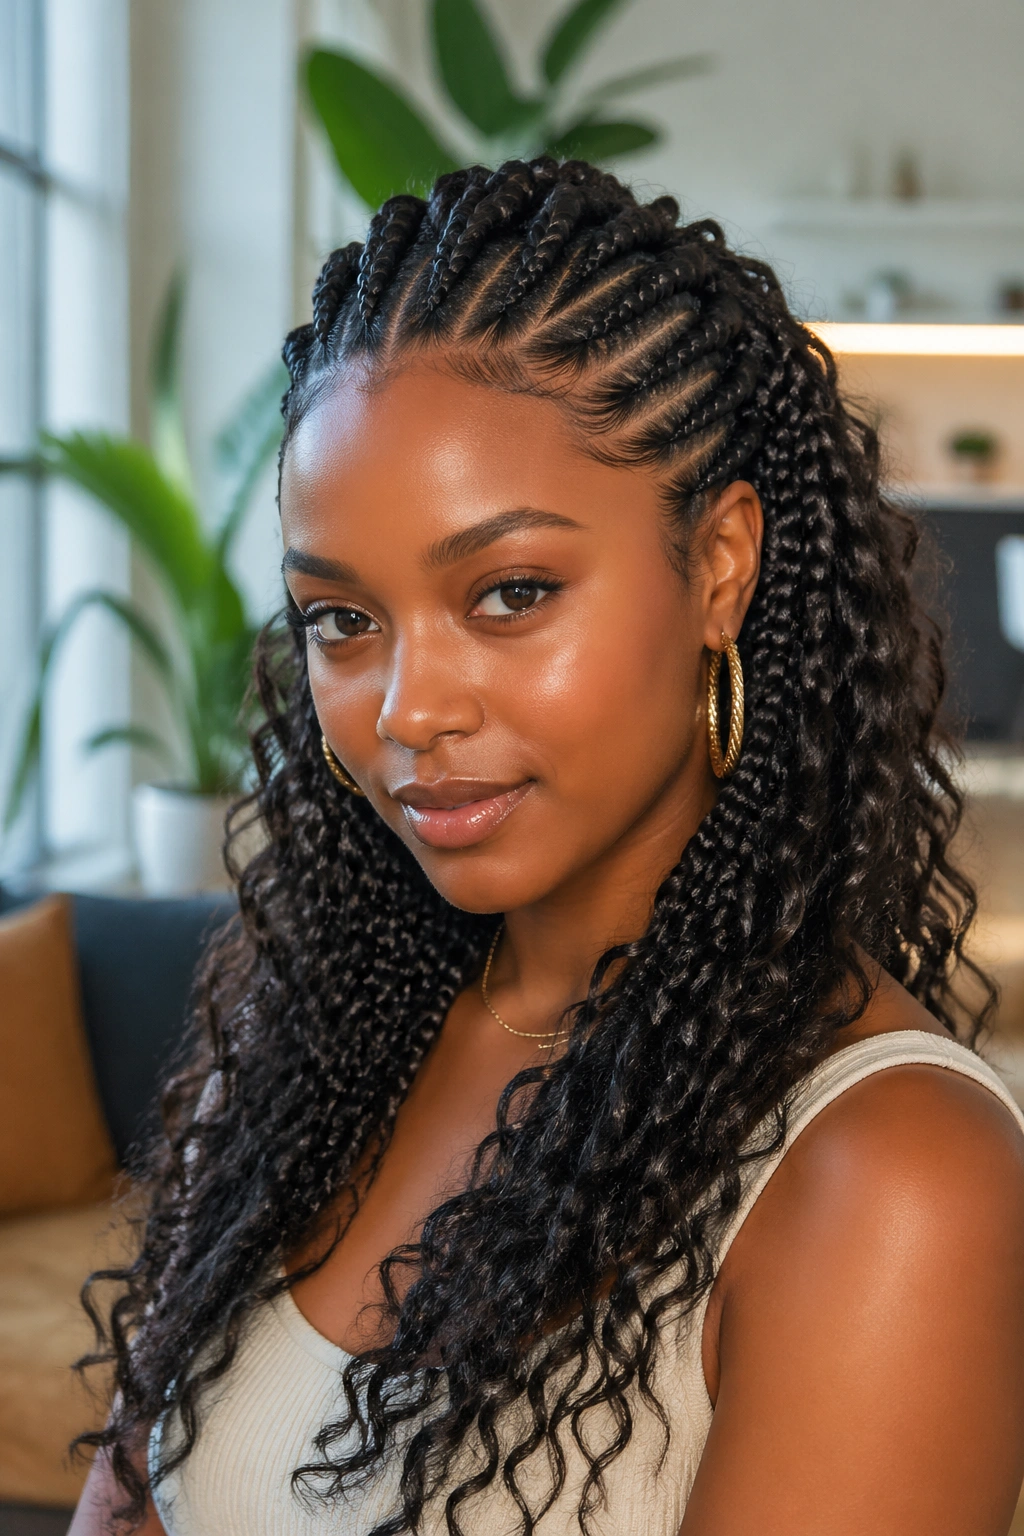
Cornrows installed with extension hair, then the ends of the extension hair are left un-braided — curly hair, either crocheted onto the tip or left loose — so the braids end in a loose, curly or wavy finish rather than a blunt tip. The “goddess” name comes from the flowing, hair-down quality of those loose ends.
This hybrid style offers the scalp protection of cornrows with the visual softness of loose hair at the length. The curly ends bounce and move with you. It looks elaborate but installs in roughly the same time as standard extension cornrows.
The curly ends need moisture to stay defined. A light curl refresher spray or a small amount of mousse applied to the ends every few days keeps them from going frizzy or straw-like.
7. Zig-Zag Part Cornrows
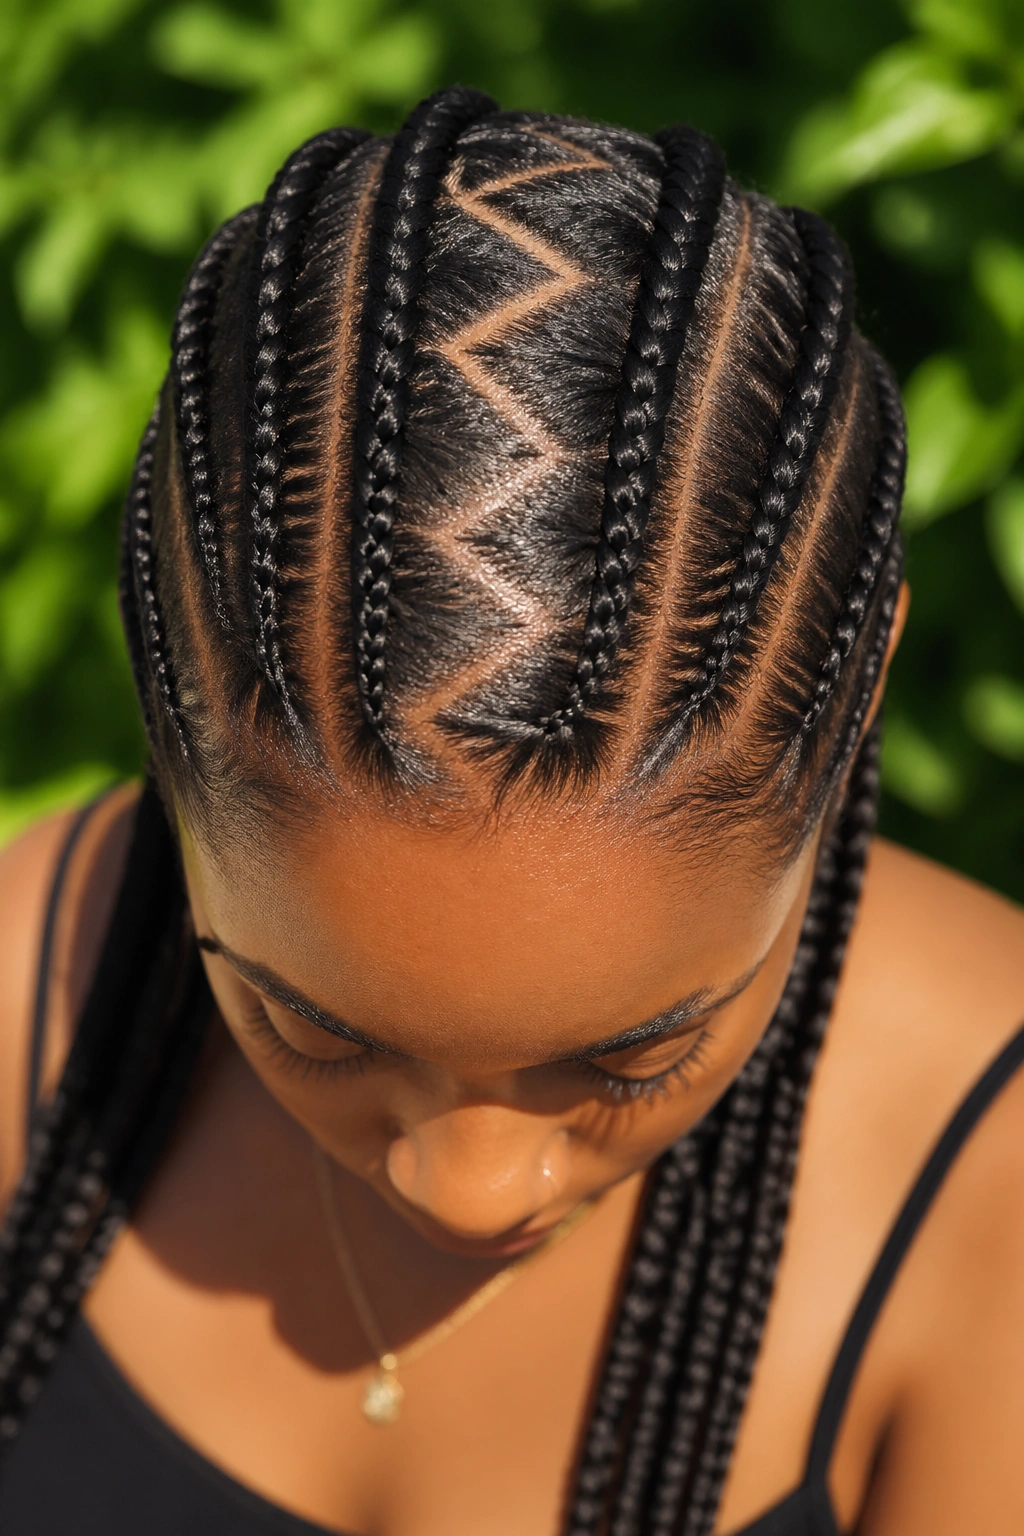
Instead of straight or curved parts between the rows, zig-zag parts create a lightning bolt or chevron effect in the negative space between the braids. The braids themselves run straight, but the part lines create a visually complex geometric pattern across the scalp.
This requires genuine precision to execute well. Zig-zag parts that aren’t consistent in their angles or depth of the zag look muddled rather than intentional. But when done precisely — each angle matching the ones on either side — the effect across a full head of cornrows is striking.
It’s worth noting that zig-zag parts expose more scalp than straight parts of the same width, which means more sun exposure at the scalp. If you wear this style outdoors frequently, apply a light SPF to the exposed scalp sections.
8. Heart or Geometric Design Cornrows
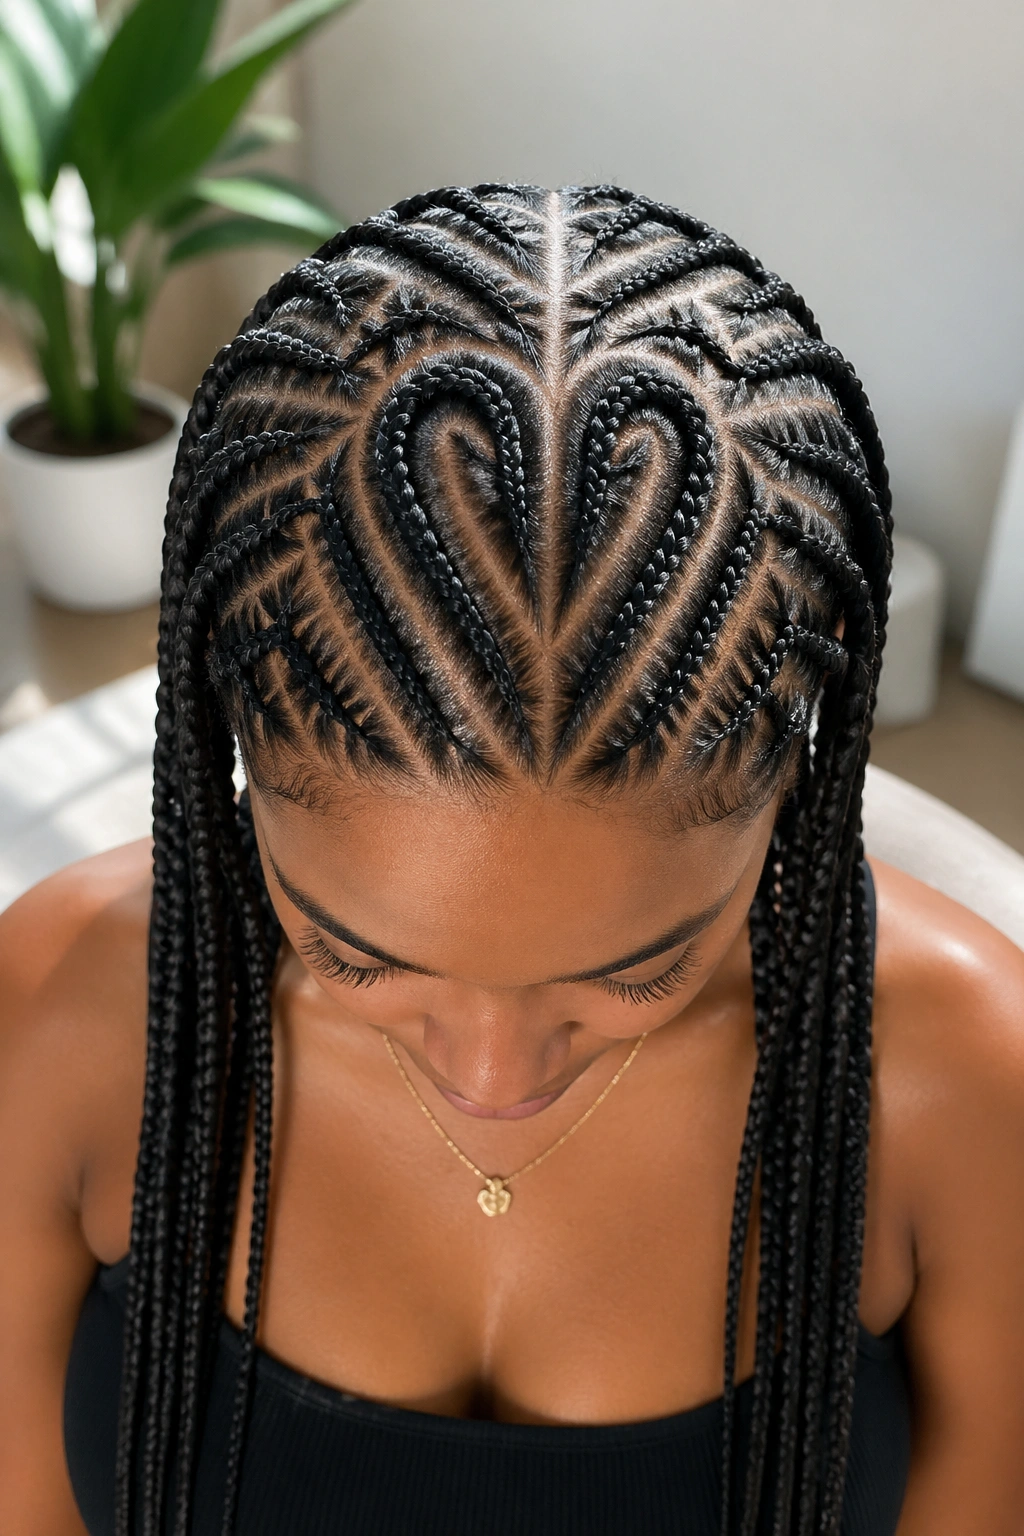
Cornrow patterns shaped into specific designs — hearts, stars, geometric shapes, diamonds, initials — laid into the scalp as the braider works. The design is created through the arrangement and direction of the braid rows rather than any cutting.
This is high-skill braiding. A simple heart at the crown surrounded by straight rows is one level of difficulty. A full scalp covered in geometric shapes that all align correctly is another level entirely. Be realistic about the skill level required and the time it takes. For a full geometric design, expect 5-8 hours minimum.
These designs photograph extraordinarily well from above — the scalp becomes its own canvas, and the image quality of phone cameras is now good enough to capture the detail.
9. Knotless Box Braids Starting from Cornrow Base
A hybrid installation: the foundation is a set of cornrows laid across the scalp, and individual knotless box braids are attached at the end of each cornrow row rather than individually at the root. This creates a different distribution of weight than standard knotless braids and can be less stressful on the hairline because the tension is distributed across the cornrow rather than focused at a single attachment point.
The result looks like standard box braids from the outside. The scalp experience is what’s different. Women with fine or fragile edges sometimes find this method more comfortable than individual knotless braid installation at the hairline.
10. Double-Sided Cornrows Meeting at the Center
Two sets of cornrows, one starting at each ear, braided upward and toward the crown where they meet in the center. The meeting point can be a clean line or a joining braid. The rows on each side mirror each other, which creates a symmetrical, formal look that works beautifully for events.
The challenge is the center join. If the rows from both sides don’t meet at exactly the right point, or if one side has more rows than the other, the center looks off. This takes planning at the beginning of the installation before the first braid is placed.
11. Cornrows with Accessories — Gold Cuffs and Beads
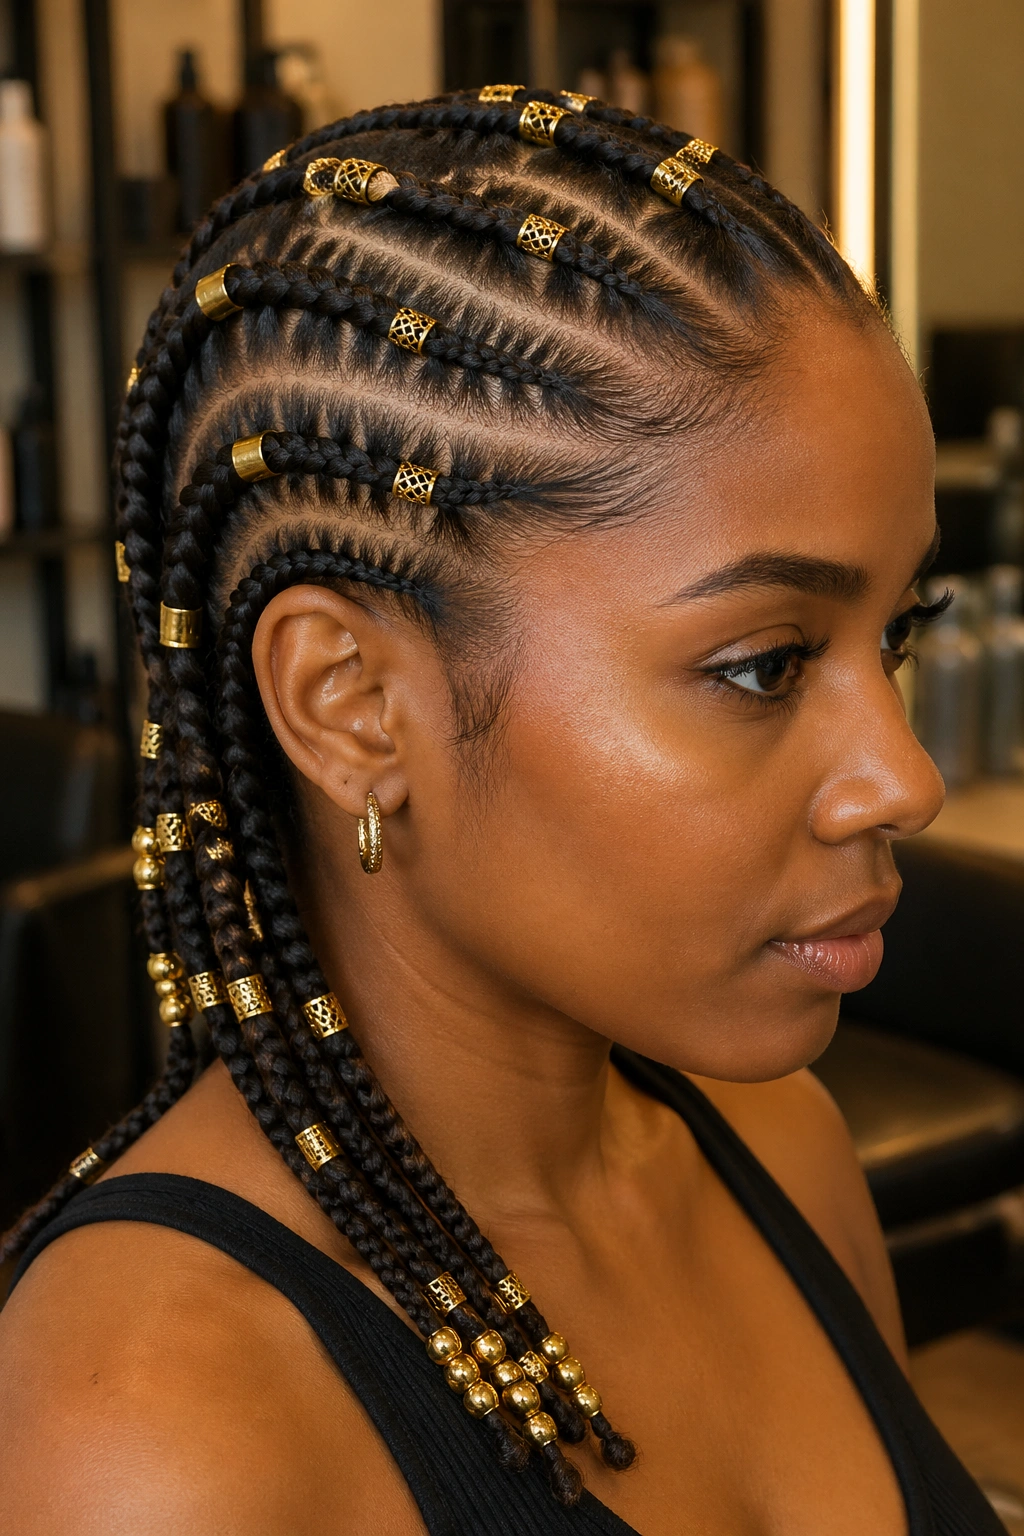
Standard straight-back or curved cornrows, elevated with gold cuffs, wooden beads, shells, or metallic rings placed at intervals along the length of each braid. The accessories add dimension, sound, and light-catching interest to what would otherwise be a clean, minimal style.
The weight of accessories matters. Heavy metal cuffs placed too close to the root can add tension to the braid attachment, which over time can stress the follicle. Lightweight cuffs, plastic beads, or very small metal rings are fine anywhere along the braid. Save heavier accessories for the mid-length or the tips where the weight distributes better.
Beads and cuffs slide onto the braid easily with a beading needle or a small loop tool. They should be snug enough not to slide down on their own but loose enough not to compress the braid itself.
12. Tribal Cornrow Patterns
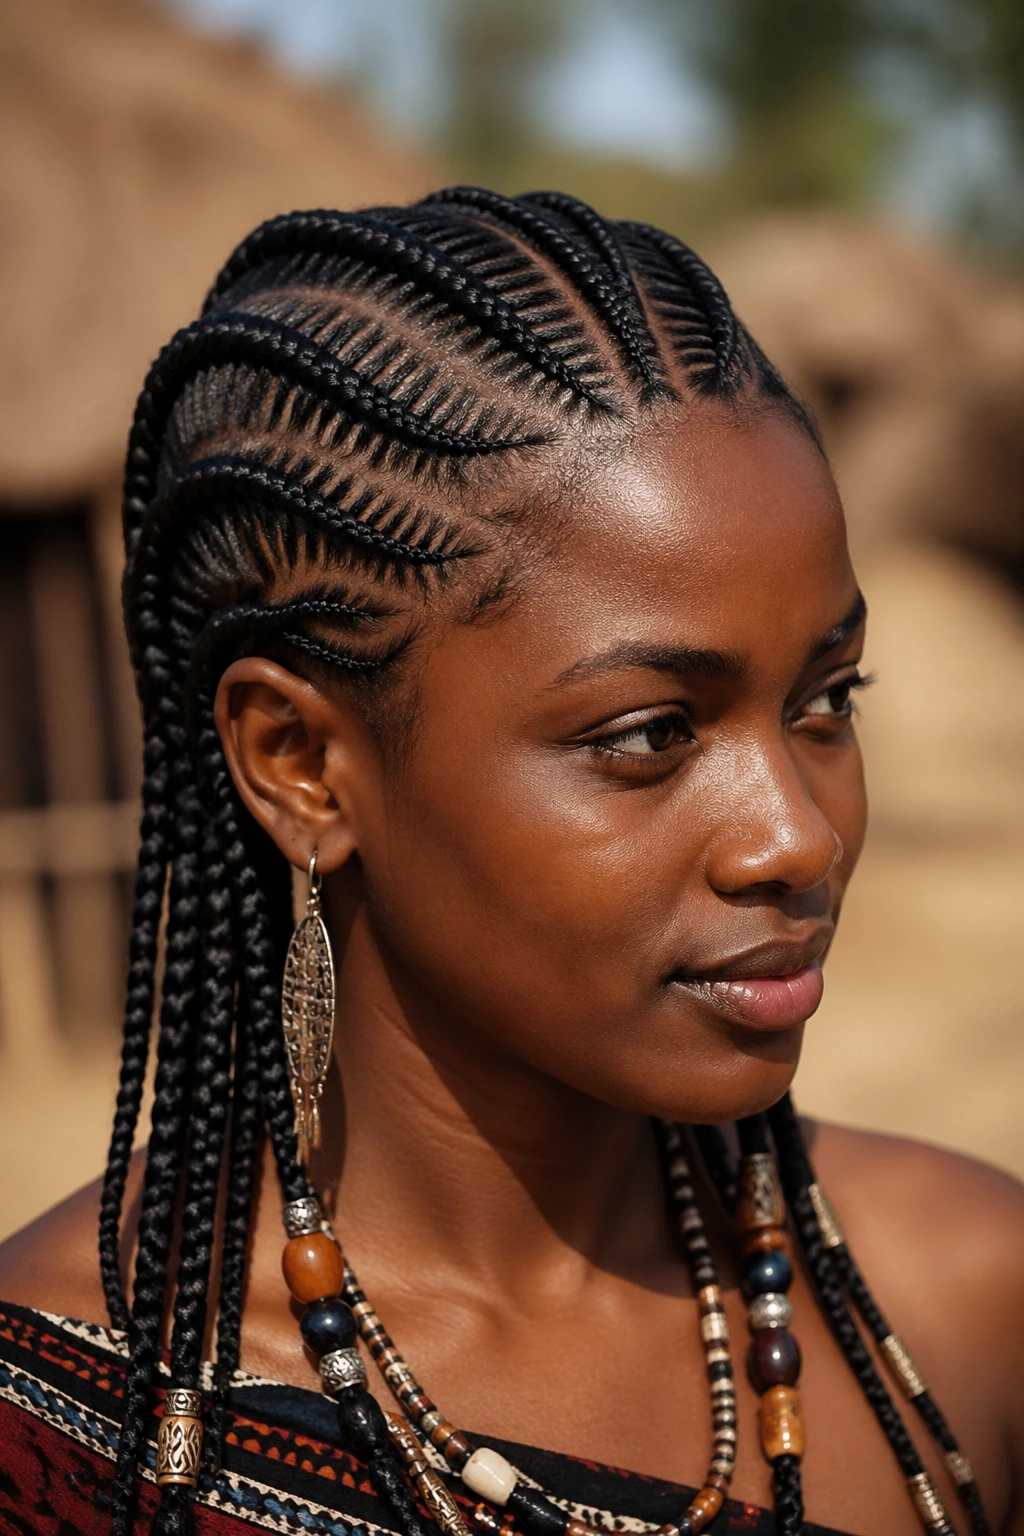
Inspired by specific African tribal braiding traditions — Fulani patterns, Himba patterns, patterns from the Hausa or Wolof cultural traditions — these styles use a combination of cornrows and loose hair or specific design elements that mark them as part of particular cultural aesthetics.
Fulani braids, for example, typically include a center cornrow from forehead to nape, rows on either side that curve from the front to the sides and then down the back, and loose braids (often with beads or cuffs) hanging at the temples and behind the ears. It’s a distinctive look with a clear cultural origin that’s worth acknowledging when you wear it.
Research the specific style you’re drawn to. Wearing a cultural style with knowledge of its origin is different from wearing it with no context.
13. Cornrows into a Ponytail
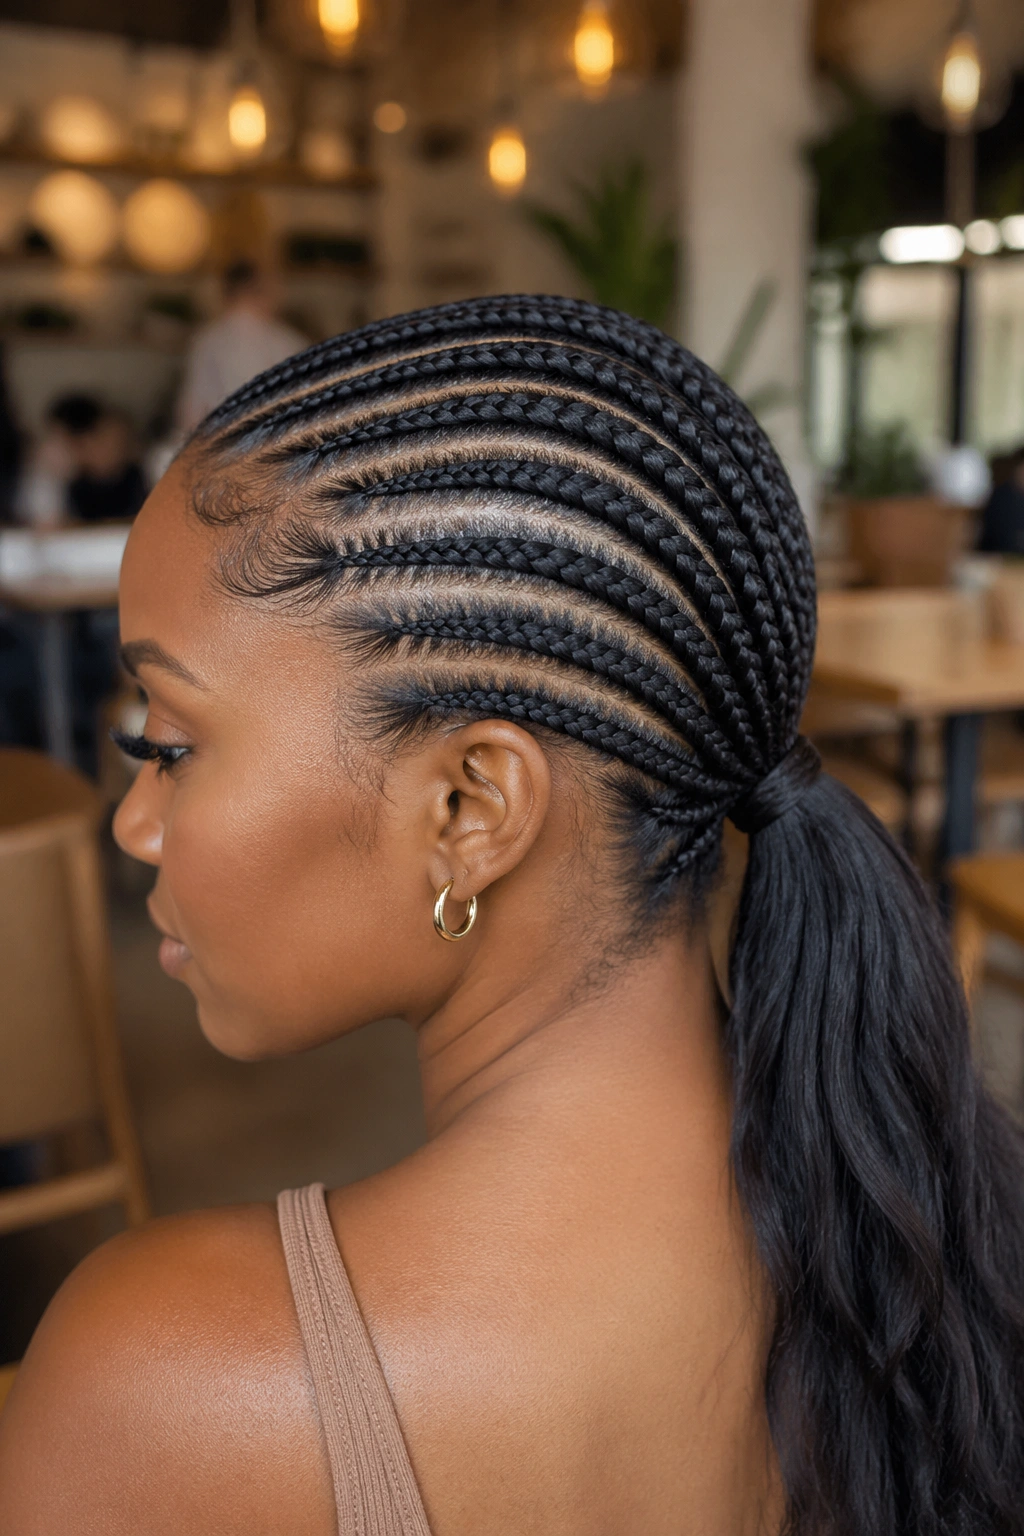
All cornrows converging at the nape of the neck rather than the crown, gathered together and secured as a low ponytail. Additional extension hair can be braided into the ponytail to add length and volume, or your natural hair can form the tail if it’s long enough.
The low ponytail silhouette from this style is sleek and graphic. The braided scalp is fully exposed — great for showing off earrings and necklines. The converging rows at the nape need to be planned so they all meet at the same point without crowding.
What to Watch For
Braids that converge too tightly at the nape can create pressure on the hairline at the back, which is where some women experience thinning. Make sure the cornrows at the nape don’t pull or feel tight when you move your head.
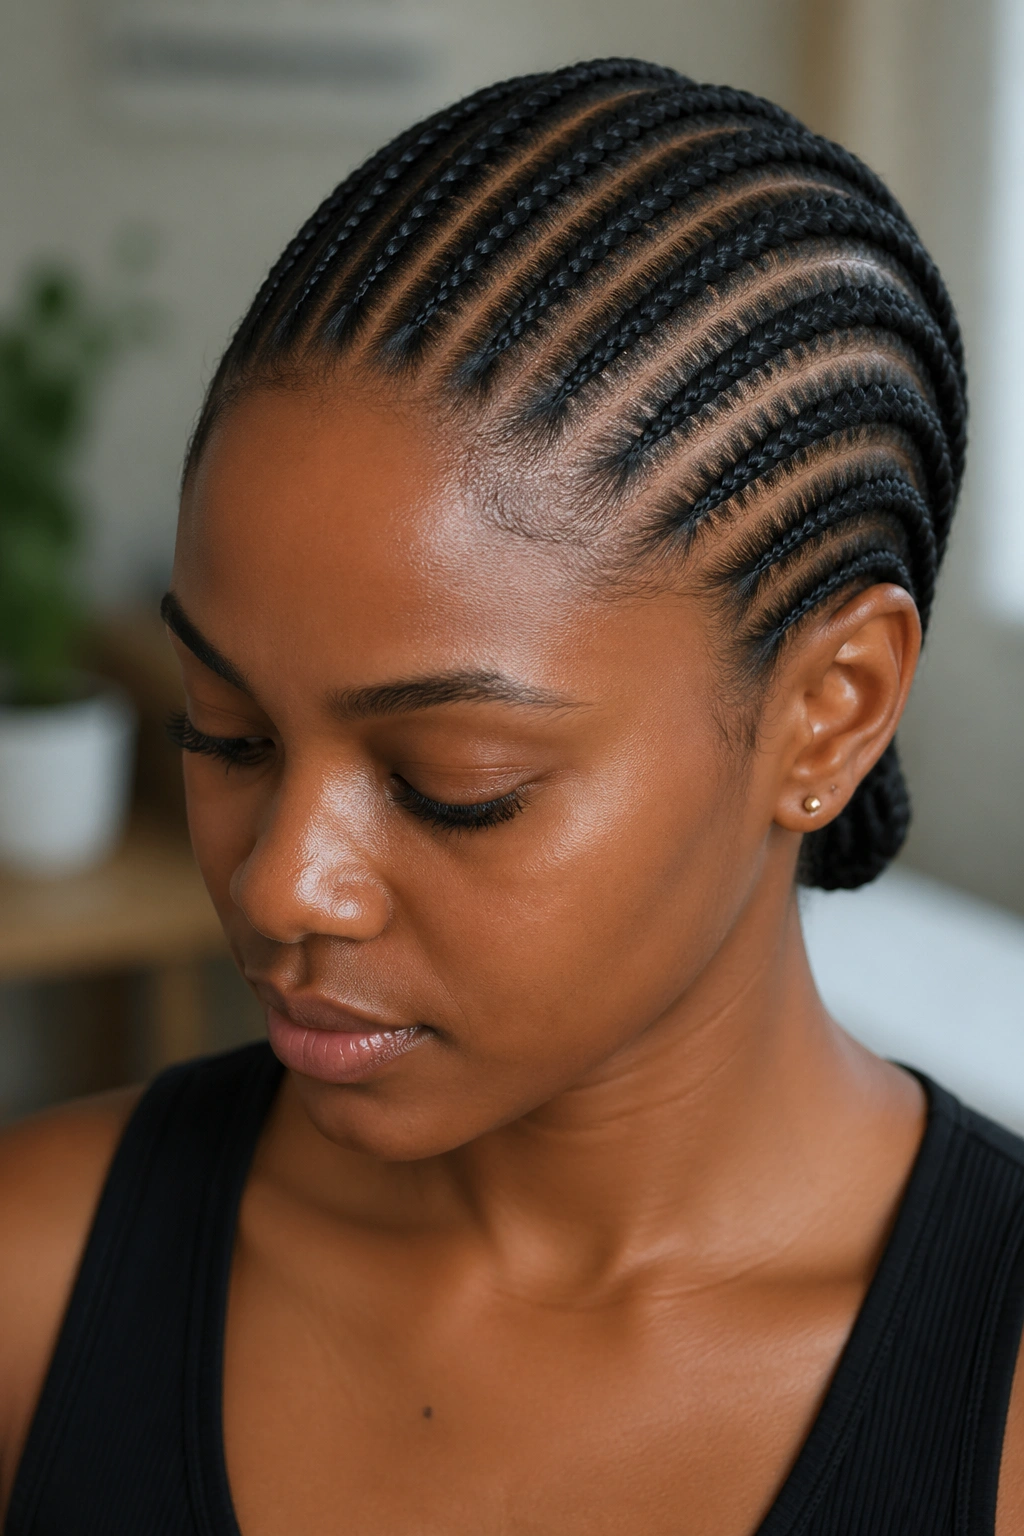
14. Extra-Small Microcornrows

Cornrows as thin as pencil lines — micro-fine rows, sometimes 40 or more across the scalp, creating an incredibly detailed pattern. Micro cornrows take much longer to install (8-12 hours for a full head) and last longer when maintained properly because the smaller braids are less bulky and frizz more gradually.
The visual effect of micro cornrows is completely different from standard-width rows — they look almost like a scalp-level pattern rather than thick braids, especially if done without extension hair. With extension hair, they create a very fine, controlled cascade.
This is not a style for anyone who wants a quick installation. But the longevity and the detail level are genuinely unmatched.
15. Fishbone Cornrows
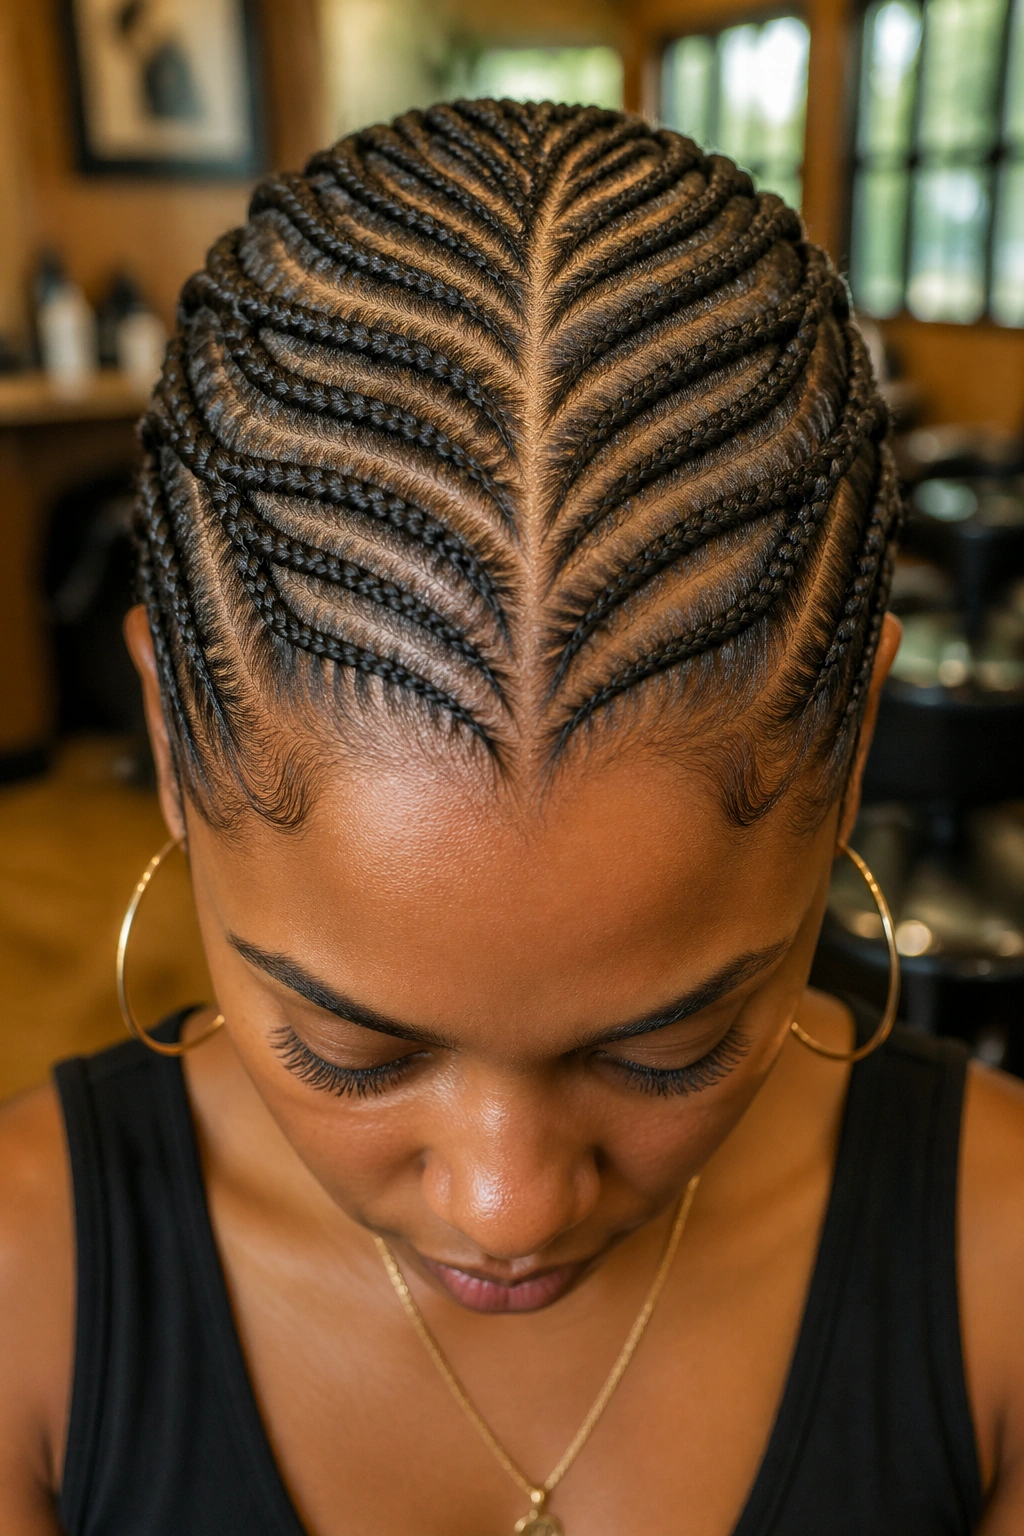
The fishbone pattern is a specific cornrow design where a center row runs from forehead to nape, and smaller rows branch off diagonally from that center line on alternating sides — like the skeleton of a fish. The result is a herringbone or chevron pattern that’s both graphic and surprisingly delicate.
This pattern works best when all the branching rows are consistent in their angle and size. Inconsistency in the angle of the branch rows makes the pattern look irregular. Your braider needs to commit to one angle at the start and maintain it across the entire head.
16. Cornrows with a Braid-Out Finish
Cornrows installed and worn for a few days as a style, then taken down to reveal a stretched, wavy, braid-out texture rather than fully unraveled coils. The cornrow pattern creates a different wave than a standard two-strand twist-out — flatter, more compact, with visible ridges from the braided texture.
This is a dual-purpose styling technique. You get the crisp, protected cornrow look for the first few days and then transition to a textured, stretched style when you take it down — without any additional manipulation or product. Two styles from one installation.
17. Cornrows into a High Ponytail
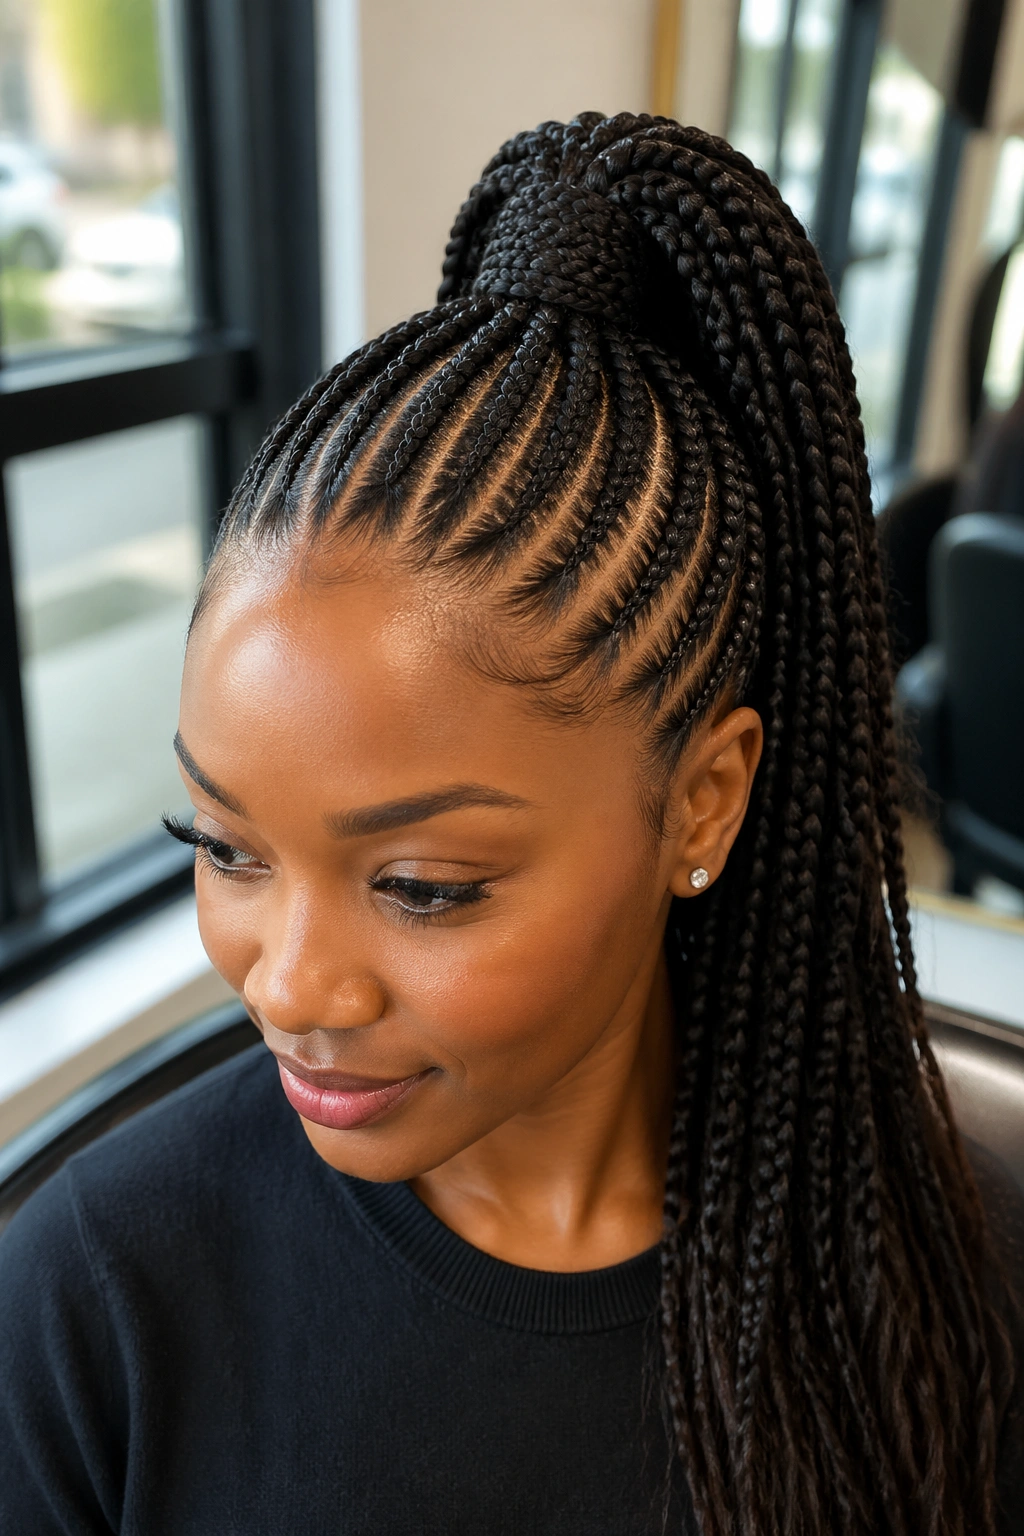
All cornrows drawing upward toward a high ponytail at the crown rather than converging low. The upward direction creates a lifting effect that’s very flattering and gives the style a more elevated, graphic quality than a low ponytail.
The extension ponytail attached at the top can be straight, wavy, or in a natural texture — depending on your preference. A straight extension contrasts with the textured braids of the cornrow base; a curly or natural-looking extension continues the textured aesthetic.
Getting the upward angle right on the cornrows requires planning. Rows from the nape need to arc significantly to reach the crown — they can’t go straight up without creating gaps or tension at the sides.
18. Cornrows with a Twist Accent
Cornrows across most of the head, with a few sections done in flat twists instead — usually the front sections or the sections framing the face. The flat twist has a slightly different texture and surface than a cornrow, creating visual variation in the pattern without being jarring.
The combination works because the flat twist, done correctly on the same hair as the surrounding cornrows, lies smooth and graphic but with a slightly rounder profile. Side by side with cornrows, it reads as a deliberate design decision rather than a mistake.
19. Bohemian Cornrows with Loose Natural Hair
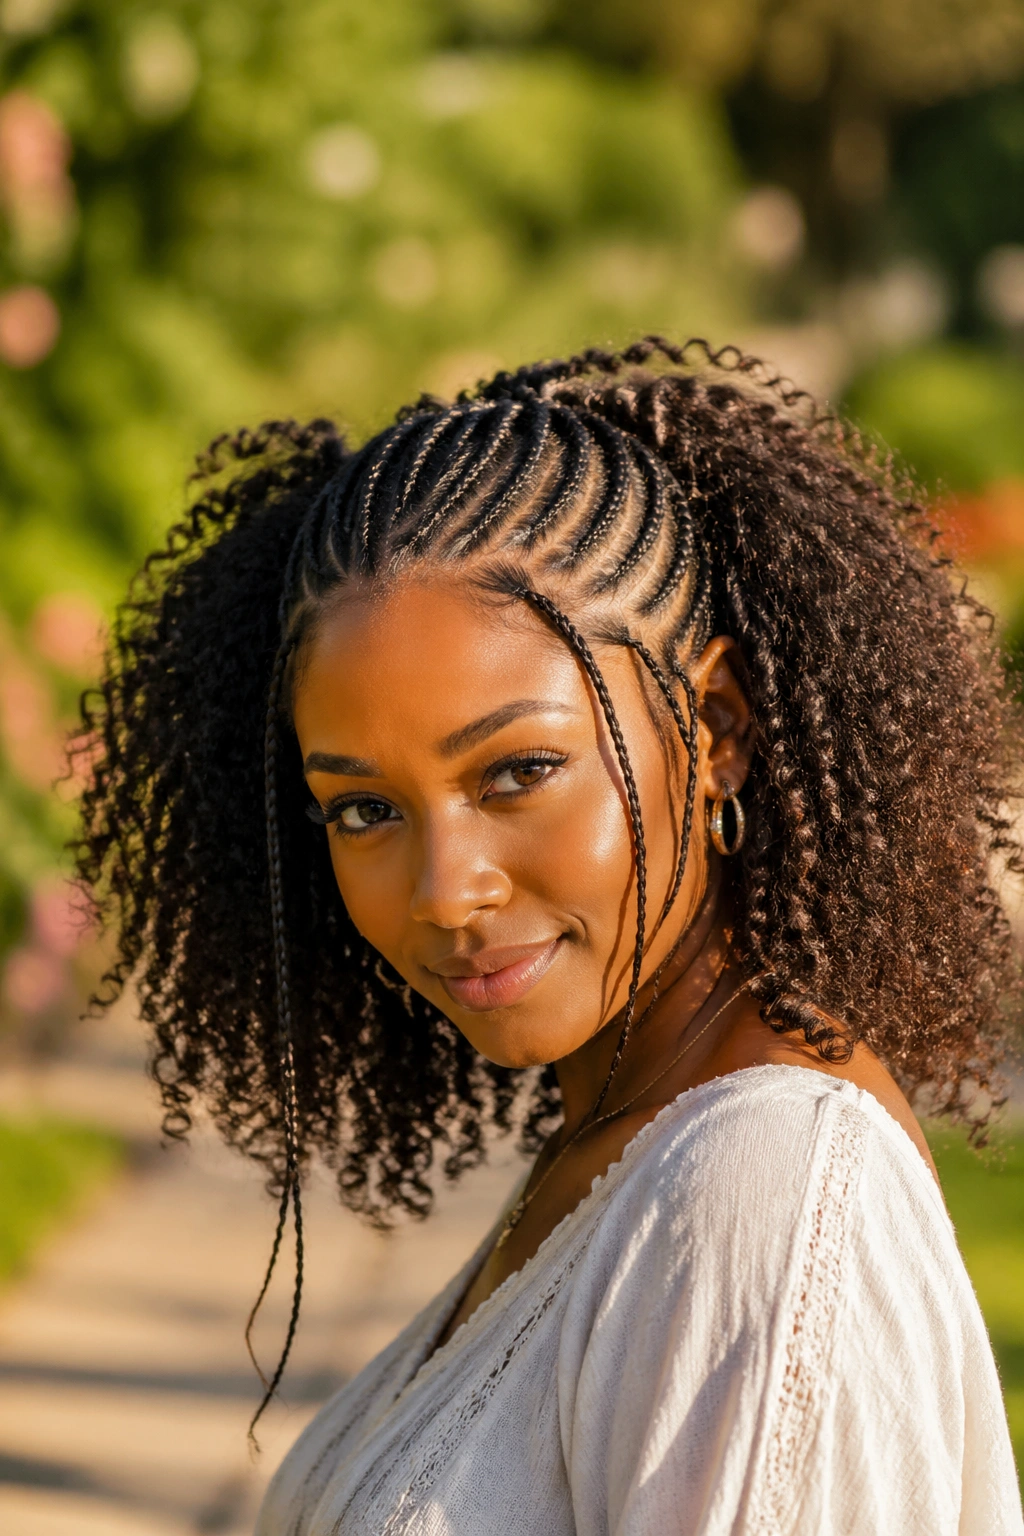
Cornrows across the top of the head, with sections of the hair left loose and in their natural state — typically at the sides, the nape, and sometimes the crown. The loose sections create a contrast between the structure of the cornrows and the free texture of the natural hair.
This style photographs beautifully because there’s a textural story happening across the entire head. The geometric, controlled cornrows against the organic, voluminous natural sections creates visual interest without requiring any heat, color, or extensions.
The loose sections need to match the product level of the cornrowed sections. Dry, undefined loose hair next to crisp, product-defined cornrows looks unfinished. Apply a lightweight curl cream to the loose sections, scrunching gently, so both elements look intentionally styled.
20. Updo Cornrows for Formal Occasions
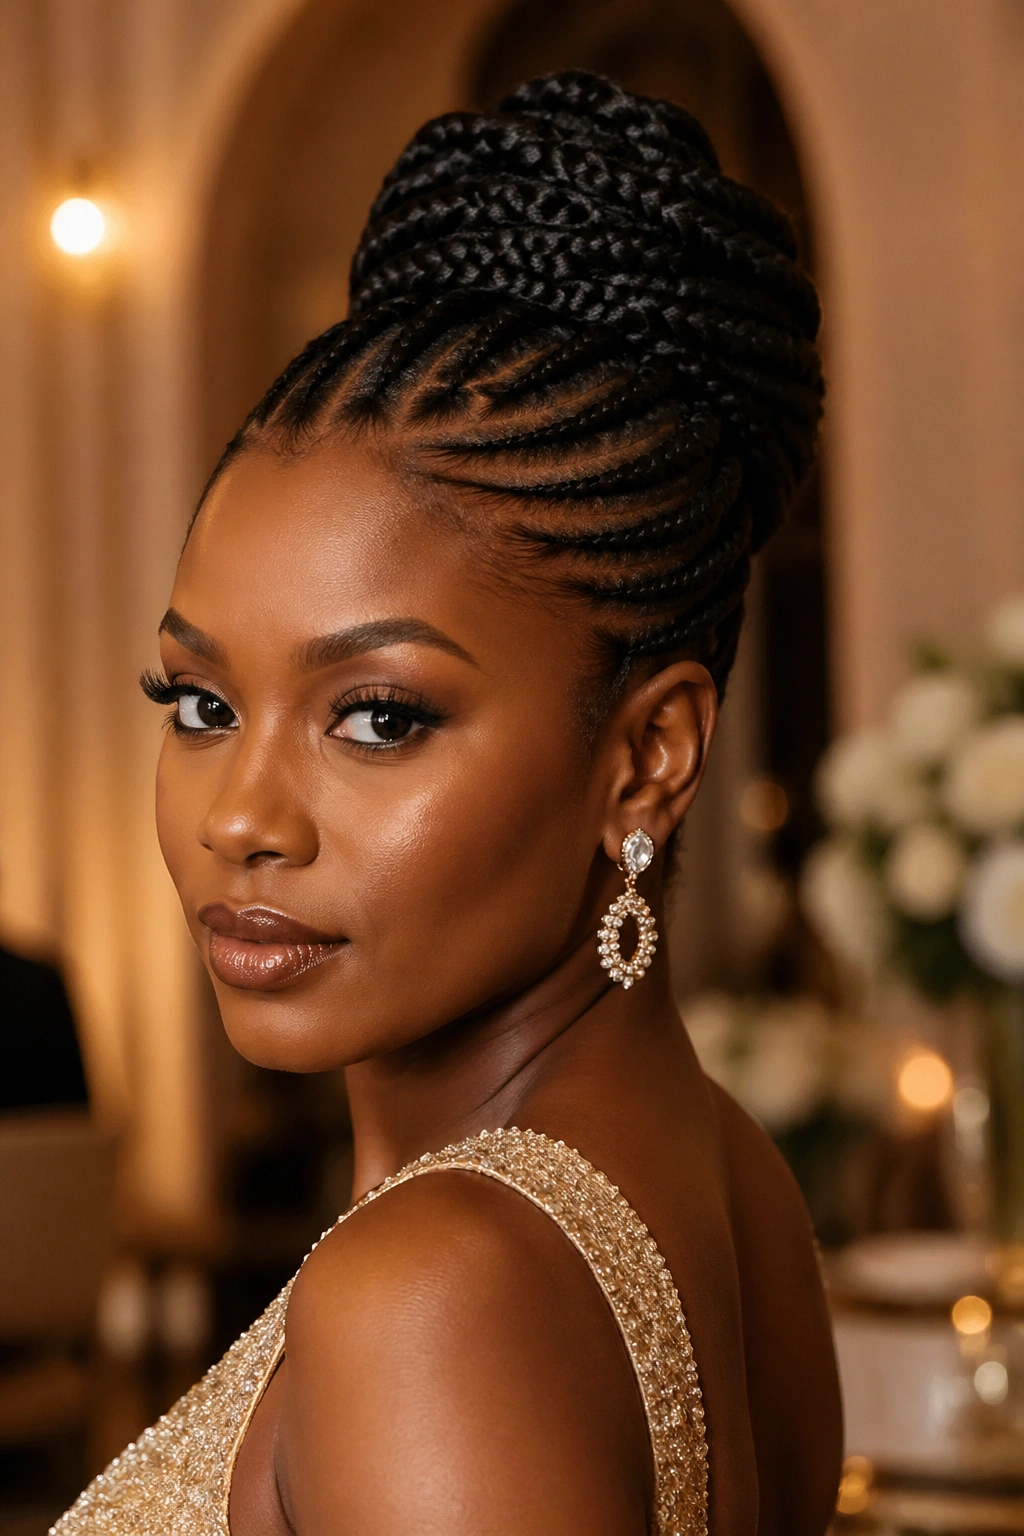
All cornrows arranged to create an upswept, formal look — rows that converge at the crown, then the ends are coiled, pinned, or wrapped into a structured updo shape. The variation here is enormous: a simple gathered twist, an elaborate sculptural shape, or a flattened bun with the braid tails wrapped around it in a swirled pattern.
Formal cornrow updos work because the braided base provides structure that regular natural hair doesn’t always offer — the cornrows anchor the updo shape and keep it from shifting through a long event. A quick spray of a light-hold edge fixer keeps the perimeter sleek.
21. Passion Twist-Adjacent Cornrows

Passion twists on cornrow bases — cornrows laid across the scalp with individual passion twists (a hybrid of spring twists and braids using wavy extension hair) attached at the cornrow sections. The texture of passion twist extension hair — its soft, springy, slightly undone quality — contrasts with the clean lines of the cornrow base in a way that reads as organic and effortless.
This is a protective style that looks more elaborate than the effort it requires to maintain. The passion twist portions just need light misting every few days. The cornrow base keeps the style anchored.
22. Braided Crown with Loose Locs Effect
Cornrows at the front and sides of the head, arranged to create a crown or halo shape, with the back and length of the hair left in faux locs or loose braids that hang down. The cornrowed crown and the hanging length create a regal, almost ceremonial silhouette.
The faux locs at the length need to be attached at the crown cornrows with a crochet or loop method, making sure each one is secure but not overloaded with extension hair. Too much weight at each attachment point pulls on the cornrow and creates tension.
23. Color-Blocked Cornrows
Cornrows installed in two or more colors of extension hair, with the colors deliberately placed to create a color-blocked pattern. One color on the left side, a different color on the right. Alternating rows of color. A single highlighted center row. The color blocking is the design.
Kanekalon braiding hair is available in hundreds of colors — every shade of natural brown and black, every shade of blonde, auburn, red, and highlight, as well as fashion colors like copper, burgundy, and rose gold. For a natural-looking color-blocked style, choose two shades that are within two tones of each other. For something more dramatic, the contrast can be as bold as you want.
24. Cornrows as the Base for Crochet Styles
Cornrows installed as a foundation, then crochet hair — curly, wavy, or straight extensions threaded through the cornrows with a crochet needle — attached all over the scalp. The cornrows provide the flat, protective base and the attachment points; the crochet hair provides all the length and volume.
This is one of the most versatile protective styles available because the crochet hair layer can be changed independently of the cornrow base. If you want a different texture or color, you take out the crochet hair and install a different variety without touching the cornrows.
On afro hair, the cornrow base for crochet takes about an hour to install. The crochet hair attachment takes another 1-2 hours depending on how much volume you want. Total: 2-3 hours for a full head versus 6-8 hours for traditional box braid installation.
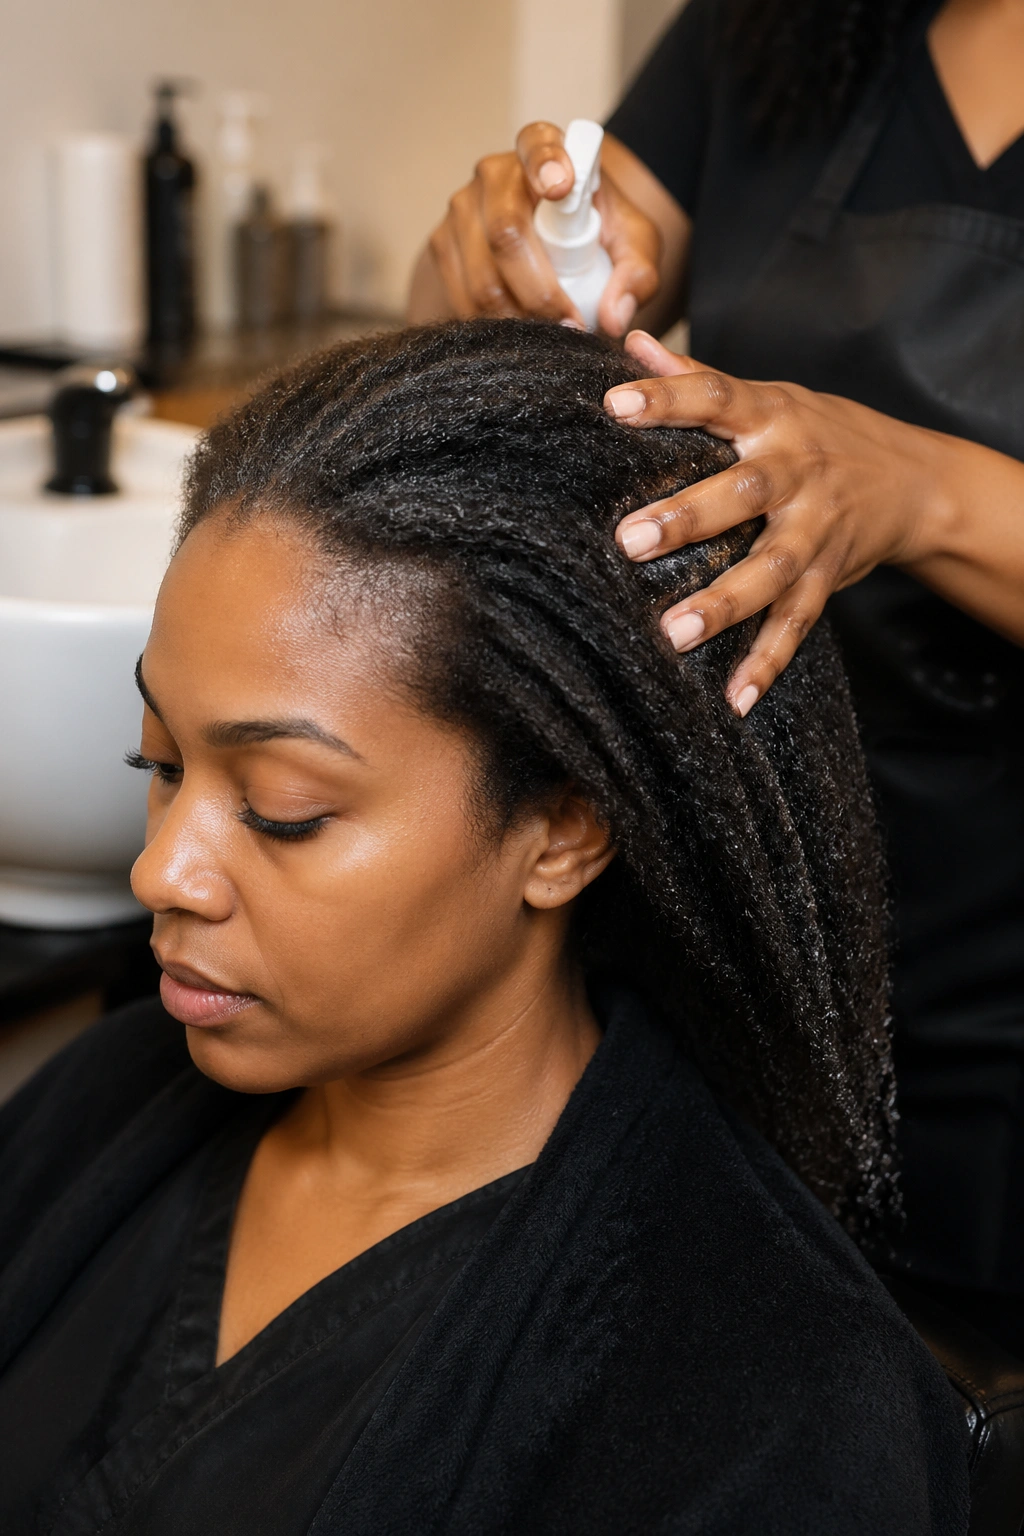
Taking Care of Your Scalp During Cornrow Wear
The biggest mistake during cornrow wear is neglecting the scalp while protecting the hair. The scalp still produces sebum, still needs circulation, and still benefits from moisture during the weeks the cornrows are in. Every 2-3 days, apply a light oil — jojoba, grapeseed, or a dedicated scalp oil — directly to the scalp along the cornrow parts. Use the applicator tip to get product precisely where the parts are rather than just pouring it over the braids.
A scalp that’s been starved of moisture for four weeks during a cornrow style comes out after takedown feeling tight, flaky, and irritated. Preventative care during the wear period eliminates this.
Removing Cornrows Without Breakage
The takedown is where most breakage happens, and most of it is preventable. Saturate the cornrows with a generous amount of conditioner — a rinse-out conditioner mixed with water works well — before starting to take them down. This slips the hair out of the braid pattern rather than forcing it. Work from the end up, not the root down. Detangle each section with a wide-tooth comb starting at the tip and working upward in small increments before moving to the next section.
After removal, do not immediately shampoo dry. Keep the conditioner in while you finish all sections, then wash. This keeps the hair slippery and detangled through the wash.
Planning Your Next Cornrow Style
Before booking your next cornrow appointment, spend time collecting reference images of styles that align with your texture, face shape, and lifestyle. Consider how long you want to wear the style — more intricate patterns require more maintenance and touch-ups at the perimeter. Consider whether you want the braids themselves to be the feature or whether you want extensions to provide length.
The most important conversation to have with your braider is about tension and scalp care. A braider who wants to talk about those things before picking up the first hair section is a braider who’s going to give you a style that looks great and doesn’t cost you your edges.
Refreshing Cornrows Between Appointments
Most people let their cornrow style go untouched until takedown day, and that’s a mistake. A mid-wear refresh can add another 1-2 weeks of clean, presentable style life without a full reinstallation. The refresh typically involves three things: re-braiding the edges at the front and sides where the new growth has created visible gaps, applying a fresh braid spray or light oil to the scalp to address any dryness, and laying the edges with a fresh application of edge control product.
The front hairline is always the first place a cornrow style shows its age. That’s where the new growth comes in fastest — because the follicles at the hairline are typically more active — and where the widened part lines and loosening of the first braided row first become visible. A targeted edge touch-up every 2-3 weeks rather than a full reinstallation is both more economical and easier on the scalp.
Some women also do a very gentle surface conditioning on the braids themselves at the mid-point — filling a spray bottle with water, a few drops of jojoba oil, and a small amount of leave-in conditioner, then misting the braid surface lightly and pressing the braids between two palms to work the moisture into the exterior of the braid without disrupting the pattern. This adds moisture without product buildup and gives the braids a fresh, conditioned look.
The Relationship Between Cornrows and Edge Health
Traction alopecia — hair loss caused by consistent tension on the follicles at the hairline — is one of the most commonly discussed risks of cornrow wear, and it’s a real one. But it’s also preventable with the right approach.
The hairline follicles are different from the follicles in the interior of the scalp. They’re smaller, often finer, and they sit in skin that’s thinner and more mobile than the top of the scalp. Tension that feels manageable at the crown feels significantly more intense at the temples and nape. A braider who uses the same tension across the entire scalp without adjusting for the hairline is putting the edges at risk.
Visible warning signs: small bumps or pimples along the hairline after installation (sign of follicle stress), lasting redness at the temple area more than a day after installation, and pain along the hairline that doesn’t resolve within a few hours. Any of these should prompt a conversation with your braider about loosening the perimeter sections.
Long-term edge health also comes from giving your hairline regular recovery time. Rotating between full-scalp cornrow installations and partial installations that leave the front hairline loose, or taking 1-2 weeks between installations where the hairline is free from any tension, allows those follicles to recover between styles.