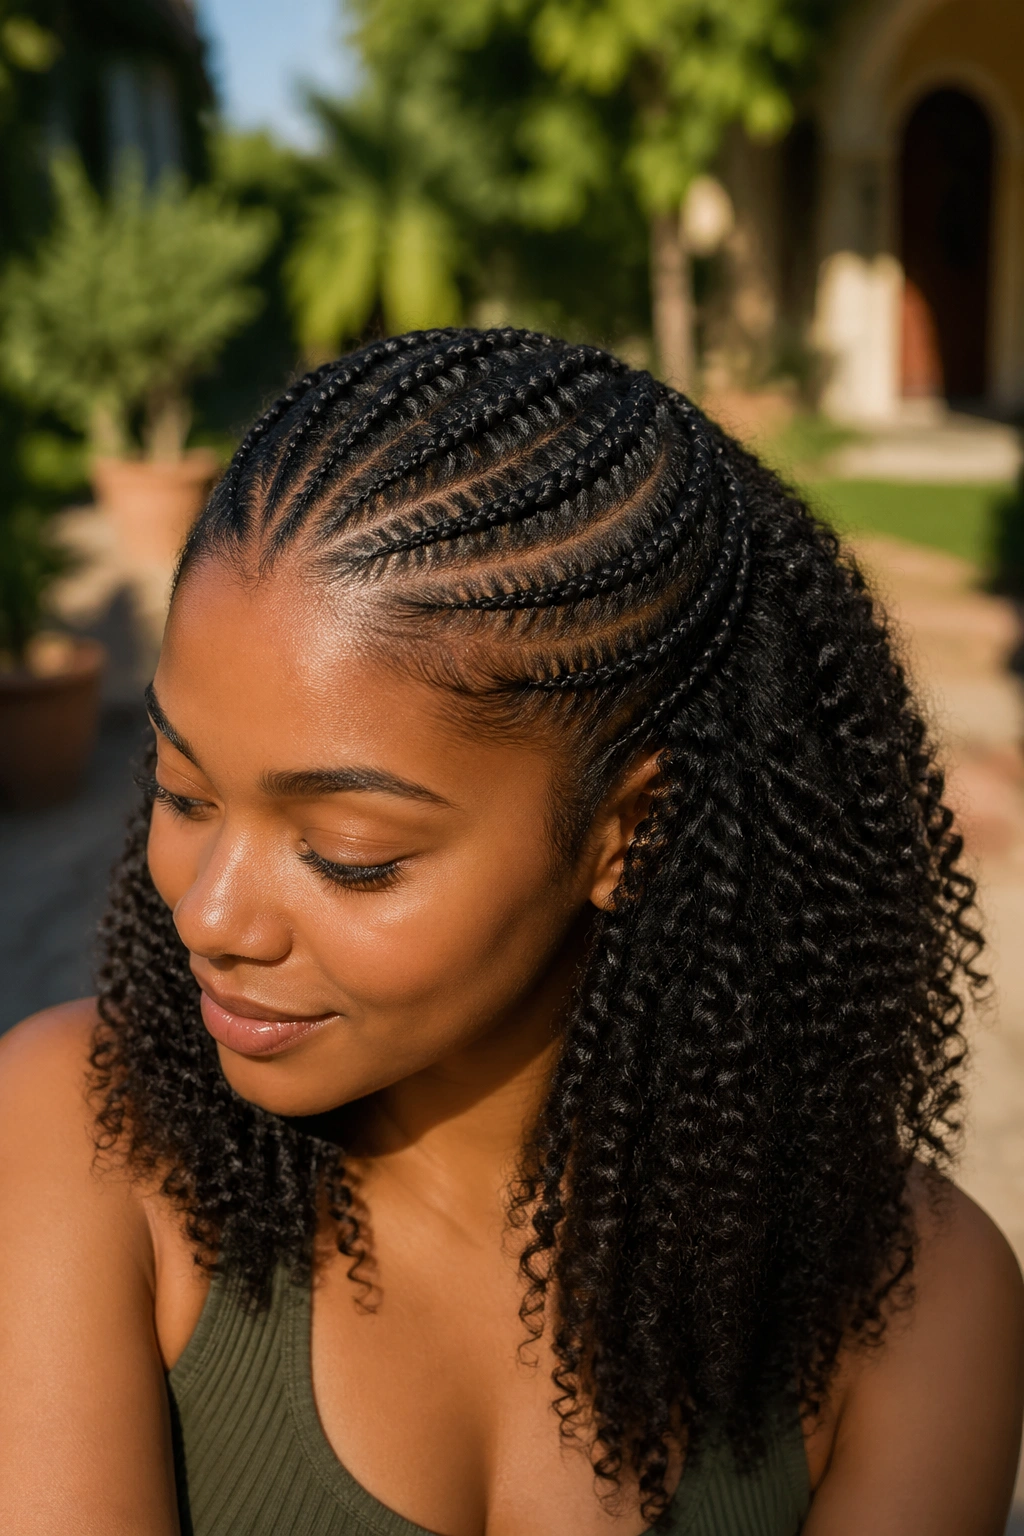
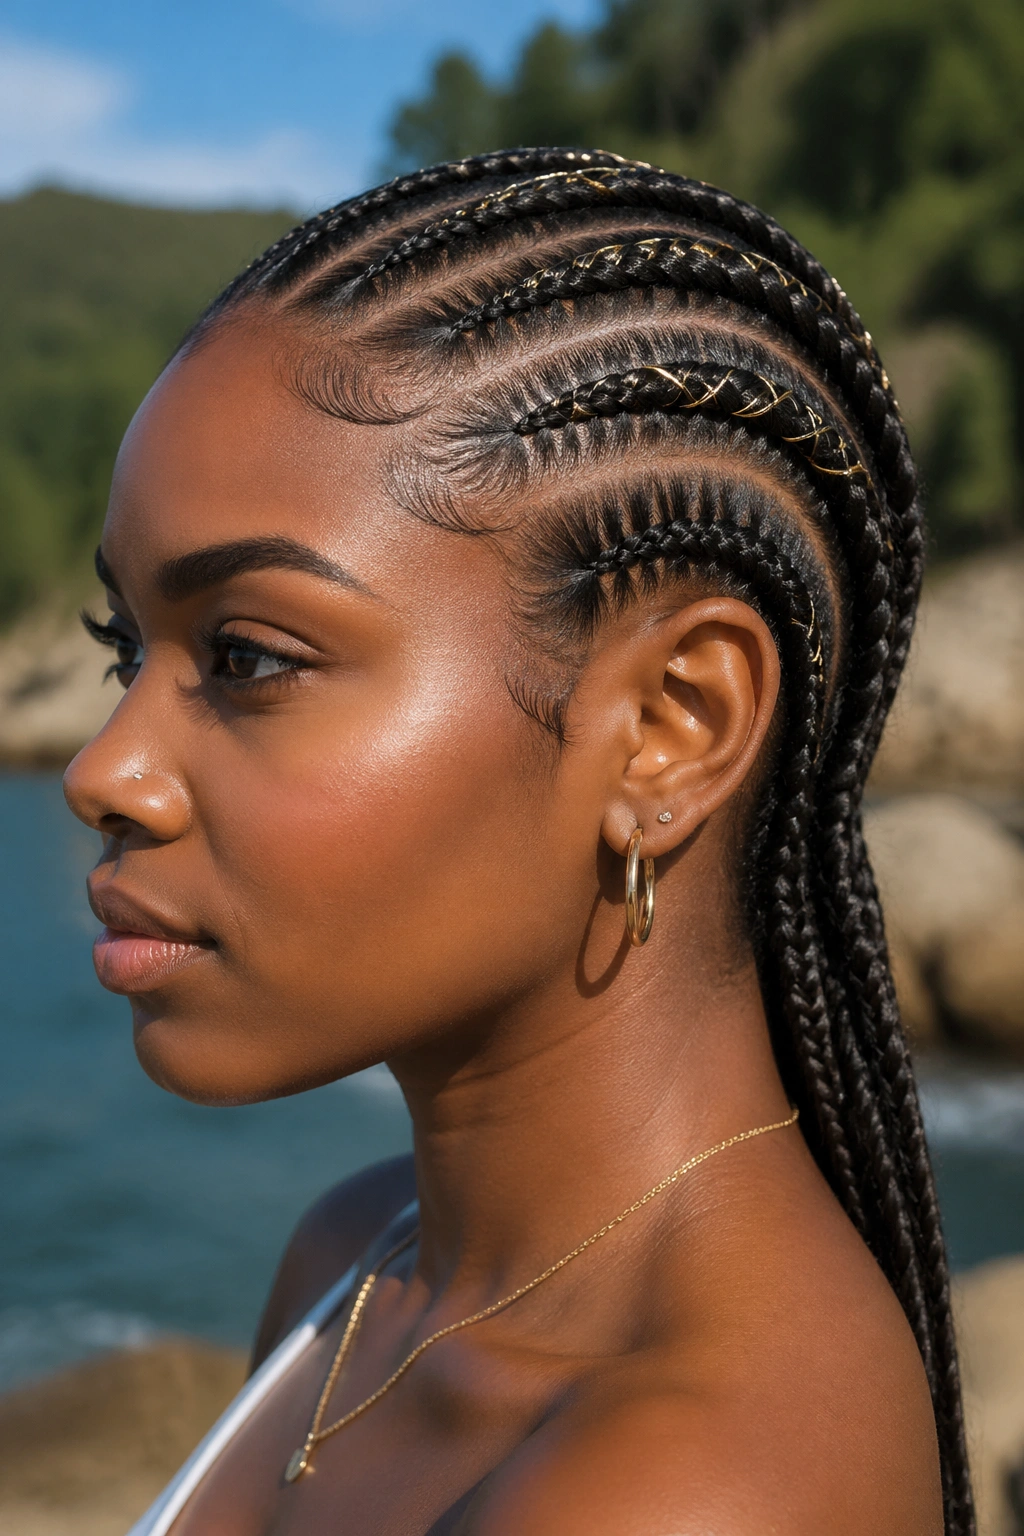
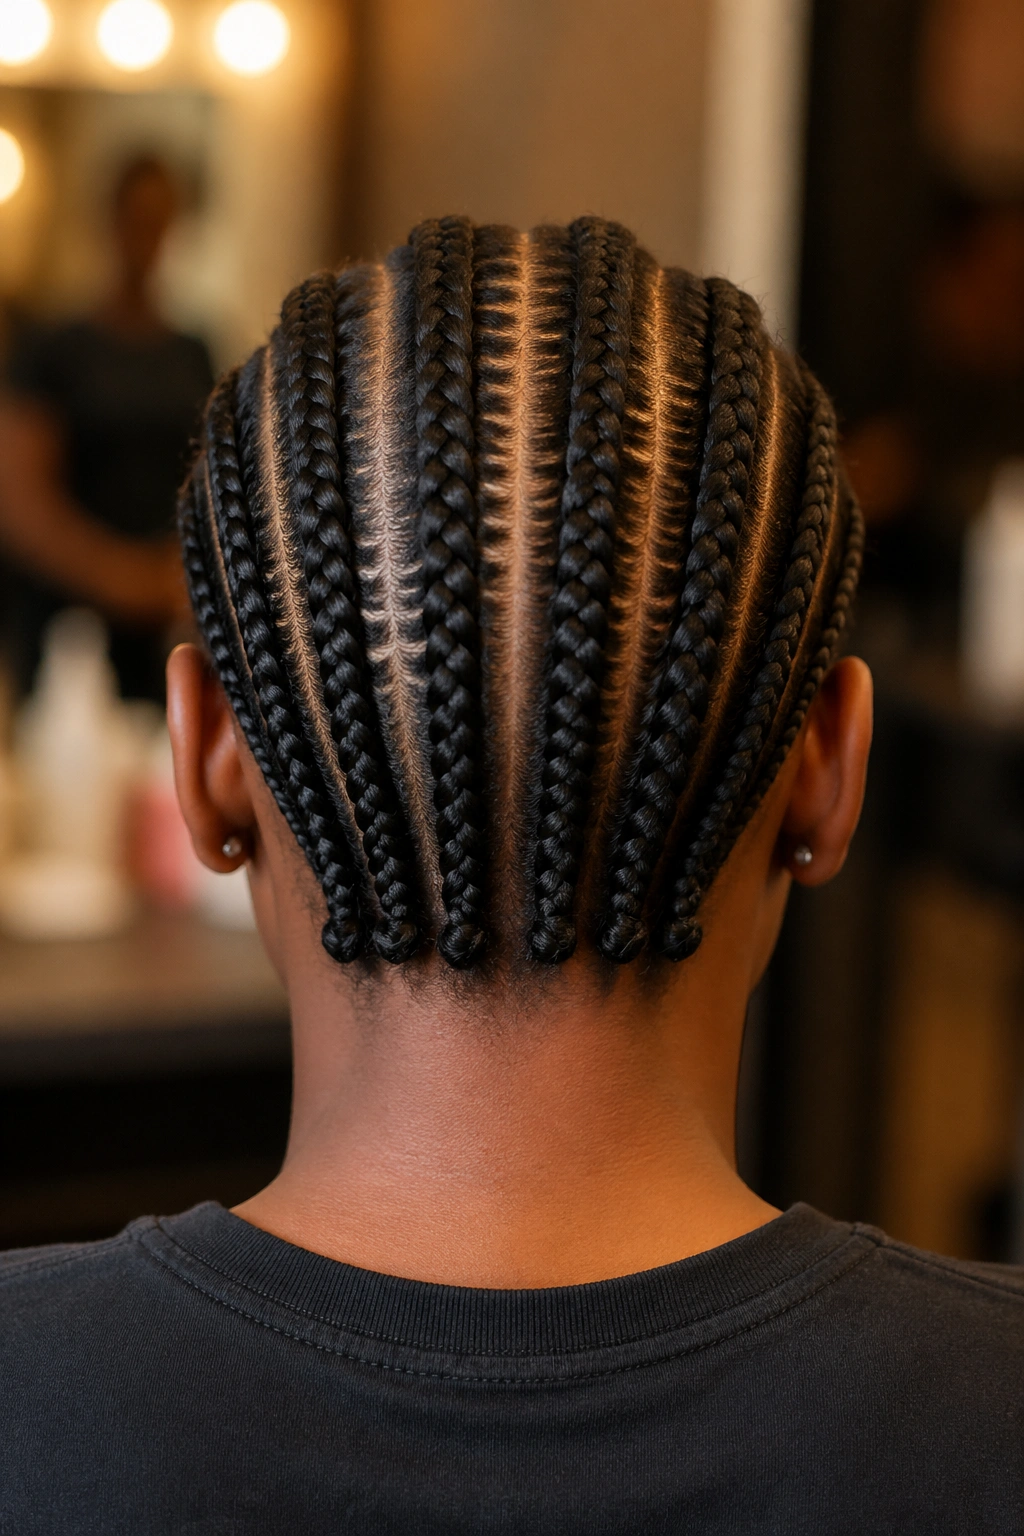
Natural hair and cornrows have a relationship that goes deeper than styling. For 4A through 4C textures, cornrows protect, preserve moisture, and give the hair a break from daily manipulation. No extensions needed. No kanekalon weighing down the roots. Just your own curls, coils, and kinks tucked into neat, protective rows.
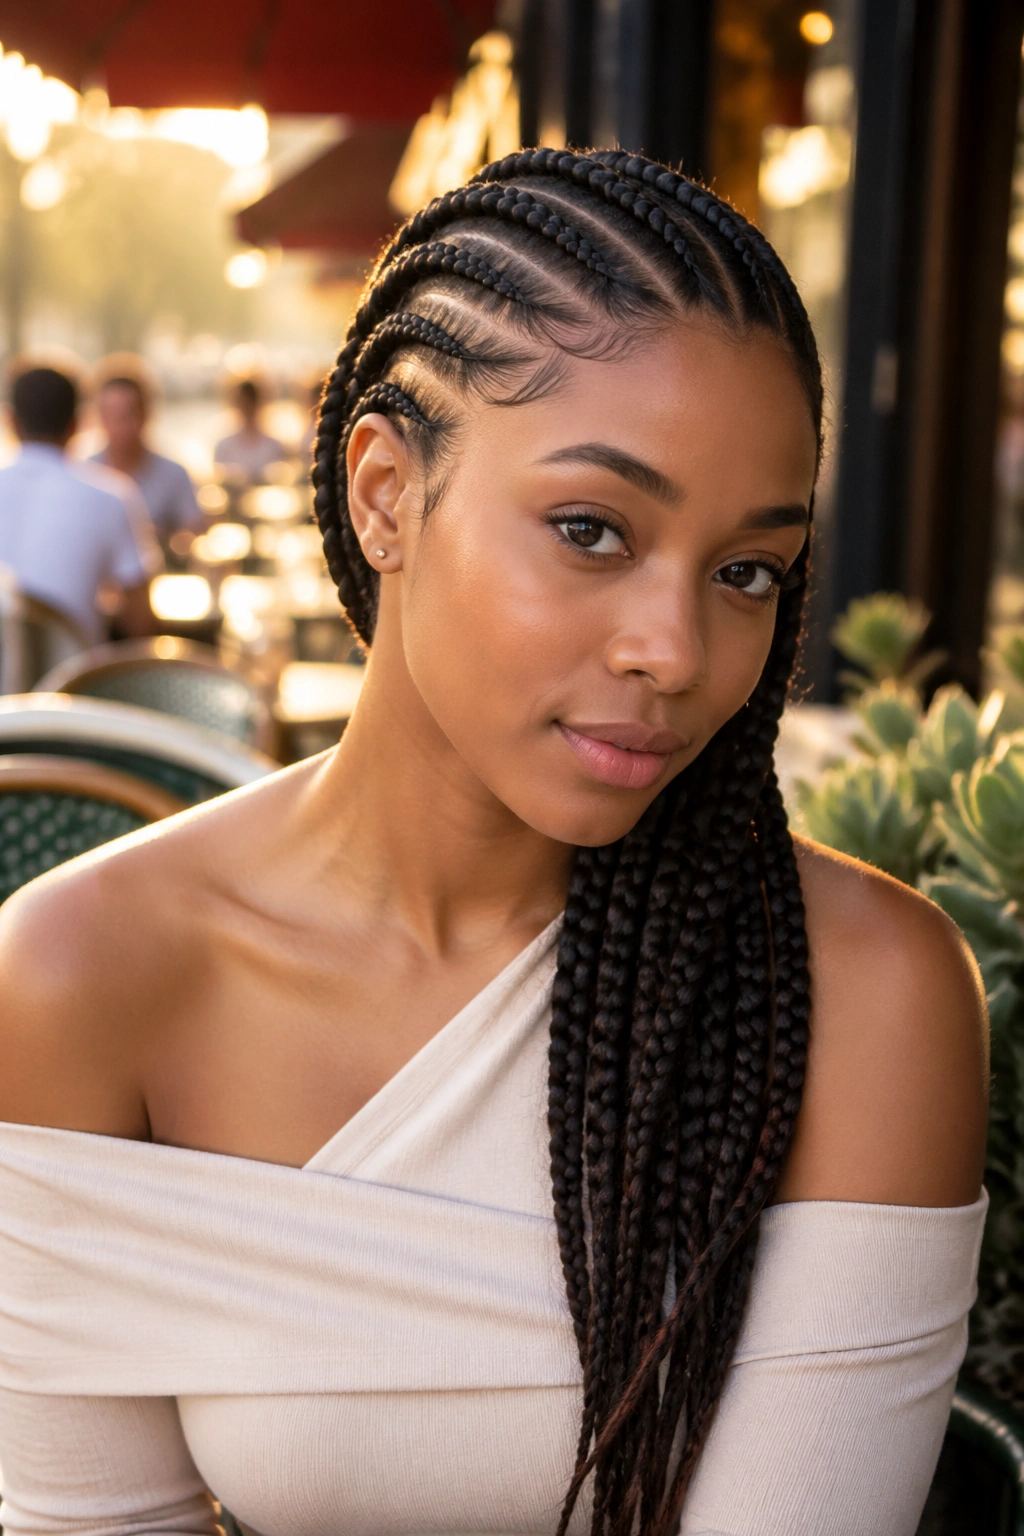
Cornrows on natural hair look different from cornrows with extensions. The texture shows through. The rows are softer at the edges, with little flyaways that read as organic rather than flawed. Width varies with hair density. And the entire install usually takes less time than a braided-in style.
What follows are 25 natural hair cornrow styles worth considering. No extensions required for any of them. Each one has a distinct pattern, parting technique, or finishing detail that sets it apart from the next.
Why Natural Hair Braids So Well
Coily and kinky textures have grip that straight hair lacks. The natural bend in each strand catches against the next, which makes cornrows stay put with less tension needed. That’s a good thing for your scalp.
Type 4 hair especially — 4A, 4B, 4C — grips so well that even loose-tension cornrows can hold for 2-3 weeks. Looser tension means less risk of traction alopecia and fewer white bumps along your parts the next day.
Natural texture also holds styling product better than relaxed hair. A cornrow on coily hair stays looking fresh longer because product clings to the texture and seals each braid.
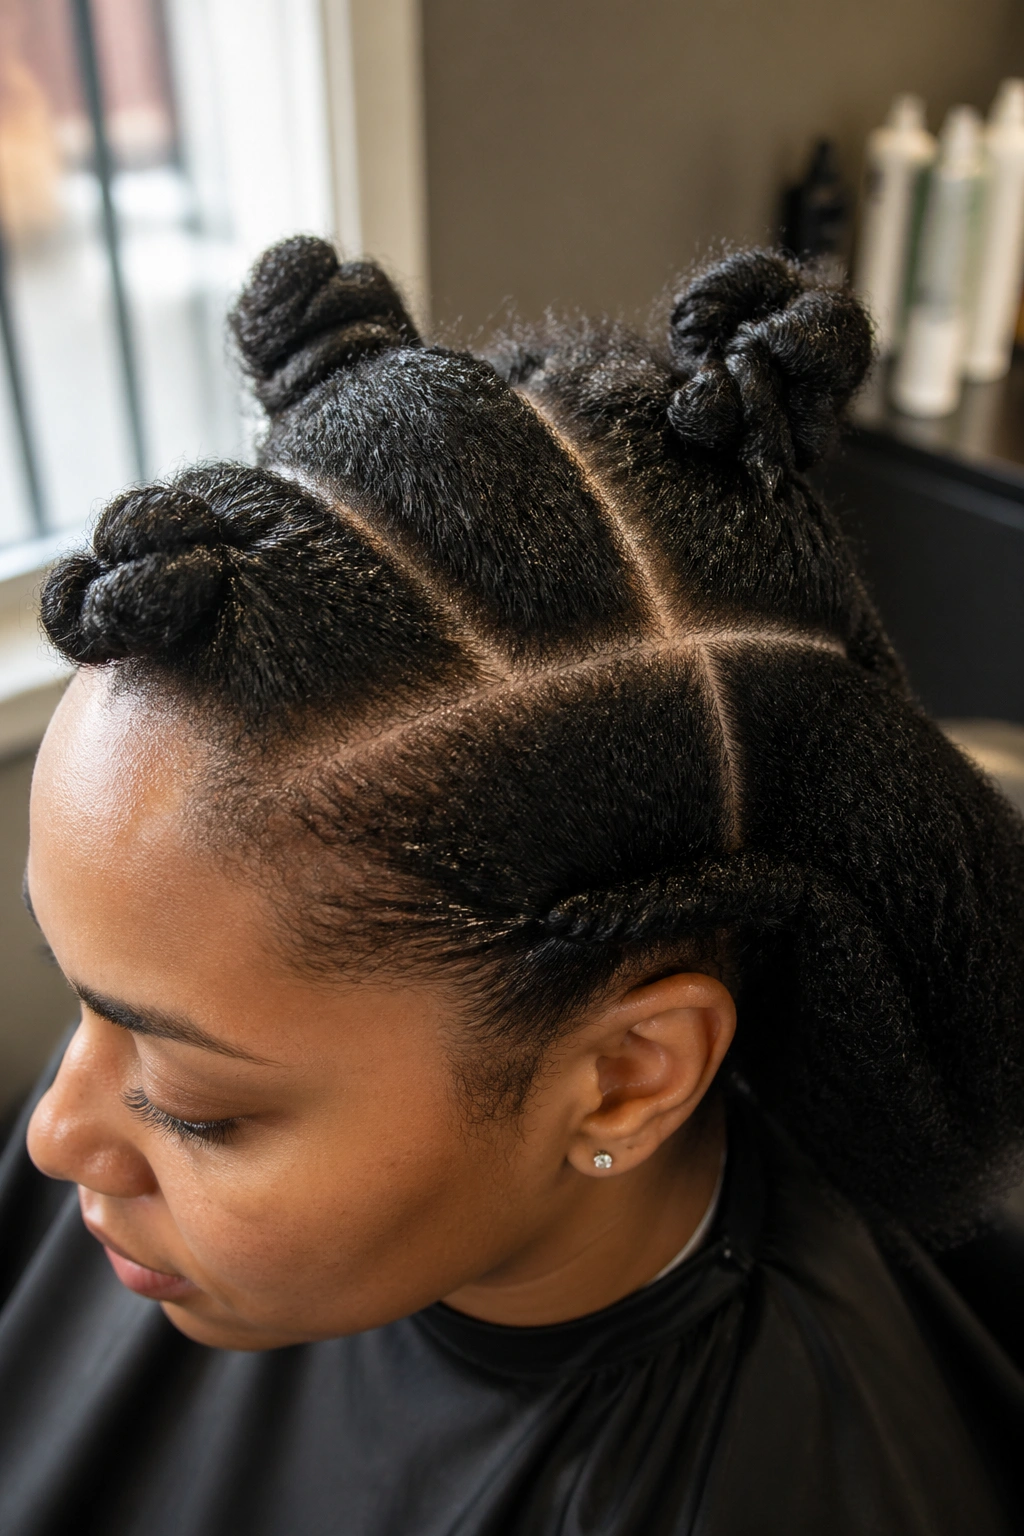
Prep That Makes or Breaks the Install
Clean hair. Stretched hair. Moisturized hair. That’s the trio.
A sulfate-free wash the day before braiding gets the scalp clean without stripping. Deep condition for 20-30 minutes under a plastic cap. Rinse with cool water to close the cuticle.
Stretching matters more for natural hair than any other texture. Shrunken coils can shrink up to 75% of their actual length, which makes parts look uneven and rows look patchy. Air-dry with hair banded in sections, or blow-dry on low heat with a tension-drying method using a paddle brush.
Leave-in conditioner gets applied section by section as the braider works. Too much and the strands slip. Too little and they’re dry and prone to snapping. A pea-sized amount per section is a good balance.
Cornrows Without Extensions — Benefits and Limits
Let’s be honest about what no-extension cornrows can and can’t do.
They can protect your hair for weeks. They can define your curl pattern when you take them down and release defined waves. They can last 2-3 weeks with proper scalp care. They use no synthetic materials, which some people prefer for skin-sensitive scalps.
What they can’t do: add length. If you want cornrows hanging past your shoulders and your natural hair is chin-length, you’ll need extensions. Can’t fake it. Also, natural-hair-only cornrows tend to show more scalp than extension versions, which some people love and others don’t.
Know what you’re working with before you commit.
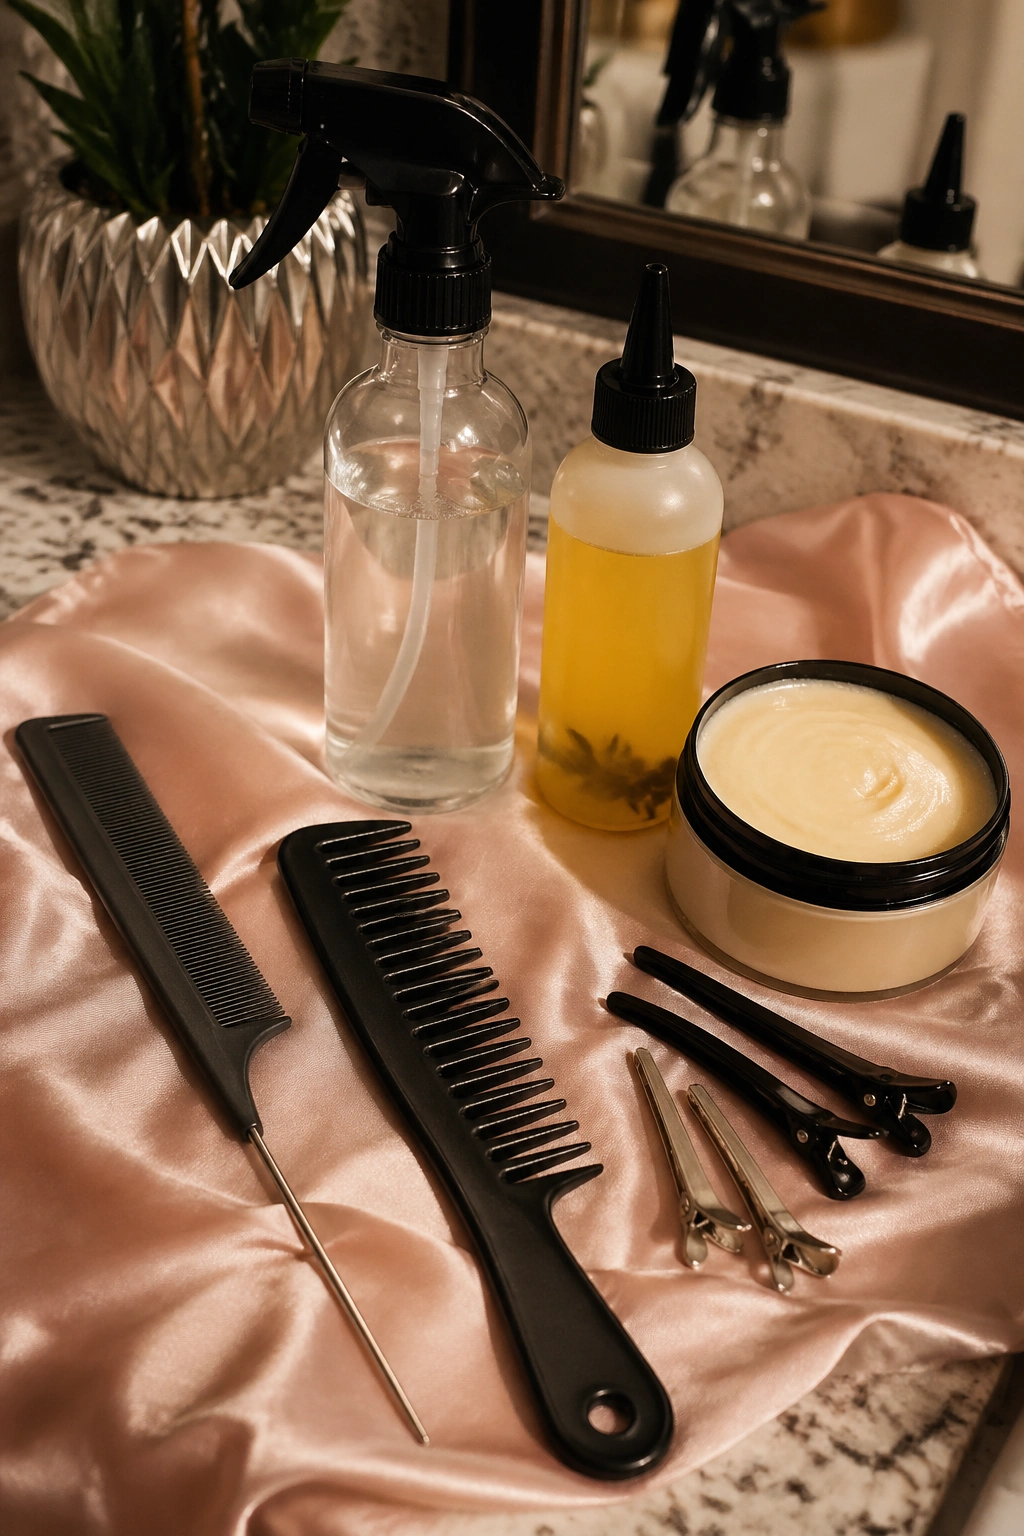
The Tools You Actually Need
You don’t need a kit with forty products. A few essentials get it done.
A rat-tail comb for precision parts. A wide-tooth comb for detangling. A spray bottle with water and a drop of leave-in. A small jar of edge gel with strong hold. A scalp oil — peppermint, tea tree, or jojoba. Clips to section off the hair. Satin scrunchies for tying away sections not being worked.
Skip the heavy butters. Raw shea and thick Jamaican castor oil can weigh down natural hair and make the cornrows look greasy instead of sleek. Save those for specific moisture sessions, not install day.
Tension Awareness on 4C Hair
4C hair is more fragile than it looks. Those tight coils are susceptible to breakage at every stress point — roots, mid-strand, and tips.
A good cornrow installer on 4C hair works with moderate tension only. Enough to keep the braid tight to the scalp, not enough to pull follicles. If your braider is pulling so hard the skin around your hairline lifts, stop them. That’s how you lose your edges.
You can also brace with one hand while they braid with the other, taking some of the pull off your scalp. Small trick, but it helps on longer sessions.
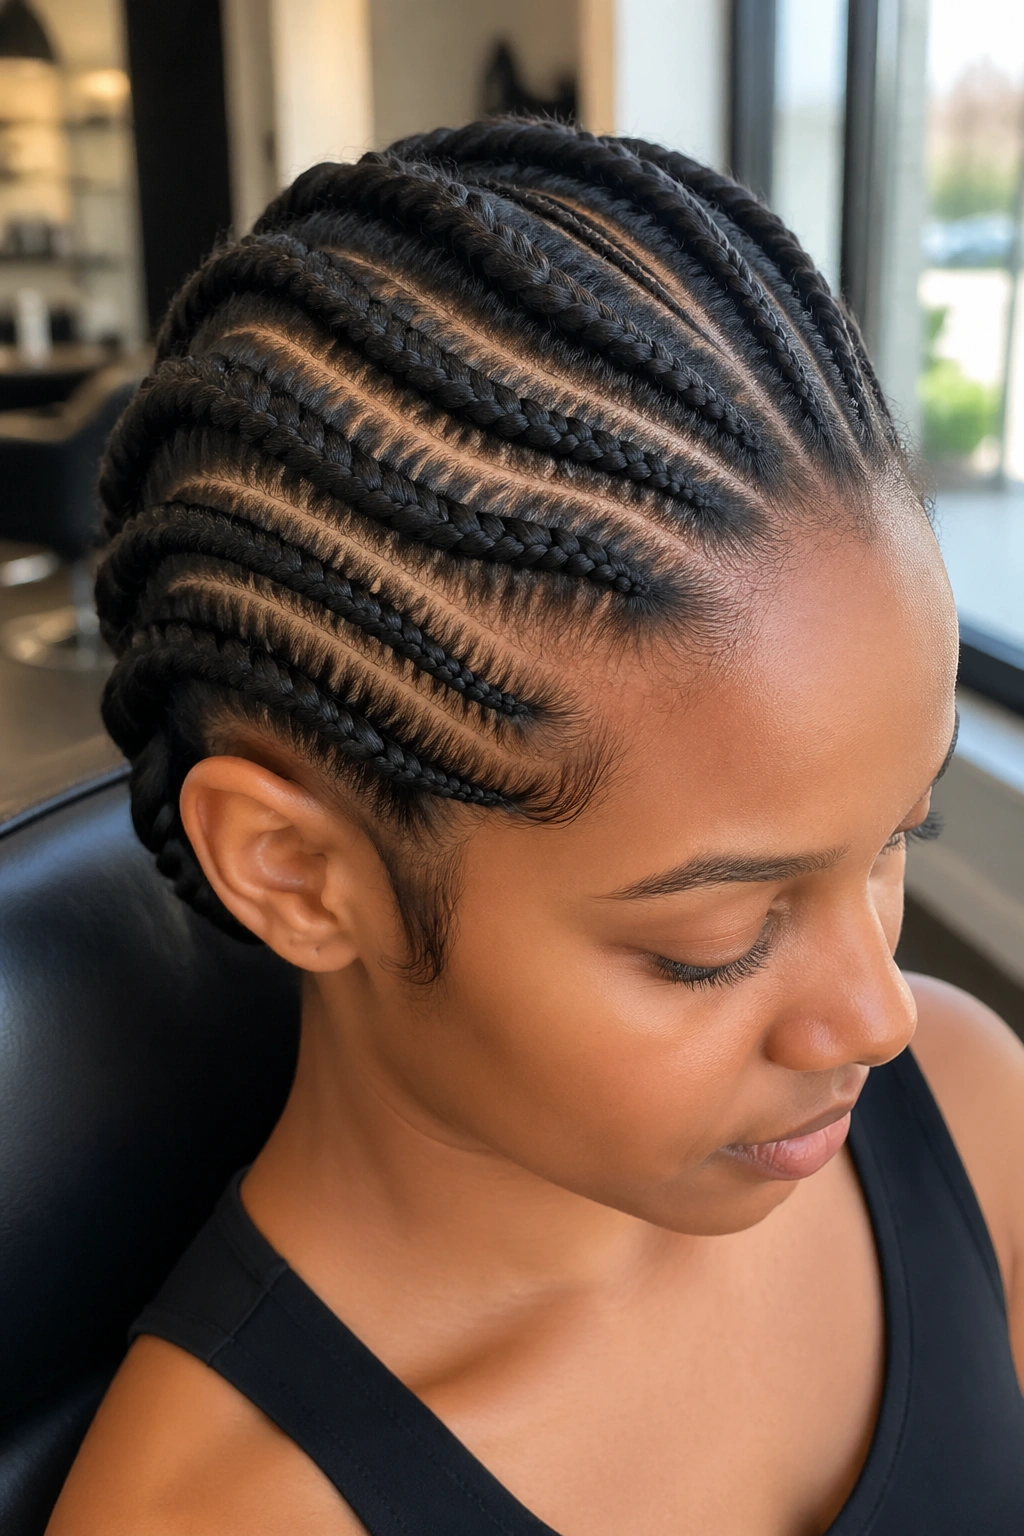
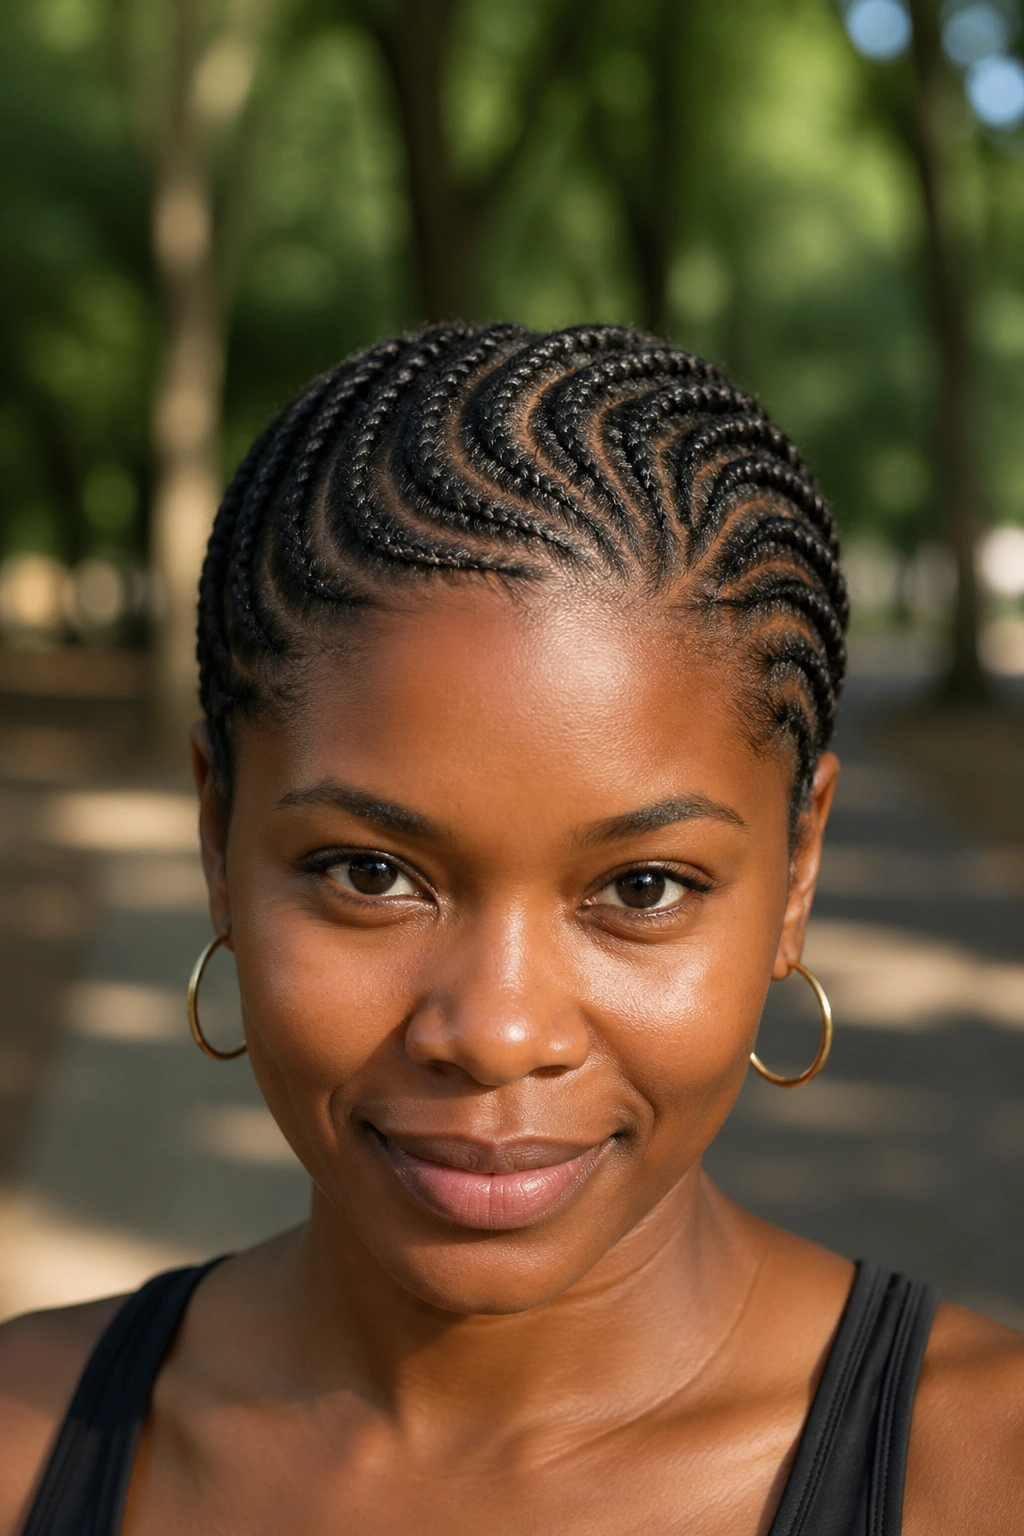
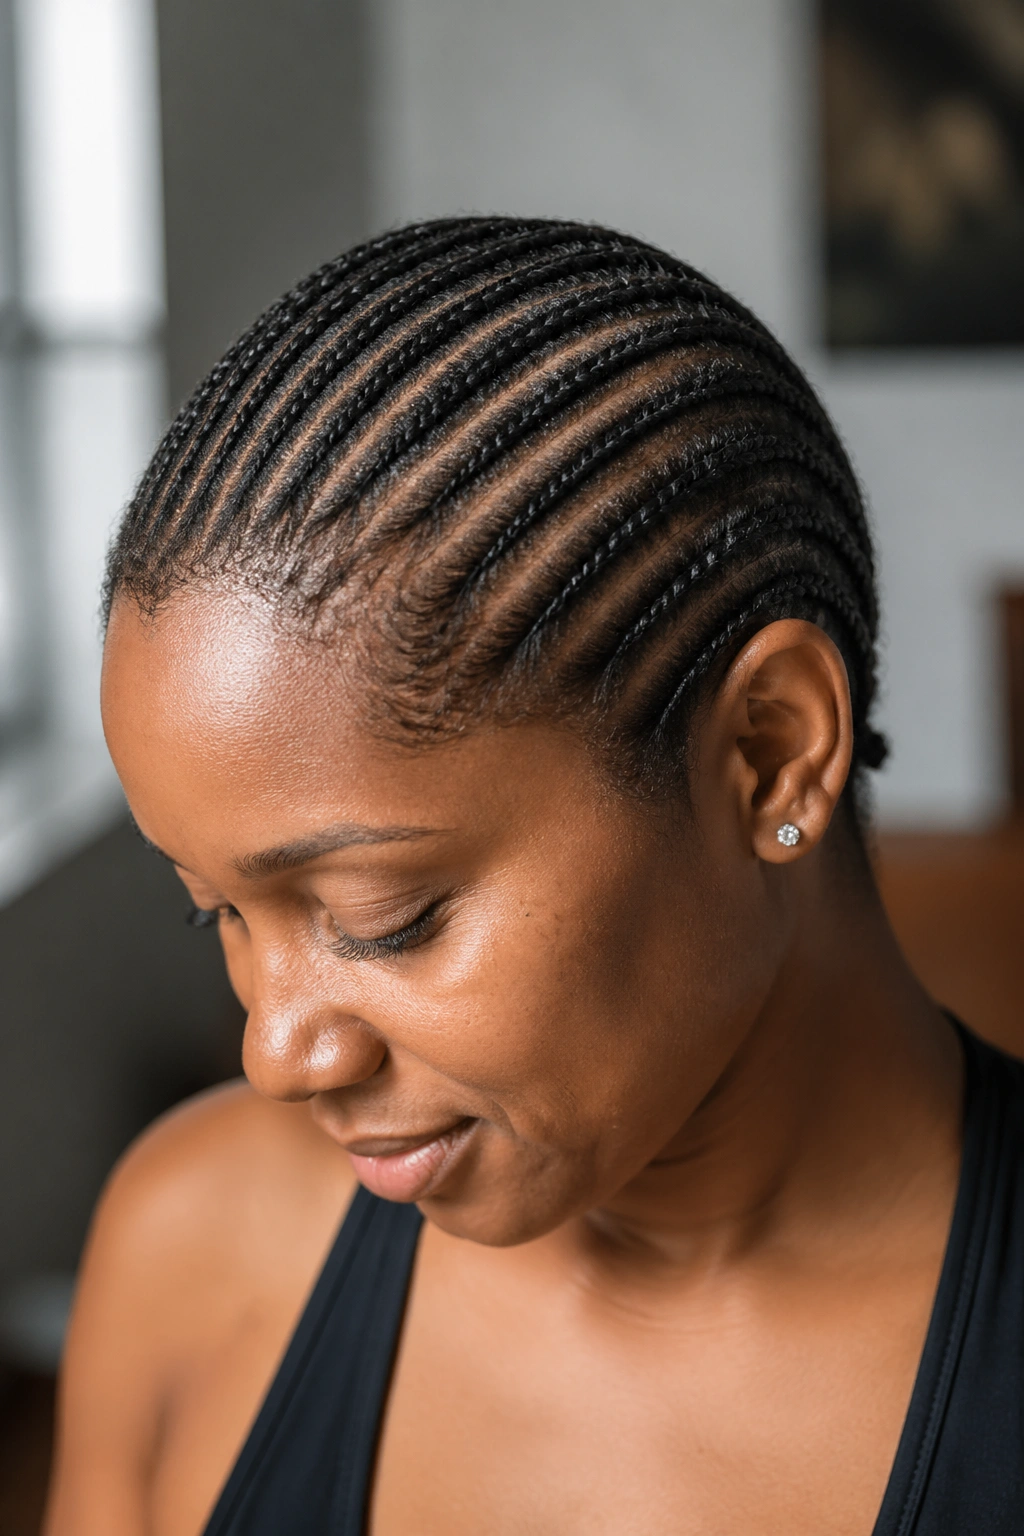
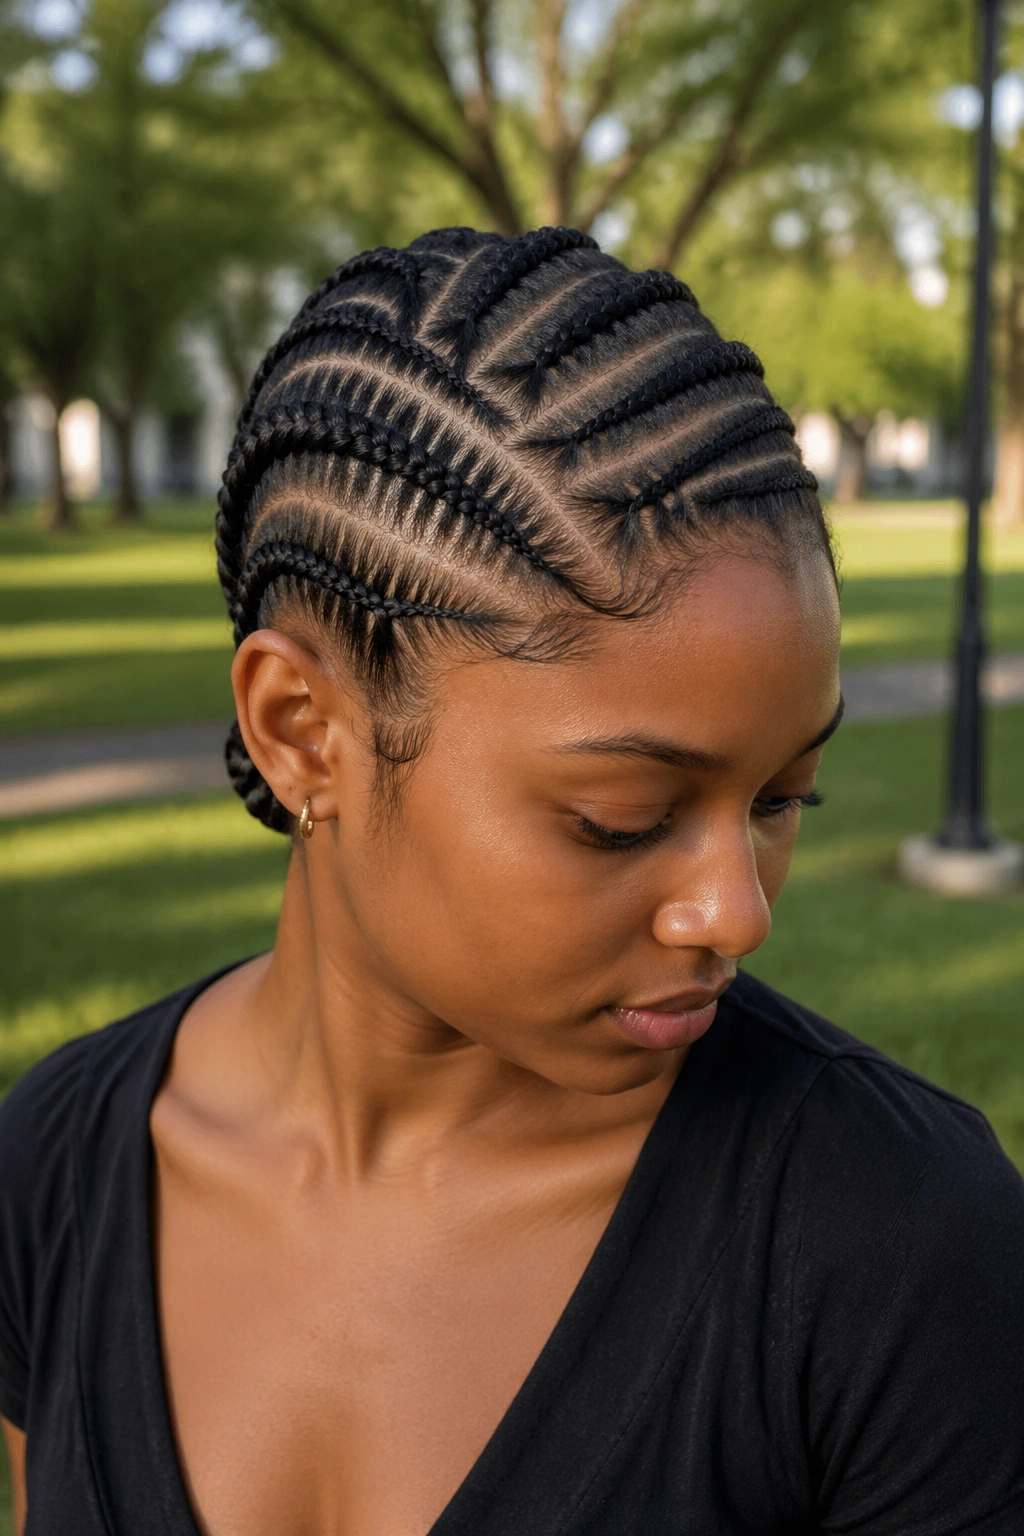
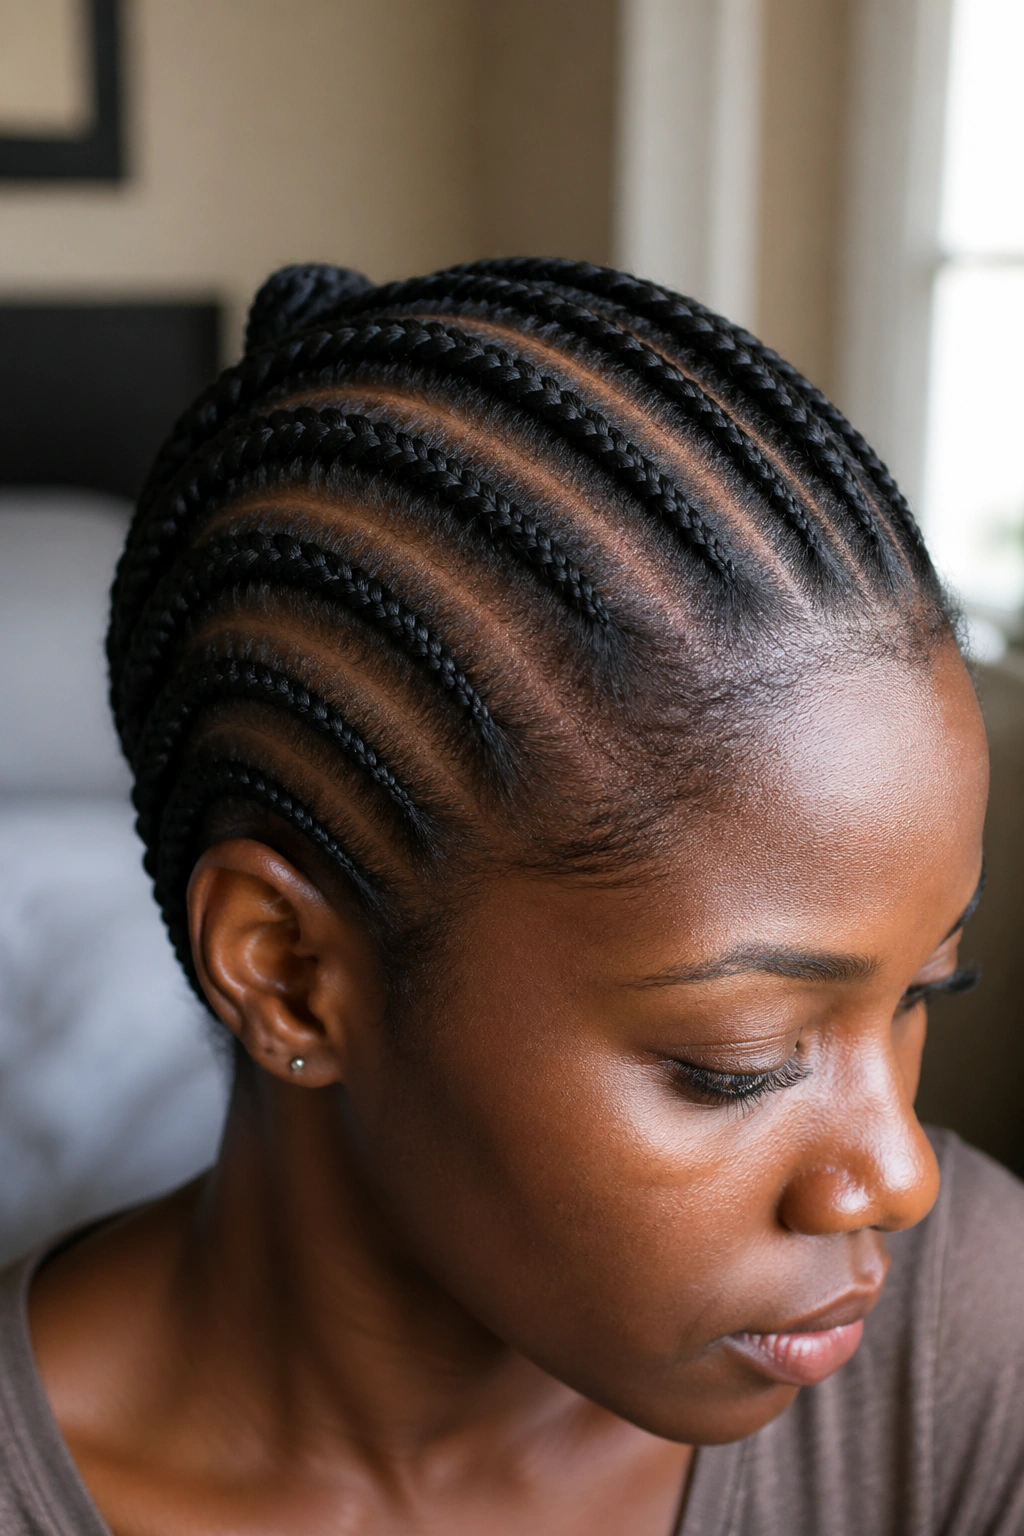
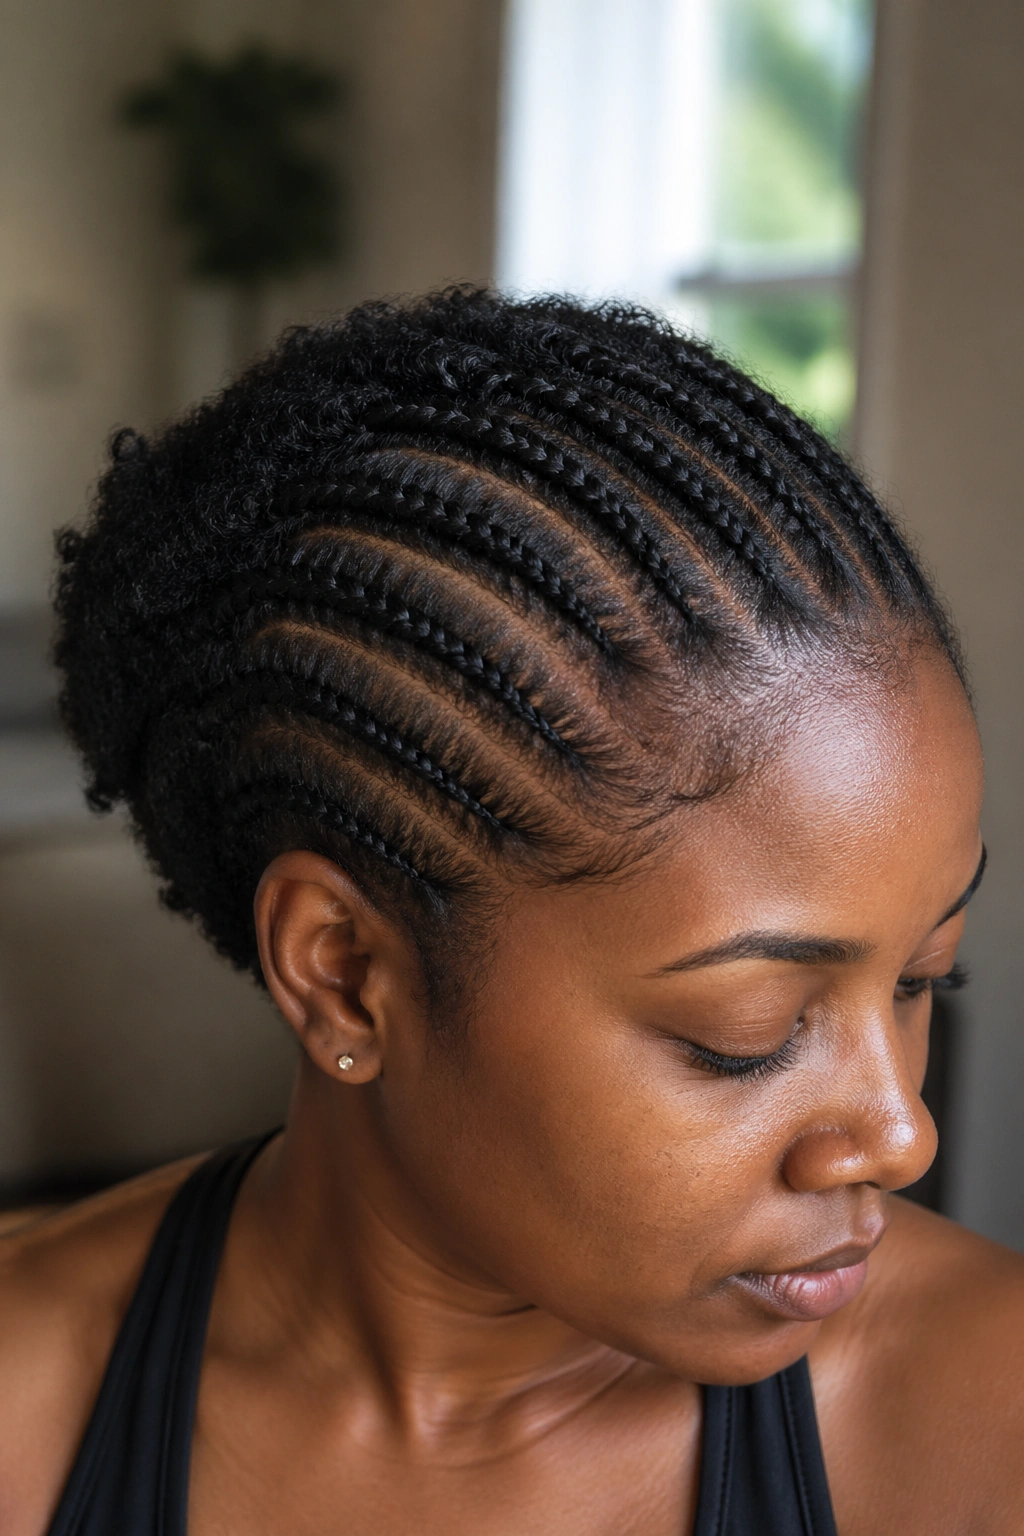
1. Simple Six-Row Straight Back
Six cornrows, straight from hairline to nape, done with just your own hair. The foundation style. The one every Black woman learns to recognize before she can talk.
Why It Works
- Fast install — 45 minutes to an hour
- Shows off your scalp in clean lines
- Holds 1-2 weeks with light care
- Perfect practice style for beginner braiders
Tip: Before starting, section off the hair in six even parts from front to back. Mark each section with a clip. Braiders who skip this step end up with uneven row widths.
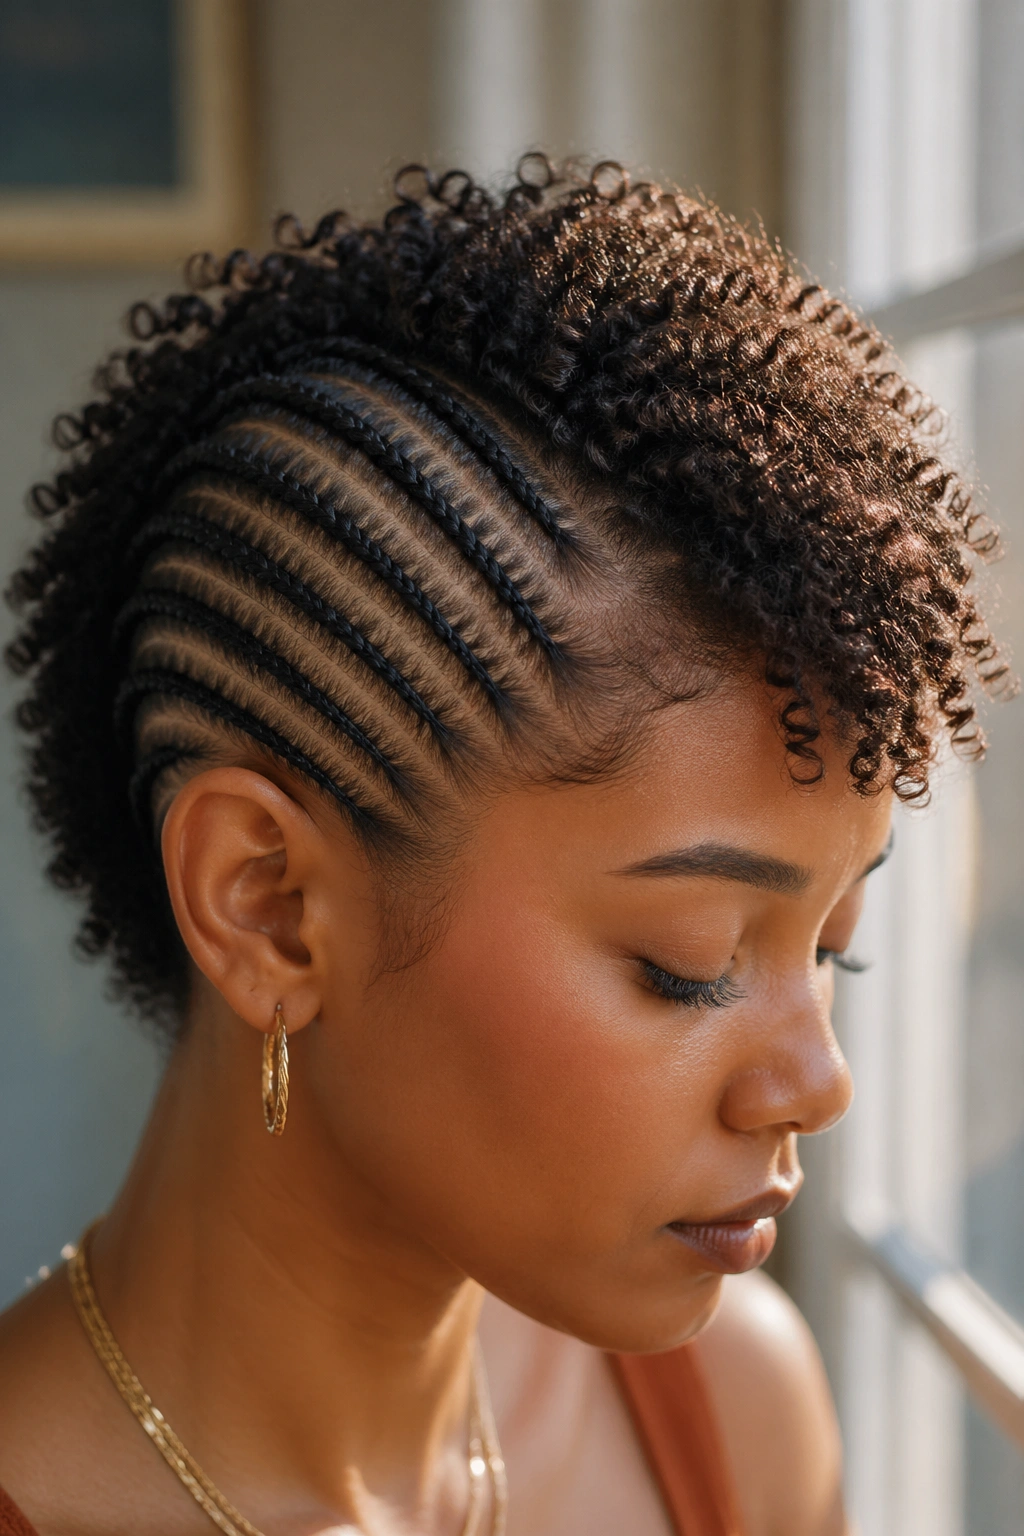
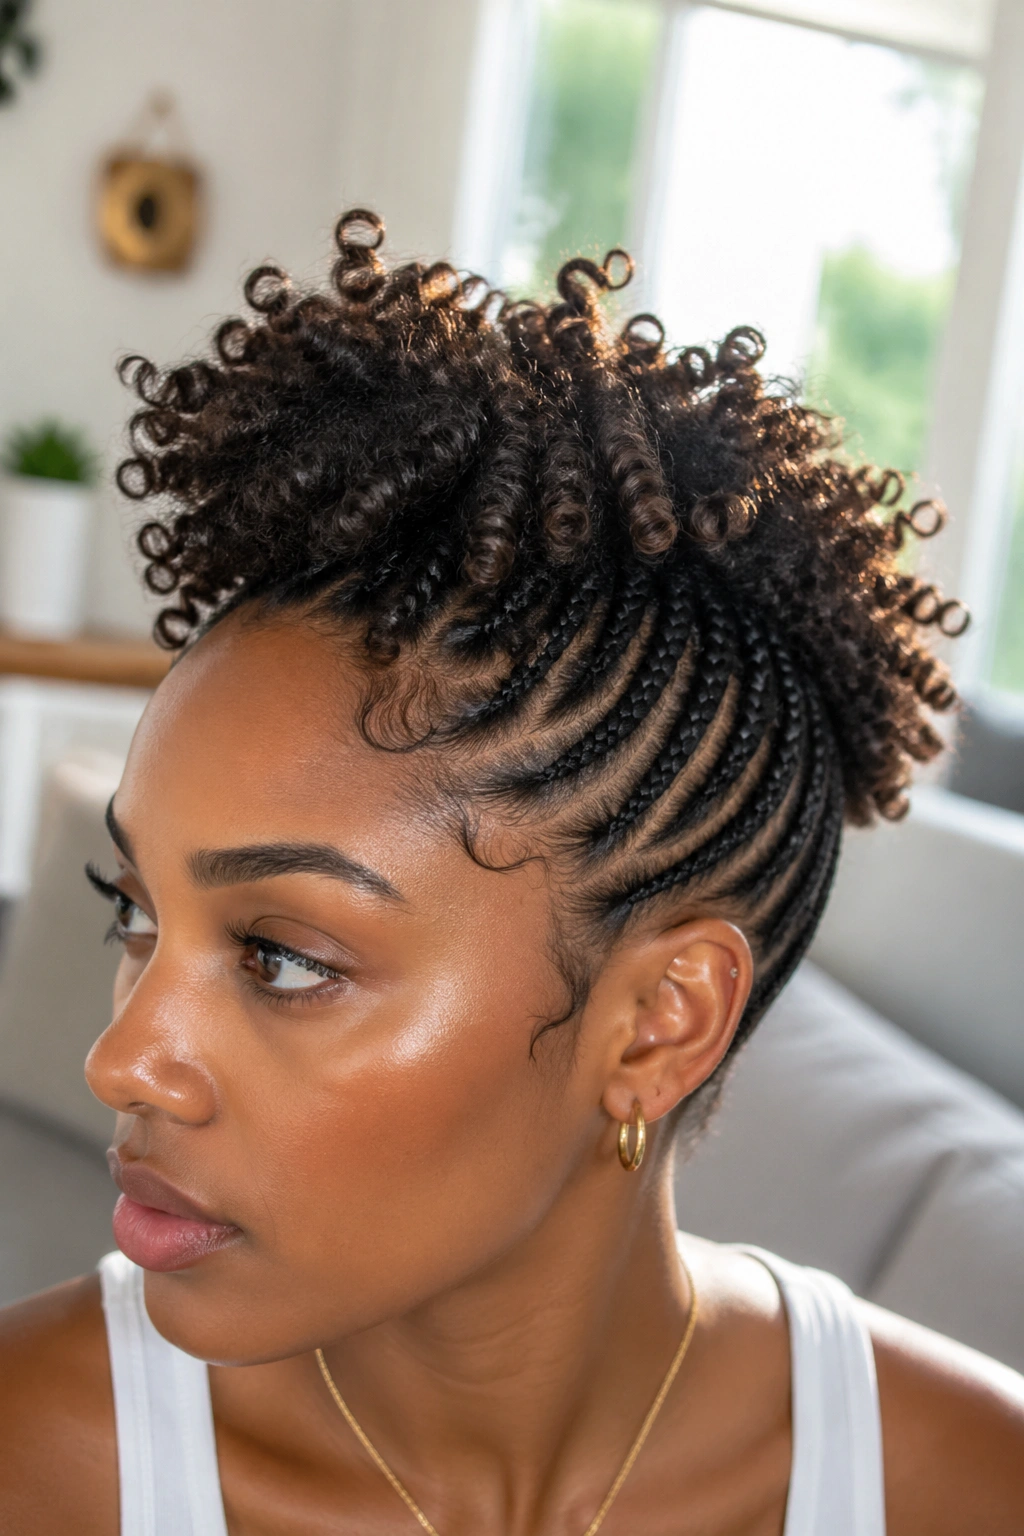
2. Natural Cornrows Into a Puff
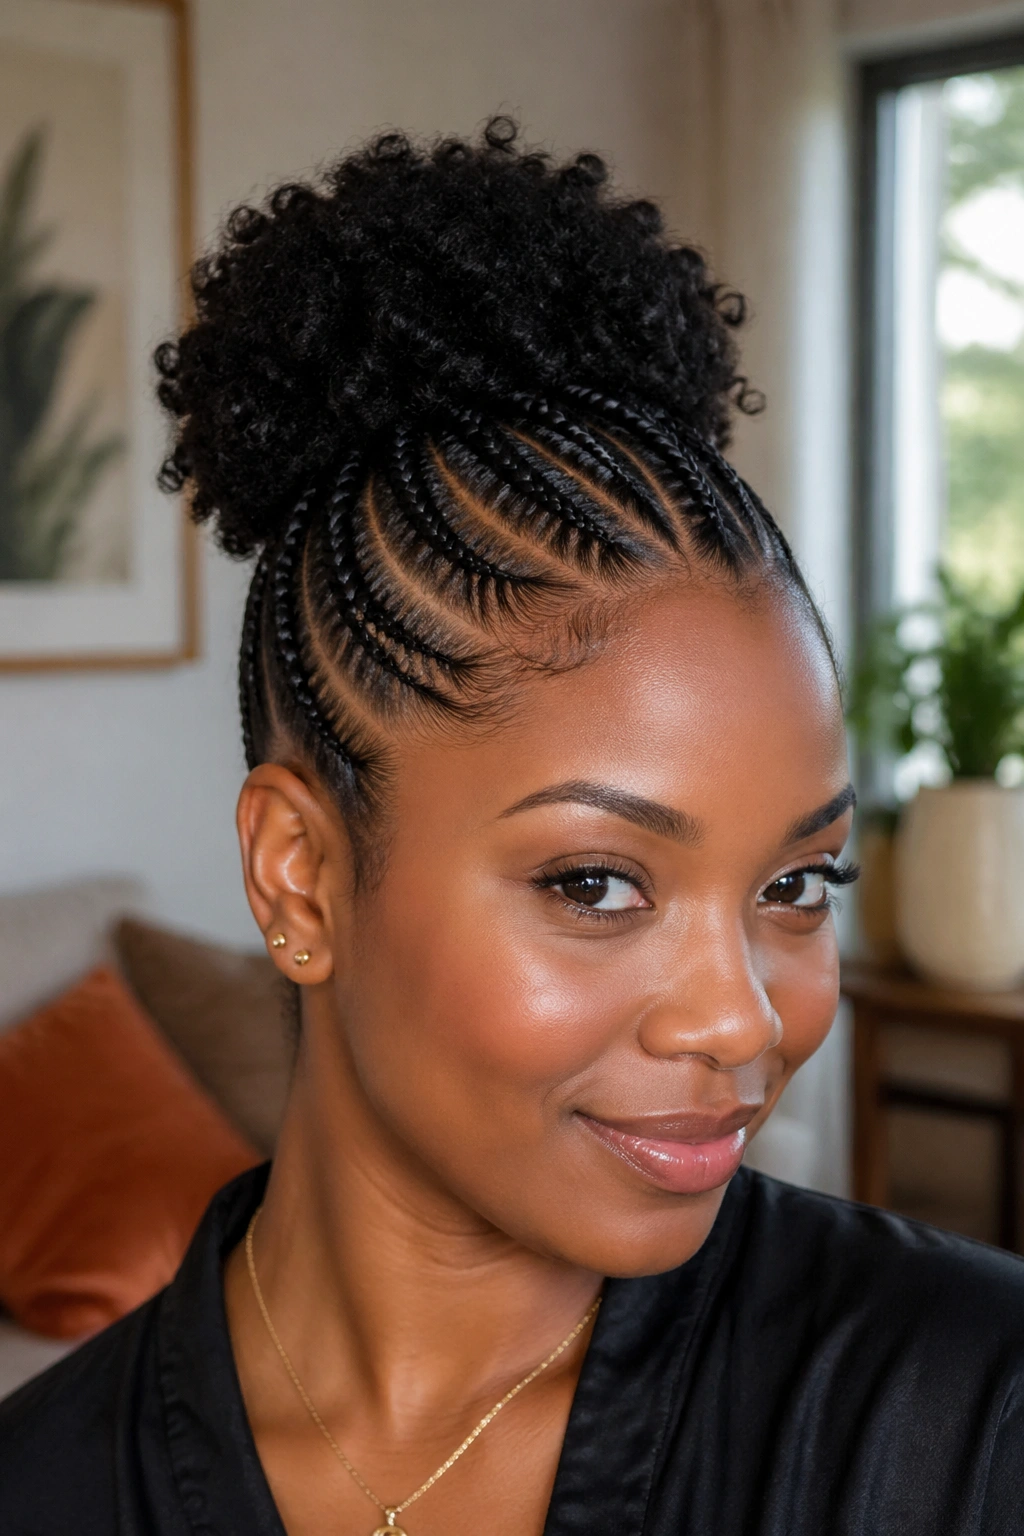
Braid cornrows going upward toward the crown, stop at the top, gather the remaining hair into a natural afro puff. The fresh contrast between tight rows and loose coils is the whole point.
The puff can be tiny if your hair is short, or massive if you’ve got length to work with. Either way, it frames your face like a crown.
This is my go-to for days when I want to look put-together but don’t have time for anything fancy. Twenty minutes, and I’m done.
3. Heart-Shape Natural Cornrows
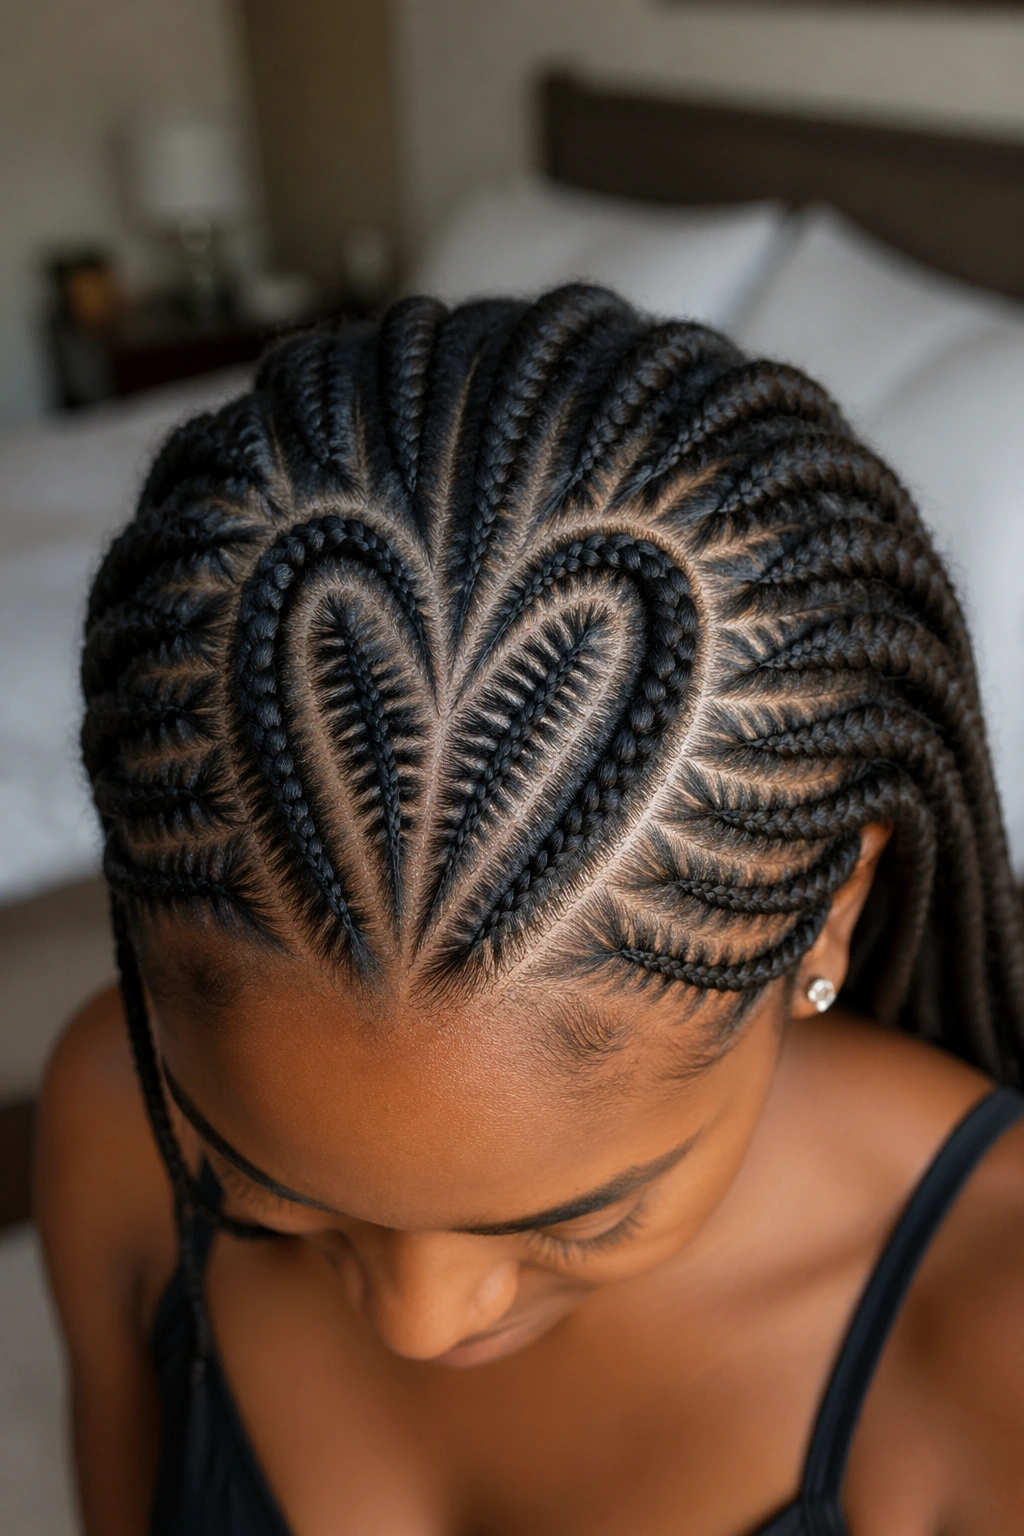
What’s more memorable than a heart traced right on your head in braid parts? The pattern shows off your natural hair texture while adding a design element without any accessories.
The heart usually sits on the top of the head, with cornrows radiating outward. The inside of the heart can be filled with tiny two-strand twists or flat twists for contrast.
For natural hair, the heart outline shows off best when the scalp contrast is clean. A little edge gel along the heart’s border keeps the shape crisp.
4. Cornrows With Flat Twist Detail
Take one or two cornrow sections and replace them with flat twists instead. The twist texture sits differently against the scalp than the braid texture, adding subtle variety across your head.
Flat twists go faster than cornrows but hold less long. If you use them as accents in a full cornrow head, budget them for the spots that get less friction — usually the center back or the crown.
The contrast between the tight plait of a cornrow and the spiral of a flat twist creates visual depth without needing any decoration.
5. Natural Cornrow Updo
All rows lead up and back. Your braider takes the ends at the crown and pins them into a small updo — bun, roll, or tuck. No extensions, just your natural length woven together at the top.
How to Style It
Dampen ends slightly before the updo is created. Natural hair needs to be flexible to bend into the shape without snapping. Pin with bobby pins that match your hair color. Set with a light mist of flexible-hold spray.
Best for weddings, proms, or any formal event where you want protective styling without the full commitment of long braids.
6. Swirl Parts With Natural Texture
Parts swirl across the scalp, creating curved cornrow paths. Your natural texture fills the rows with density that makes the swirls look almost three-dimensional.
Ever seen those artistic cornrow photos where the scalp looks like a maze? That’s this style. Hard to do well on short natural hair — you need at least 4-5 inches of stretched length to braid along the swirl without the hair slipping out.
Length matters more than texture for this one. 4C hair with 6 inches stretched length can rock swirl cornrows just as easily as 3A hair with 8 inches loose.
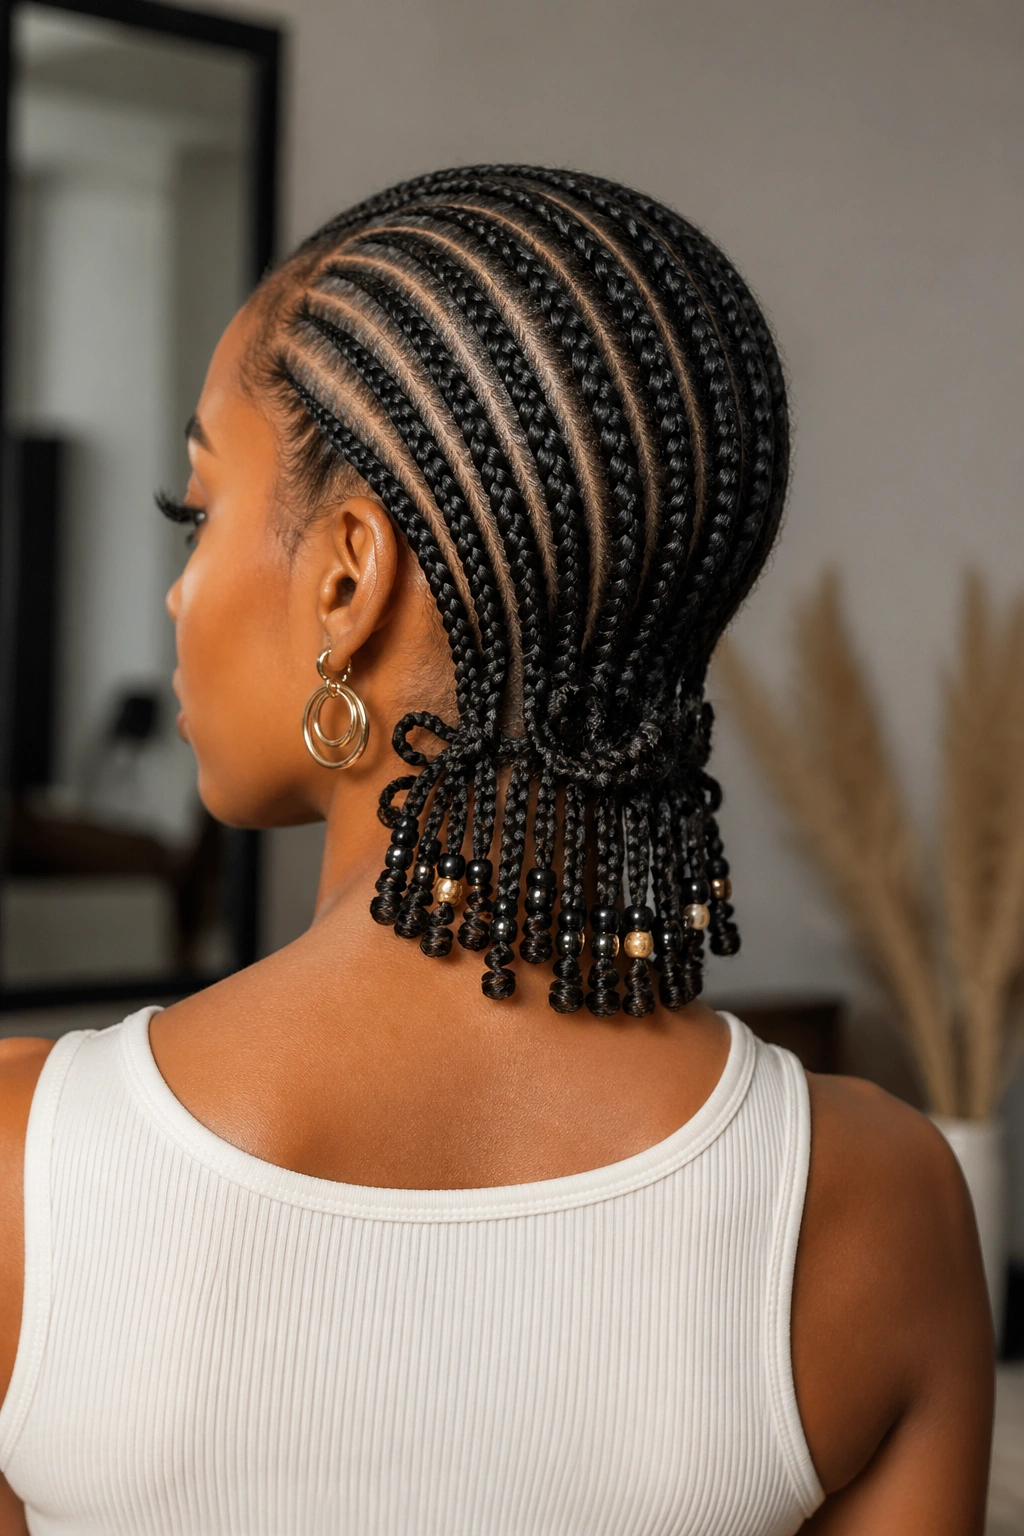
7. Natural Cornrows Ending in Bantu Knots
Cornrow the full length of your hair to within 2-3 inches of the ends. Don’t finish the braid — instead, coil the remaining hair into a Bantu knot at the end of each row.
You get two styles in one. Wear it with the knots for a few days. When you’re ready to switch, unknot the ends and let the braids hang loose with fresh spiral curls at the tips — that’s called a knot-out.
The curl pattern from Bantu knots on natural hair comes out tighter and more defined than heat curls. It sets while you sleep. It lasts 2-3 days minimum with a silk bonnet overnight.
8. Side Part With Angled Rows
Unlike centered cornrows that balance evenly, side-part cornrows pull to one side. One side has minimal rows, the other side has more. The imbalance gives the style character.
What’s different here is that your face looks asymmetric in a flattering way. The deep side part opens up one side of your face, which lengthens round faces and softens sharp ones.
Side-part cornrows on natural hair show off your own density without hiding it behind extensions. For women with thick 4B or 4C hair, that density becomes the feature.
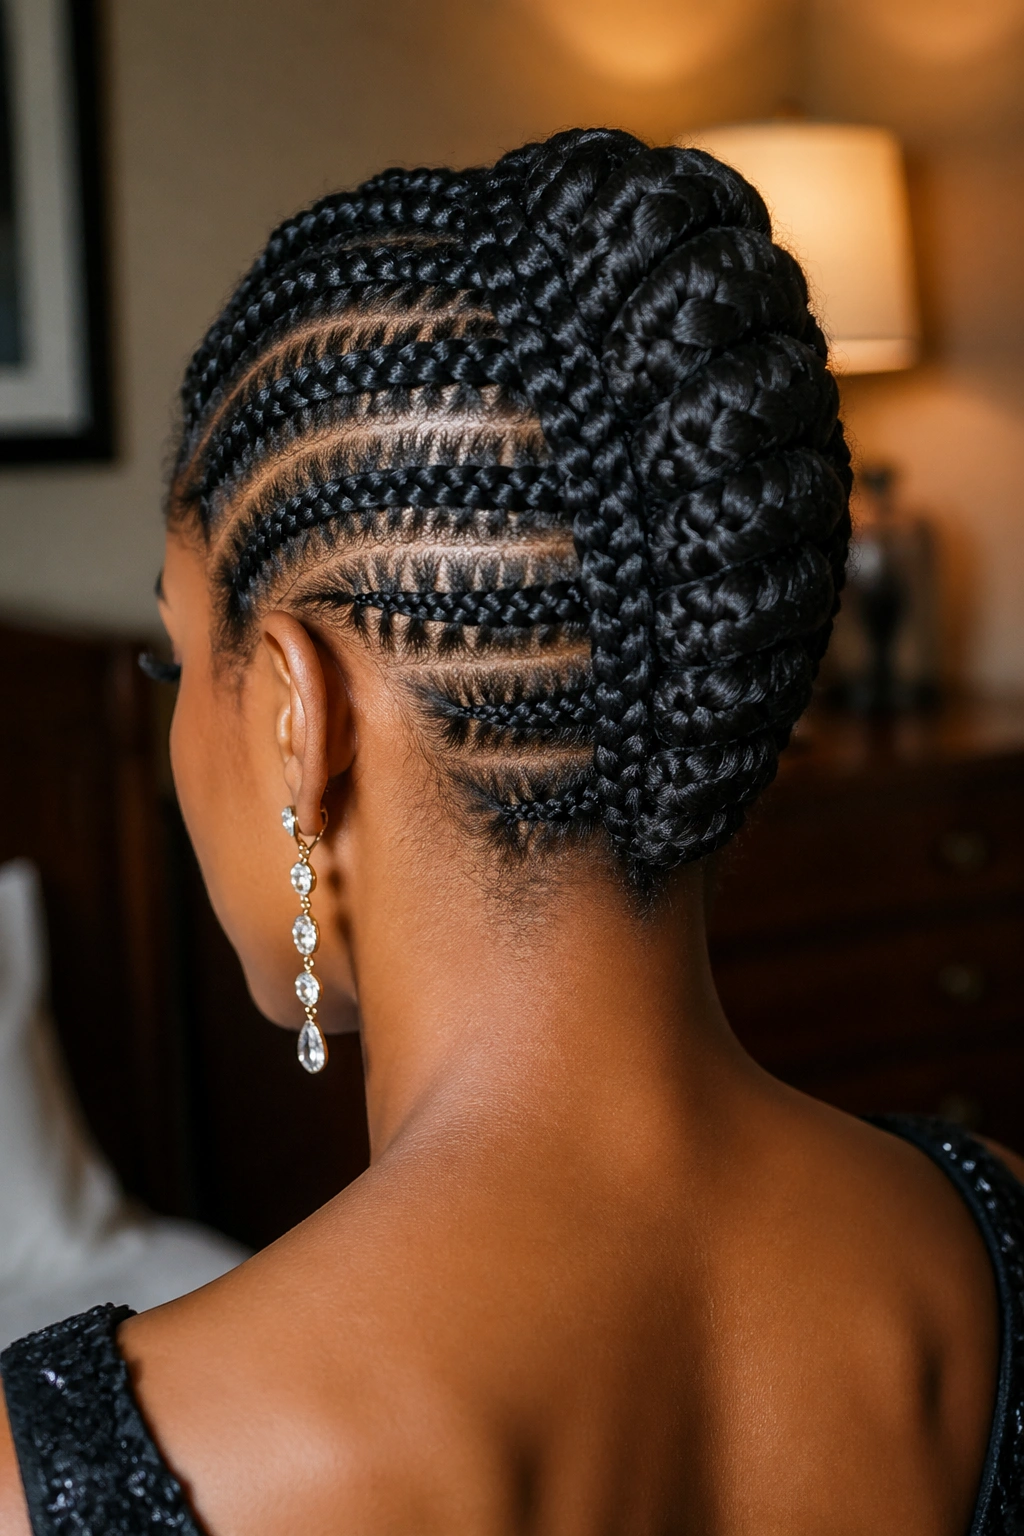
9. Mini Cornrows All Over
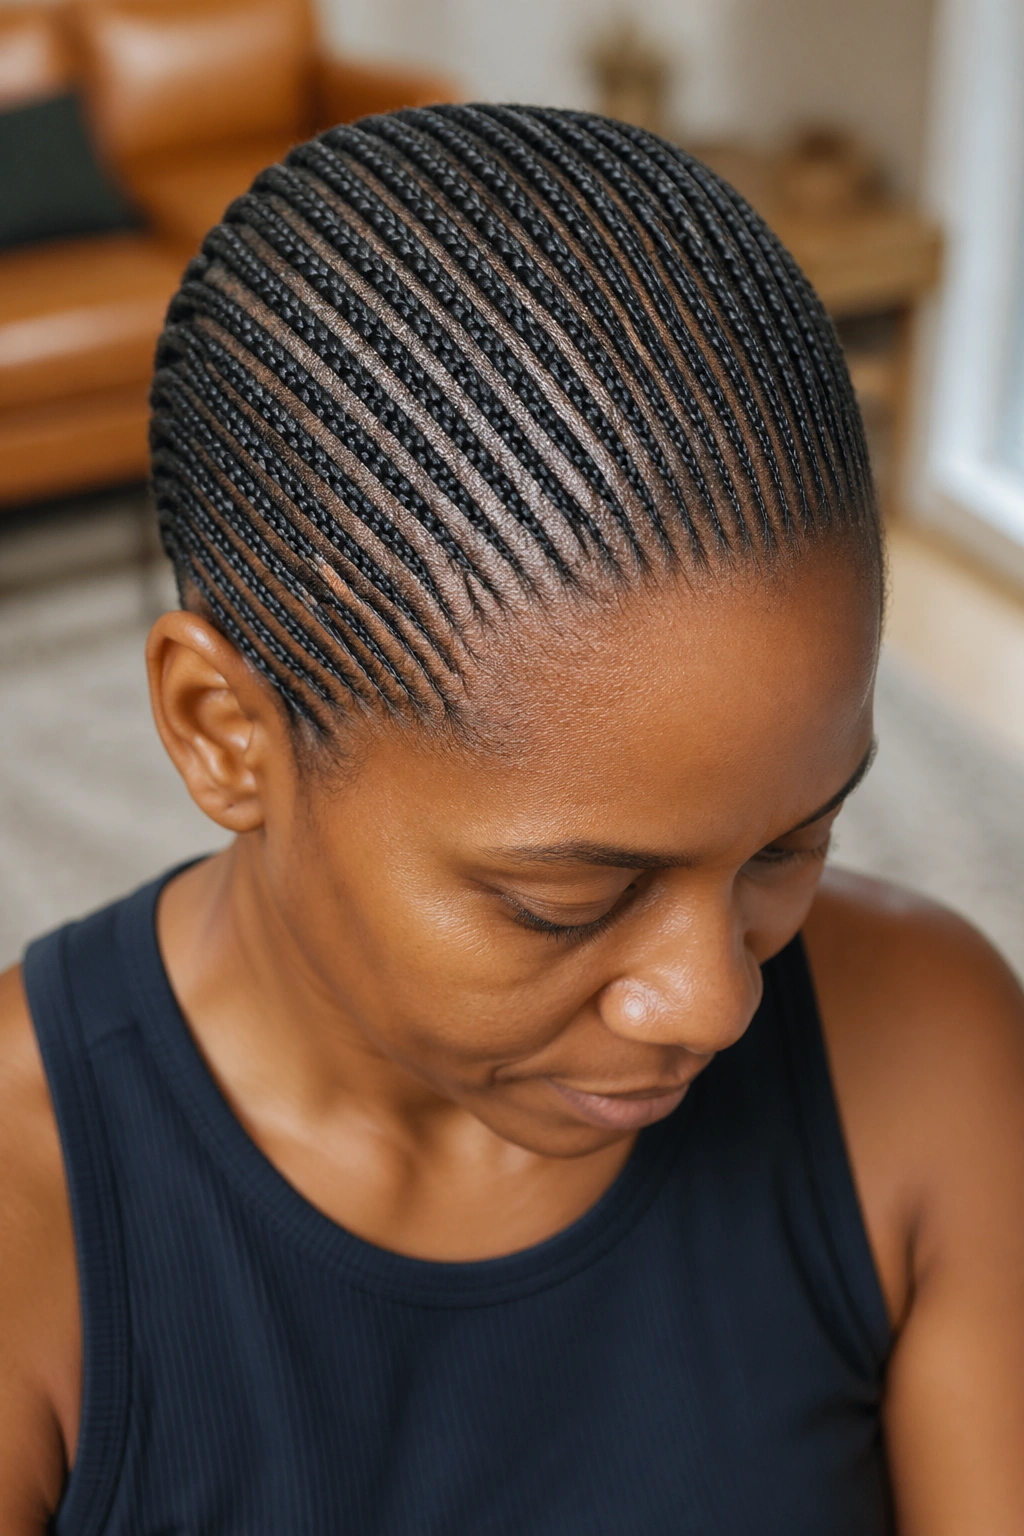
Small cornrows covering the entire head in a uniform pattern. Twenty to thirty tiny rows, each maybe a quarter-inch wide.
This install takes hours. On dense natural hair, you’re looking at 4-5 hours in the chair. But the result is a crown of intricate braidwork that lasts 3-4 weeks easily.
Who this is for: anyone with thick hair and patience. The mini pattern lets your density show off without the rows looking chunky.
10. Crown Cornrows With Free Curls Below
Cornrow only the top and crown of your head. Leave the back and sides out as loose natural curls.
The style reads like a half-updo. Front and top look structured and protected. Back and sides show off your curl pattern in full.
My favorite use for this style: heat damage recovery. When my ends are fragile and my roots are healthy, I cornrow just the roots to protect the growth and let the compromised ends stay accessible for moisture treatments.
11. Diagonal Cornrows to One Shoulder
All rows angle from the opposite side of the head, traveling diagonally down toward one shoulder. The ends gather on one side.
The natural hair version of lemonade braids — minus the waist-length kanekalon. Your own hair length determines the final look. Shoulder-length natural hair, sweet. Chin-length, not so much.
The diagonal angle flatters an off-shoulder neckline or any top that exposes one side of the collarbone. Style and outfit work together.
12. Natural Cornrows With Center Braid
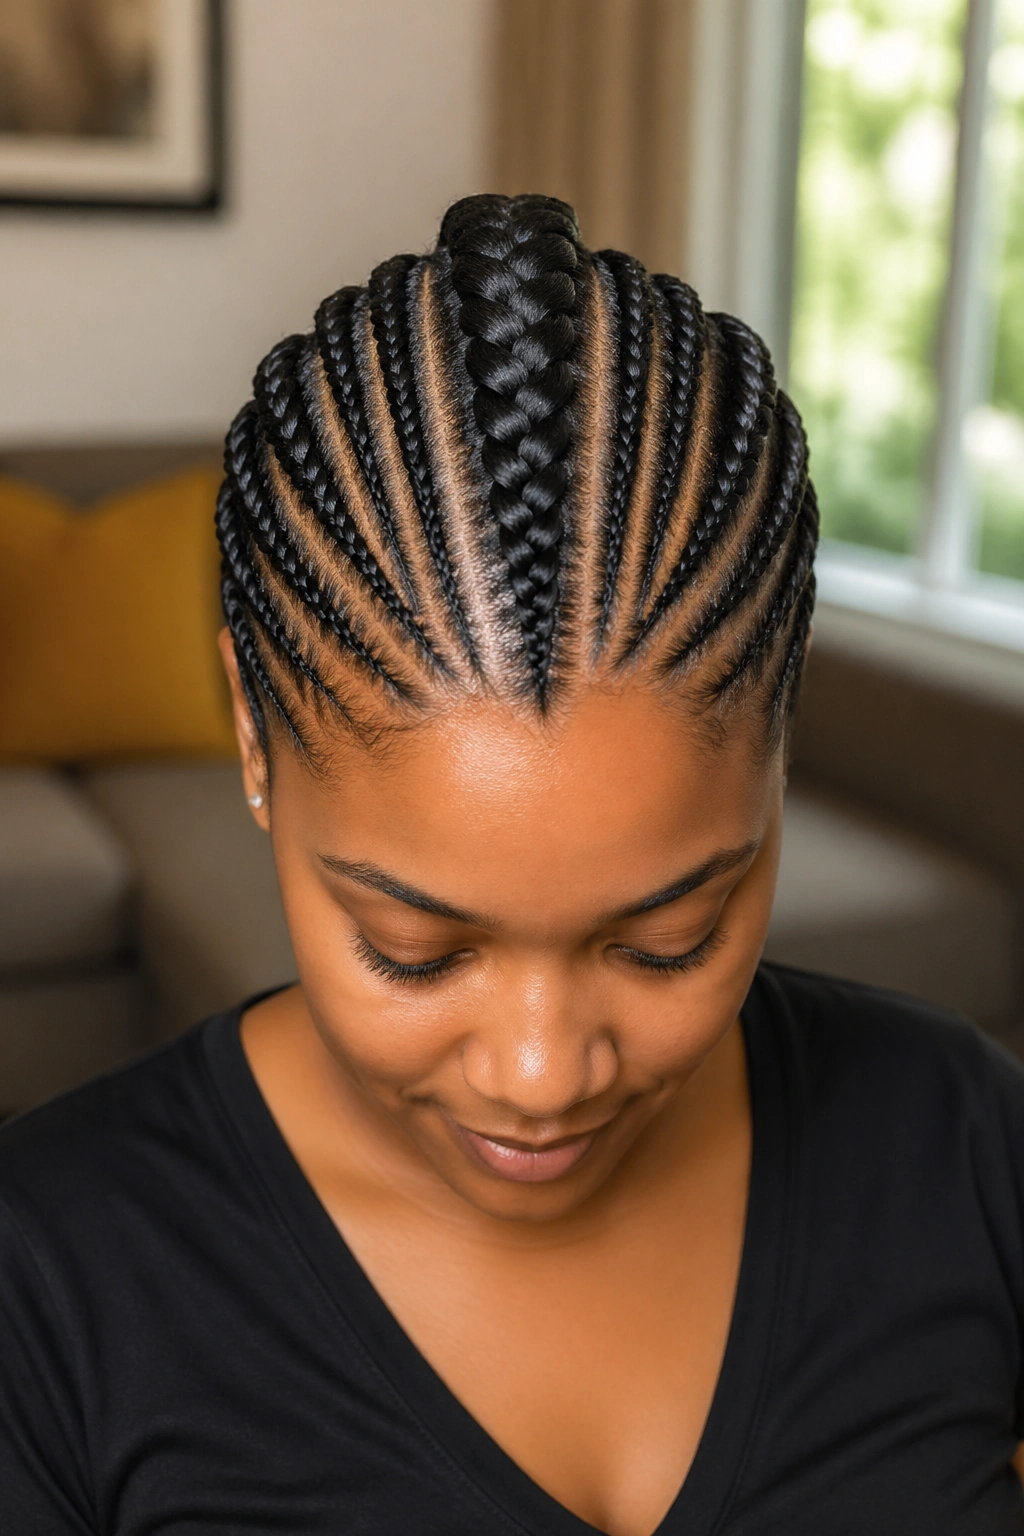
One thick cornrow runs dead-center from your hairline to the nape. Smaller cornrows flank it on both sides, angling slightly away from the center line.
Picture a spine with ribs branching off. That’s the visual.
The center braid becomes the focal point. Make it slightly thicker than the others, and consider leaving the end loose with a defined curl for extra drama.
13. Zigzag Parts on Natural Hair
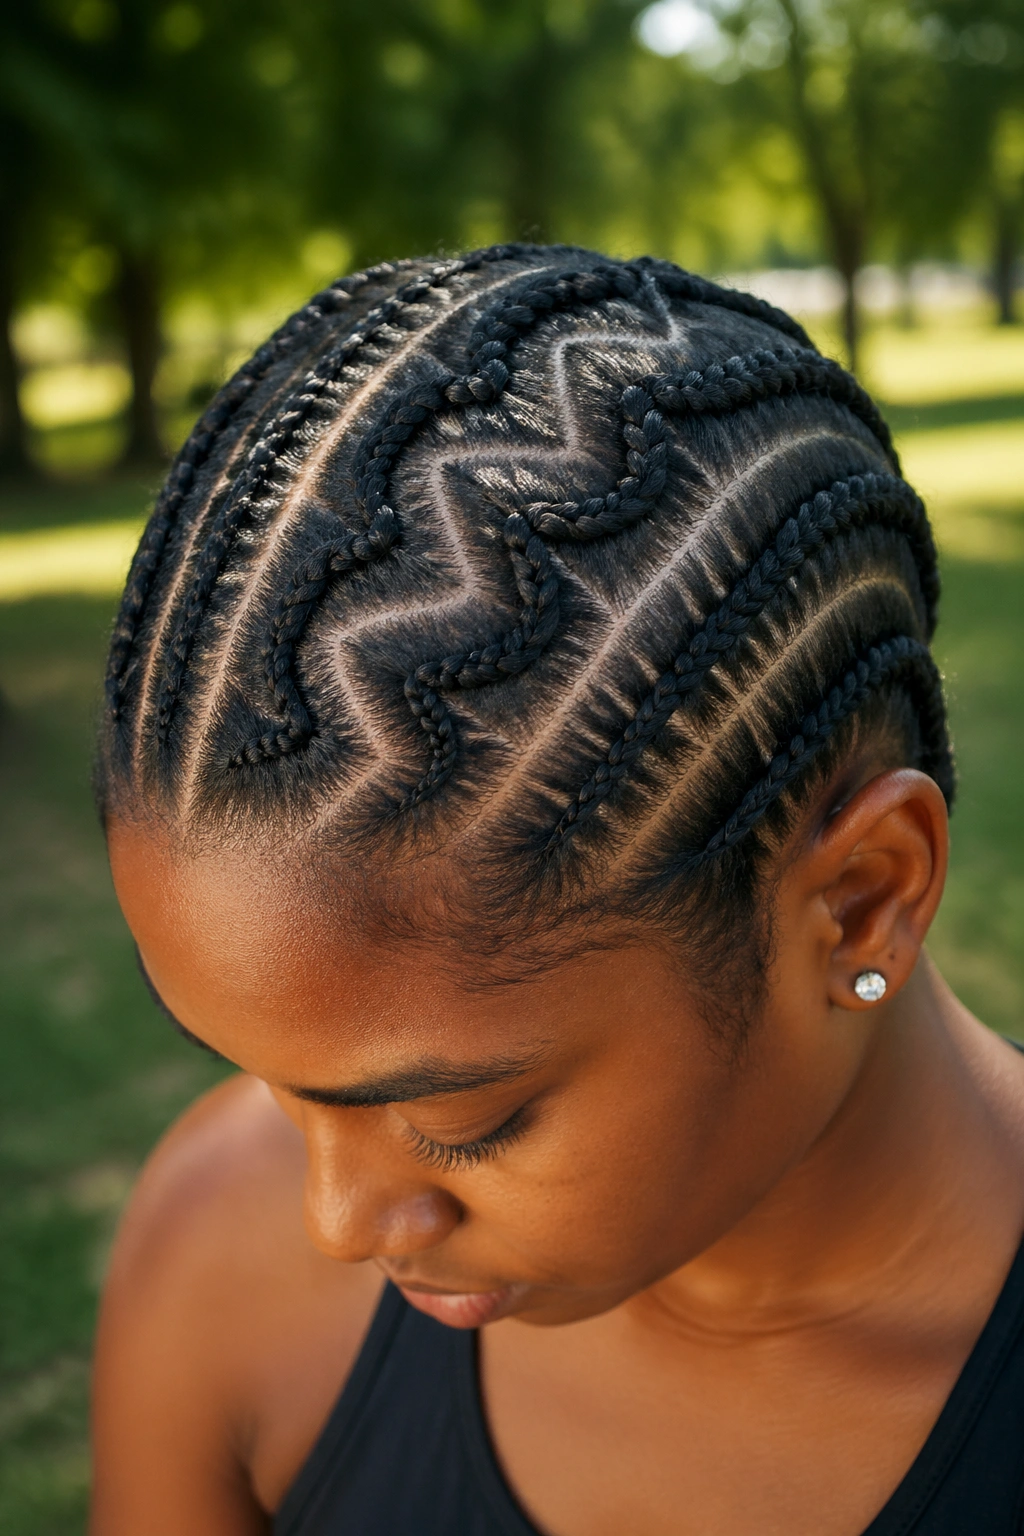
Instead of straight parts running from front to back, zigzag parts create Z-shaped paths between each row. Your natural hair texture emphasizes the zigzag parts by showing scalp contrast where the coils meet the skin.
What Makes It Different
- Parts become decorative elements themselves
- Each row follows a wavy path rather than a straight line
- Works beautifully on 4B and 4C textures where scalp contrast is high
Add 30-45 minutes to the install time. The zigzag parts take precision that straight rows don’t require.
14. Cornrow Mohawk With Natural Curl Stripe
Cornrow the sides tight. Leave a strip down the middle of your head un-braided, letting that center section stay as natural curls.
The curl strip becomes the statement. You can pick it out for a fuller look, flat-iron it for sleekness, or leave it in its natural state.
The cornrowed sides protect the hair underneath. The loose center lets you style that part however you want for each outing.
15. Short Natural Hair in Micro Cornrows
Even short natural hair — 2-3 inches — can be micro-cornrowed across the whole head. The rows are small, tight, and close to the scalp, making the style read almost like a braided cap.
Micro cornrows on short hair are a go-to for growing-out phases. They tuck away the awkward lengths while your hair gets longer. The pattern can change every few weeks, giving you variety while your hair rests underneath.
Duration: 2-3 weeks before the roots start showing new growth and the style looks fuzzy.
16. Cornrows With a Twist-Out Crown
Cornrow everything except a crown section. That section gets twist-out treatment — two-strand twists, set overnight, then untwisted for a defined curl halo on top.
Two textures, one head. The contrast works because both elements are natural — no extensions, no synthetic hair. Your own density shows through everywhere.
For the twist-out to hold, the twists need to be fully dry before unraveling. Going to bed with damp twists and untwisting in the morning — yep, that’s the move.
17. Natural Cornrows Ending in a French Roll
Cornrow from hairline to nape. At the nape, gather all the ends together and tuck them into a French roll — the classic vertical roll of hair running down the back of your head.
The French roll adds polish without adding extensions. It lifts the whole style into formal territory, which works for weddings, business dinners, or theatrical performances.
Pin the roll securely. Natural hair’s tendency to shrink and expand with humidity can loosen a poorly-pinned roll by midday.
18. Multi-Direction Cornrows
Your head, divided into four quadrants. Each quadrant has cornrows going in a different direction — front quadrant goes forward, back quadrant goes back, side quadrants go outward.
Complicated to explain. Striking to see.
The style works because the directional contrast emphasizes each quadrant as its own section. Parts between quadrants become design lines.
19. Cornrows With Flat Twists at the Front
Front hairline is flat-twisted in two rows. The rest of the head is cornrowed. The twist-to-braid transition happens along the crown.
This hybrid pattern works when your edges are delicate. Flat twists put less tension on the hairline than braids, so your edges stay intact while the rest of the head is protected.
Delicate edges deserve gentle handling. Don’t let anyone tell you otherwise.
20. Big Natural Cornrows

Four large cornrows running front to back. Each row is an inch or more wide, making them look almost like ridges down your head.
Who This Is For
- People with thick, long natural hair
- Anyone tired of tiny braids that take hours
- Those who want to protect their hair without extensions
The big cornrow look is fast, bold, and low-maintenance. 30-45 minutes install, 1 week hold. Perfect for a quick refresh between longer styles.
21. Cornrows Into Two Puffs
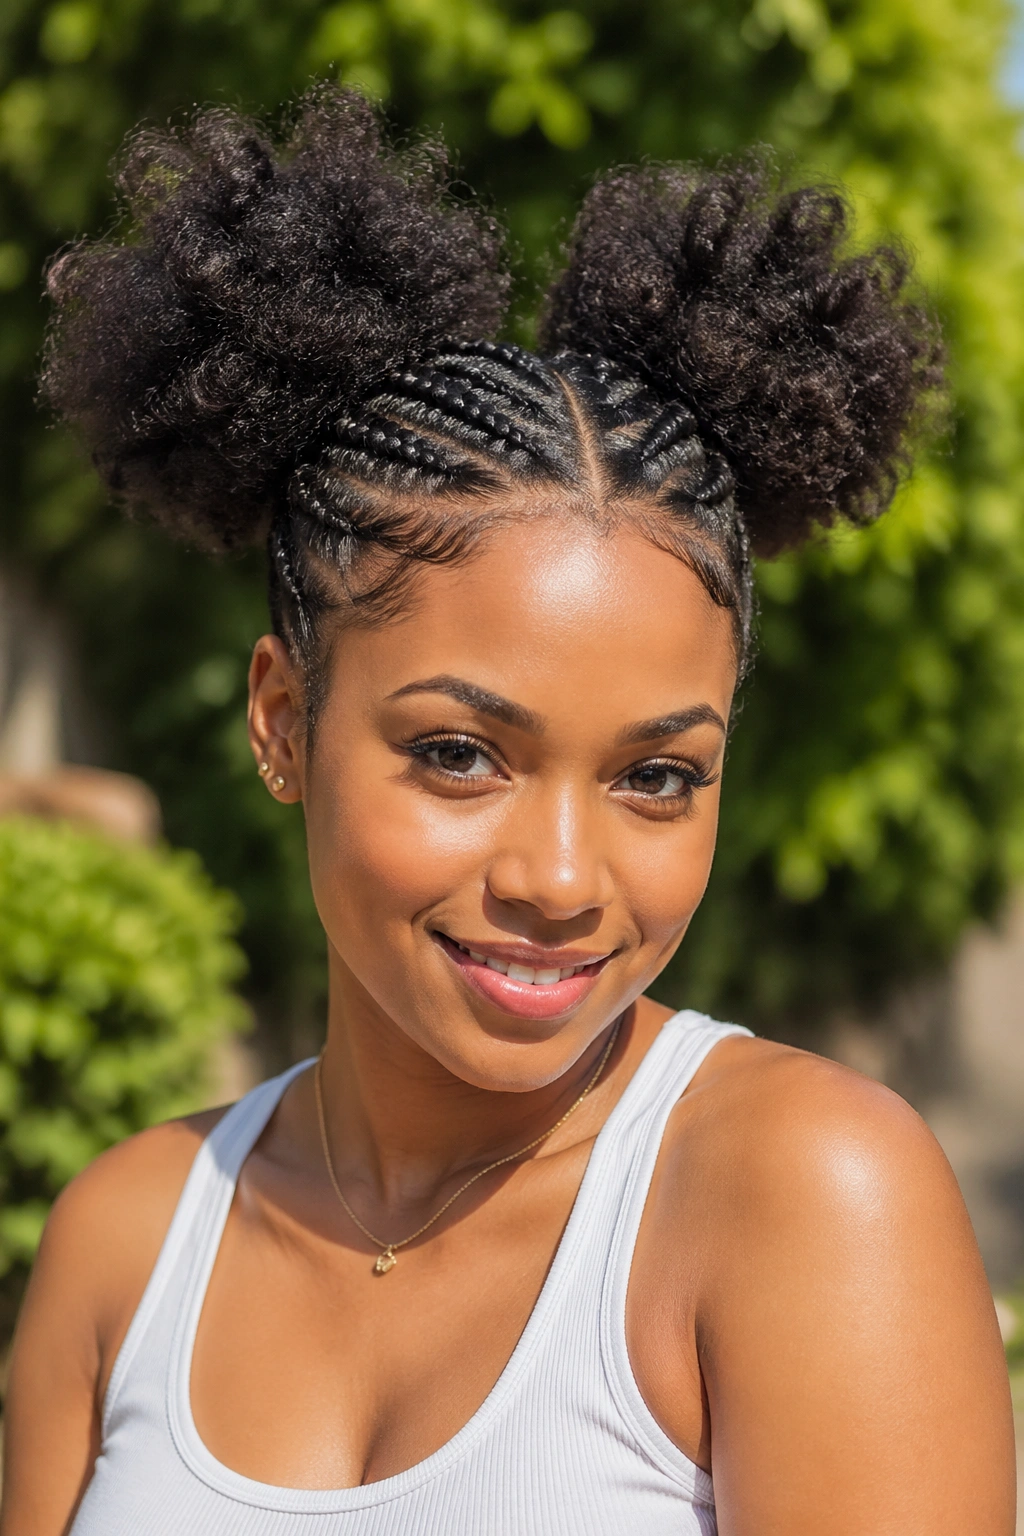
Half up, half out. Cornrow the front half of your head into two sections. At the crown, release each into its own afro puff.
Two puffs read as playful, cute, and distinctly youthful without being juvenile. They work at any age but carry extra charm on younger faces.
The install takes 30-45 minutes and holds 4-7 days. Short run for a fun look.
22. Cornrows With Hair Wrap Accent
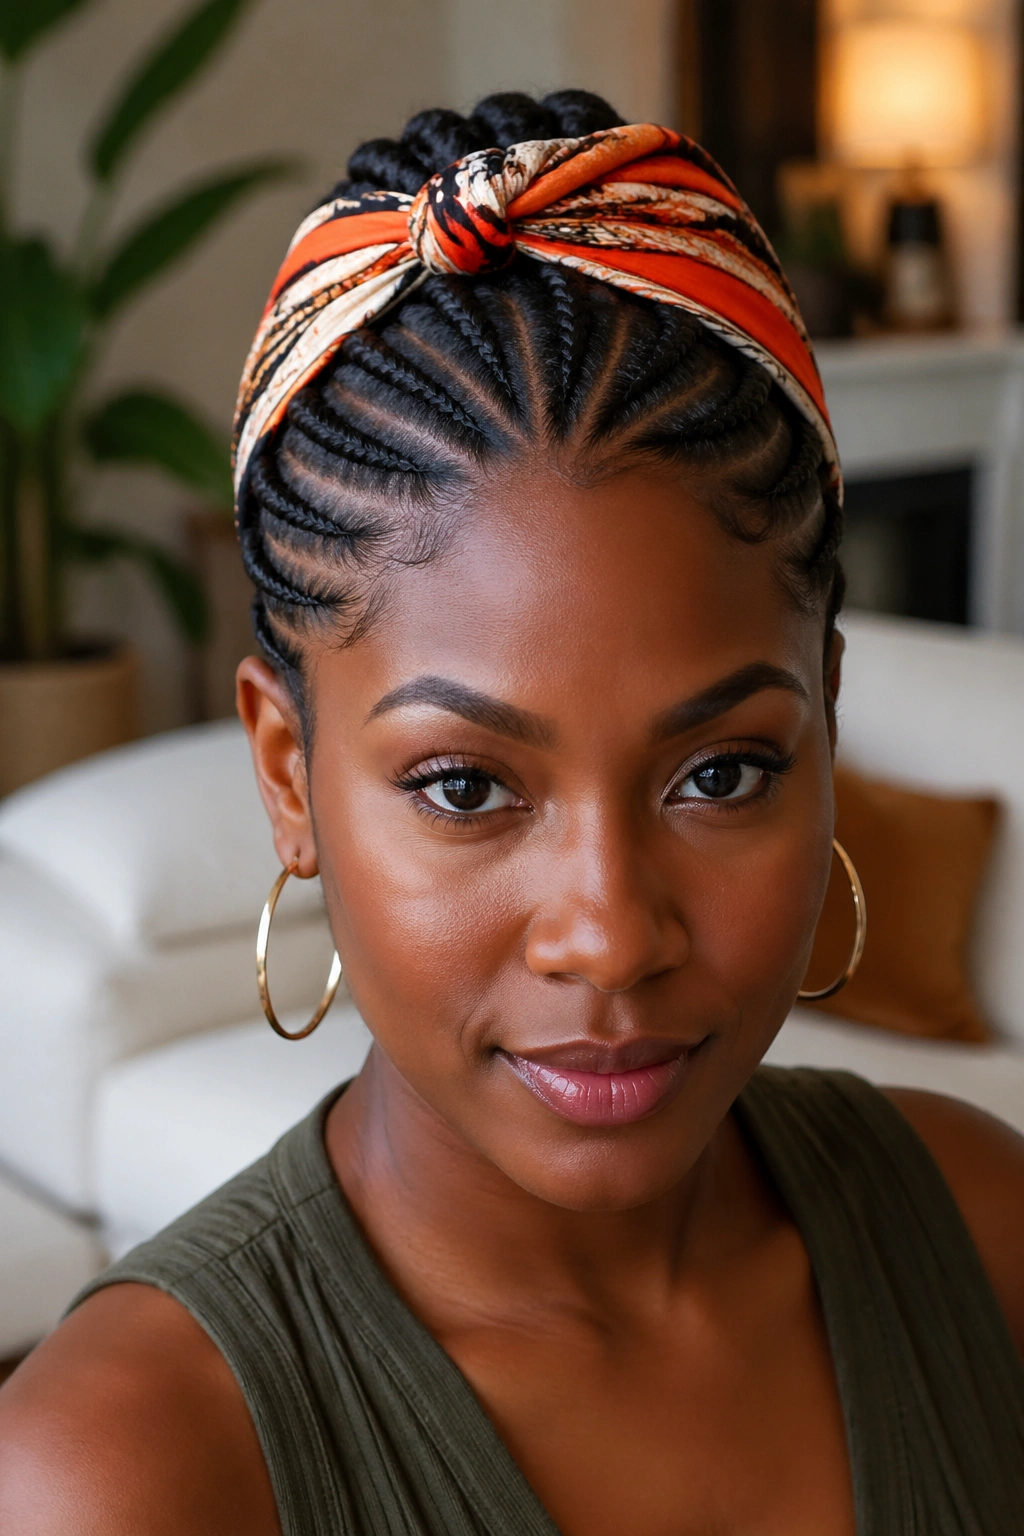
Natural cornrow pattern, finished with a satin or silk hair wrap tied around the crown. The wrap isn’t permanent — you tie it on after the braiding is done, and remove it at night.
Why it works: the wrap hides areas where the cornrows might be less precise, while adding color and pattern that contrasts with the tight rows below.
Silk wraps also double as overnight protection — tie tighter before bed, let the braids rest beneath.
23. Cornrows With Threaded Accents
Thin gold or silver threads woven into select cornrows. Pull the thread through each stitch as you braid. The thread shows through the braid like a running pattern.
Unlike beads that dangle, thread stays integrated with the braid. The shimmer catches light subtly without being flashy.
Pick thread that contrasts with your hair color — gold on dark brown hair, silver on black, copper on auburn. The contrast makes the thread readable.
24. Natural Cornrow Crown With Back Detailing
Simple straight-back cornrows on top. But at the back of the head, the ends get detailed — either with small beads, mini twists, or a woven pattern using the braid ends themselves.
The front is plain and clean. The back is where the art happens.
This style rewards movement. When you walk or turn your head, the detailed back catches the eye in a way the front can’t.
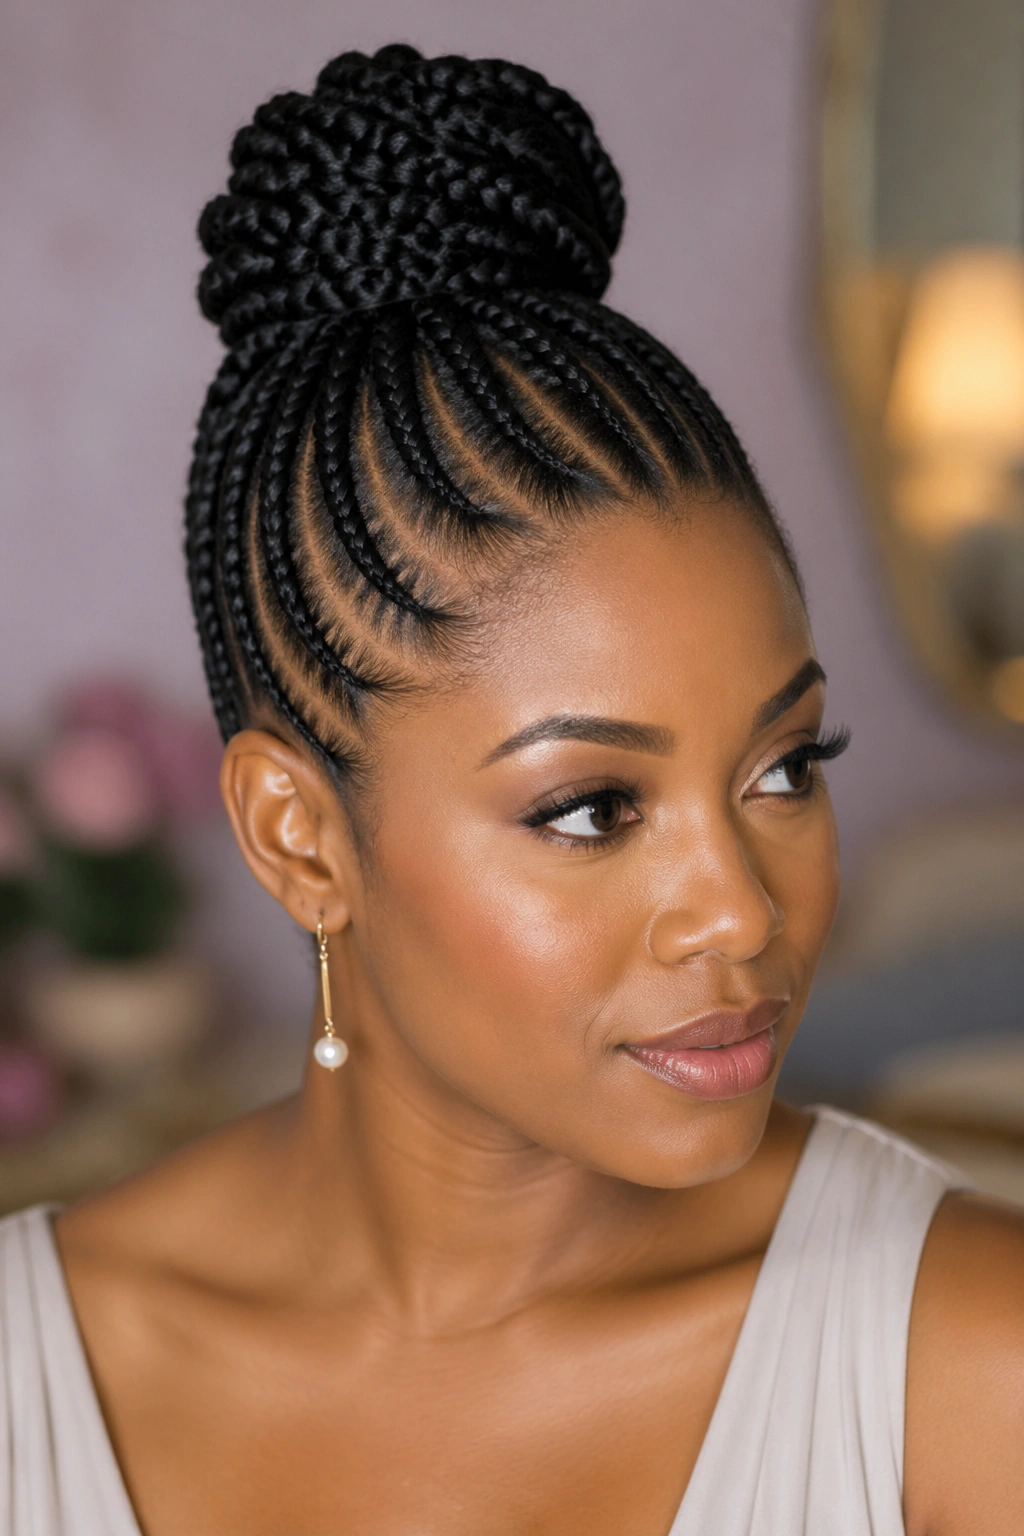
25. Cornrows With a Central Bun
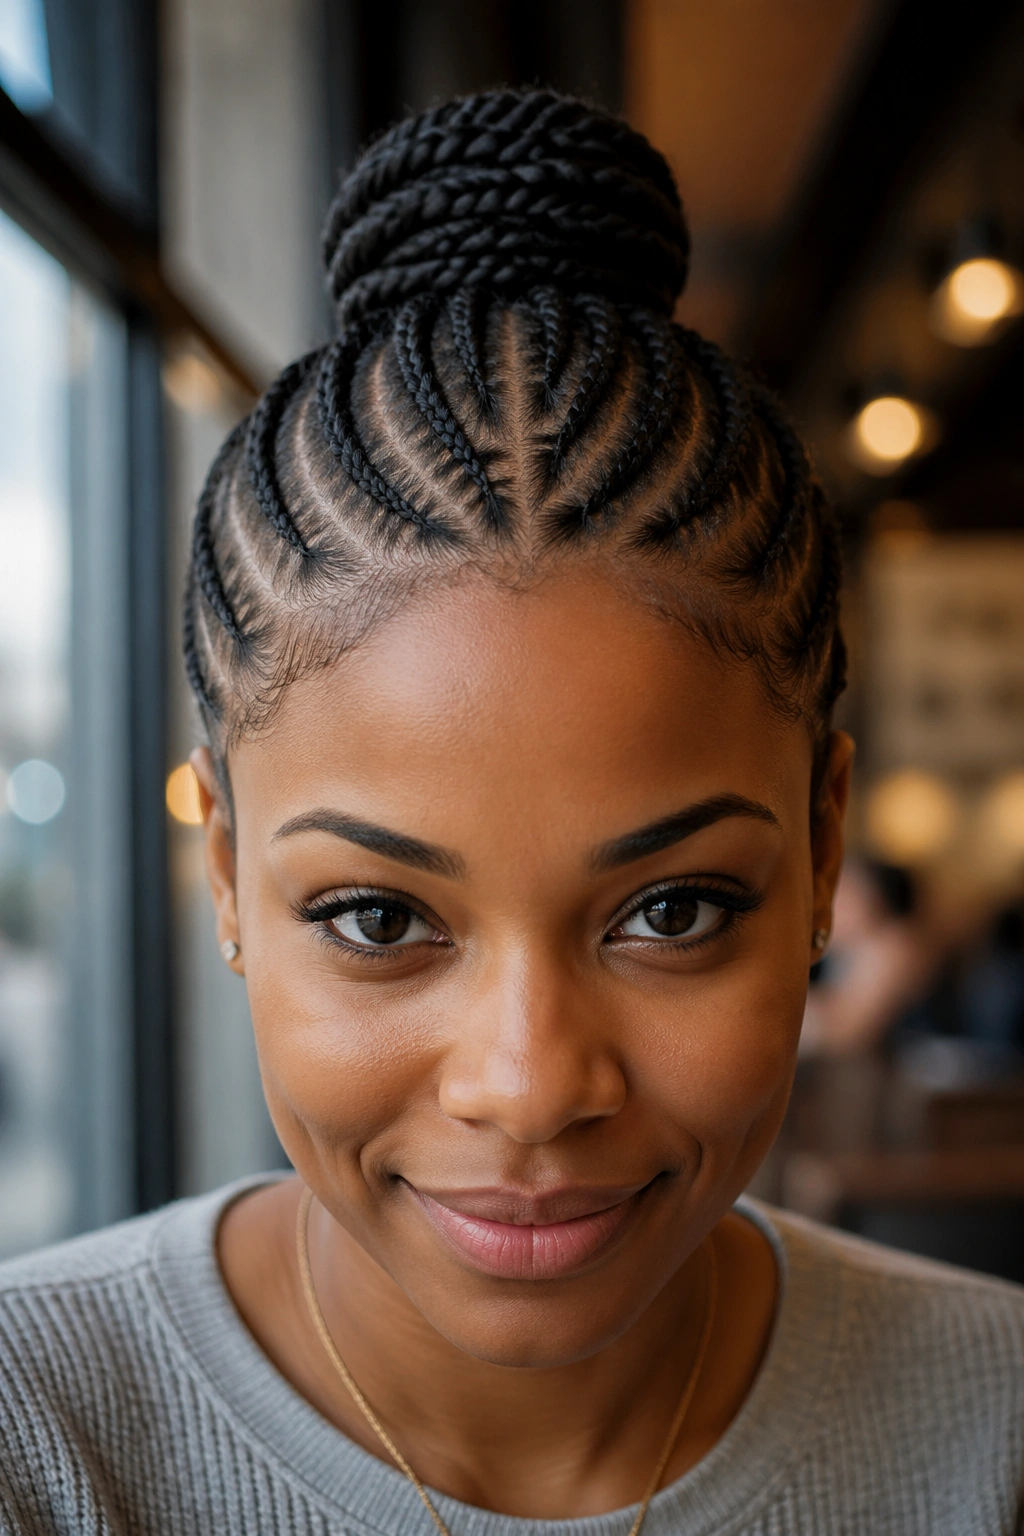
All rows lead toward the center of the crown, where the ends are gathered into a small, neat bun right on top.
Not a messy bun. Not a sock bun. A tight, polished, centered bun — the kind that makes the whole style look intentional and finished.
The Catch
- Your natural length needs to be at least 6 inches to get enough volume for the bun
- The bun placement needs to be dead center, not off to one side
- Edge control gel is a must for keeping flyaways out of the bun
For women with 8+ inches of natural length, this style looks sleek and architectural. Worth the practice to nail it.
Moisturizing Natural Hair in Cornrows
Dry cornrows frizz and break. Your hair still needs moisture even when it’s braided.
The LCO method works for cornrow maintenance: Liquid (water mist), Cream (light leave-in), Oil (light oil like jojoba). Apply once or twice a week, focusing along each part line and along the braid shafts.
Avoid heavy butters during cornrow wear. Shea butter and thick castor oil build up in the braid and make takedown miserable. Save those for the wash days that bookend your cornrow wear.
Spray with water-based mists daily if you’re in a dry climate. Hydrated braids flex and move with your scalp. Dry braids pull and crack.
Protecting the Style Overnight
Night care is where cornrows live or die.
A satin bonnet or pillowcase prevents cotton from rubbing against the braids and causing friction frizz. Cotton absorbs moisture too, so going to bed without protection dries out your braids while you sleep.
Tie the bonnet snugly but not tightly. Too tight pulls on the braids. Too loose falls off by 3 AM.
Silk scarves also work. Wrap them around the head with a slight tuck at the front. Don’t let the scarf rest against your forehead skin all night — it can cause breakouts.
When Cornrows Need to Come Down

Natural-hair cornrows last 1-3 weeks depending on your hair type and the install tightness. Signs it’s time:
Fuzzy roots that won’t smooth down. Itch that persists despite cleaning. Visible buildup at the parts. The braids just look tired.
Don’t push past that window. A second week of tired cornrows isn’t as cute as you think, and keeps your hair in a stagnant moisture state that can lead to breakage.
Maintaining Your Edges Through the Cycle
Cornrow wear cycles can wear on your edges if you’re not careful. Protect them through the install, wear, and takedown.
During install: ask for moderate tension only at the hairline. If it hurts at the temples, that’s damage starting.
During wear: brush edges gently in the morning. Apply a small amount of edge gel only if needed, not daily. Daily use builds up and stresses the follicles.
During takedown: don’t rip the cornrows out. Unravel slowly from the ends, working up. Your edges will thank you.
Takedown Without Tears or Shedding
Shed hair collects during weeks of braiding. When it finally releases during takedown, it looks scary — but most of it is normal shedding, not breakage.
Finger-detangle section by section with conditioner. Don’t use a brush until after conditioner’s applied. Brushing dry cornrowed hair pulls out healthy strands along with shed ones.
Wash gently afterward with a clarifying or sulfate-free shampoo. Follow with a protein treatment if your hair feels weak, or a moisture deep-conditioner if it feels dry.
Letting Your Hair Rest Between Styles
Back-to-back cornrows without rest weeks is how damage accumulates. Give your hair 5-7 days between installs.
During rest week: wash, deep condition, trim any split ends, and do a low-manipulation style like a twist-out or wash-and-go. Let your scalp breathe. Let your strands sit in their natural state.
Your next install will take better and last longer when your hair has had time to recover.