



Curly hair bun styles for natural hair are one of those categories that manage to be simultaneously simple and endlessly varied. A bun is a bun — hair gathered and secured — but on natural curly hair, the texture, the size, the placement, and the way the curls frame the arrangement make every single version feel distinct. Black women with 3c through 4c hair have a particular advantage with bun styling: the natural coil pattern means the bun holds its shape with less product and fewer pins than straight hair, and any curls that escape the arrangement look intentional rather than messy. The bun is a protective style, a formal option, a quick-fix solution, and an artistic canvas all at once.
Why Buns Work So Well on Curly Natural Hair
There’s a practical reason and an aesthetic reason, and both are compelling.
Practically, a bun on curly natural hair provides genuine protection. The ends of the hair — the oldest, most vulnerable part of the hair shaft — are tucked and hidden rather than exposed to friction, environmental damage, and constant manipulation. Hair that stays in a bun consistently throughout the week accumulates less breakage and more length over time. This is especially meaningful for natural hair that’s been in a growth phase.
Aesthetically, curly natural hair in a bun has a richness of texture that straight hair in a bun simply doesn’t have. The coils that escape around the edges of the bun, the volume at the base, the way the hair springs rather than slumps into shape — all of these qualities make a natural hair bun look genuinely interesting rather than just functional. Straight hair in a bun disappears; natural curly hair in a bun commands attention.
There’s also the versatility argument. A low bun reads completely differently from a high bun. A neat bun reads differently from a messy one. A puff bun, a top knot, a side bun, a double bun — the placement and structure create different aesthetics from the same basic technique. And on curly hair, each variation is amplified by the texture.
Understanding Your Curl Pattern and Bun Behavior
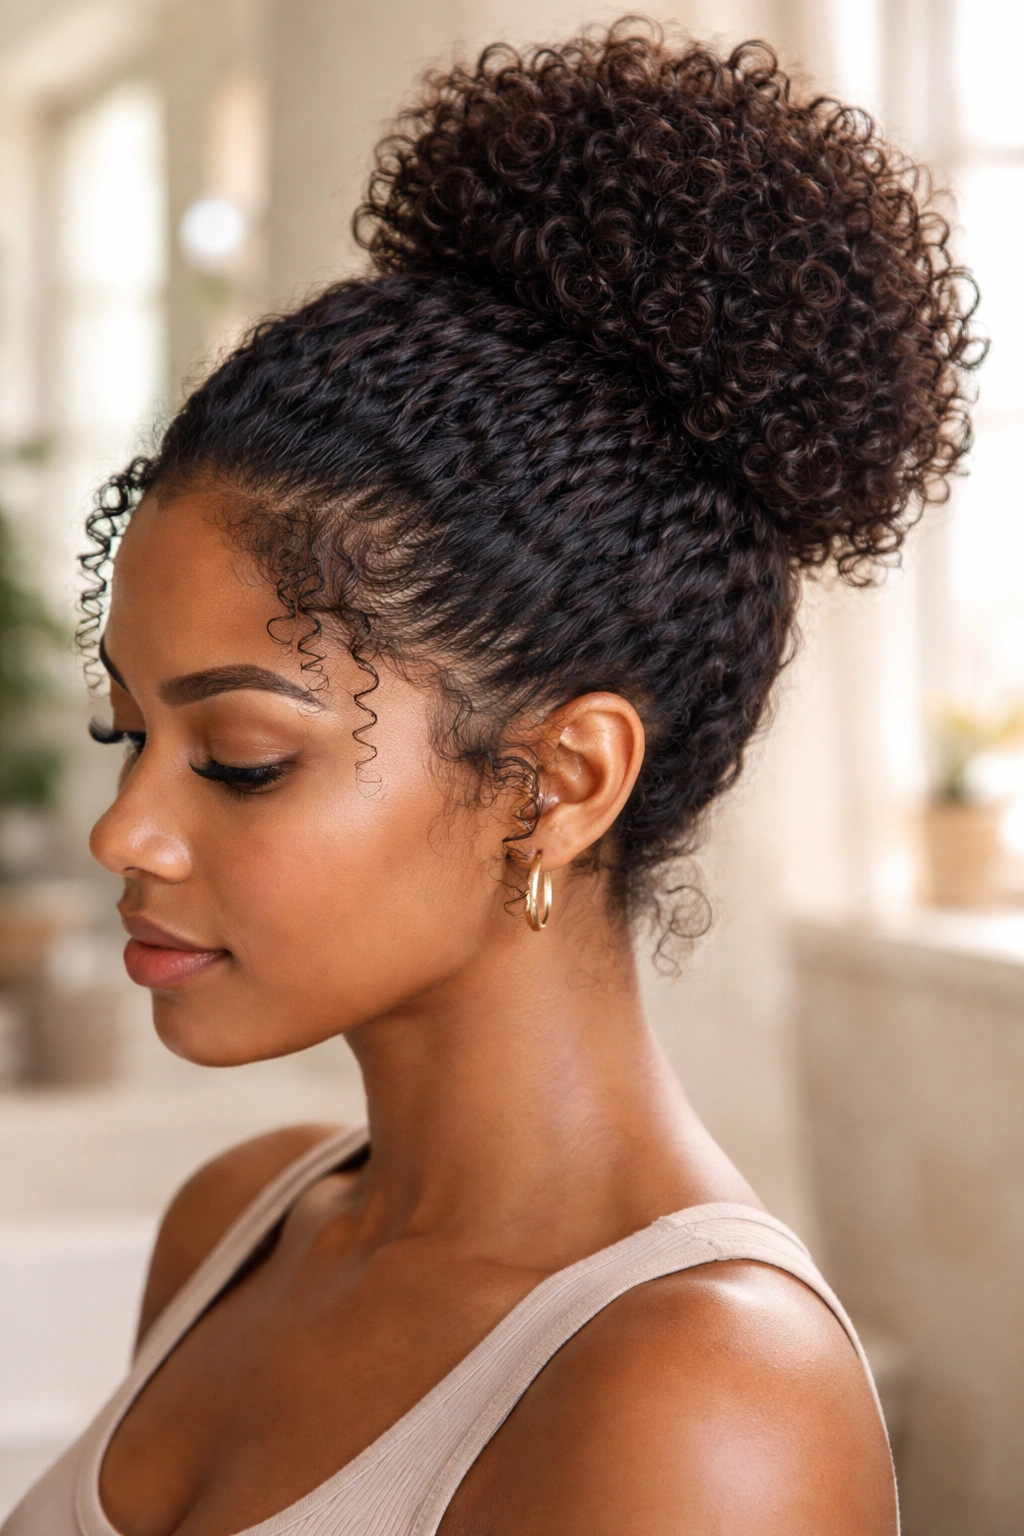
Different curl patterns behave differently in a bun, and working with your specific pattern rather than against it produces the best results.
4c hair shrinks significantly when gathered into a bun. The bun will appear smaller than the actual length of the hair because the coils compress tightly. The bun holds well without much product — the hair grips itself. Edge control is particularly useful for laying down any shorter sections around the hairline that don’t make it into the bun.
4a and 4b hair shrinks less than 4c but still coils significantly in a bun. The texture at the hairline and in any escaped sections is beautifully defined. Buns on 4a/4b hair often have that perfect halo of defined curls around the base.
3c hair has less shrinkage and more visible curl definition. The bun itself will appear larger relative to hair length. Escaped curls around the bun edges are visibly spiraled and add a soft, romantic frame to the style.
Mixed curl patterns — which many natural hair women have throughout different sections of their head — create interesting bun textures where different parts of the bun might sit or spring differently. This isn’t a flaw; it’s what makes the bun uniquely yours.
Tools You’ll Actually Need for Natural Hair Buns
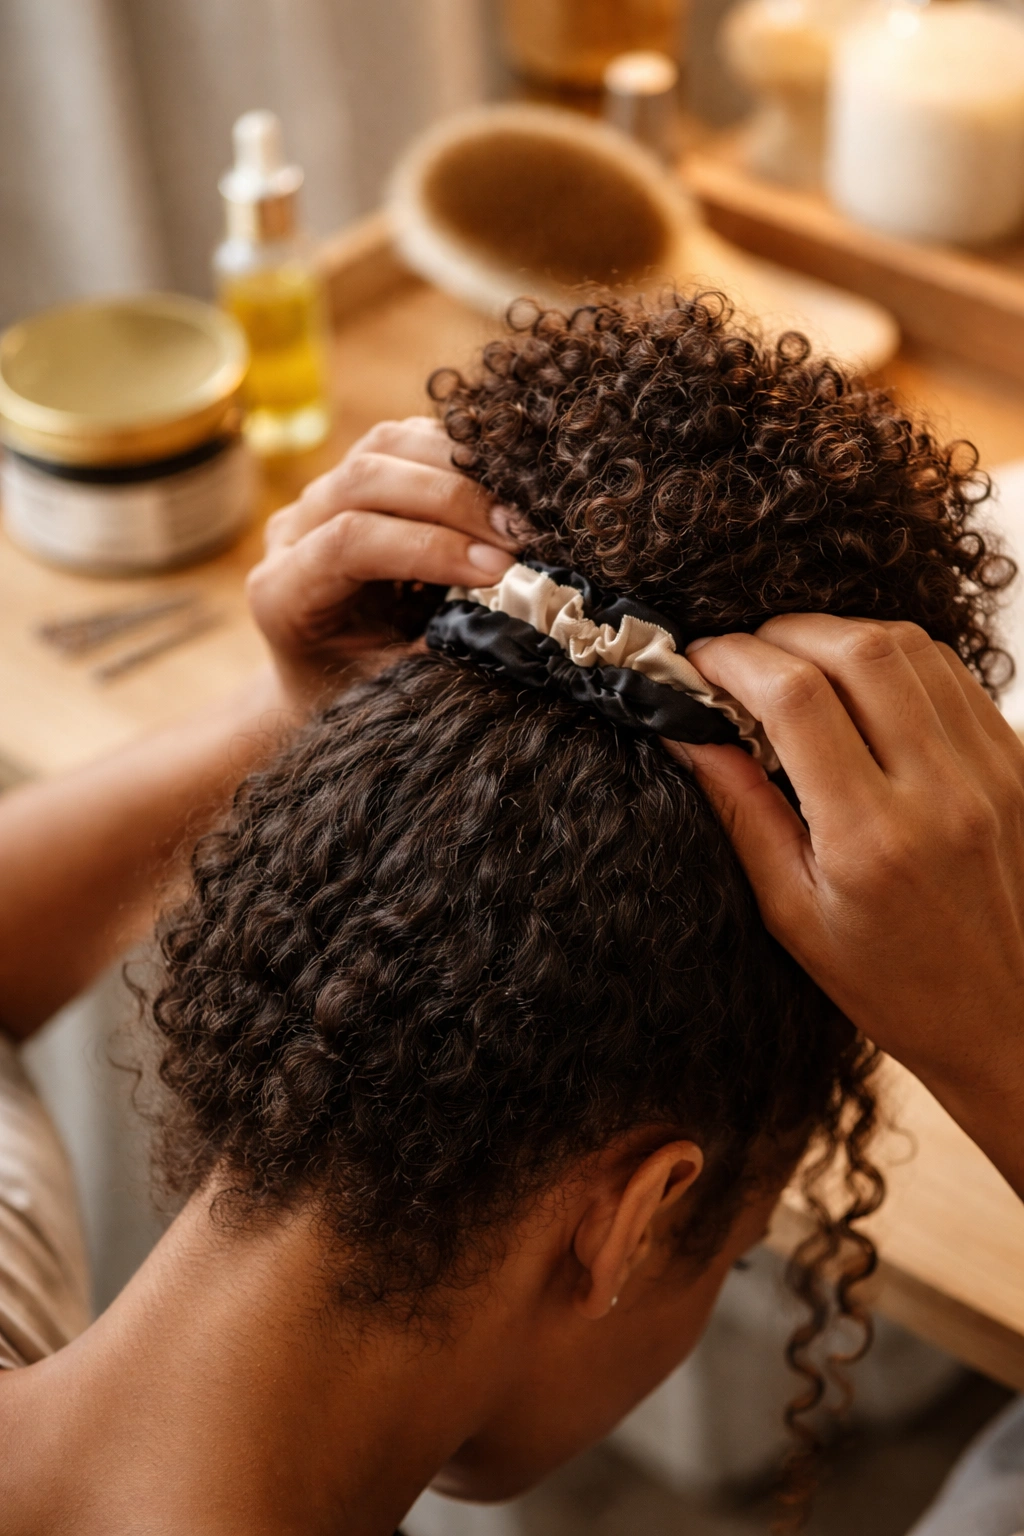
The right tools make the difference between a bun that holds for twelve hours and one that falls apart in two.
Satin-lined hair ties are non-negotiable. Regular elastic hair ties cause friction and breakage at the gathering point. Satin significantly reduces this friction. If you can’t find satin-lined hair ties, fabric-covered elastics or spiral hair ties are the next best option.
Bobby pins — the curved, metal kind — in a color matching your hair. For curly natural hair buns, you’ll need fewer than you think because the coils grip each other, but having a dozen or so on hand for securing stray sections is always useful.
Edge control or gel for laying down the hairline. A soft toothbrush or edge brush applies it precisely without over-application.
A few drops of oil worked through any loose curl sections before gathering — jojoba, argan, or a styling oil — adds sheen and reduces frizz without weighing down the curl.
High vs. Low vs. Mid-Height Buns — What Each Does
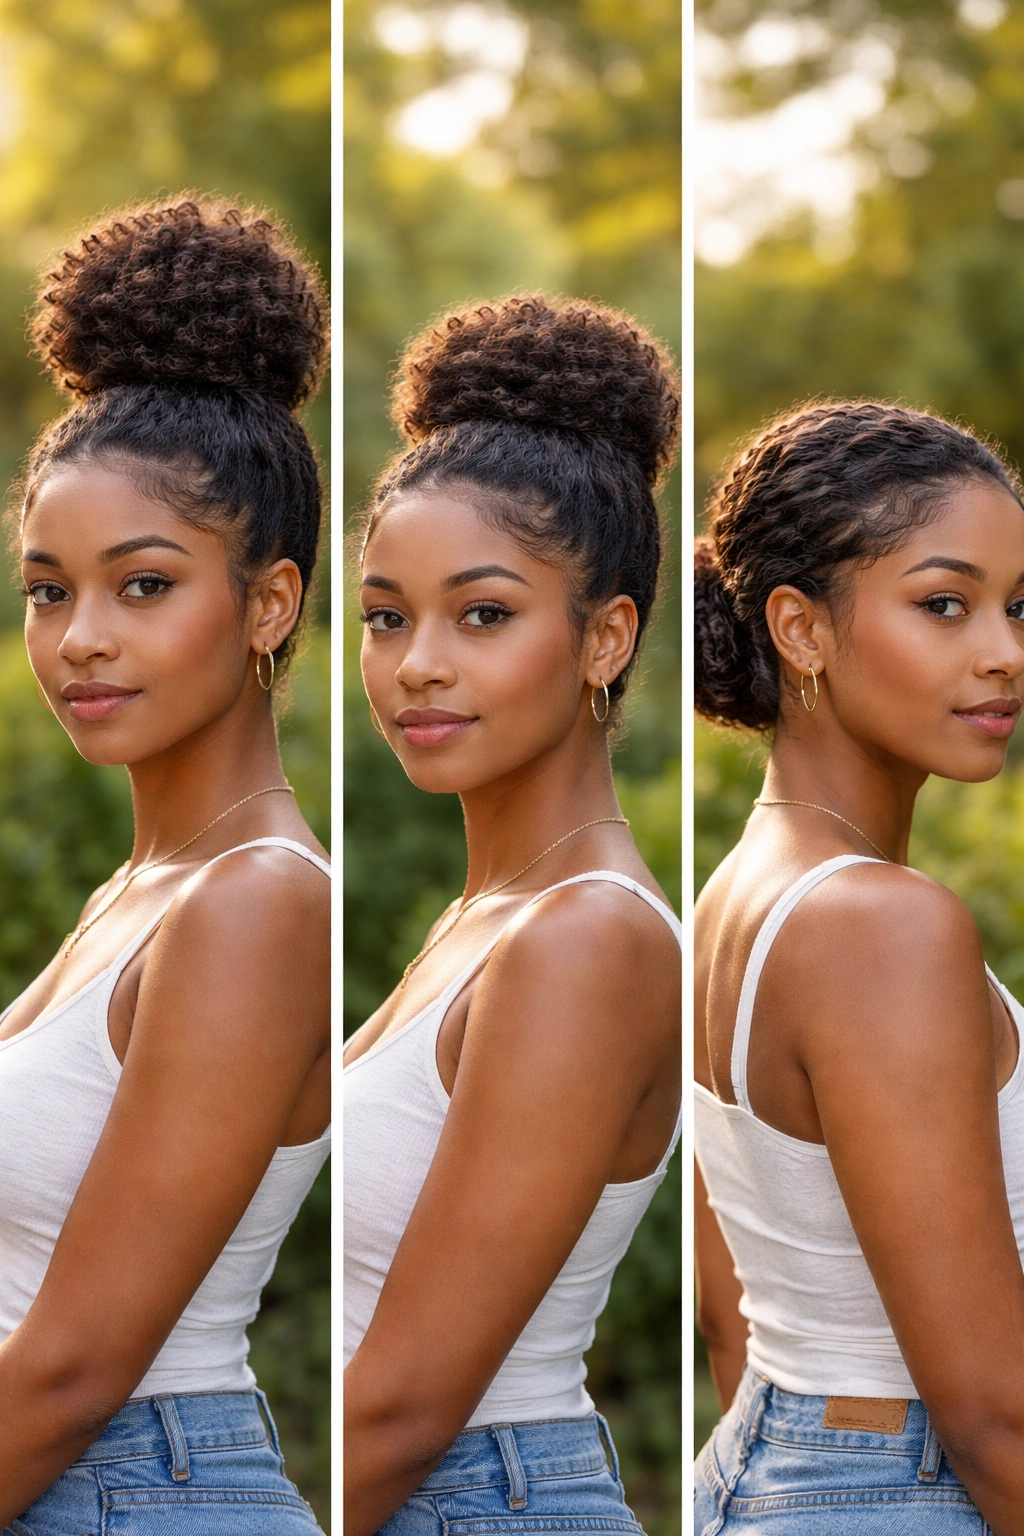
The height at which you position your bun on the head changes the entire visual effect of the style, and it also affects which face shapes benefit most.
High buns (above the crown) add visual height, lift the face, and expose the neck and jaw completely. They work brilliantly for rounder or squarer face shapes that benefit from added vertical length. High buns also feel cooler in warm weather because they keep the hair well away from the neck.
Low buns (at or near the nape) feel more formal and classic. They draw attention to the jawline and neck. They’re less subject to gravity shifting them during the day and tend to hold their position more reliably than high buns. Low buns are the go-to for professional settings and formal occasions.
Mid-height buns (at the back of the head, behind the crown) are the most universally flattering because they don’t pull the features upward or downward dramatically. They’re the bun equivalent of a regular ponytail — reliably appropriate and comfortable.
1. Classic High Puff Bun
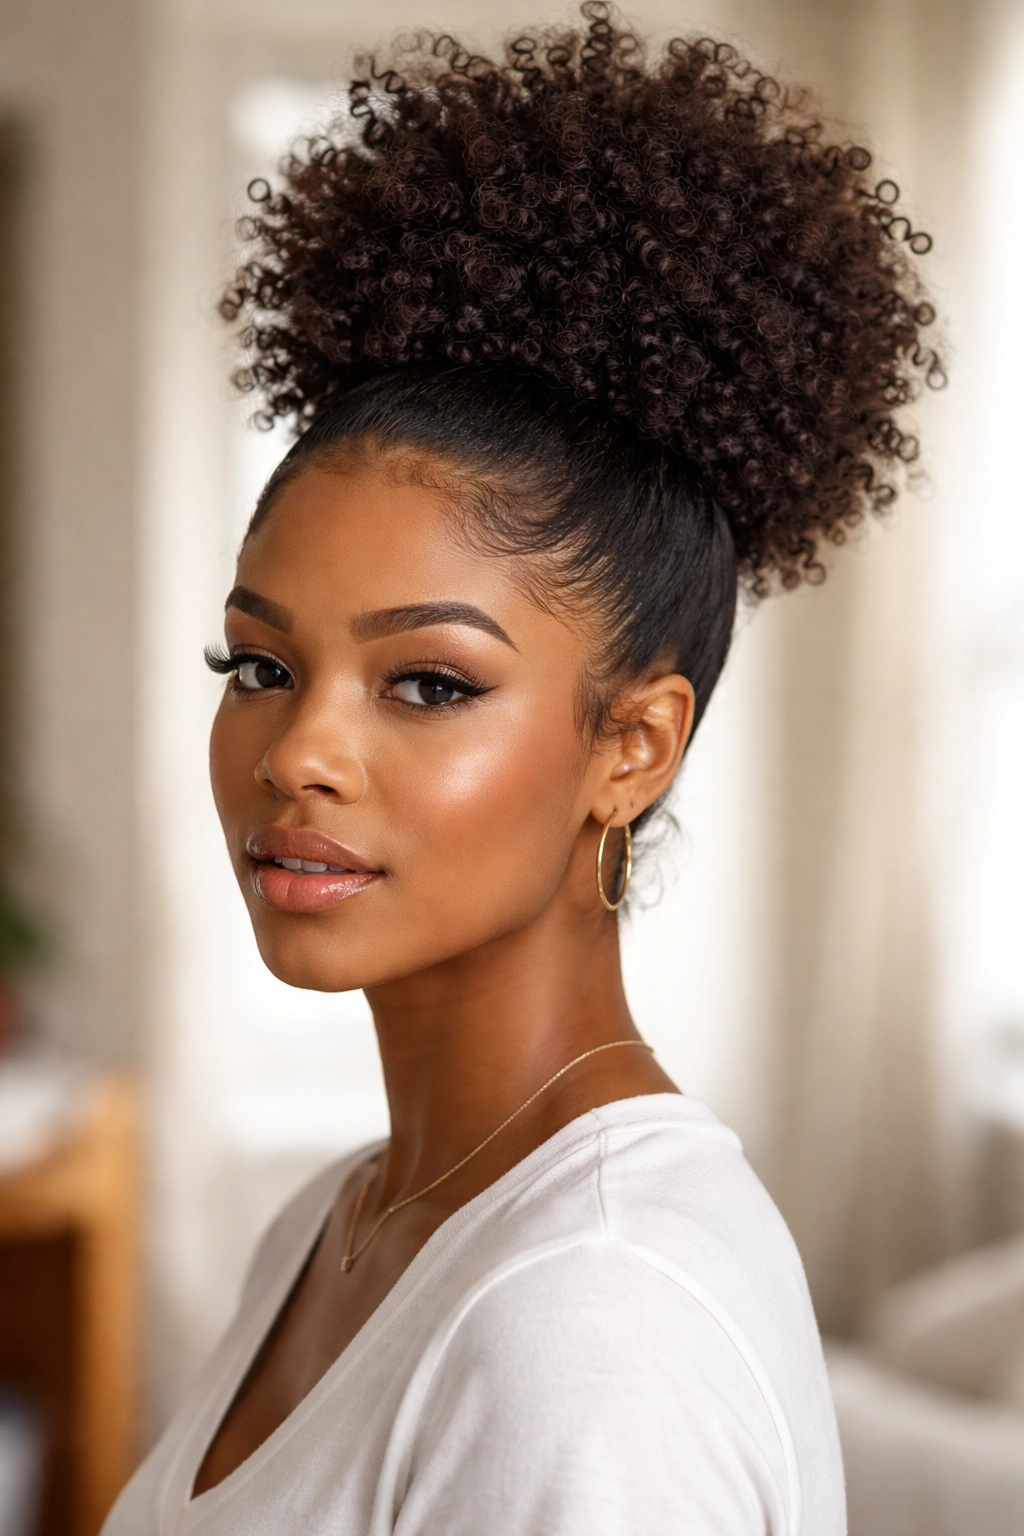
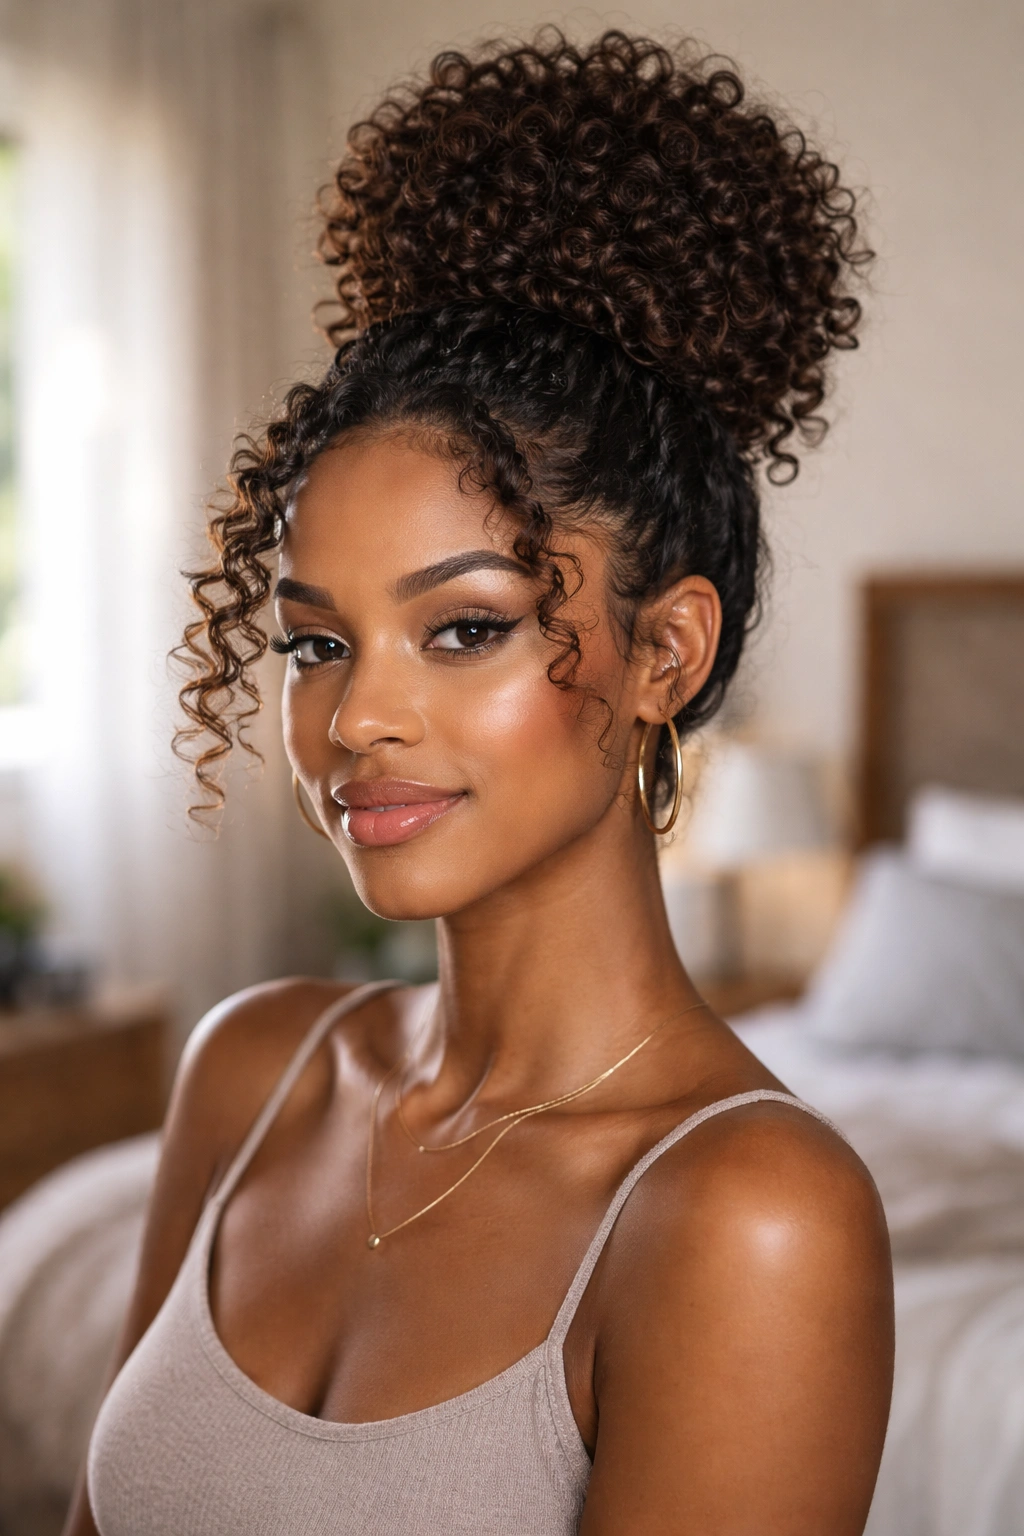
The high puff bun is one of the most iconic natural hair styles in existence. Gathering all your curls as high as possible and securing them with a hair tie (letting the curls spring into a rounded puff shape at the top) is simple in concept and endlessly beautiful in execution.
What makes the puff bun different from a tight bun is that the curls are allowed to expand freely above the hair tie rather than being smoothed down or contained. The puff is the point — let it be as big as your hair wants to be.
How to Get This Look
- Gather all hair upward from all directions toward the crown or above
- Secure with a satin-lined hair tie in one motion (don’t wrap multiple times — over-wrapping creates tension on the hairline)
- Shake your head gently to allow the puff to expand and settle naturally
- Use edge control and a soft brush only on the hairline — leave the puff itself untouched
- Let any escaped curls around the base of the puff sit where they fall naturally
2. Low Natural Bun With Wrapped Base
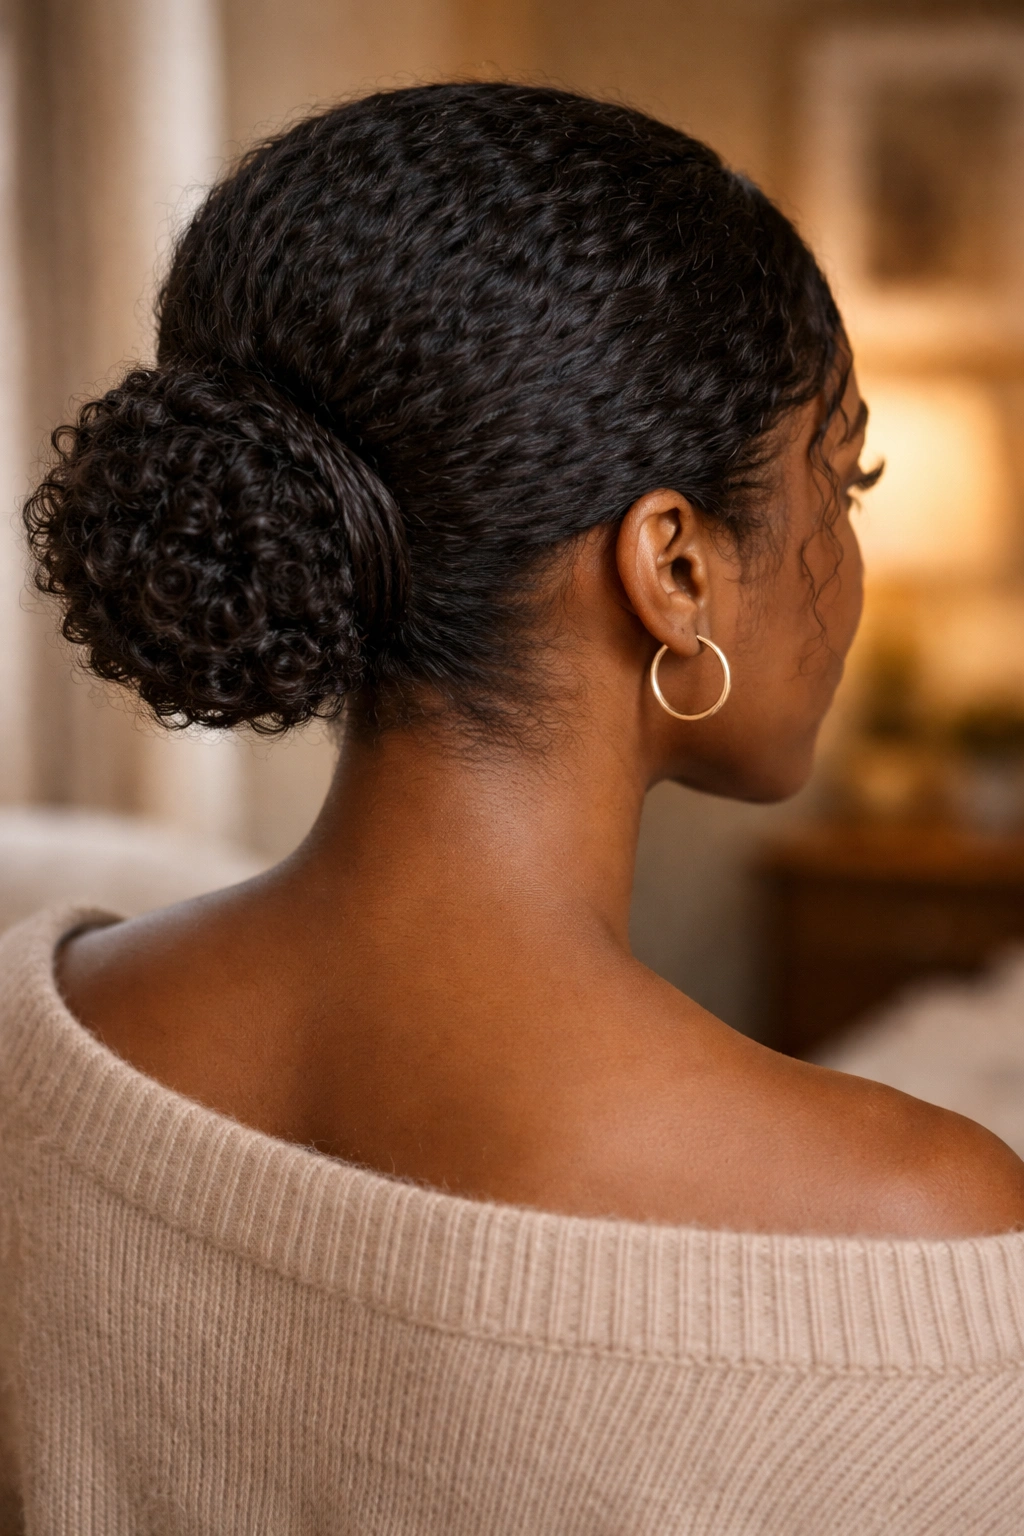
A low bun at the nape with one thin strand of hair wrapped around the hair tie at the base is the most polished, intentional version of a simple bun. The wrapped section hides the hair tie entirely and gives the finished bun a couture quality.
Take a thin section from the underside of your hair before gathering everything into the bun. Gather and secure everything else. Then wrap the held-out section around the hair tie at the base and secure the tip underneath with a bobby pin.
This single detail — the wrapped base — is the difference between a bun that looks like you rolled out of bed and one that looks like you thought about your hair. The effort is thirty seconds; the visual impact is significant.
3. Curly Top Knot
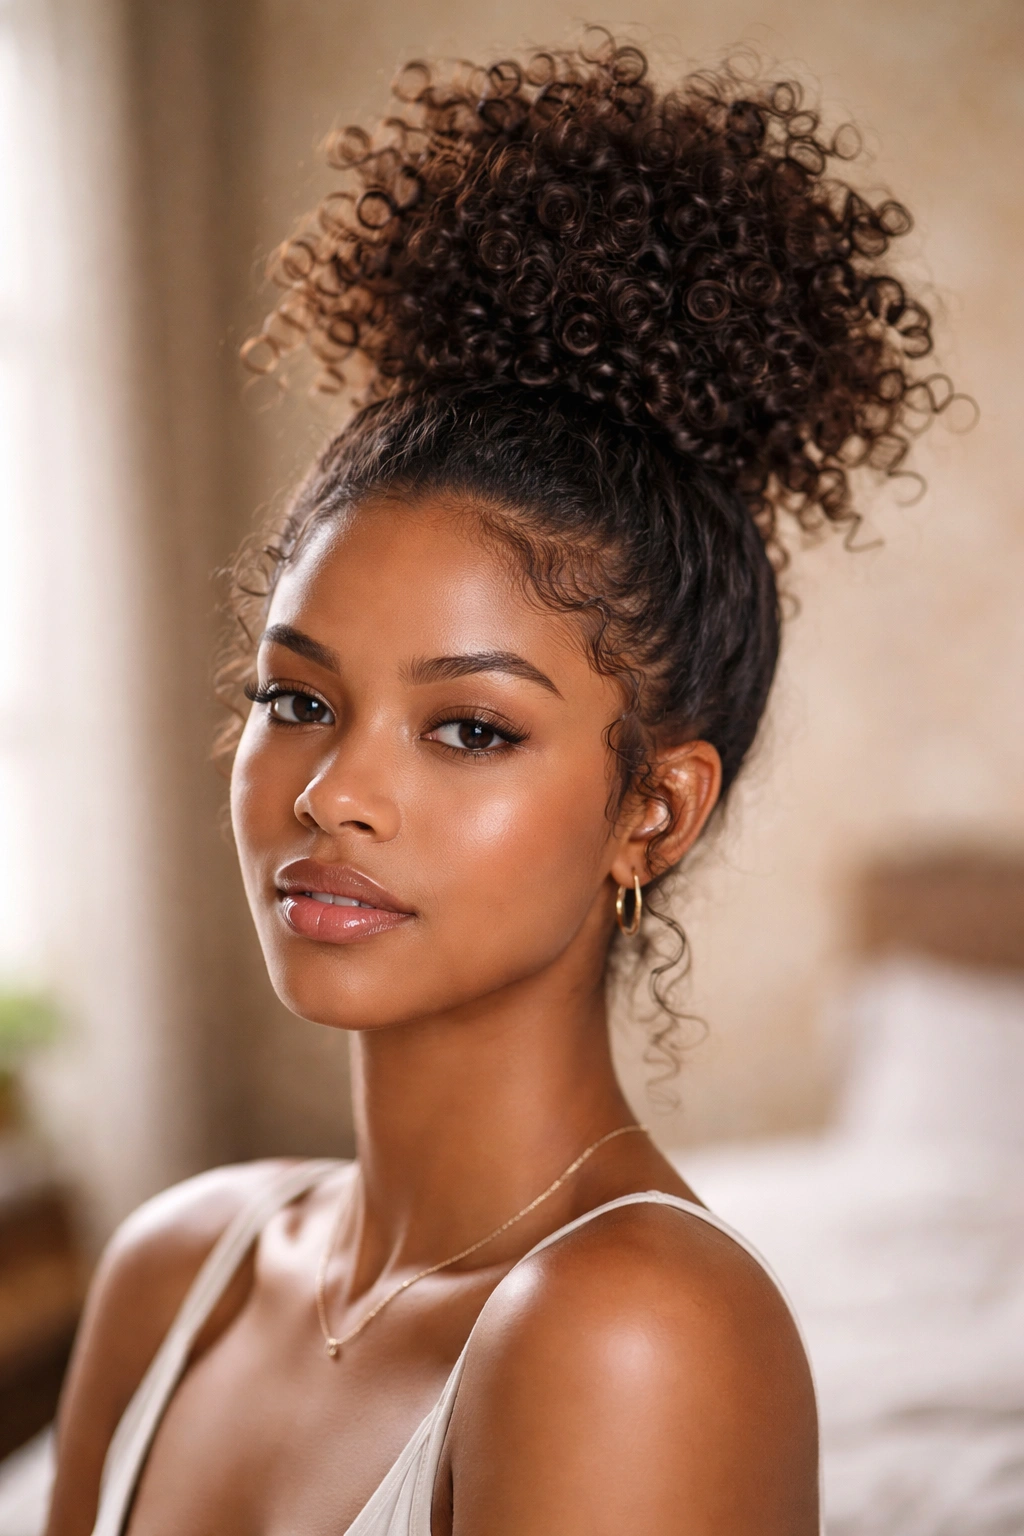
A top knot on curly natural hair doesn’t sit sleek and smooth the way it might on straight hair — and that’s what makes it so beautiful. The coils bunch and spring at the top, creating a bun that’s more like a round cloud than a smooth bun shape. Curls escape in multiple directions from the gathering point, creating a halo of texture around the knot.
The top knot is the most casual and most expressive of bun styles. It’s what you wear when you want your hair to look like you love it without trying too hard.
Apply a light hold gel through the sections before gathering to keep the definition in the curls at the base. Then gather everything upward and twist the gathered hair once or twice before securing. The twist gives the top knot its characteristic upward pointing shape.
4. Double Buns (Space Buns) on Curly Natural Hair
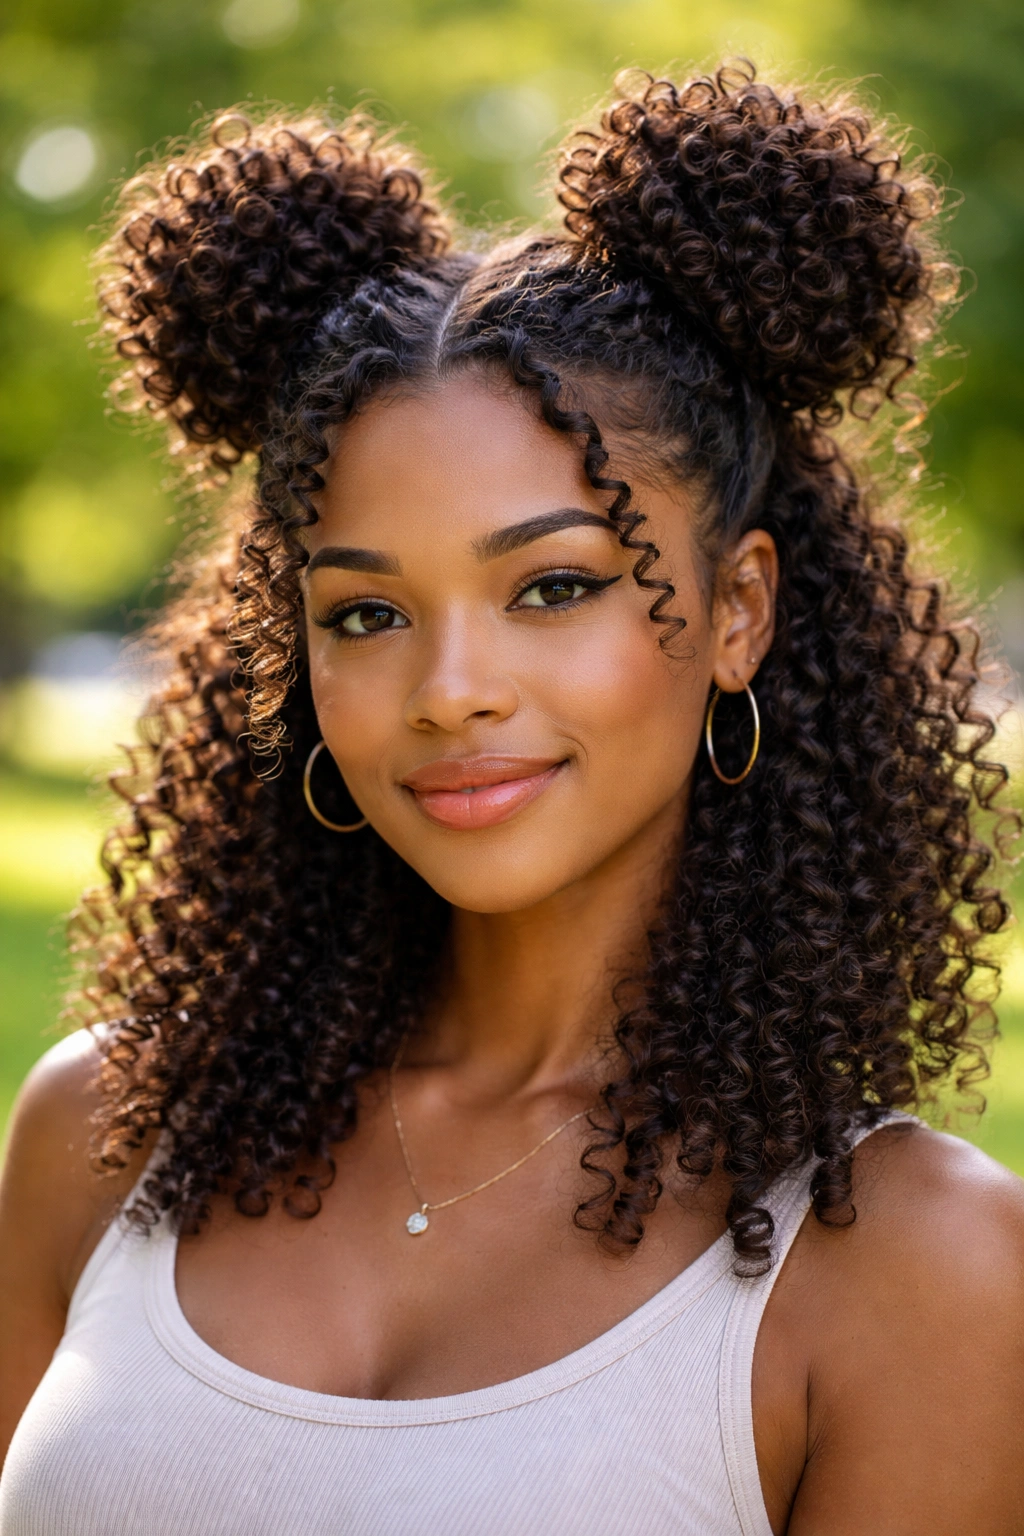
Two buns — one on each side of the head — on curly natural hair look genuinely fun and face-framing. The coily texture at each bun and the escaped curls around each gathering point give the space buns a very specific natural hair energy.
Part your hair down the center, then gather each side into the highest position that feels comfortable. Secure each with its own hair tie. Let the curls spring up from each gathering point.
Space buns on curly natural hair photograph beautifully and work for creative environments, outdoor events, and casual days when you want your hair to be genuinely joyful.
5. Natural Bun With Braided Detail
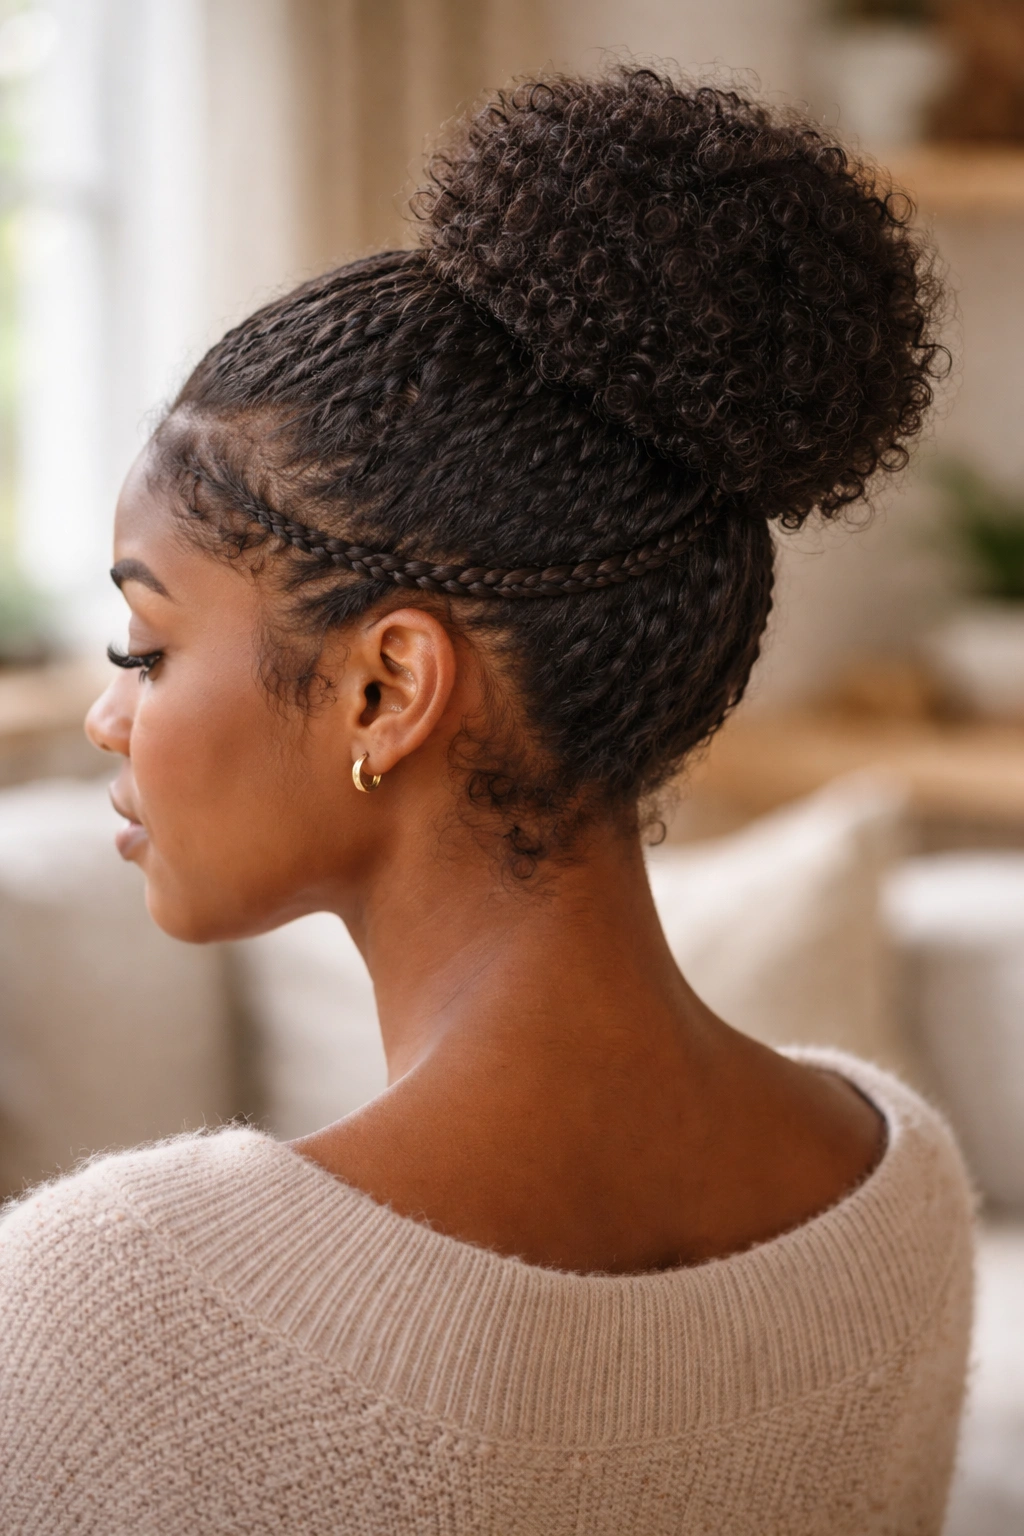
Adding a thin braid to the base of a natural bun — either wrapping the braid around the bun like a decorative ring or braiding a section from the hairline backward before gathering into the bun — adds an artisanal detail that elevates the basic bun significantly.
A single french braid starting at the center front hairline and continuing backward to the gathering point, then incorporated into the bun, looks incredibly intentional and beautiful. The braid provides visual interest at the hairline and transitions naturally into the rounded bun.
6. Pineapple Bun
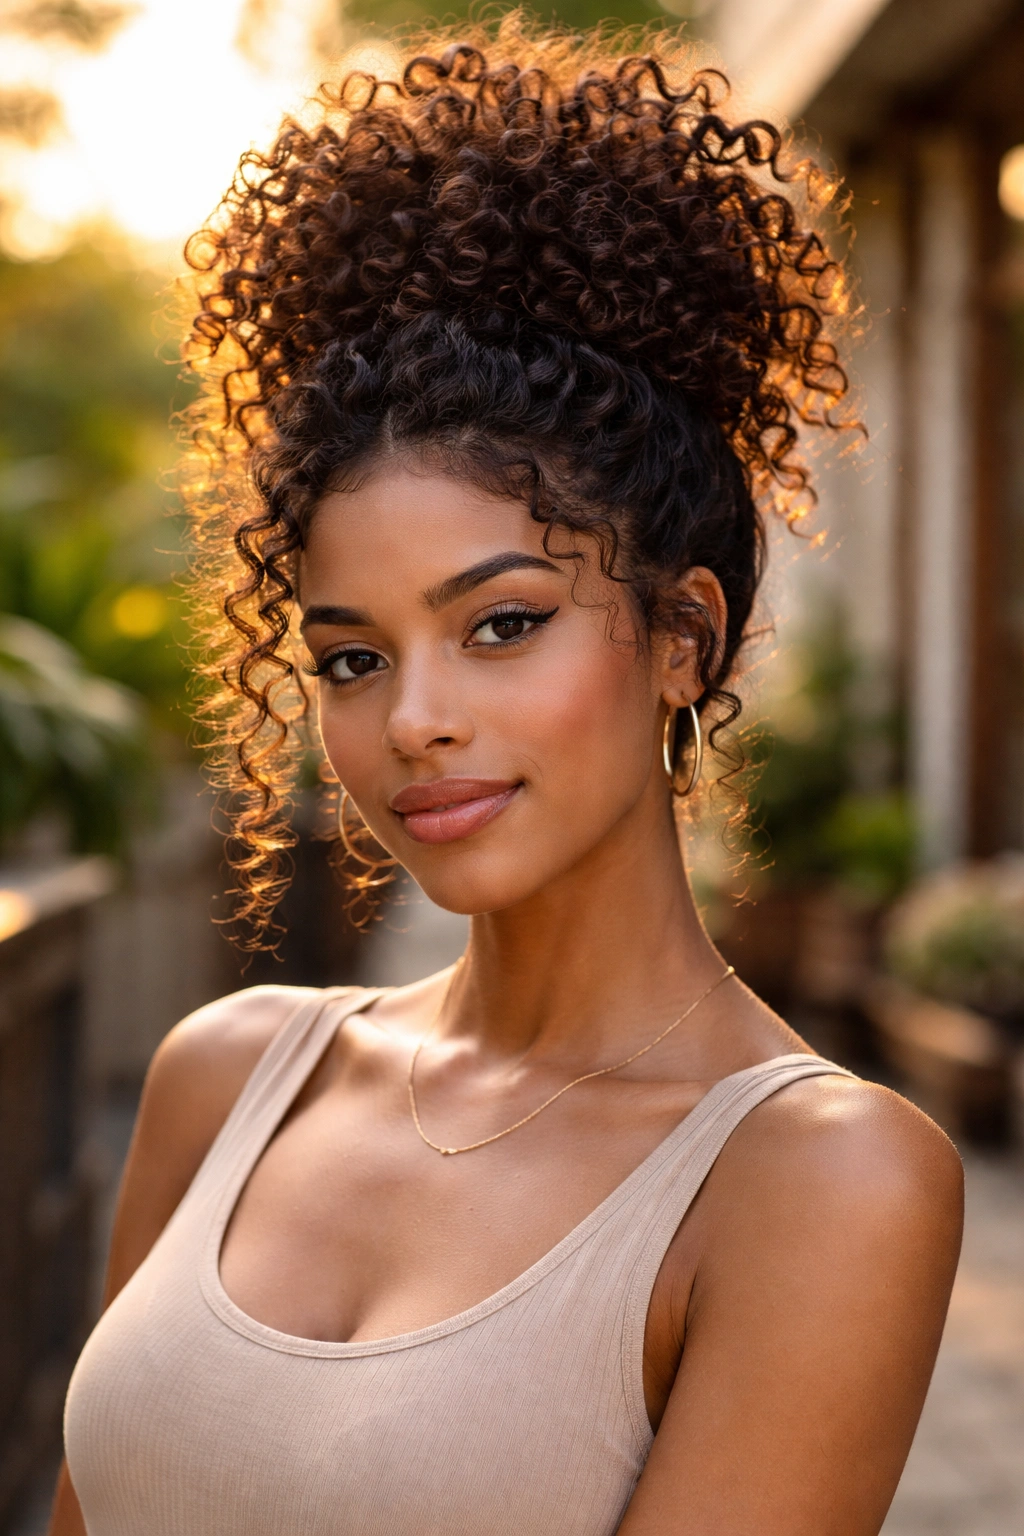
The pineapple — gathering all hair at the very top of the head in a high, loose arrangement — is a protective style in itself, typically used overnight to preserve curl definition. But worn during the day, a loose, expressive pineapple bun has a specific cool-girl energy that very little else can match.
The pineapple bun is looser than a proper high bun. Hair cascades from the gathering point rather than being fully secured into a contained shape. Curls fall forward, backward, sideways from the top. It’s deliberately imprecise.
This style works best when your curl definition is already strong — a day or two after a wash-and-go when the curls are still defined. The pineapple shows off what your curl pattern can do.
7. Bun With Bantu Knot Detail
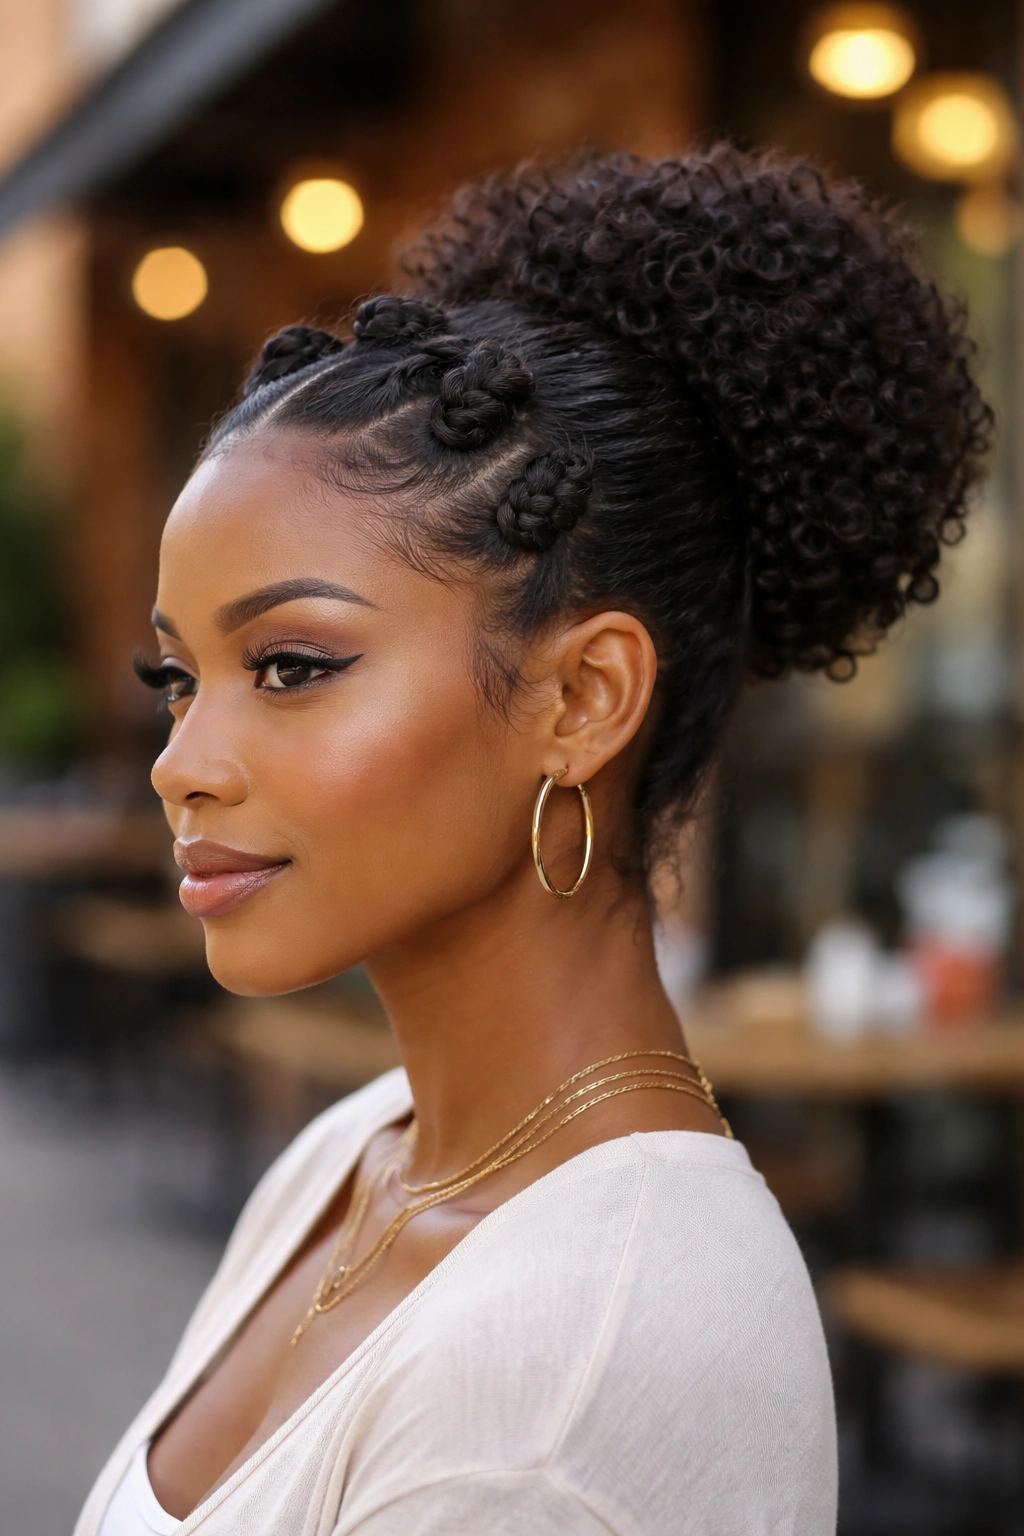
Incorporating one or more Bantu knots at the front of the head — along the hairline or at the temples — while the majority of hair is gathered into a bun at the back creates a style that has both cultural resonance and visual interest.
The Bantu knots sit like sculptural accents on the front sections while the full bun provides the foundation. This combination works particularly well when the bun is low or mid-height so the Bantu knot accents at the front are clearly visible and not competing with the bun’s height for visual attention.
8. Slicked Back Low Bun
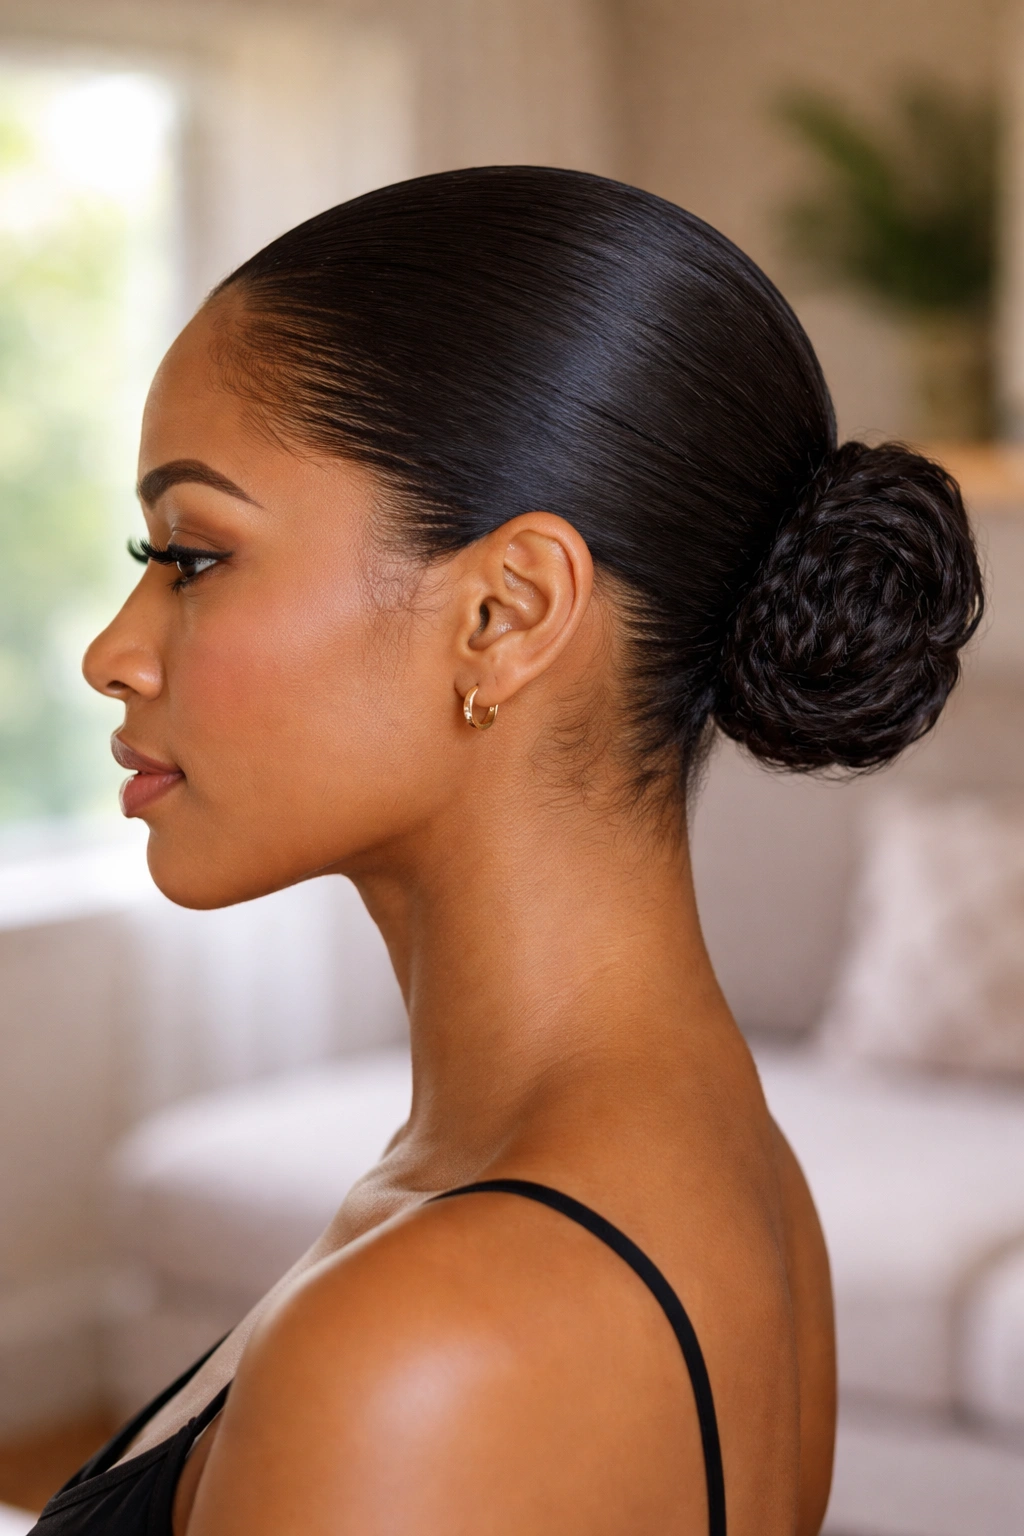
The slicked-back look on natural hair requires a strong hold gel or edge control and some manipulation — smoothing the hair backward from the hairline all the way to the bun. The coils are flattened into the slicked portion, then allowed to spring free at the gathering point.
The contrast is the thing: completely smooth, sleek sides and back transitioning into a full, springy bun at the nape. The bun itself looks fuller because of the cleanness of the slicked sections around it.
This style works best when the bun is not too large — a moderate, neat bun at the nape rather than a sprawling puff. The slicked sides need a calm, proportional bun to balance them.
9. Natural Afro Puff Bun
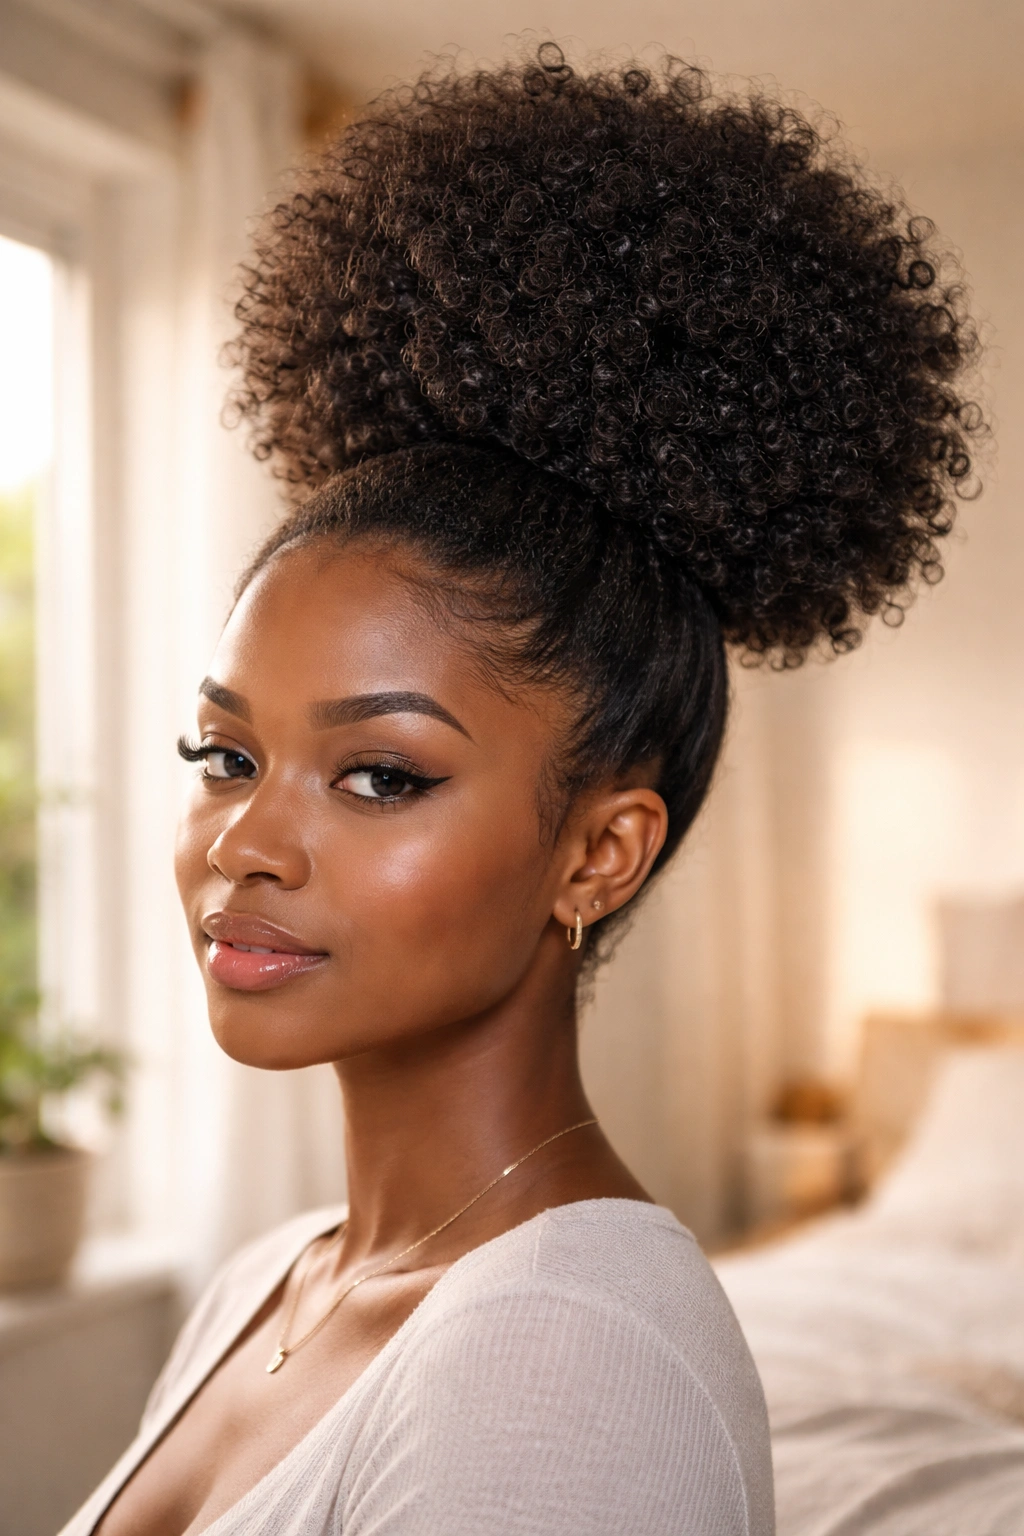
The afro puff is not quite a bun and not quite a puff in the traditional sense — it’s its own category. The hair is gathered into a hair tie and then encouraged to expand outward and upward as much as possible, creating a round, globe-like shape of curly hair above the hair tie.
On 4c hair, the afro puff bun can be truly remarkable in size — the dense, tightly coiled hair expanding in all directions from the hair tie creates a natural sphere shape that has incredible visual presence.
The bigger the better, in the afro puff context. Don’t smooth it down, don’t tame it, don’t apply heavy products that flatten the curl. Let it be everything it wants to be.
10. Bun With Curly Bang
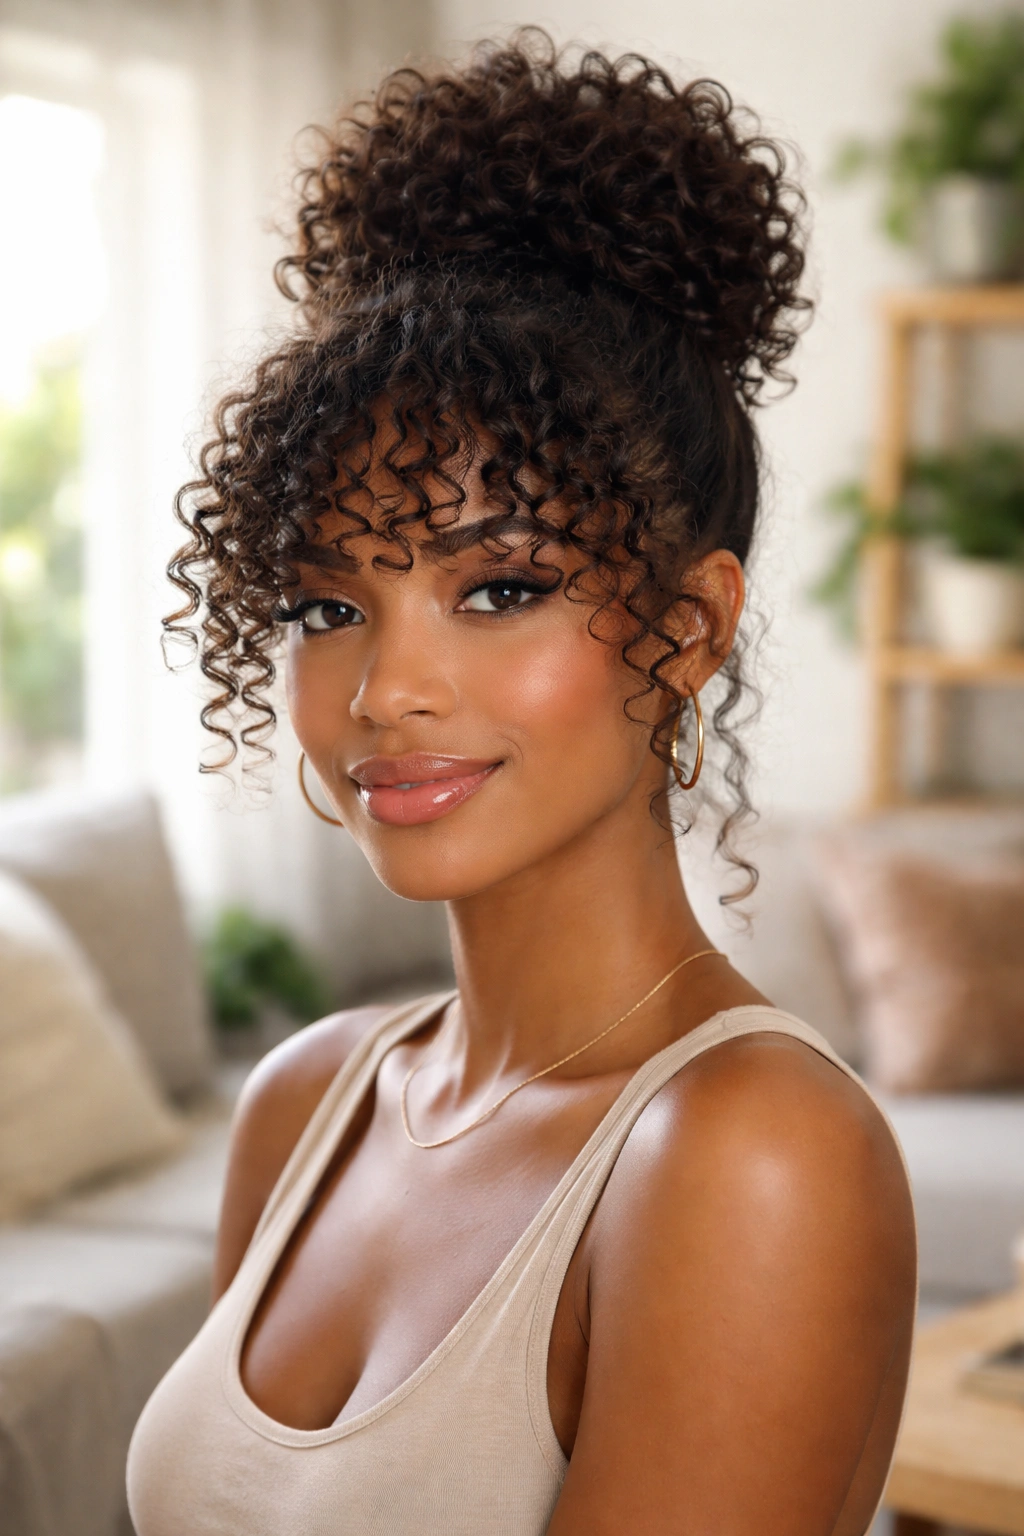
Leaving a section of curly hair at the front free while the rest is gathered into a bun creates a curly bang effect that softens the face and adds dimension to an otherwise simple style.
The curly bang on natural hair can be a genuinely dramatic element — if your front sections have tight 4c coils, they’ll spring forward and frame the forehead. If you have looser curl patterns at the hairline (common in the 3c-4a range), the bang will have visible, defined spiral shape.
Moisturize and define the bang section before gathering everything else into the bun. Apply a curl cream and scrunch, then allow to air dry before completing the bun.
11. Twisted Bun on Natural Hair
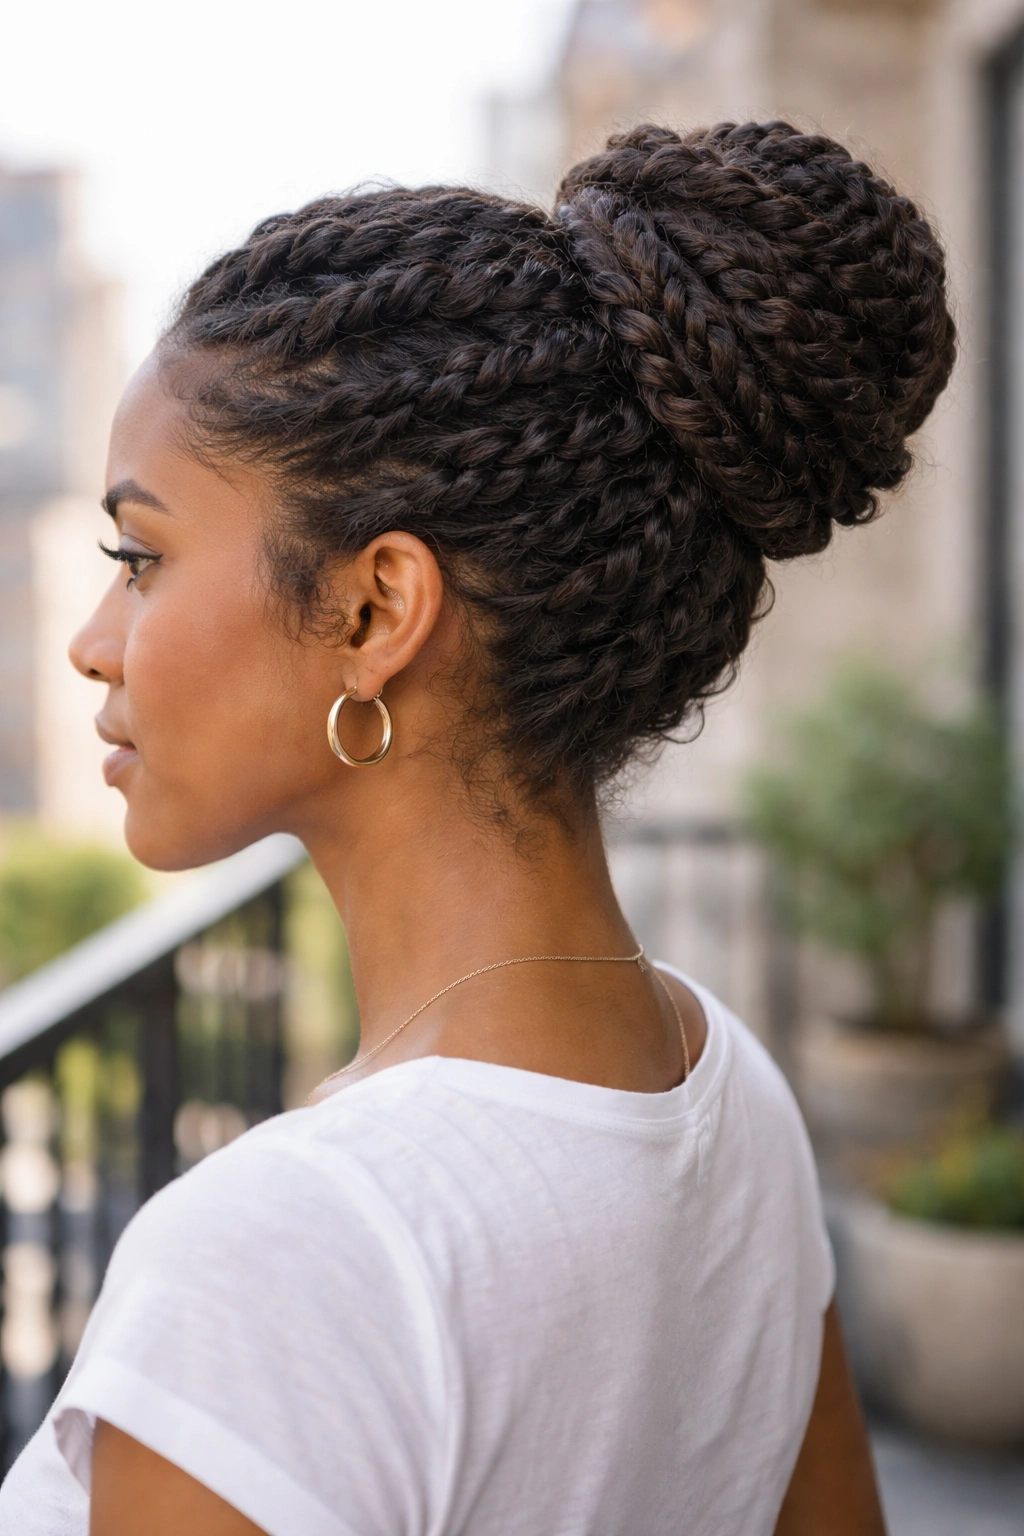
Rather than gathering loose natural hair into a bun, twisting sections first and then gathering the twists creates a bun with more visible texture and structure. The twist pattern in each gathered section adds detail to what would otherwise be a smooth bun base.
A twisted bun also holds longer than a loose natural hair bun because the twisted sections have their own structural integrity that resists unraveling at the gathering point.
This is particularly useful for women with looser natural curl patterns (3c) whose hair might slip out of a gathering more easily than tighter coil patterns.
12. Bubble Bun
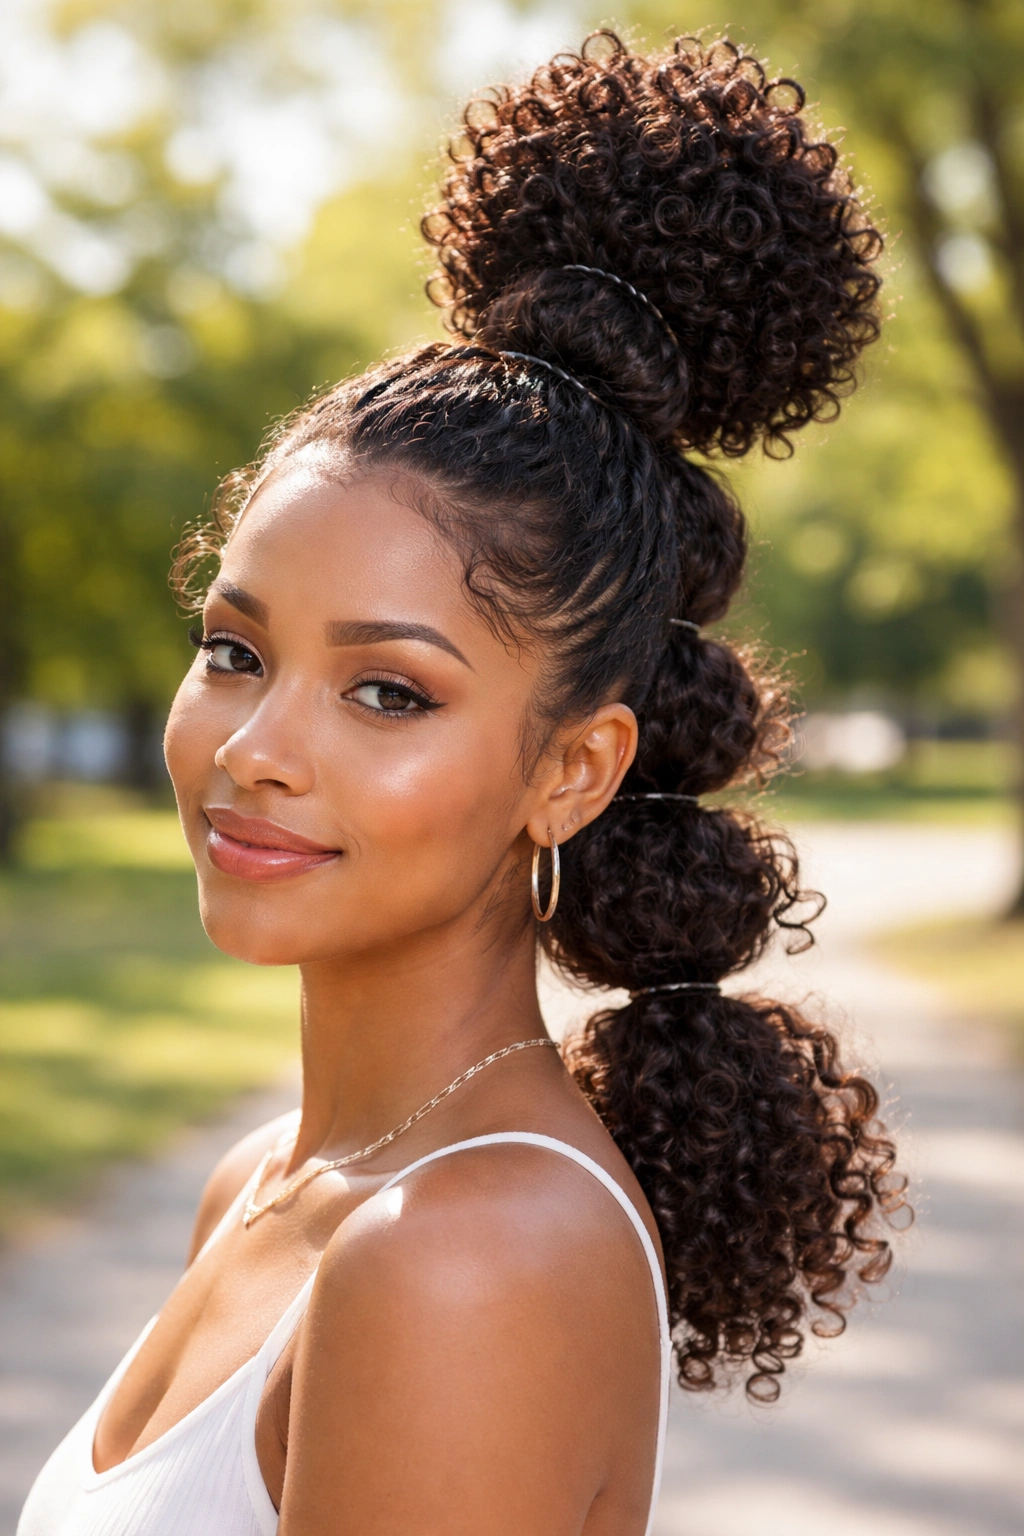
A bubble bun uses multiple hair ties placed along the length of a gathered section to create a segmented, bubbled effect. At each hair tie, the hair balloons out slightly; at the next hair tie it’s gathered in again. The result is a ponytail or bun that looks like stacked bubbles of hair.
On curly natural hair, the bubbles are especially full because the coils expand between each hair tie. The whole structure is more voluminous and interesting than a simple bun.
How to Get This Look
- Gather hair into a high ponytail and secure with the first hair tie
- Add a second hair tie 2-3 inches below the first, pushing the hair between the two ties outward to create the bubble shape
- Repeat with a third and fourth hair tie
- At the final hair tie, allow the hair to hang freely or tuck it under to create the bun shape
13. Bun With Satin Headwrap Accent
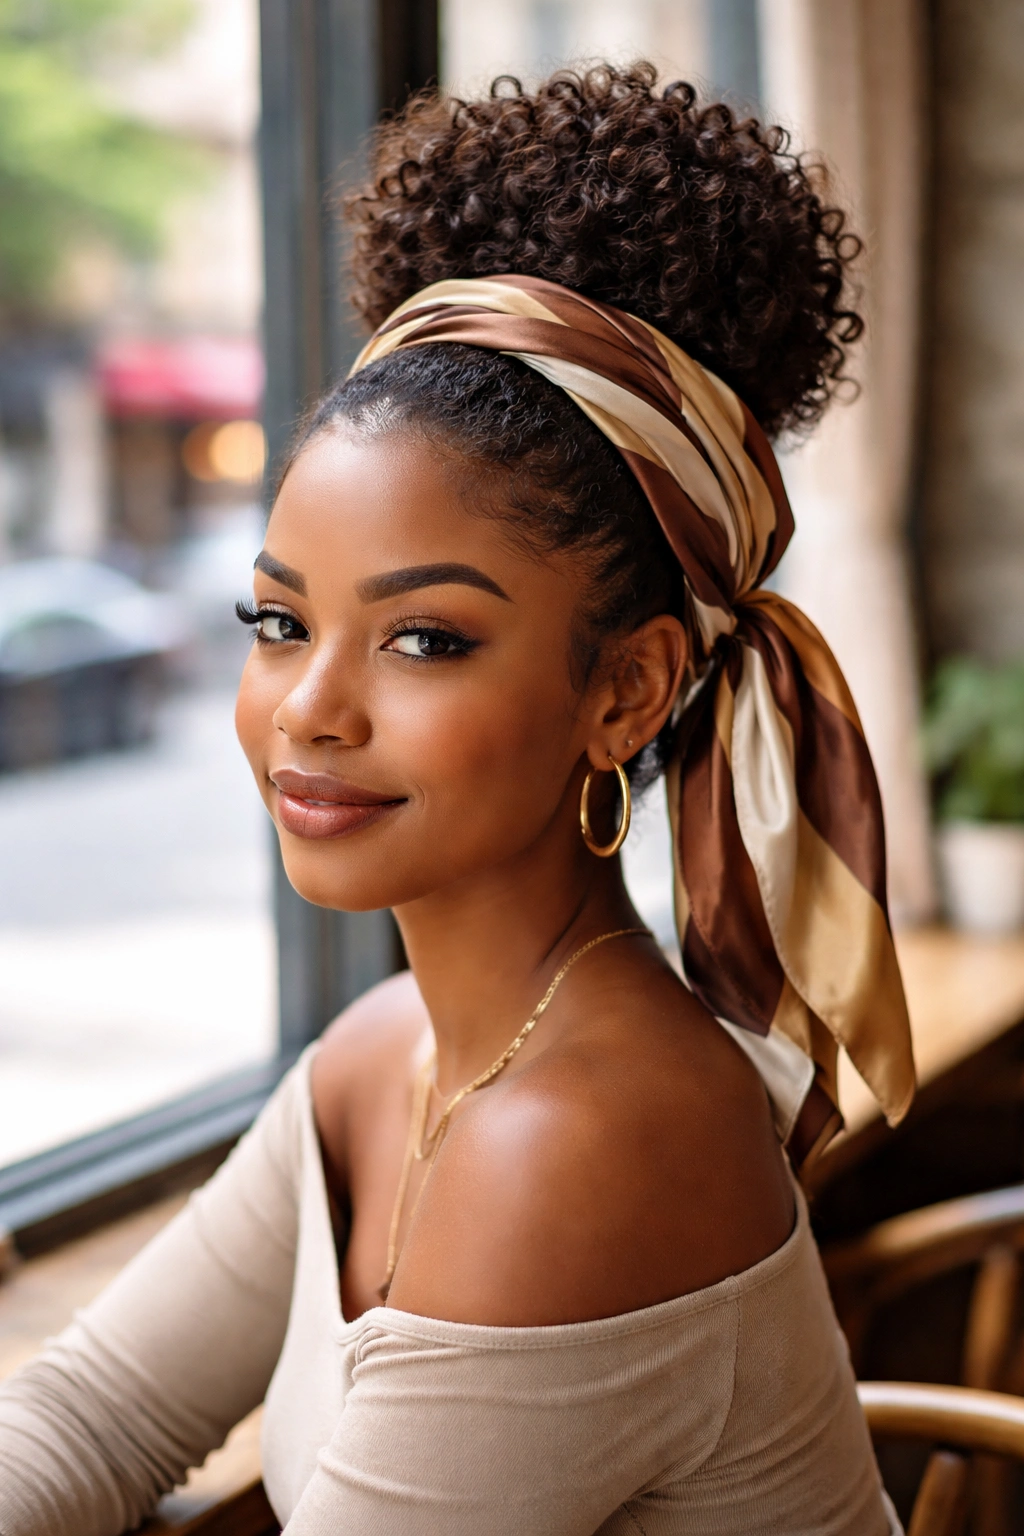
Tying a silk or satin scarf around the base of a natural hair bun — leaving the bun exposed on top and the scarf framing the head below — adds a fashion element to the bun that looks deliberate and chic.
The scarf can be tied at the front in a bow, at the side with trailing ends, or at the nape with the ends tucked under. Different tie positions create different aesthetics — a front bow reads more playful, a nape tie reads more classic.
The satin also provides some protection for the hairline where the scarf sits. Win-win.
14. Faux Hawk Bun
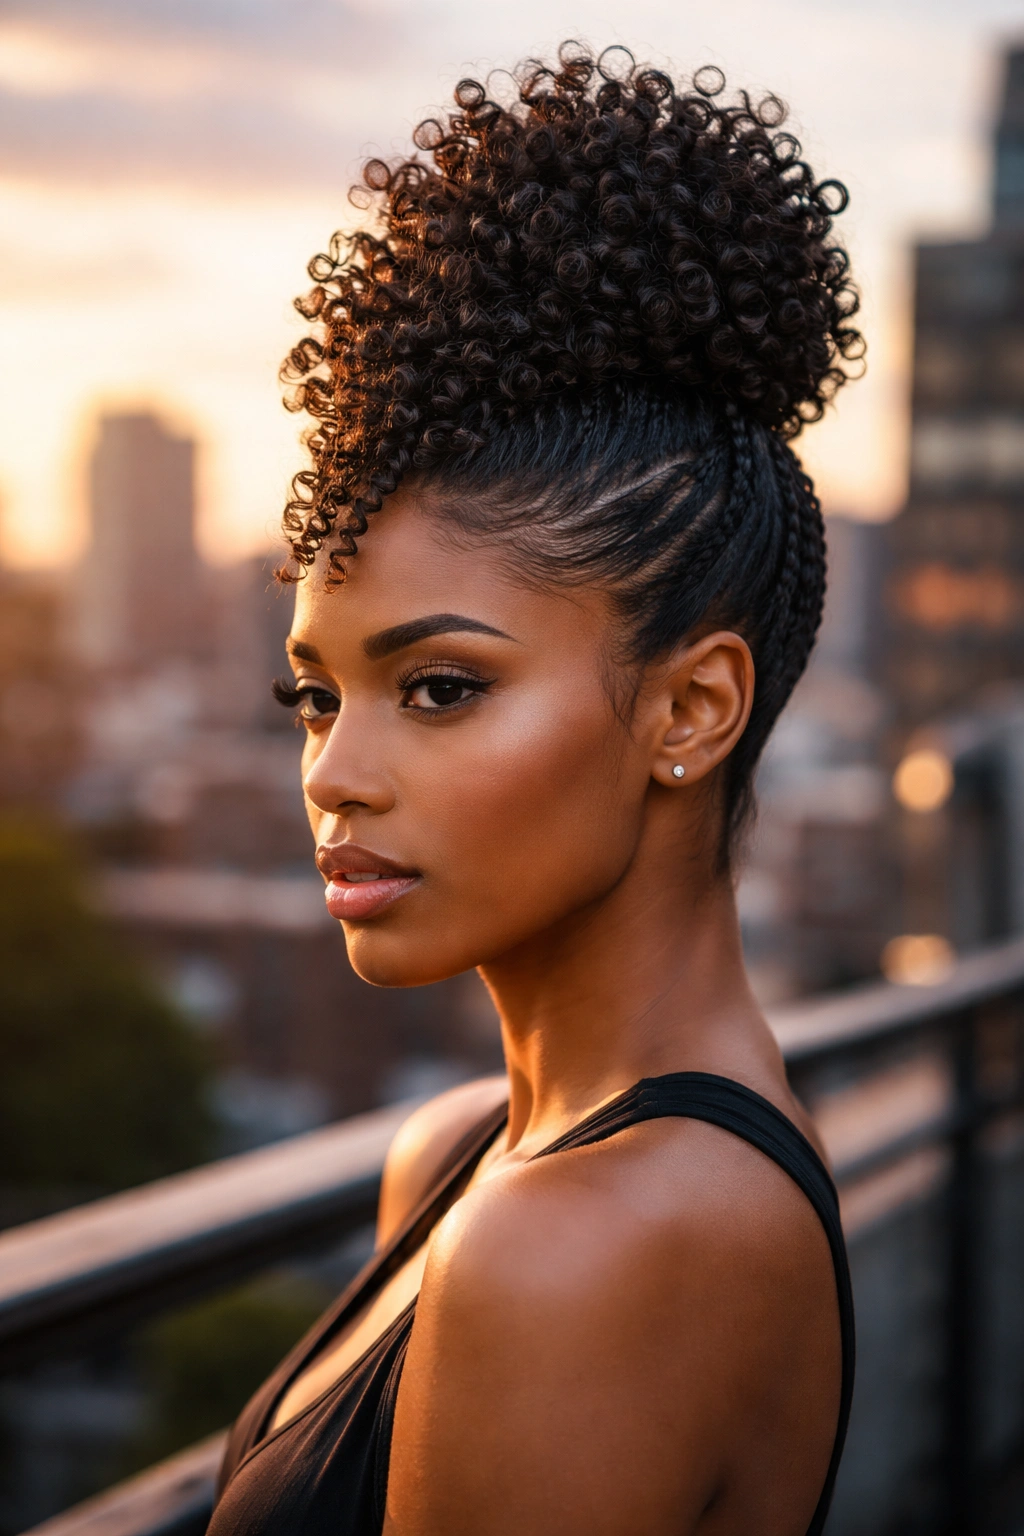
A faux hawk bun gathers hair in a ridge running down the center of the head while the sides are smoothed or braided down. On curly natural hair, the center ridge is a collection of natural curls gathered upward; the sides are either slicked down or cornrowed flat.
The faux hawk bun has a strong, bold silhouette. The center ridge of curls stands up and forward while the smooth or braided sides create graphic lines along the temples and ears.
This is not a subtle style — it’s confident and architectural. It suits women who want their hair to make a statement.
15. Natural Bun With Braided Side Section
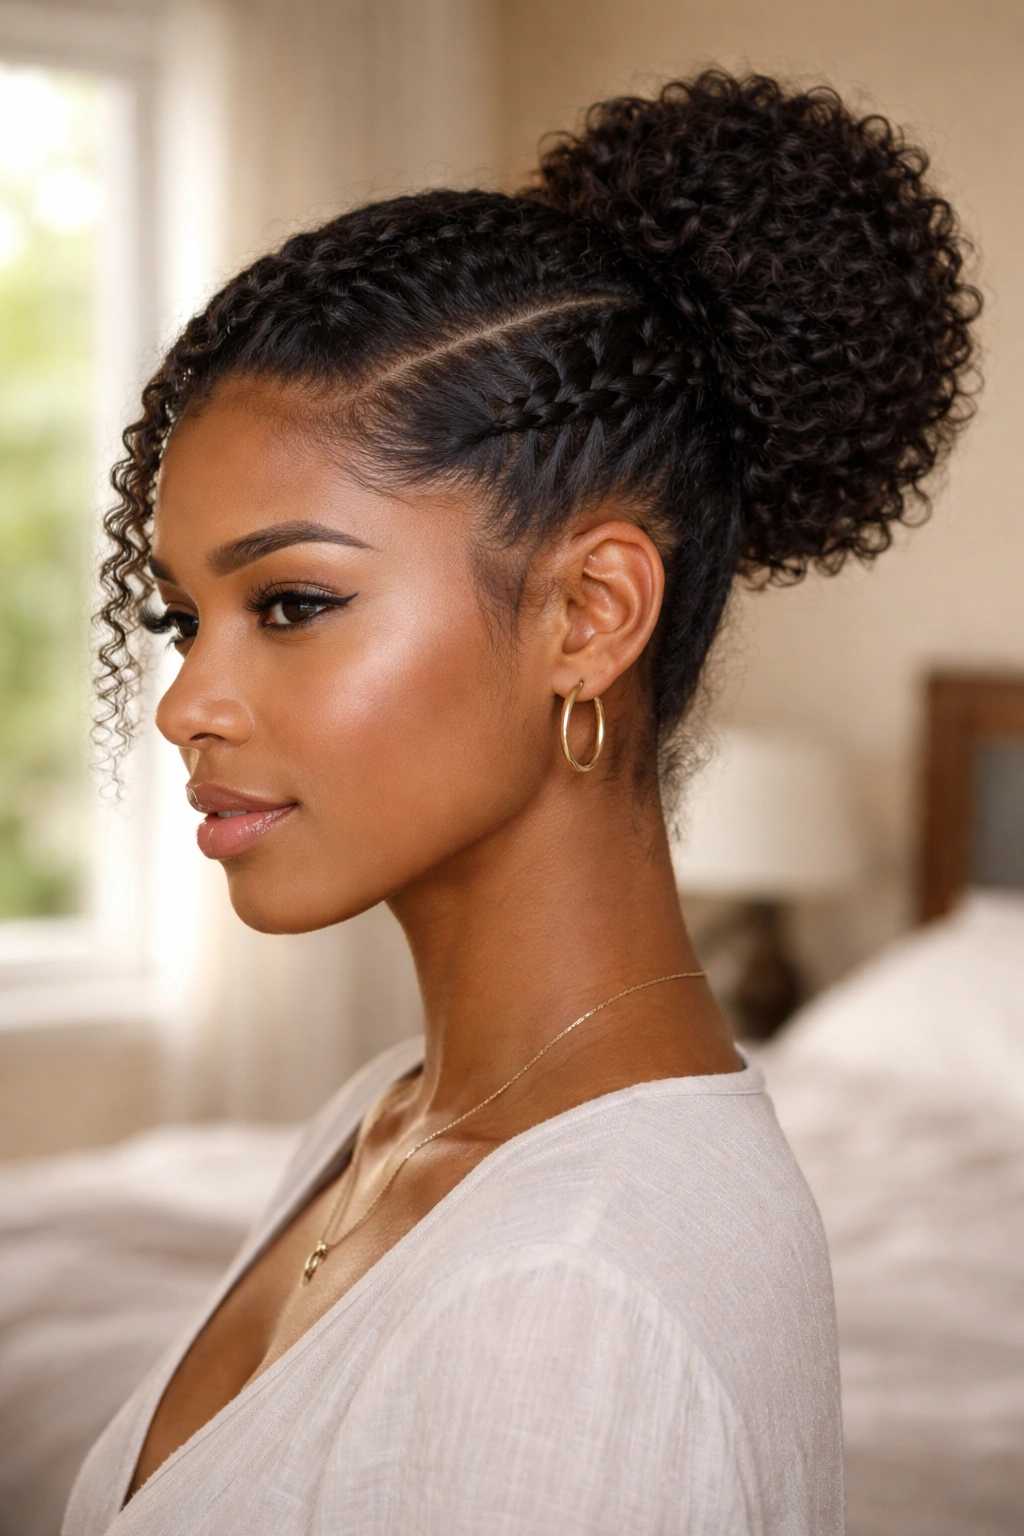
One side of the head cornrowed or flat twisted back, with the hair eventually incorporated into a bun at the back, creates a style that’s more intricate than a simple bun but not as complex as a full braided updo. The braided section on one side is graphically interesting; the bun at the back brings the hair together.
This asymmetric approach works particularly well for women who want to show off clean parting and braiding work on one side while still getting the practical benefits of having hair secured in a bun.
16. Curly Bun With Two-Strand Twist Accents
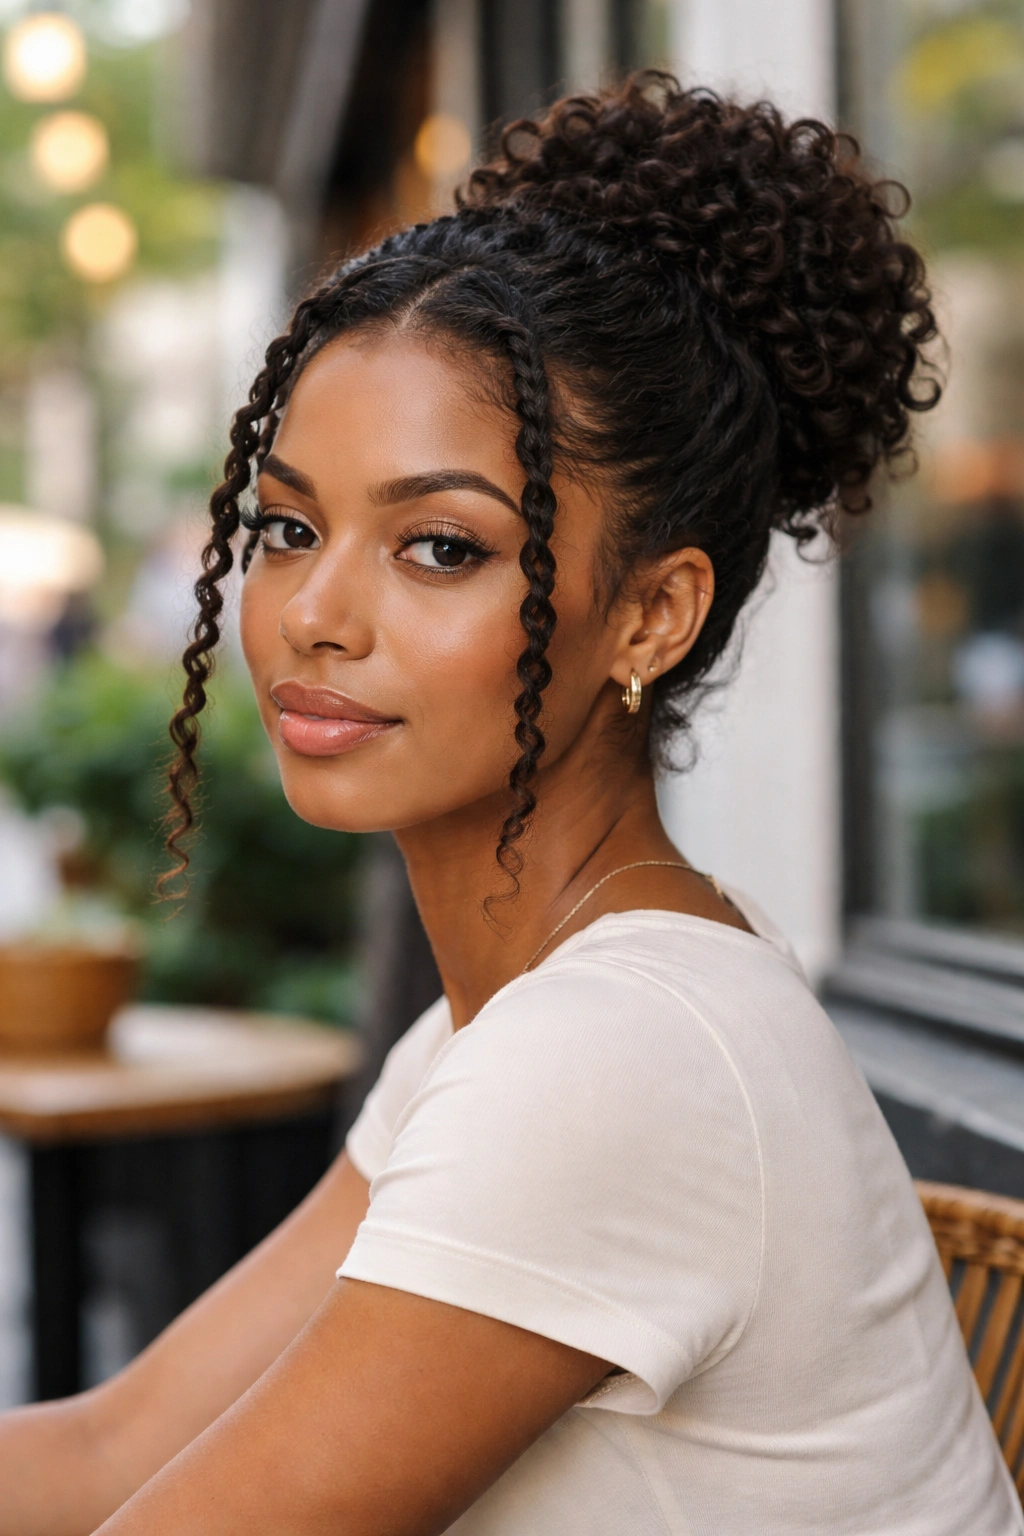
Installing a few two-strand twists at the front sections — around the hairline or at the temples — before gathering the majority of the hair into a bun, creates a framed look where the twists act like defined, structural bangs or accent pieces.
The twists have more definition than loose natural curls and hold their shape throughout the day. They frame the face deliberately and create a groomed, intentional look around the edges of the bun style.
17. Stretched High Bun
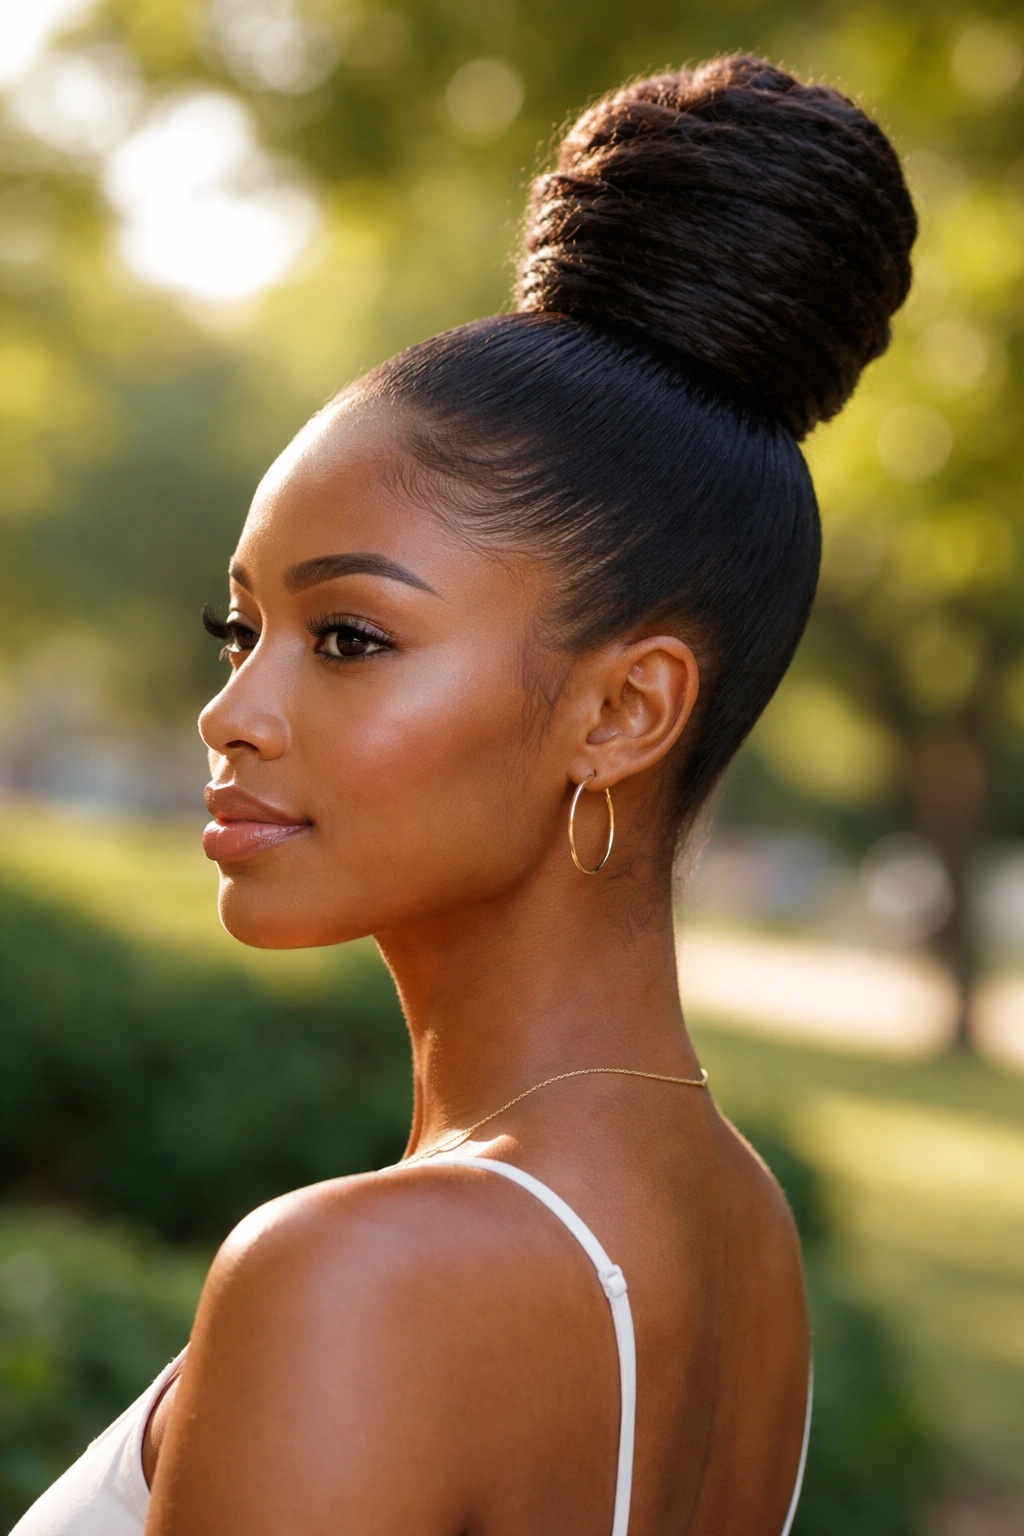
Stretching natural hair before gathering it into a bun changes the size and shape of the bun dramatically. Stretched natural hair — whether stretched via threading, banding, or blow-drying on low heat — creates a longer, more elongated bun shape rather than the round, compact shape of a fully coiled bun.
The stretched bun is sleeker than a natural coily bun and holds its shape for longer because the stretched hair doesn’t spring back as readily. This is the choice when you want a tidier, more maintained-looking bun rather than a wild, full one.
18. Braided Base Bun
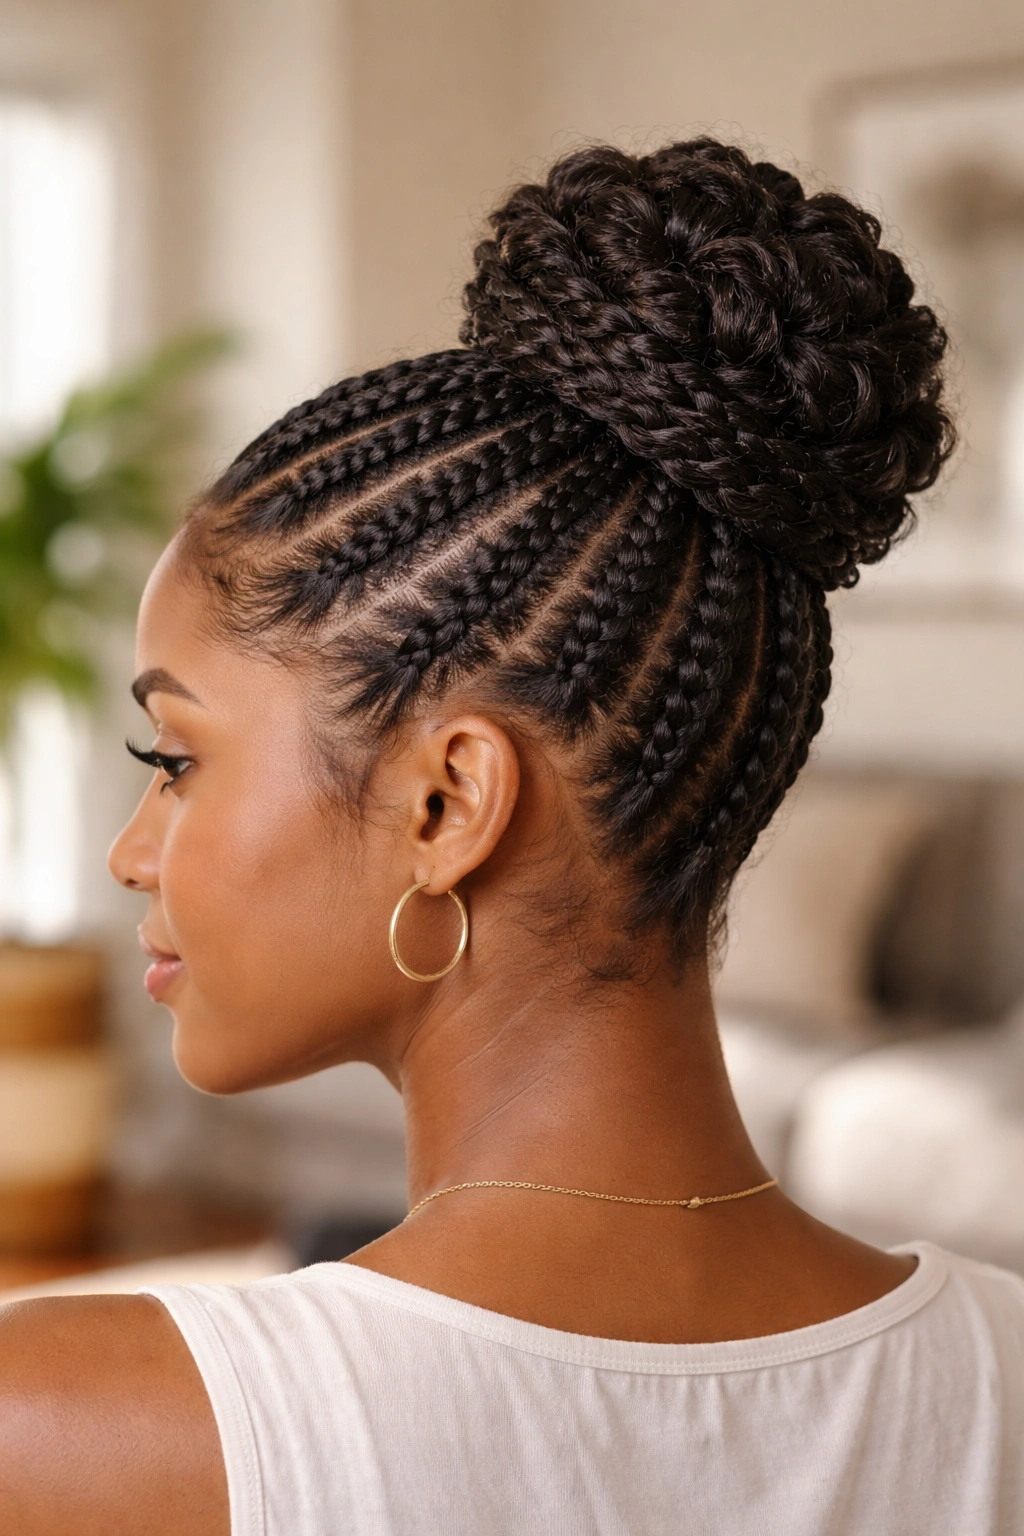
Cornrowing the hair from multiple directions toward a central point on the head — so all the cornrows terminate at the same location — creates a braided base that a bun can then be formed at or pinned over.
The braided base is a style in itself when the hair is too short for a bun (you can simply wear the cornrows with no bun on top). But with enough length, a small bun or puff at the central point where all the cornrows meet creates a style that’s both graphically intricate at the scalp and expressive at the gathering point.
19. Protective Low Bun for Everyday Wear
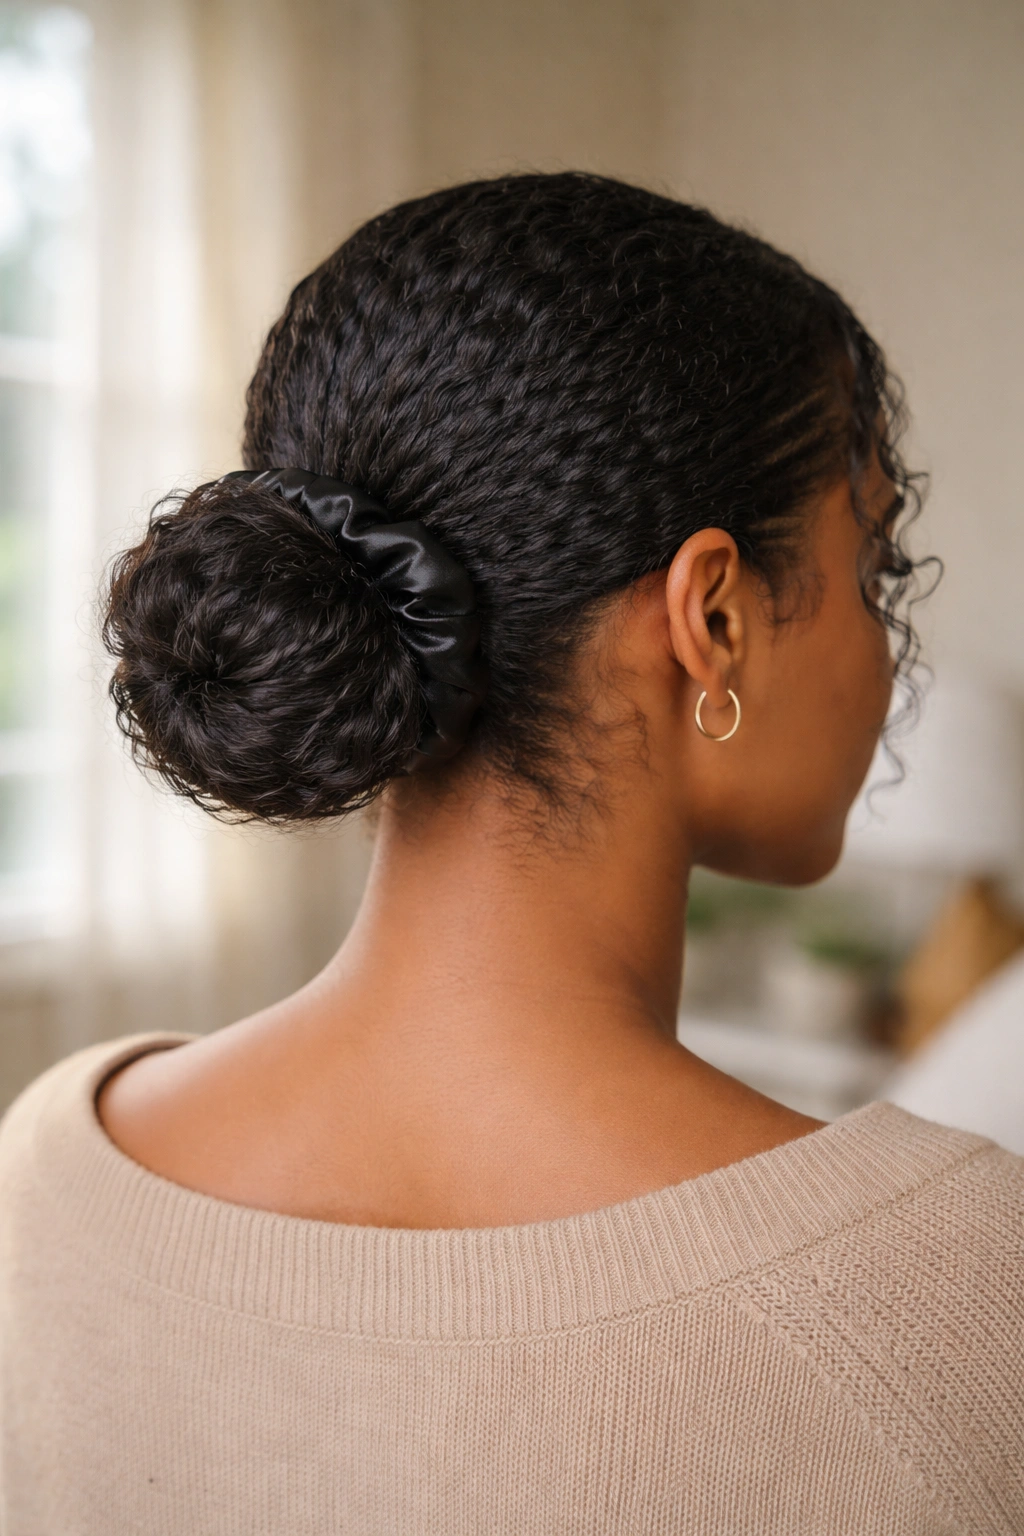
The everyday protective bun is not the most glamorous style on this list, but it’s the most functional. A simple low bun at the nape — hair gathered, secured with a satin tie, edges laid — provides daily protection for natural hair without requiring significant time or energy.
The key to making this look intentional rather than thrown together is two things: clean edges and a smooth gathering point. A couple of minutes with edge control and an edge brush, plus a deliberate hair tie placement (no crooked or multiple-wrapped ties), transforms a quick bun from looking casual to looking composed.
20. Puff Bun With Headband
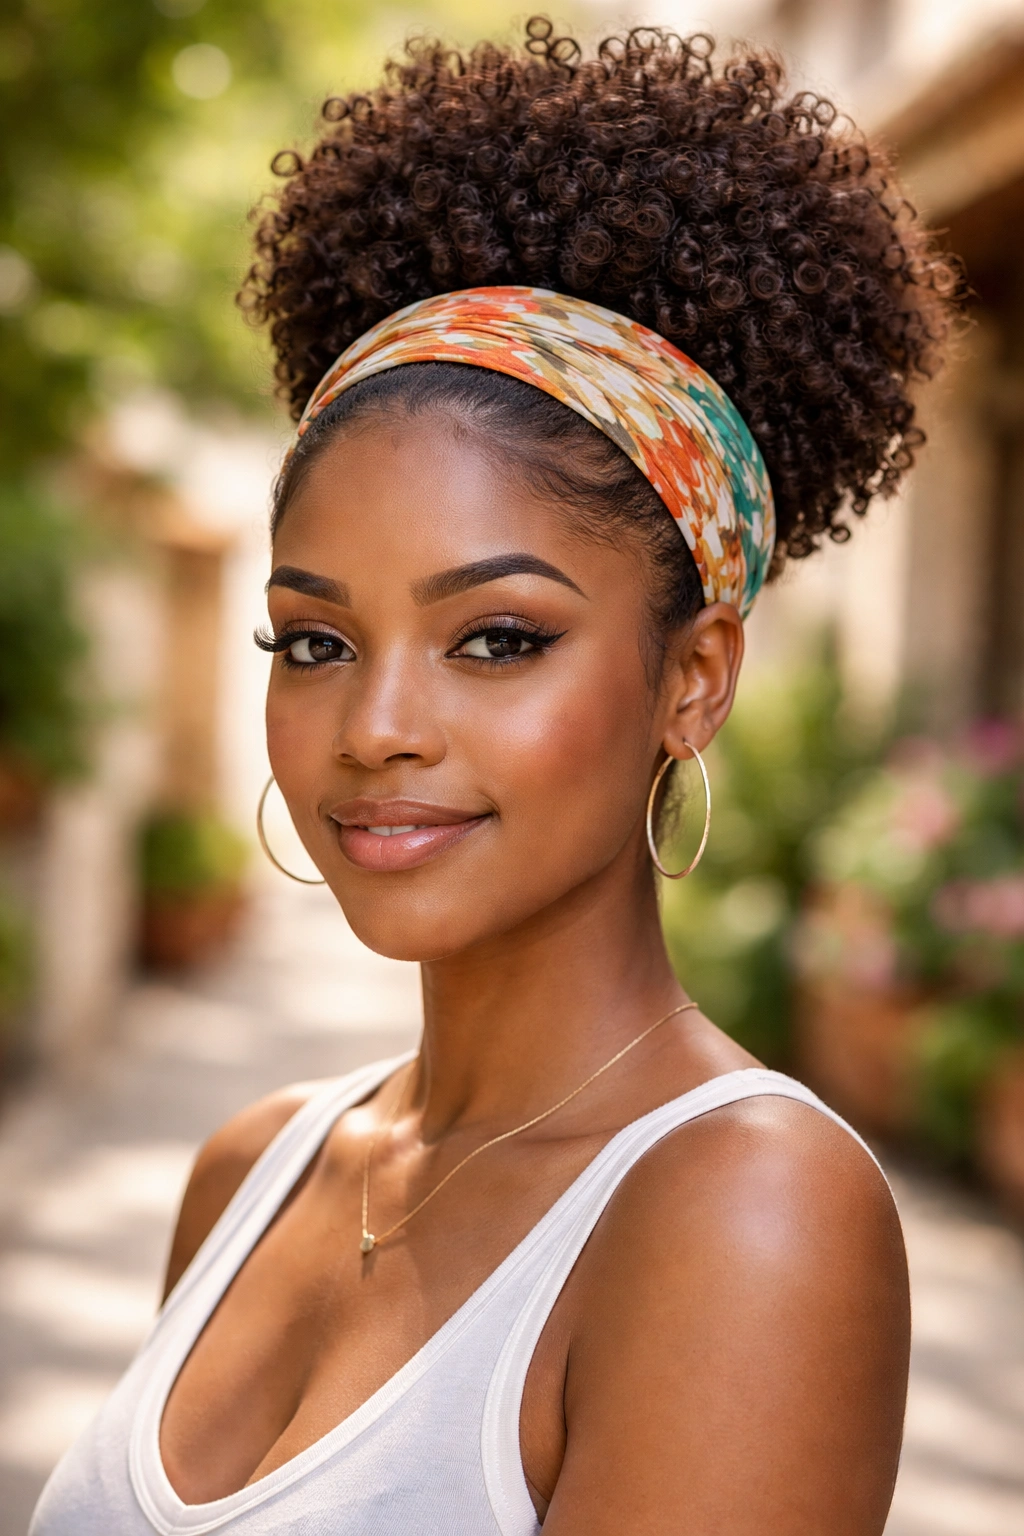
A headband worn across the front of the head — positioned at the hairline or slightly back — transforms the simple puff bun. The headband frames the face, keeps edges smooth, and adds color or pattern to what might otherwise be a very simple style.
Wide fabric headbands on natural curly buns look particularly good because the width of the headband echoes the volume of the puff above it. Narrow headbands can look visually thin against a large natural puff.
21. Curly Bun Transition Style
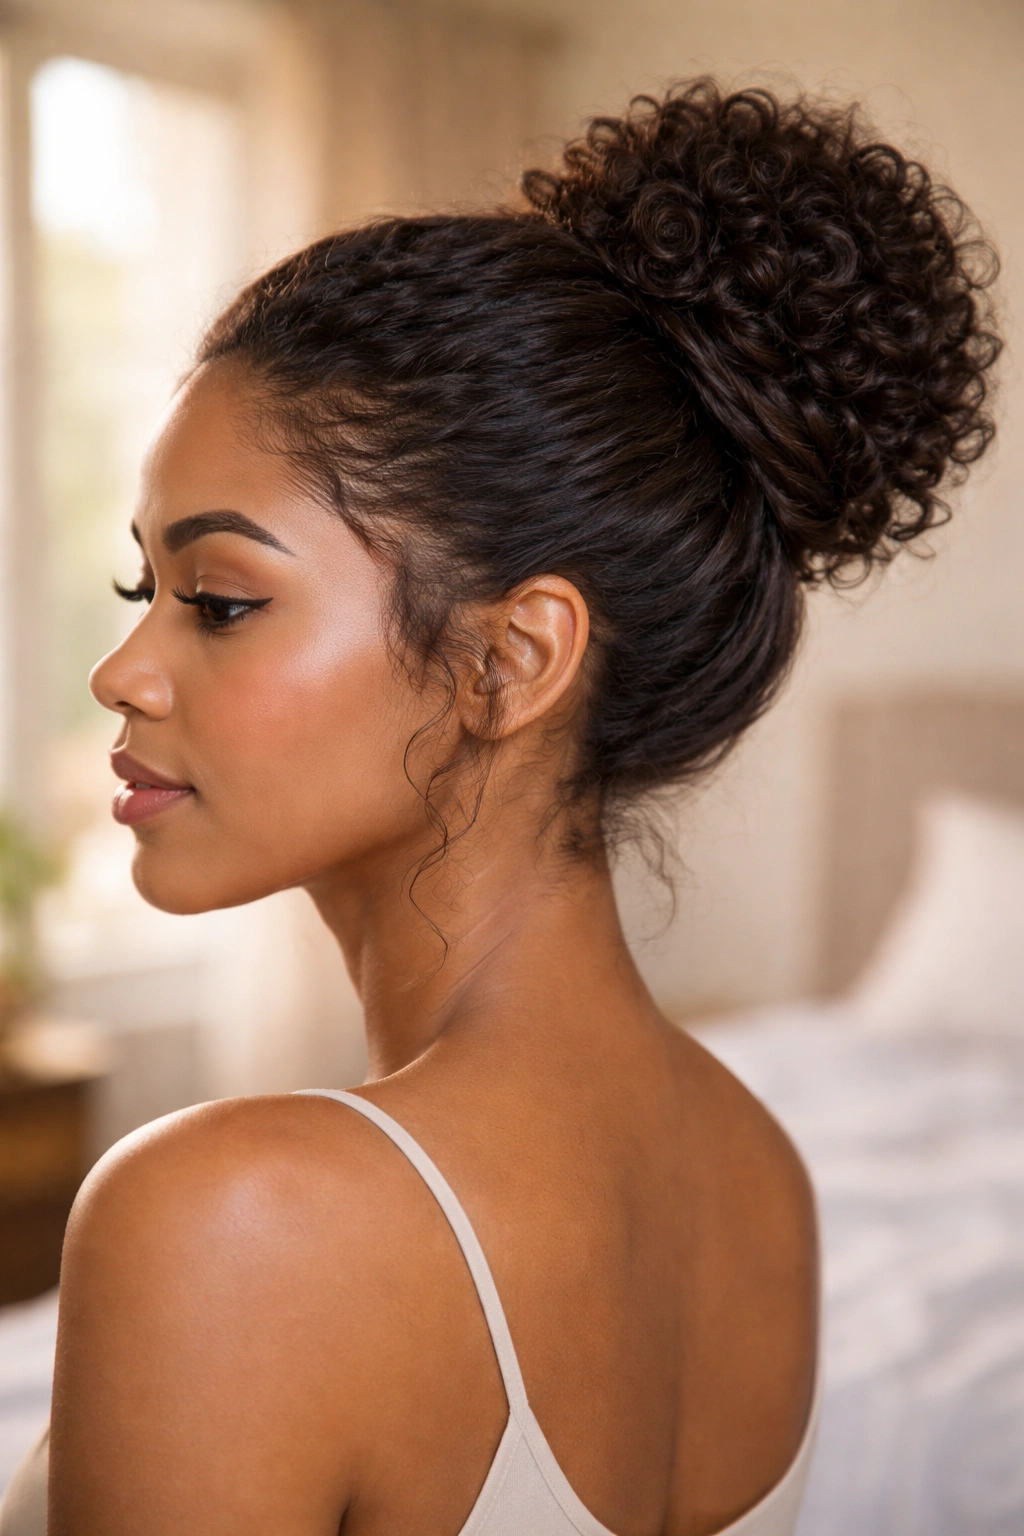
When transitioning from chemically treated hair to fully natural hair, the length disparity between the two textures makes styling tricky. The natural new growth coils up tightly; the treated length hangs straight. A bun that gathers both into one arrangement is one of the most effective transitioning styles because the bun hides where the two textures meet.
Twisting or braiding the hair before gathering into a bun helps blend the textures in the bun. The twist creates a uniform texture throughout rather than making the coily new growth and the straight length fight each other visually.
22. Bun With Pearl or Crystal Hair Pins
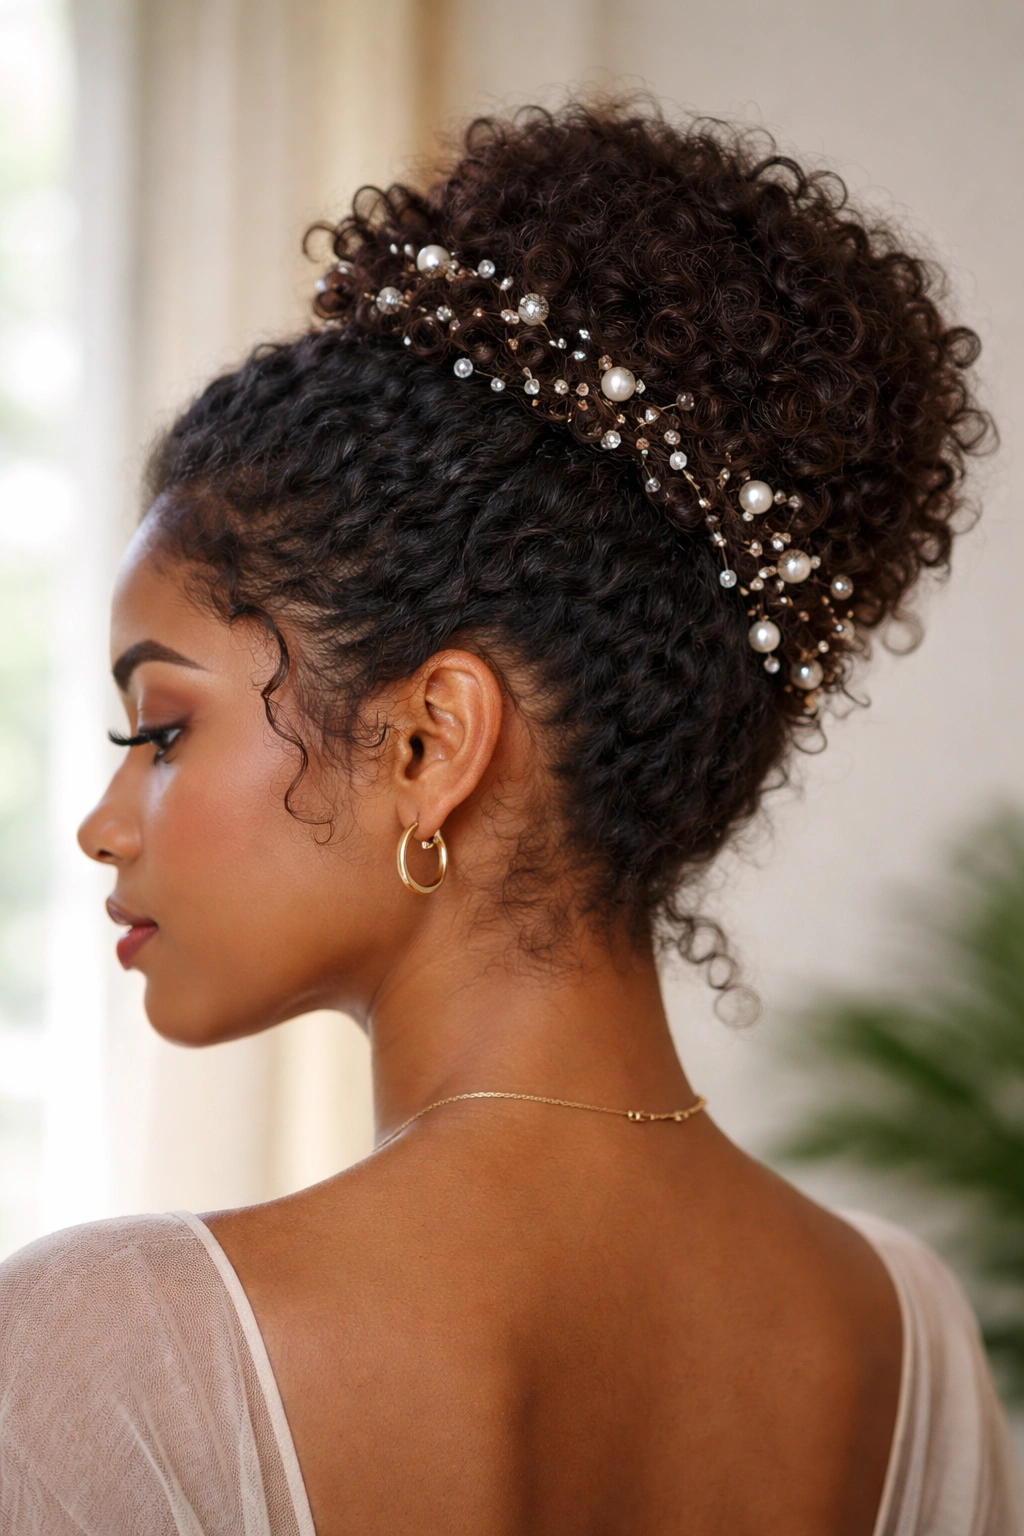
Hair pins aren’t just tools — on a natural hair bun, decorative pins become part of the style itself. Pearl-tipped pins scattered through a natural curly bun add an elegant, bridal quality. Crystal or rhinestone pins catch the light and make the bun sparkle.
Position pins deliberately — not randomly. A cluster at one point on the bun, with nothing elsewhere, creates a focal point. Pins scattered in a spiral pattern around the bun create the impression of a deliberately designed accessory. Random pins in no particular pattern just look like you forgot to remove them.
23. Waterfall Curly Bun
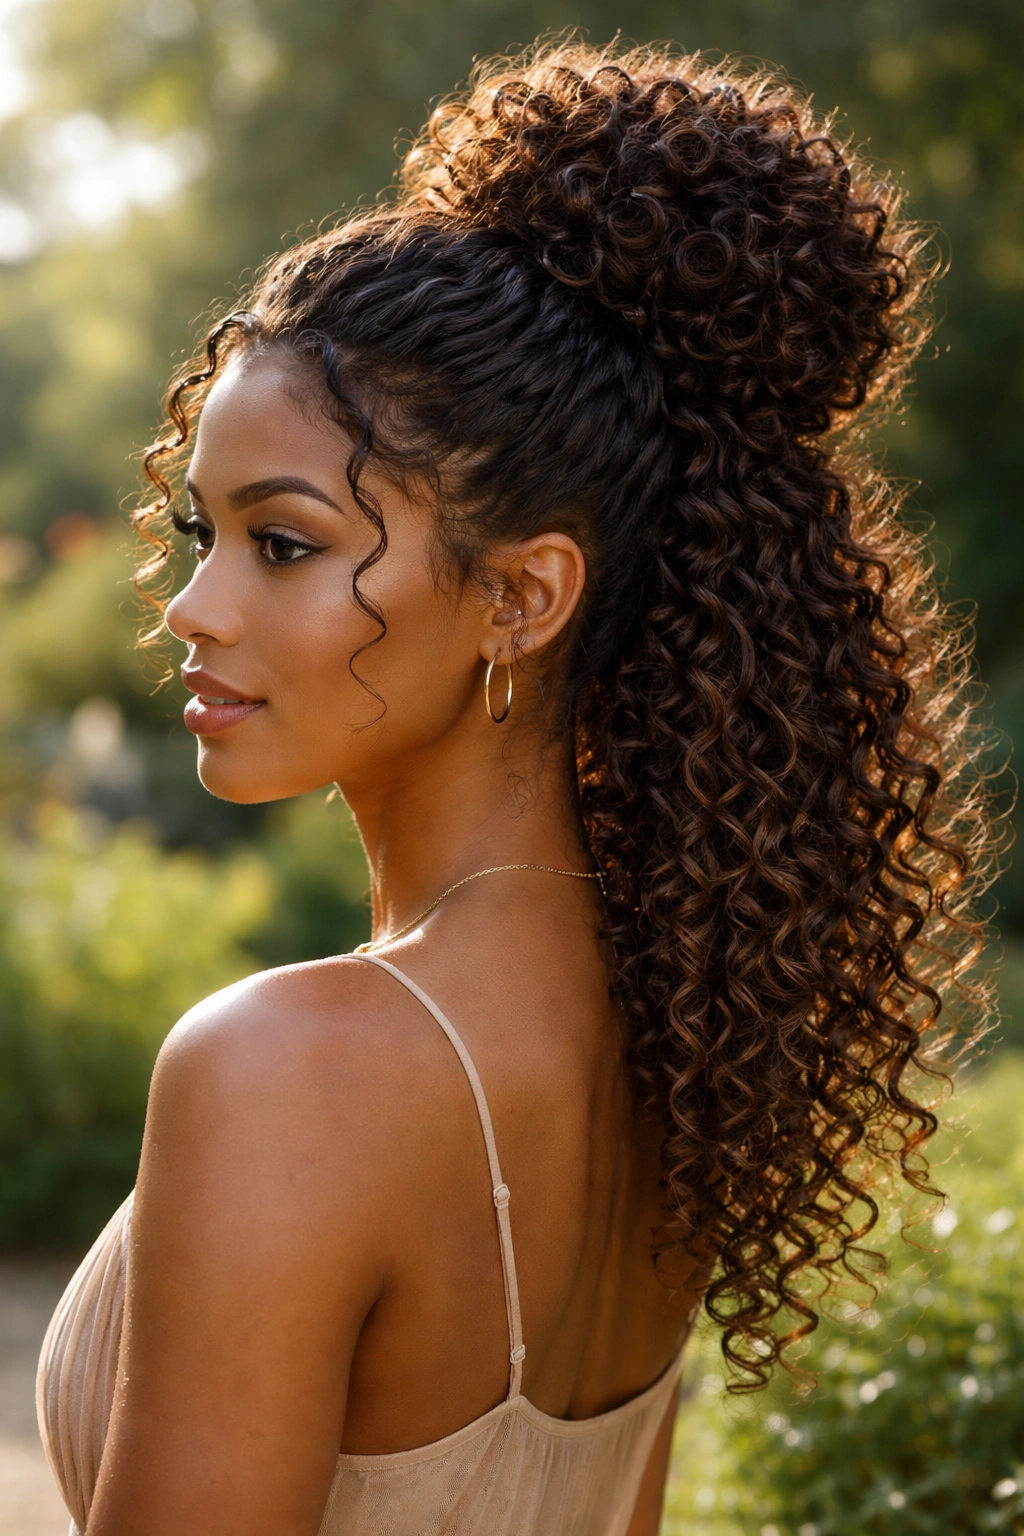
The waterfall bun gathers most of the hair into a bun but leaves the tips free so they “waterfall” downward from the bun gathering point. On curly natural hair, these cascading tips coil and spring freely below the bun, creating a style that’s part gathered updo and part free-hanging style.
The waterfall element is most effective when there’s a clear distinction between the gathered bun body and the freely falling curly tips. This means having enough hair length that the bun is full and defined before the tips begin.
24. Side Bun on Curly Natural Hair
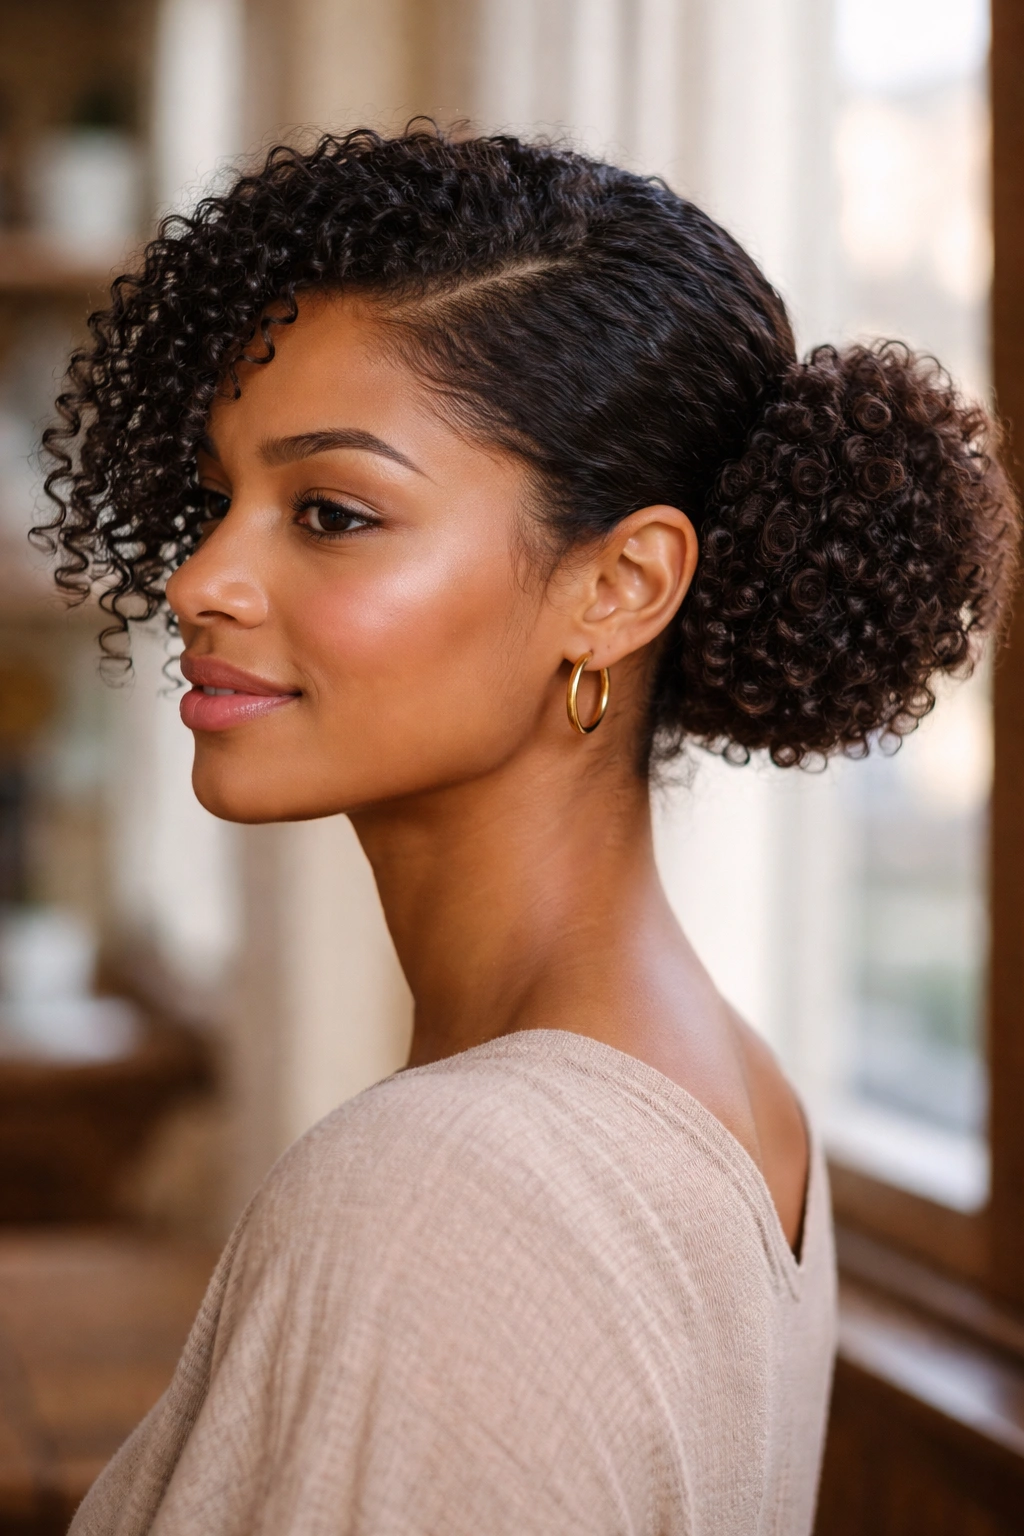
Positioning the bun to one side of the head — at the temple, behind the ear, or at the nape on one side — creates an asymmetric silhouette that reads as effortlessly chic. The exposed side of the head and neck is clean and dramatic; the bun side is textured and full.
A side bun on curly natural hair is particularly flattering because the coily texture of the bun creates a soft focal point at the side rather than a sharp, geometric one. It’s romantic rather than severe.
25. Bun Styling as a Daily Ritual
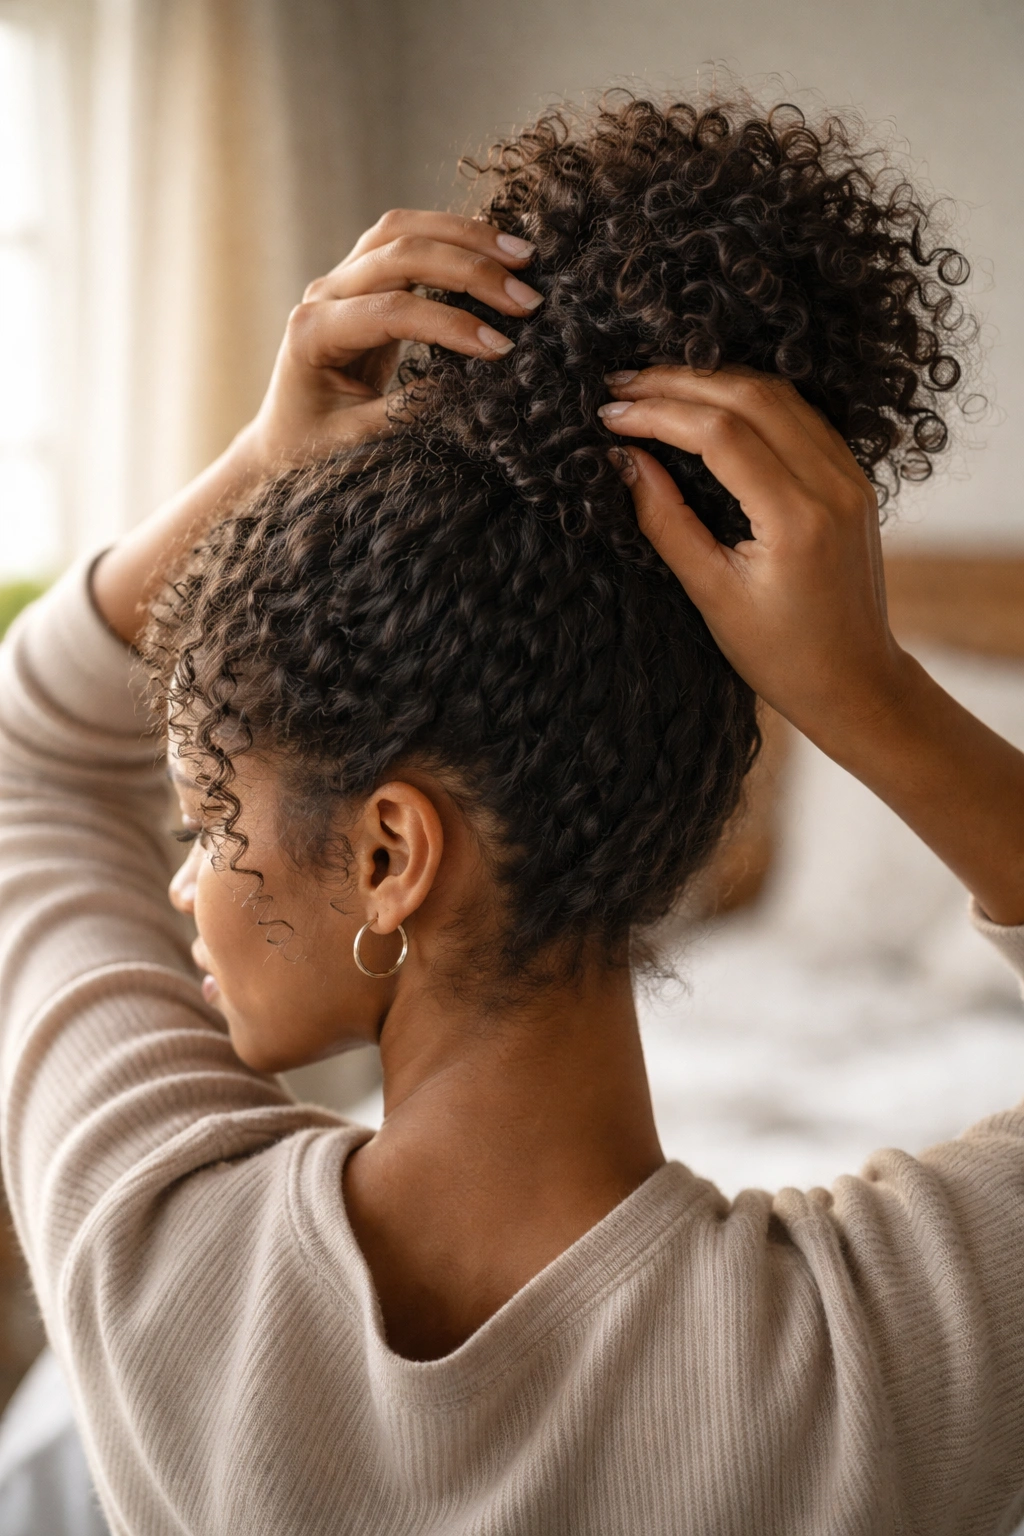
The best thing about curly hair bun styles for natural hair is how they can become a genuine daily ritual rather than just a quick styling choice. Taking a few minutes each morning to define your edges, choose your bun position, select an accessory or not, and settle the curls into their arrangement — this is time spent caring for yourself as much as styling your hair.
Natural hair buns deserve to be done with attention and intention. The bun that gets five minutes of care looks meaningfully different from the one thrown up in thirty seconds. Not because one is inherently better — there are beautiful thirty-second buns — but because the intention shows. It always shows.
Protecting Your Natural Hair in Bun Styles
Consistent bun styling is excellent for retention as long as the tension at the gathering point is managed carefully. The hair tie should sit in the same location only for as long as is comfortable — varying the position of the bun slightly each day prevents concentration of tension at one spot.
At night, releasing the bun and re-setting it loosely — or switching to a loose pineapple — allows the hair to relax and breathe. Sleeping in a tight bun every night puts consistent stress on the gathering point that accumulates over time.
A satin bonnet or satin pillowcase overnight protects the edges, reduces friction on the hair at the bun point, and preserves curl definition better than cotton. This single habit — consistent satin — is one of the most impactful things you can do for natural hair health regardless of how you style it.
