Sleek braided ponytails for long hair solve a very specific problem: long hair has weight, and weight makes a plain ponytail slump, split, or frizz at the crown before the day is done. Add a braid, and the whole shape changes. The root area stays tighter, the tail looks more deliberate, and the length stops feeling like something you have to manage every ten minutes.
Loose hair is gorgeous until it starts sliding out of every clip.
That’s why the prep matters so much. A clean part, a flat brush, a little gel or edge control at the hairline, and small clear elastics do more work than most people expect. Long hair also needs tension in the right places — not a painful yank, just enough control to keep the braid from loosening once the tail starts moving.
Tiny elastics matter.
Some braided ponytails lean polished and office-ready. Some feel sporty, some feel dressed up, and a few have that sharp, editorial look that makes straight hair look almost architectural. Long hair is the best canvas for all of them because the extra length gives the braid room to show off its pattern instead of disappearing into the tail.
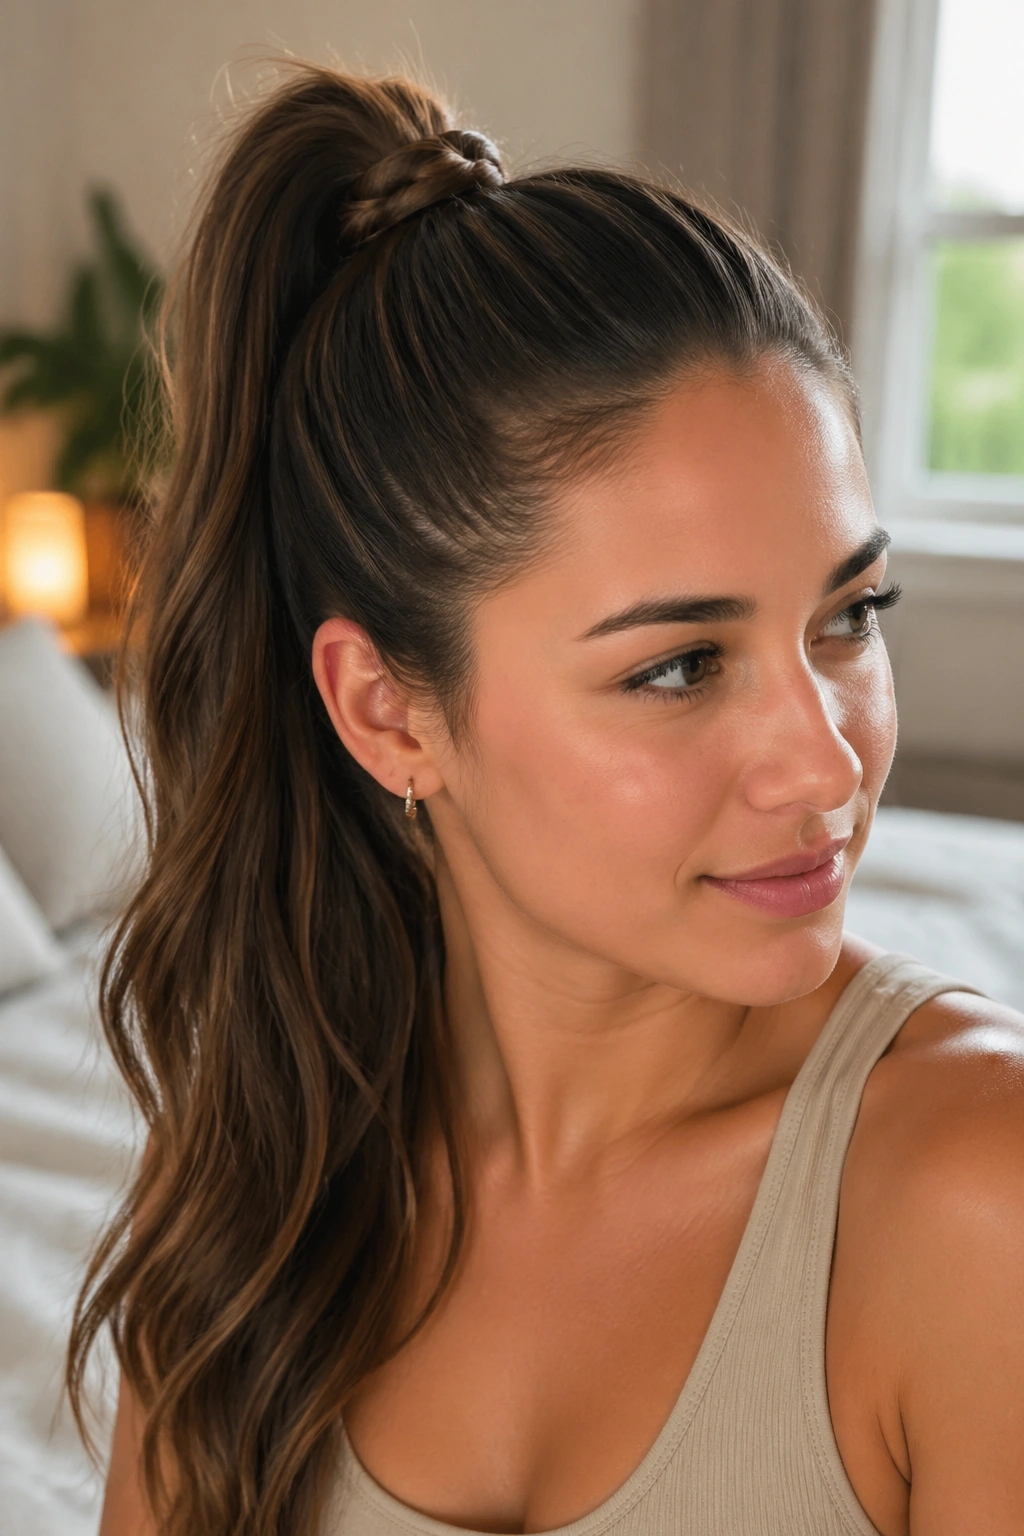
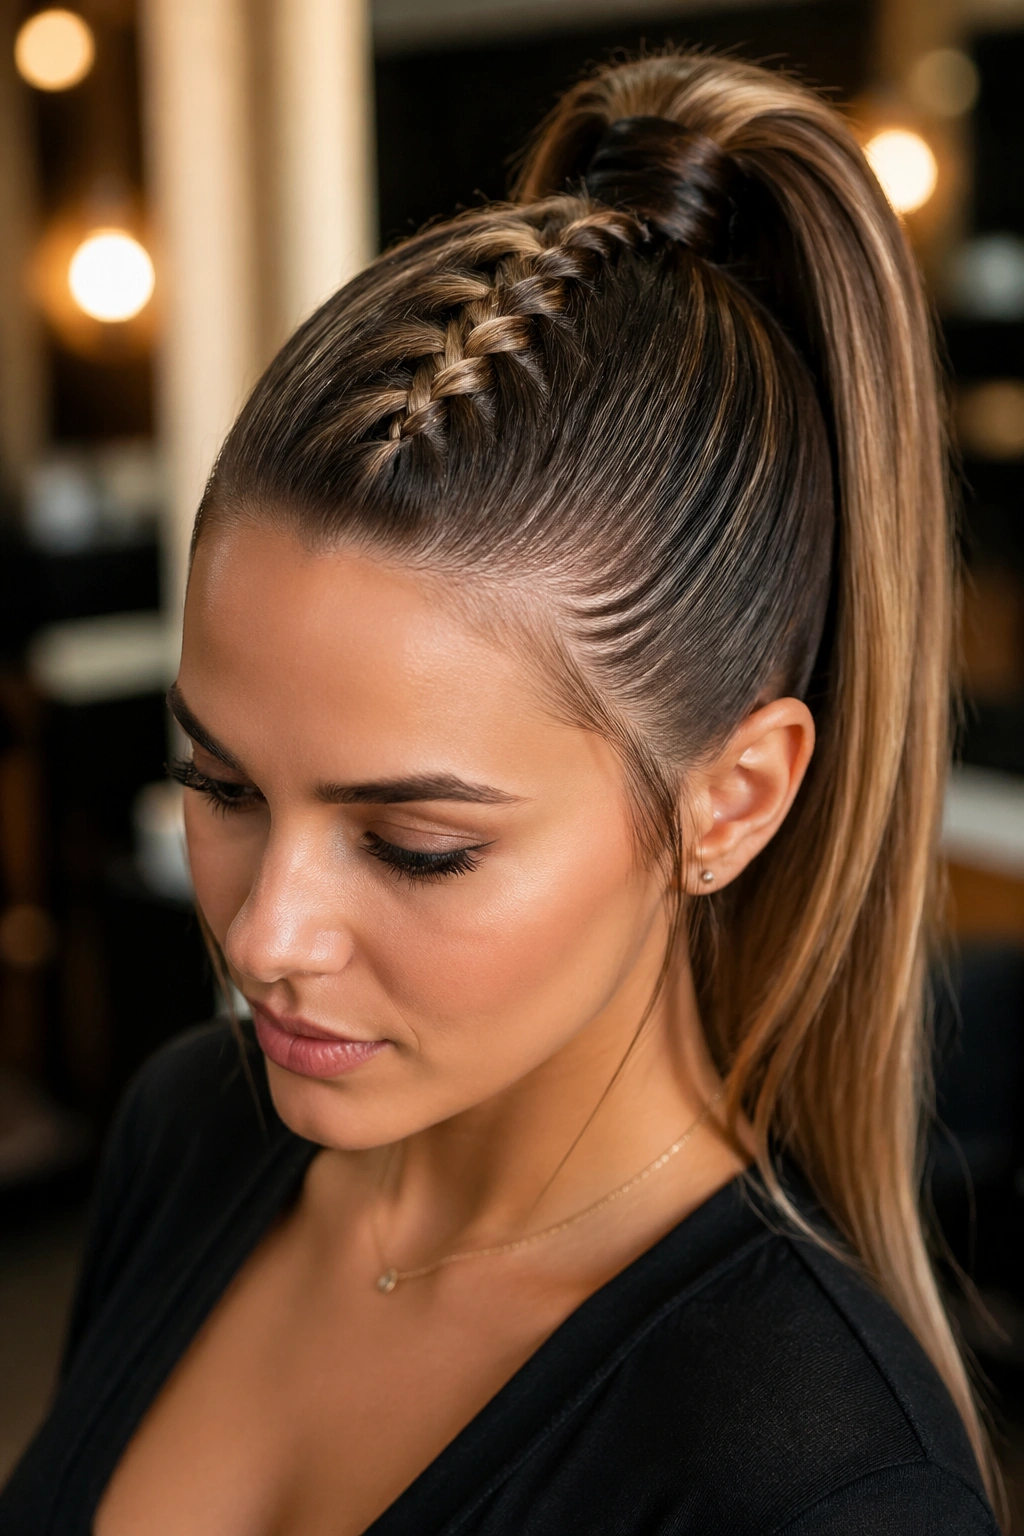
1. High Dutch Braided Ponytail
This is the one I’d reach for first if you want the face to look a little more lifted. A high Dutch braid starts at the front hairline and sits on top of the hair instead of sinking into it, so the braid reads clearly even on very long lengths.
How to place it
Keep the braid snug through the crown, then gather the rest high at the back of the head. That small shift — braid first, ponytail second — keeps the style sleek instead of puffy. If your hair is layered, a touch of gel at the temples helps the shorter pieces stay put.
- Start with a deep brush-out so the surface lies flat.
- Use a fine-tooth comb to draw a clean part.
- Braid with small, even sections for a tighter ridge.
- Wrap one thin strand around the elastic if you want a cleaner finish.
Best for: long straight hair, blown-out waves, and anyone who wants height without teasing.
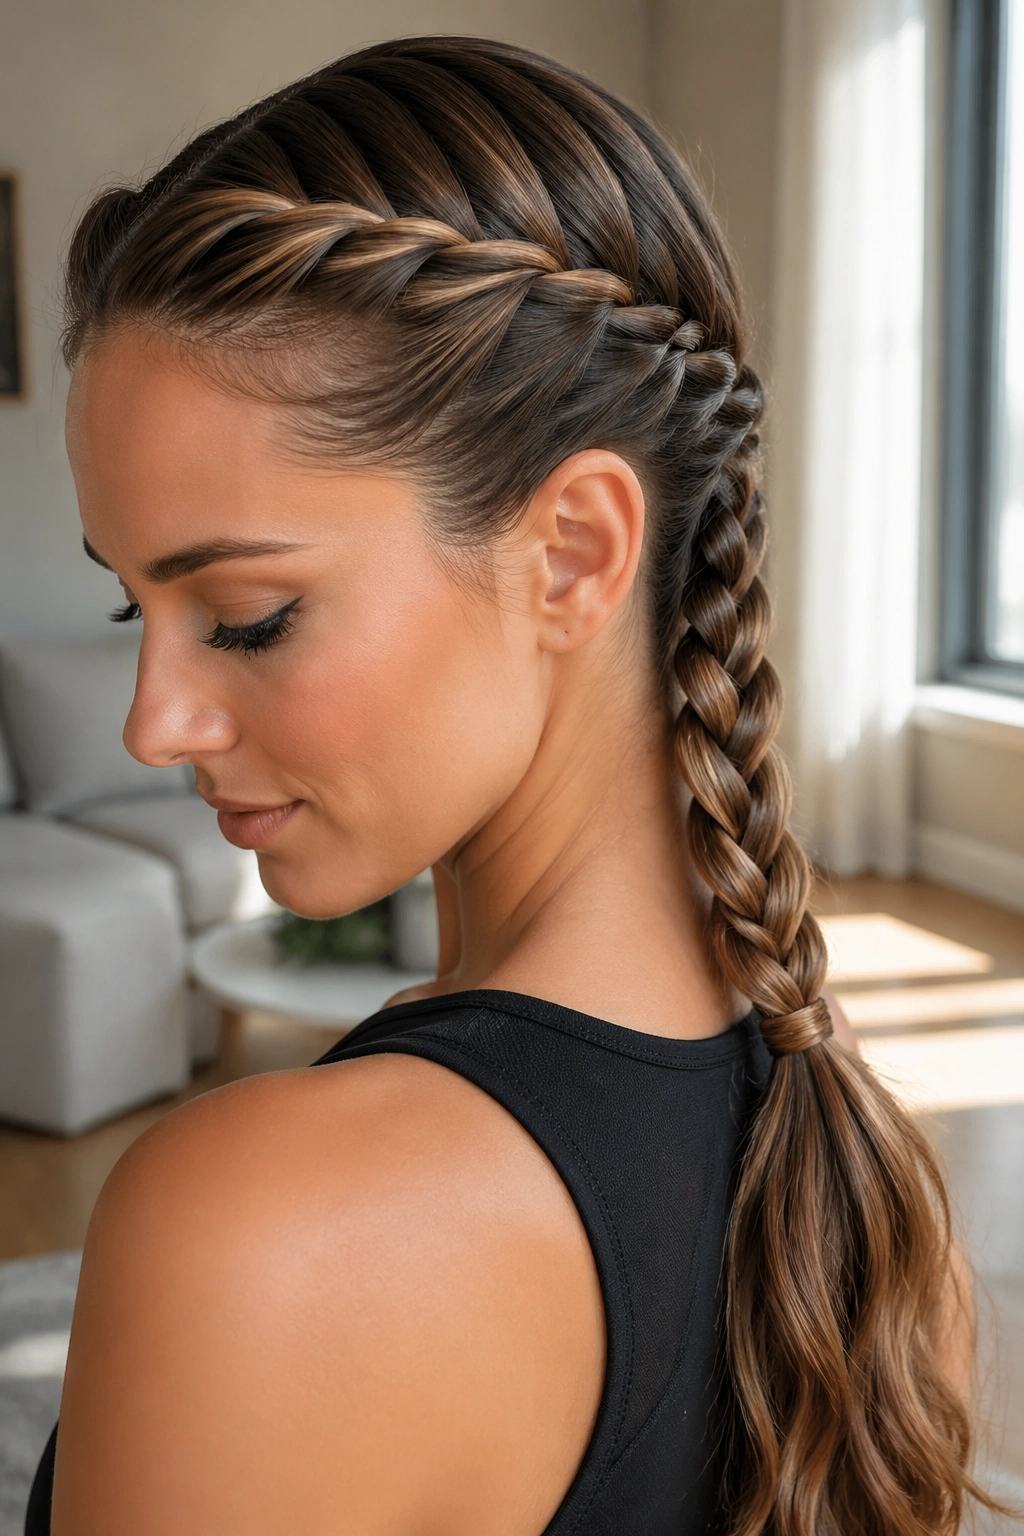
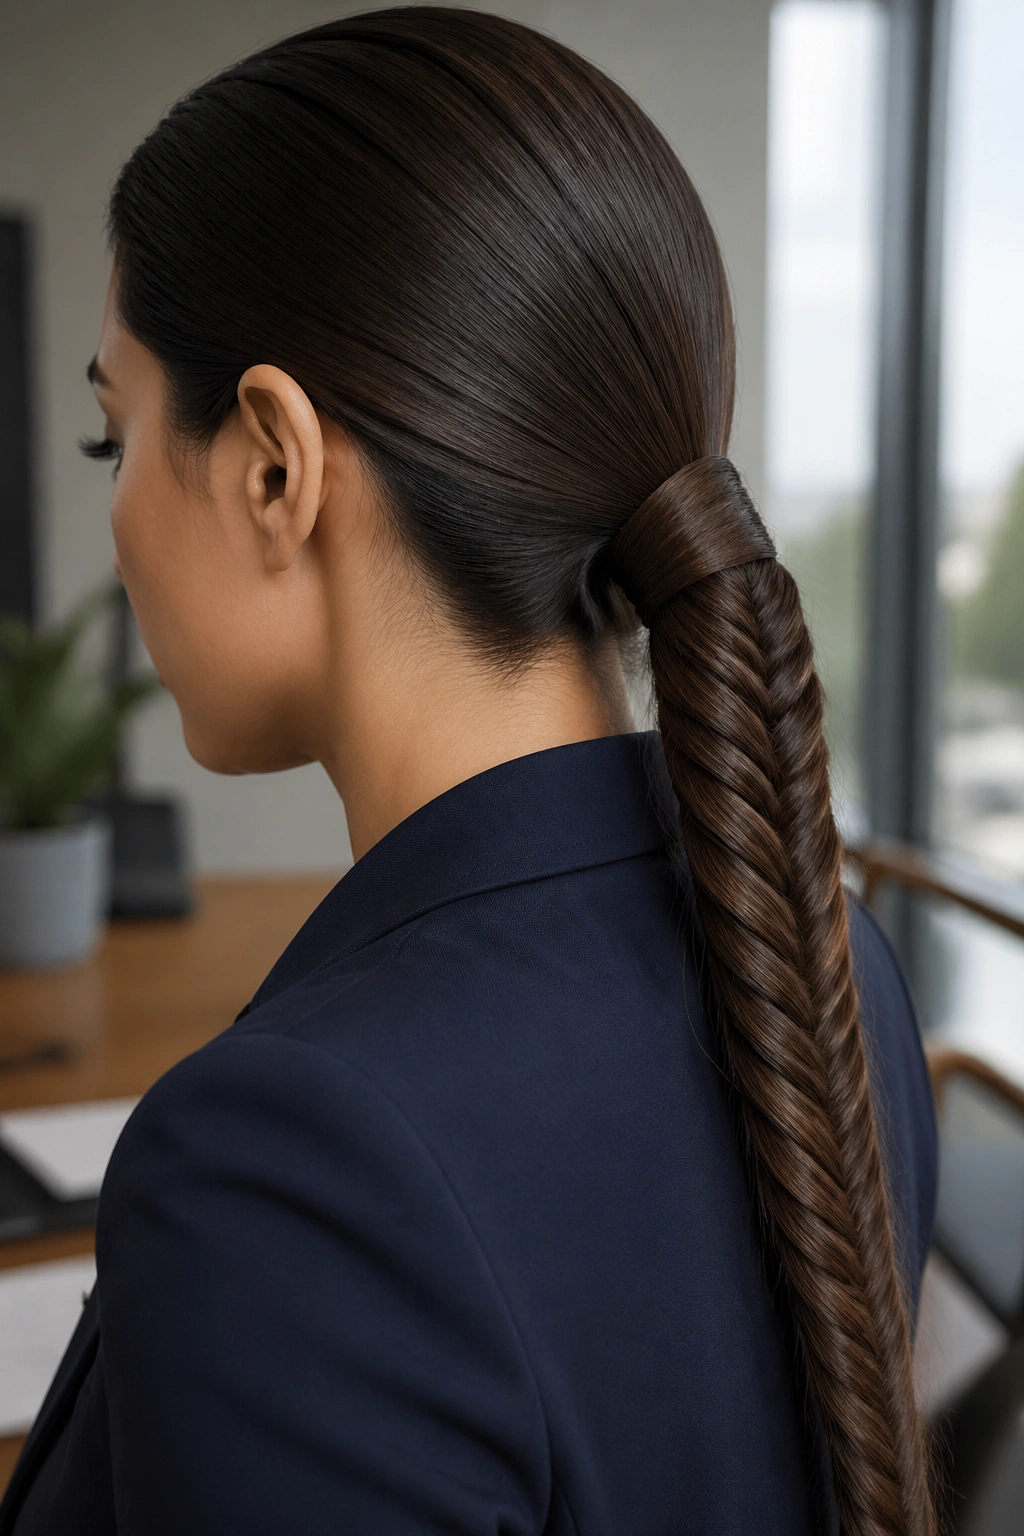
2. Low Fishtail Braided Ponytail
Why does a fishtail look so polished even when you keep the rest simple? Because the weave is tight and detailed, and on long hair that detail shows up all the way down the tail. A low fishtail ponytail has a calm, glossy feel that works at the office, for dinners, and for days when you want your hair controlled but not severe.
The trick is to keep the crown flat and let the braid do the visual work. A loose fishtail can look romantic, but a sleek fishtail is all about control. Brush the hair back, secure the base low at the nape, then fishtail the ponytail itself. A little shine serum on the ends keeps the tail from puffing out halfway down.
It’s a slow braid. Worth it.
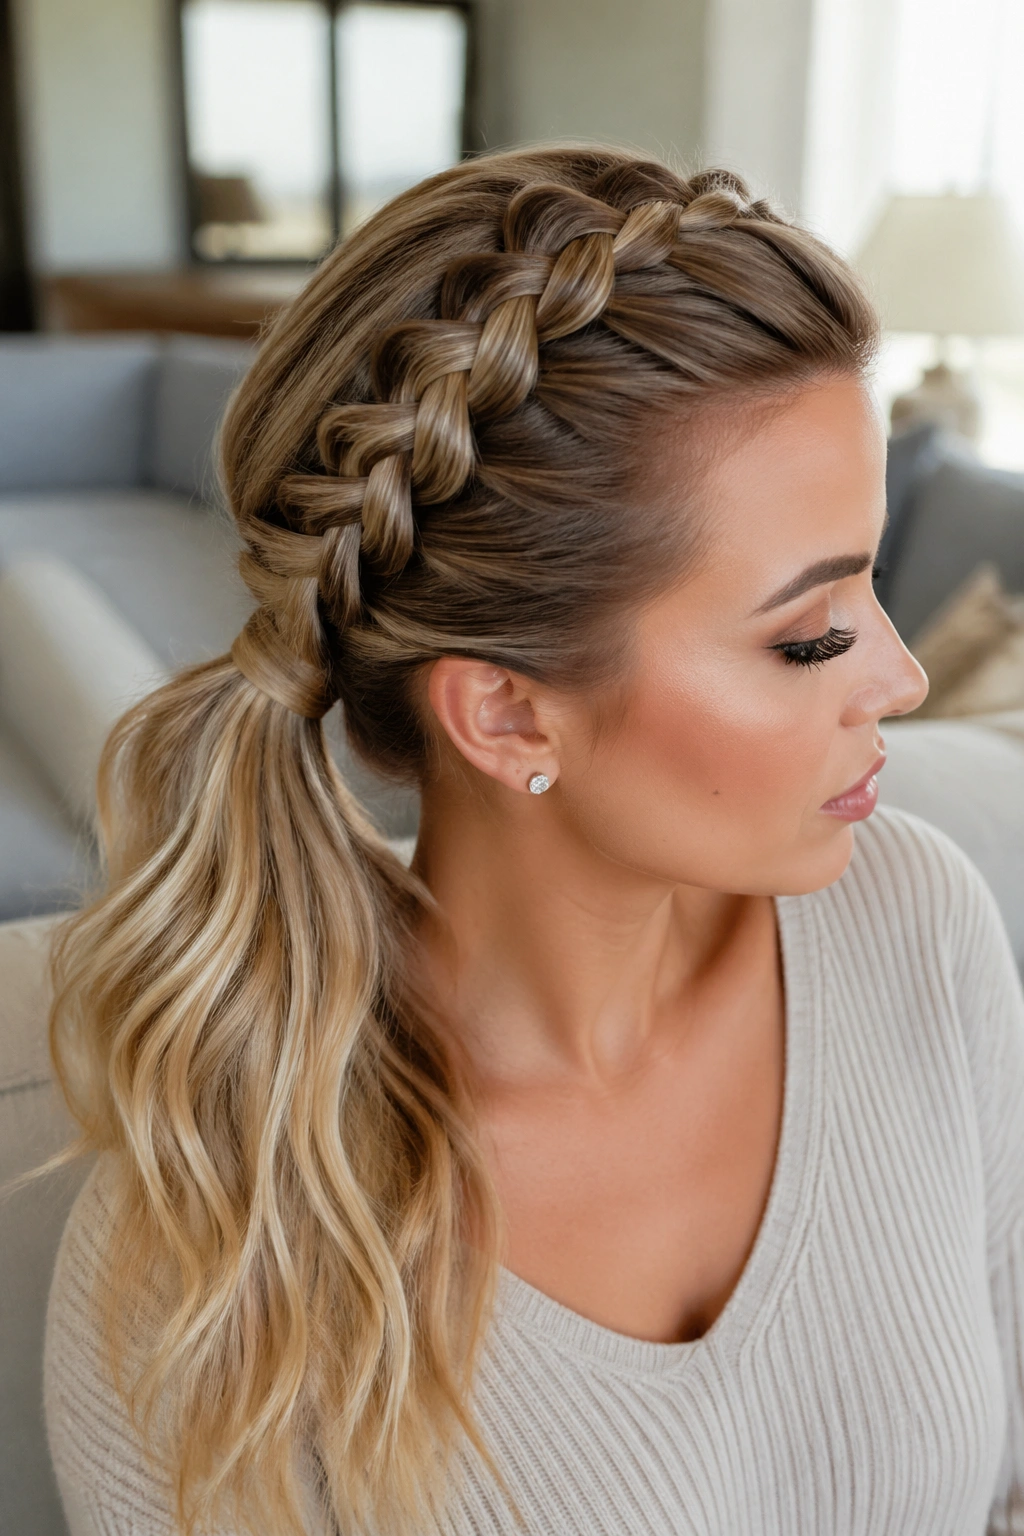
3. Side-Swept Dutch Braid Ponytail
If a center part feels too rigid, this is the softer answer. A side-swept Dutch braid pulls the eye diagonally across the head, which gives long hair a bit of movement before it even reaches the ponytail.
I like this style when the hair has a heavy side or one front piece refuses to behave. Instead of fighting that, work with it. Start the braid near the higher side of the part, sweep it down toward the back of the head, and gather the rest into a ponytail just below the braid’s end. The side angle makes the style feel intentional, not like you changed your mind halfway through.
Who it flatters
- Rounder faces that benefit from a diagonal line
- Thick hair that needs a little visual shape
- Long layered hair that tends to fall forward
Keep the braid close to the scalp. That’s the whole point.
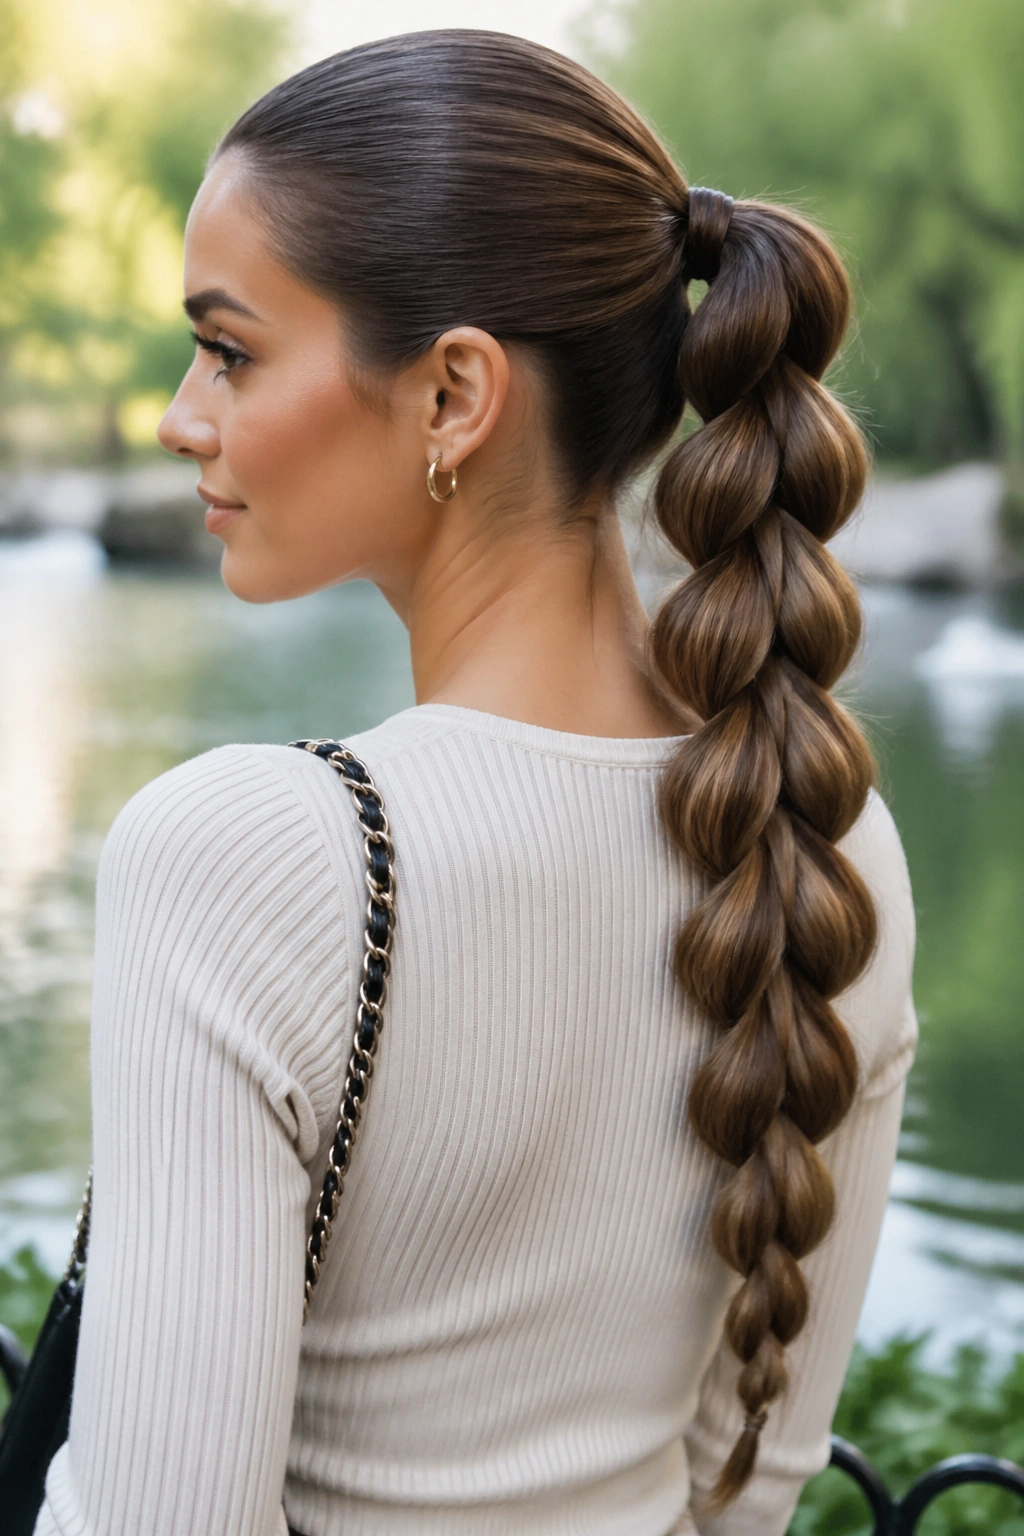
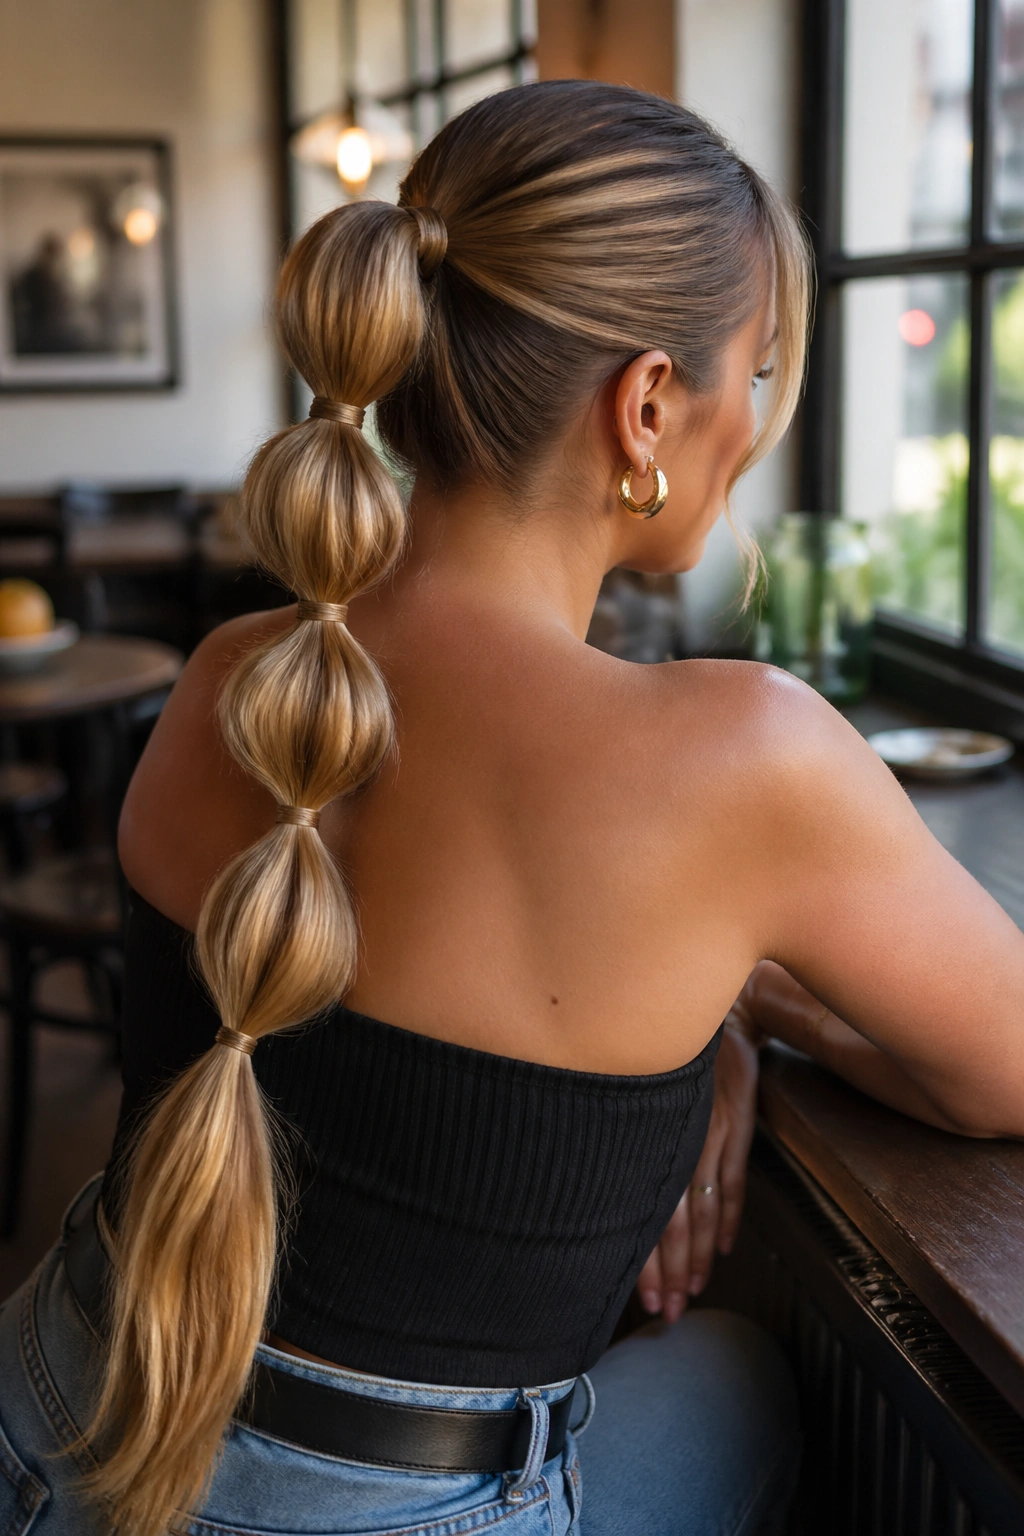
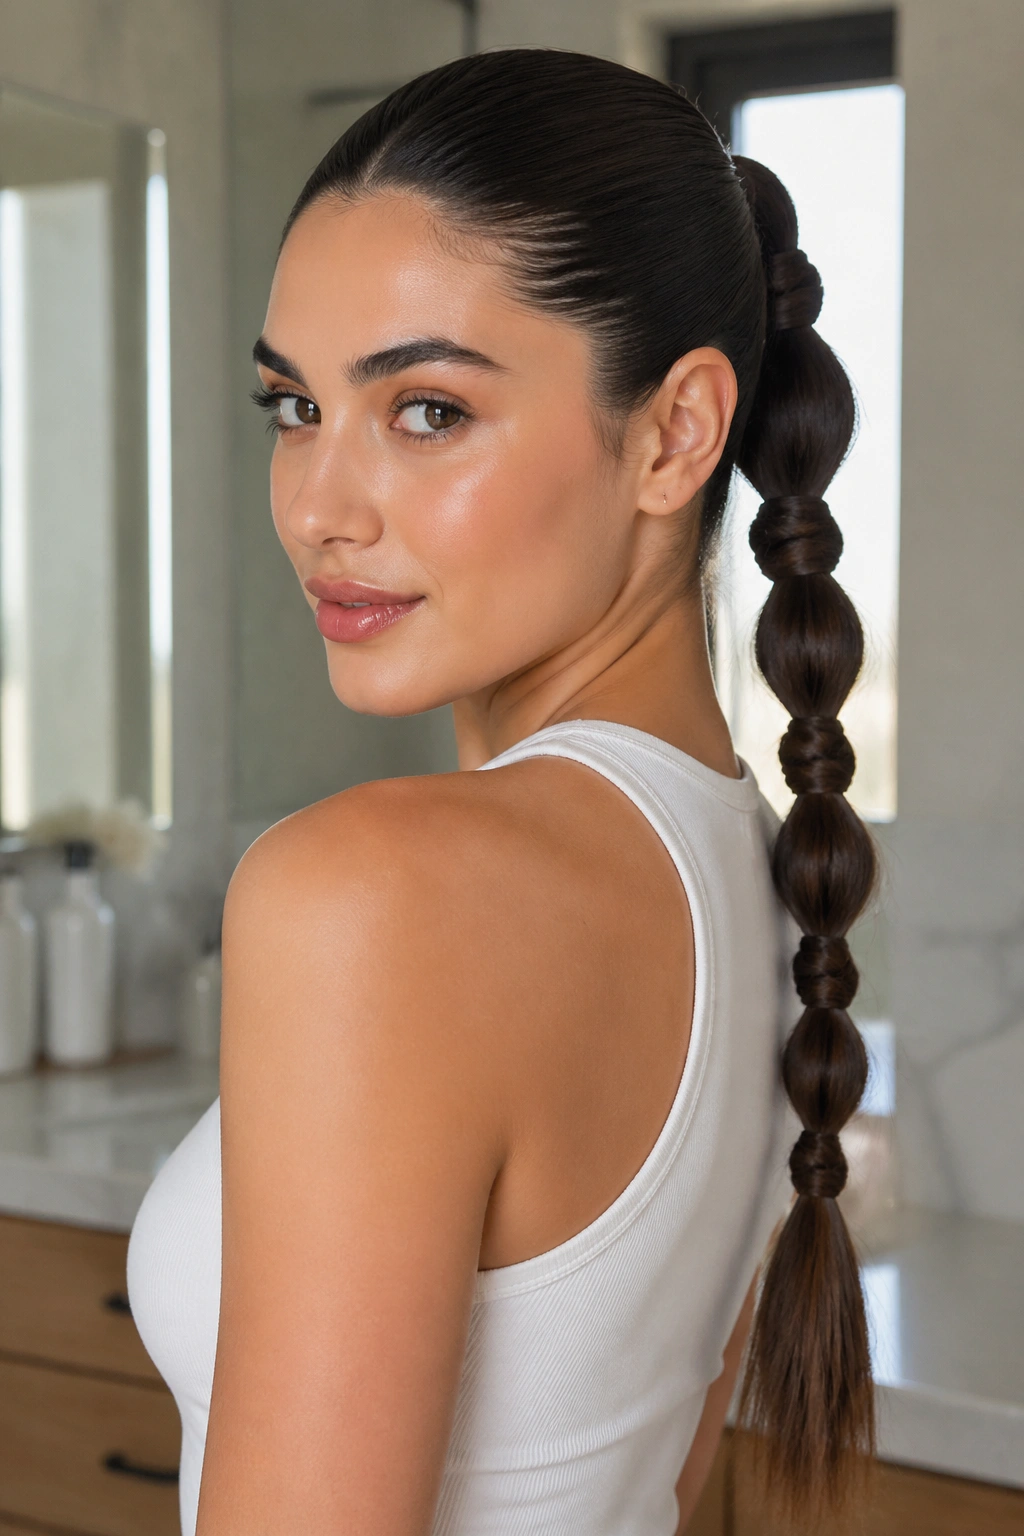
4. Bubble Braid Ponytail
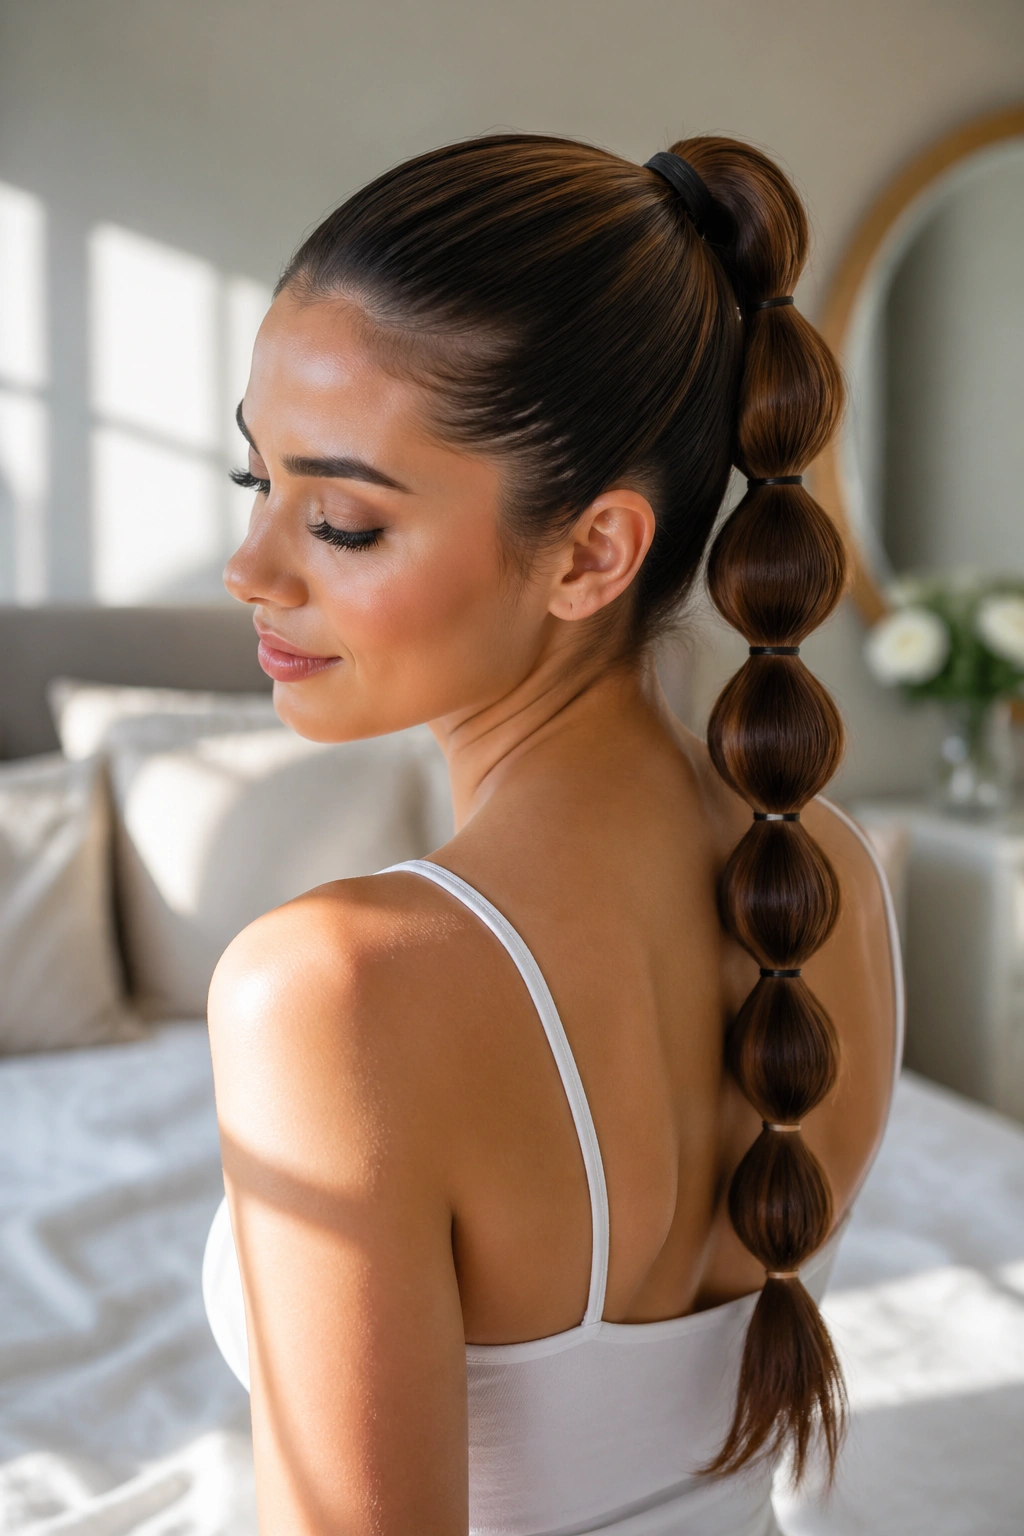
Bubble braids are one of the easiest ways to make long hair look fuller. They are not technically complicated, and that’s why I keep coming back to them. Once the root section is smooth and tight, the rest is just spacing elastics along the tail and gently tugging each segment into a rounder shape.
For a sleek version, use clear elastics every 1½ to 2 inches. The bubbles should be evenly sized, and the hair between them needs to stay smooth, not messy. A little spray wax or smoothing cream helps if your hair has flyaways that pop up the second you touch it.
This style is especially useful when the hair is very long and feels too heavy for a single braid. The bubbles break up the length, so the ponytail looks styled instead of dragged down by its own weight.
5. Rope Braid Ponytail
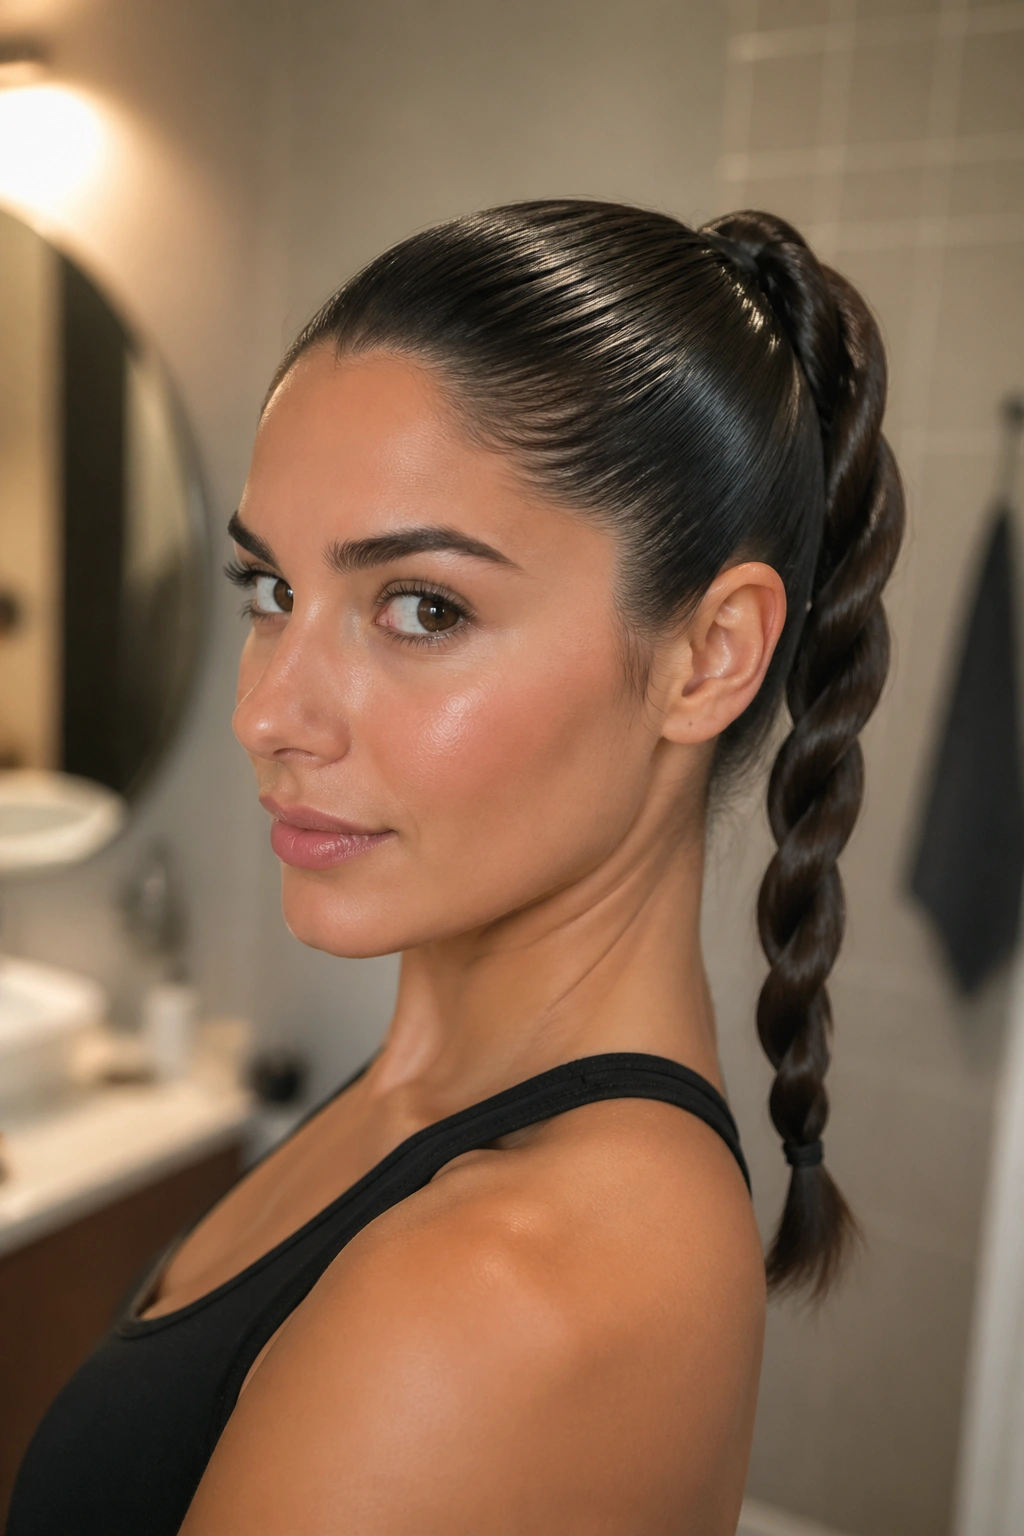
A rope braid has a cleaner, tighter look than a three-strand braid, and that’s exactly why it works so well on long hair. Two sections twisted in the same direction, then wrapped around each other in the opposite direction, create a slim spiral that feels neat without needing a lot of fuss.
I like rope braids for glossy hair. They show off shine, and they don’t fray as fast as some looser braid patterns. If your hair is very slippery, prep the lengths with a small amount of cream before you start twisting. Too much product will make the braid look greasy, so go light.
This is one of those styles that looks more difficult than it is. It just needs even tension. If one side gets looser than the other, the spiral starts to lean, and long hair makes that imbalance easy to spot.
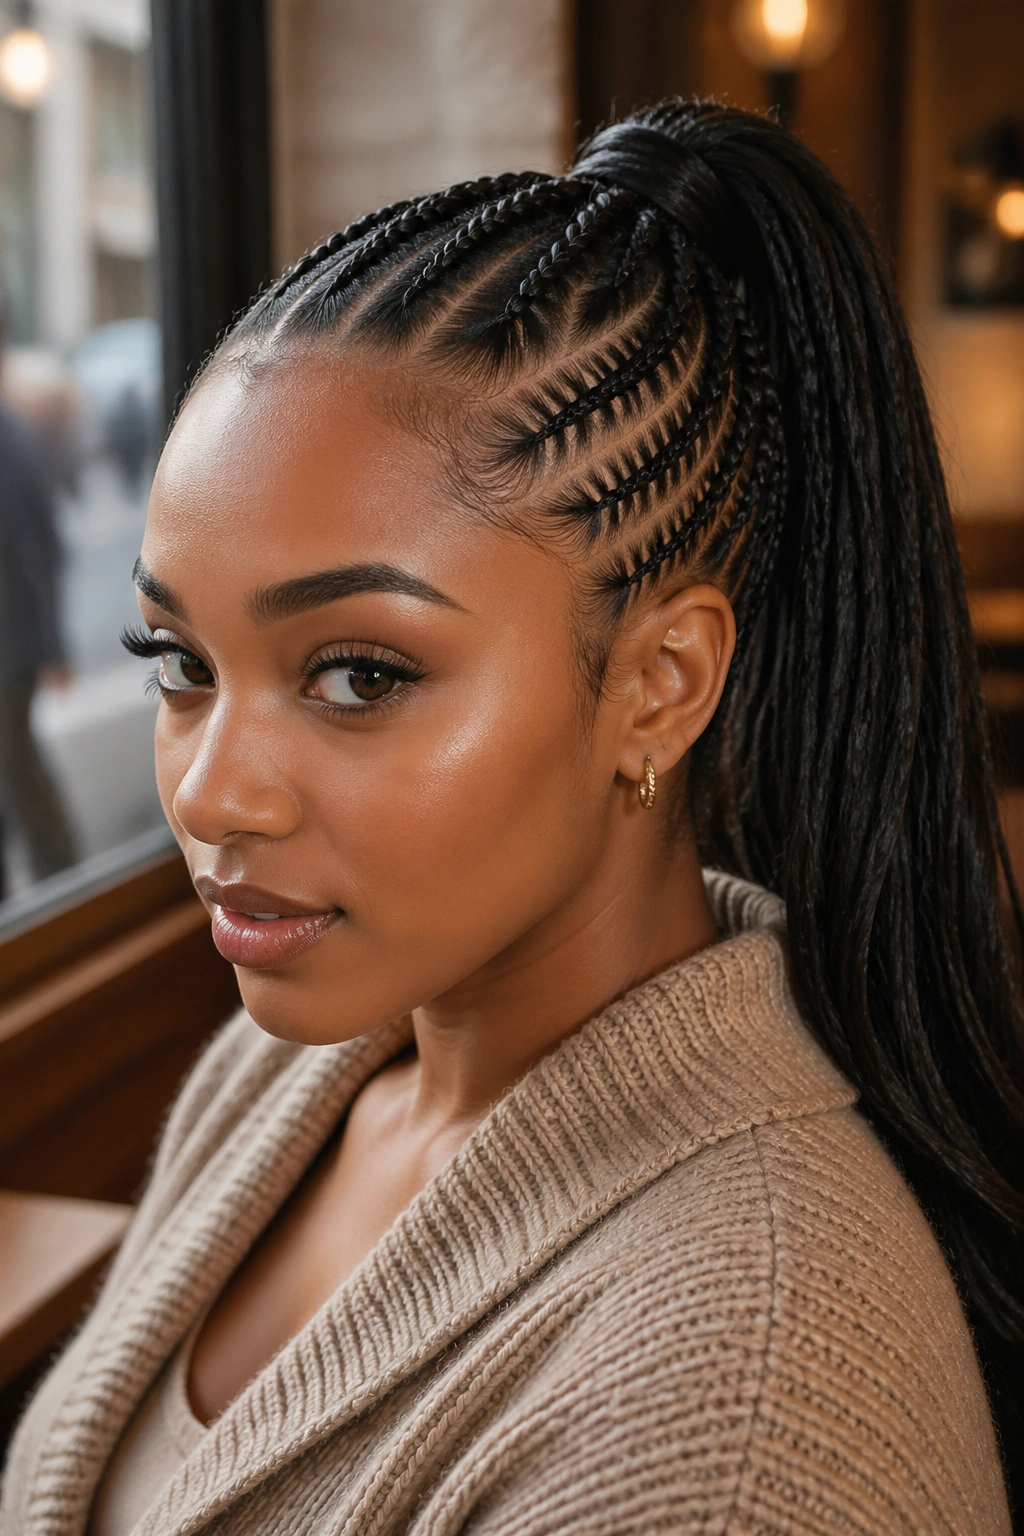
6. Cornrow Ponytail
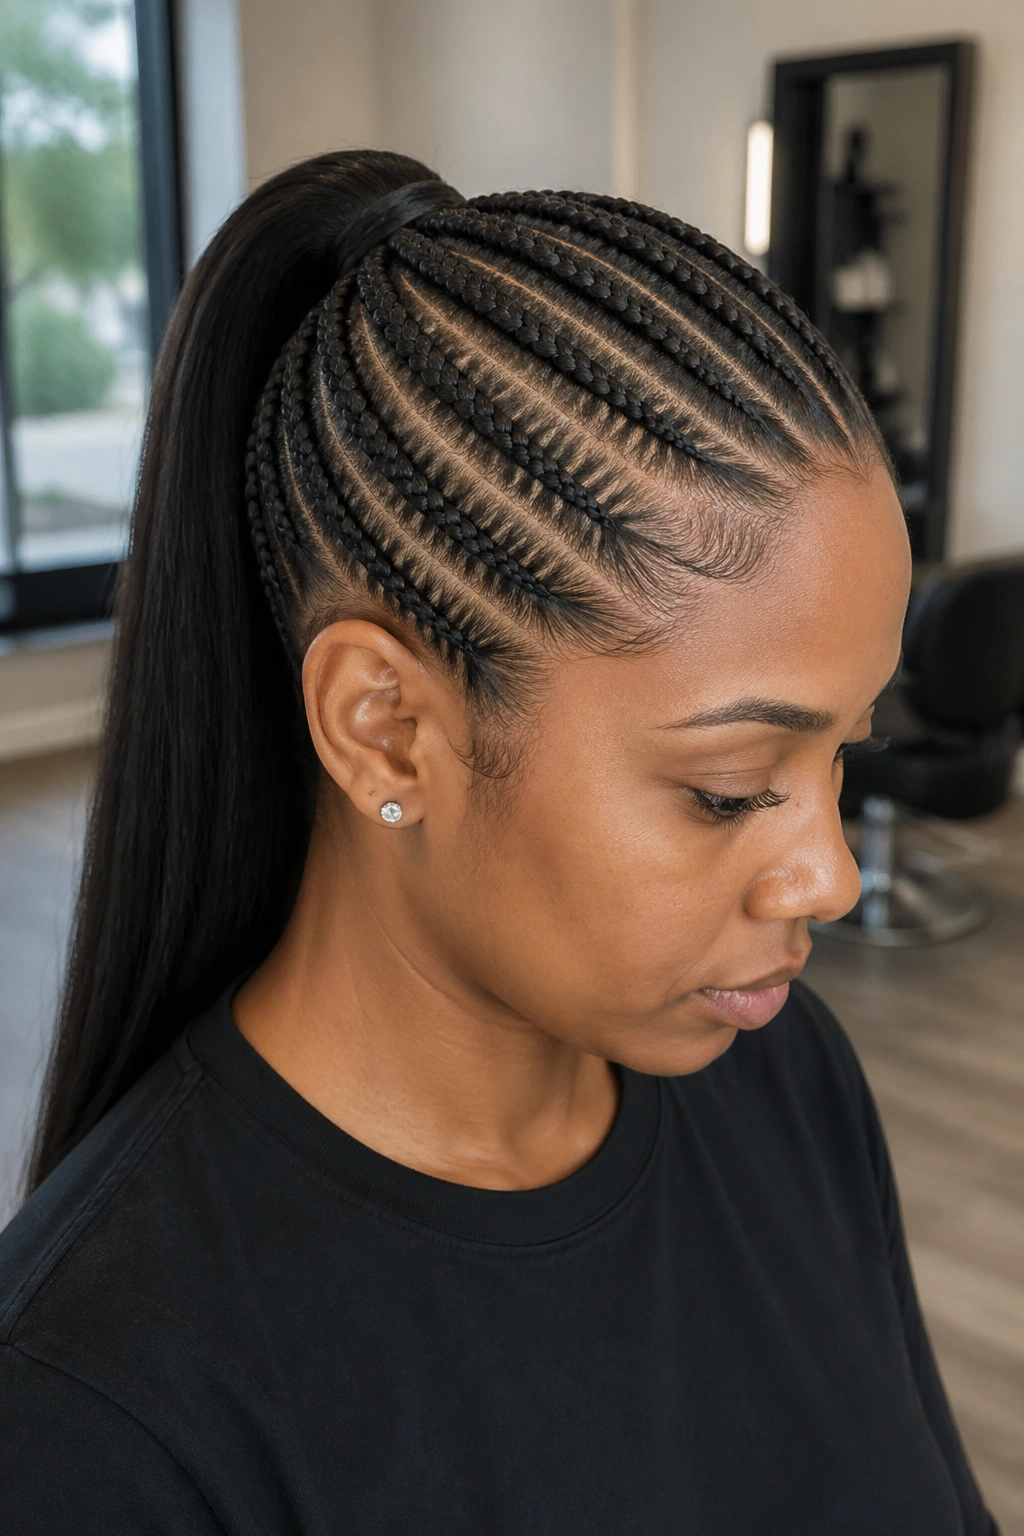
Need every short layer and baby fringe pinned down? Cornrows are the answer. A sleek cornrow ponytail keeps the scalp flat and the roots tidy, then lets the length fall in one controlled tail at the back or high at the crown.
The best version uses straight, even parting. If you’re doing the style on yourself, map the sections first with the tail of a comb and keep the parts crisp before you start braiding. Cornrows can feel tight if they’re done carelessly, so the goal is secure, not painful. A good braid sits close without tugging at the edges.
What makes it work
- Flat scalp sections stop puffiness at the root
- The ponytail base stays anchored longer
- Long hair gets a sharper silhouette
- The style holds up well on busy days
No fluff. Just structure.
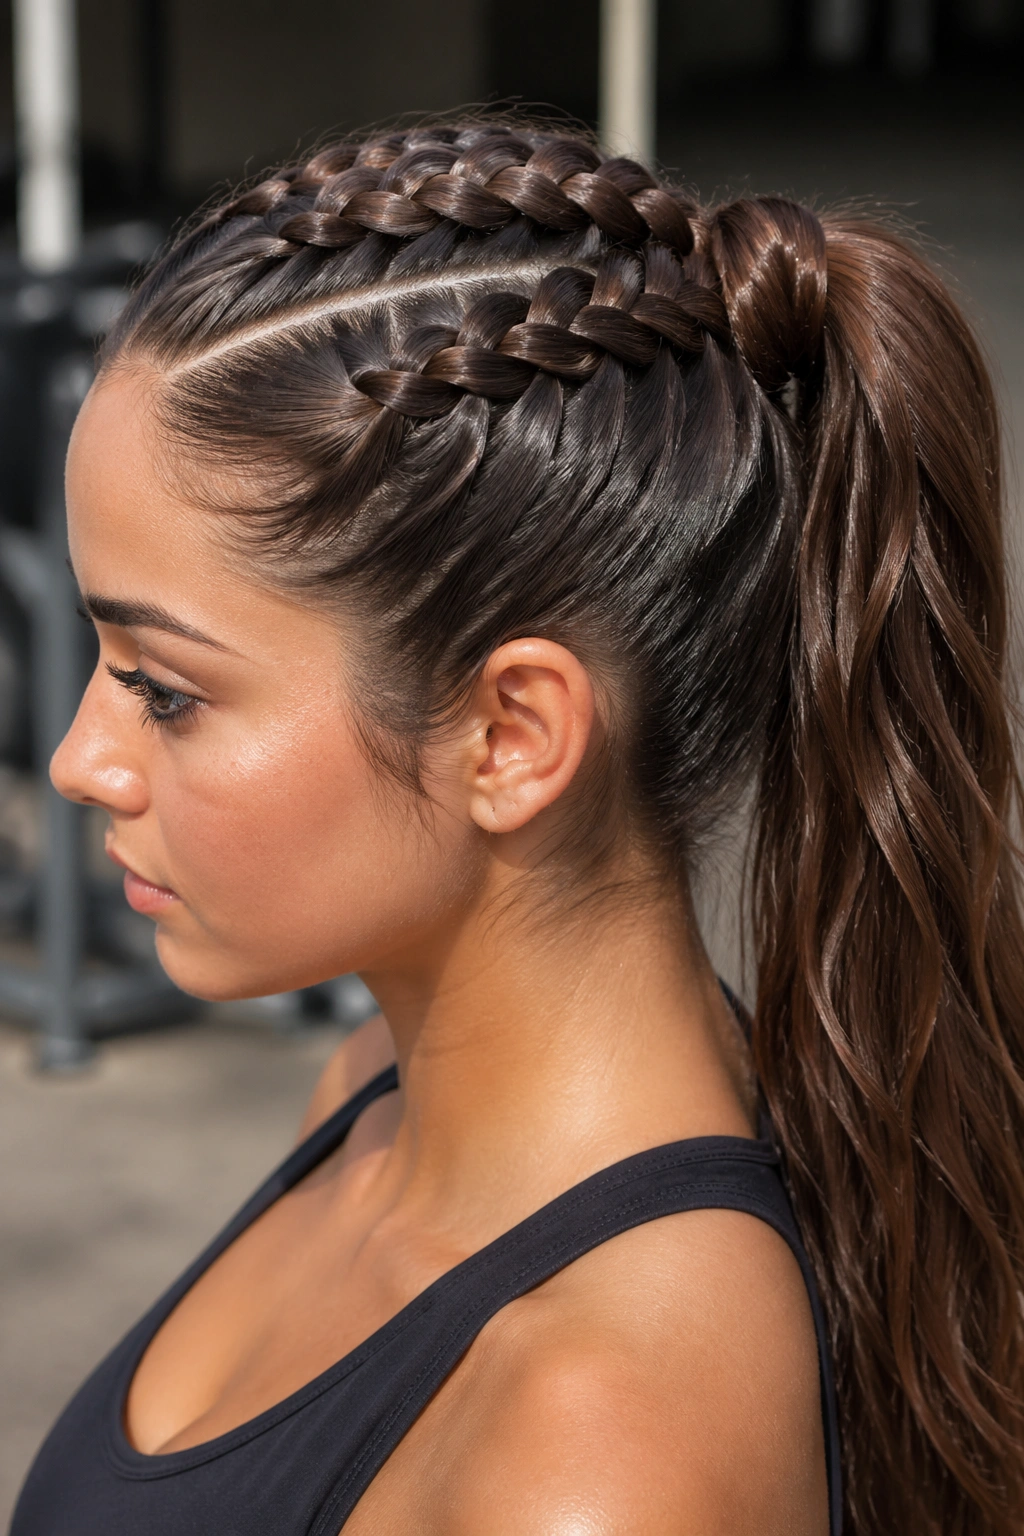
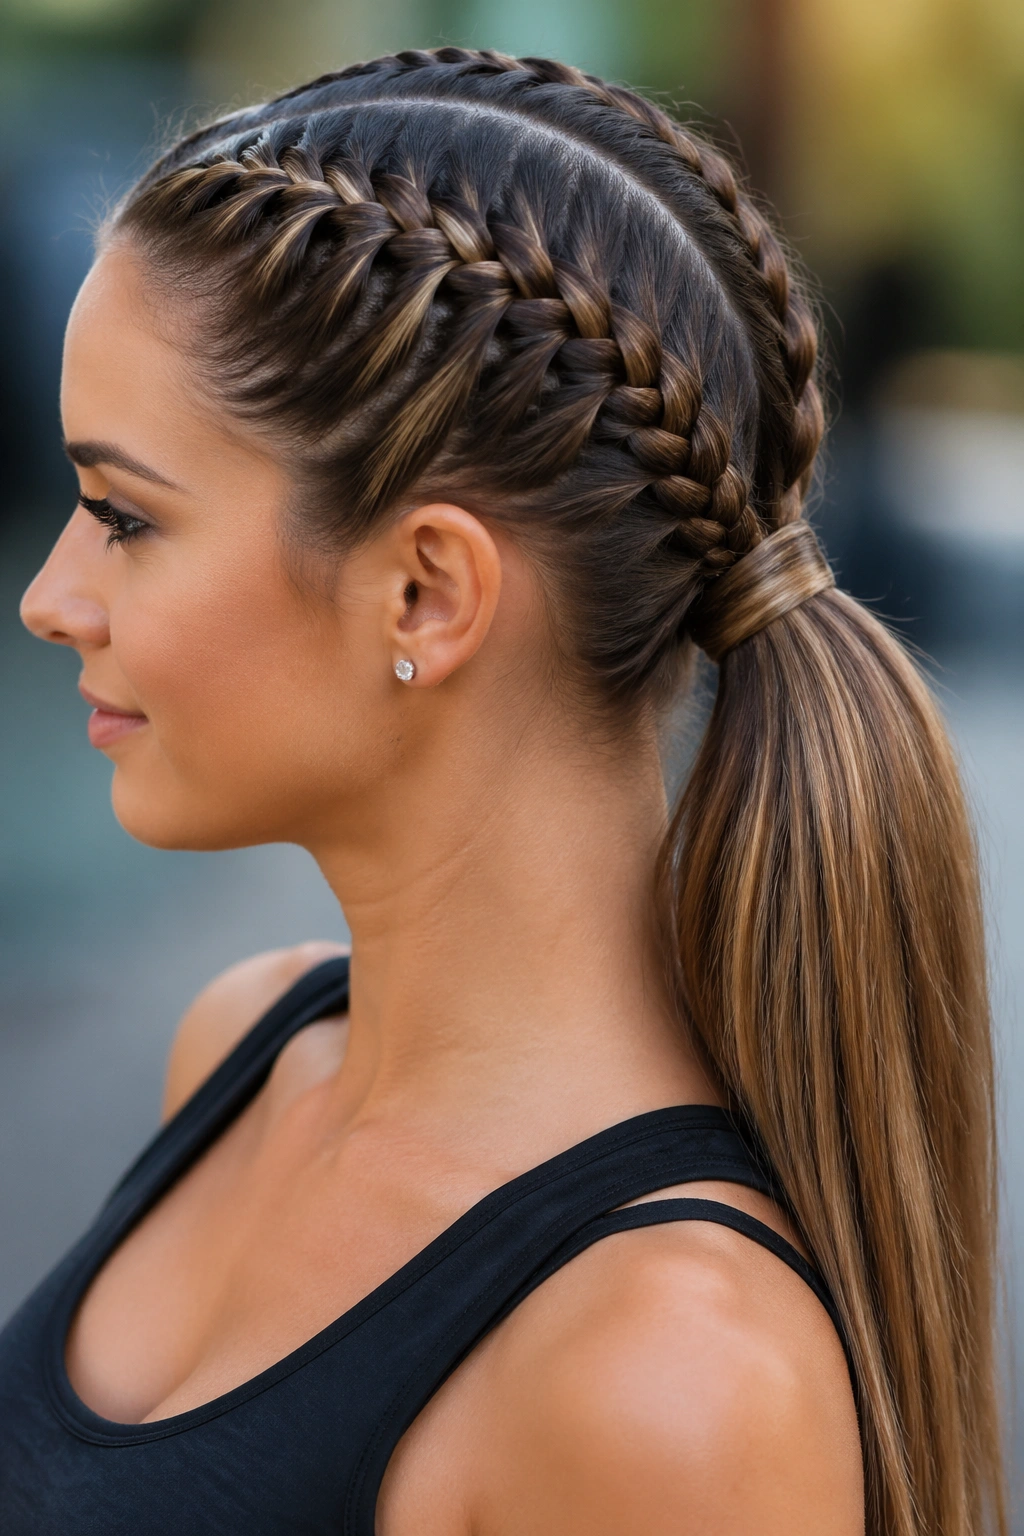
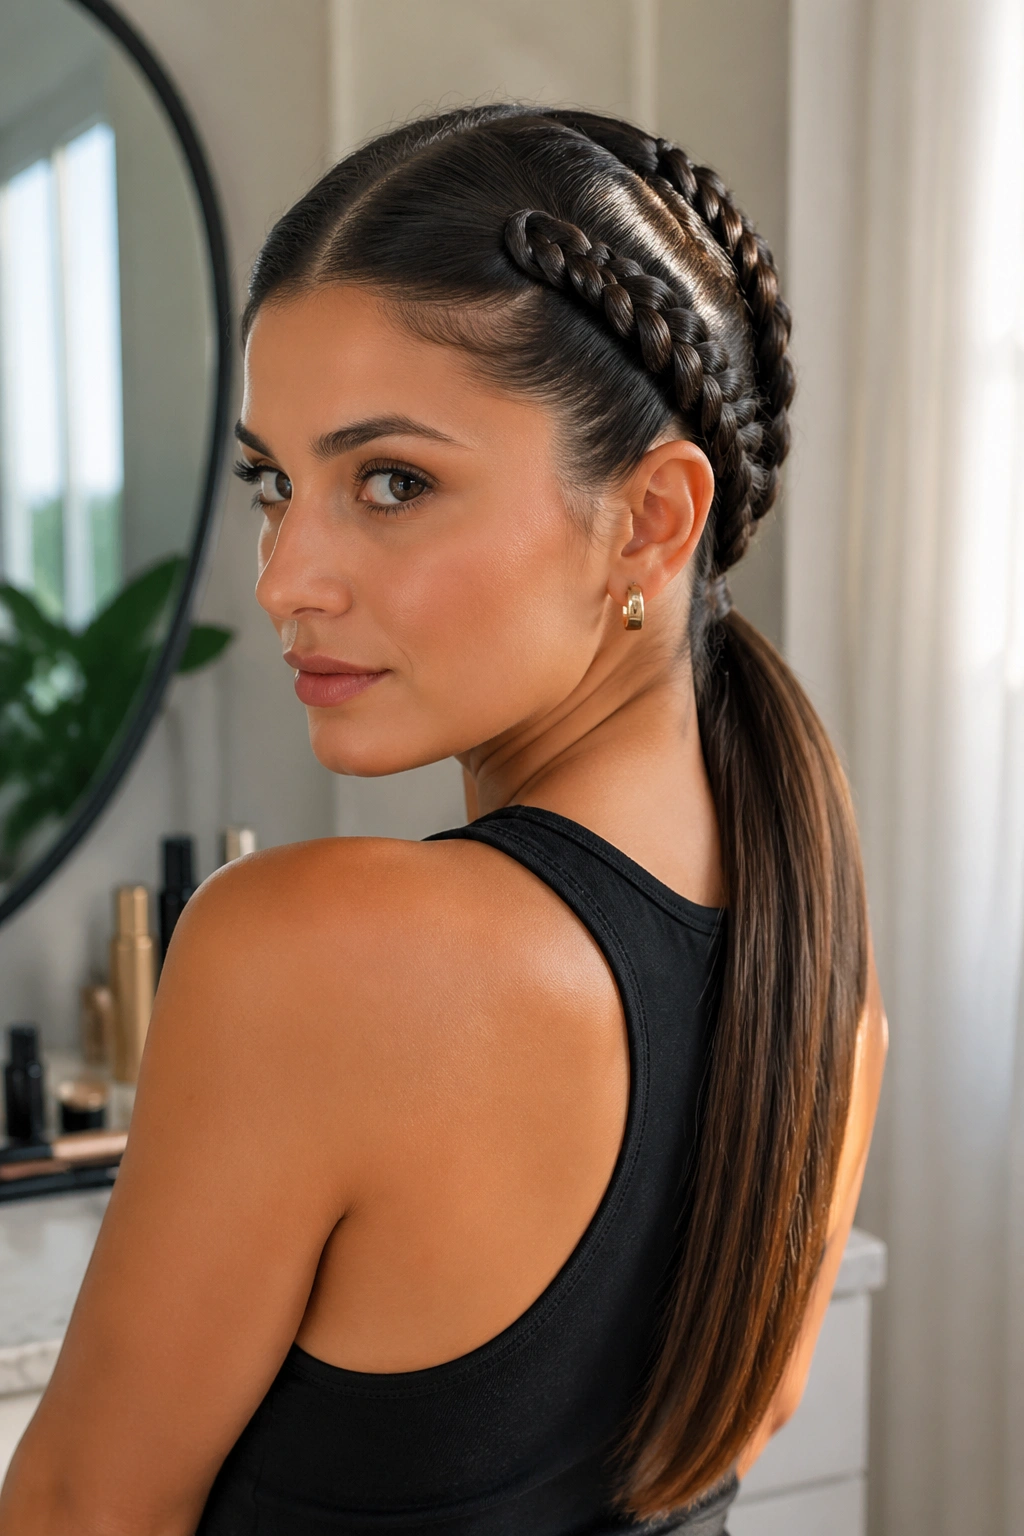
7. Boxer Braid Ponytail

Boxer braids into a ponytail have that athletic, clean look that never feels fussy. Two Dutch braids run along the scalp, meet at the back, and get gathered into one ponytail. On long hair, the result is strong and smooth, with enough texture to keep it from looking plain.
I reach for this shape when the hair needs to stay off the face but still look deliberate. The center part should be exact, and the two braids should mirror each other as closely as possible. If one side starts lower than the other, the whole style reads crooked.
The ponytail at the end can be straight, waved, or braided again. I usually leave the tail sleek and long, because the contrast between the tight top and the smooth fall is what gives the style its punch.
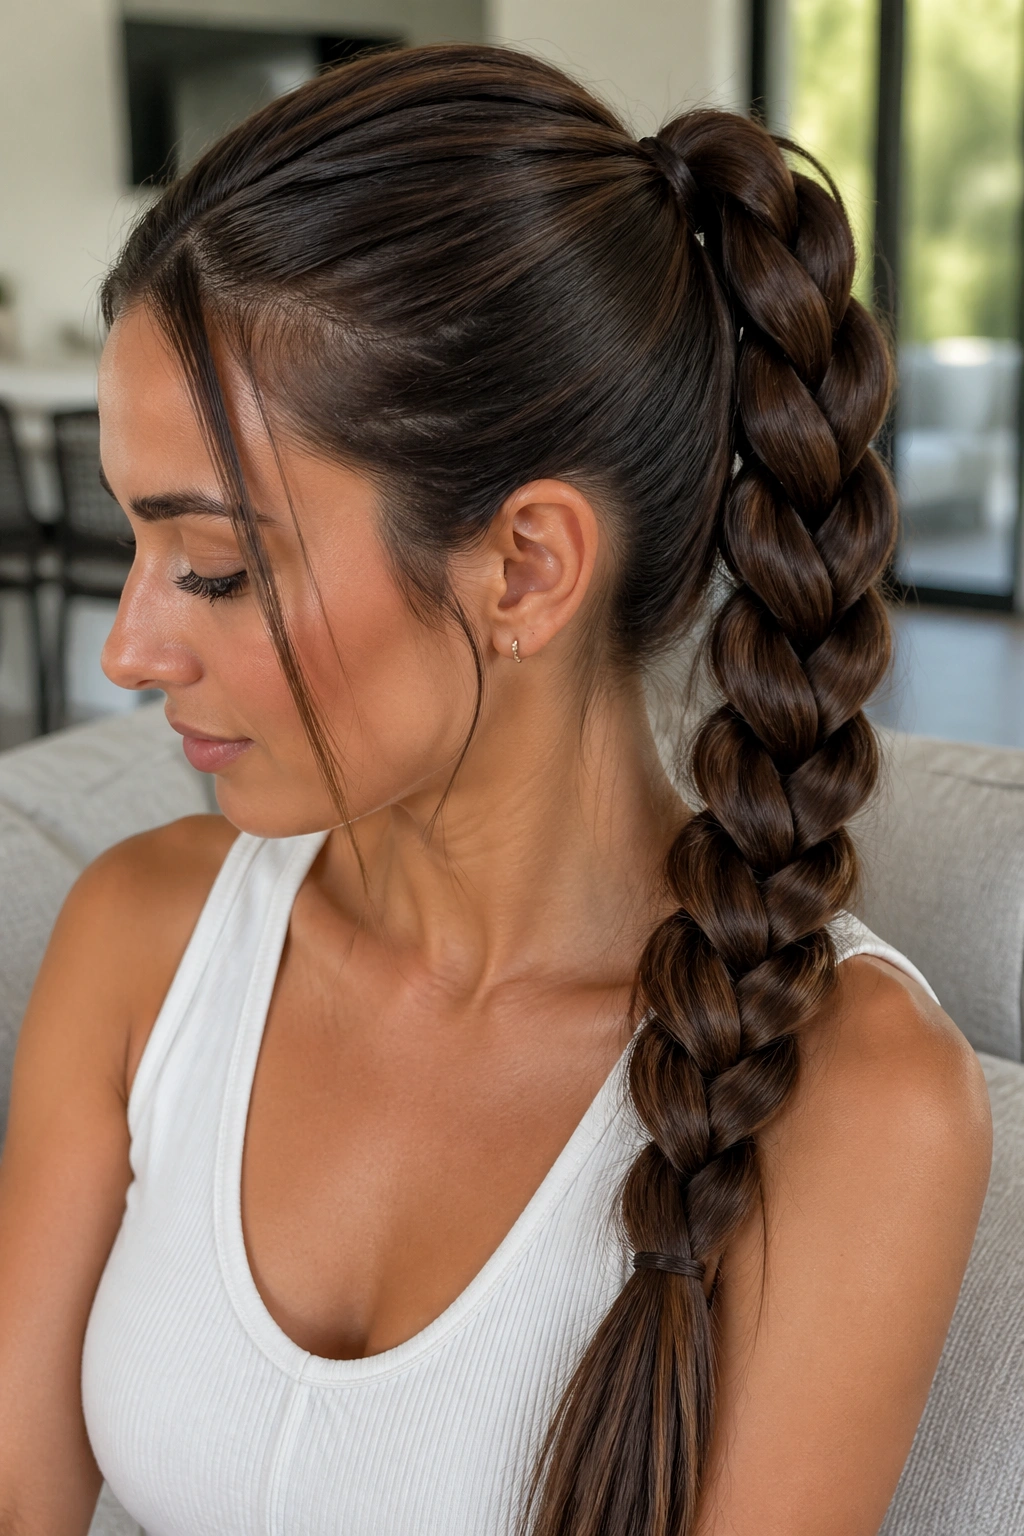
8. Four-Strand Braided Ponytail
Why does a four-strand braid look so rich? Because the extra strand creates a denser weave, and long hair gives that pattern enough length to actually show. You get more texture without needing more accessories.
It’s a little more technical than a standard braid, but it’s worth learning if you wear your hair long and straight. The braid reads crisp from root to tip, and the finished ponytail looks fuller than it would with a three-strand version. A tiny bit of mousse on damp hair can help the strands hold together if your hair slips easily.
A clean way to think about it
One hand holds the outer sections.
The other keeps the middle sections even.
That’s the part people overcomplicate. Once the tension stays consistent, the braid settles into a sleek, woven rope that holds its shape well. It’s the kind of style that makes plain hair look like you spent more time on it than you did.
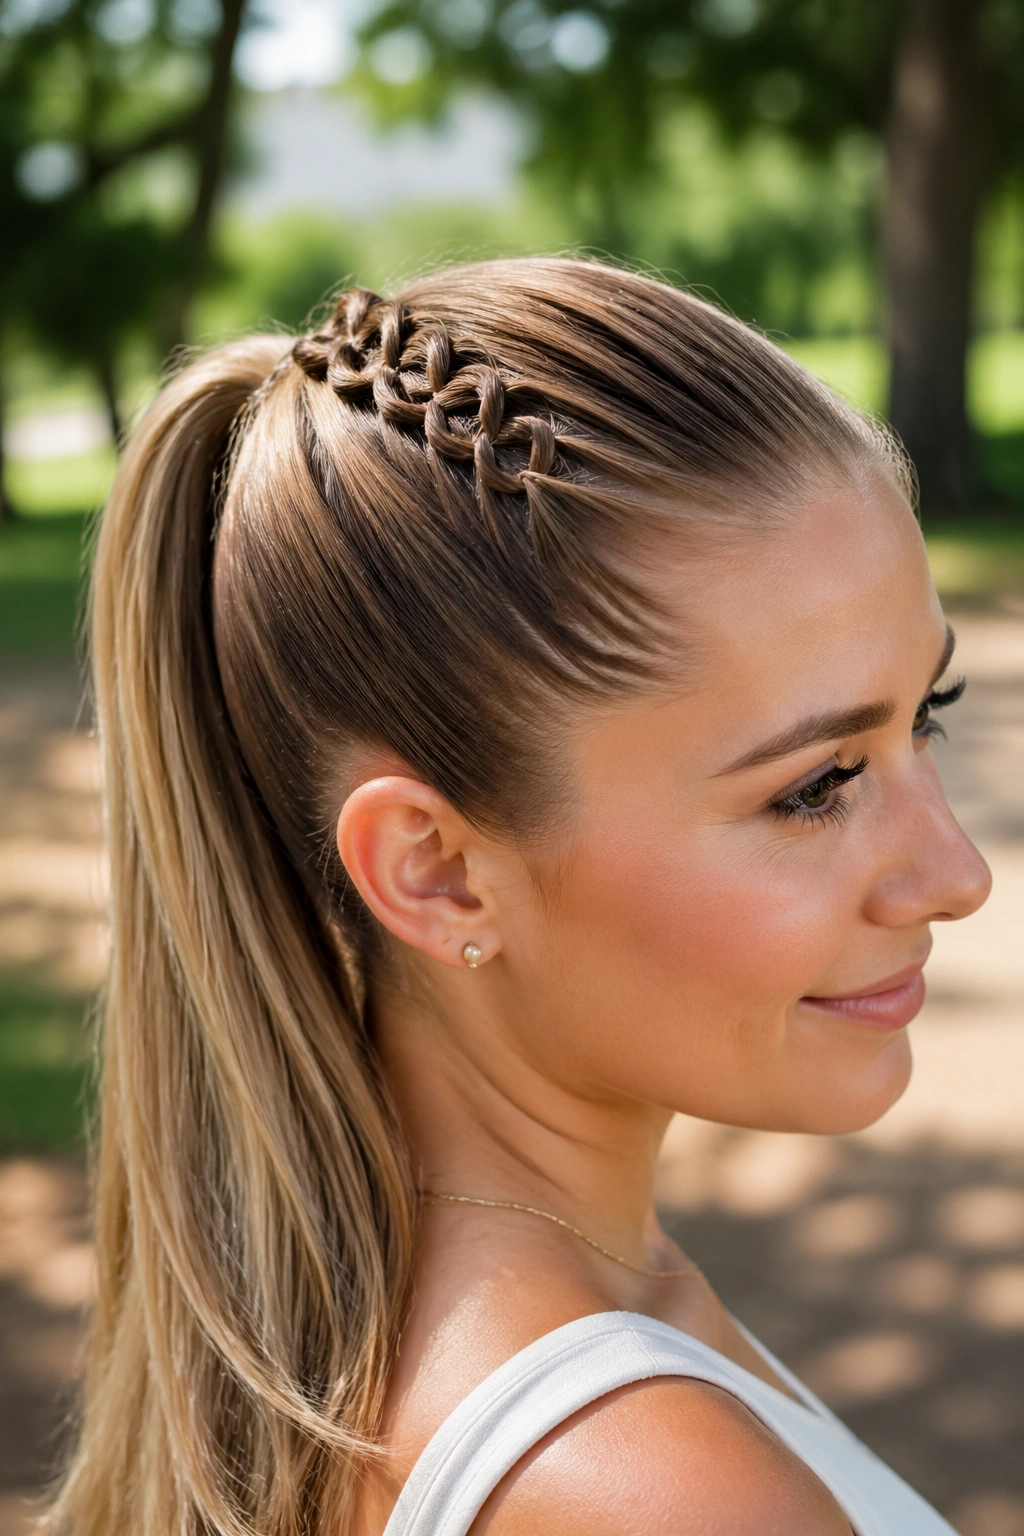
9. Pull-Through Braided Ponytail
A pull-through braid is the closest thing to a cheat code in this whole group. It gives the look of a thick braid, but the structure comes from a chain of tiny ponytails secured with elastics. On long hair, that means instant volume without having to wrestle with slippery sections.
I like this style for thick hair that refuses to stay neat in a classic braid. You separate the hair into stacked sections, loop each one through the next, then gently fan them out. The result feels bigger and more graphic than a standard braid. Keep the base smooth, though. That polished root is what keeps the style from looking messy.
It also works well when you want a long ponytail to look intentional from every angle. From the front, it stays sleek. From the back, it has structure.
10. French Braid Ponytail
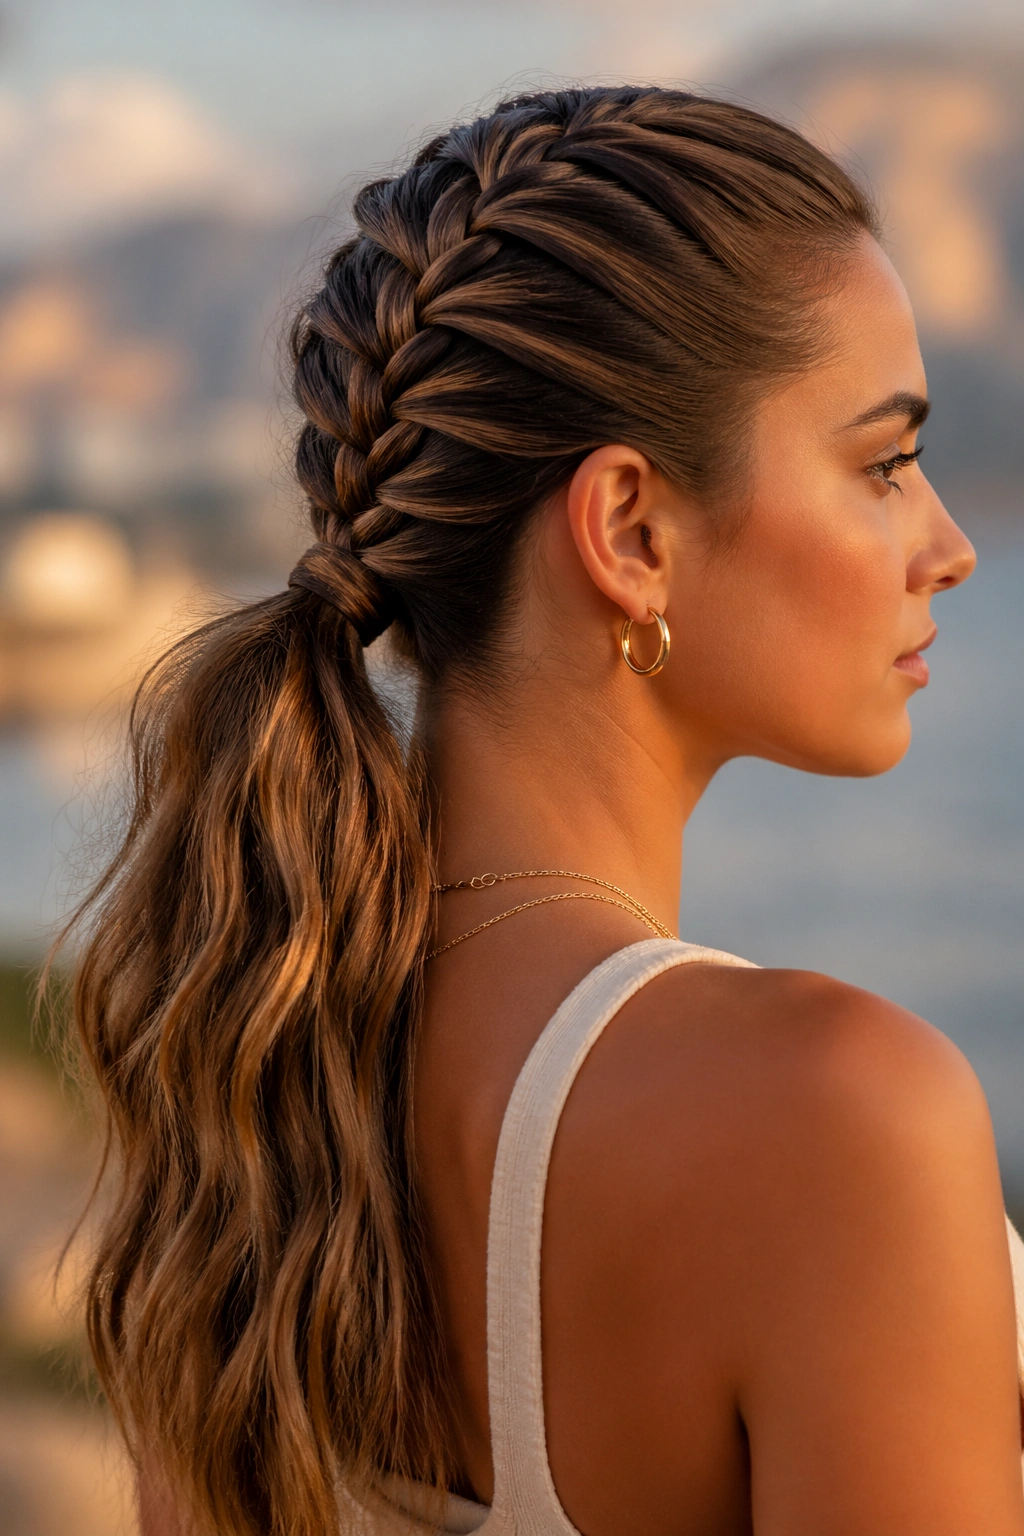
A French braid into a ponytail is the kind of style I recommend when someone wants one look that can do almost everything. The braid starts at the crown, picks up hair as it moves back, and merges into a ponytail once it reaches the nape or higher.
The appeal is the balance. The top stays smooth, the braid gives you texture, and the ponytail can hang straight or curled. Long hair makes the braid especially pretty because the added length gives the woven section a longer runway before it becomes the tail.
Keep the sections even as you braid. If you start loose and try to tighten later, the top will look uneven, and sleek styles do not forgive that very well.
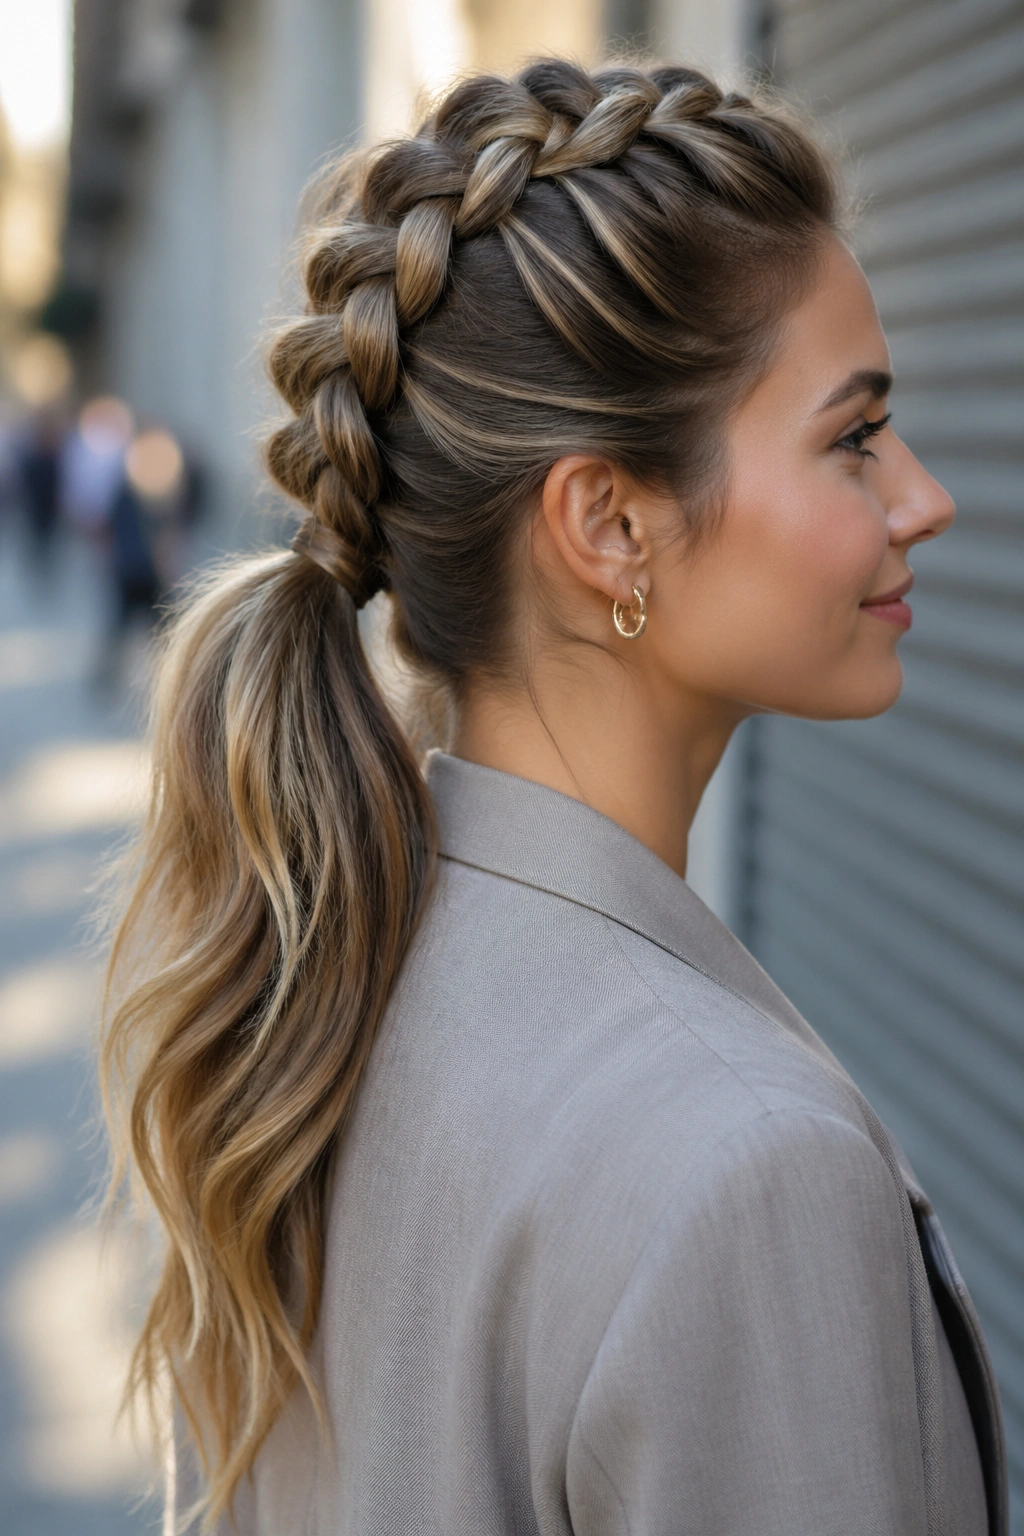
11. Double Dutch Braid Ponytail
Two Dutch braids can look sporty, but they can also look sharp and polished when the parts are clean and the finish is glossy. Once the braids reach the back of the head, gather them into one ponytail and smooth the tail with a brush or serum.
This is a smart pick for very long hair because the double structure helps distribute the weight. The roots stay controlled, and the braid pattern makes the style feel secure. I’d choose this over a single braid when the hair is thick enough to overwhelm a simpler style.
Best when you want
- A center part that stays crisp
- A secure base for long wear
- A more graphic shape through the crown
- A ponytail that won’t collapse by midday
It’s not delicate. That’s the charm.
12. Infinity Braid Ponytail
What makes an infinity braid interesting is the repeating figure-eight pattern. It looks intricate even when the rest of the style stays plain, which is handy if you want a sleek ponytail but do not want a full head of braiding.
I like this best as a center detail that leads into a ponytail, not necessarily as the whole tail. That placement keeps the style clean and stops it from looking too busy on long hair. The braid should sit flat against the head, and the sections need to stay narrow so the pattern stays visible.
Where to use it
- Along the crown before a ponytail
- As a single statement braid on one side
- In a low ponytail for a dressier finish
It’s a little fiddly at first, but once the pattern clicks, it has a very neat payoff.
13. Wrapped Base Braid Ponytail
A braided base can rescue a plain ponytail in about two minutes. You braid a small section first, wrap it around the elastic, and pin or tuck the end underneath so the base disappears into the style. That tiny move makes the ponytail look finished instead of thrown together.
Long hair benefits a lot from this trick because the length already gives you drama. The base just needs to look clean. A wrapped section hides the elastic, smooths the transition from braid to tail, and keeps the hairline from looking bulky.
No one talks about this enough.
The style works especially well when the rest of the ponytail is straight and glossy. You get one neat detail right where the eye lands first, then the length falls cleanly behind it.
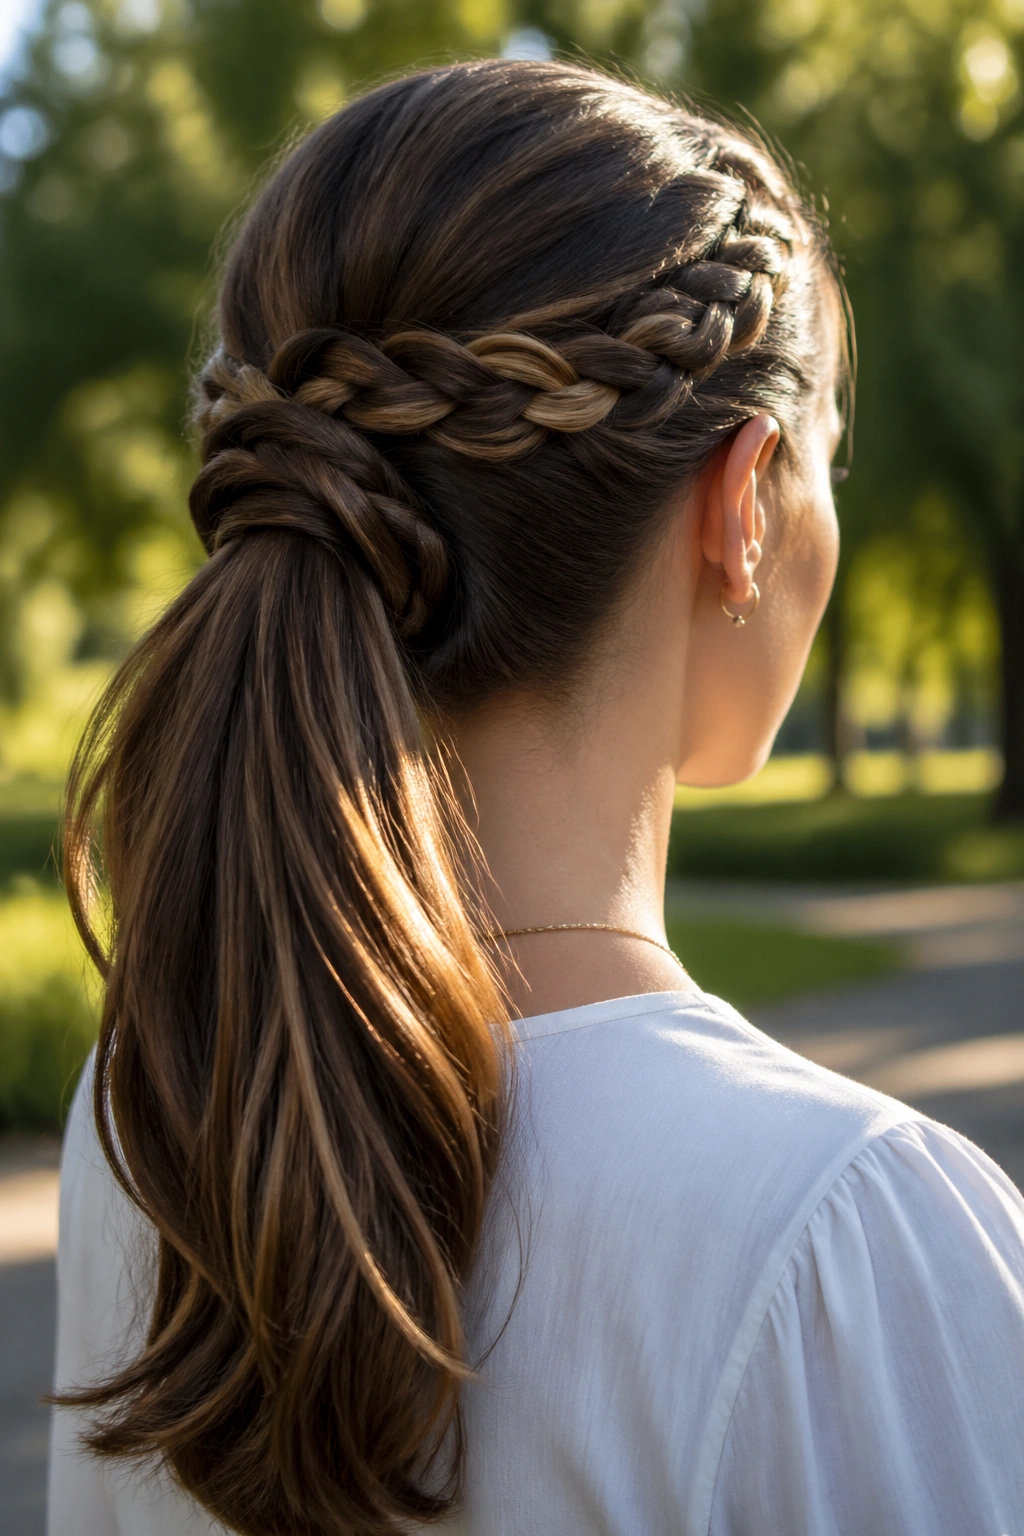
14. Crown Braid Ponytail
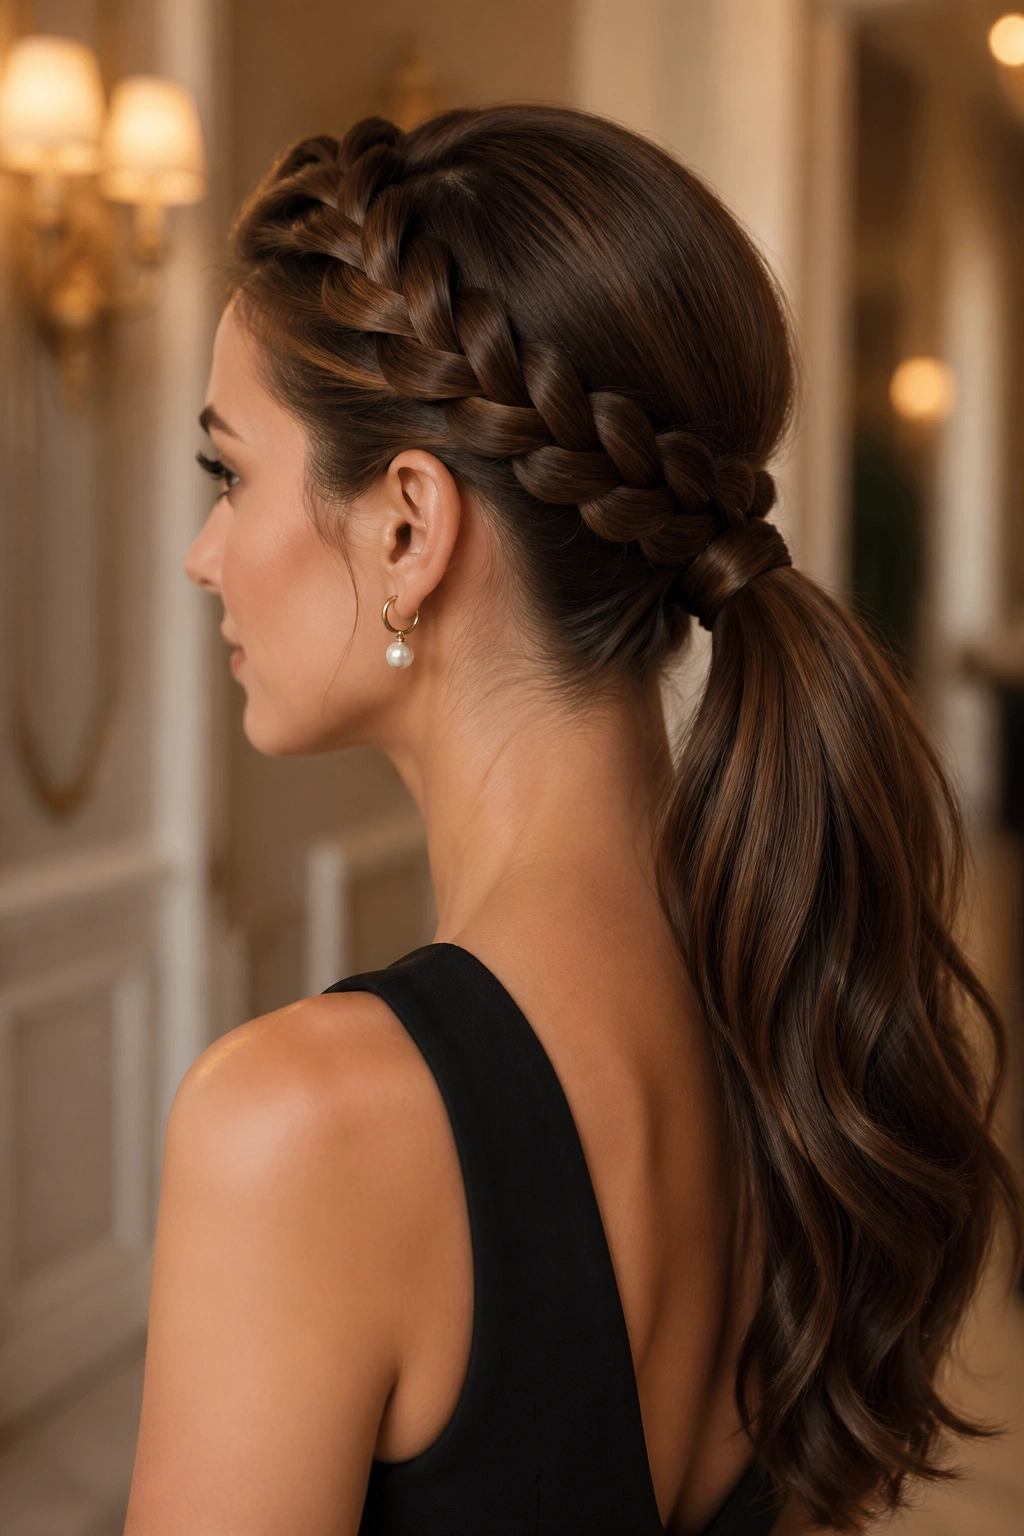
A crown braid into a ponytail gives you a polished shape around the hairline before the tail even starts. It circles the head or sweeps across the top like a band, then merges into a ponytail at the back. On long hair, that means structure without a helmet-like feel.
This is one of my favorite looks for dressier settings because it keeps the front soft while the braid does the work. The crown section should lie close to the head, not puff out. A little edge control around the temples and nape keeps the curve neat.
A few things that help
- Part the hair first, then braid
- Keep the braid width even
- Anchor the ponytail low enough to show the braid
- Smooth the tail after tying it off
It’s graceful without being fussy, which is rare.
15. Triple Bubble Braid Ponytail
If one row of bubbles feels too simple, stack three of them down a long ponytail. The effect is playful but still sleek at the crown, which is what keeps it from drifting into costume territory. The base matters more than people think. Get that part flat, and the rest of the style can have a little fun.
Use small elastics to create evenly spaced sections, then gently pull each segment into a rounder bubble. On very long hair, I prefer slightly larger gaps between the elastics so the braid reads clearly from a distance. Too many tiny bubbles can look busy.
This style is a good fit for thick hair or extensions. It uses length well. That’s the main point.
16. Inside-Out Braid Ponytail
An inside-out braid, sometimes called a reverse braid, pushes the woven sections outward instead of tucking them in. That gives the braid a more raised, three-dimensional look while the crown can still stay flat and sleek.
I like it because it changes the silhouette without making the style loose. Long hair tends to swallow small details, but this braid keeps its shape. Start at the front or slightly off-center, braid tightly, and gather the tail once the braid reaches the point where you want the ponytail to begin.
It’s a good choice if a standard French braid feels too familiar. The reverse texture gives the ponytail a little more presence.
17. Pancaked Braid Ponytail
A pancaked braid is one where you gently pull the loops wider after braiding, and on long hair that little adjustment can be the difference between flat and full. The crown can stay sleek while the braid body itself gets softer and wider.
That contrast is what makes the style interesting. Tight roots, fuller braid, smooth tail. I would not pancake the whole head if you still want a refined finish. Do it only on the braid section, and keep the top pulled close so the style does not lose shape.
What to watch for
- Pull the braid apart slowly
- Support the braid with one hand while you widen it
- Stop before the pattern gets too loose
- Finish with a light mist of hairspray
Too much pulling turns it into fuzz. A little goes a long way.
18. Ribbon-Woven Braided Ponytail
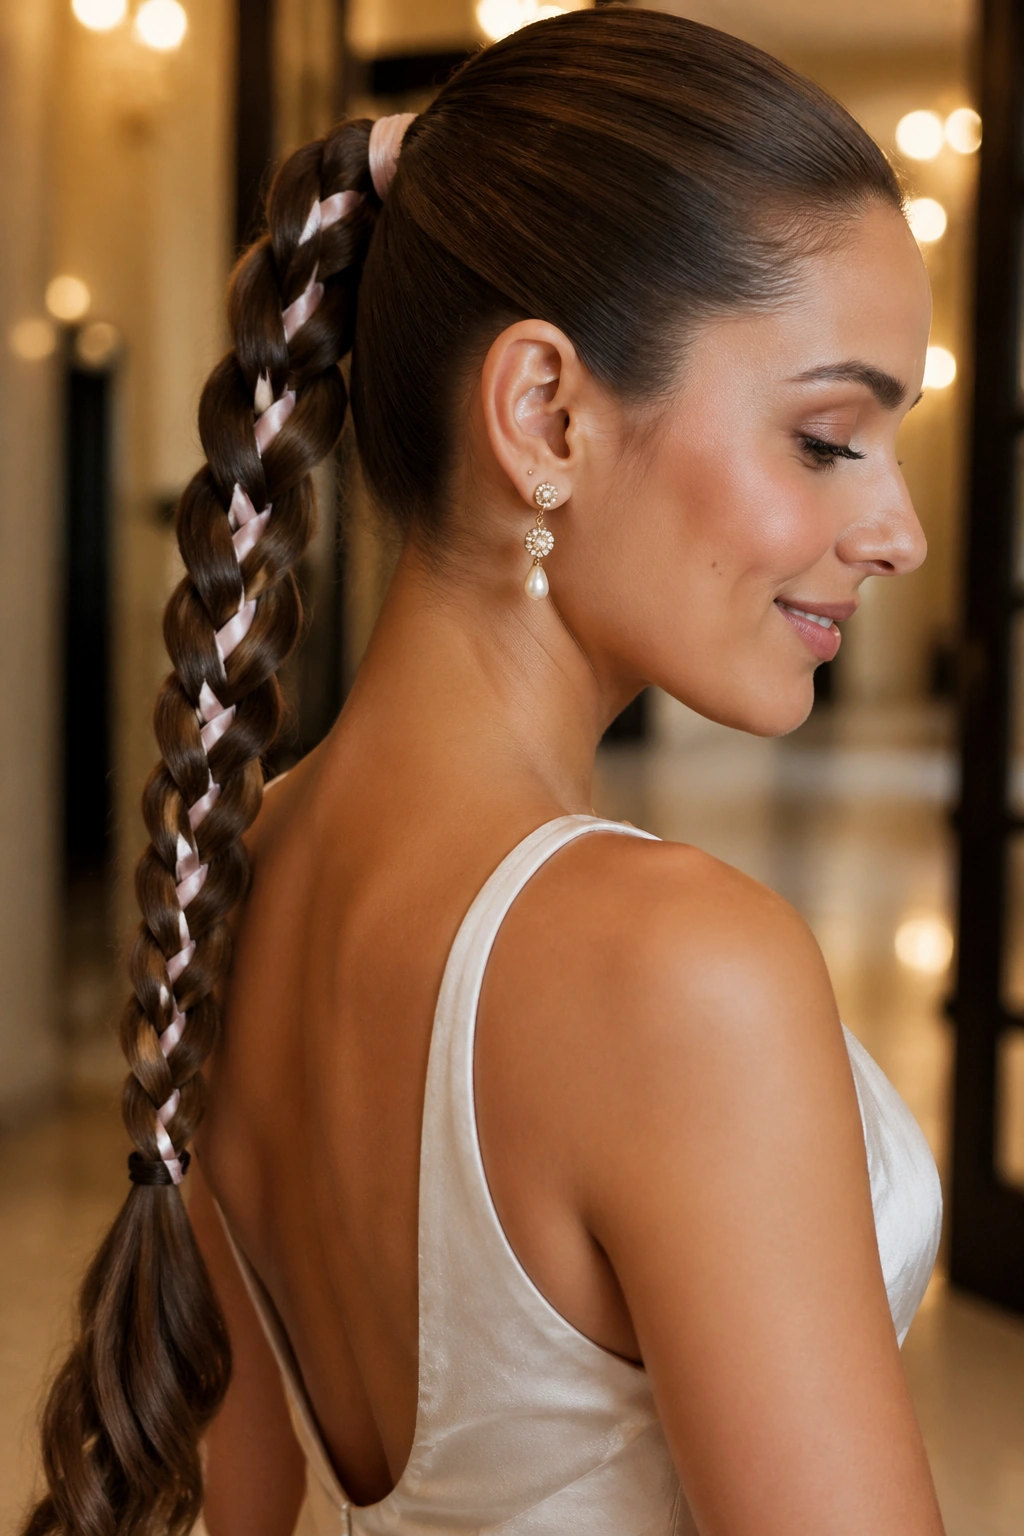
A narrow ribbon changes a braid faster than most people expect. Weave it through a long ponytail, and the whole style gets a cleaner line and a more dressed-up feel. I prefer a ribbon around ¼ to ½ inch wide; wider ribbon can start to overpower the braid and make the sections bulky.
The key is to keep the ribbon flat as you braid. Twisted ribbon looks messy fast, and long hair leaves plenty of room for that mistake to show. A satin finish gives shine, while grosgrain feels a little more grounded and less slippery.
Keep the color simple if the hair is already glossy. If the ribbon fights the hair for attention, the braid loses its shape.
19. Mohawk Braid Ponytail

If you want a stronger shape, stop trying to hide the center line. A mohawk braid ponytail celebrates it. The braid runs down the middle of the scalp, while the sides stay smooth and tight, then everything gathers into a ponytail that lands with a little attitude.
This style suits long hair because the length at the back keeps the look from feeling too severe. The top is sharp, but the tail softens it. A firm part and close braiding at the crown are essential here — if the sides start puffing, the whole idea falls apart.
Why it stands out
The silhouette is narrow at the top and fuller at the bottom.
That shape is what gives it presence. It’s direct, clean, and not shy about taking up space.
20. Knotted Braid Ponytail
A knotted braid ponytail is what happens when you want detail without spending forever sectioning hair. Instead of a standard braid pattern, you twist or knot small sections down the tail, creating a chain of neat turns that read as textured but still sleek.
I like this on long hair because the knots show up better when there’s real length to work with. Keep each knot snug and even, and make sure the base ponytail is tight before you start. If the root shifts, the knots can slide and the style loses its clean line.
It’s a little unexpected. That’s the fun of it. The top stays smooth, the tail gets a pattern, and you don’t need a dozen tiny braids to get there.
21. Center-Part Rope Braid Ponytail
A center part plus two rope braids gives long hair a balanced, almost symmetrical look that feels neat from the front and structured from the back. Once the braids meet at the nape, gather them into a ponytail and smooth the tail so the finish stays crisp.
This style works best when the middle part is exact. If the part wanders, the whole look starts to feel off-center in a way that’s hard to ignore. A tail comb helps a lot here, and so does a mirror that lets you check both sides before you tie anything off.
Keep the center line crisp
- Start the part at the forehead
- Draw it straight to the crown
- Match braid tension on both sides
- Hide the elastic with a wrapped strand
It’s a clean style. No extra noise.
22. Feed-In Side Braid Ponytail
A feed-in braid gradually adds hair as it moves along the scalp, which gives the braid a tapered, polished start. Put that on one side and pull it into a ponytail, and you get a sleek shape that feels detailed without covering the whole head in braids.
This is a smart option if you want the face framed on one side but still want the ponytail to stay easy to wear. The sections should start small near the hairline and get slightly fuller as they move back. That taper is what makes the braid look smooth instead of chunky.
It also helps long hair sit flatter at the root. The feed-in method removes some of the bulk that can make a ponytail lift awkwardly.
23. Twist-Into-Braid Ponytail
This one is for anyone who likes braided ponytails but gets tired of hard sectioning. Start with two twisted sections, then transition into a three-strand braid once the hair is gathered. The top stays sleek, the twist gives the head a soft curve, and the braid carries the style through the tail.
I like this version when the hair is silky and hard to control. Twists grab a little faster than a braid at the root, so the style can stay neat even before the elastic goes in. A light cream on the lengths helps the twist stay smooth without turning greasy.
- Twist each section in the same direction
- Cross them in the opposite direction
- Switch to a standard braid at the ponytail
- Secure the end with a clear elastic
Simple. Clean. Reliable.
24. Braided Wrap-Over Ponytail
A wrap-over braid sweeps across the back of the head and folds into the ponytail instead of staying in one narrow line. It’s the kind of detail that makes the whole style feel more finished, because the braid seems to travel into the ponytail rather than just sitting beside it.
The shape works especially well on long hair that needs a little direction. The braid gives the eye a path to follow, and the ponytail becomes part of that line. Keep the base low and smooth if you want the wrap to read clearly. If the root area gets too puffy, the braid loses its clean edge.
It’s elegant without being stiff, which is harder to pull off than it sounds.
25. Micro-Braid Ponytail
Micro braids add texture in small doses, and that’s the trick. A few tiny braids at the front or along a part can feed into a sleek ponytail without taking over the style. On long hair, those little lines create detail where the eye first lands.
I would not overload the head with them unless that’s the point. Three to five micro braids is usually enough if the ponytail itself is already long and polished. Keep them thin, clean, and close to the scalp. If they get bulky, the style starts to feel crowded.
Best with
- Straight or lightly wavy hair
- A deep side part or center part
- Strong hold gel at the roots
- A smooth tail left loose or lightly curled
Small details. Big payoff.
26. Curved-Part Braid Ponytail
A curved part changes everything. Instead of drawing a straight line down the head, curve the part from the hairline toward the crown and let the braid follow that arc into the ponytail. The result feels softer than a hard center line and more custom than a plain side part.
This shape is especially nice on long hair because the length makes the curve visible. The braid can start close to the arc, stay neat through the crown, and end in a ponytail that still feels sleek. A tail comb is the tool that matters here. Freehanding the curve usually ends with a wobbly line you will notice in every mirror.
It’s a small change. It changes the whole mood.
27. S-Curve Braid Ponytail
An S-curve braid ponytail has a little more movement than a straight part, and that movement keeps long hair from feeling too fixed. The braid travels in a soft S-shape before it gathers into the tail, which gives the style a cleaner flow than a standard straight-back braid.
I like this one for hair that has a lot of length but not much natural body. The curve gives the roots direction, and the braid adds enough structure to stop the ponytail from sagging. Keep the curve shallow. If it gets too dramatic, the look turns theatrical fast.
A narrow elastic and one wrapped strand at the base are enough to finish it. That’s the part I’d keep if I had to choose only one detail from the whole list — a clean part, a tight base, and a braid that knows exactly where it’s going.